How to draw Elsa from Frozen
Aaaah Disney... It has cradled our childhood and continues to make us dream.
But how to talk about Disney without thinking of its biggest success in recent years: Frozen... and today I'm going to show you how to draw the magnificent Elsa. If you want to know draw a Disney character, I invite you to check out the article on our blog that discusses this!
CHOOSE THE DRAWING MODEL
To start, we'll take a model. Whether we are comfortable with drawing or not, it's always better to have a model to rely on, even if you add a personal touch at the end.
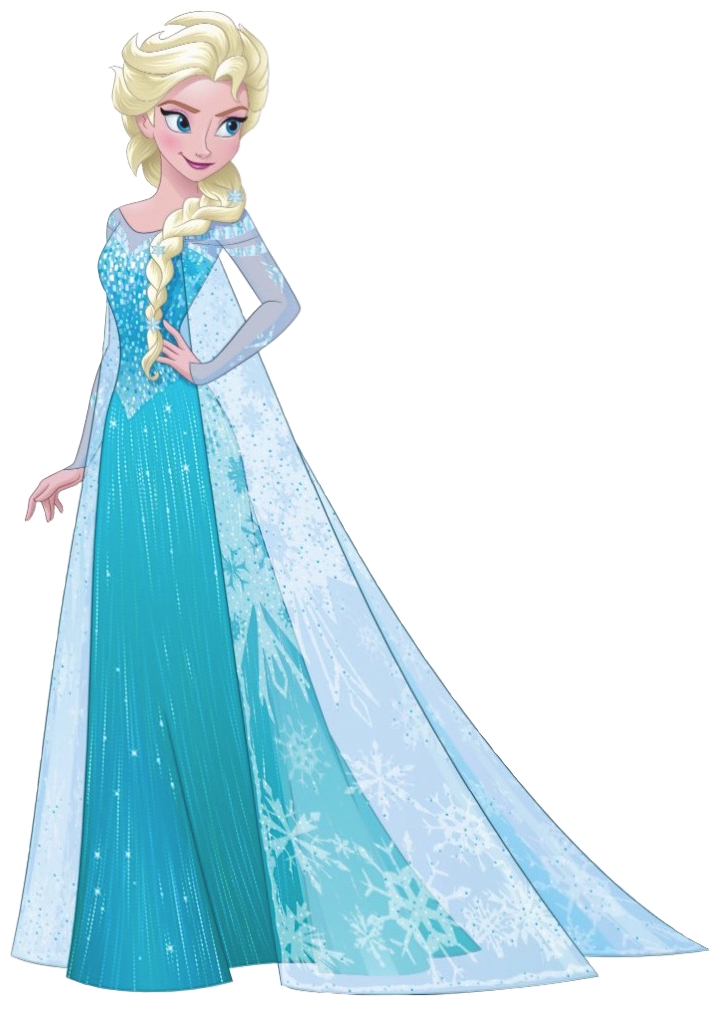
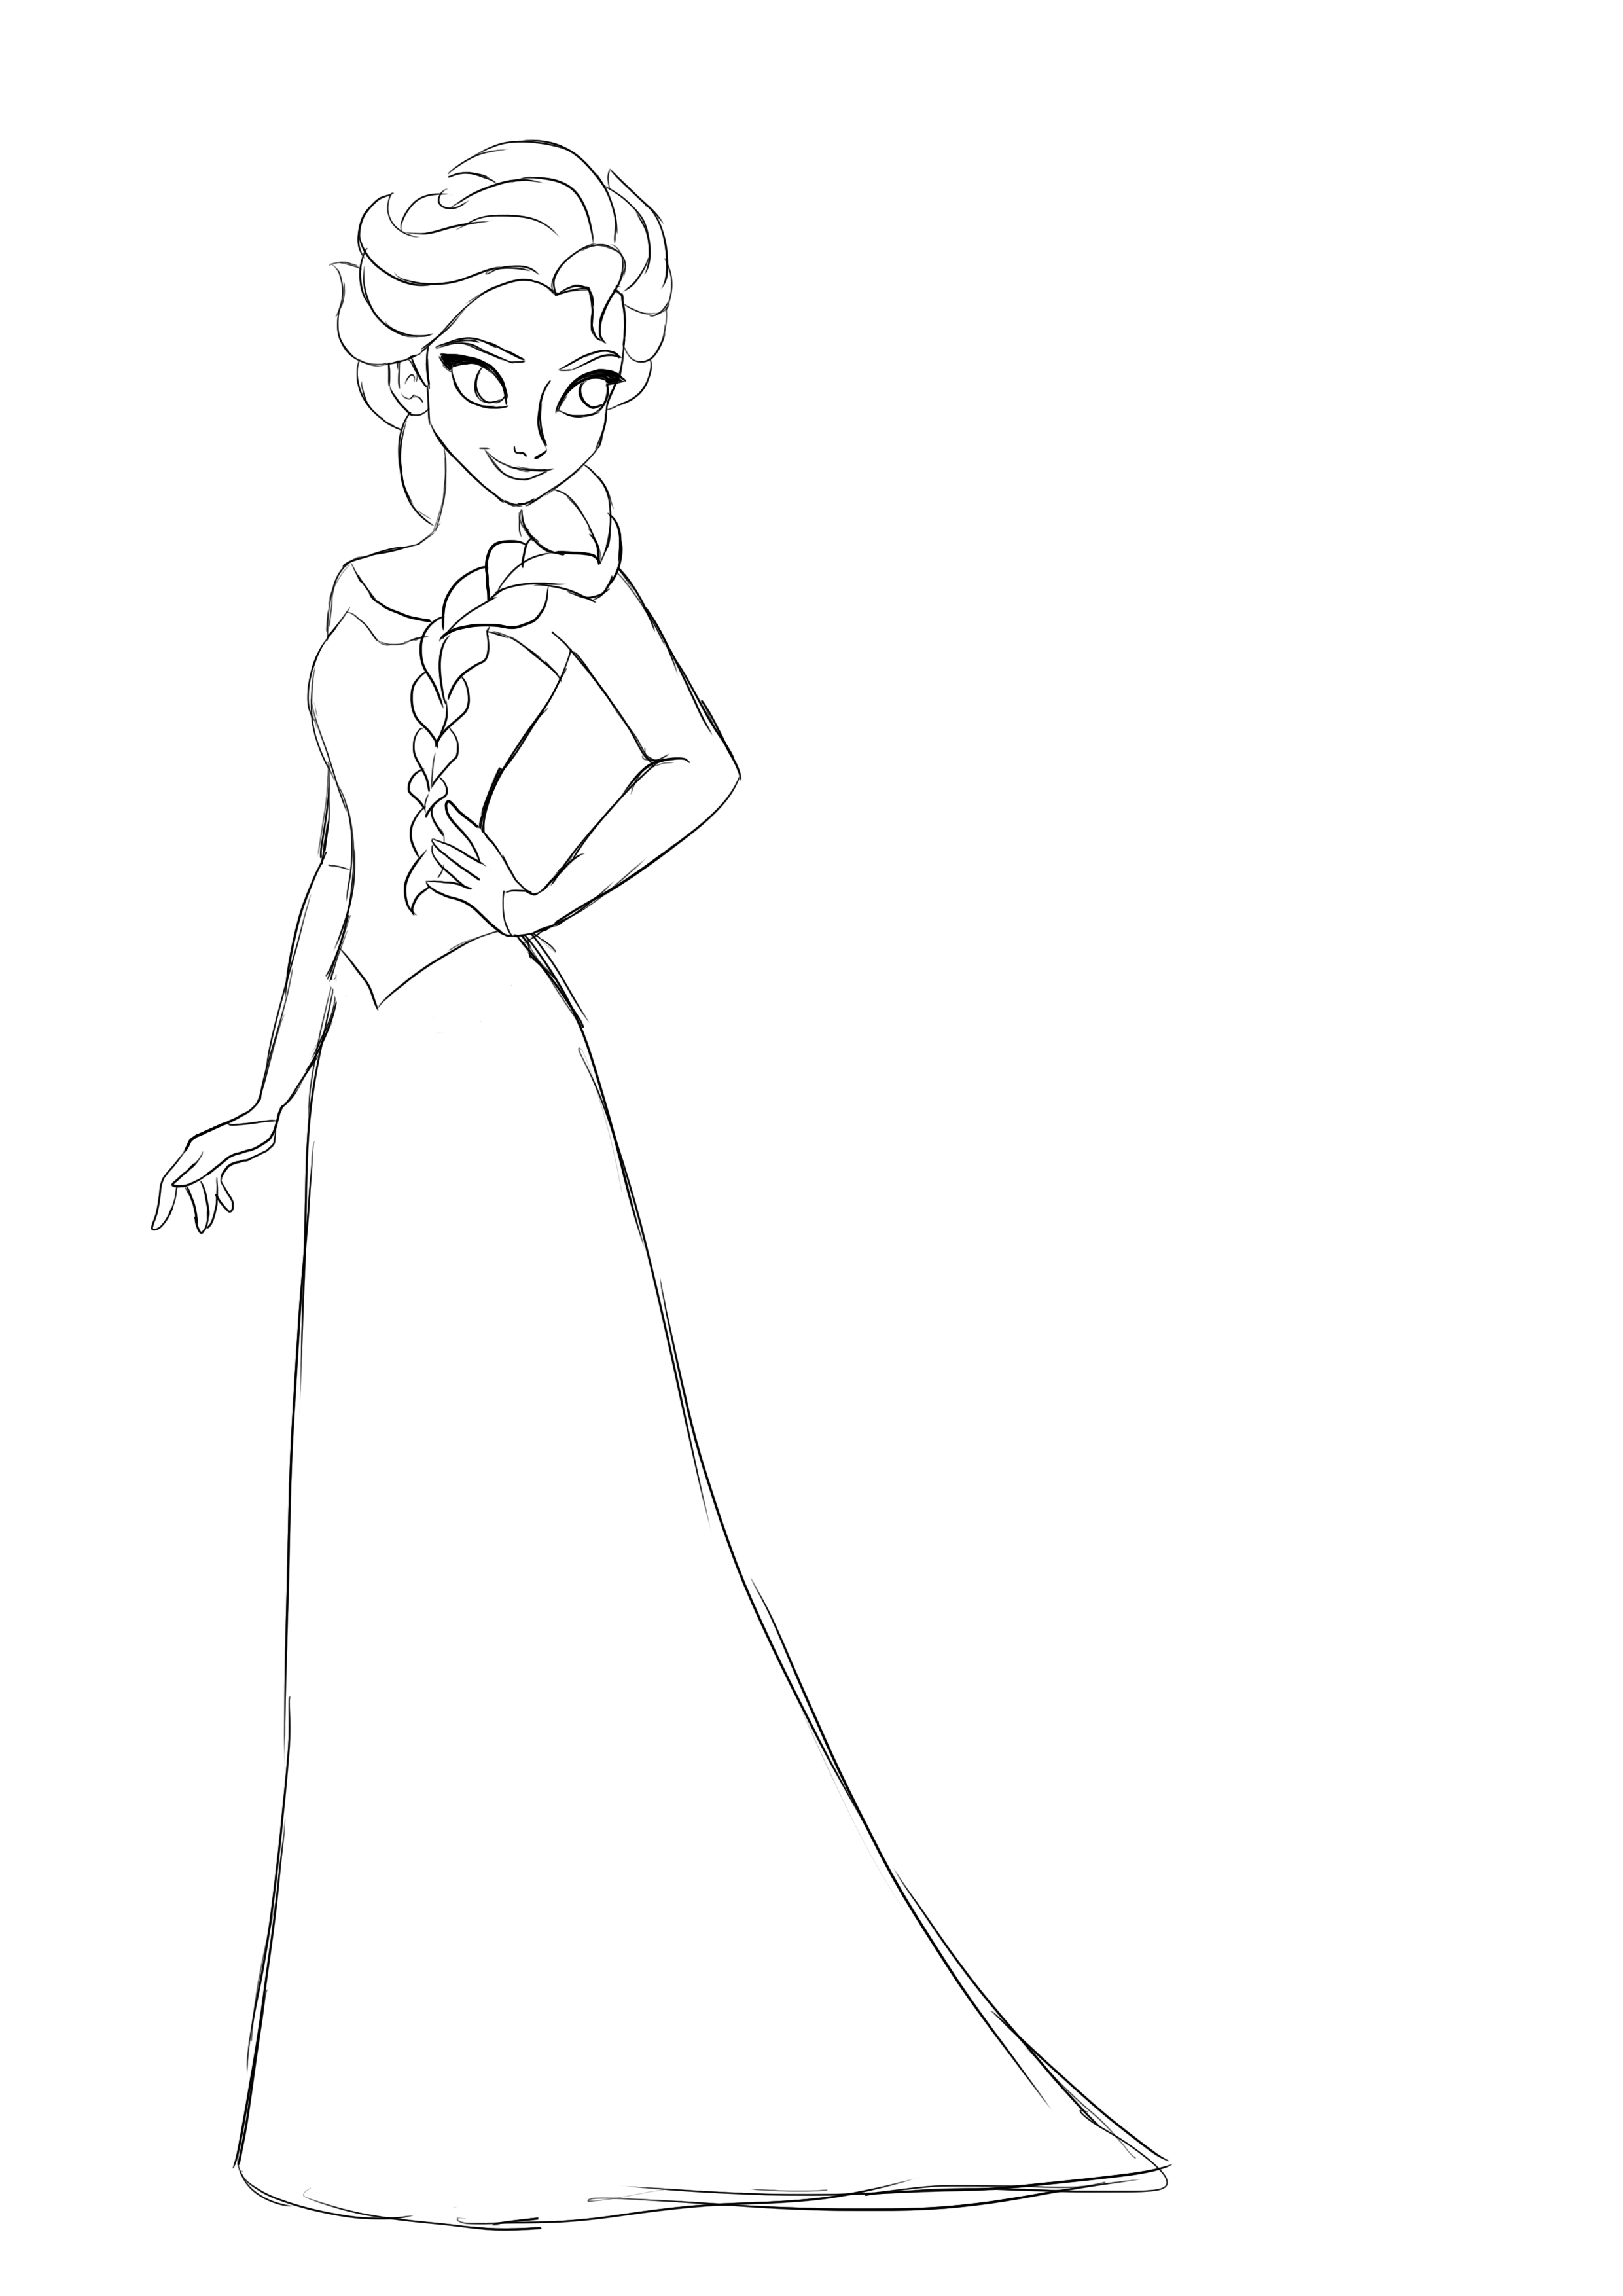
So I chose this image that clearly shows Elsa, from head to toe.
To begin with, we'll take a closer look at the proportions...
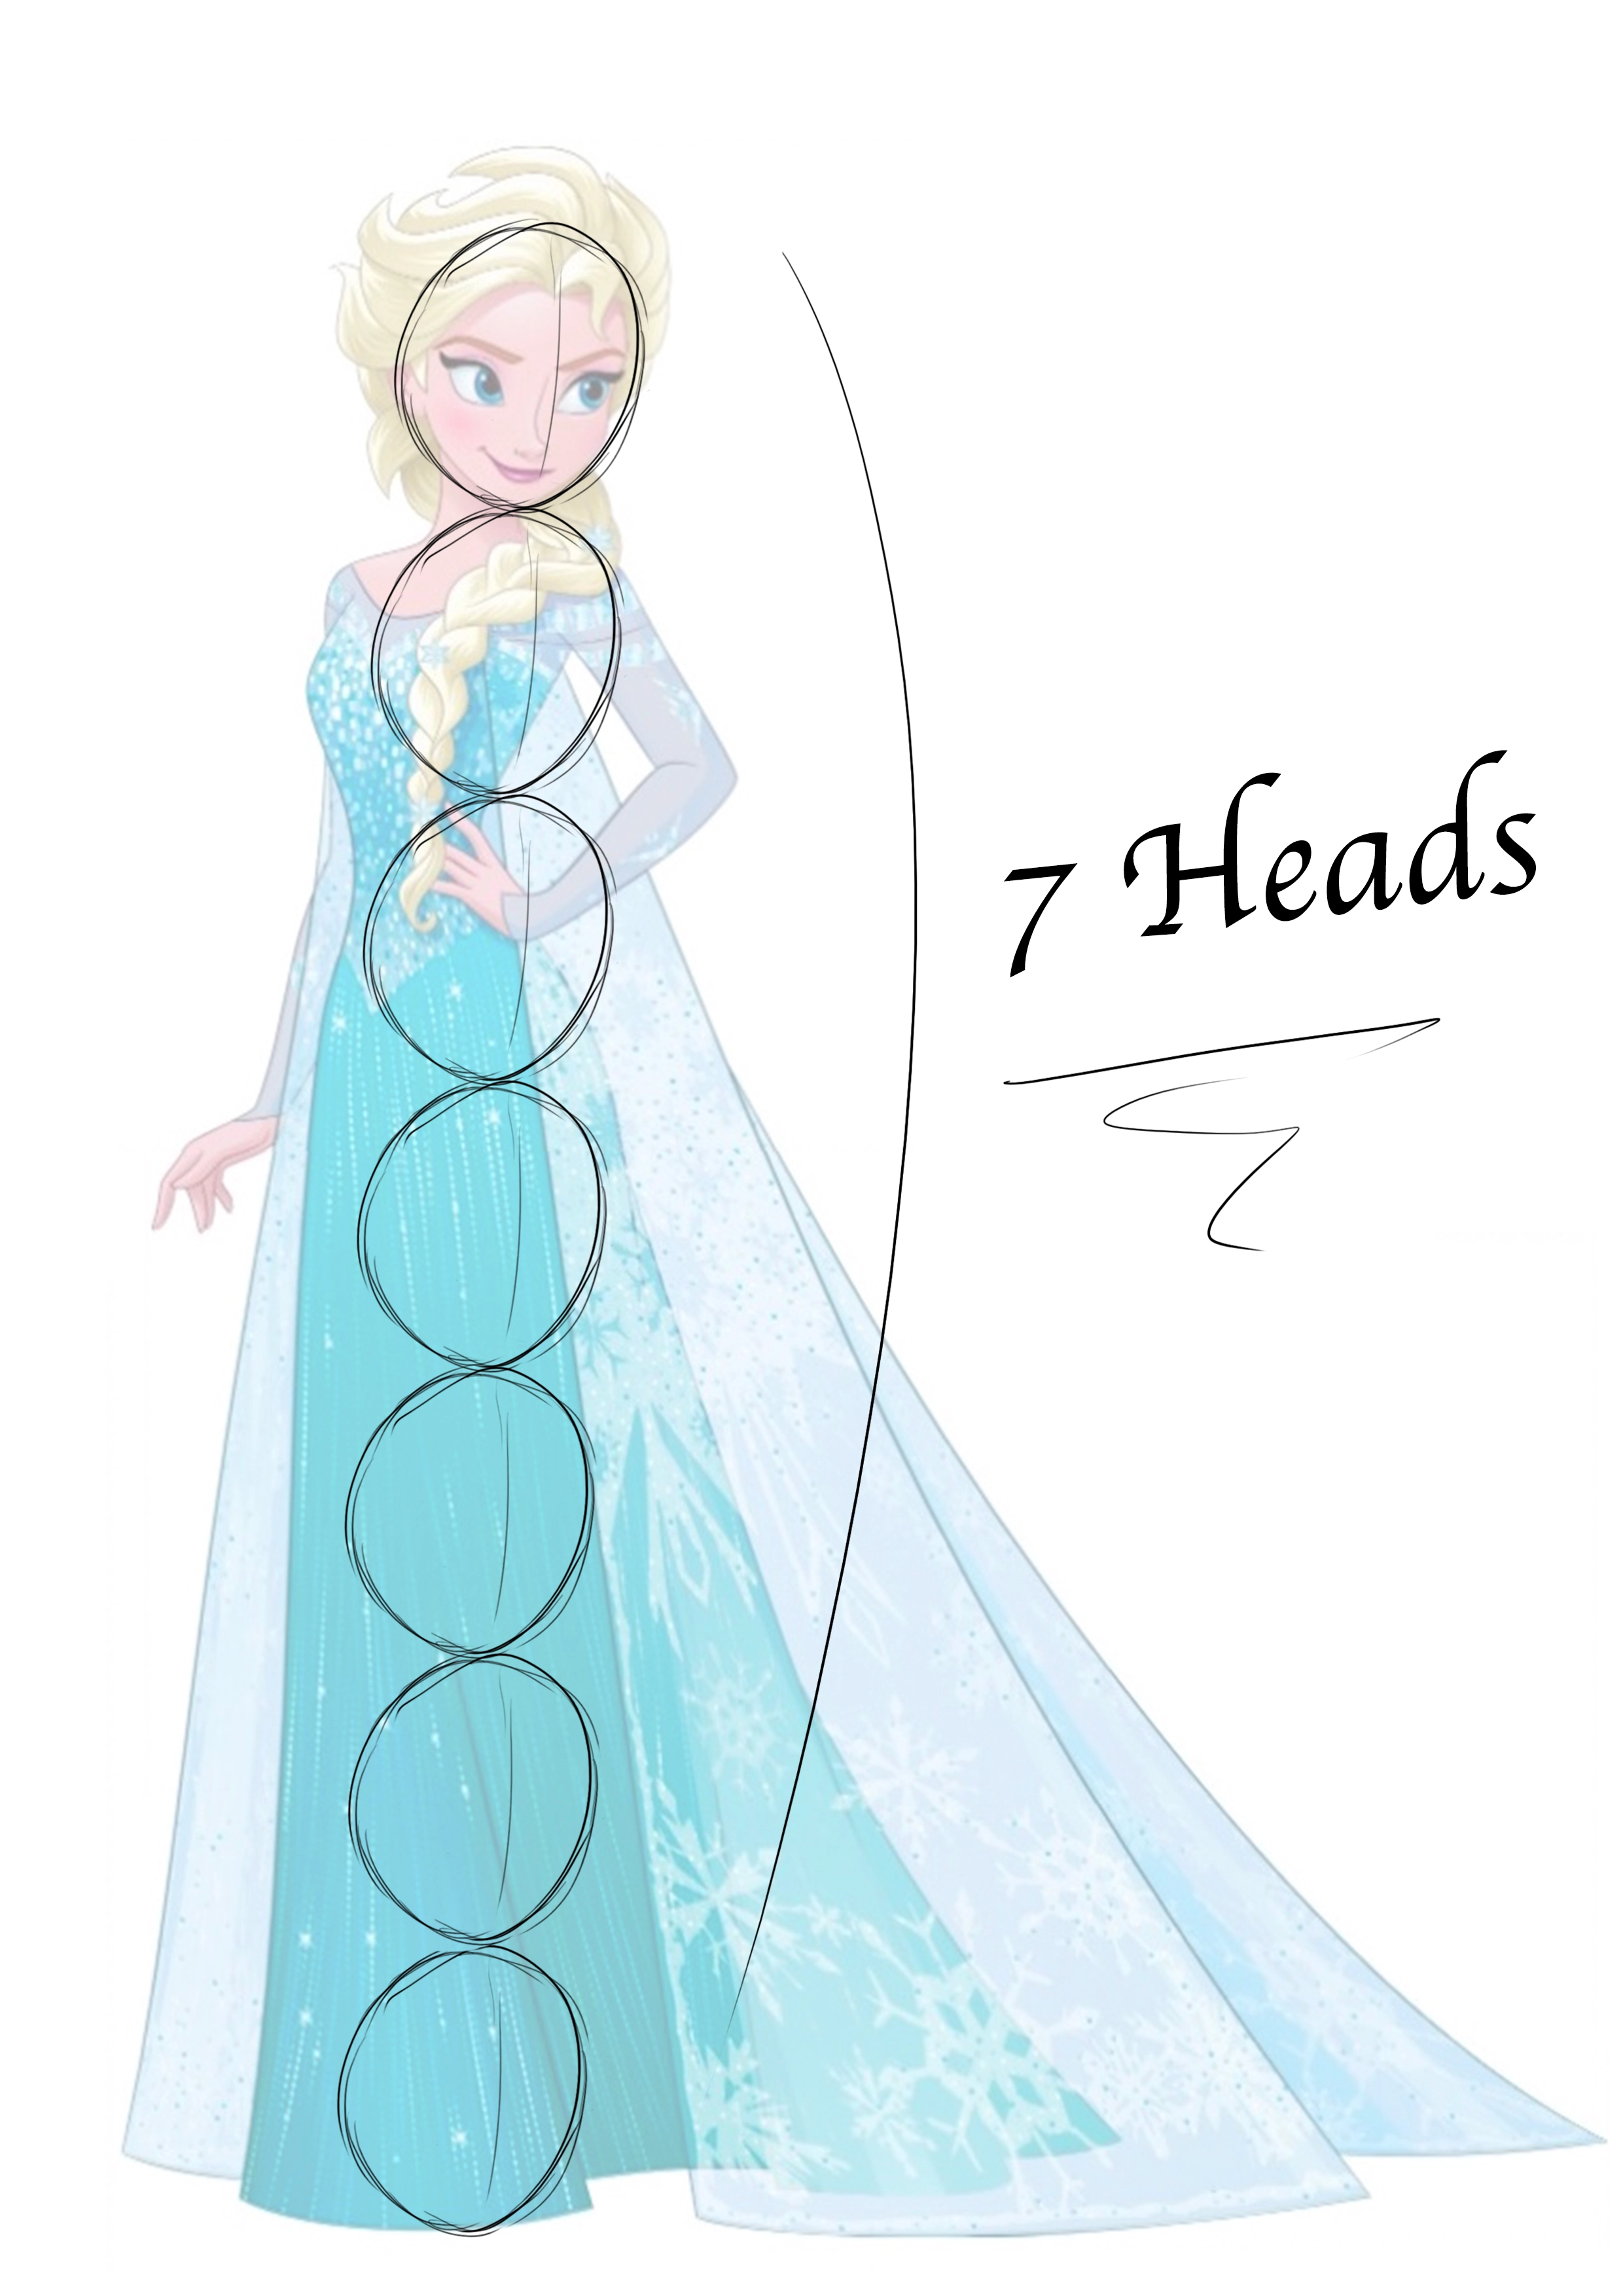
[No text to translate]
As can be seen in the image, Elsa is 7 heads tall, which is the "normal" proportion for a young adult (children are about 6 heads tall and adults 8 heads tall. Height varies depending on the size of the head... but that's another story).
FOR MORE INFORMATION AND TIPS ON THE PROPORTIONS OF YOUR CHARACTERS, CLICK ON THE FOLLOWING LINK TO ACCESS THE COURSE "THE BASICS OF DRAWING" WHERE YOUR TEACHER EXPLAINS EVERYTHING:

THE DRAWING OF THE SNOW QUEEN
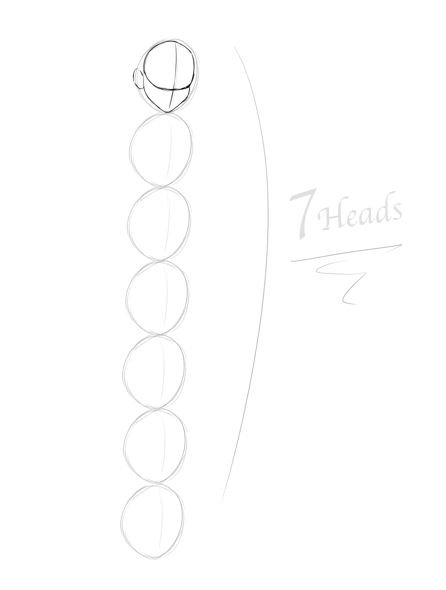
You will then draw 7 ovals, leaving a small margin at the top for the hair and at the bottom for the folds of the dress. This will give you the height of your character.
We will start by drawing the base of the head.
Draw a line at 2/3 of the circle, it will serve as a guide for the eyes.
Refine the chin and jawline to shape the face and add the ear, which starts slightly above the jawline and ends at the line level (as shown in the image above).
DRAW THE BODY
Now let's move on to the body.
Initially, we will define its movement and position.
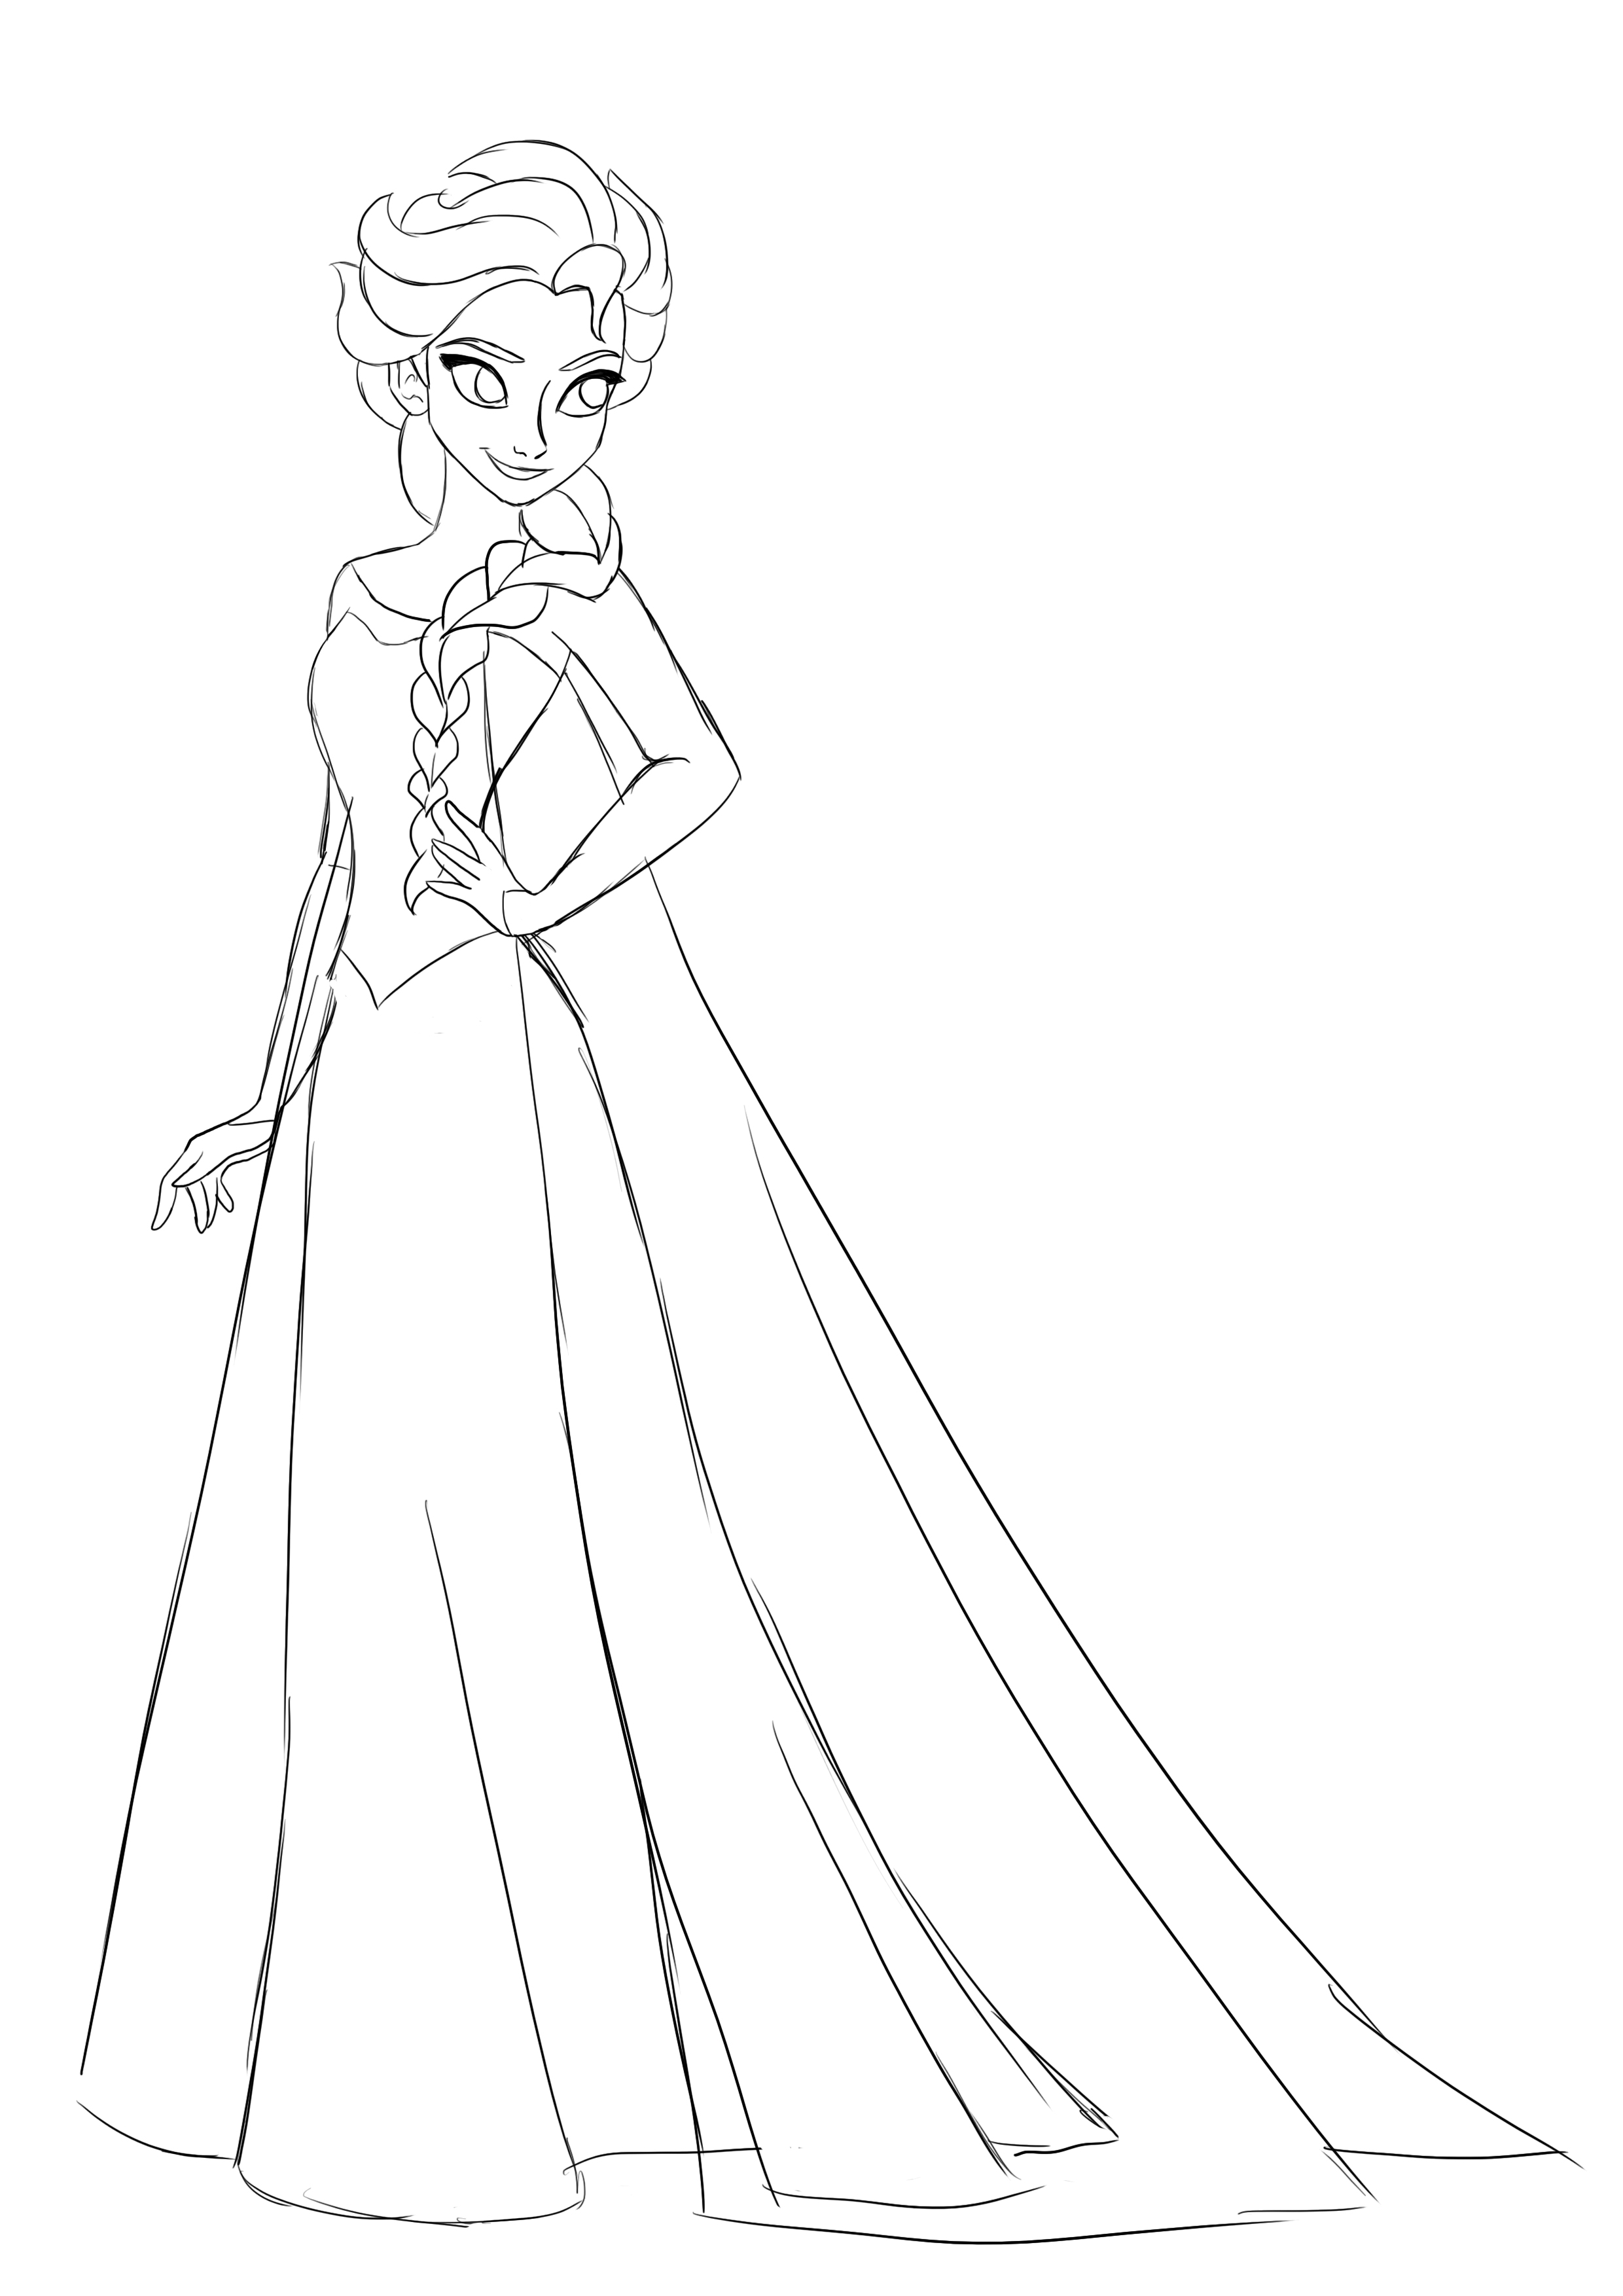
In the reference image, Elsa is bending to the left, her left arm is stretched while the right one is bent, placing her hand above her hips.
We are going to draw Elsa's anatomy in a simplified version. The lines will represent the bones and the circles, the joints. This step is the most important because it allows us to manage the body proportions. So, take your time to achieve coherent proportions and most importantly, don't be afraid to make several attempts!
Draw a curved line to mark the movement of the torso. It is about 2 heads long. Then, do the same for the arms. On our model, the shoulder-to-elbow length and elbow-to-wrist length are the same. Also, note that when an arm is extended downwards, the fingertips reach about the middle of the thigh.
Then, you position the hands. For now, you can just use basic shapes, we will focus on them later ...
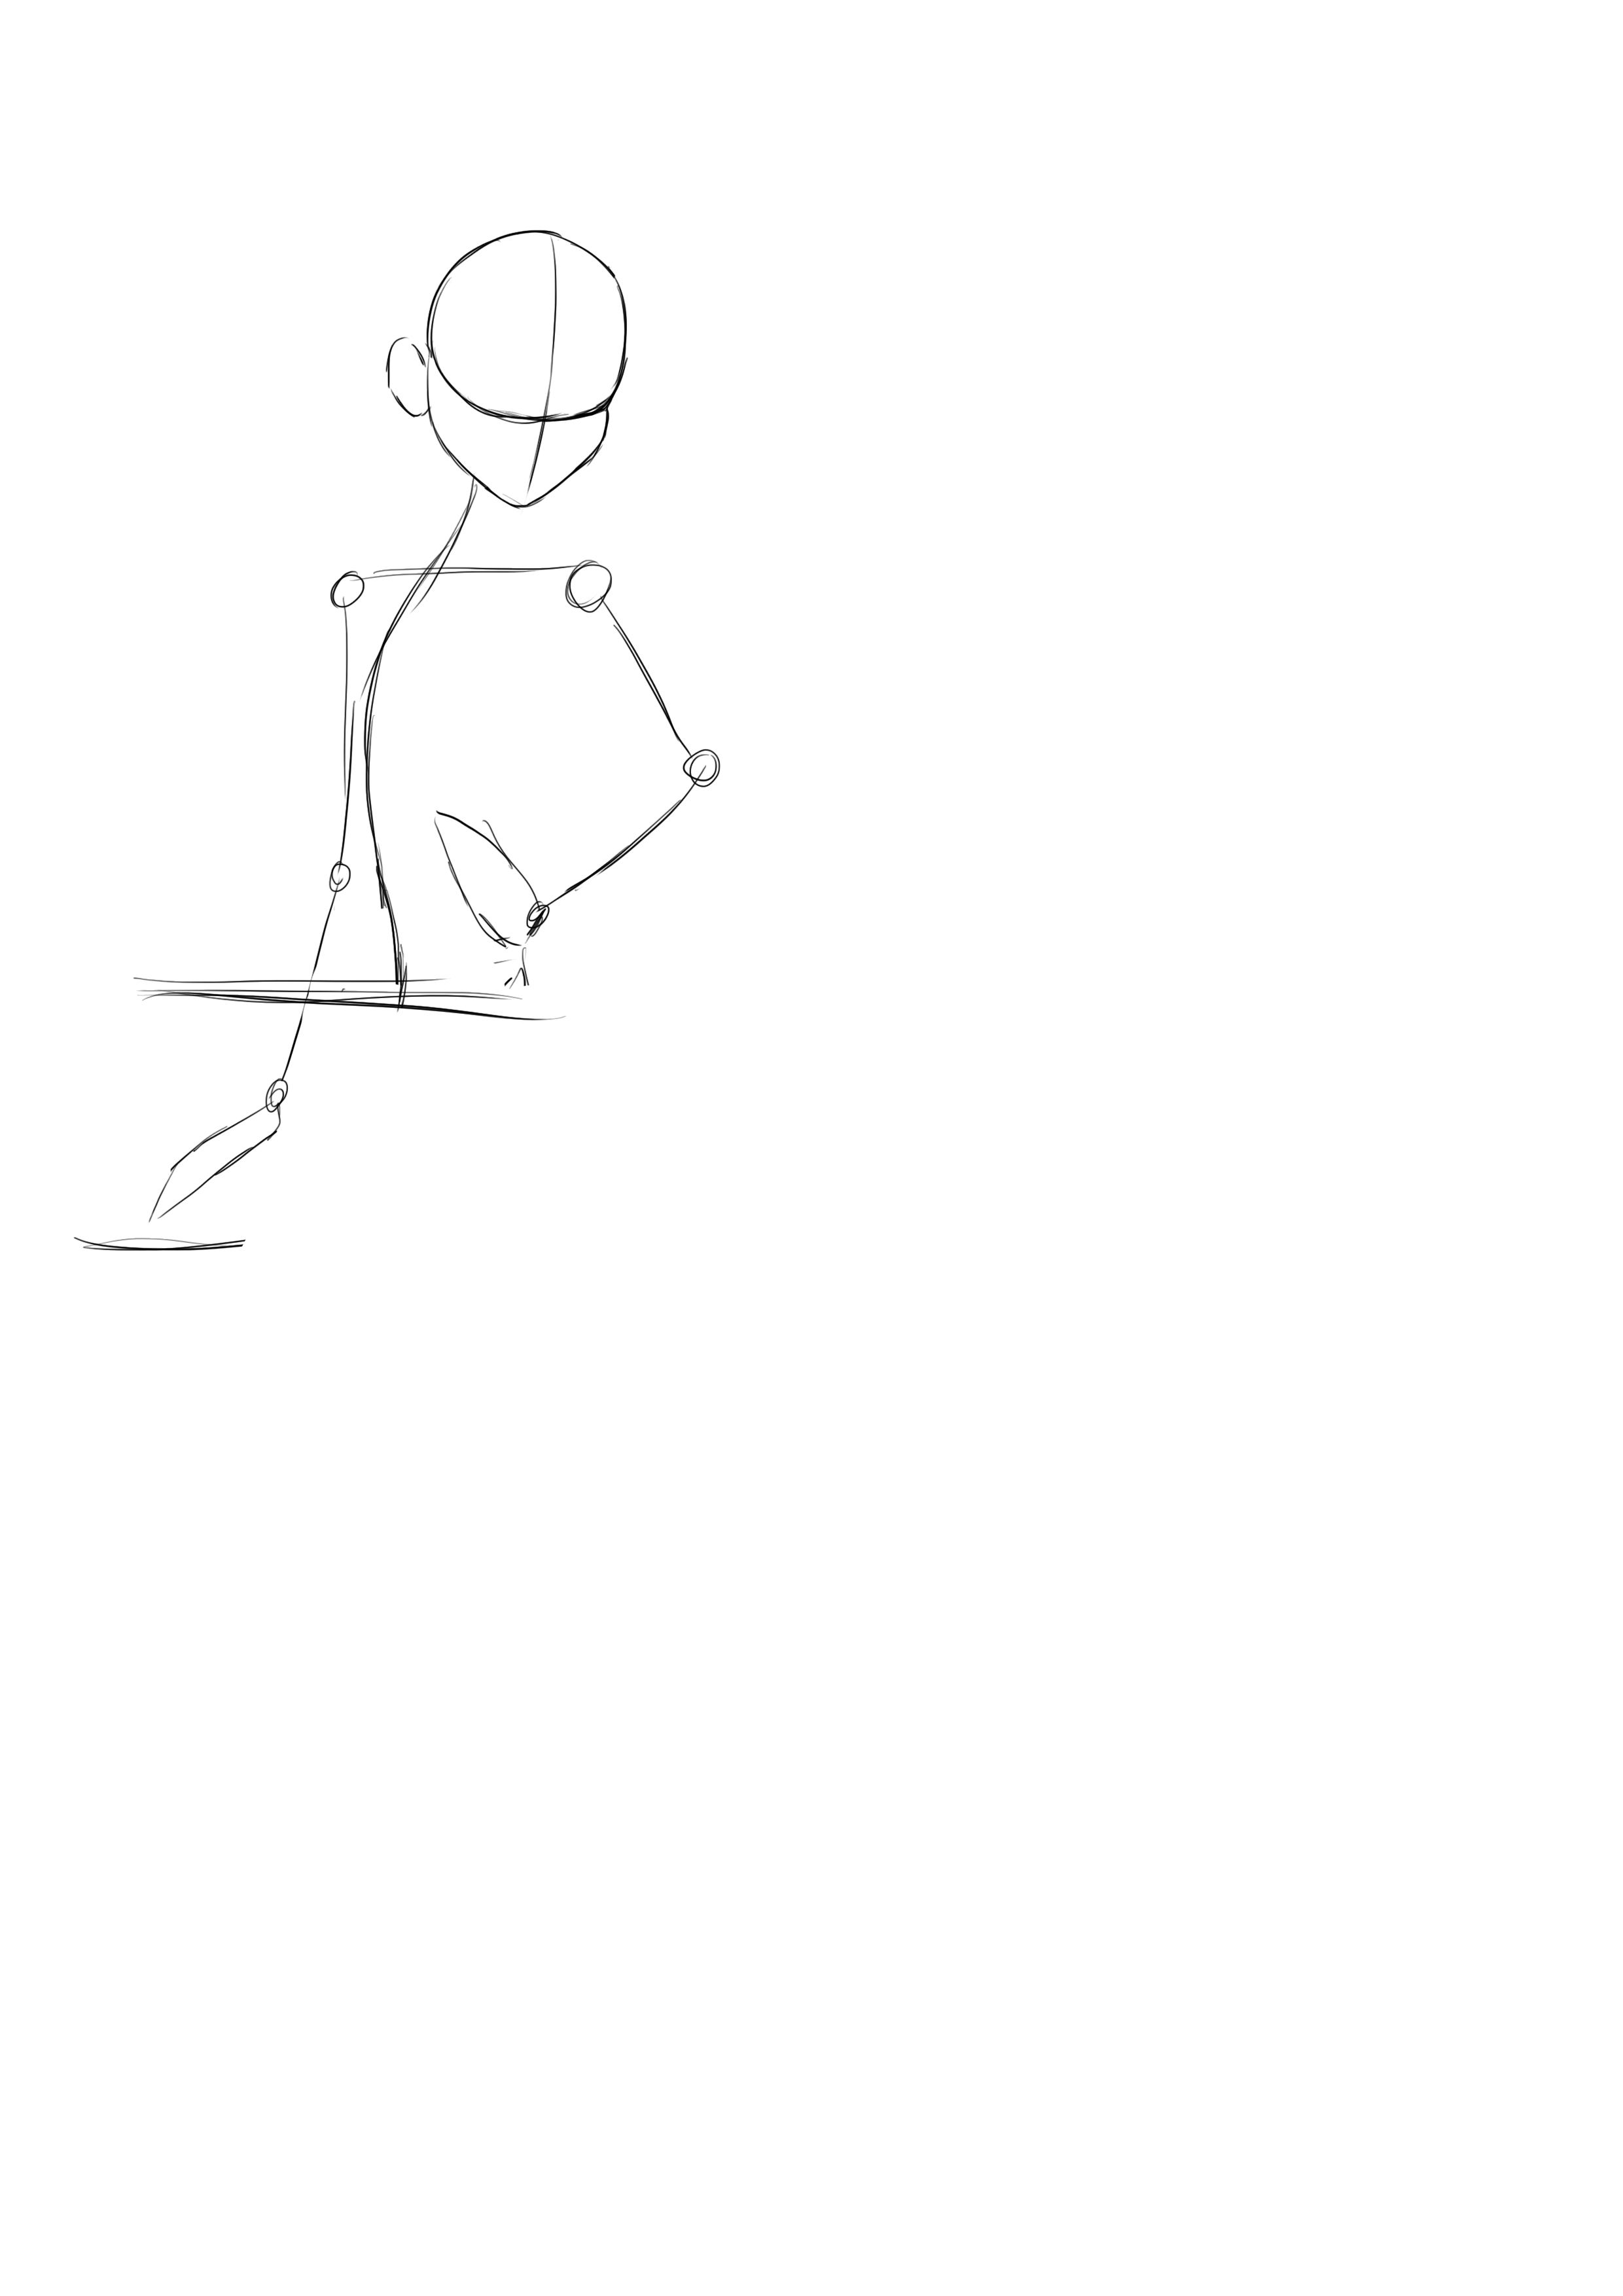
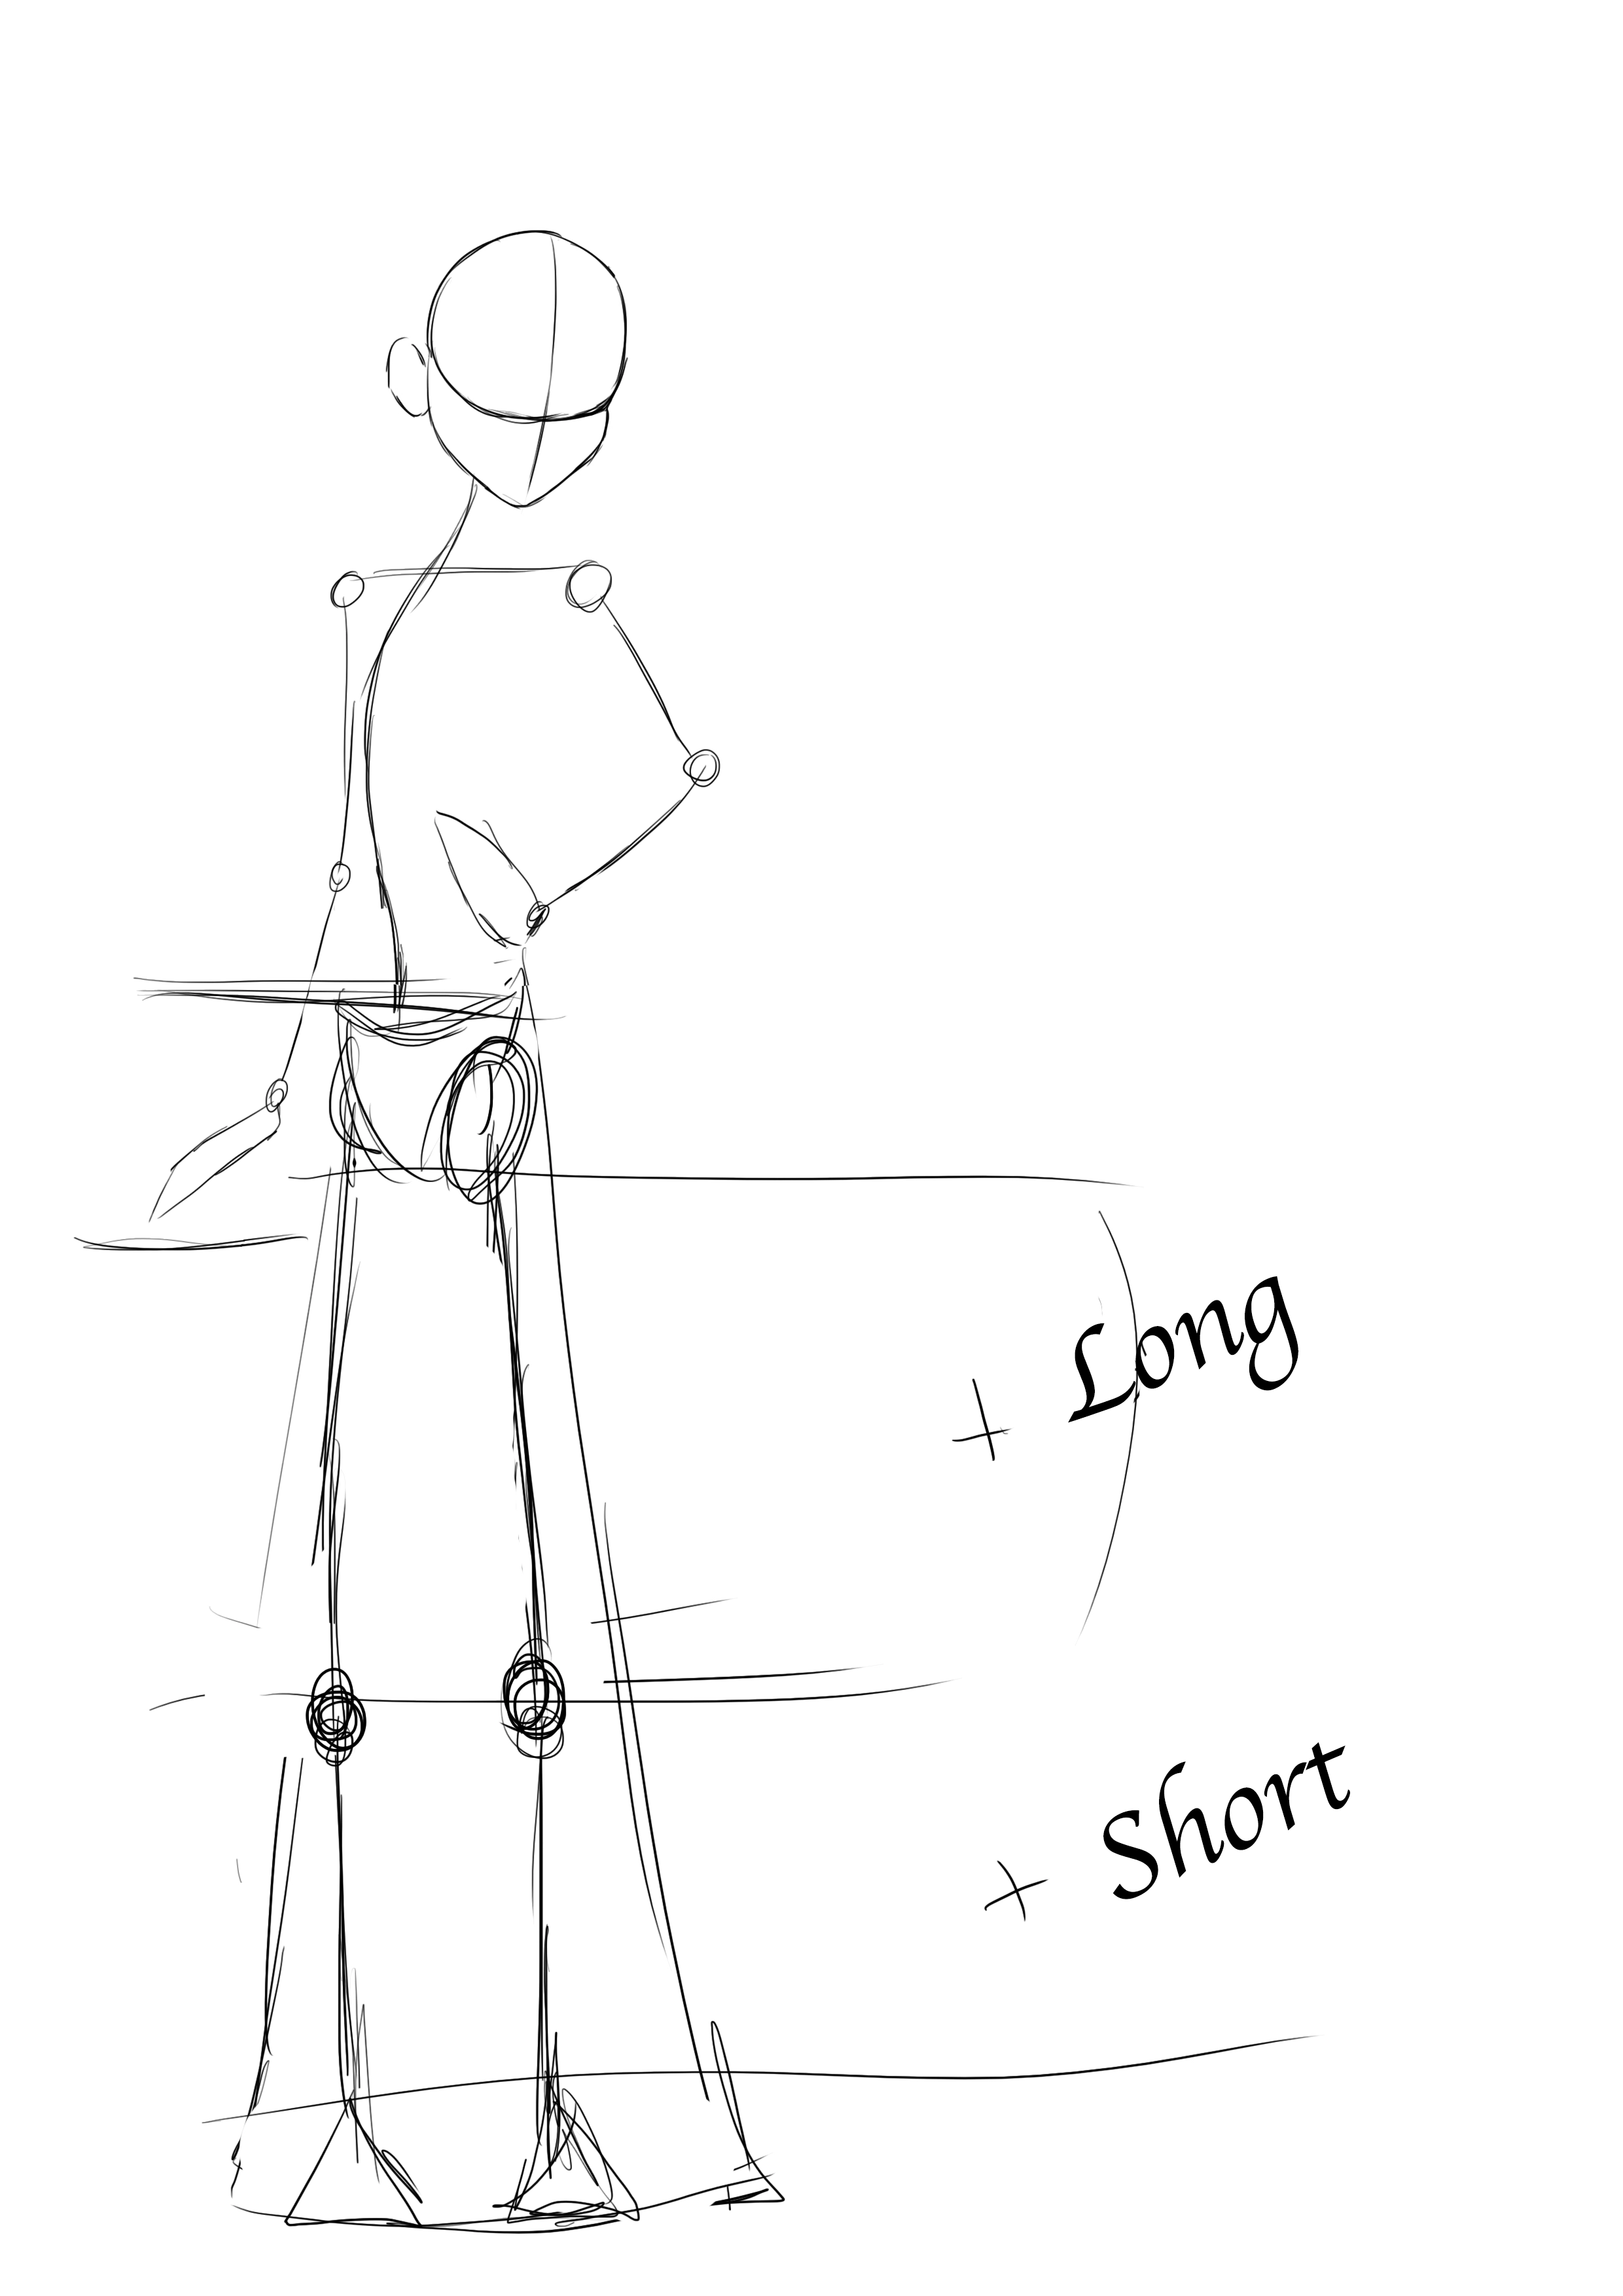
Now that the upper body is done, we'll move on to the legs.
For that matter, it's quite simple since they are hidden by the dress but it can also be tricky. Indeed, you will tend to make them too long or too short. So here are the proportions to follow to have the right leg length.
To start, you'll place the pelvis, or at least a rough representation of it. An upside-down triangle will suffice. If I tell you to place it, it's because it has a very important place in the body. Indeed, it is to the pelvis that the main bones are attached. It is from there that the spinal column, which supports us (and which we have represented by a line), extends. It also serves as the attachment for the femur, the thigh bone, which is the longest bone in the body.
To draw them, you will proceed in the same way as for the arms. A line for the bone and a circle for the joint.
You start from your pelvis and count approximately 2 heads for the femur. Then 1/2 a head for the tibia. The half head that remains is the height of the feet (ankle - heel).
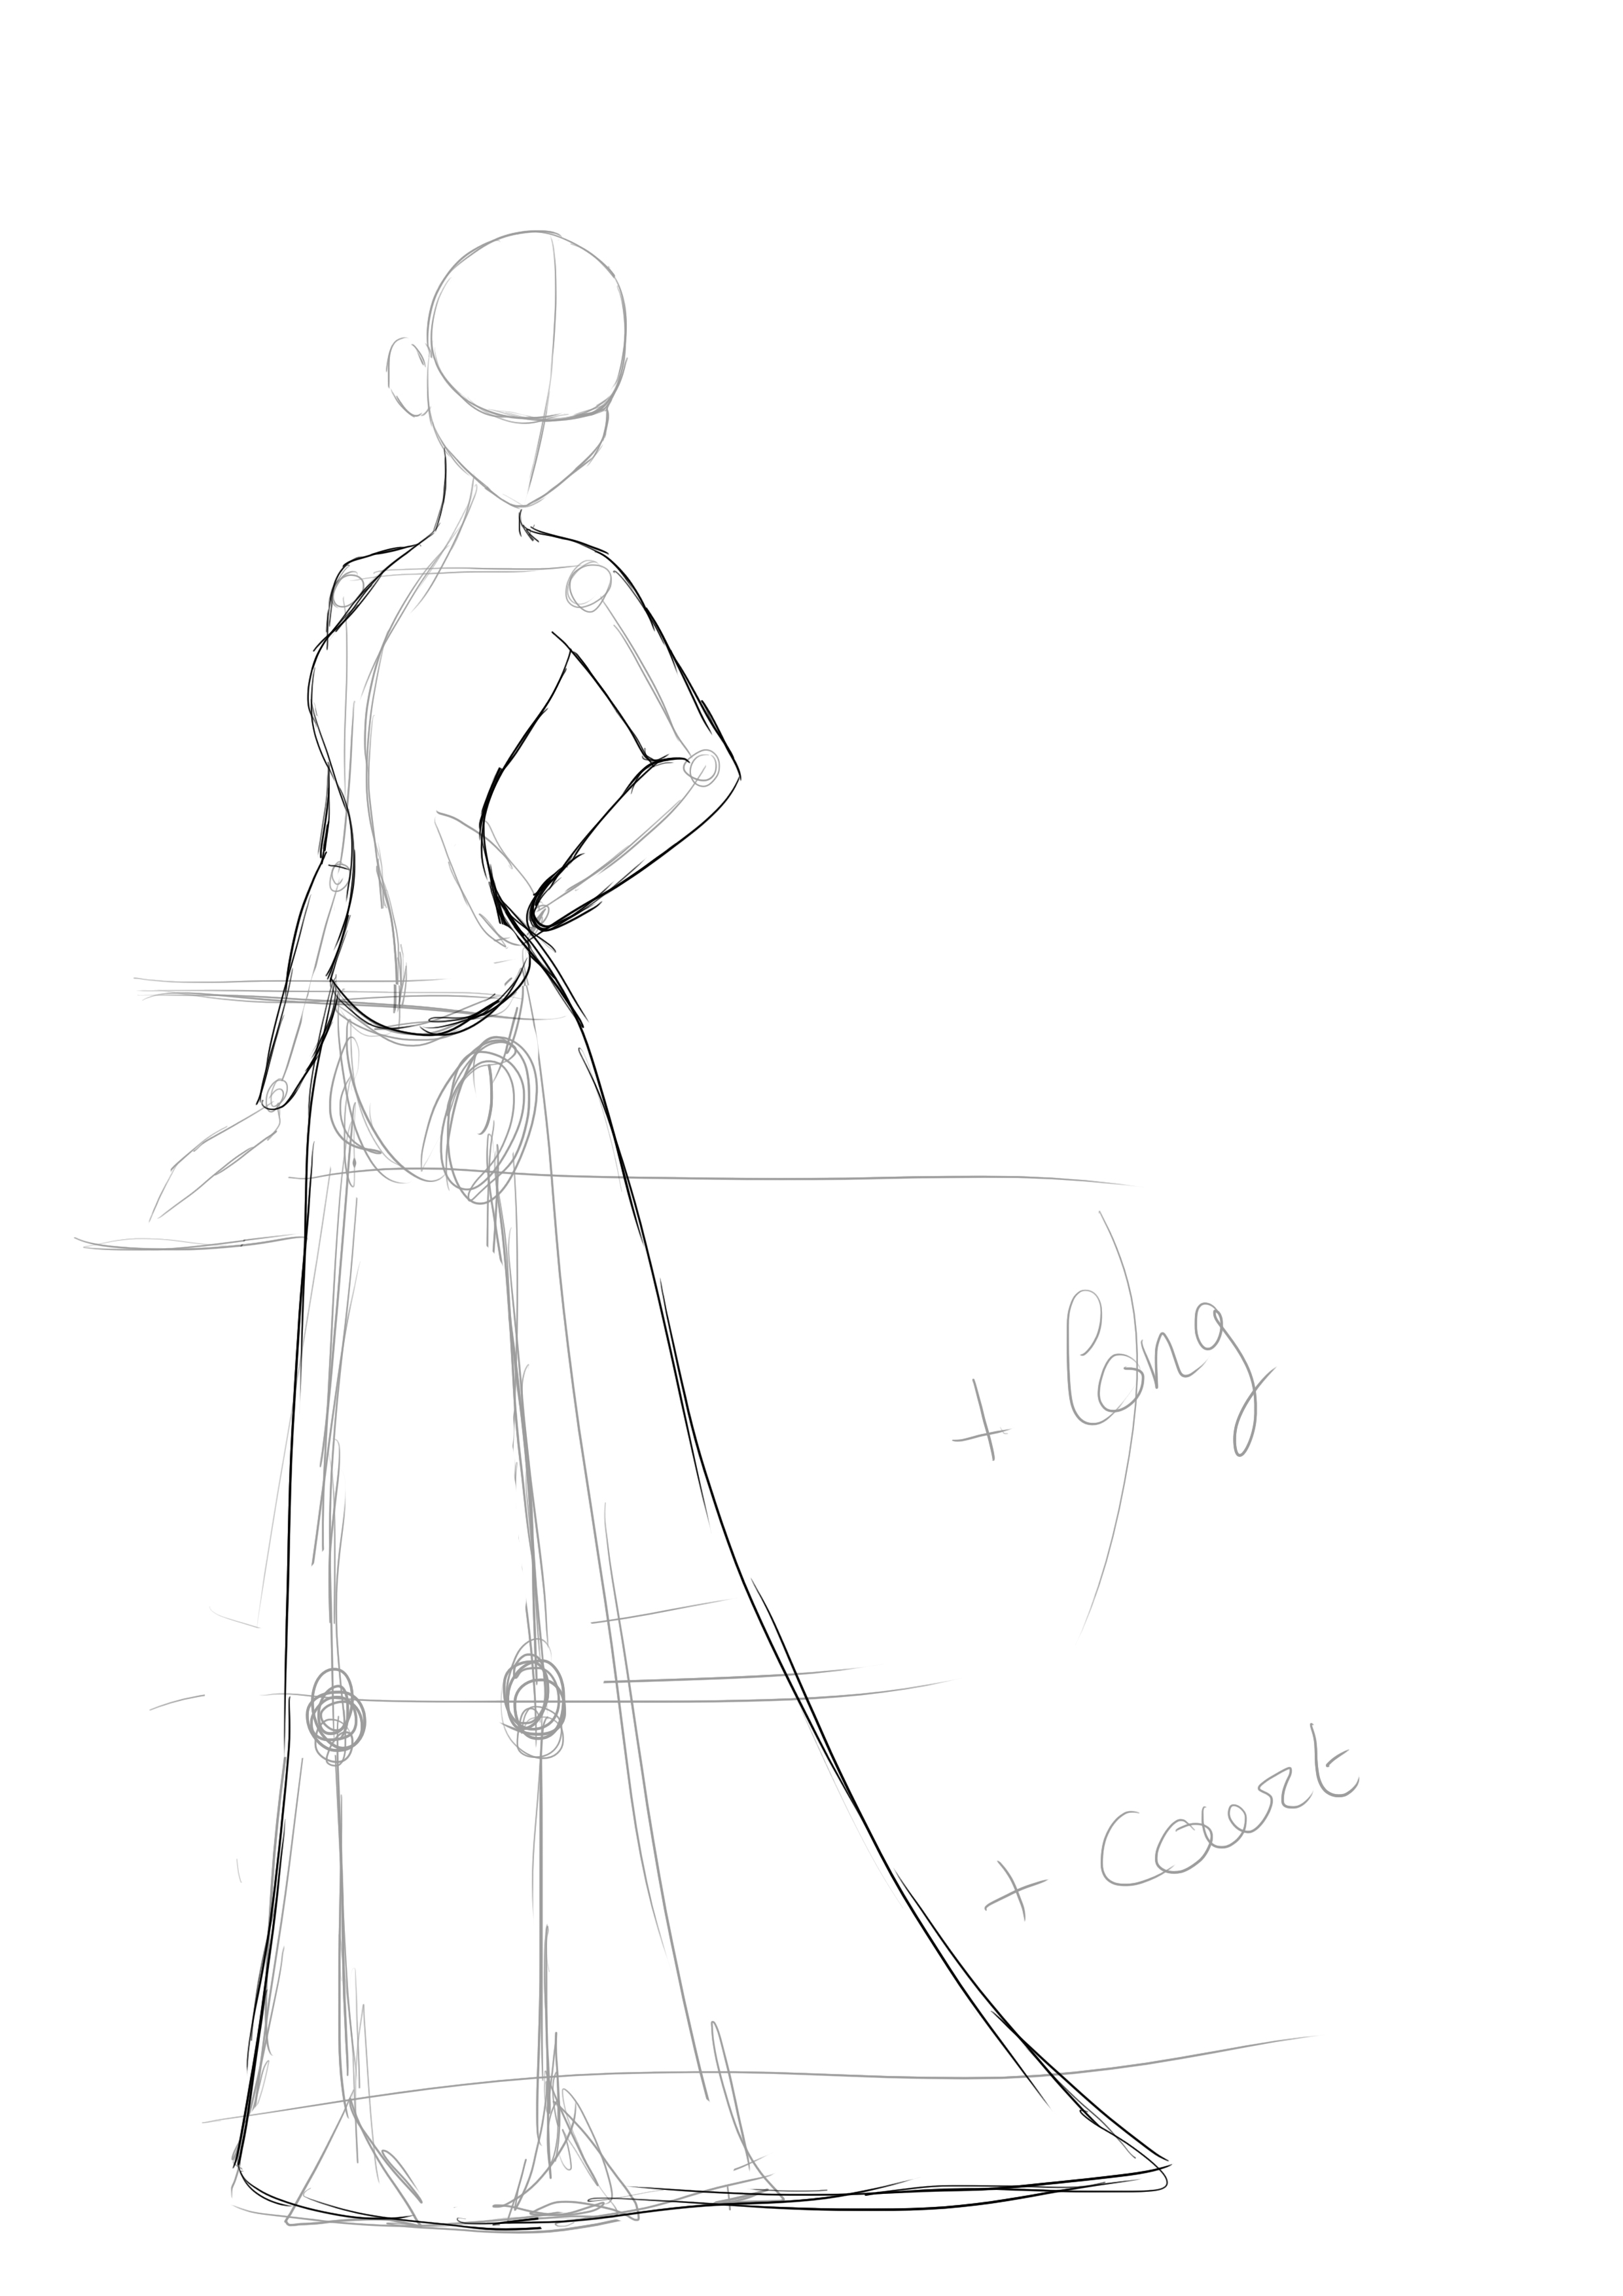
When everything is in place, you can place a flared rectangle downwards, which will serve as a dress.
Drawing the skeleton of a character is the hardest and longest step when you're not used to it. A little tip:
Generally, one draws with a sheet of paper laid on a desk (or a table), head leaning over the sheet. This position does not allow one to perceive the perspective of our drawings correctly.
Place your drawing upright on a piece of furniture and step back a few paces; you'll see a difference and all the flaws in your drawing will become apparent! (If you can draw standing up at an easel, it's best for a better view of your artworks ;) ) Or even better, work on a tilted table.
DRAW THE DETAILS
If you notice any flaws, now is the time to correct them because we are going to move on to the details of the body. So take your time on this step :)
By following the basic lines, you will be able to give some "substance" to this slim body. Start with the neck, then do the shoulder and continue with the arm.
For the torso, you need to inflate it at the top (where the rib cage is) but also shape the chest, then you narrow it in the middle to widen it slightly at the end. This helps to mark the hips, which are very visible in women (unlike men who are more "straight"). Once the torso is finished, you will continue the line of the hips and round it slightly to create the shape of the buttocks. Then you finish by flaring everything out to give the final shape of the dress.
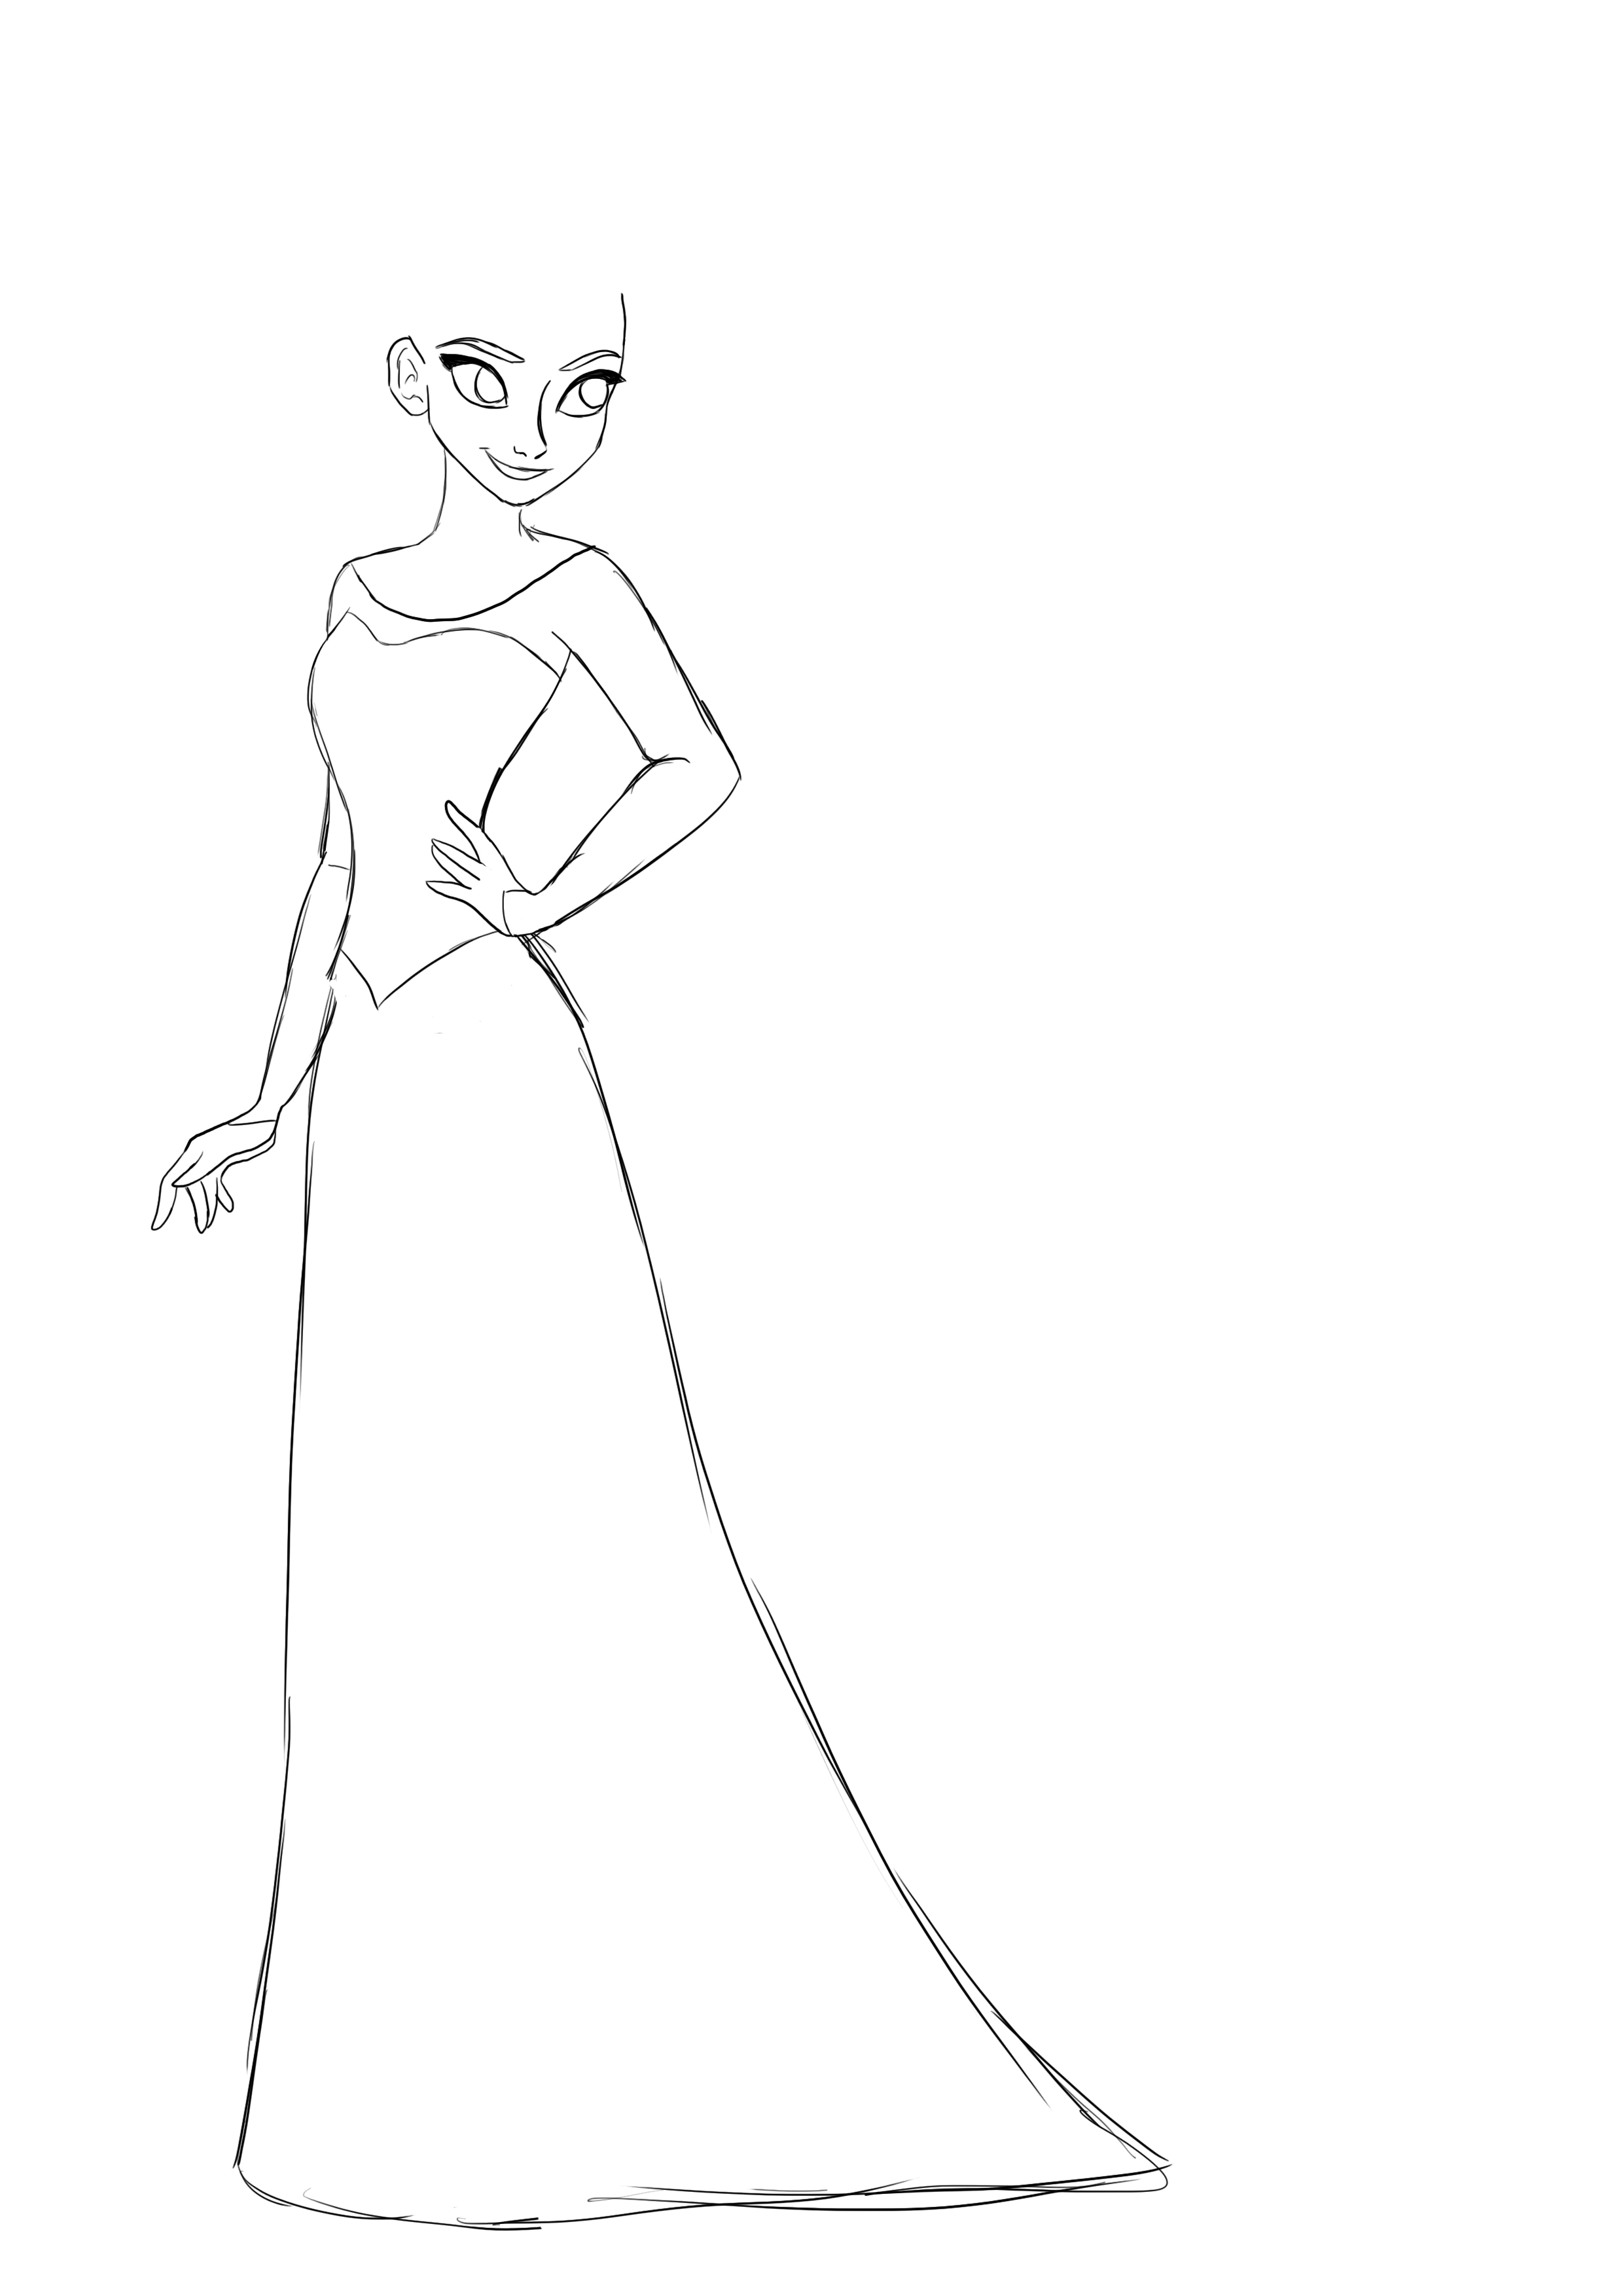
We will now do the hands and the details of the dress and face.
For the hands, Elsa - like all Disney princesses - has very slim wrists as well as long slender fingers. Start with the thumb, which begins at the end of the wrist. The fingers start further out and are in a "fan" shape (see the image above).
Once the hands are done, you will make the eyes. To do this, you will use the facial features. The line that divides the face in two serves as the end of the eyes. Elsa's eyes are almond-shaped. You will therefore make two curves. One at the level of the line and one above. The lowest point is on the side of the nose, while the highest point is on the outer side. You make the eye inside as well as the eyebrows.
The nose is delicate, starting at the base of the eyebrow, curving down, and ending in a point.
As for the mouth, it's a simple curve with a lip below.
The dress is in 3 parts. The first is at shoulder level. Elsa wears a transparent long-sleeve t-shirt under her dress. Draw the rounded collar and pointed sleeves.
Then there is the bustier (the 2nd part). The top of the bustier follows the shape of the chest and the bottom is at the waist, ending in a point. Then the 3rd part is the bottom of the dress that you have normally already made.
Let's move on to the hair. Elsa has hair with quite a bit of volume on top but is relatively short, then it ends with a long braid.
To make the top, you will therefore draw several strands going towards the back of the head. She also has a small strand coming in front of her face, almost at the center of it.
The braid starts at the back of the head and then wraps around the neck to finish over the shoulder. To help you make the braid, you can make deformed hearts, for example.
We're almost at the end, hang in there! :)
Let's finish the dress and draw the train.
For the dress, pleats must be made because a fabric is not straight and stiff unless it is intended.
Once the folds are made, make the train.
She walks in front of the dress and is transparent, so do not erase the features of the dress.
The train extends from the bustier and ends slightly below the dress. It has a straight cut like the dress and a few pleats at the bottom.
To conclude, we will add a few details.
We will draw the irises of the eyes, which are two black circles with a white dot in the corner. The irises are centered in the eyes, but since Elsa is in a 3/4 view and looking to the right, they need to be drawn slightly flattened to give a voluminous effect.
Then you add a few strokes in the hair, making sure to follow the shape of the strands to avoid a mass effect.
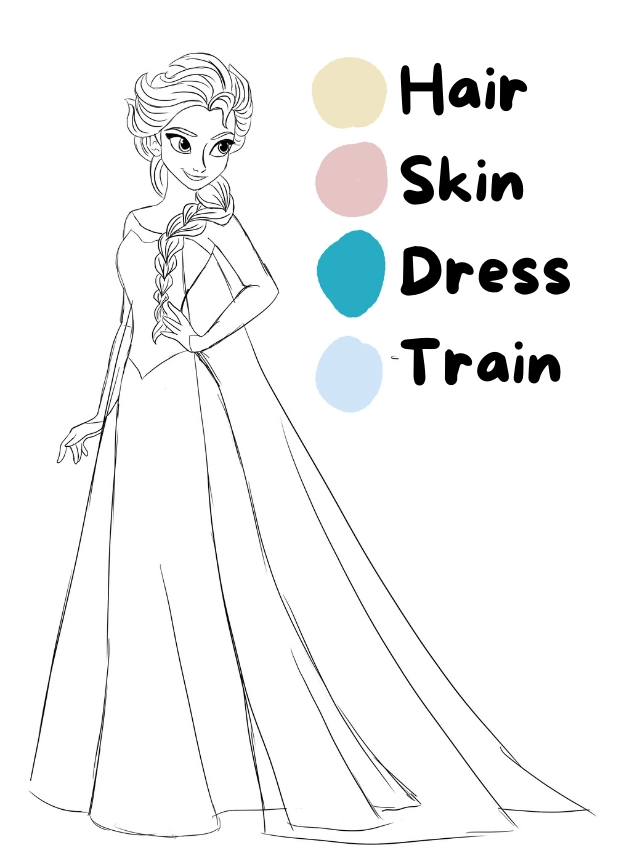
If you wish, you can add color to your drawing.
Elsa is primarily composed of 4 colors:
Beige for the skin, Blonde for the hair, a teal blue for the dress and a light blue for the long-sleeve t-shirt and train.

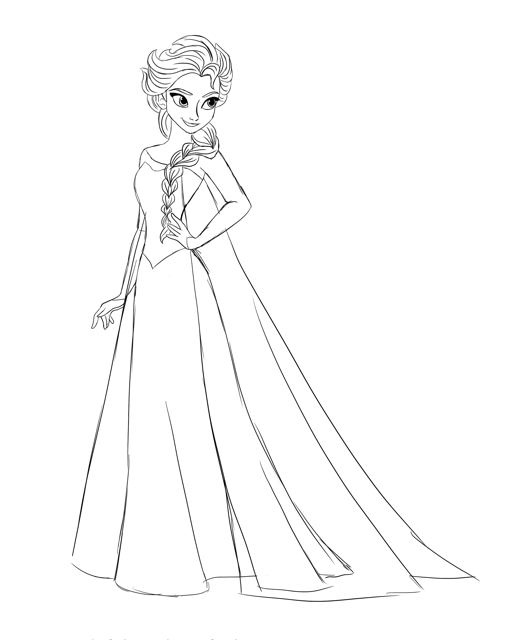
There you go, you now know how to draw Elsa! :)
CONCLUSION
Once again, take your time between each of the steps mentioned. It's very important not to rush and to observe well, then correct your mistakes. You'll find that anyway it's impossible to succeed with such drawings just at the first attempt (or else you have practiced a lot!).
Don't worry about the mistakes you're going to make, it's normal. The most important thing is to observe them well so you can correct them, take your time, and most importantly: enjoy yourself.
Do not hesitate to comment on the article if you have any questions, or for any other remarks.
Thank you and see you very soon for a new article.

Discussion
8 comments