How to Draw a Mermaid
Today we're going to learn how to draw a mermaid!! YES, this mysterious creature that comes in many forms. It can be found in several mythologies. Indeed, we tend to draw a mermaid with a very slender silhouette, although this isn't necessarily the case! I suggest that we take a brief look at these representations to better understand these fascinating but extremely dangerous creatures before we start drawing them.
REPRESENTATION OF THE MERMAID IN MYTHOLOGY
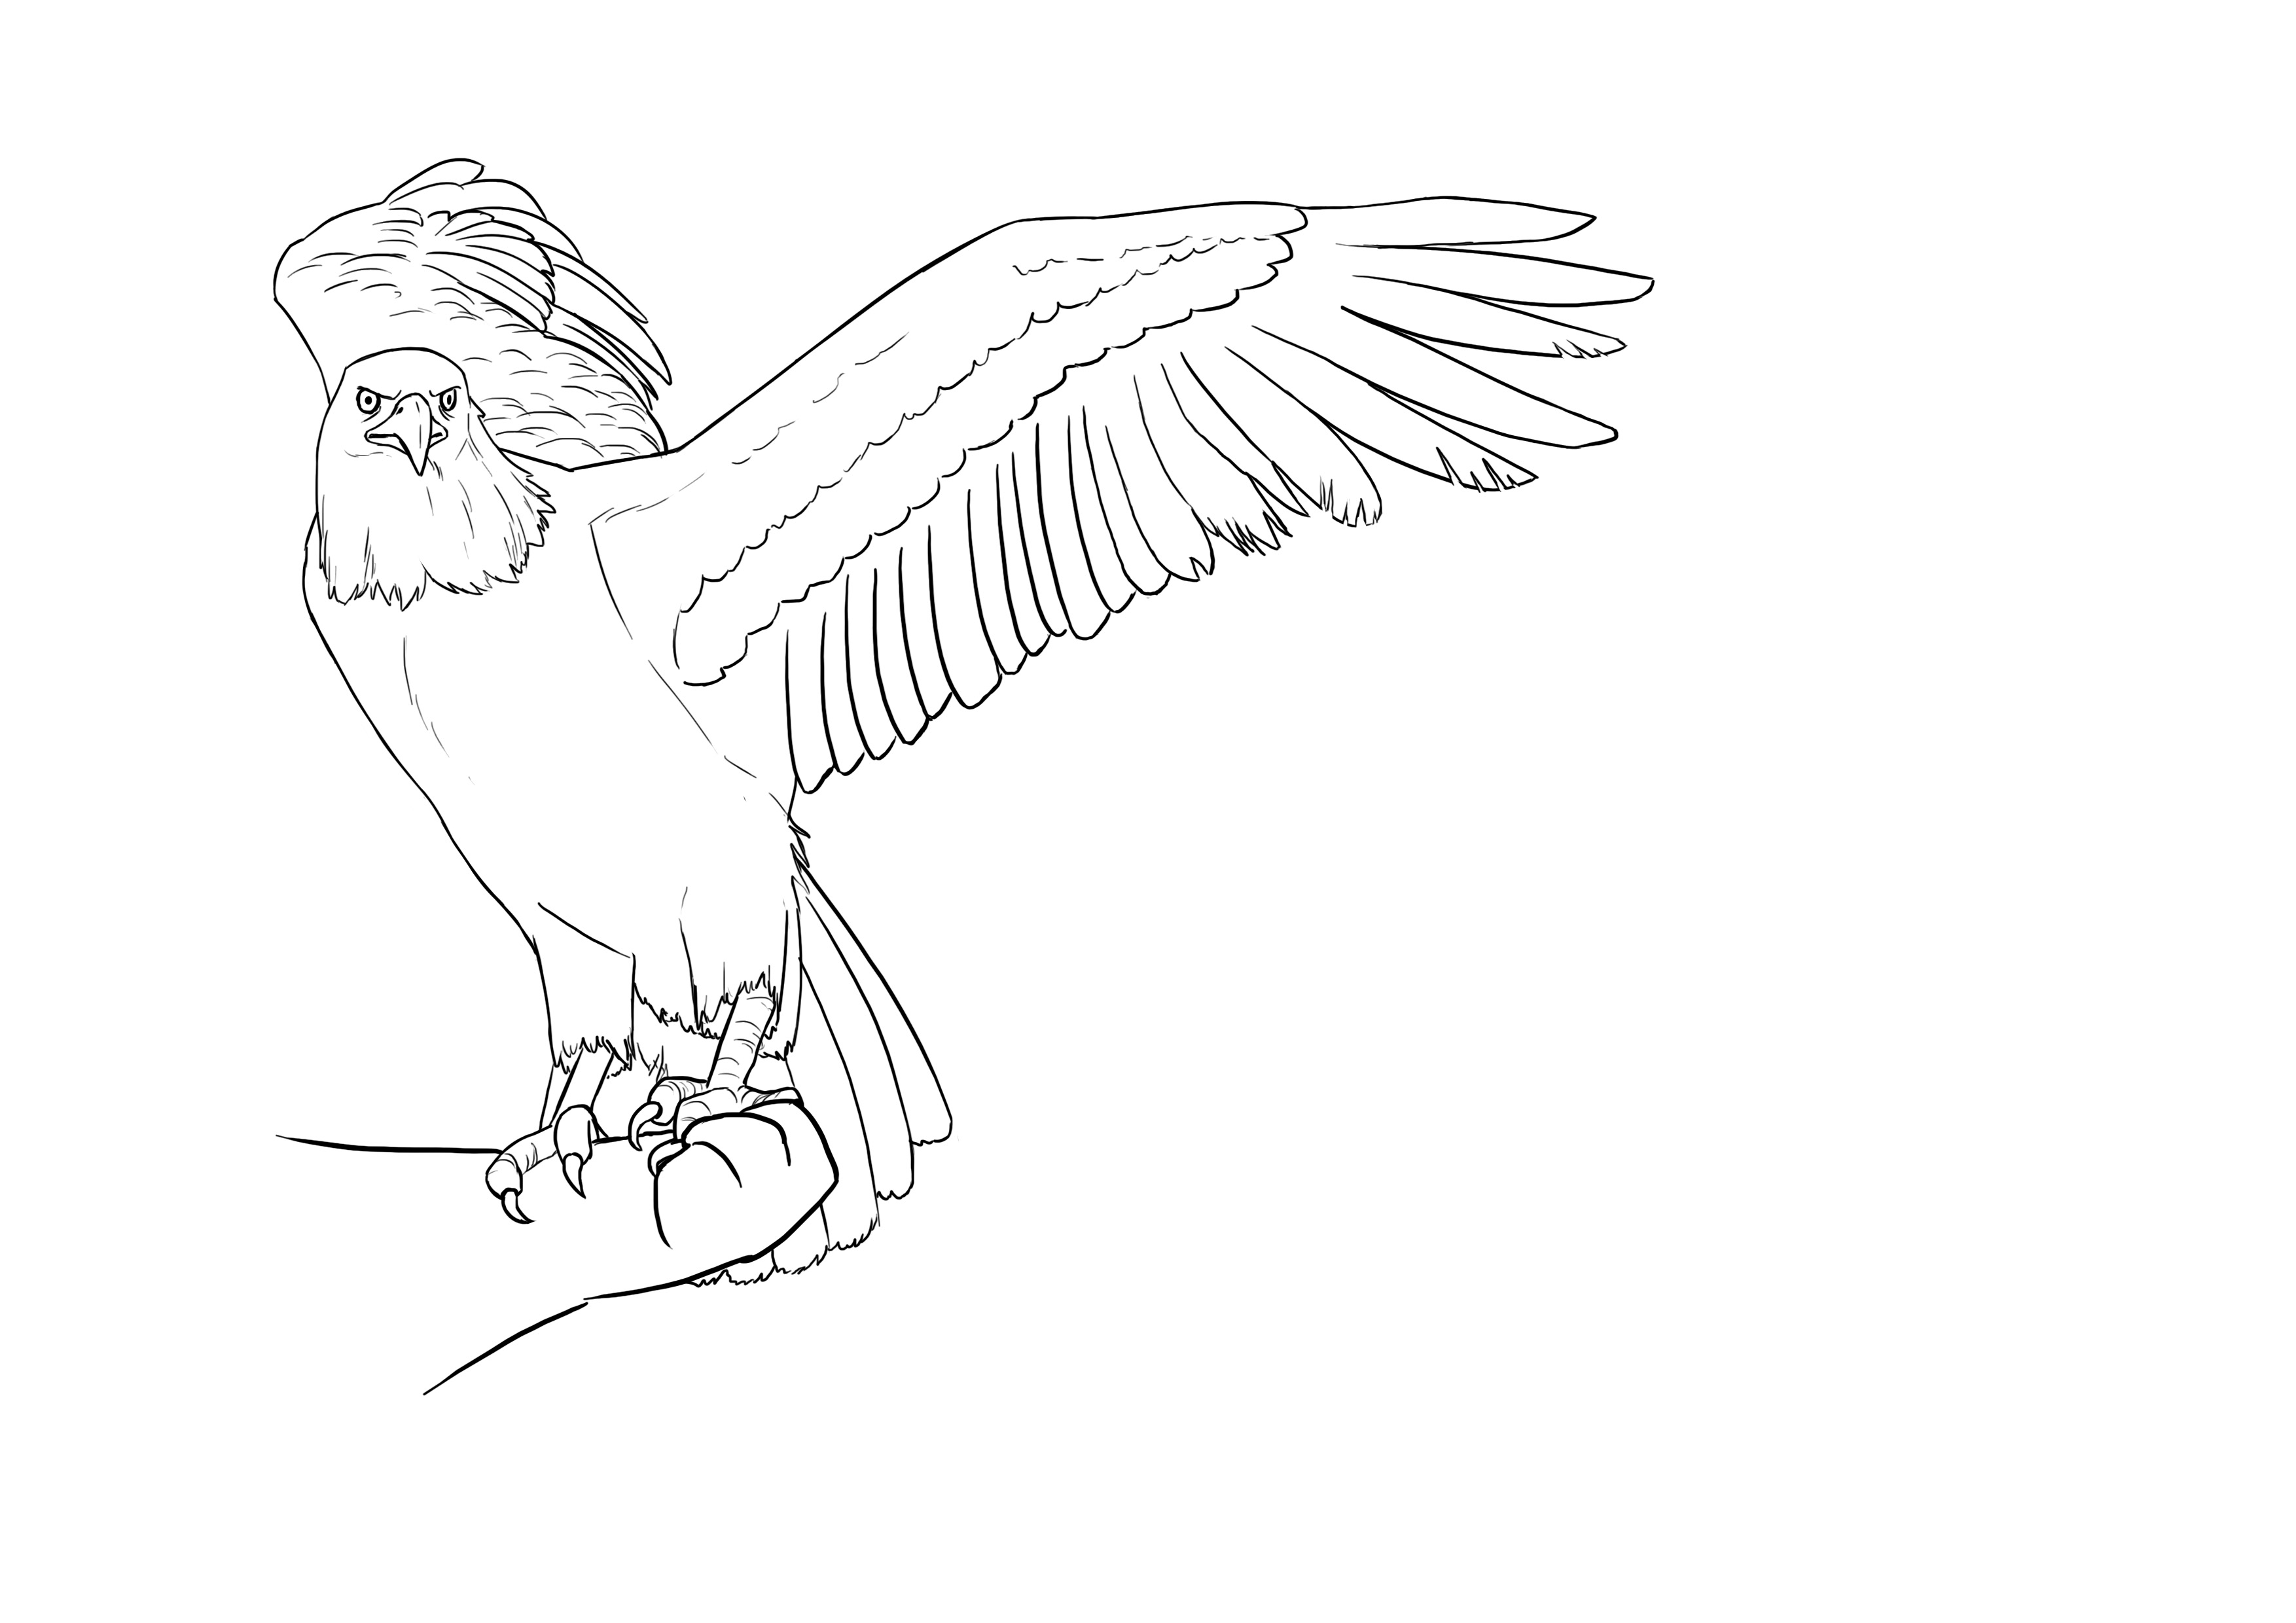
We can distinguish two types of sirens in mythologies. Indeed, Roman and Greek mythology talk about sirens that are half-woman, half-bird, while in Norse mythology, the sirens are depicted as half-woman, half-fish.
Let's start with Roman and Greek mythology!! Here is one of the representations that can be found:
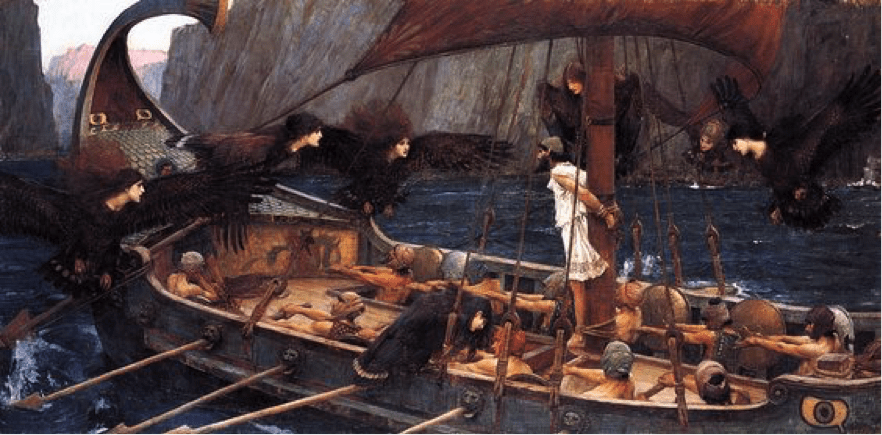
This is Ulysses confronting the song of the sirens. It is a work by John William Waterhouse made in 1891. We can see that the sirens depicted here are birds with the heads of women. In Greek mythology, sirens are beings that are half-woman, half-bird. According to the tales, the sirens come in groups of two, three, or four. Their songs diverted sailors, causing them to crash on the rocks in order to devour them.
Now let's talk about the sirens of Norse mythology! Here is another representation of the mermaid in these countries:

This time, the mermaid depicted is half-woman, half-fish. But the image is still by the same painter, John William Waterhouse, and was made in 1900.
In medieval and Scandinavian folklore, the mermaid is a legendary creature, half-woman, half-fish. These beings are formidable monsters. The Norwegian work "Konungs Skuggsja" describes them as attractive creatures resembling a woman from the waist up, with a substantial bosom, long arms, and long hair. Their neck and head are completely shaped like a human's. But this monster is large, with a terrible face, a pointed forehead, wide eyes, a large mouth, and wrinkled cheeks.
This version of the mermaid can be found among many other legends about this monster that still remains a mystery.
Now that the mythology of the mermaid holds no secrets for you, we will move on to how to draw a mermaid.
THE BASICS OF DRAWING A MERMAID
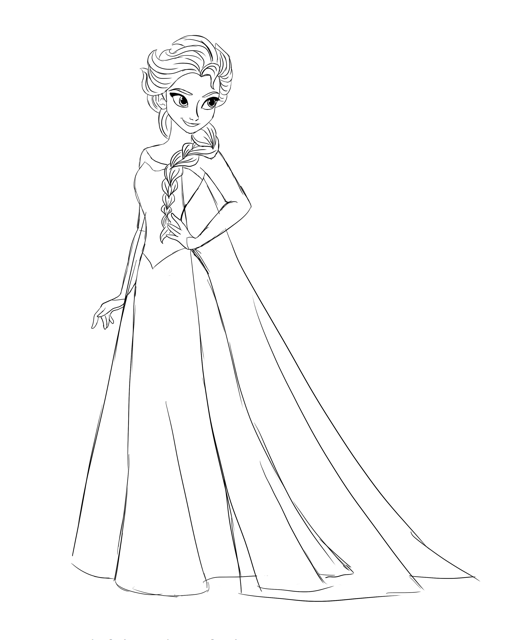
How do we construct a mermaid? Well, let's take this example image of the anatomy of a mermaid, which I remind you is not realistic (since mermaids do not exist!!). It also means that you can find other types of mermaids depending on the artist.
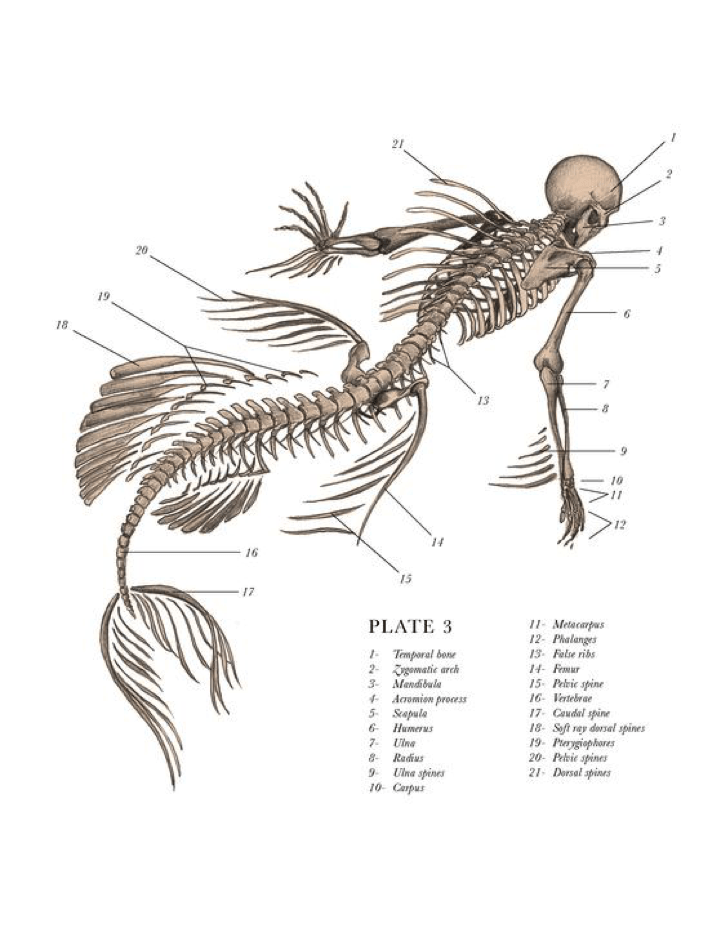
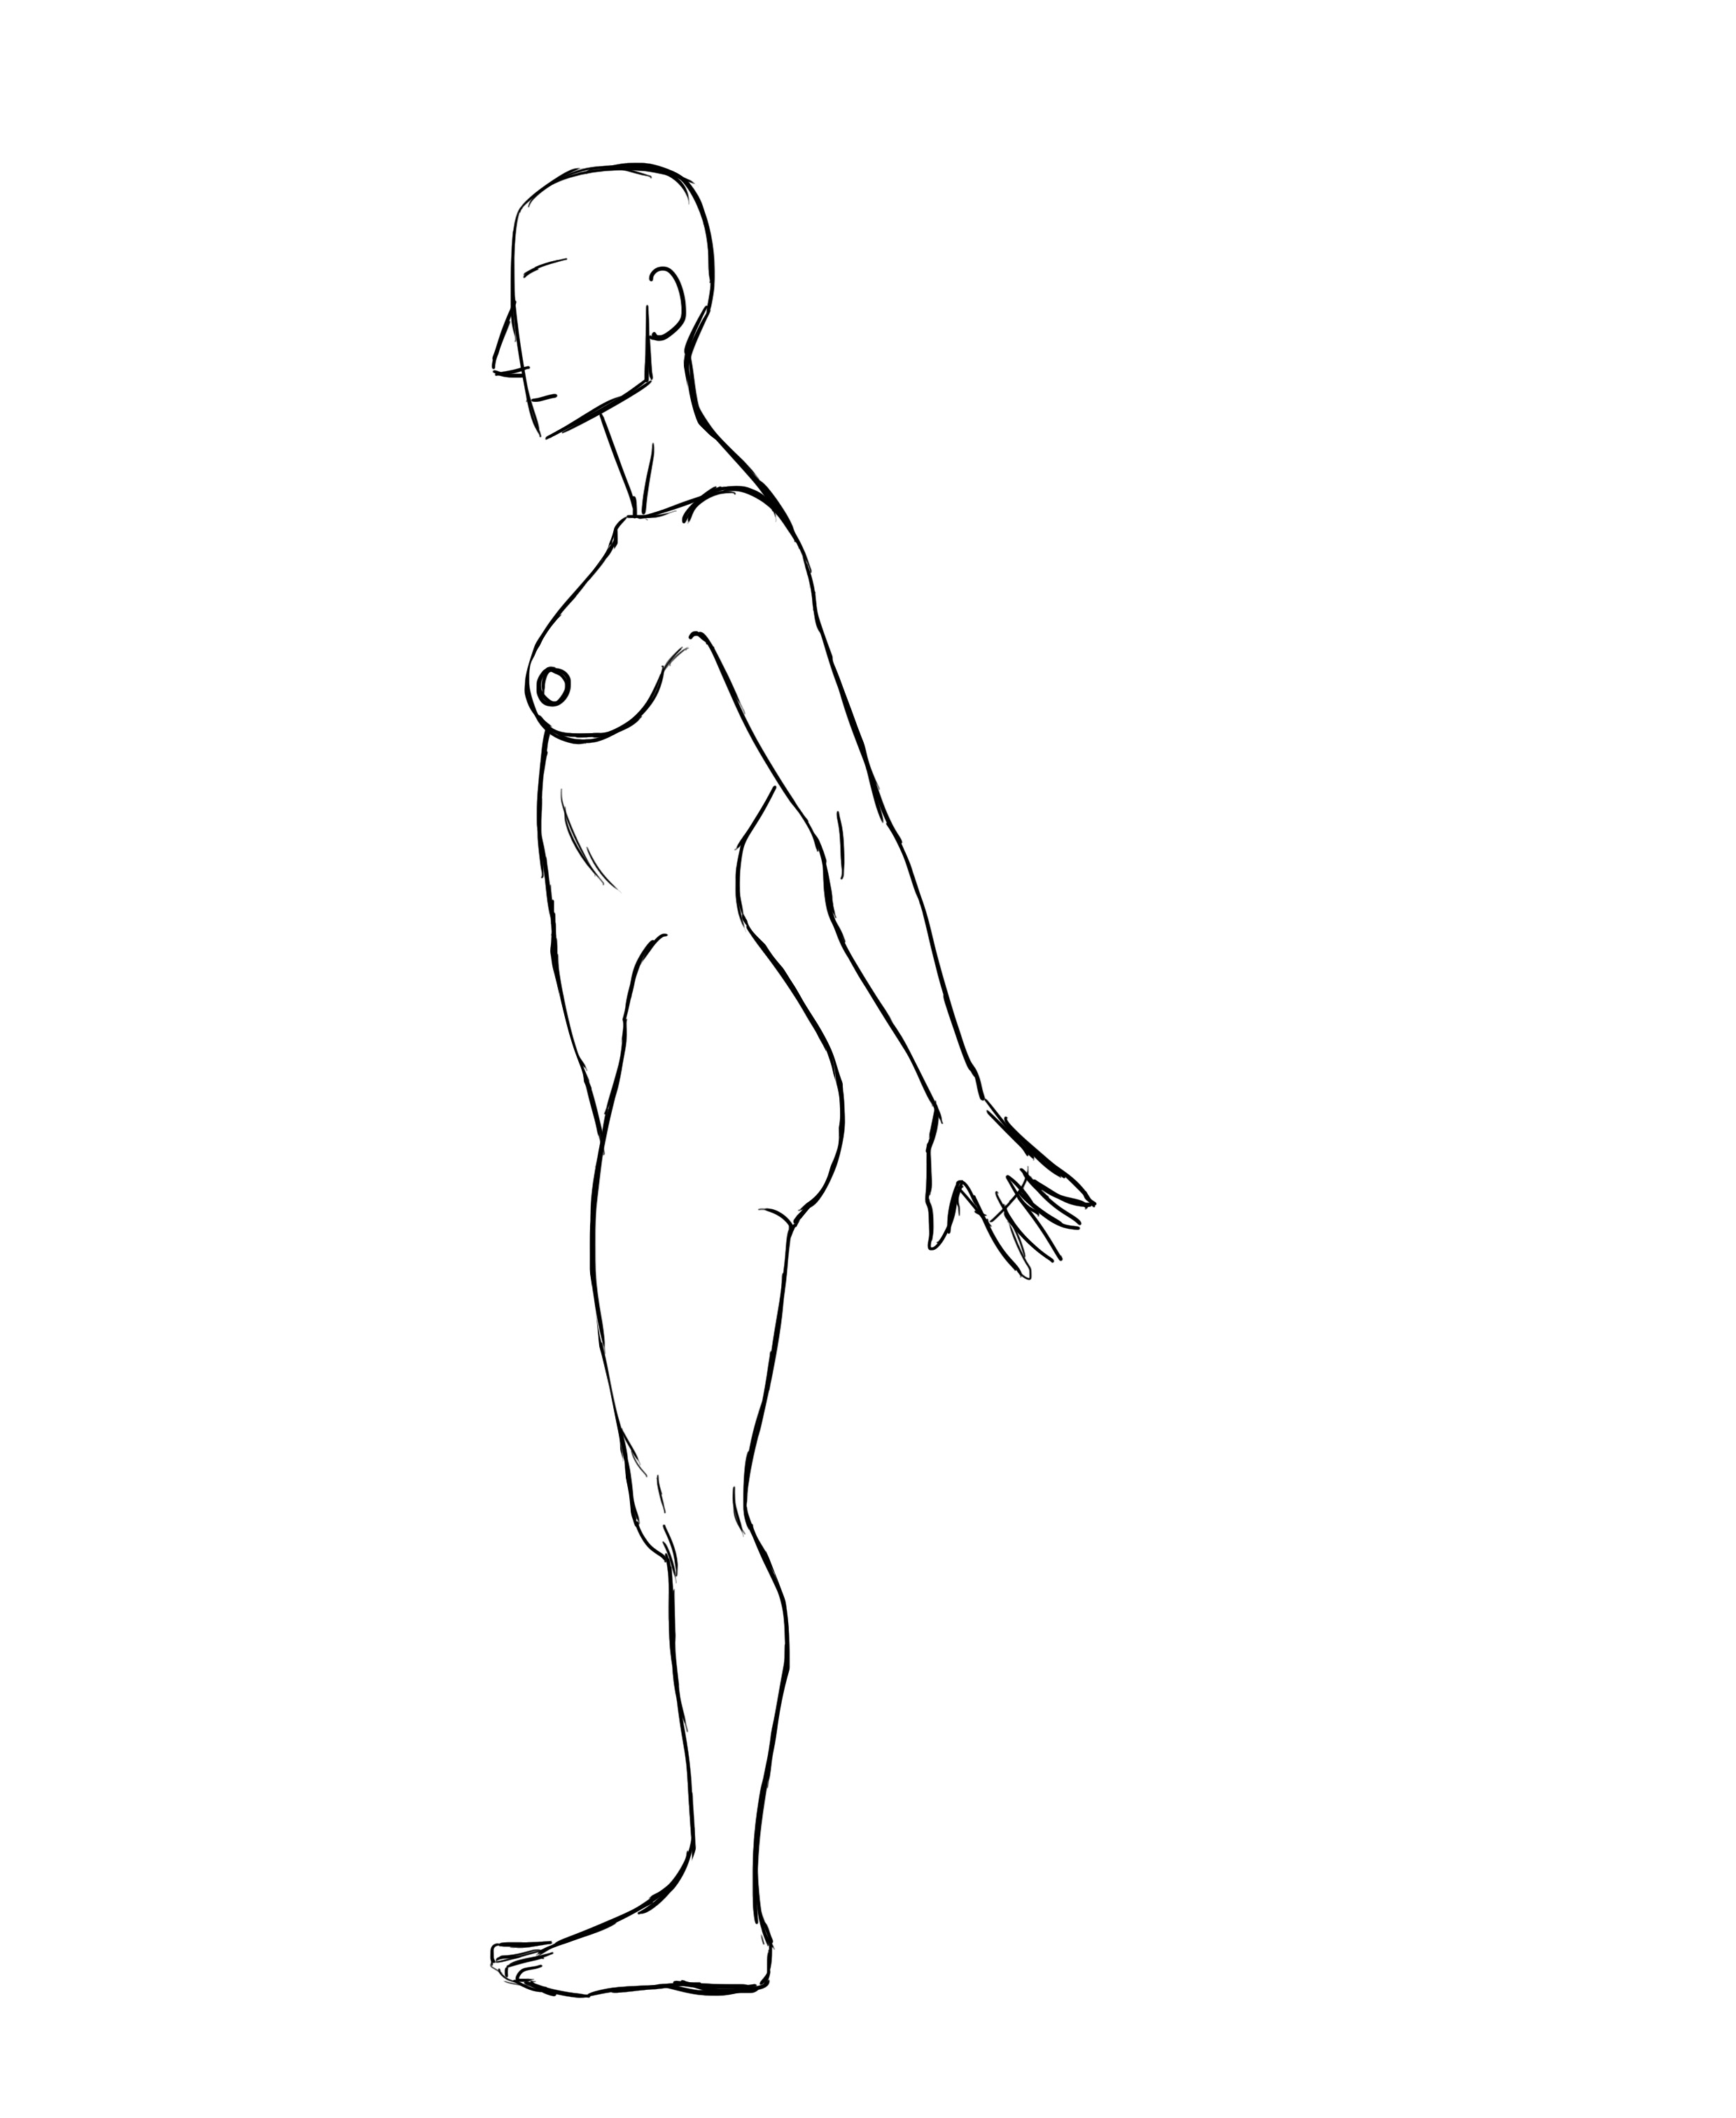
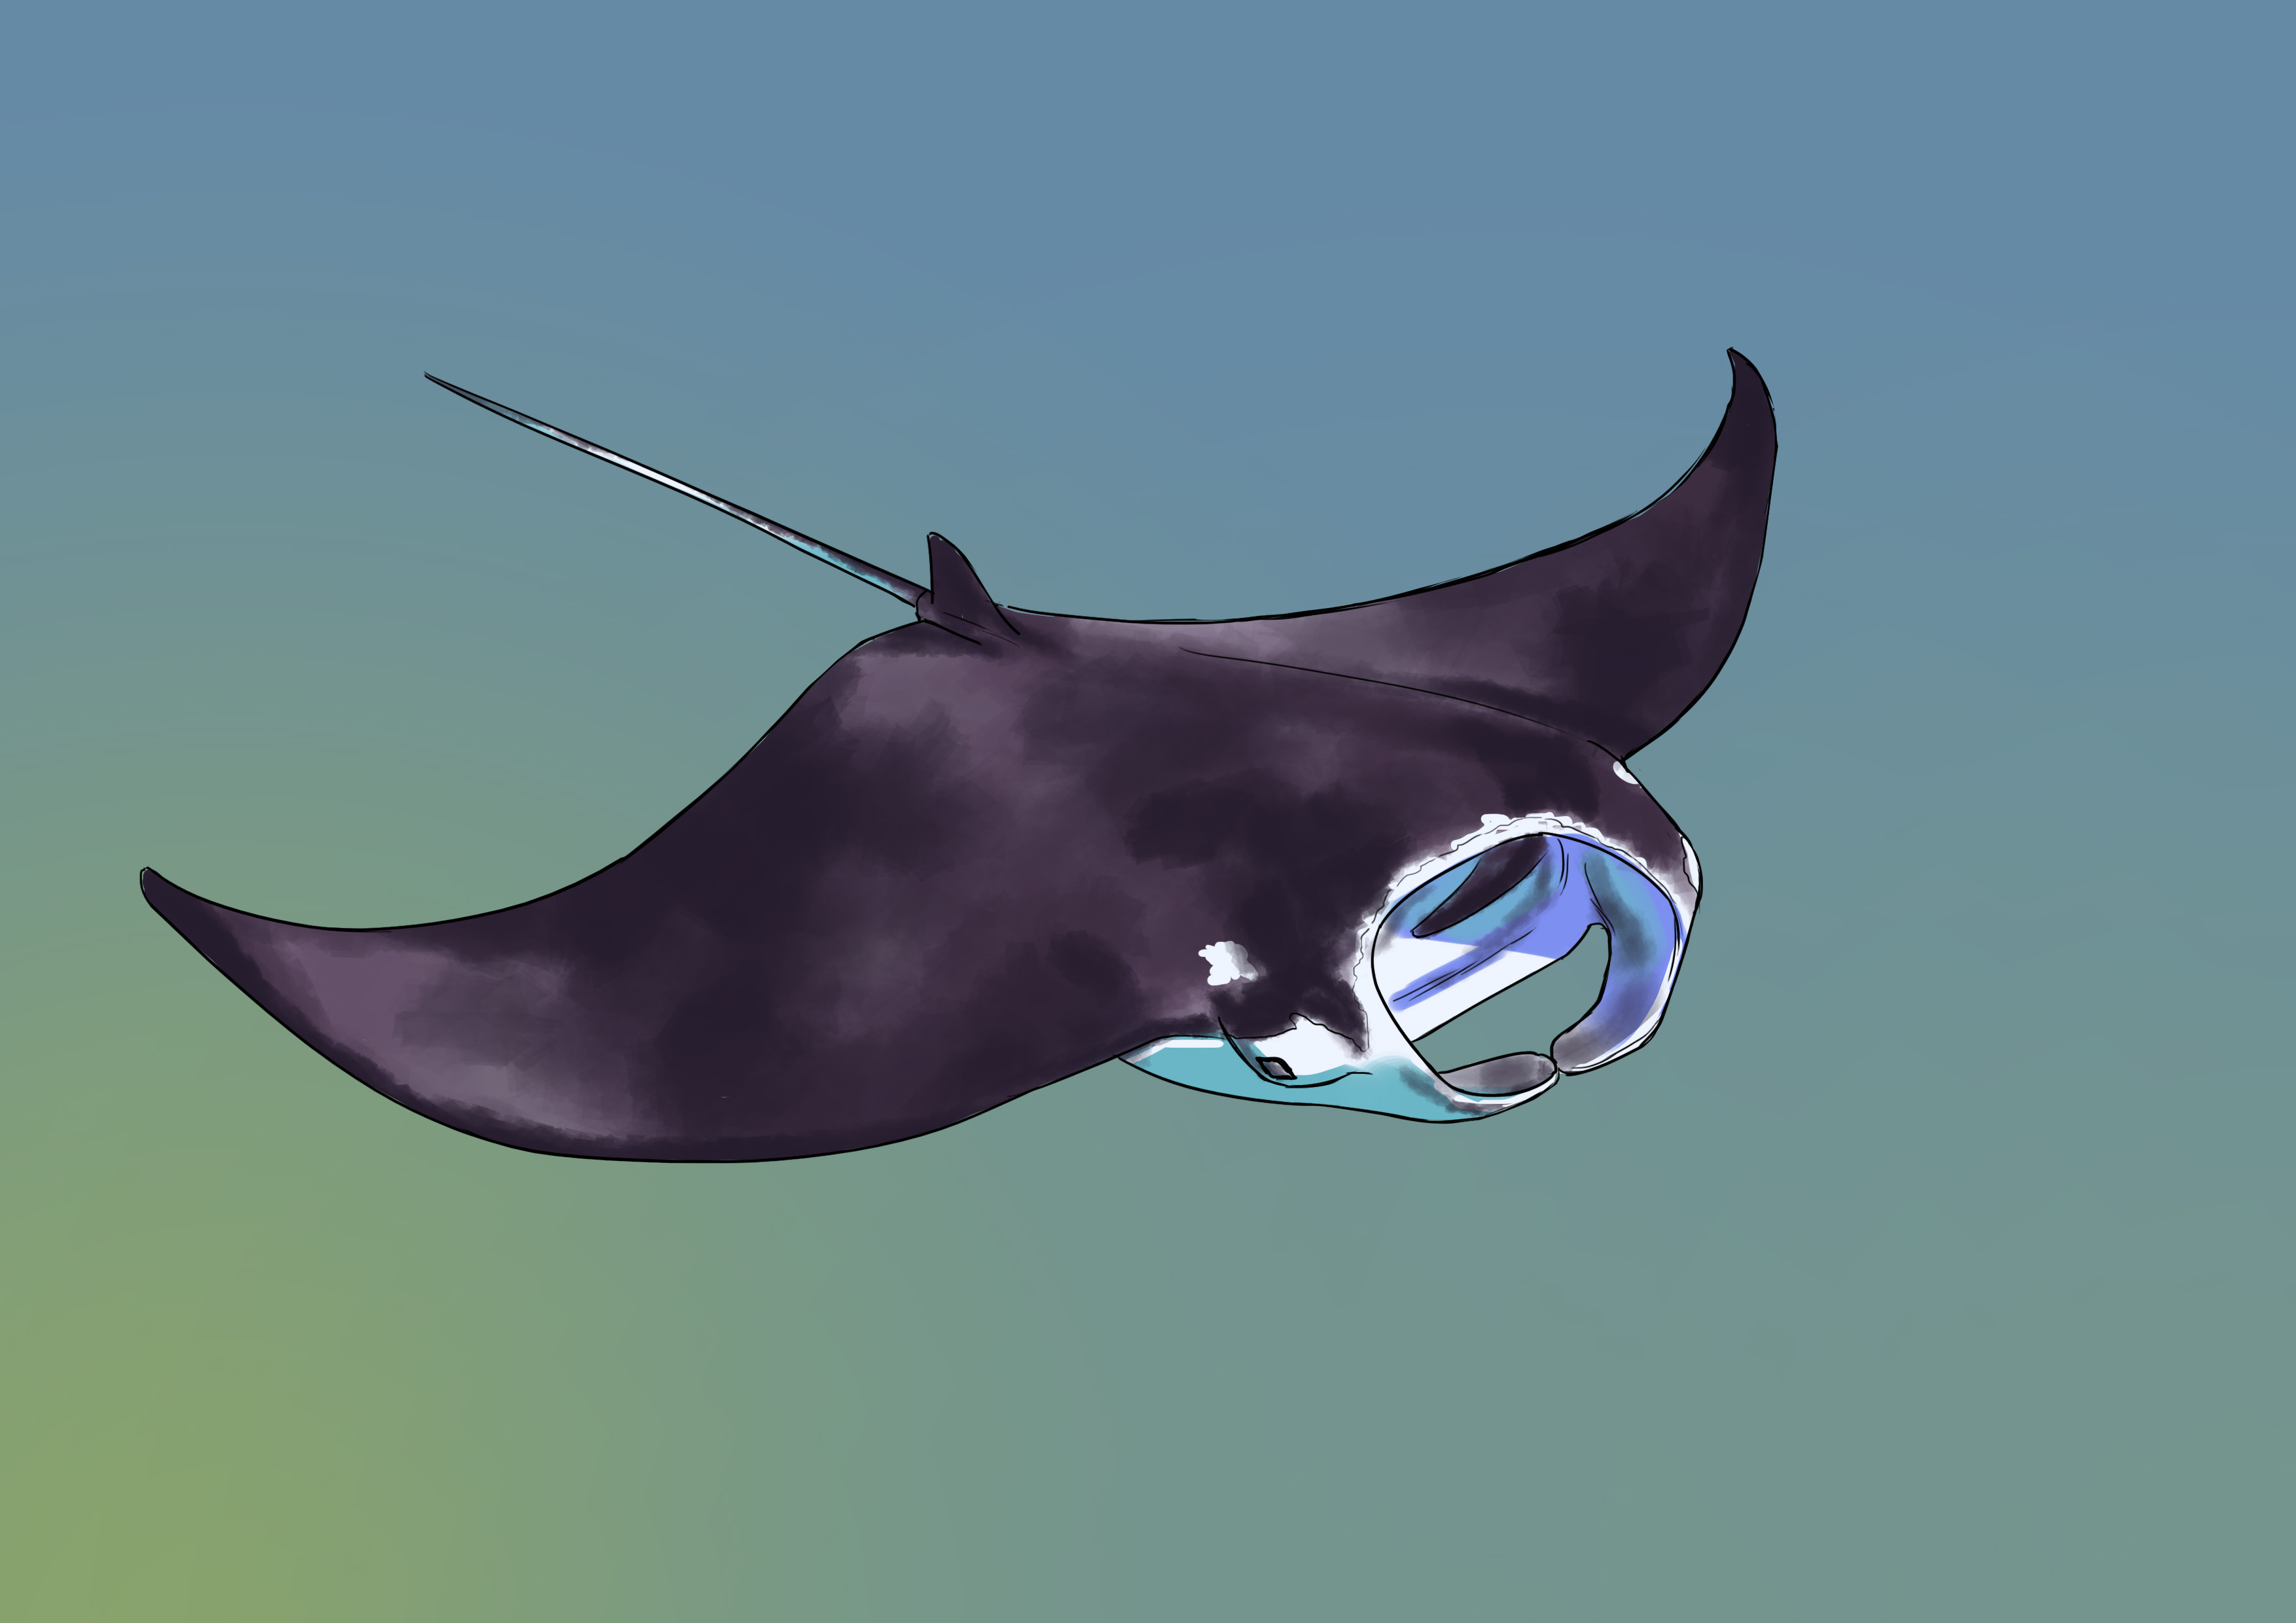
Don't panic, we will look at the anatomy together!! As you can see in the image above, the mermaid has a woman's body up to the waist. To learn how to draw a woman's body, I invite you to read the article on our blog about this topic! :) The second part corresponds to the tail of a fish with multiple fins on the arms and the spinal column. It can be any type of fish, marine mammal, or other species living in the water.
An important point that we cannot see in the drawing but must remember is that the mermaid does not have lungs but gills for breathing, just like the fish, in our case.
Now, let's get to the heart of the matter: drawing a mermaid. For this, we will start by drawing her with simple shapes and gradually work our way to details like fins and scales…
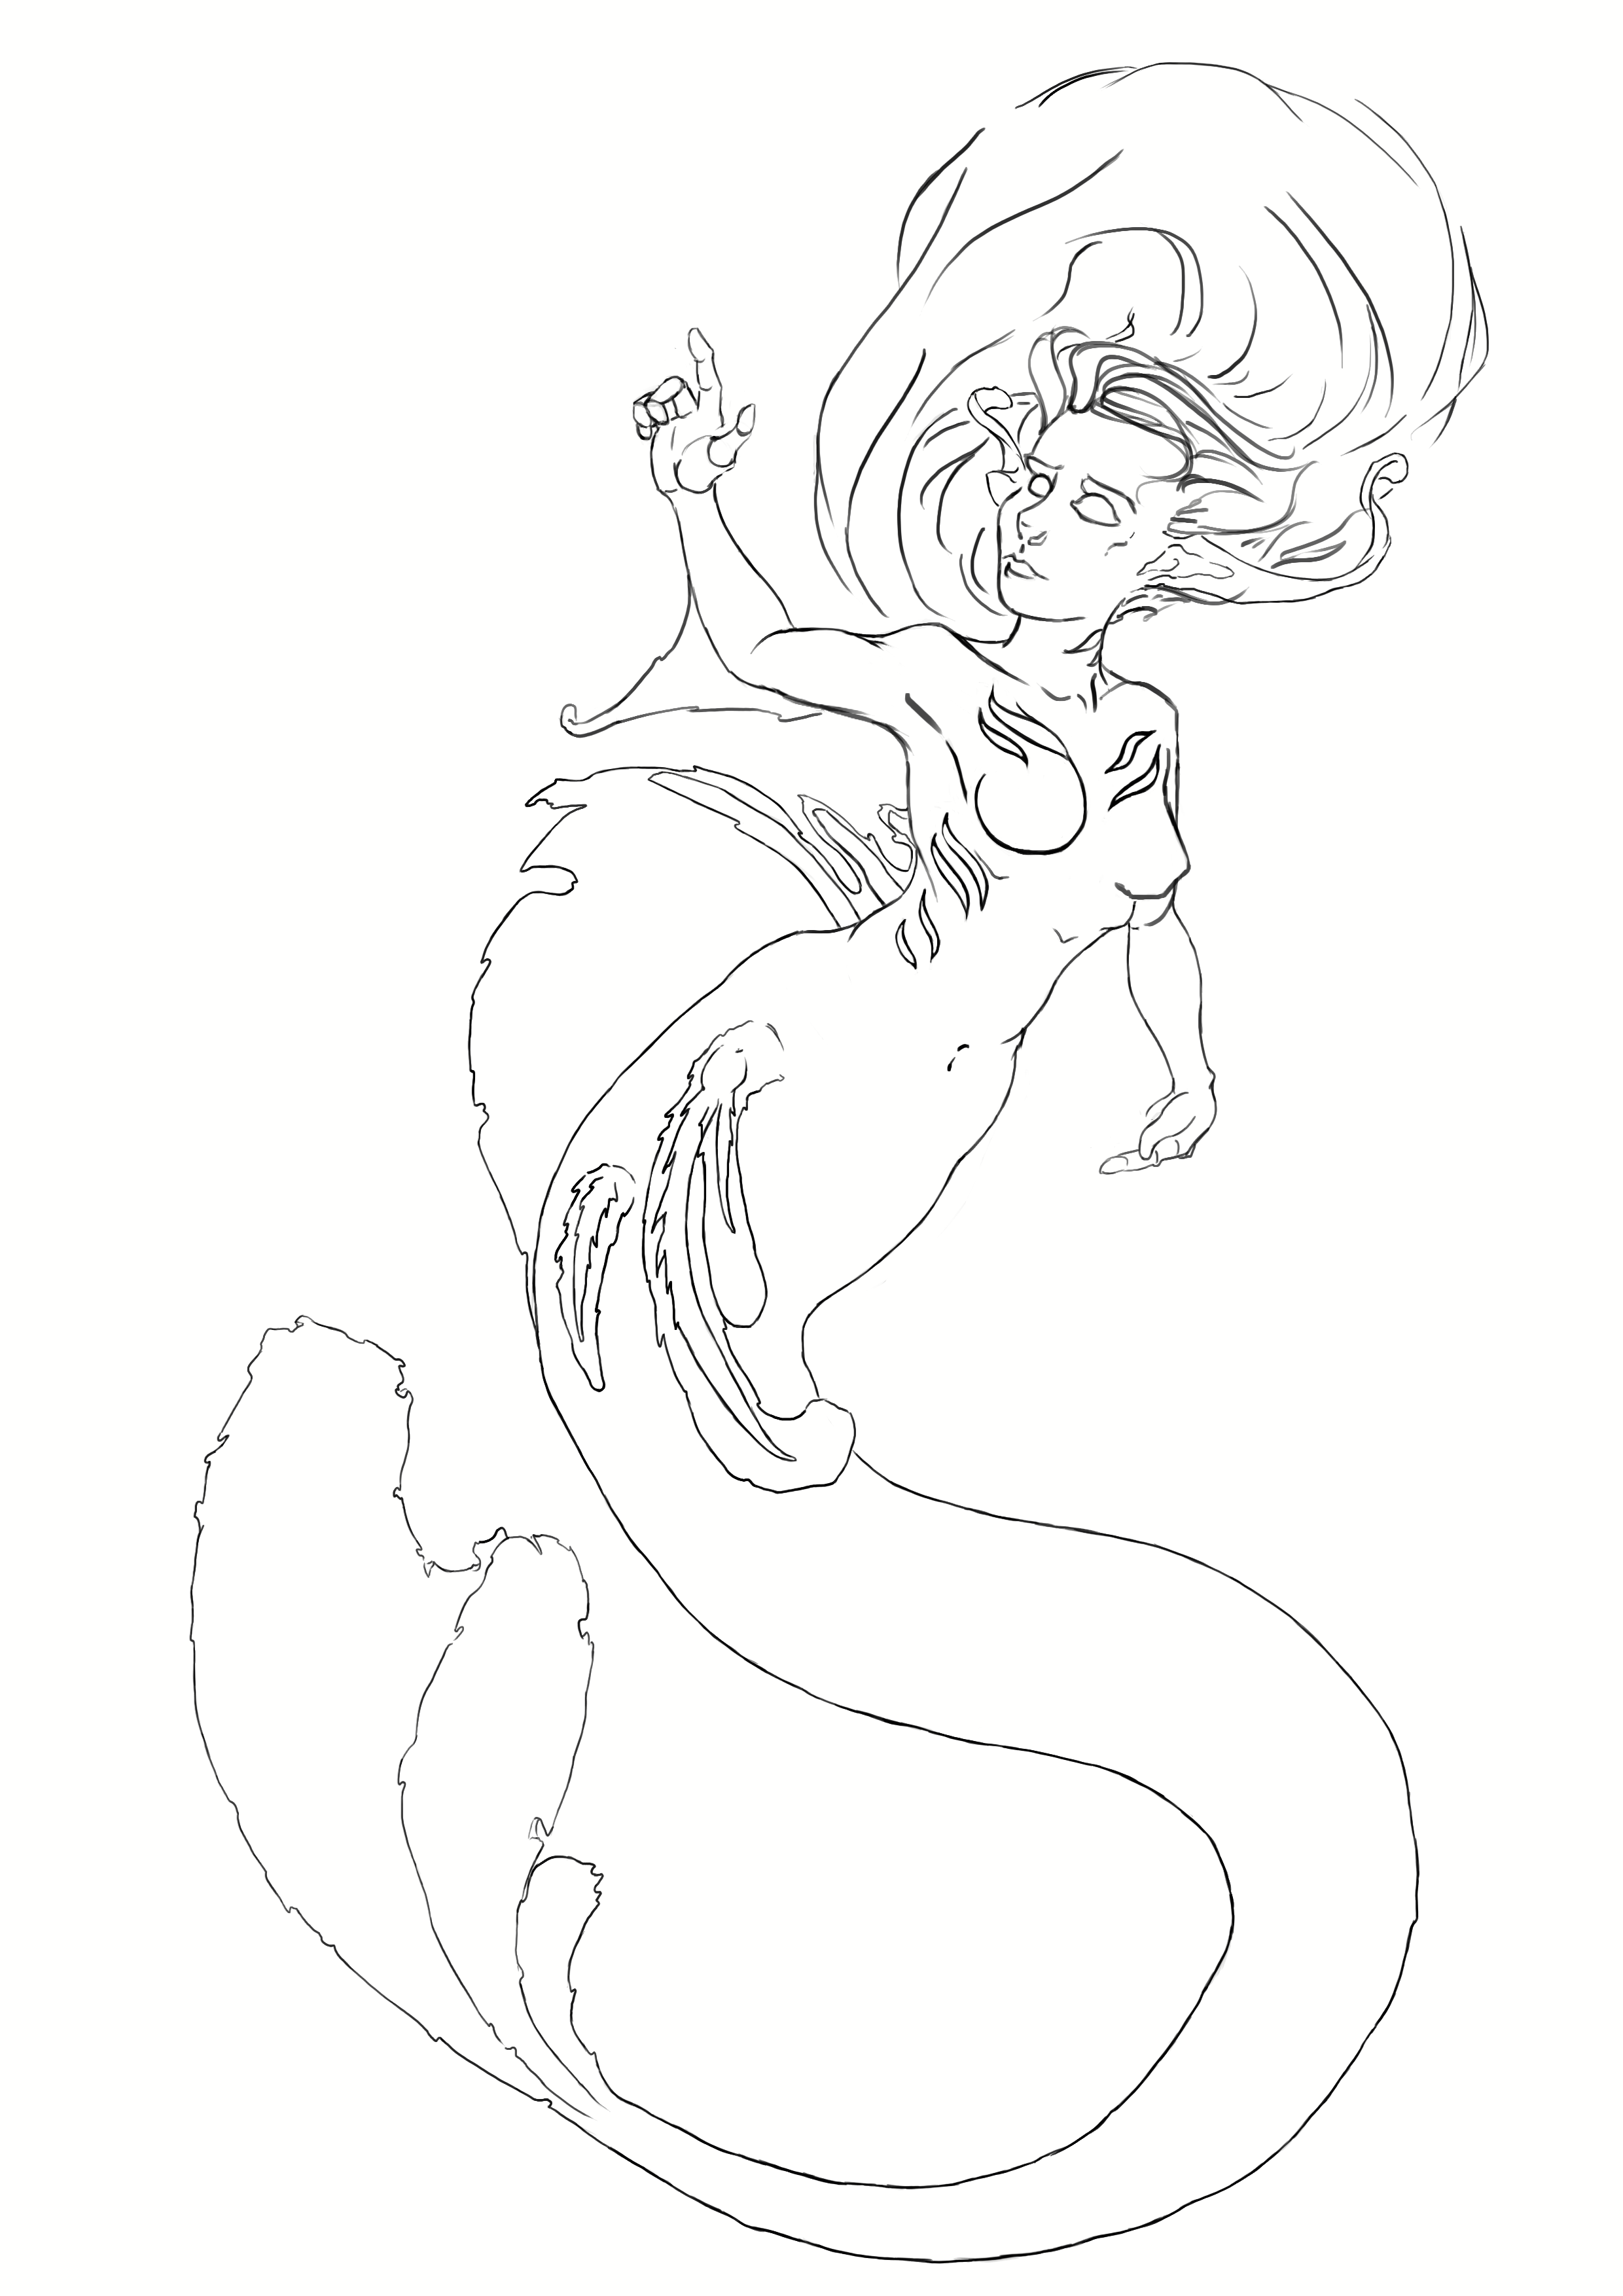
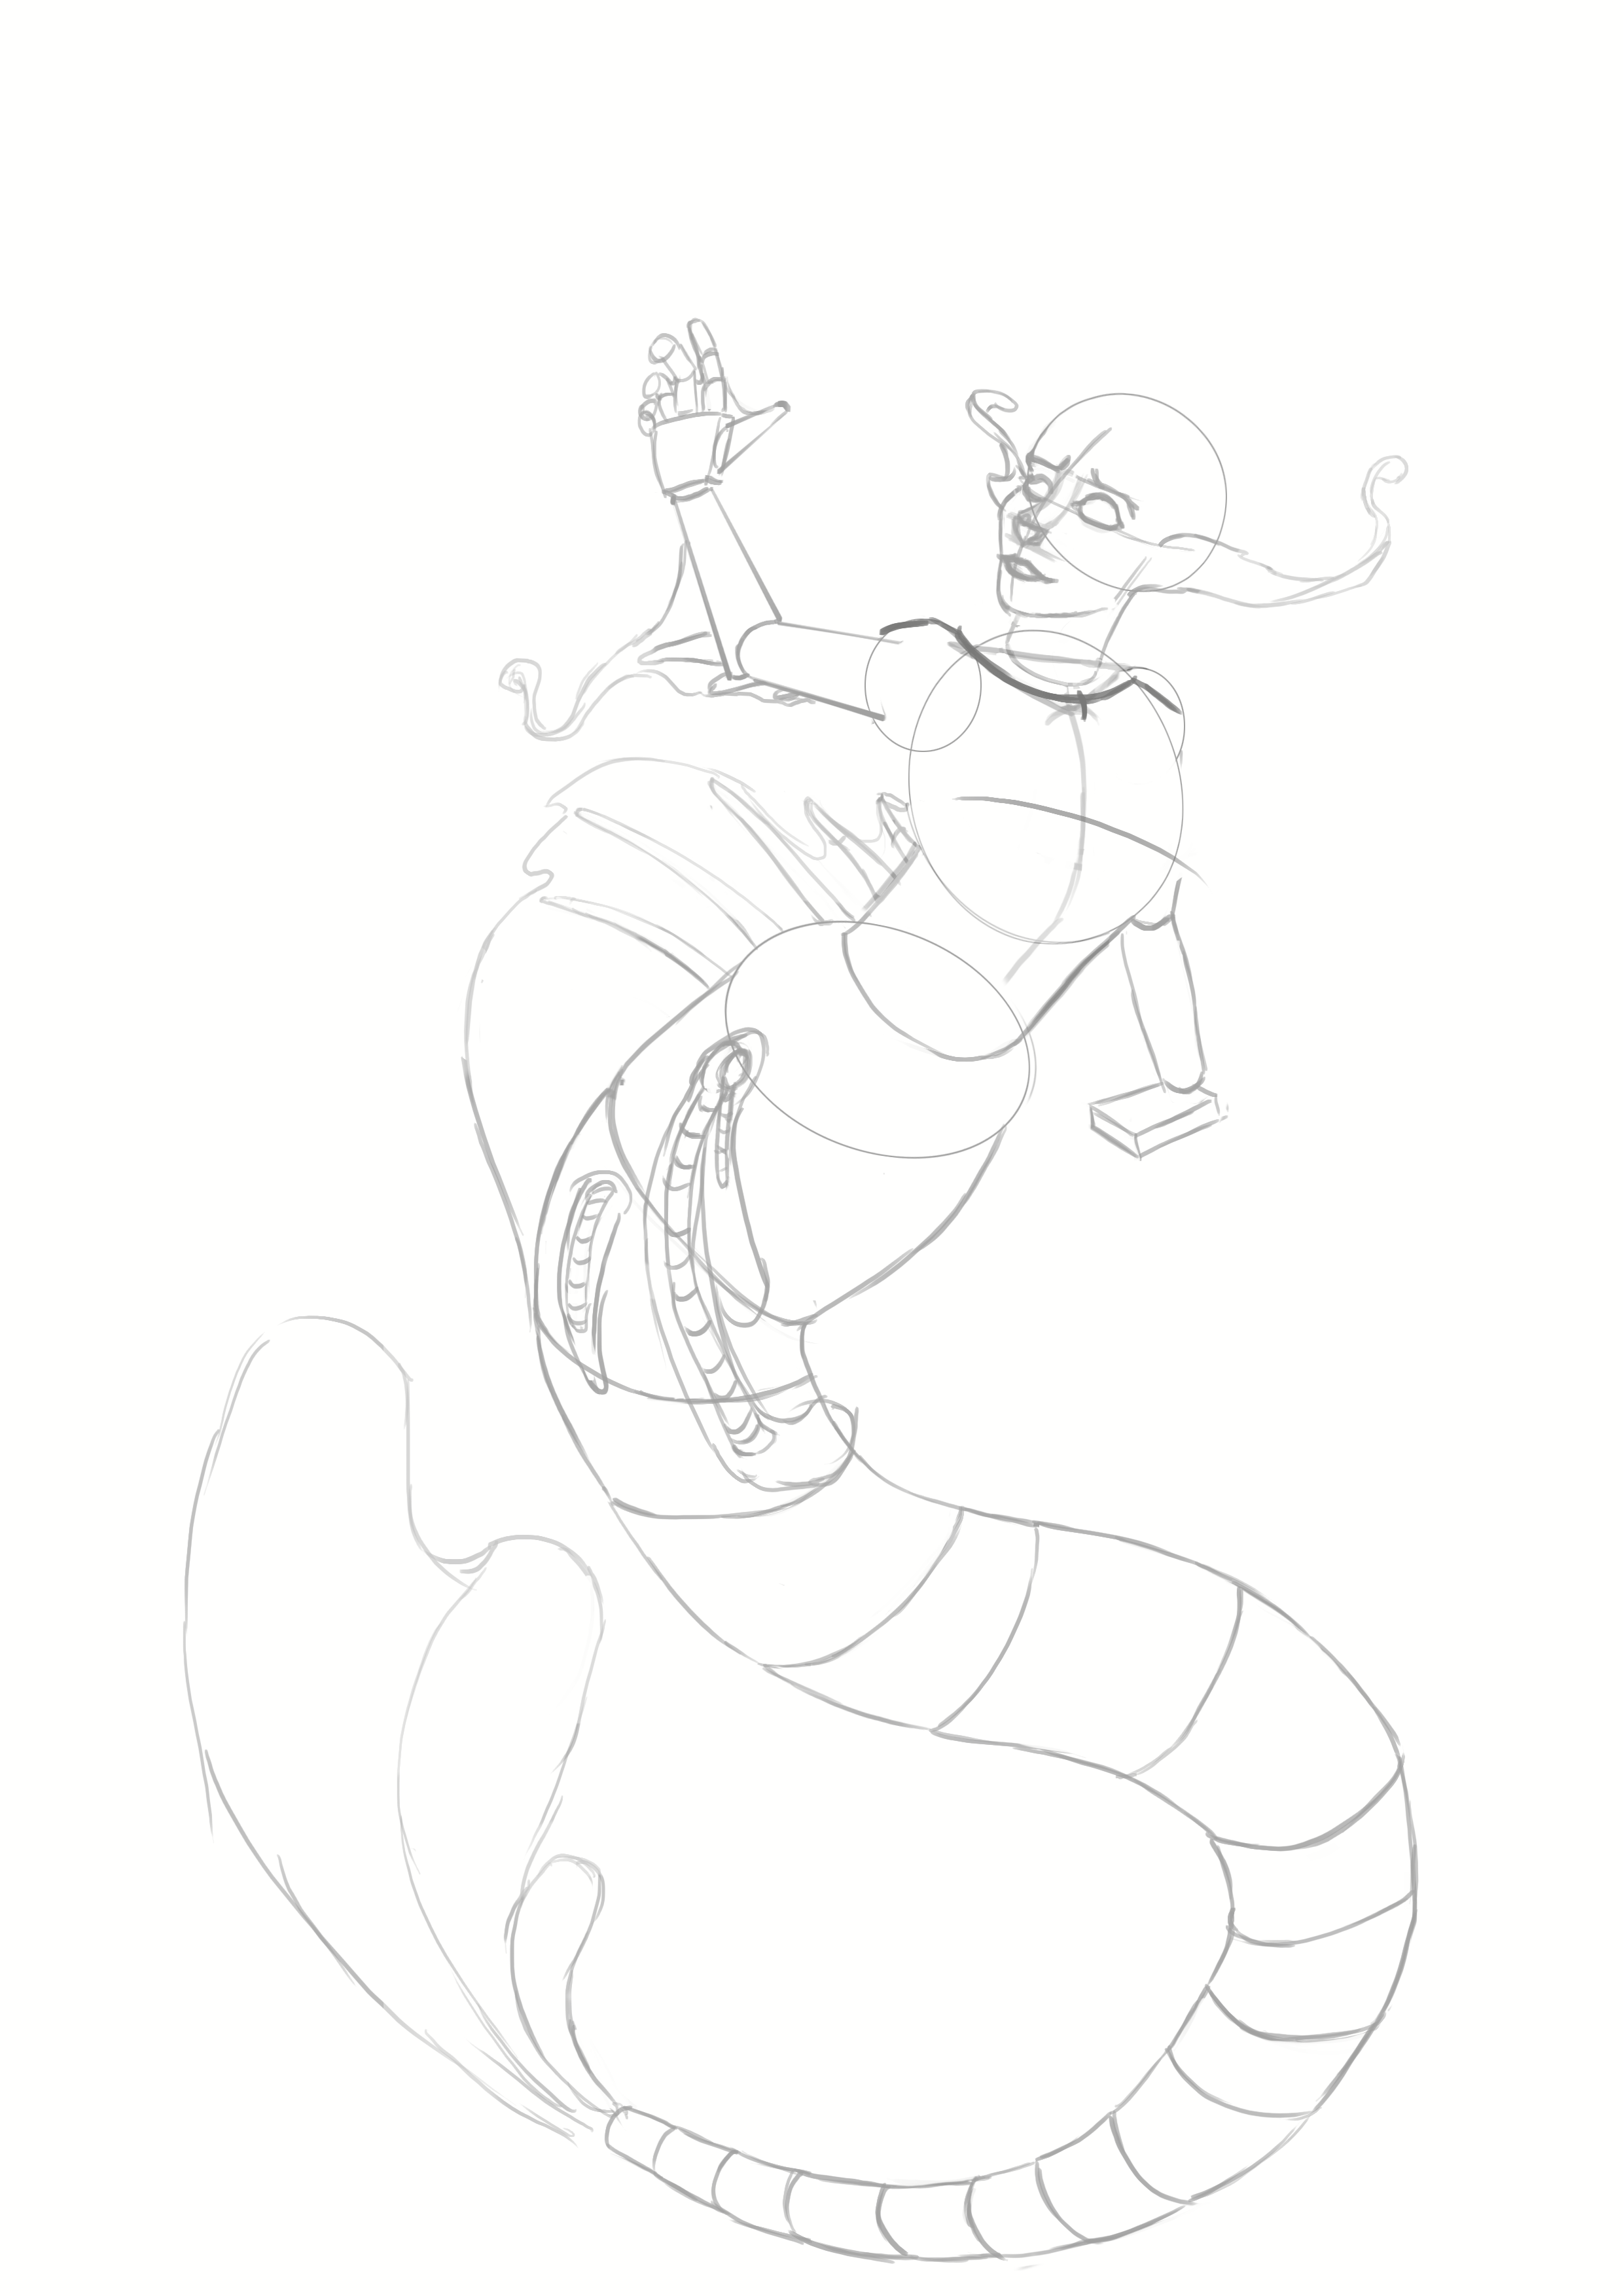
Initially, we will use circles, ovals, cylinders, and rectangles as a base to construct our mermaid. I suggest that we use this drawing to build our mermaid; it's one of my own creations.
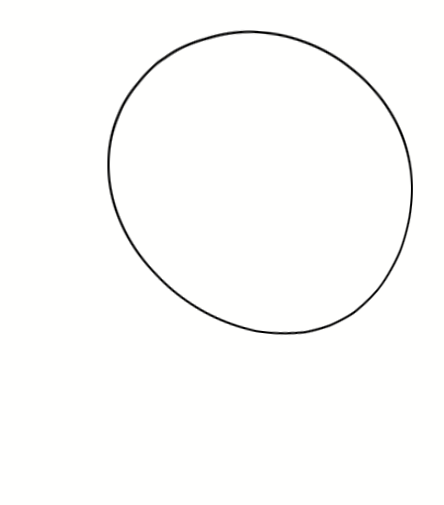
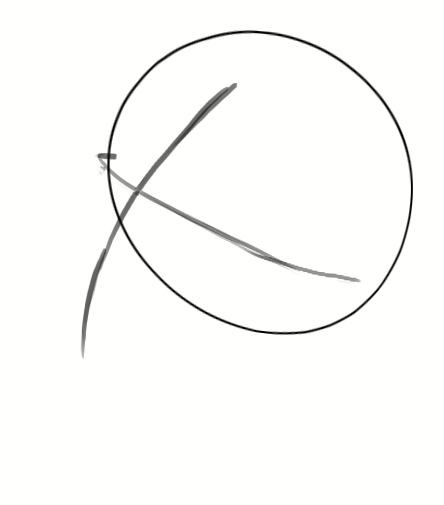
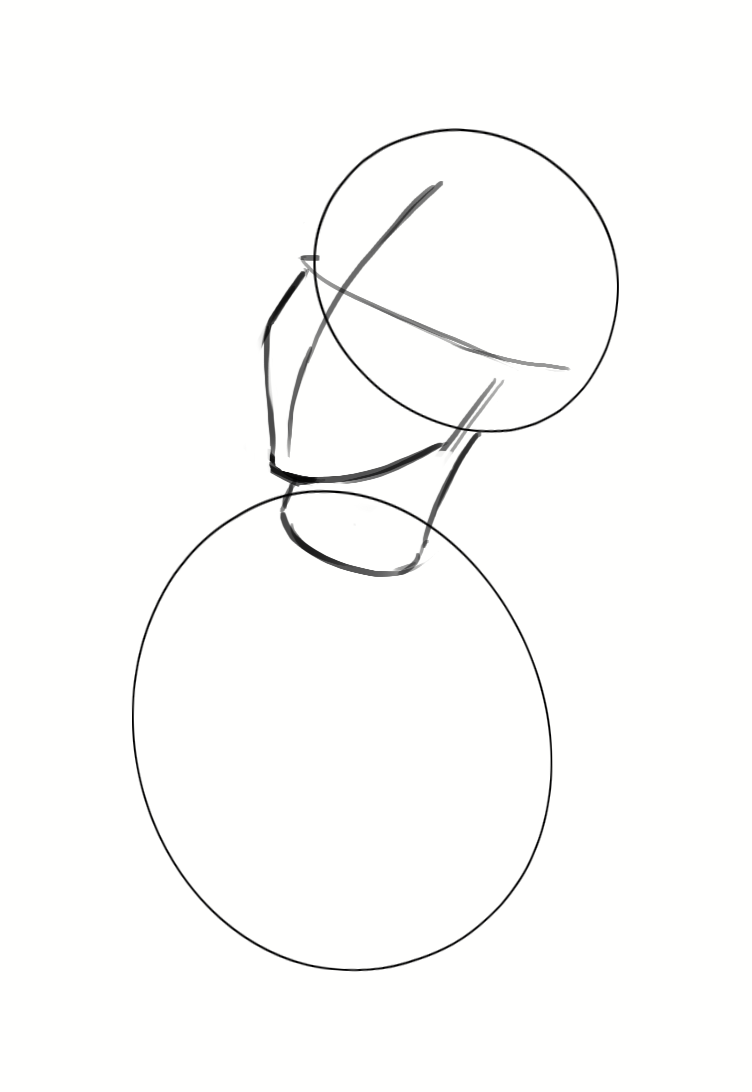
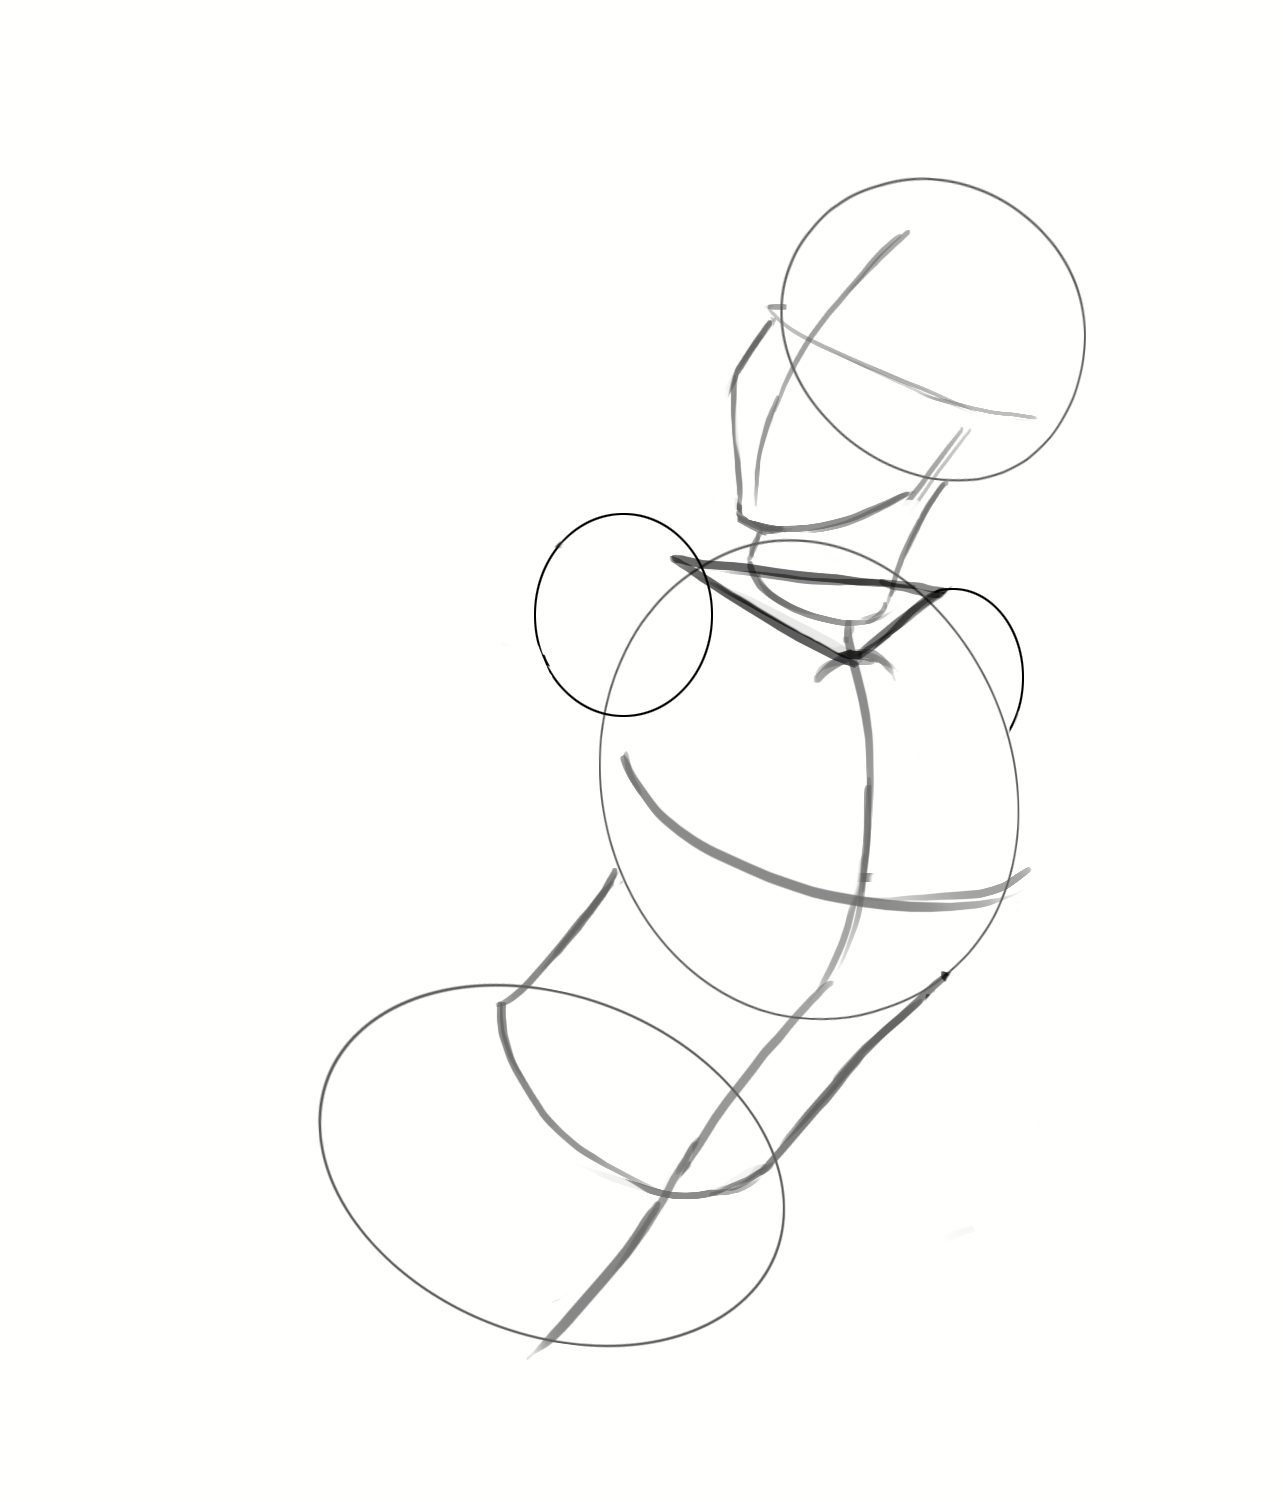
DRAWING THE BASE OF THE HEAD
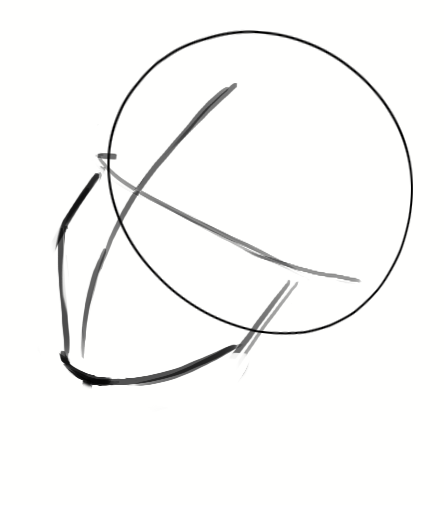
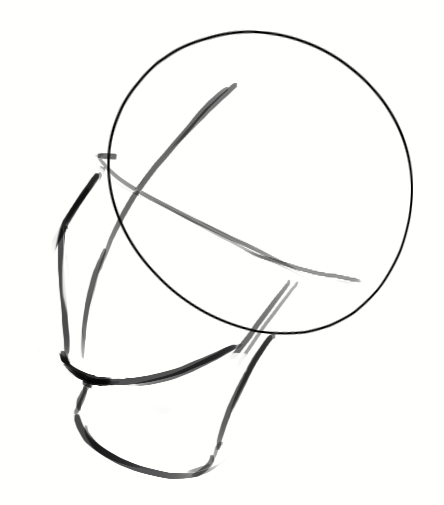
I suggest we start with simple shapes as follows: the head by drawing a circle, then defining the features that will allow us to place the eyes, the nose, and the mouth, which we will discuss later in the article. To position the jaw, we will represent it with a triangle. And finally, we will represent the neck with a cylinder.
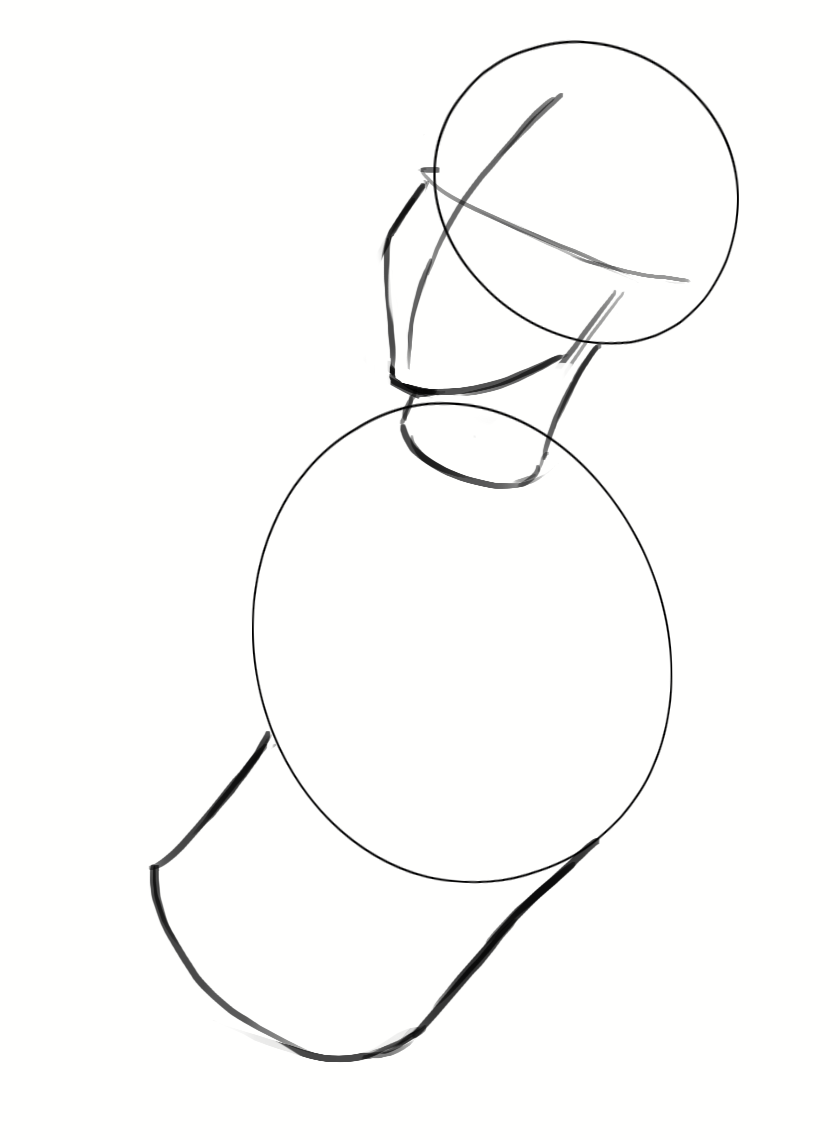
DRAWING THE BASE OF THE MERMAID'S BODY
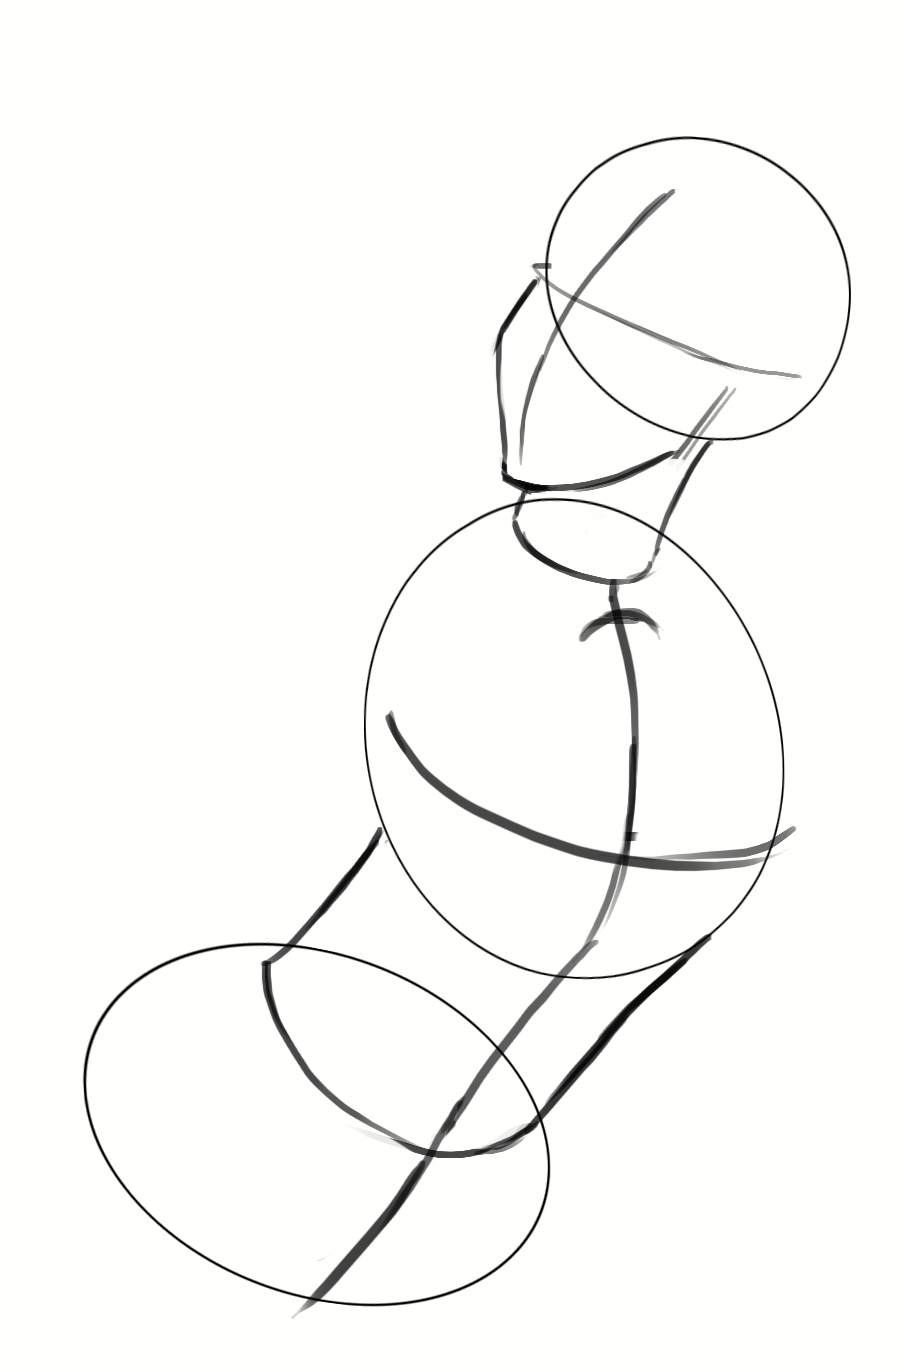
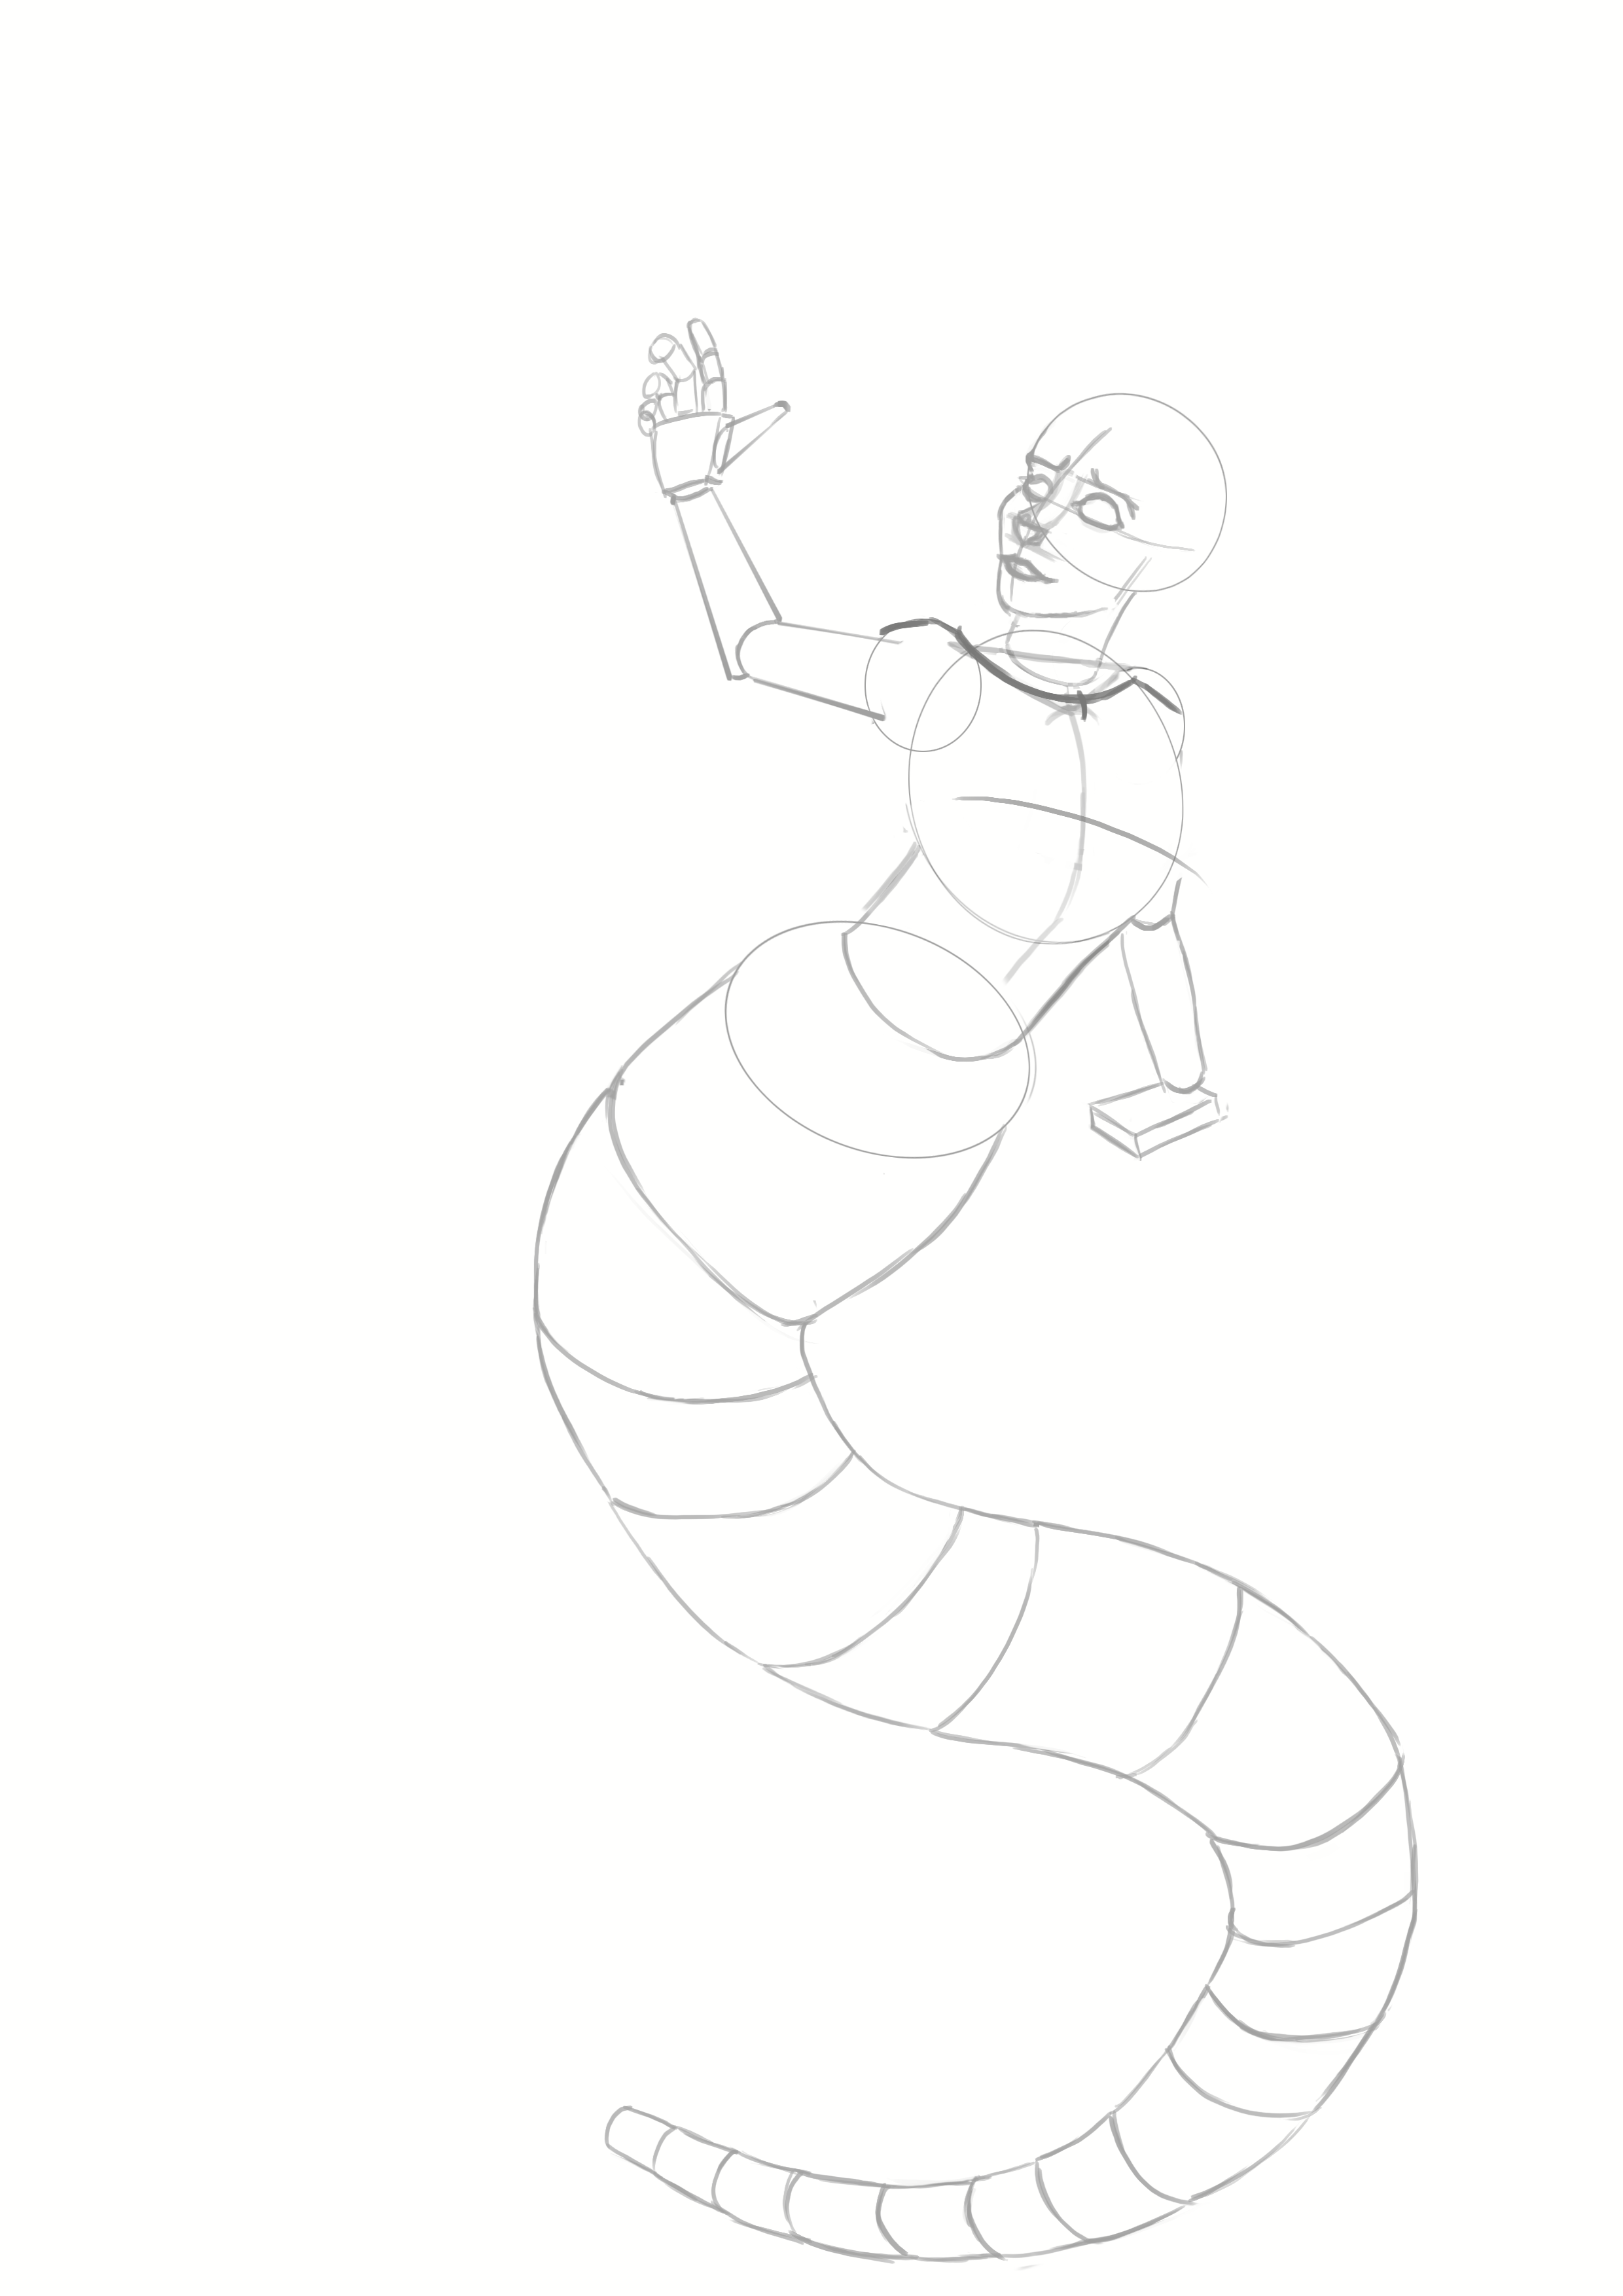
Now that the head is constructed, we can move on to the rest of the mermaid's body, still using the same method of simple shapes. Circle, round, and cylinder will be the keywords for constructing the rest of the mermaid's body. We will place an oval for the thorax. For the torso, we will draw a cylinder, and the pelvis will be represented by an oval.

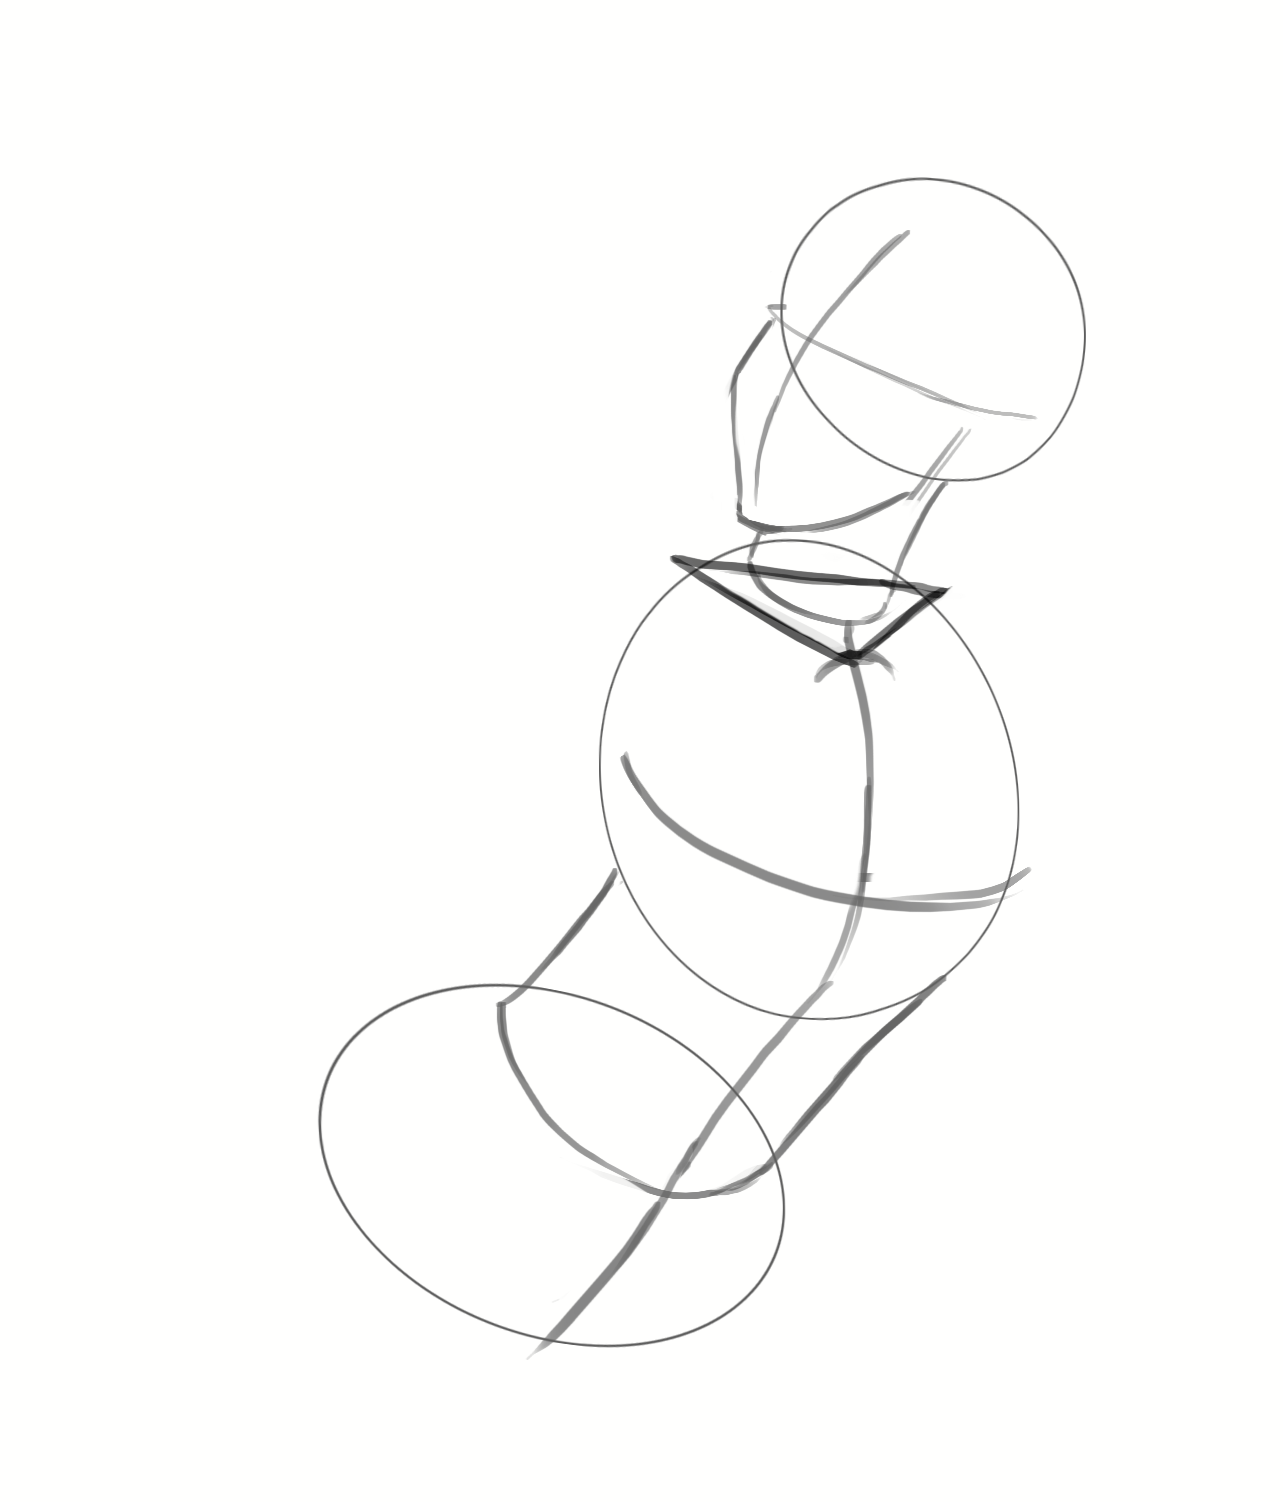
We will place a guideline to determine the middle of the body. This will allow us to place the collarbones, chest, and the mermaid's navel, and it will also help us position the shoulders and then the arms…
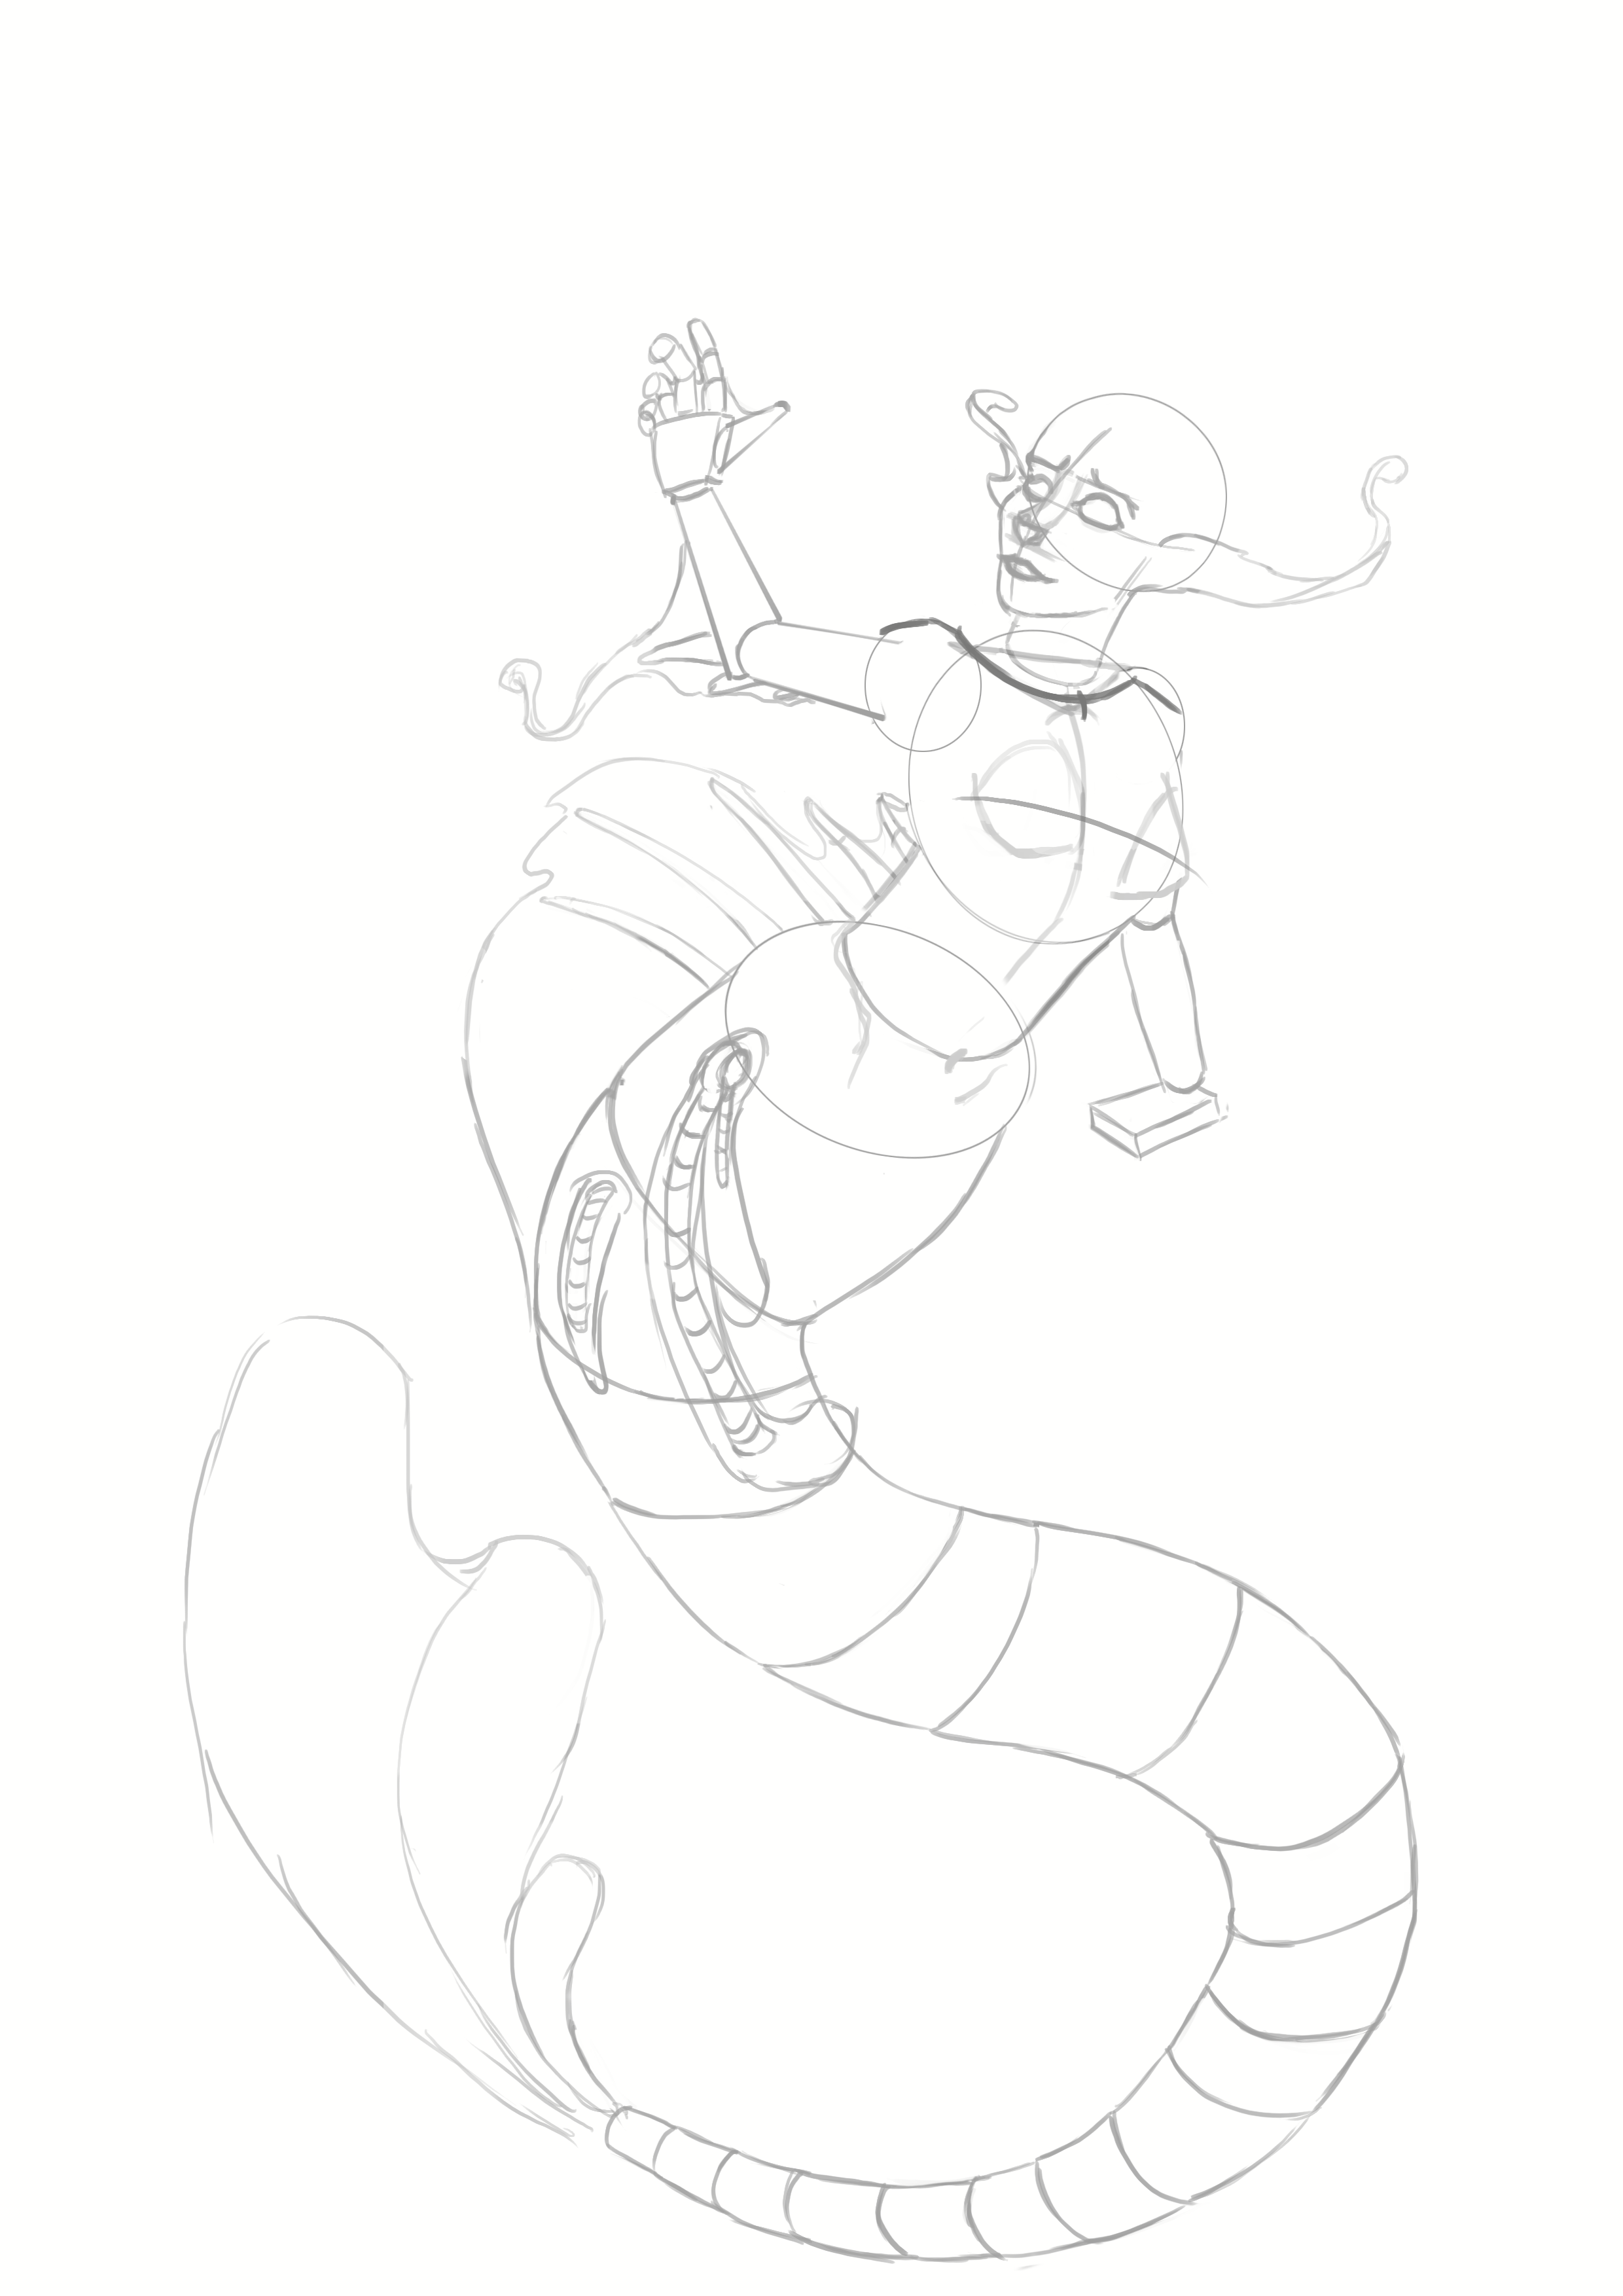
To place the shoulders, we will draw a triangle. We will represent the shoulders with two circles at the ends of the triangle's tips.
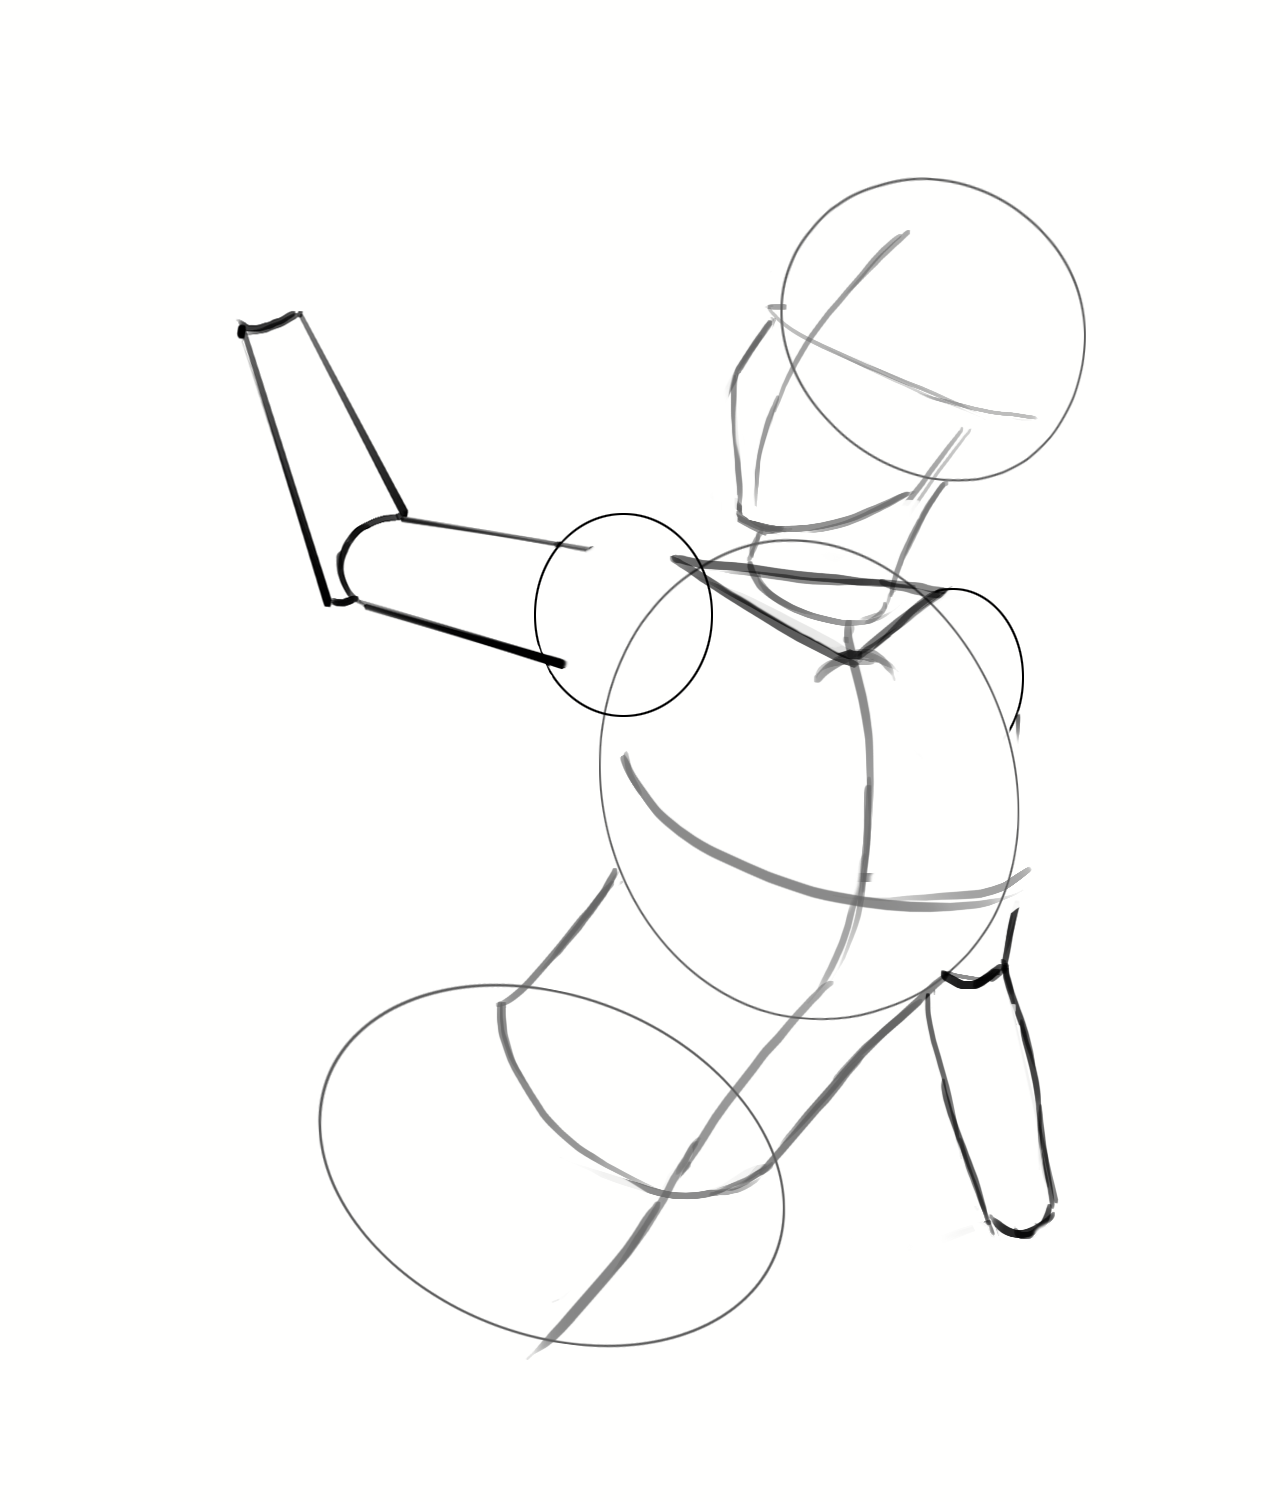
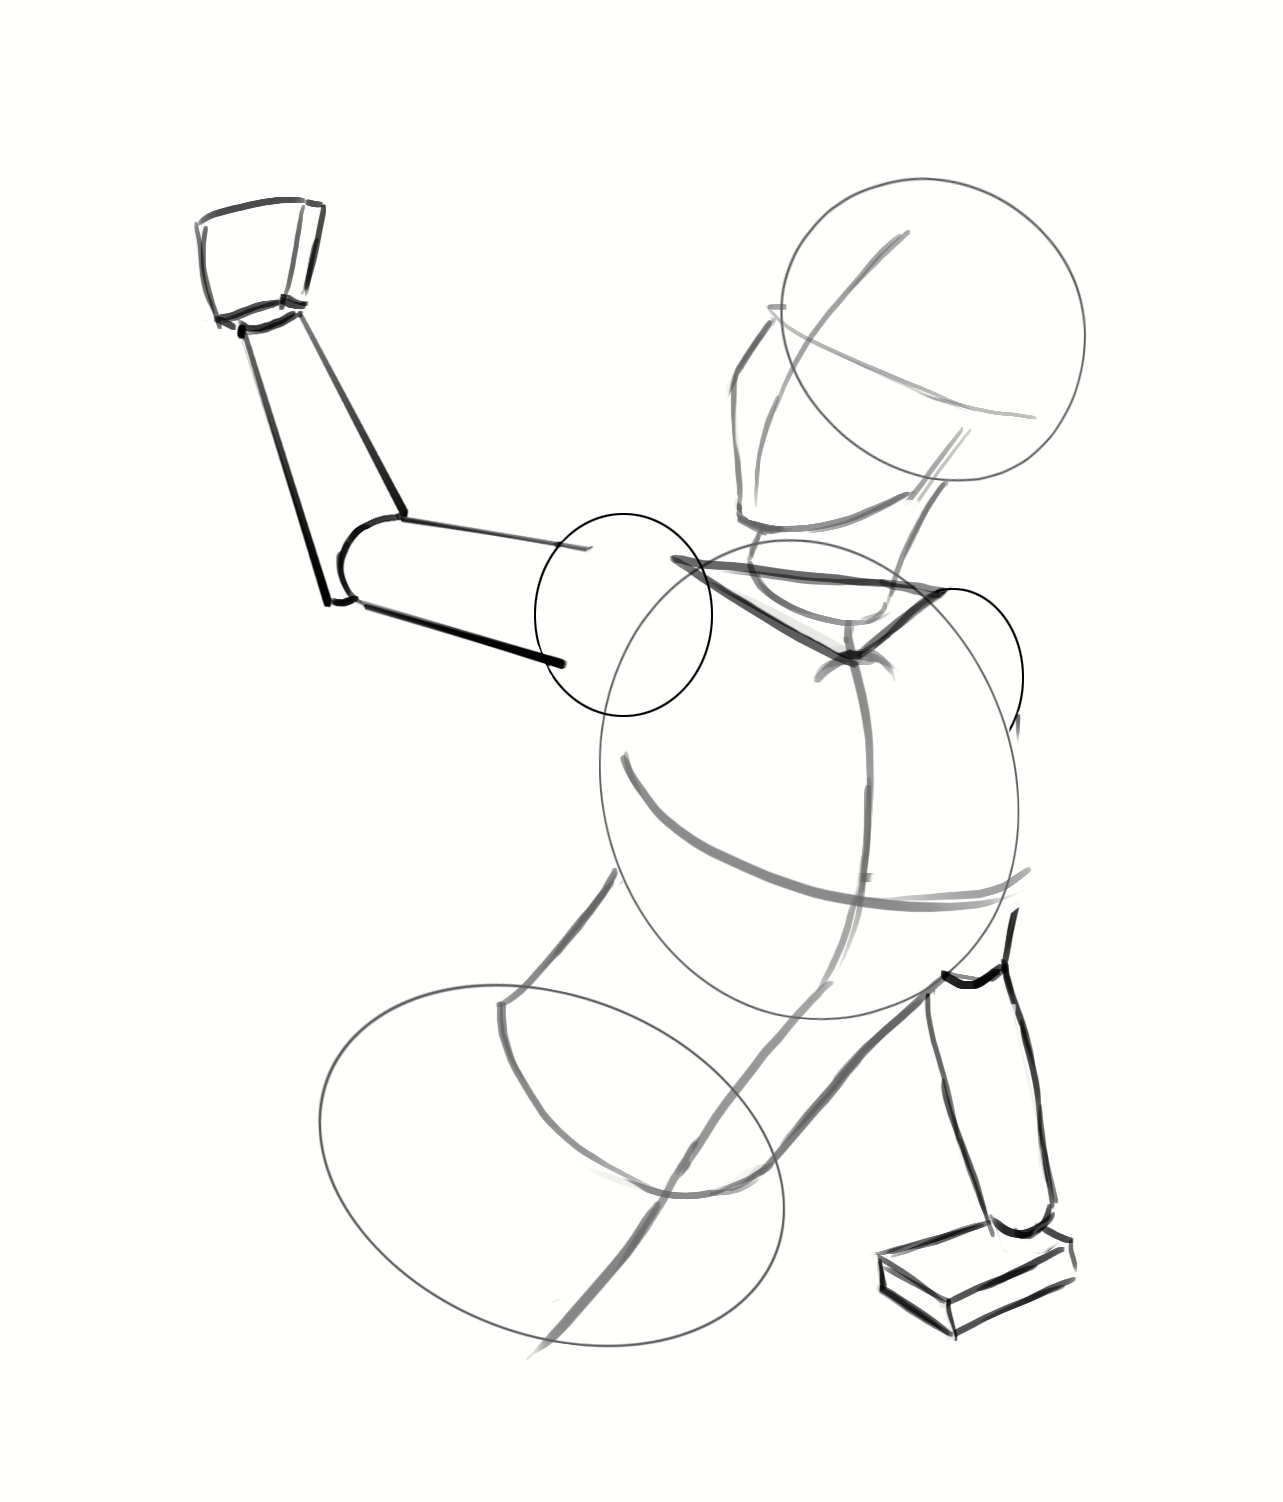
Once the shoulders have been placed, we will move on to the arms, which we will represent by cylinders. We will place rectangles at the ends of the cylinders for the palms of the hands.
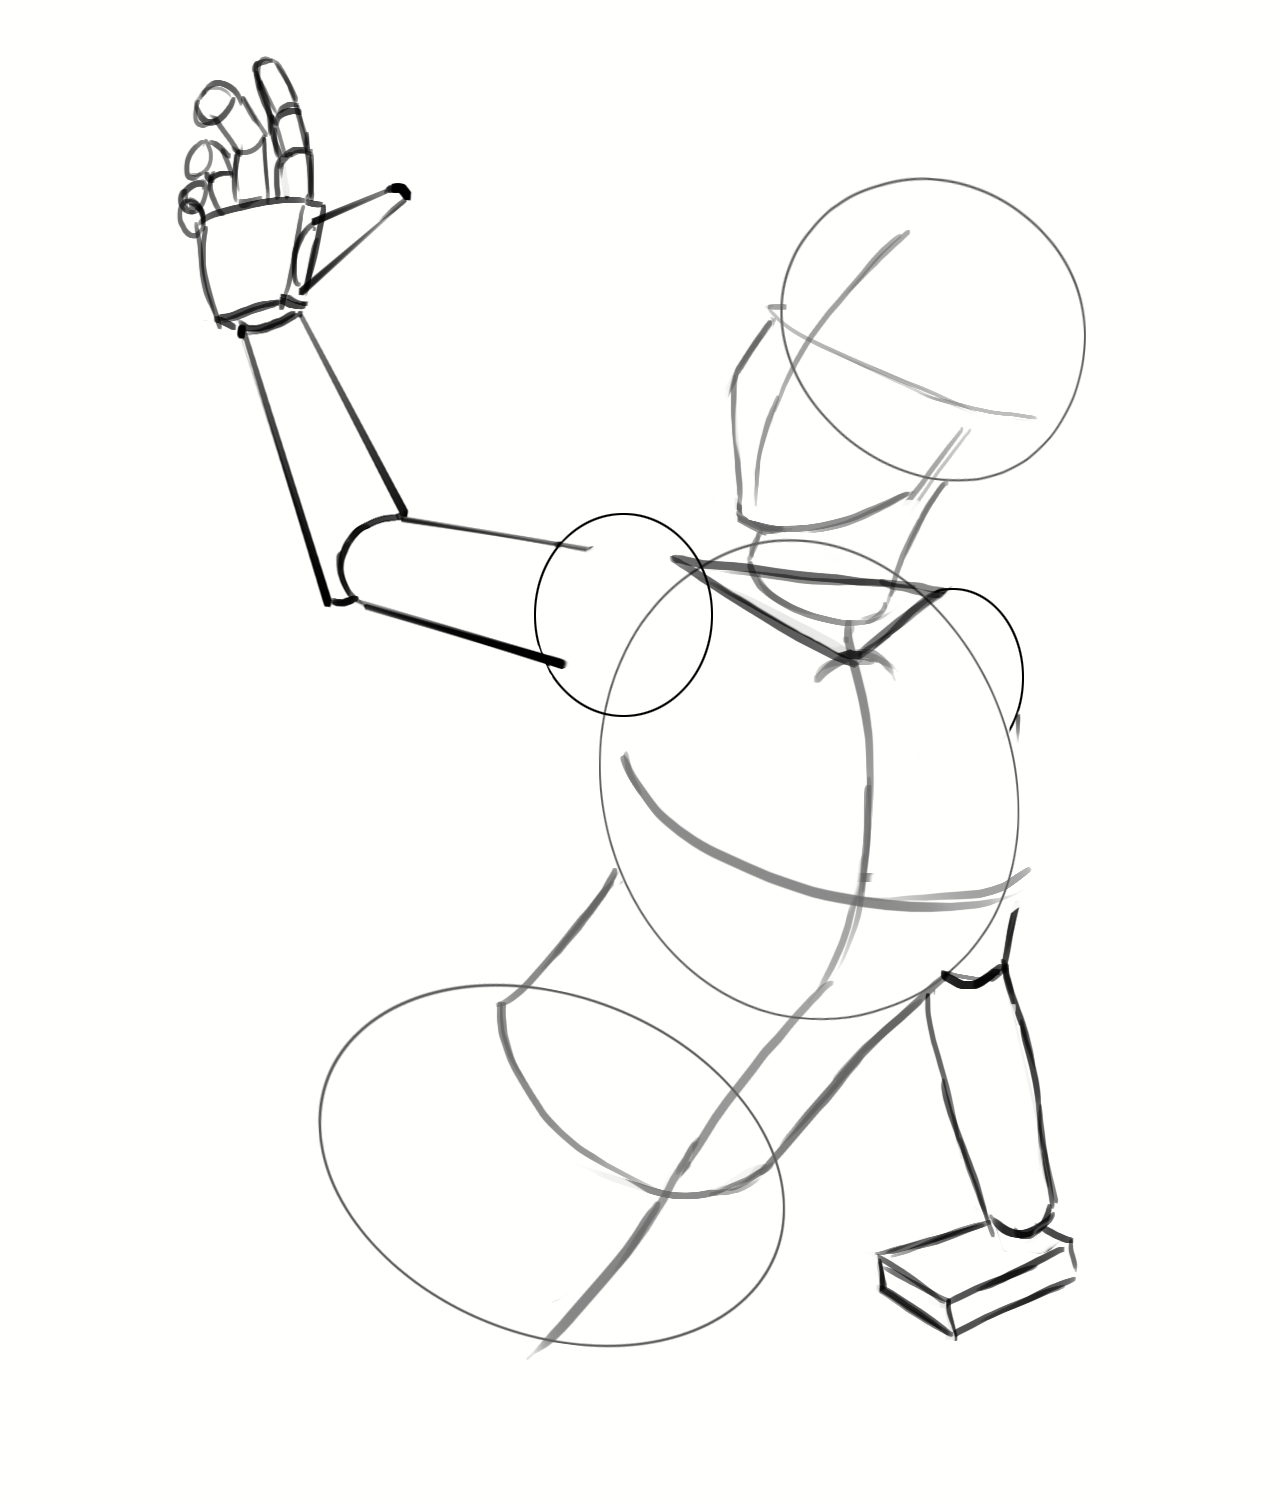
Now that the hands are positioned, we can draw the fingers as truncated cylinders; the cuts represent the phalanges on the hands.
We've finished the human part of the mermaid! Now let's move on to the fish part of the mermaid. To do this, we need to draw several cylinders in succession, yes again... to create the mermaid's tail. Here is the result:

DETAILS ON THE HEAD
Now that the basics are done, we can move on to shapes that are closer to a human and a fish. First, we will look at how this works for the face because there are many things to draw, including the nose, the mouth, the eyes, the gills, etc... For more information on how to draw a woman's face, you can take a look at our blog, the article is on there ;)
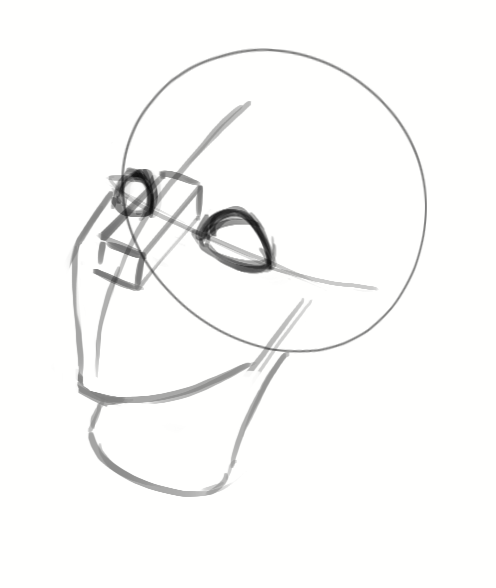
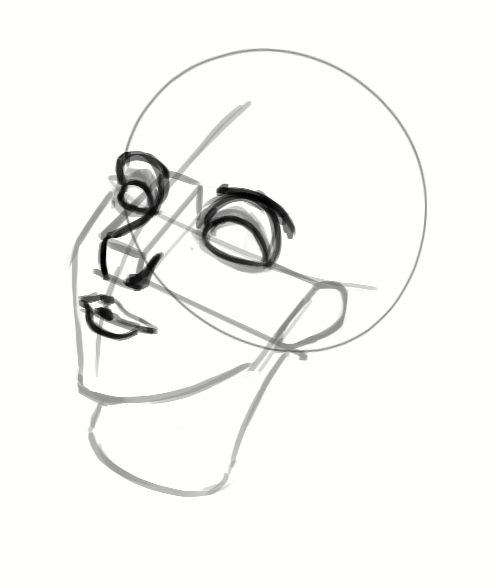
So we will draw the base of the nose represented by a rectangle. For the eyes, we will first place ovals, and for the mouth, we will represent it by a simple line that will delineate the upper and lower lips.

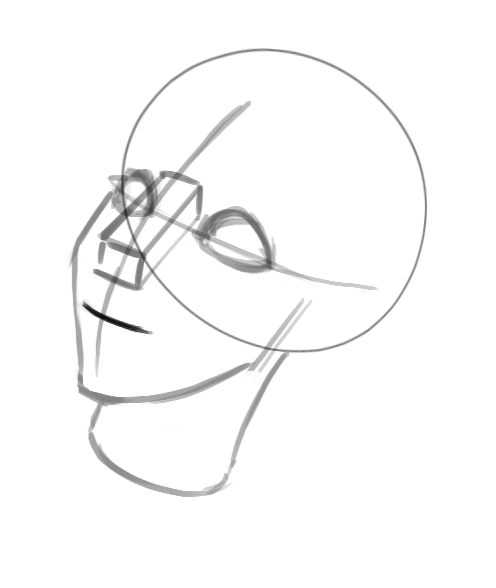
We will then place a kind of marker for the ear by drawing a half-circle. Place it in relation to the nose and the eyes... Let me explain: the ear starts between the middle of the eye and the center of the nose. Like this:
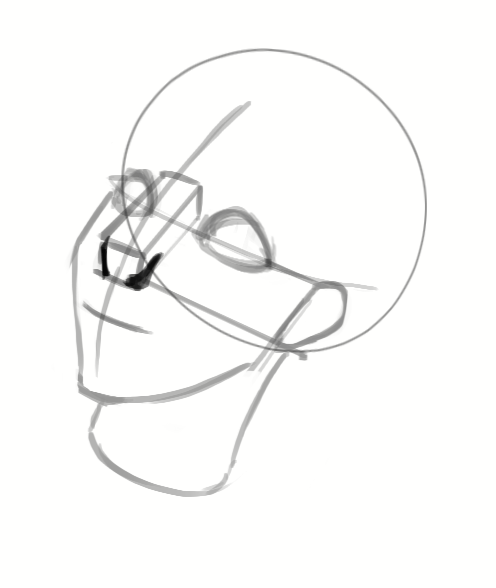
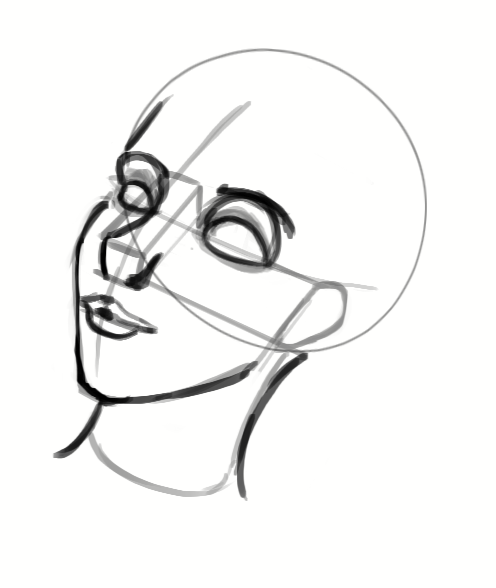
Now let's move on to the facial details. Let's start with the nose, which will be slightly flattened and almost non-existent since mermaids have gills just like fish. We will represent it in the form of a triangle, and then we'll carve a circular arc to create the semblance of a nose.
For the eyes, we will follow the same process as for the ears, that is, half-circles. Now for the mouth: let's start with the lower lip, the bottom one, which we will draw as a half-oval, and for the upper lip, we will draw a triangle that we will round off to give the lips a more feminine shape. Then we move on to the eyebrow arch, which we will once again represent with half-circles.
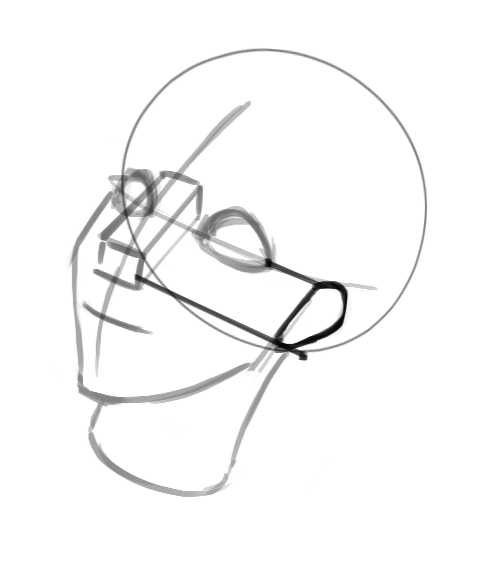
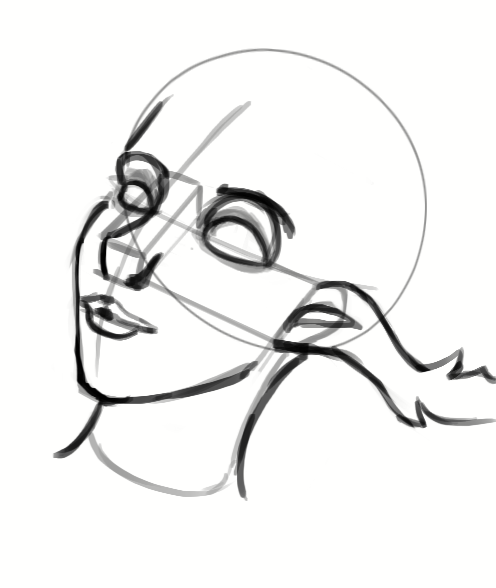
Now let's move on to the contour of the mermaid's face with shapes rounder than the base of the face, which will help define the mermaid's face. For the forehead, we will settle for a simple line. We will finish with the ears, which will be represented by fin-like, wavy shapes similar to the seaweed we find in the ocean.
DRAWING THE MERMAID'S DETAILS STEP BY STEP
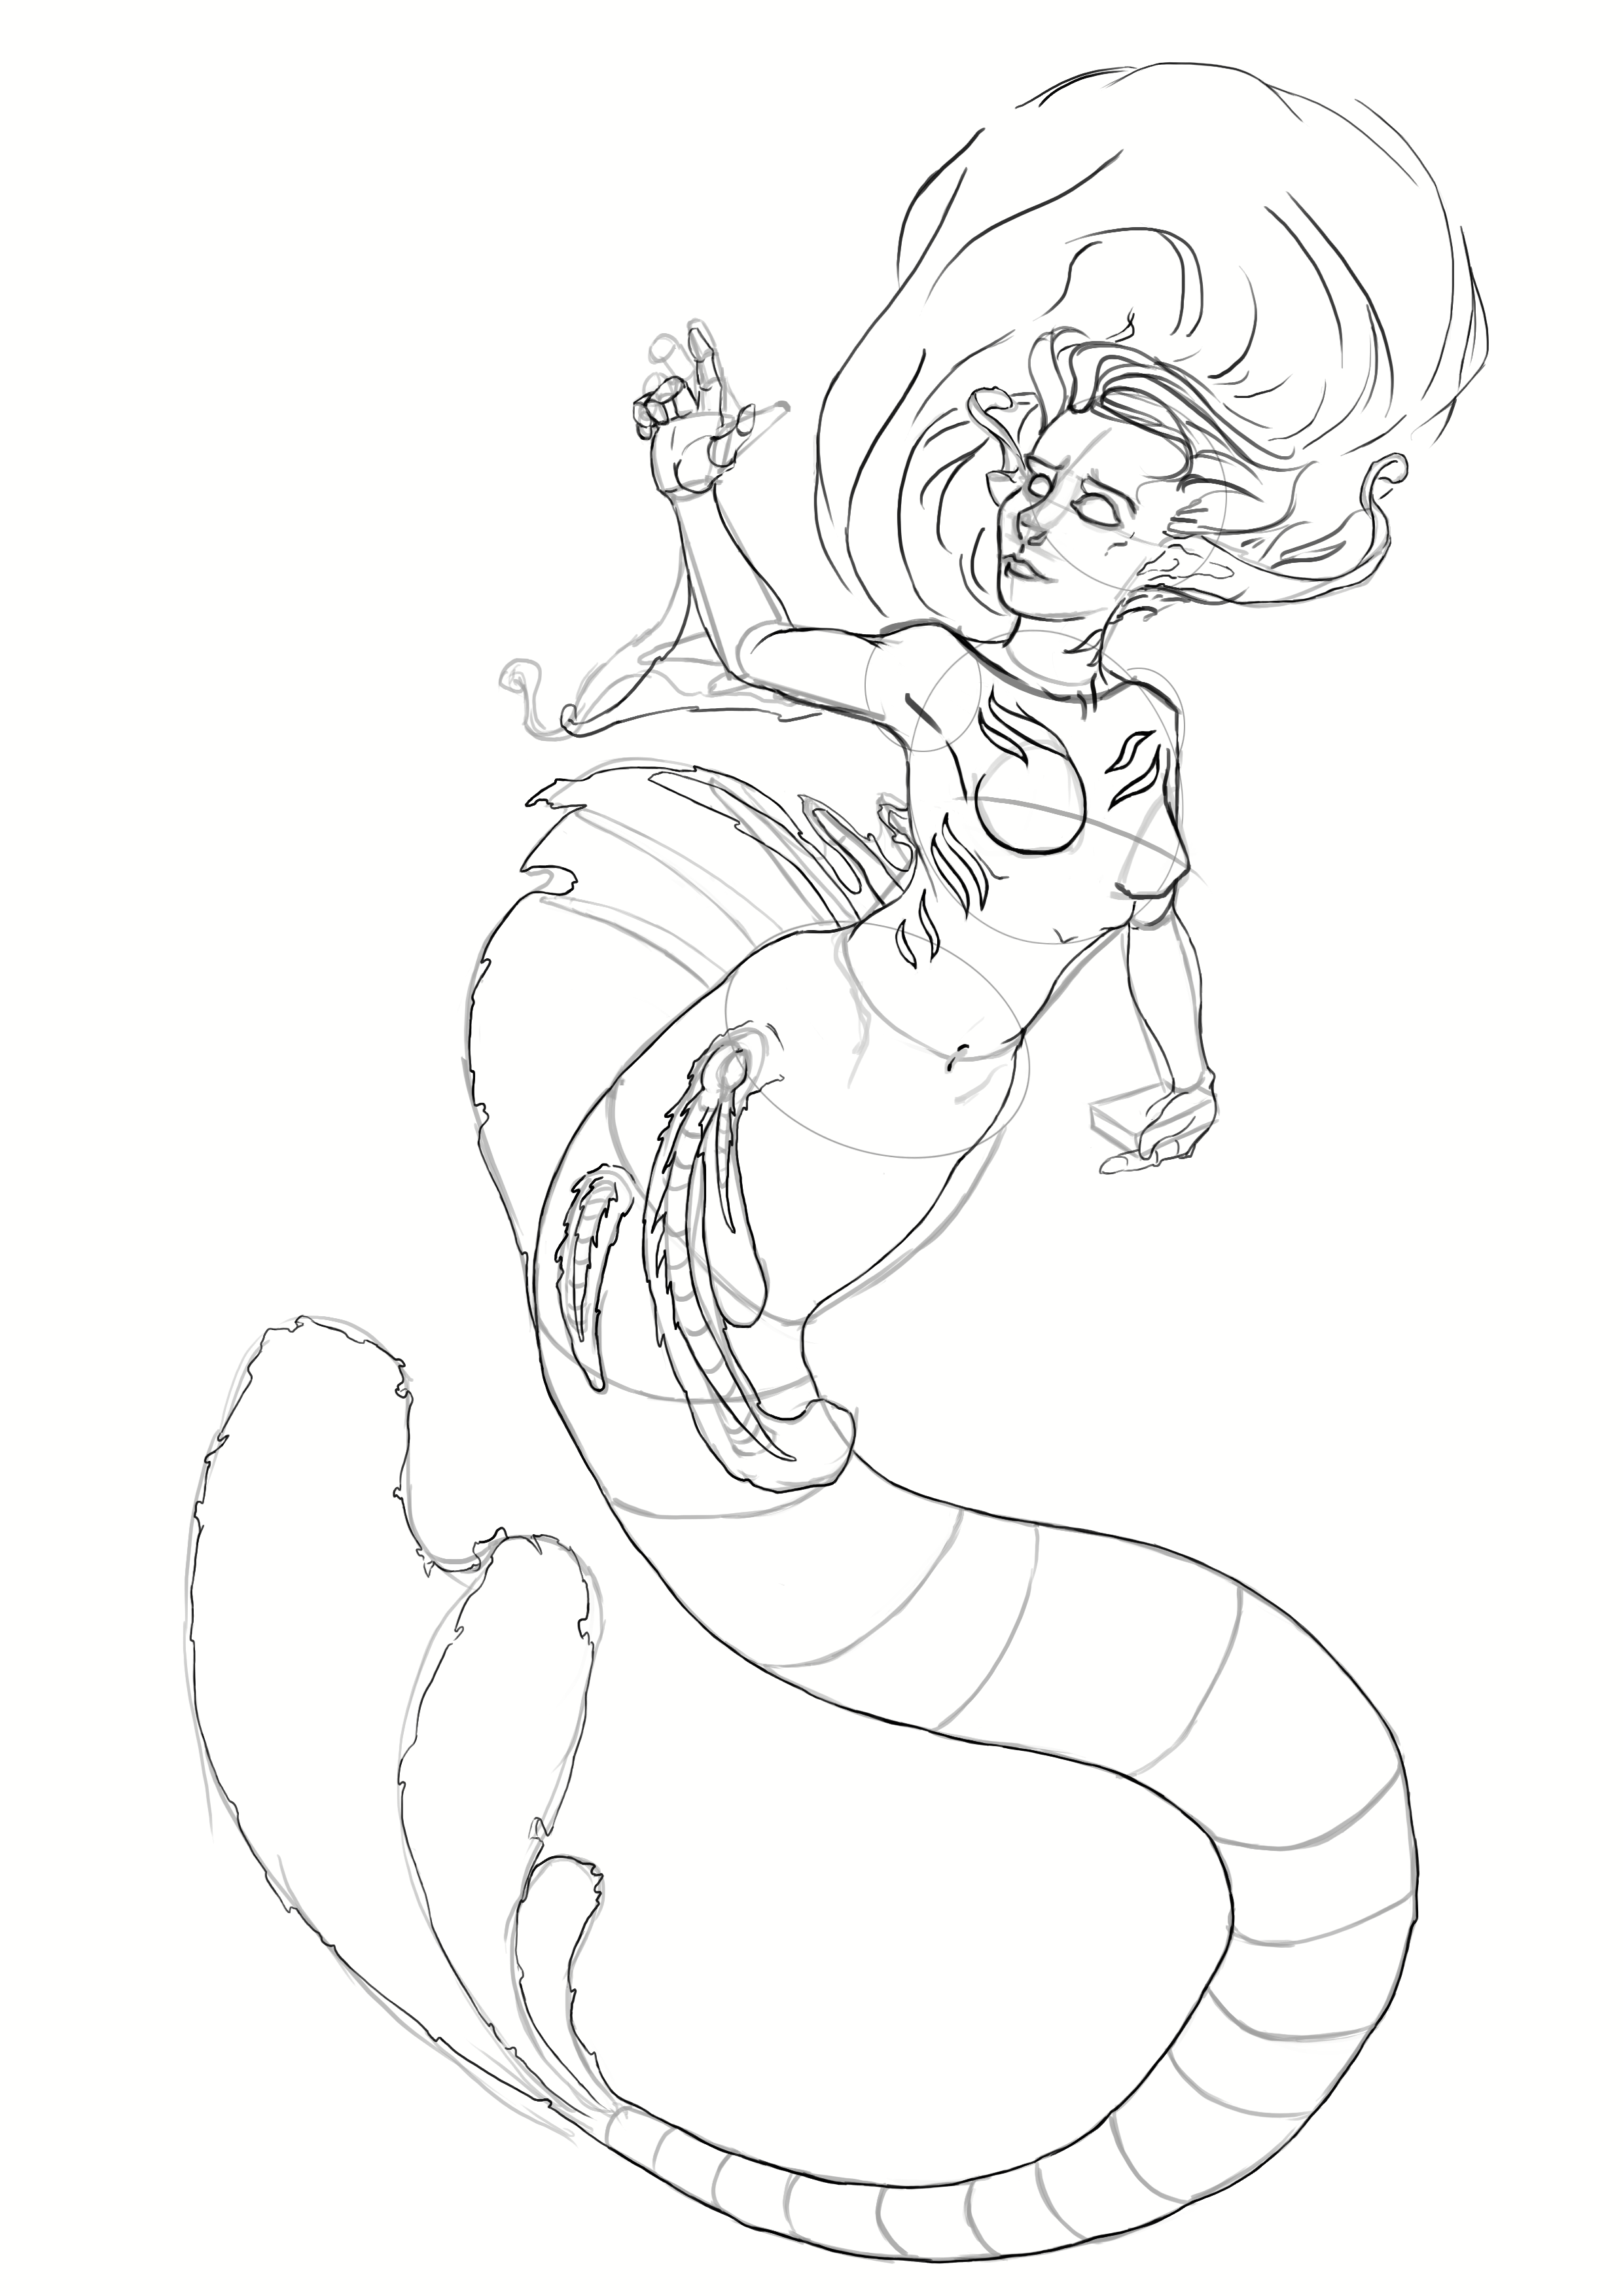
Now we're done with the face, we can tackle the mermaid's body. First, we will position the shoulders and chest in the right place with simple lines, which are markers for now.
Continue by adding ridges on the mermaid's back and arms using circles and long cylinders:

We will then place the fins located all over the mermaid.
We will represent the chest with triangles. As for the navel and the pelvis, we will represent them with simple lines as follows:
FINALIZING THE MERMAID DRAWING
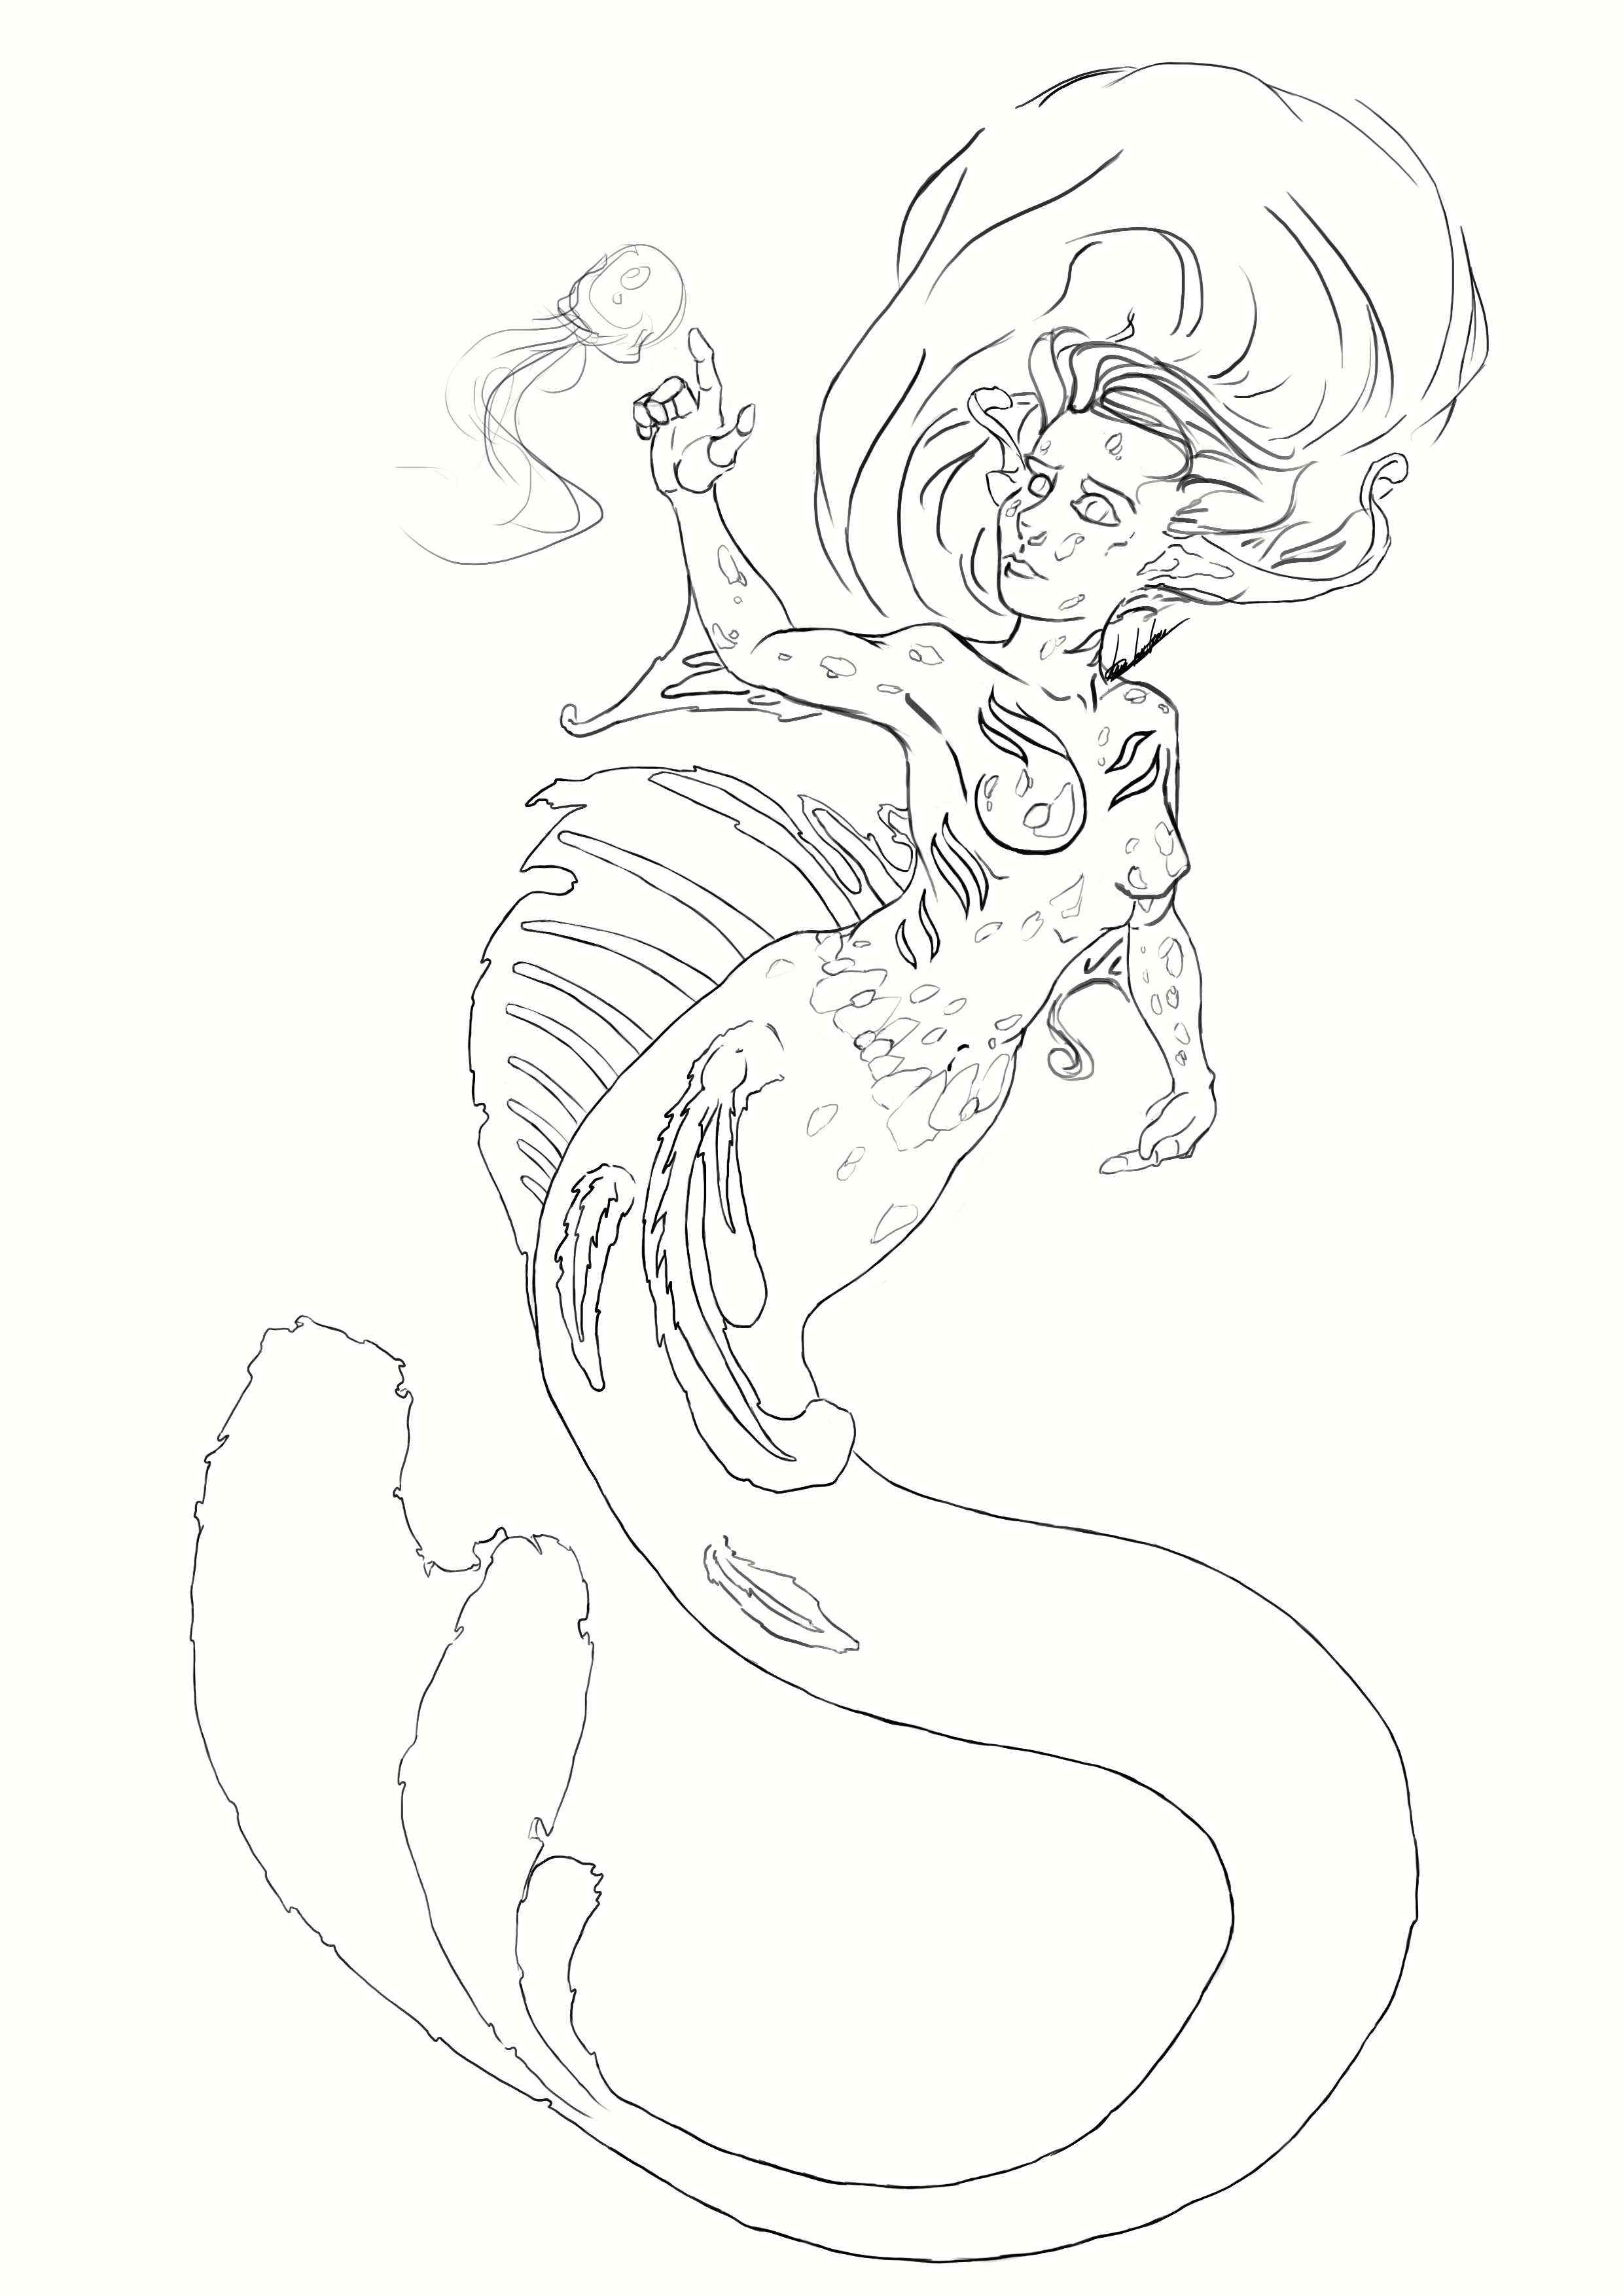
Now that all the basics are laid out, we can move on to the details... And finish our mermaid!!


Discussion
4 comments