How to Draw a Person from Behind
In this article, we will show you how to draw a person from behind. This article is linked to the article "how to draw a seated person." In this one, I will show you how to give your character expression and attitude without relying on their face.
Body language is very important for conveying emotion, especially when drawing a person from behind.
How can you know what a person is feeling without seeing their face?
This is where body language comes into play.
At the beginning of this article, I will repeat a lot of things that I mentioned in the article "How to Draw a Seated Person." In that article, I explained how to decipher facial emotions, notably with the position of the shoulders, back, and pelvis. And this is what we're interested in now.
DRAWING A CHARACTER FROM BEHIND IN DIFFERENT POSITIONS
Let's start by talking about the main element of the back: the spine.
The spine supports the entire upper body, and while it is quite flexible in some people, it is still a cluster of bones that has its limits.
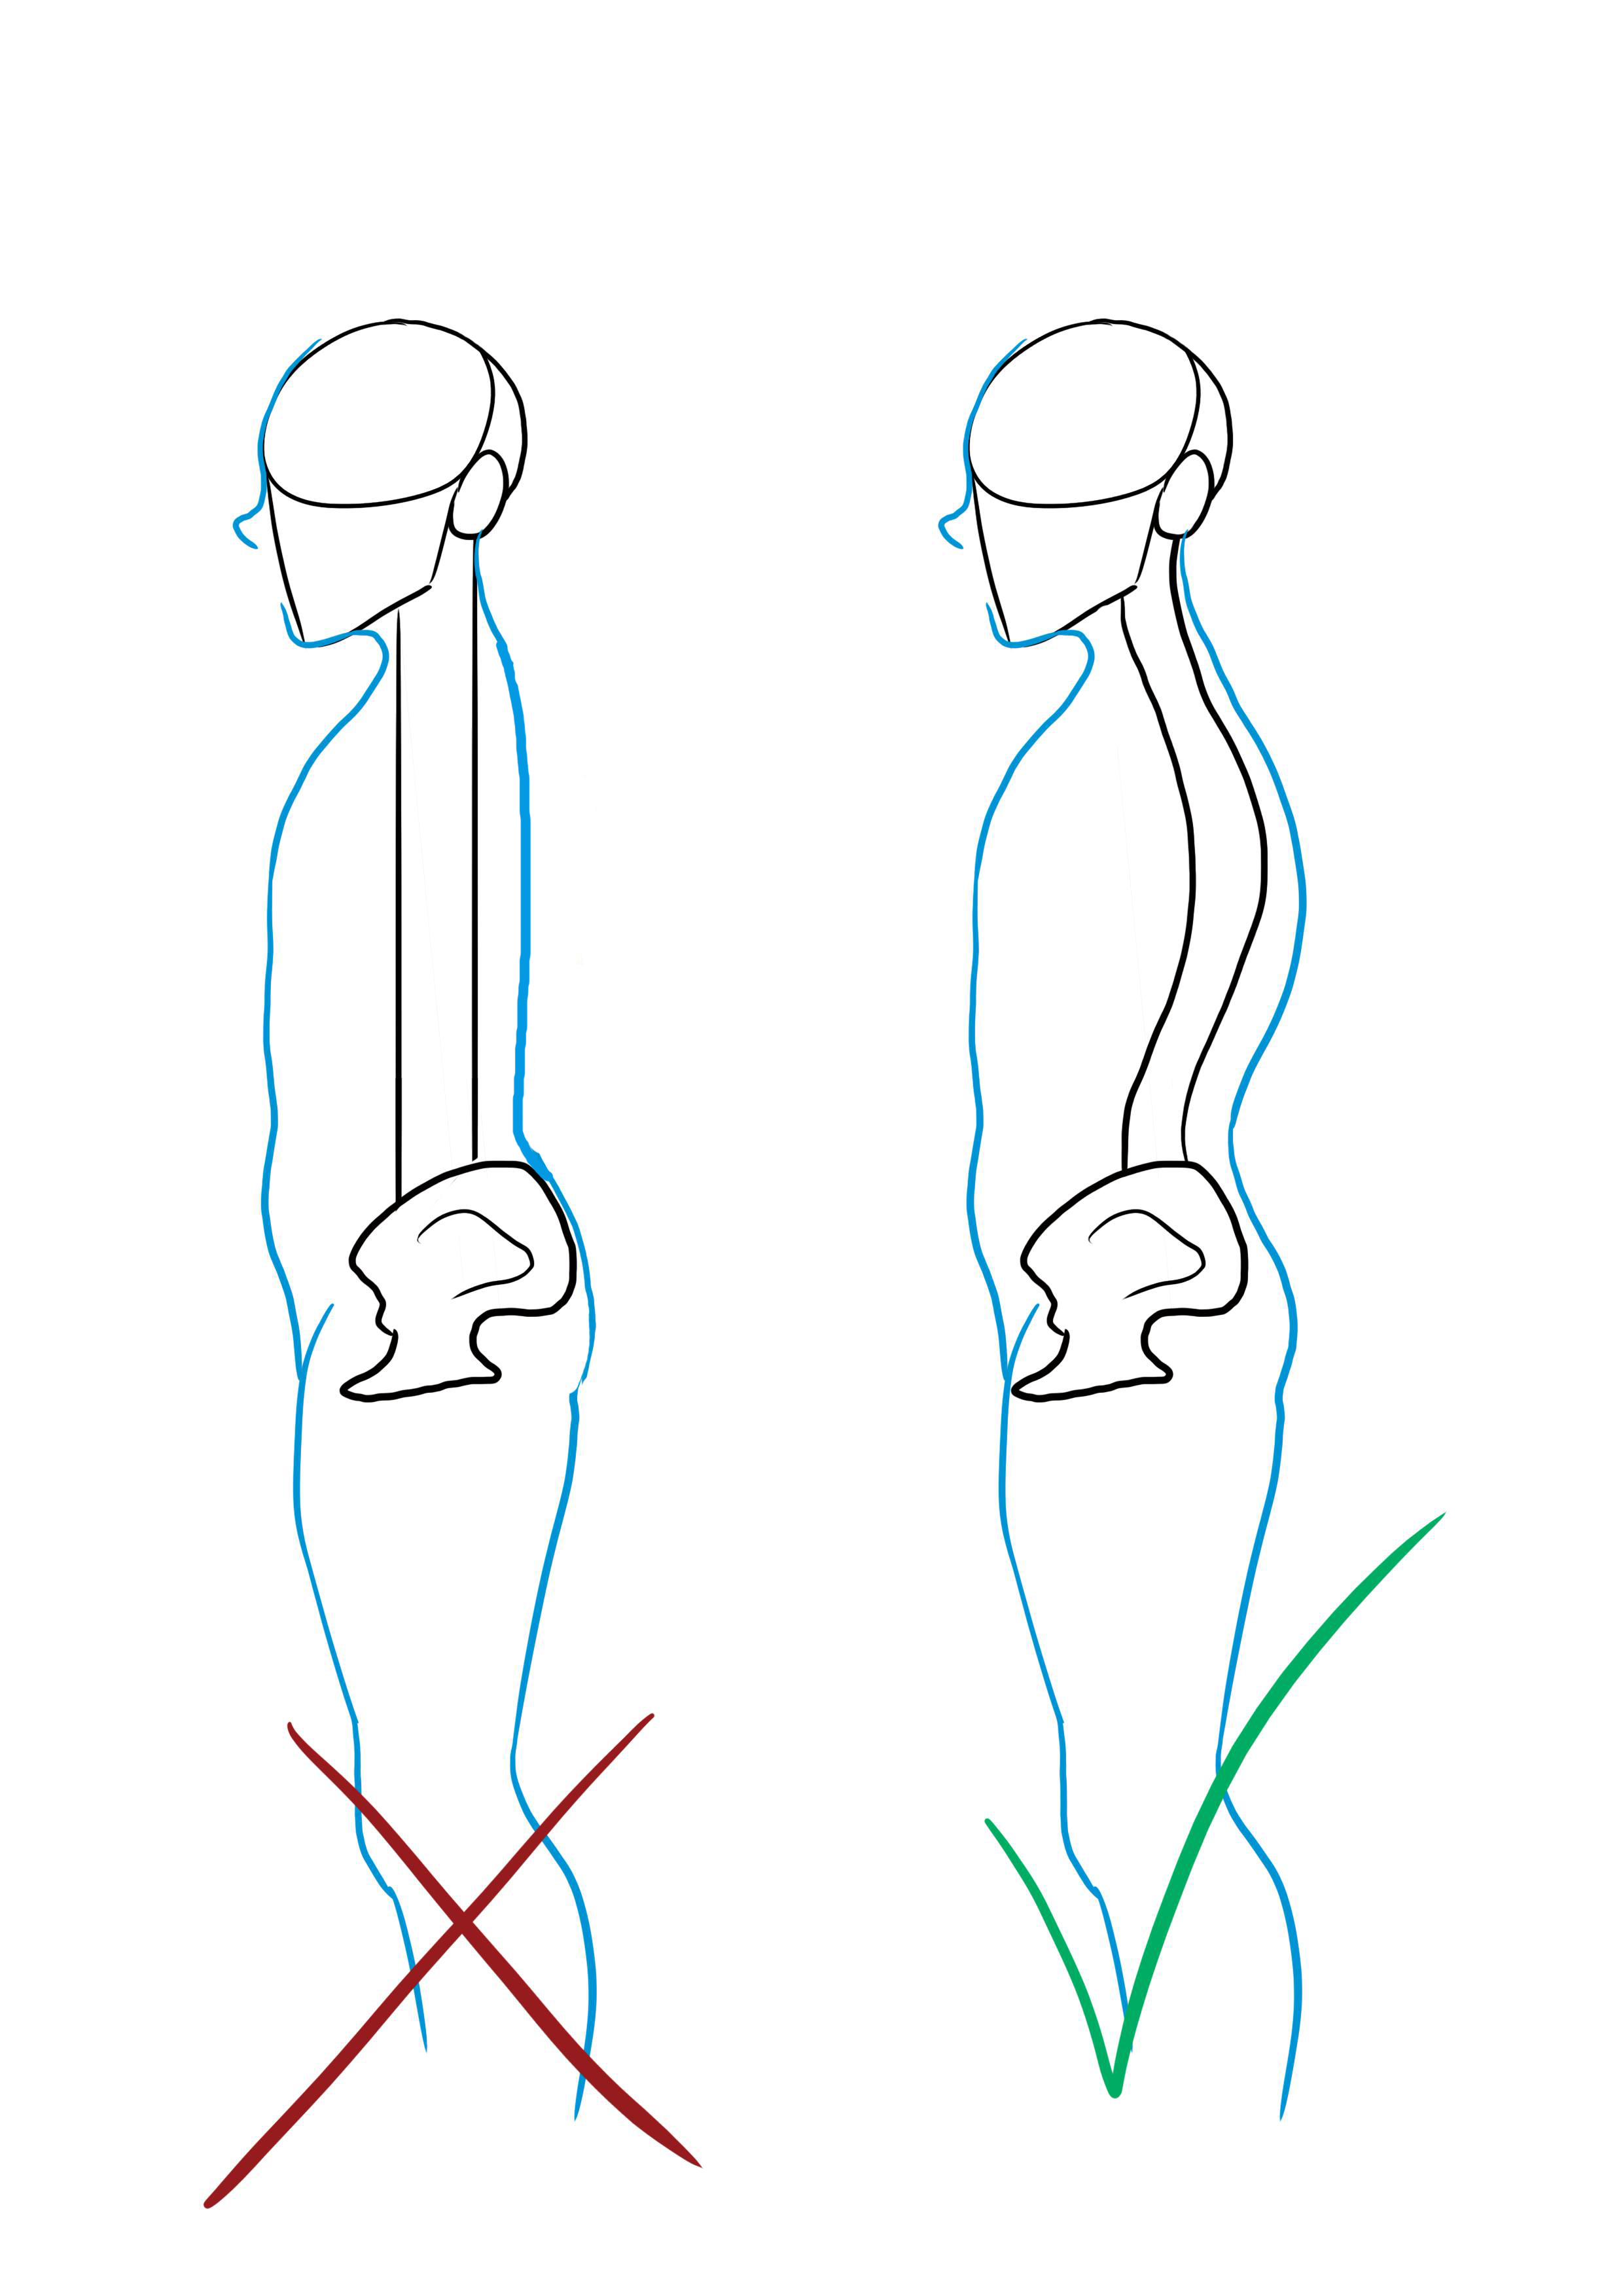
The spine is not a straight tower of bones, it is curved to support the weight of the torso.
A person cannot have a completely straight back.
When we say "have a straight back," it simply means having the shoulders aligned with the pelvis. But there will inevitably be a curve in the back.
However, the back can be rounded if the person is bent over, because the spine stretches and the small of the back (even though it is still there) is much less visible, especially from the outside.
Before drawing your character, you need to define their personality, their current mood. Each person has a specific way of sitting. Body postures change according to a person's character.
A confident person tends to stand straight with their head held high, while a shy, introverted person will have their head tucked into their shoulders and their back slouched.
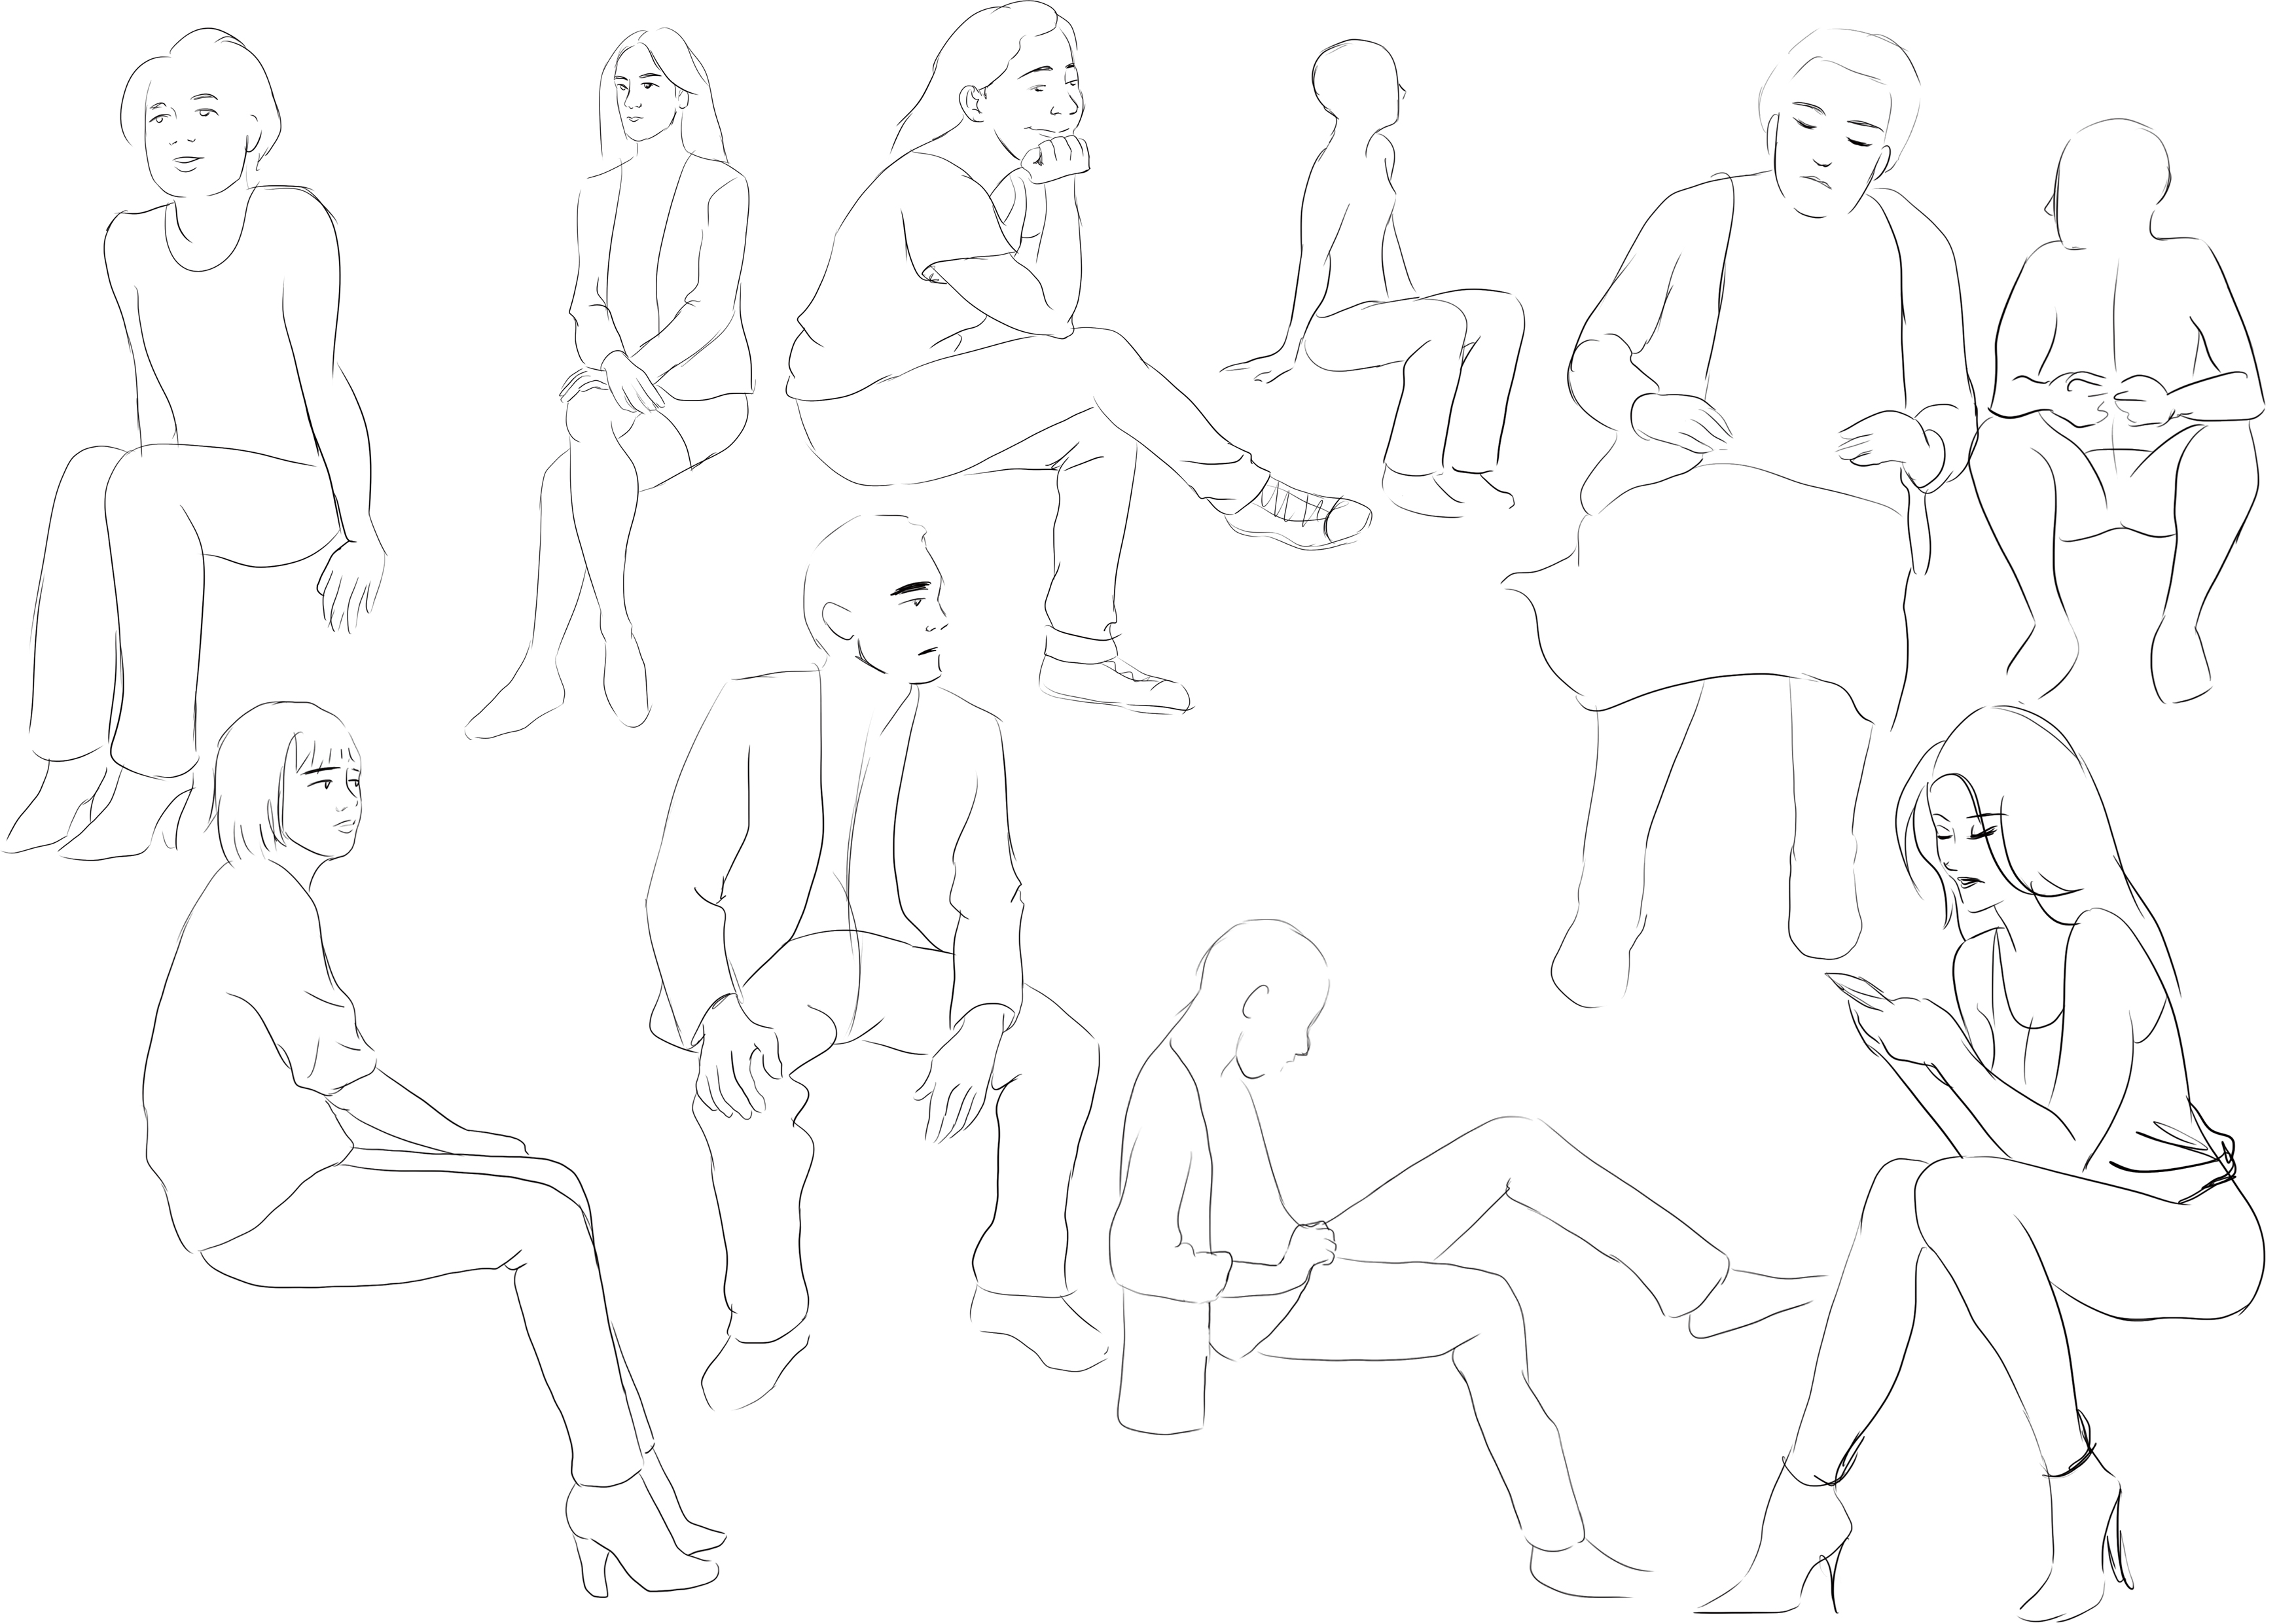
I took the examples that I used for a seated person and drew them from behind to show you what it would look like.
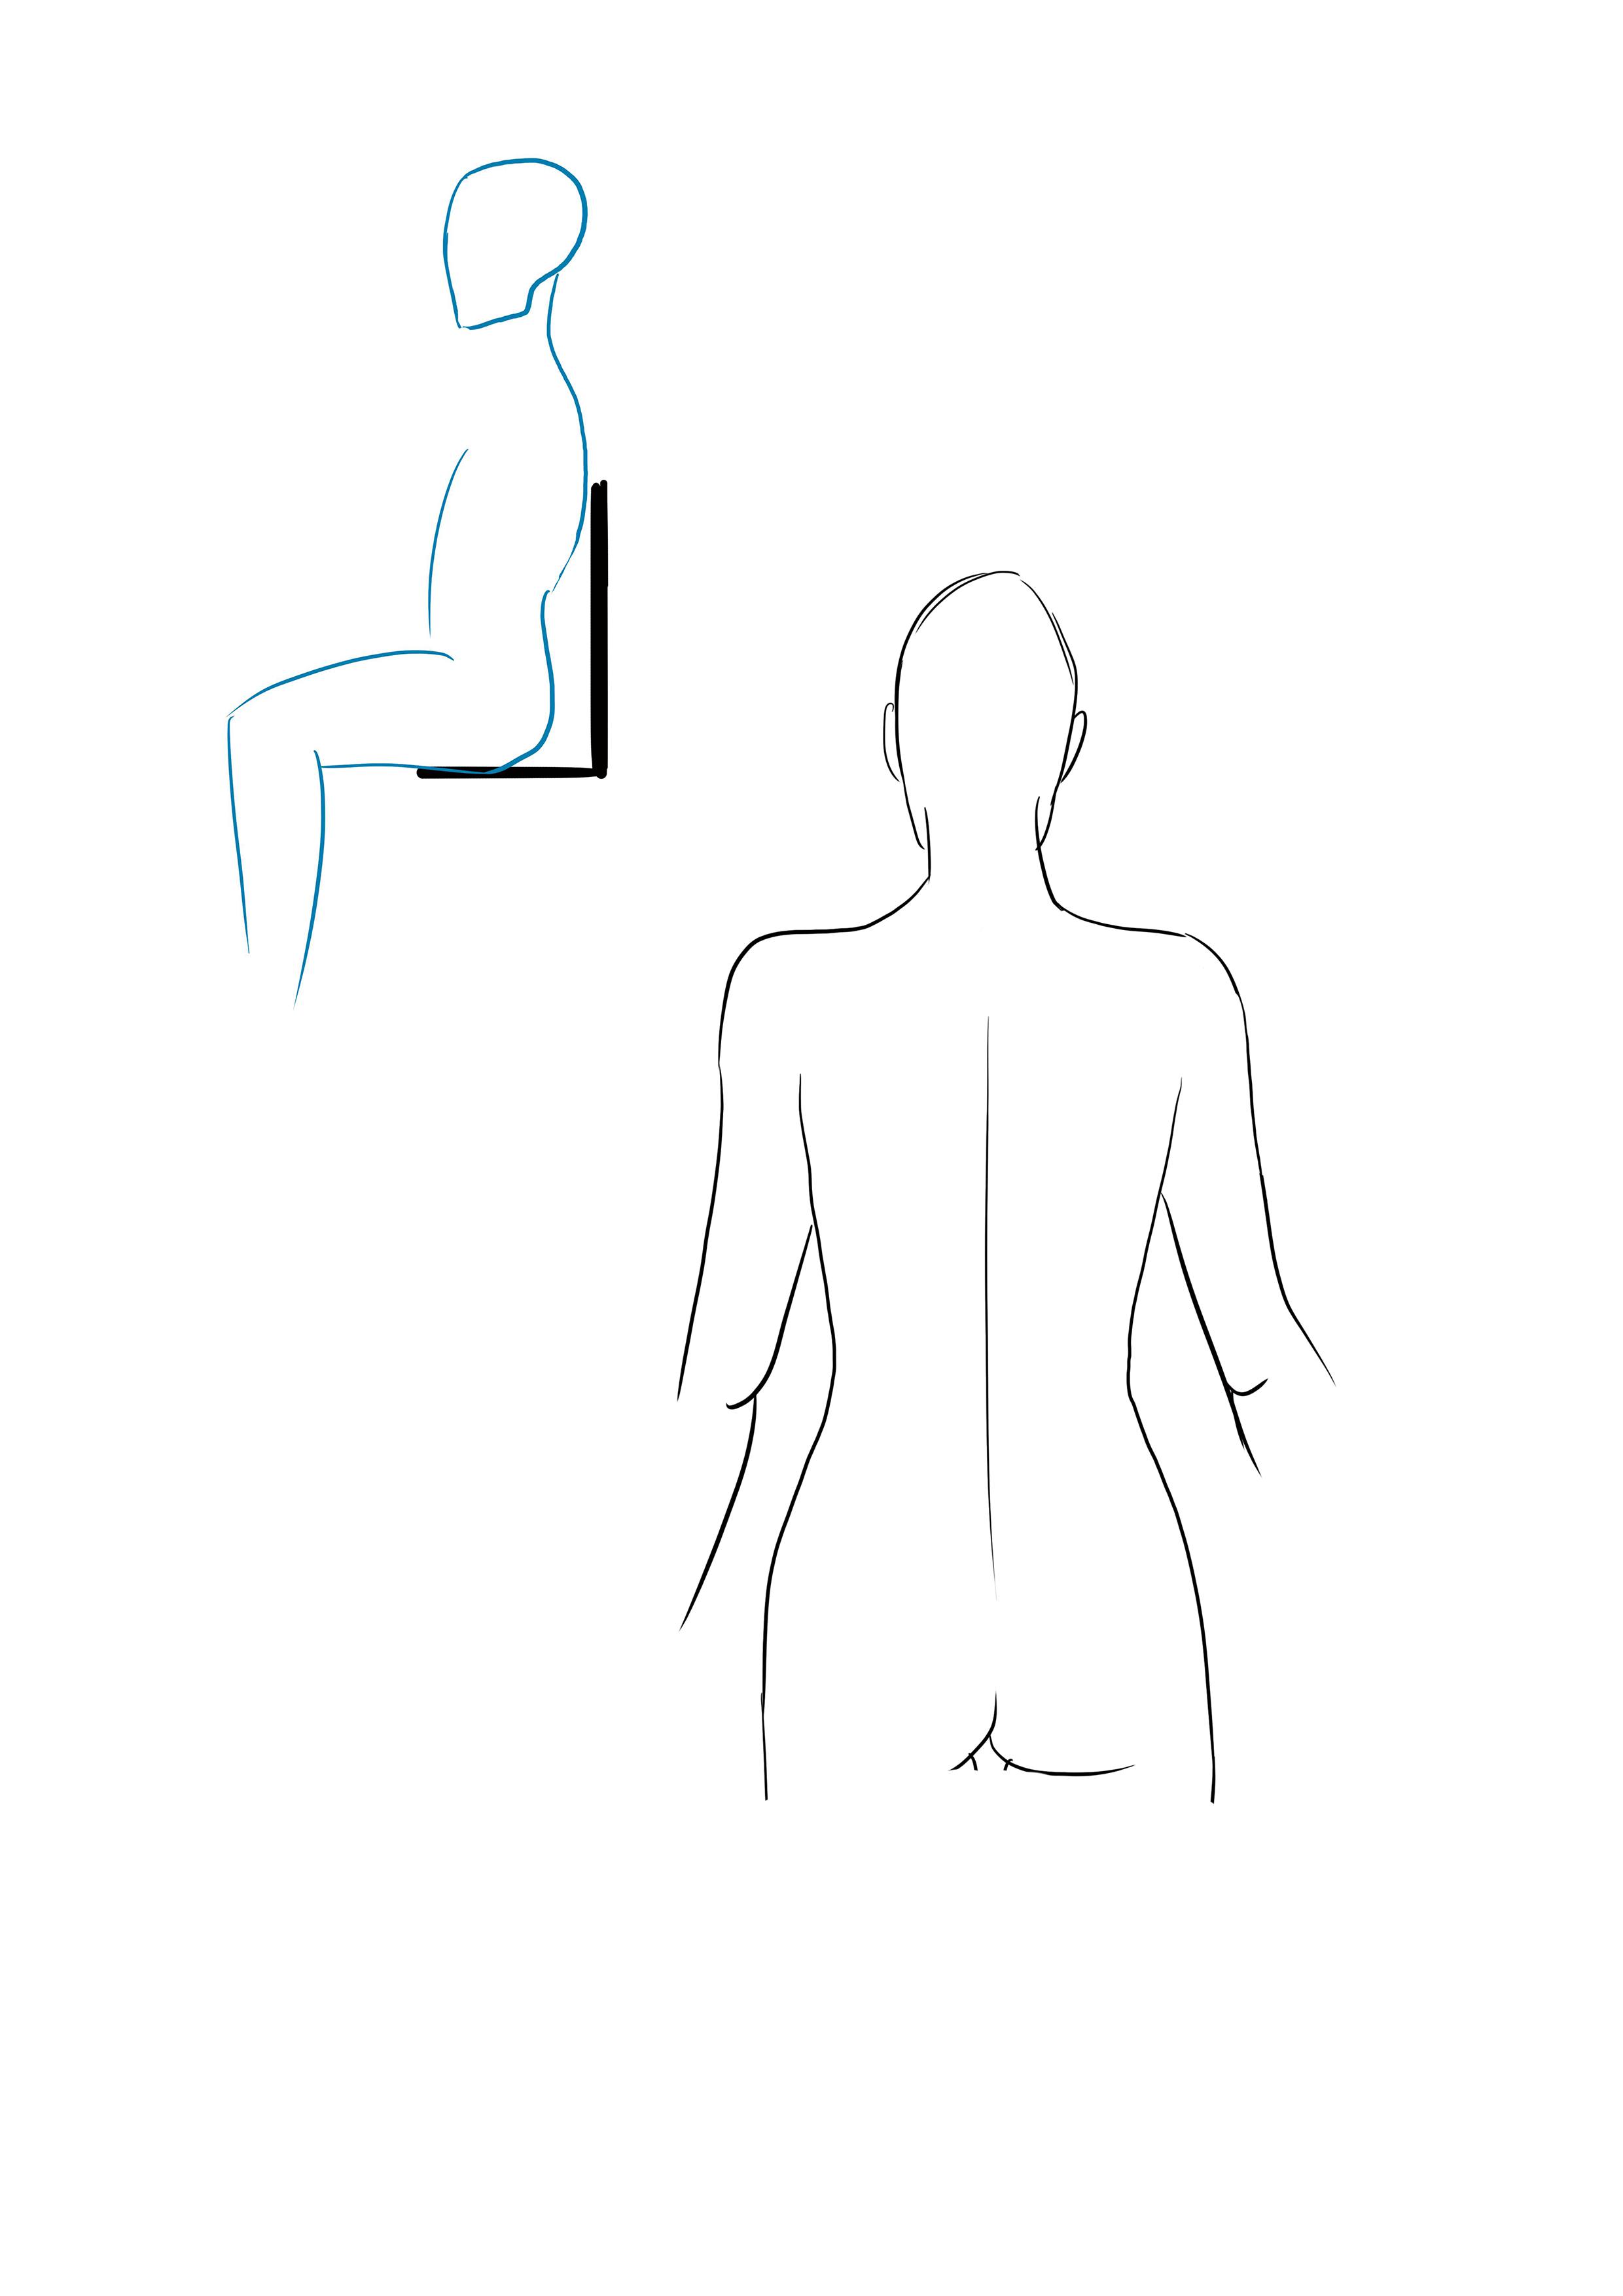
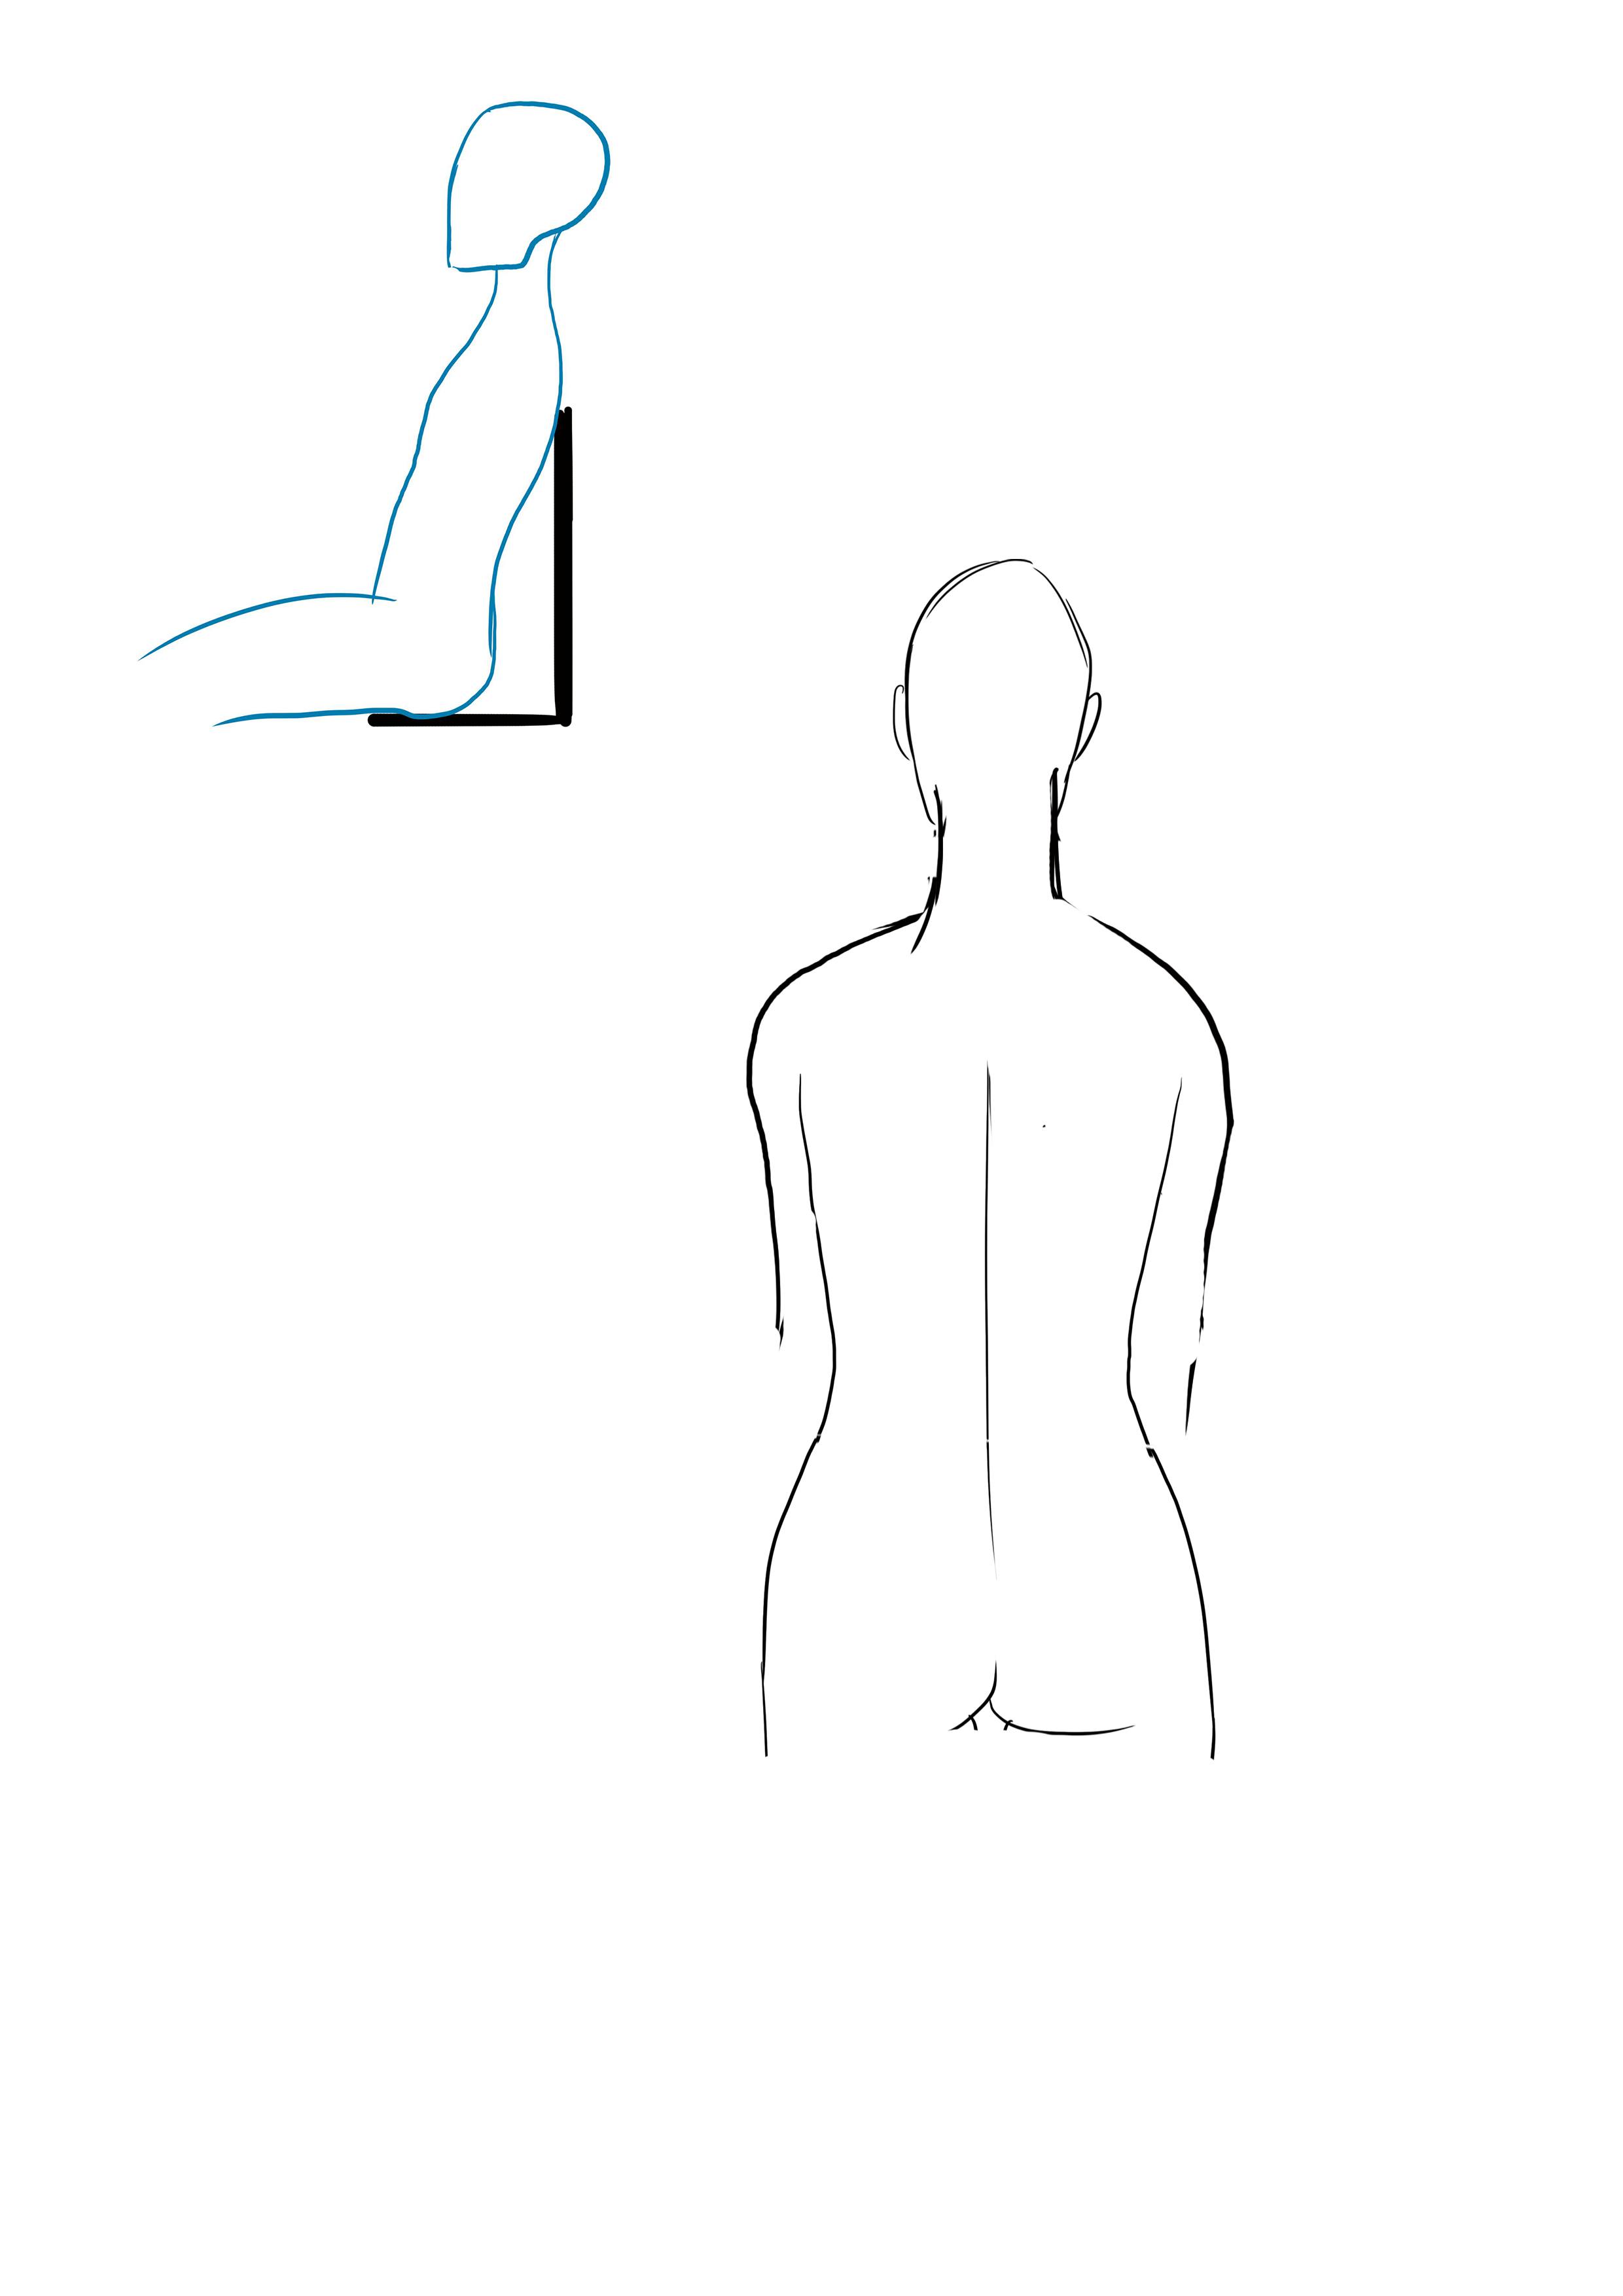
The posture here is normal, with the pelvis forward and the head and upper back straight.
Seen from the back, the neck is visible, the shoulders are straight and aligned, and the back is elongated.
A nonchalant person, or at least someone who wants to give that impression, will be "slouched."
To give the impression of a slightly rounded back and hunched shoulders when viewed from behind, I will lower the shoulders, bringing their line in front of the neck line.
The neck will be shorter and the head slightly flattened to give the impression that it is tilted forward.
The back will be shorter, the buttocks lifted, and the shoulder blades slightly visible as the skin is taut because the shoulders are forward.
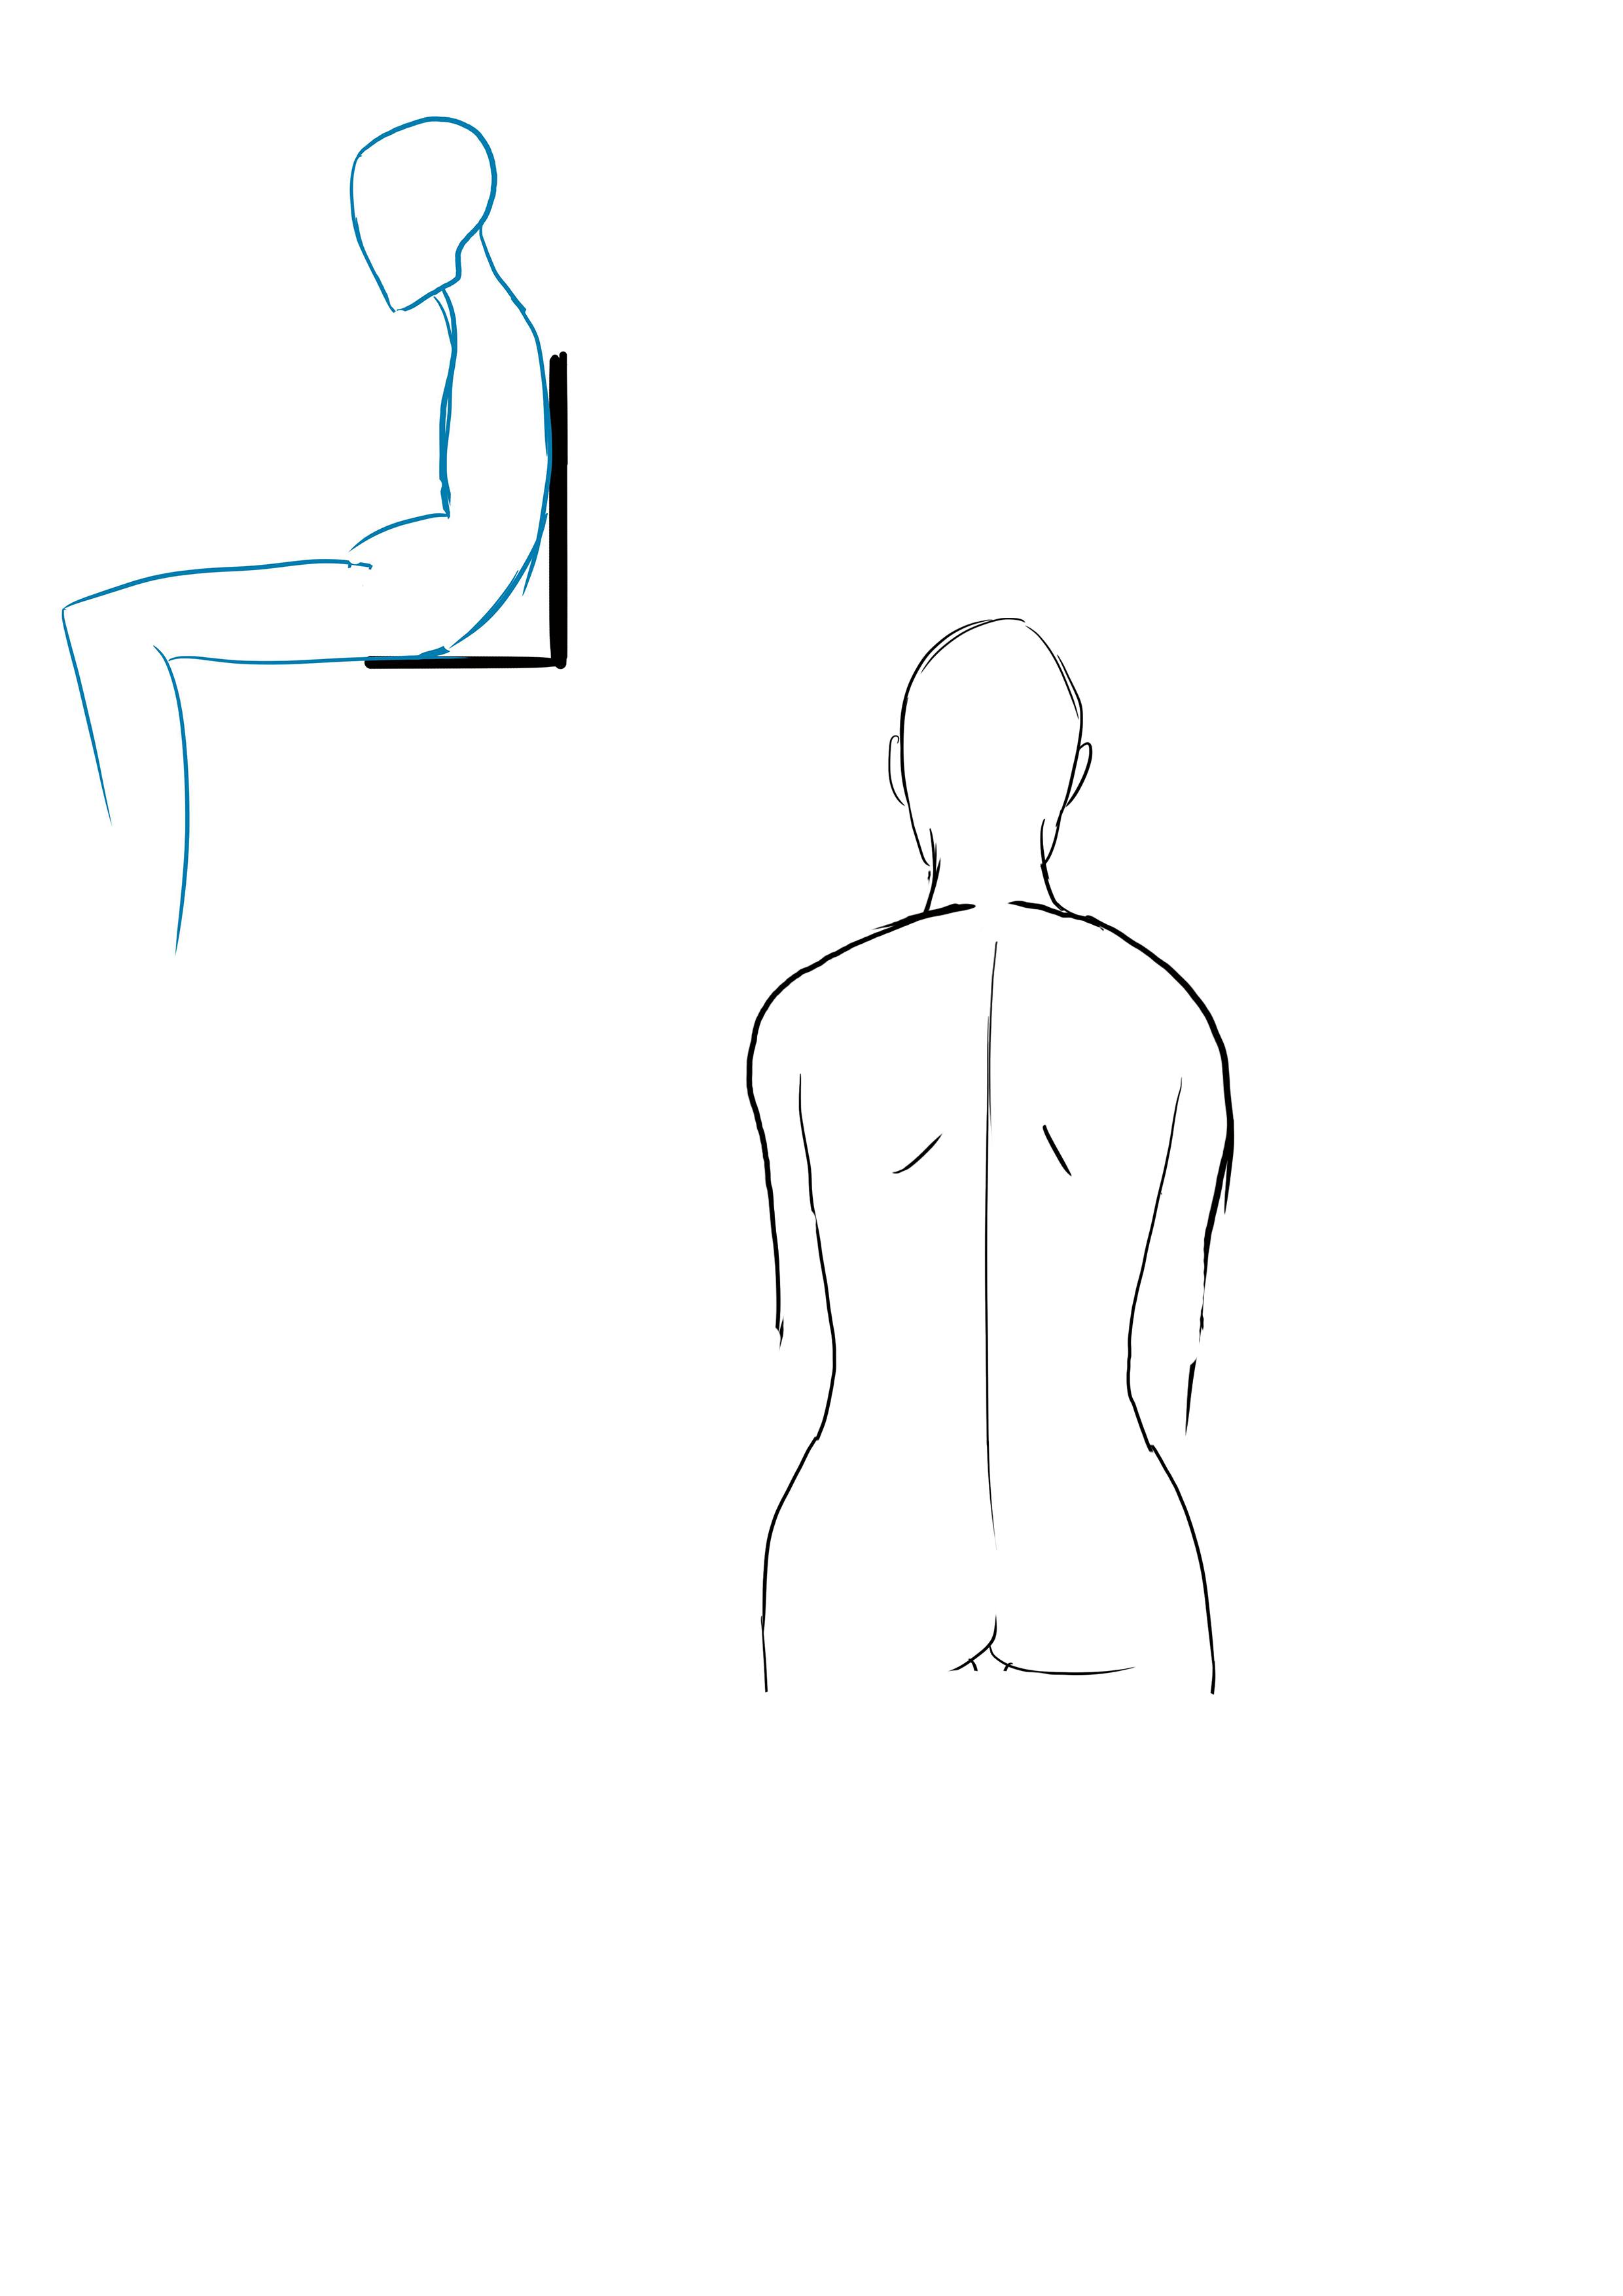
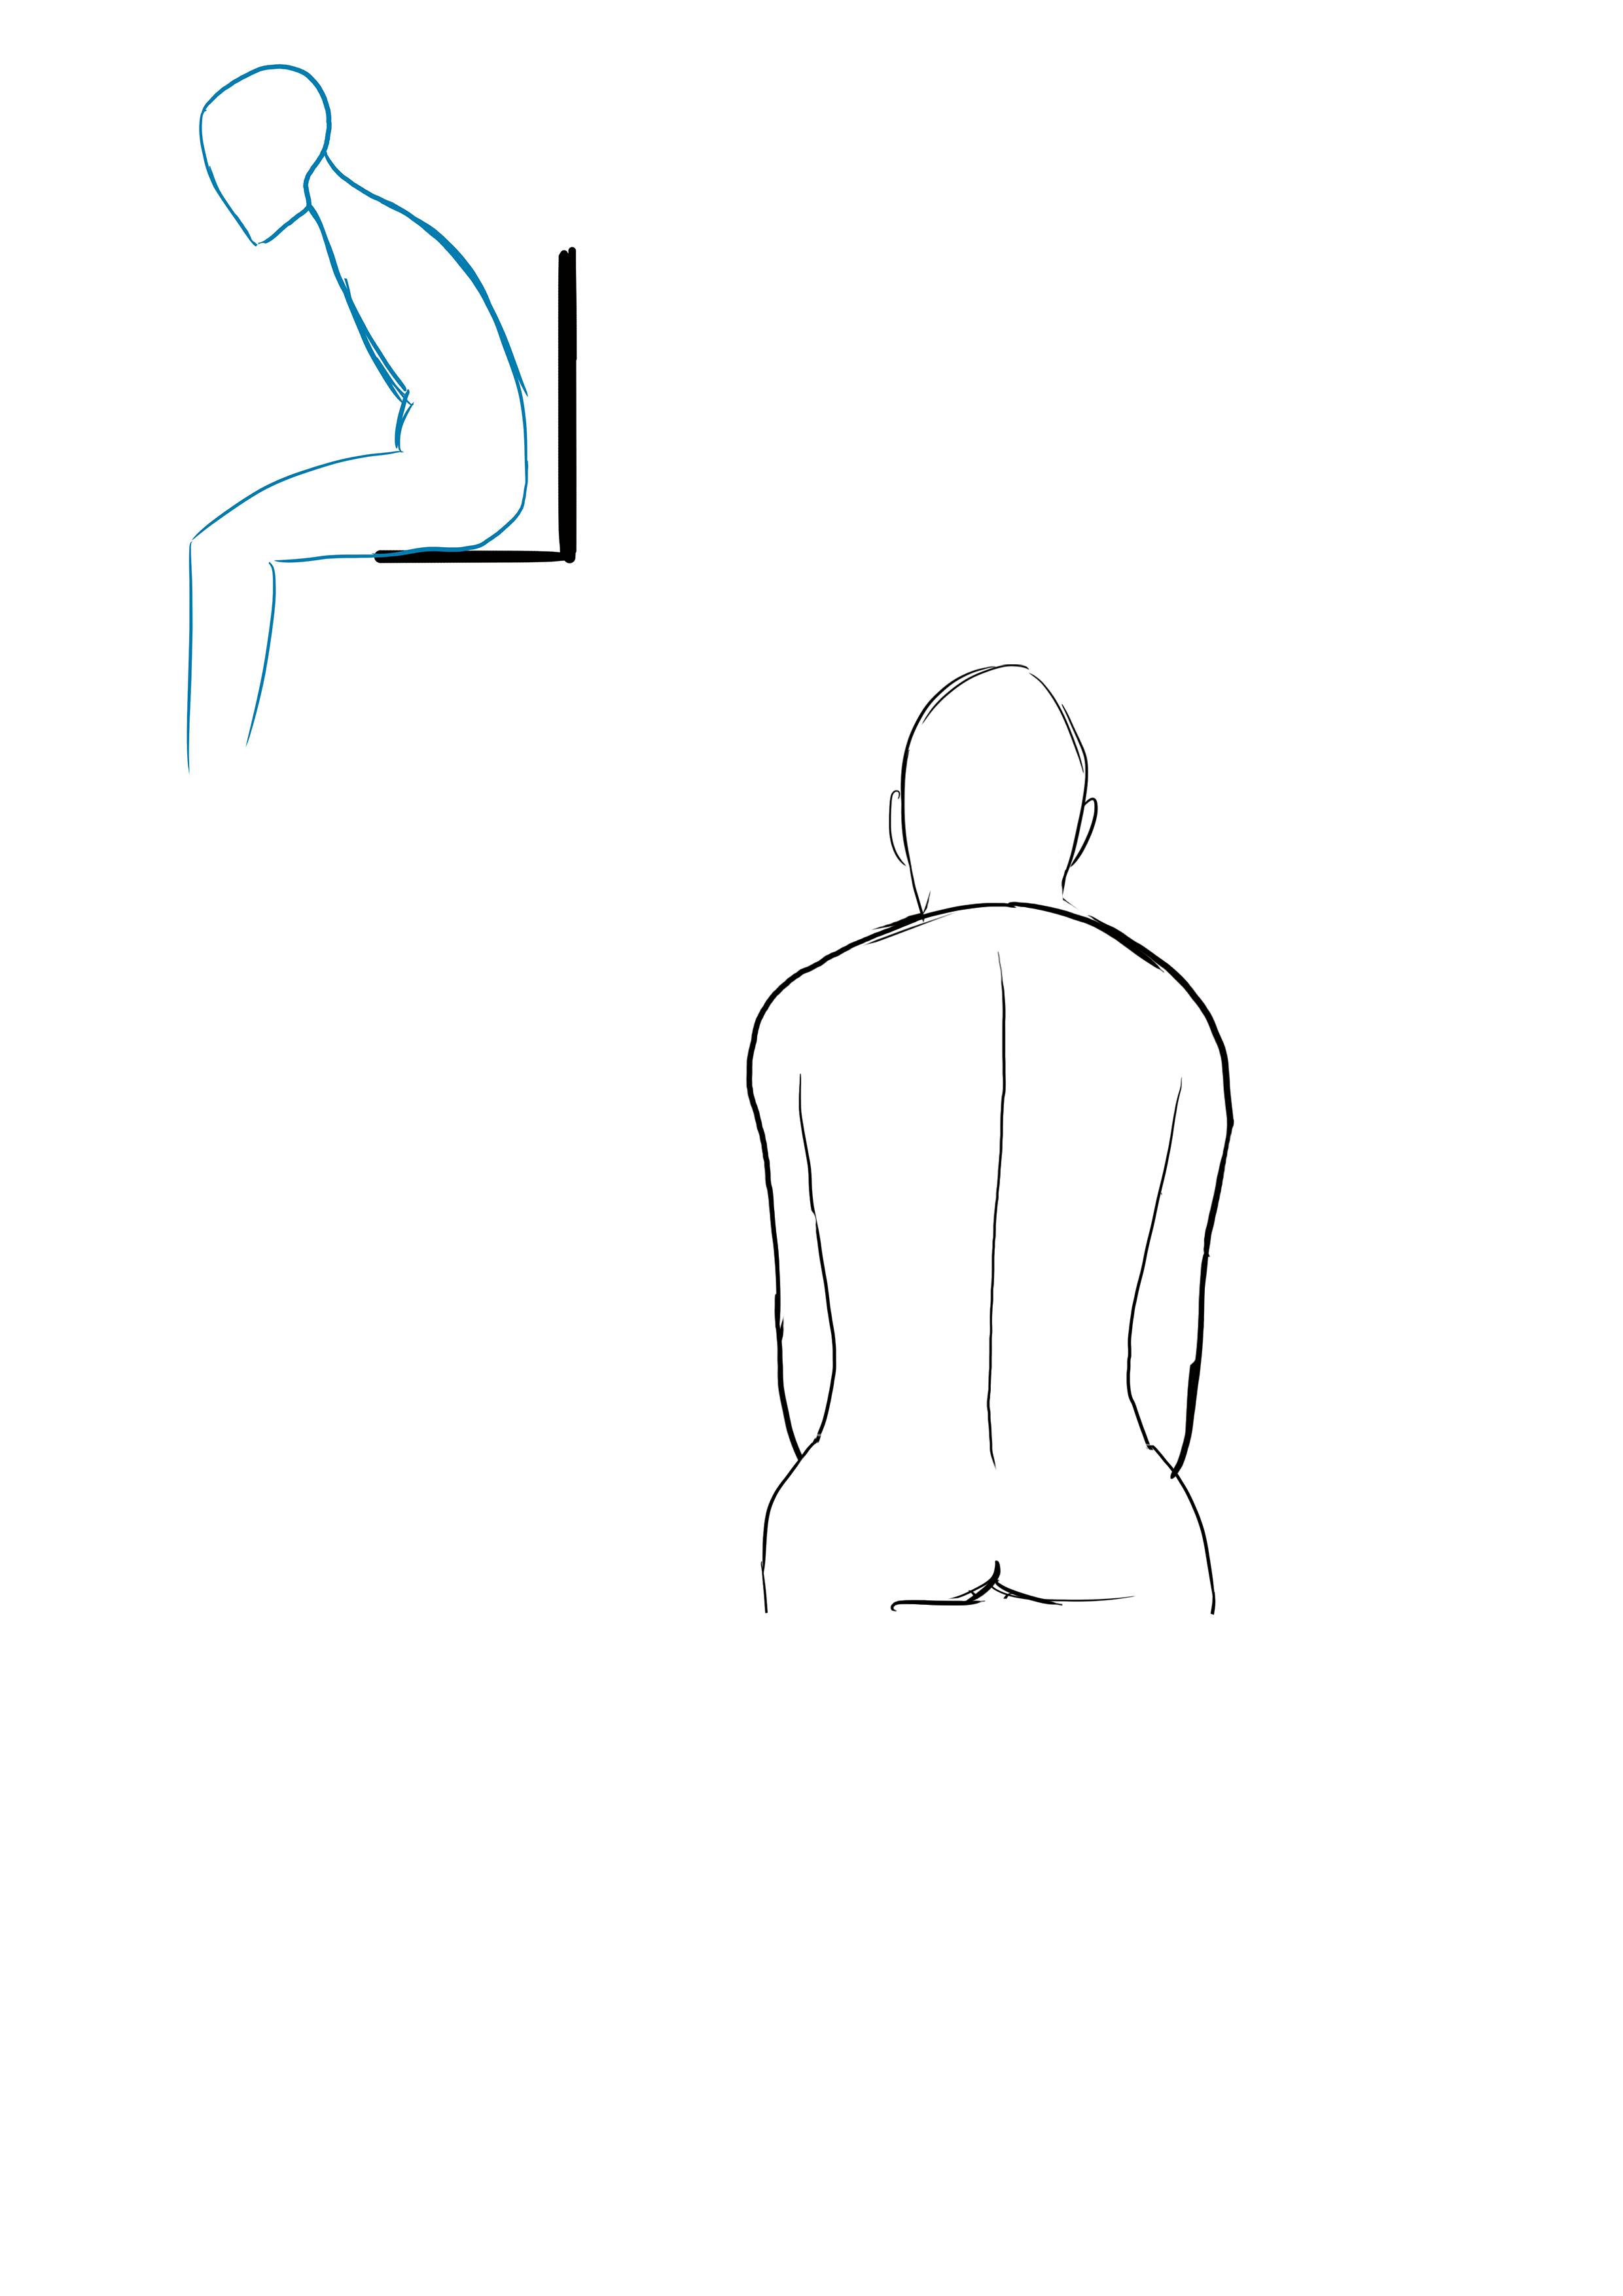
Sitting diagonally backwards, with the head raised forward, can indicate that someone is stressed.
Seen from the back, it is the opposite of the previous example. If the shoulders are still lowered, their line no longer passes in front of the neck. Moreover, the neck lengthens and the skull is also larger. It returns to its normal size.
The back is a little less crushed.
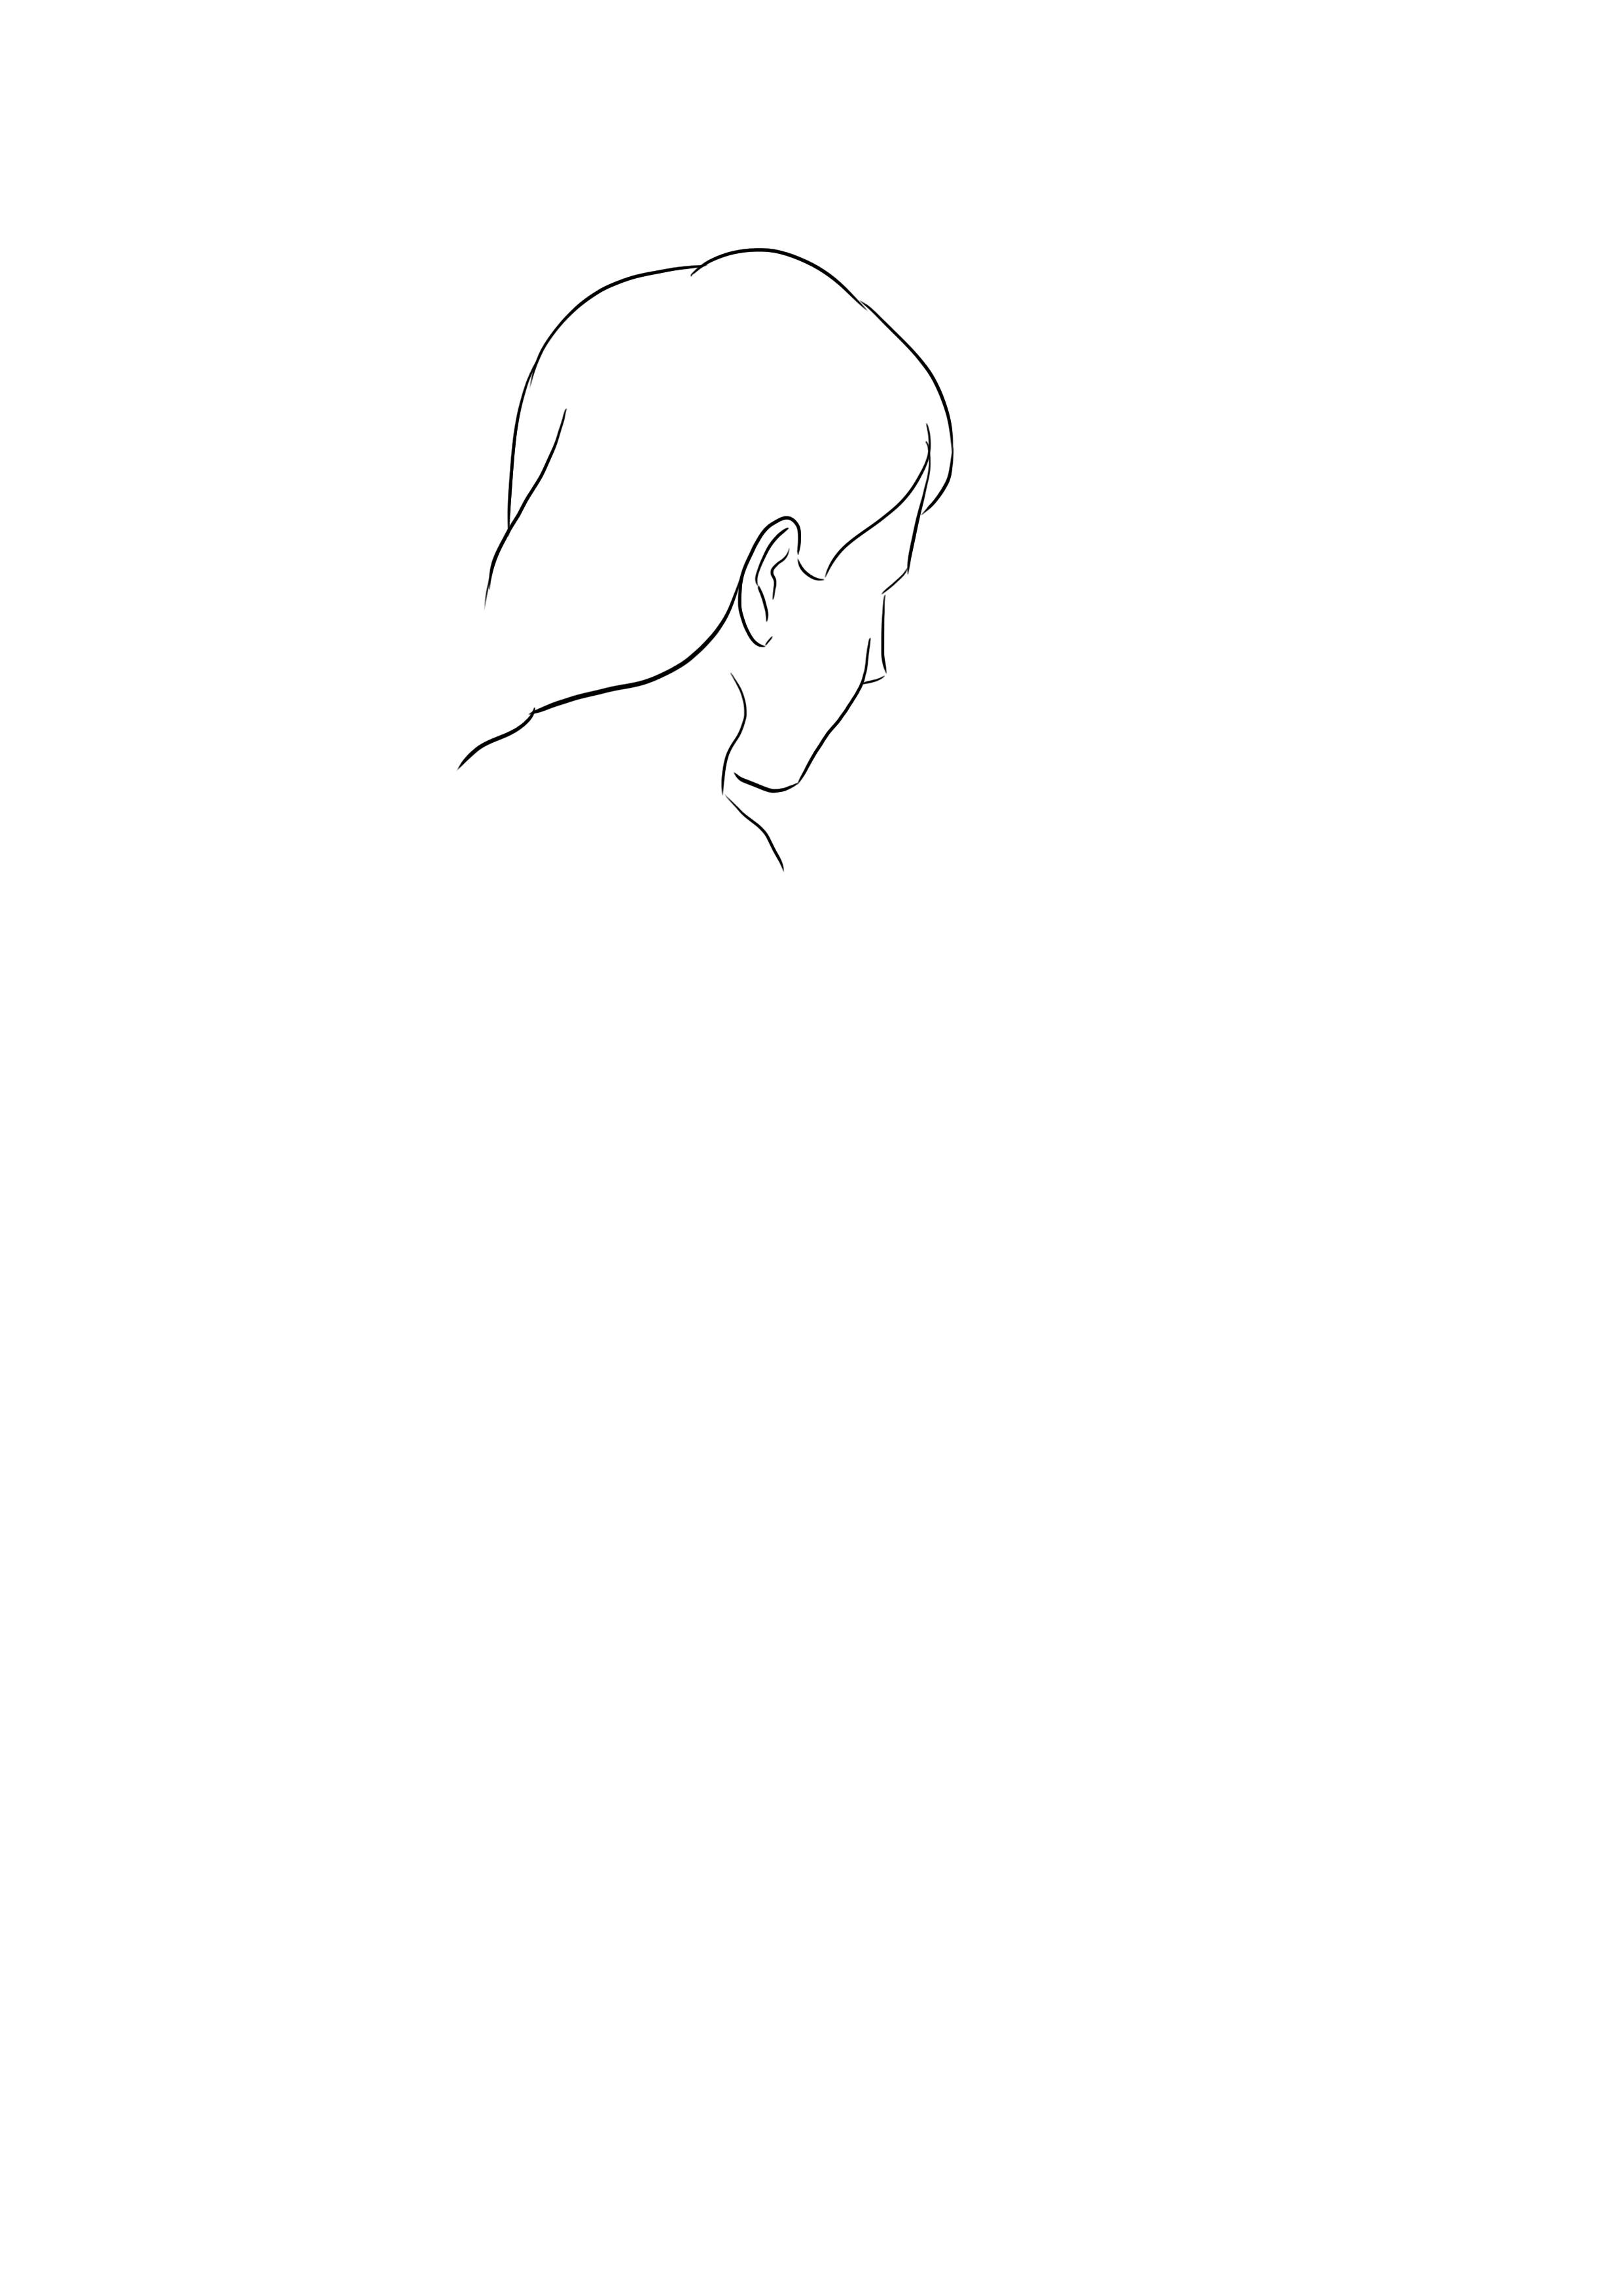
Here we have the case of a withdrawn person with a rounded back and their head forward in a seated position.
Now let's move on to examples that are a bit trickier to draw: someone with a well-rounded back and their head lowered.
Viewed from behind, the head is less visible and the neck disappears.
The upper back will tend to hunch, the spine is very prominent, and the skin on the back is taut. In this position, the muscles and bones are visible, especially if the person is slim or muscular.
To give the impression of a rounded back, the back must be shortened and the shoulders lowered.
Here, we have the example of a person that is very withdrawn into themselves, with their head tucked in and their shoulders forward.
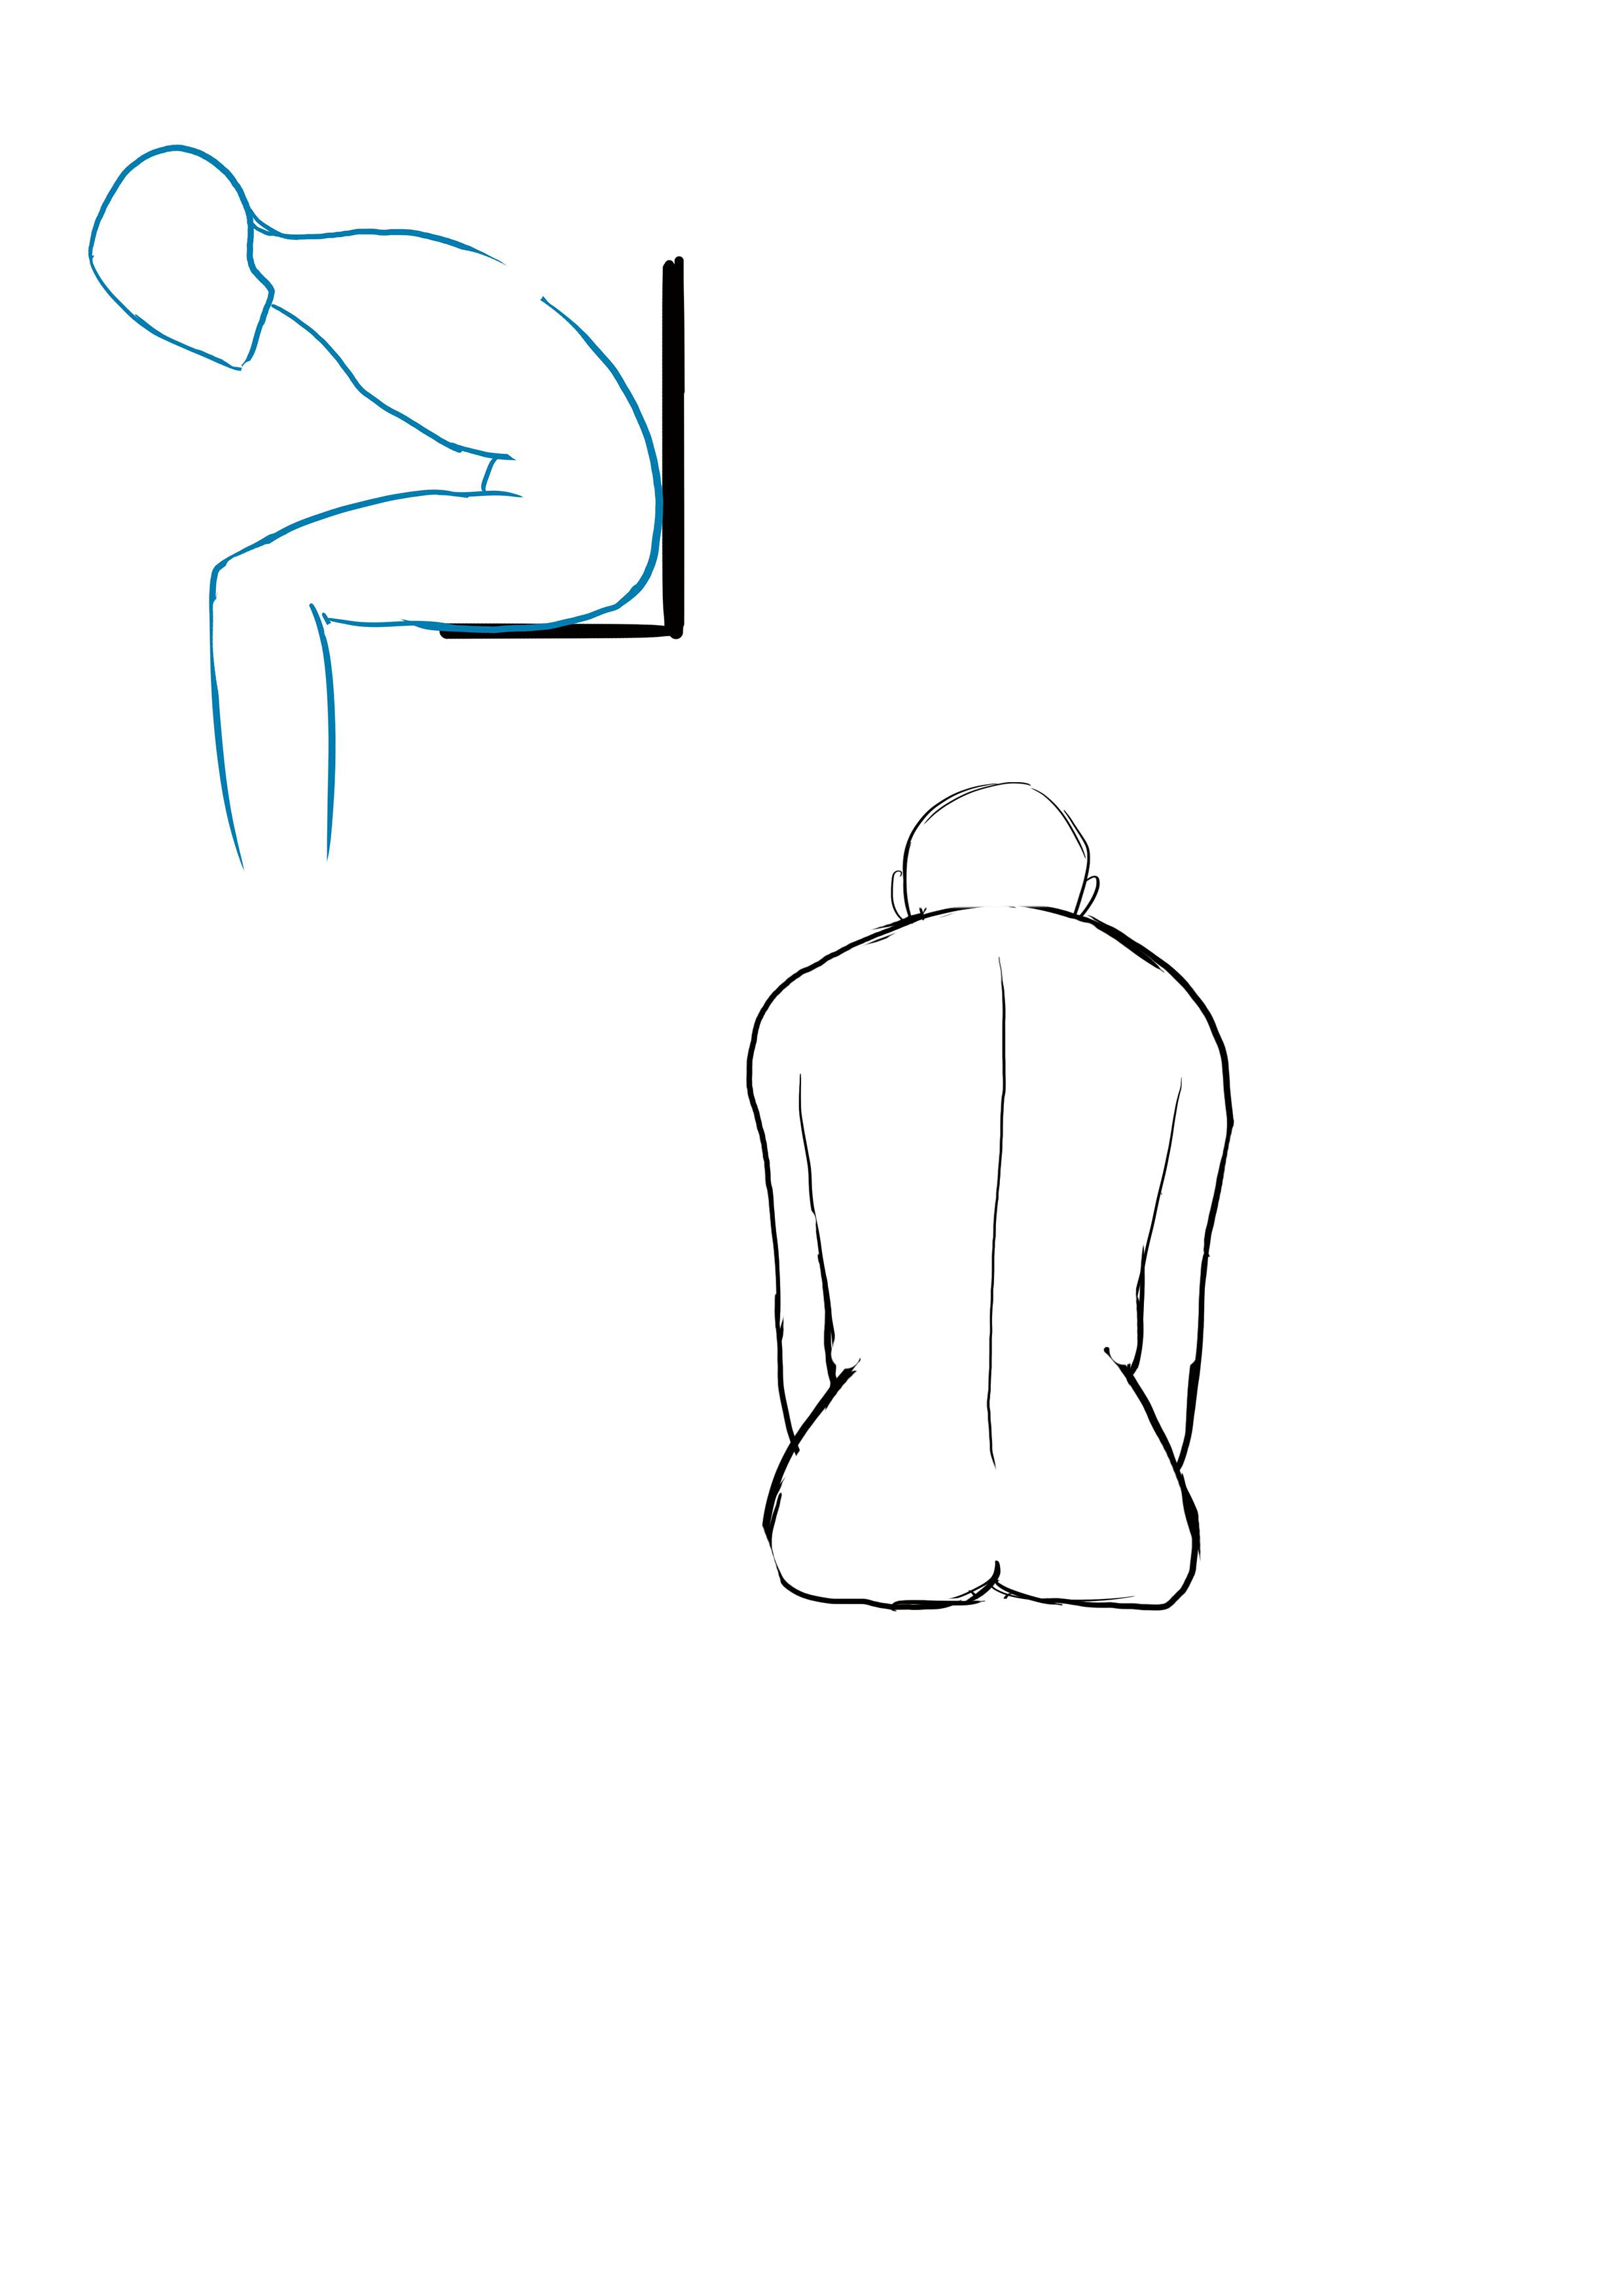
For this last example, the back view will be emphasized to show how much the character is leaning forward.
The neck has disappeared and 3/4 of the head is hidden, or even more if you want your character to have their head tilted forward.
The shoulders are hunched and the line of the back takes over from the line of the neck.
The back is very short - its center line is slightly twisted to create the illusion of curvature. Finally, the lower back (the pelvis) comes to the foreground and is highlighted.
As I explained in the article "How to Draw a Seated Person," the examples mentioned above are basic and exaggerated. Each person is unique and sitting with your head tucked into your shoulders does not necessarily mean that you're introverted, as it can also reflect a feeling of sadness or something else.
Both character AND emotions play a role in body language.
To draw a character from the back, you must accentuate the pose and exaggerate to convey the emotions.
If your character's shoulders are not lowered enough, it won't be clear that they are depressed.
ANATOMICAL STUDY OF THE BACK FOR DRAWING
Now that we have gone over expressions, we are going to look at some basic anatomy that will be useful for drawing a back.
I won't bother you with the names of the muscles or bones, just remember how the human body is built as it will be very useful for drawing in the future!
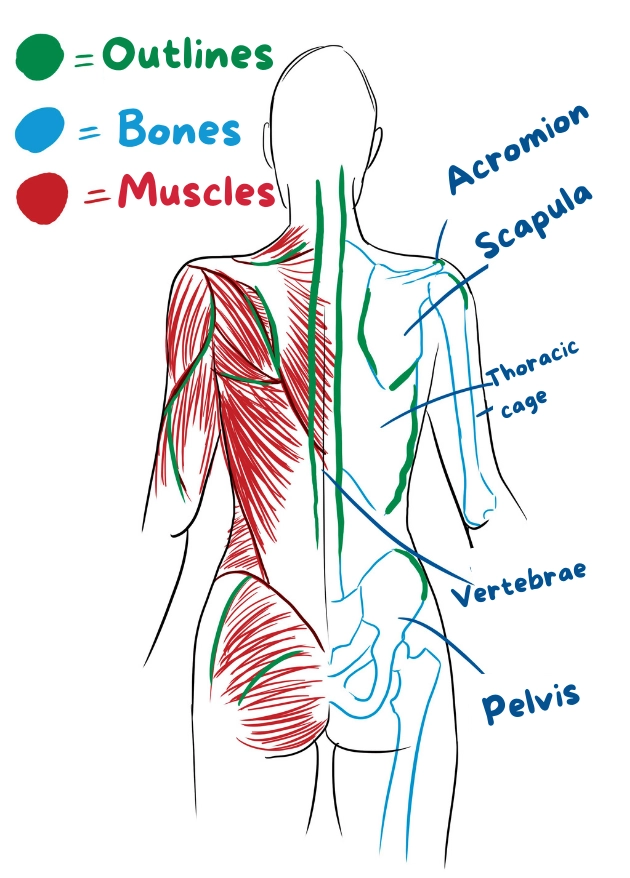
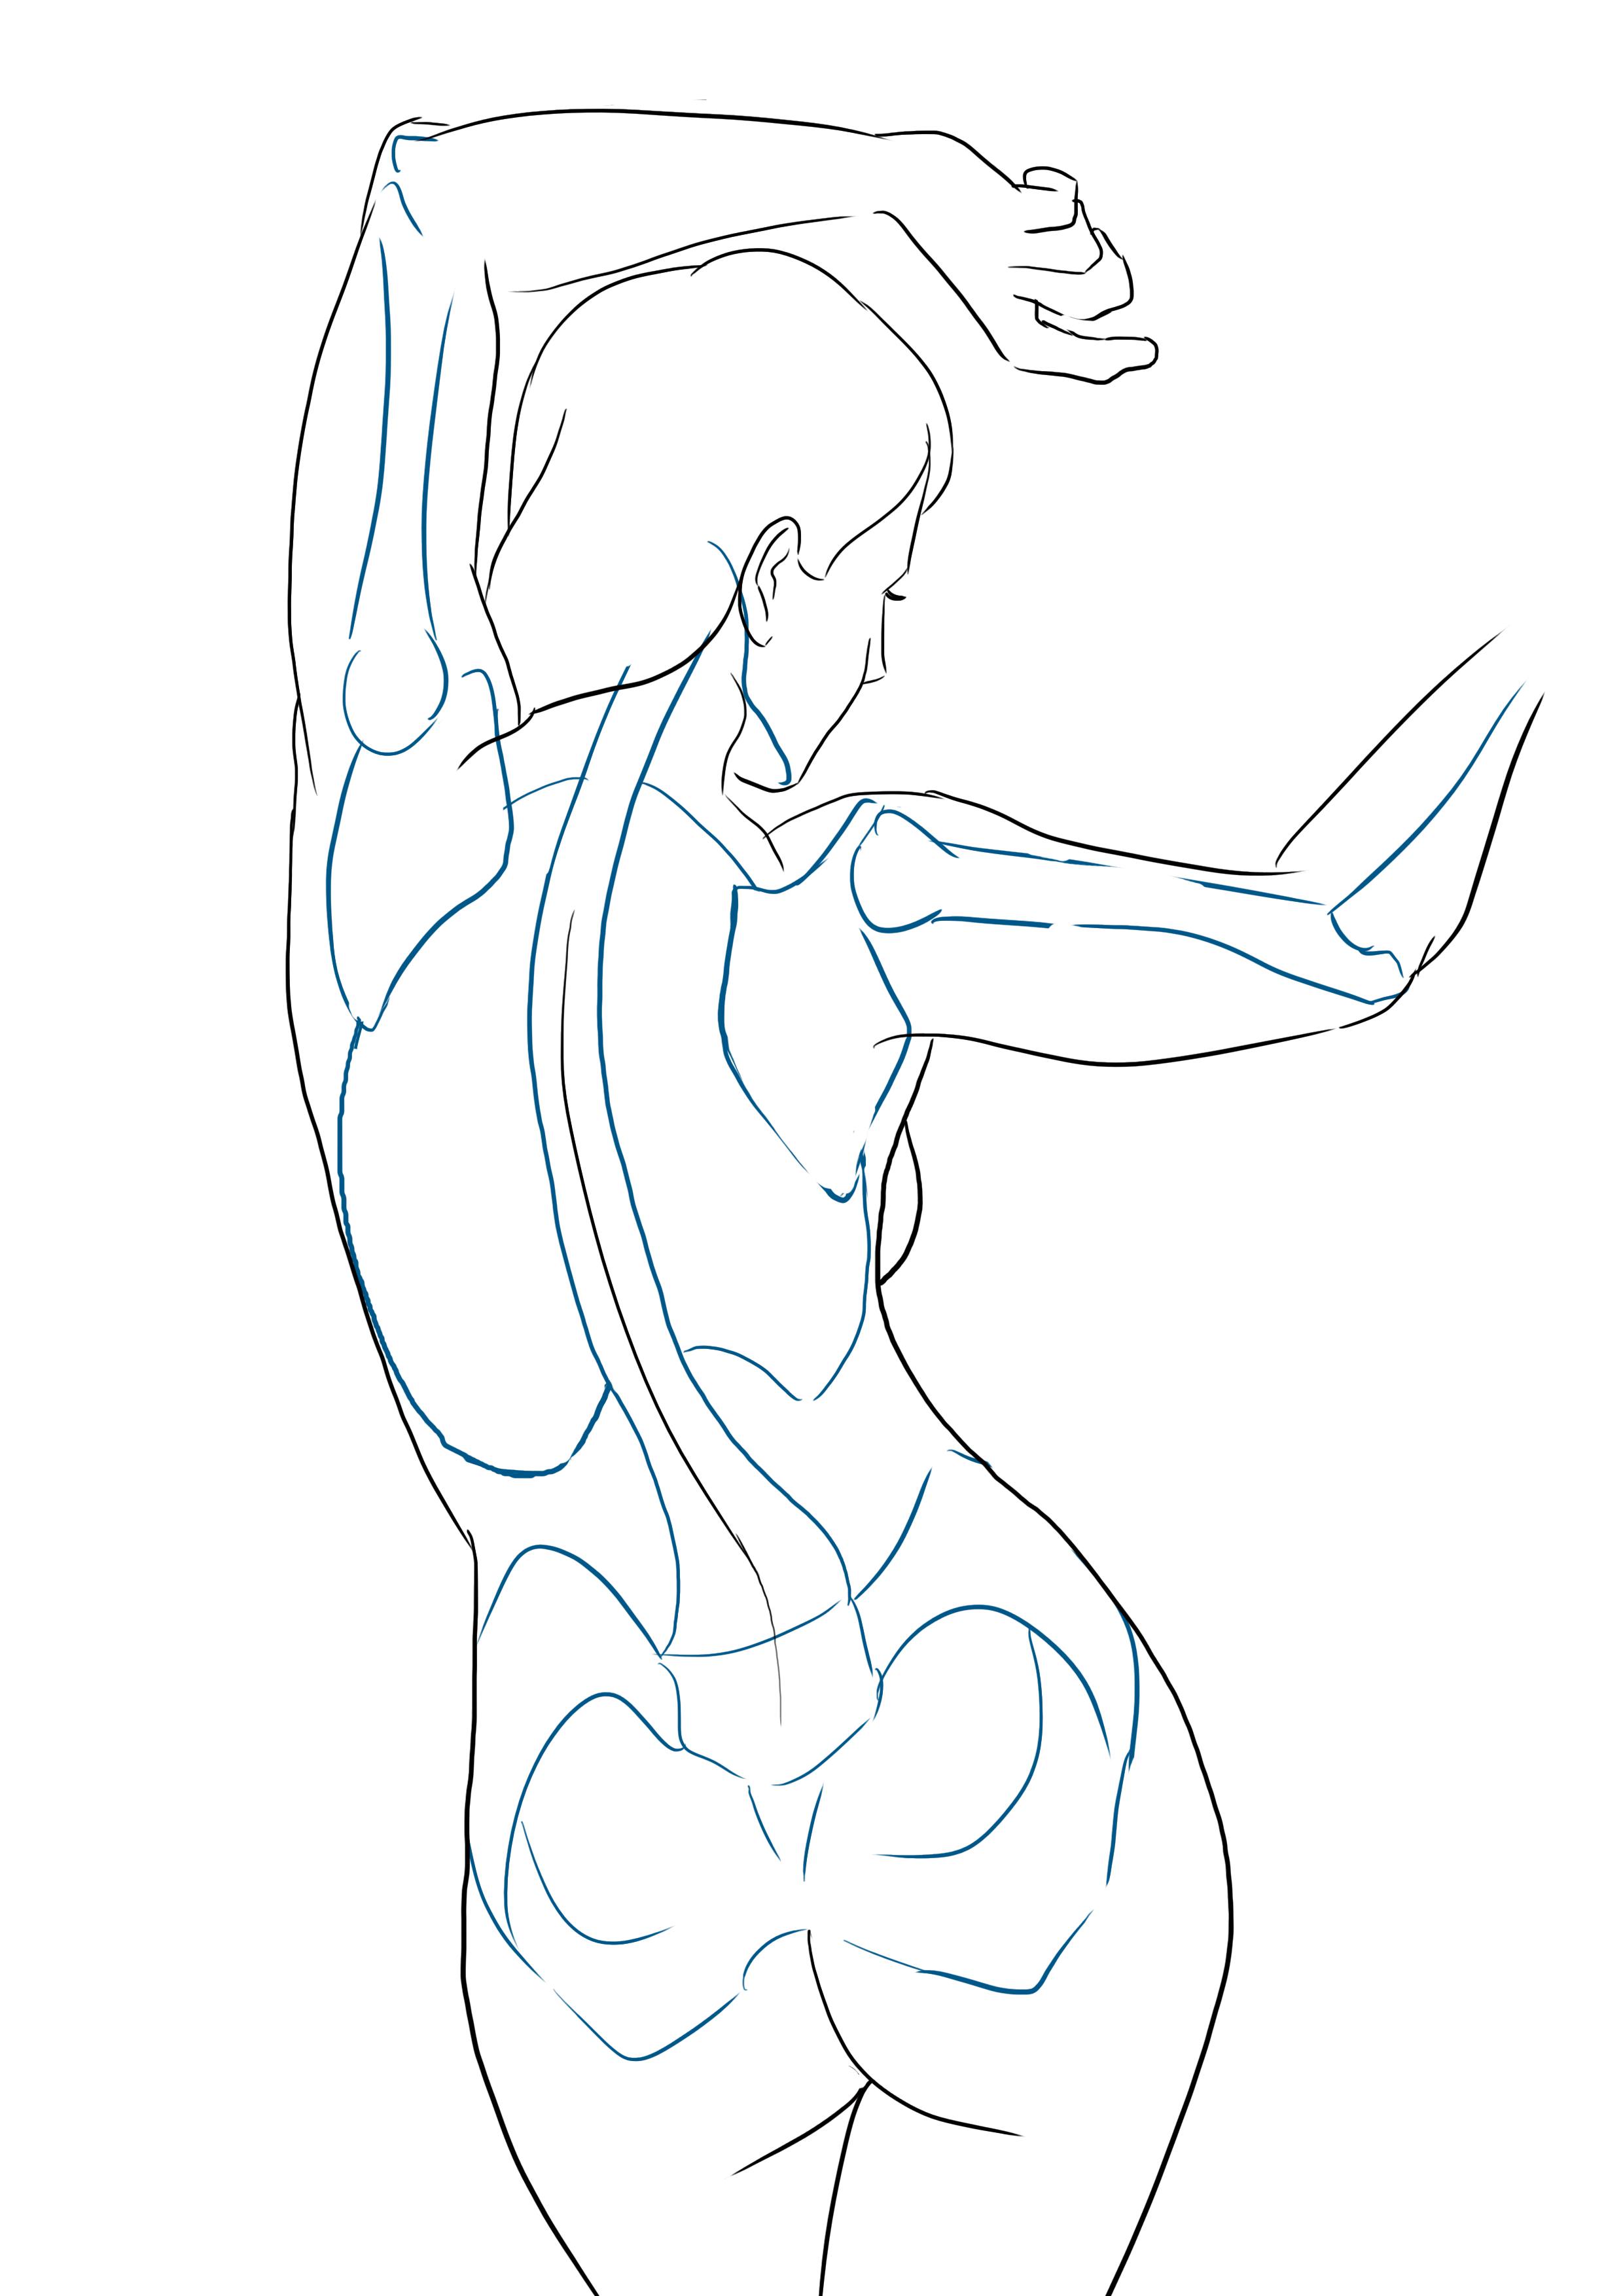
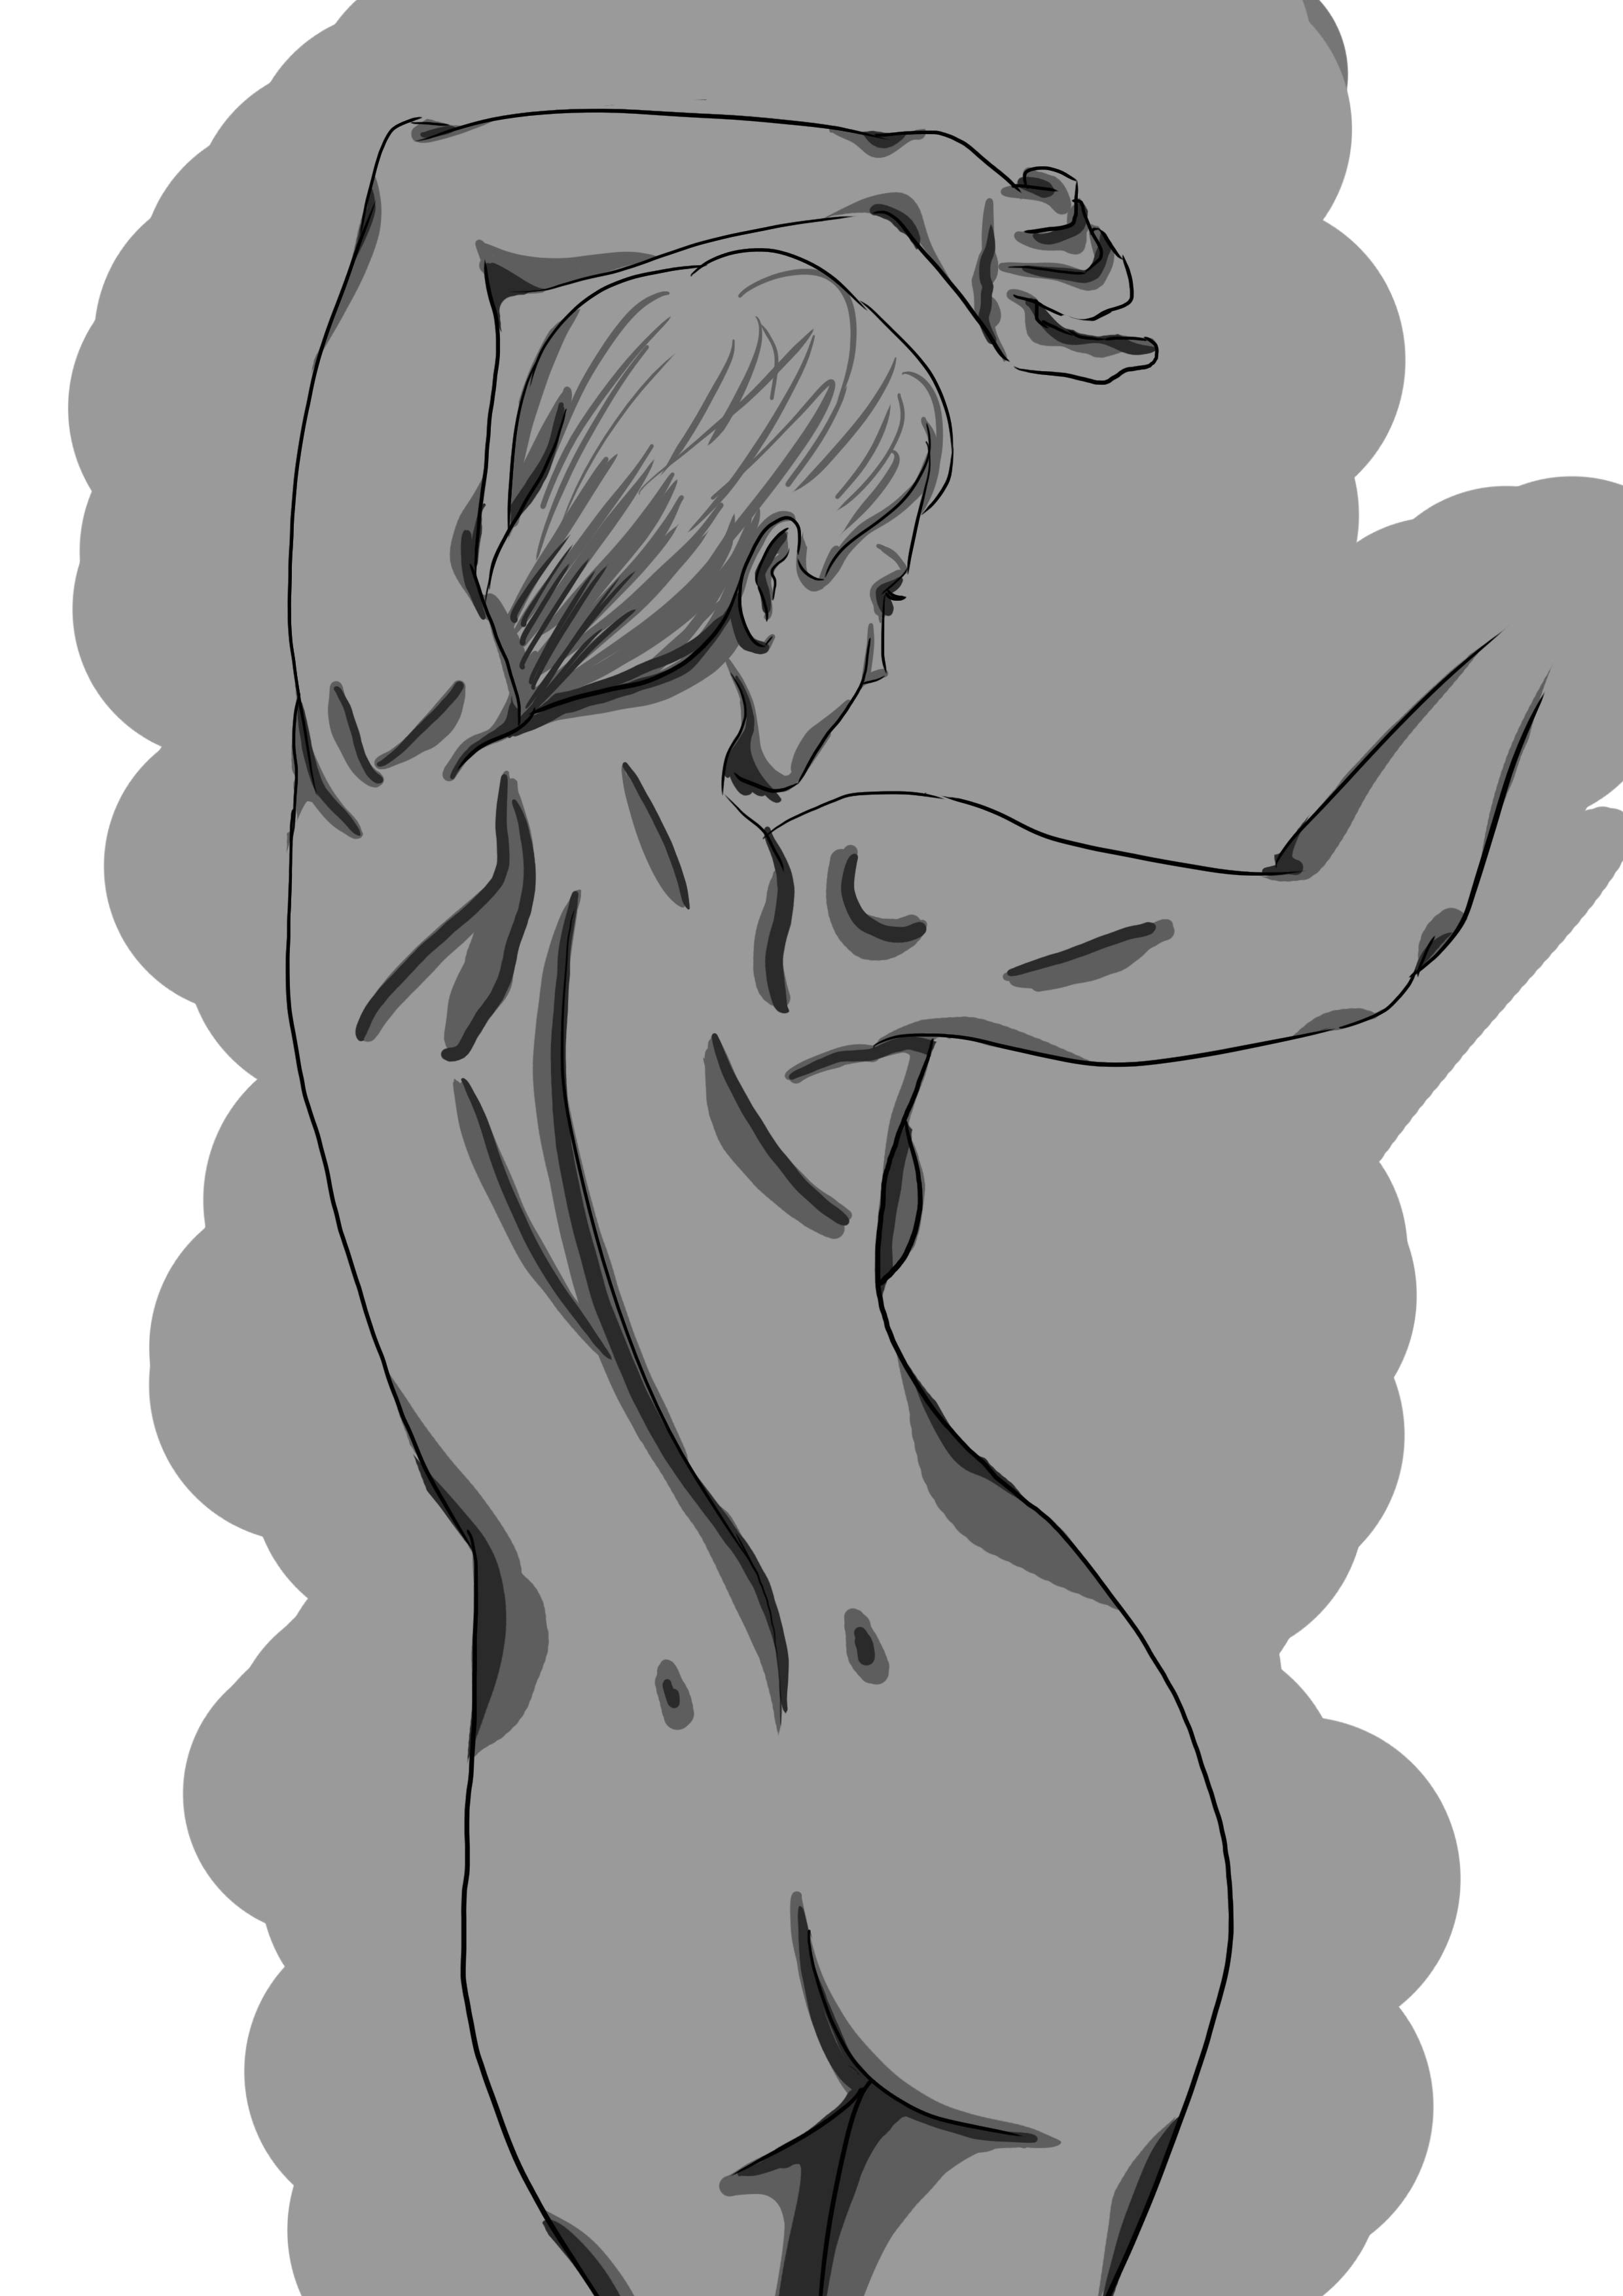
Here you can see a drawing of a person as seen from behind, with the main muscles on one side and the main bones on the other side.
This isn't an anatomical drawing, so the tiny bones and muscles do not interest us. What interests us is how the skin reacts to the movement of the muscles and bones.
Depending on the type of body we have, we have more or less contours.
A thin and muscular body will have more contours than a fat body, where the bones are not visible, and typically neither are the muscles.
So, the thicker the layer of fat, the less effect there will be between the bones/muscles and the skin.
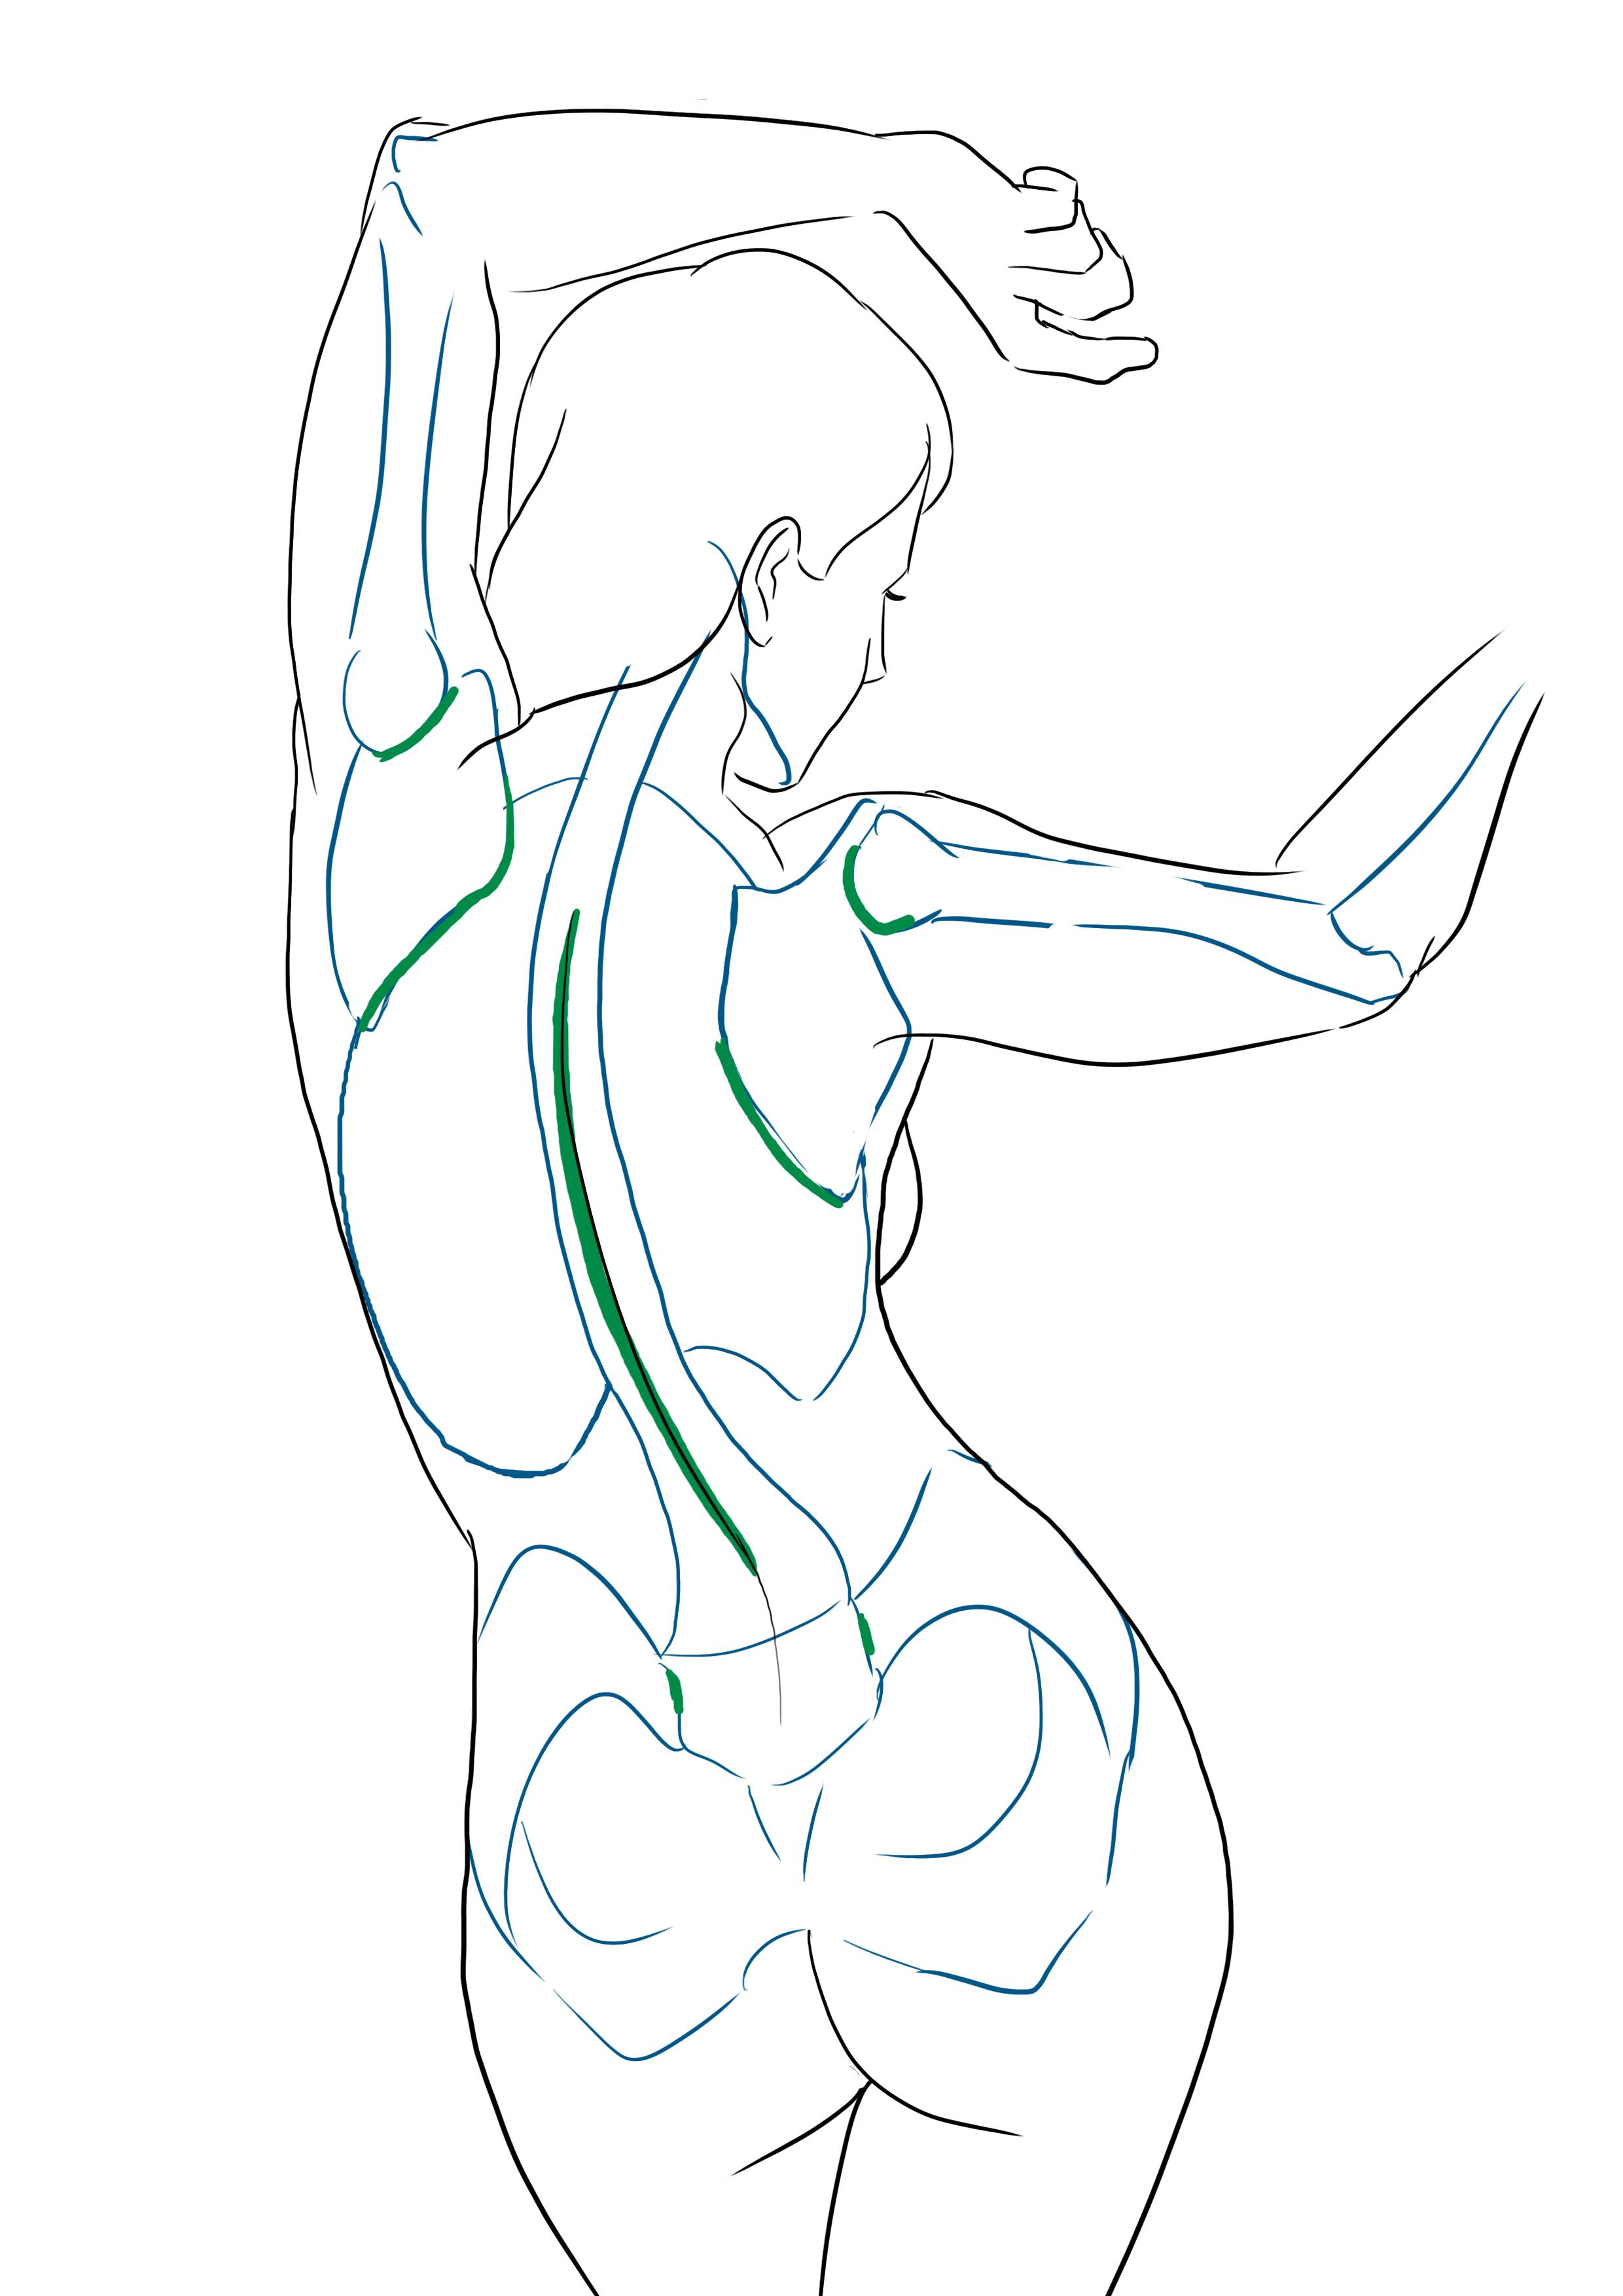
On this diagram, I have highlighted the areas often marked by bones and muscles that are clearly visible on a person in green.
Some areas will be more or less visible depending on the person's build, but generally, the spine and shoulder blades stand out quite a lot, even on a larger person.
Now that we've covered human anatomy, we can move on to the main drawing.
DRAWING A WOMAN FROM BEHIND STEP BY STEP
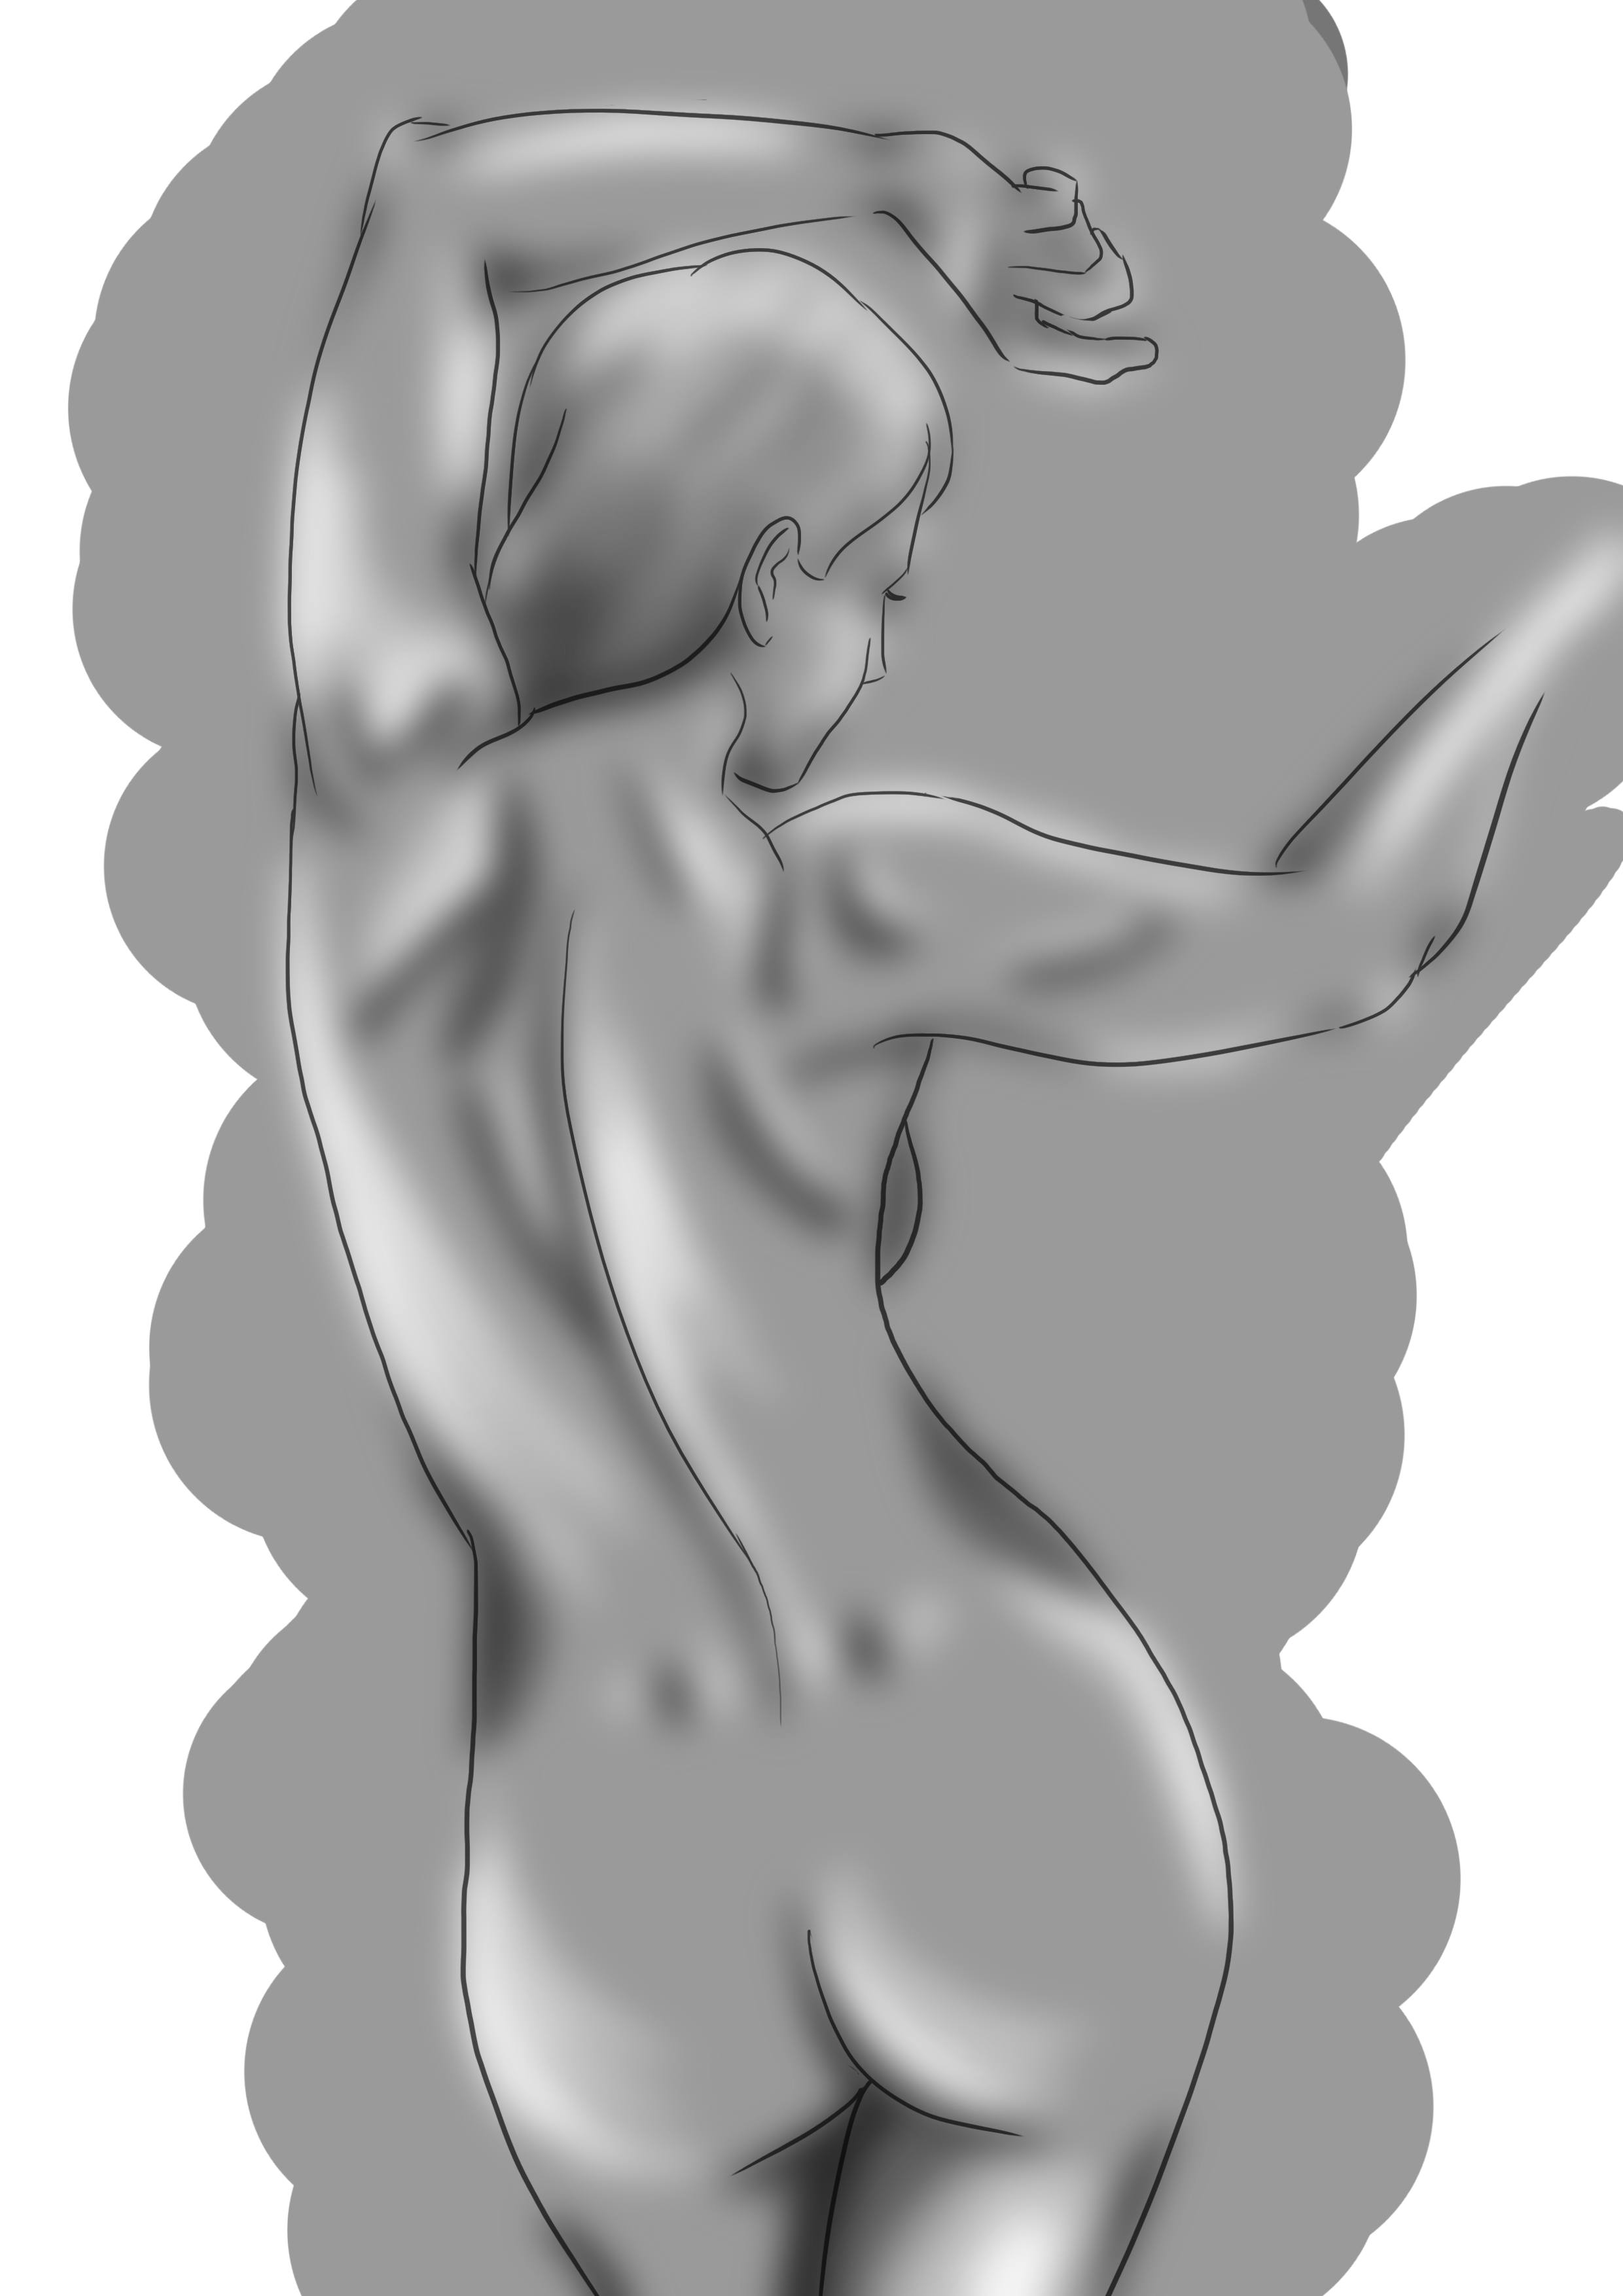
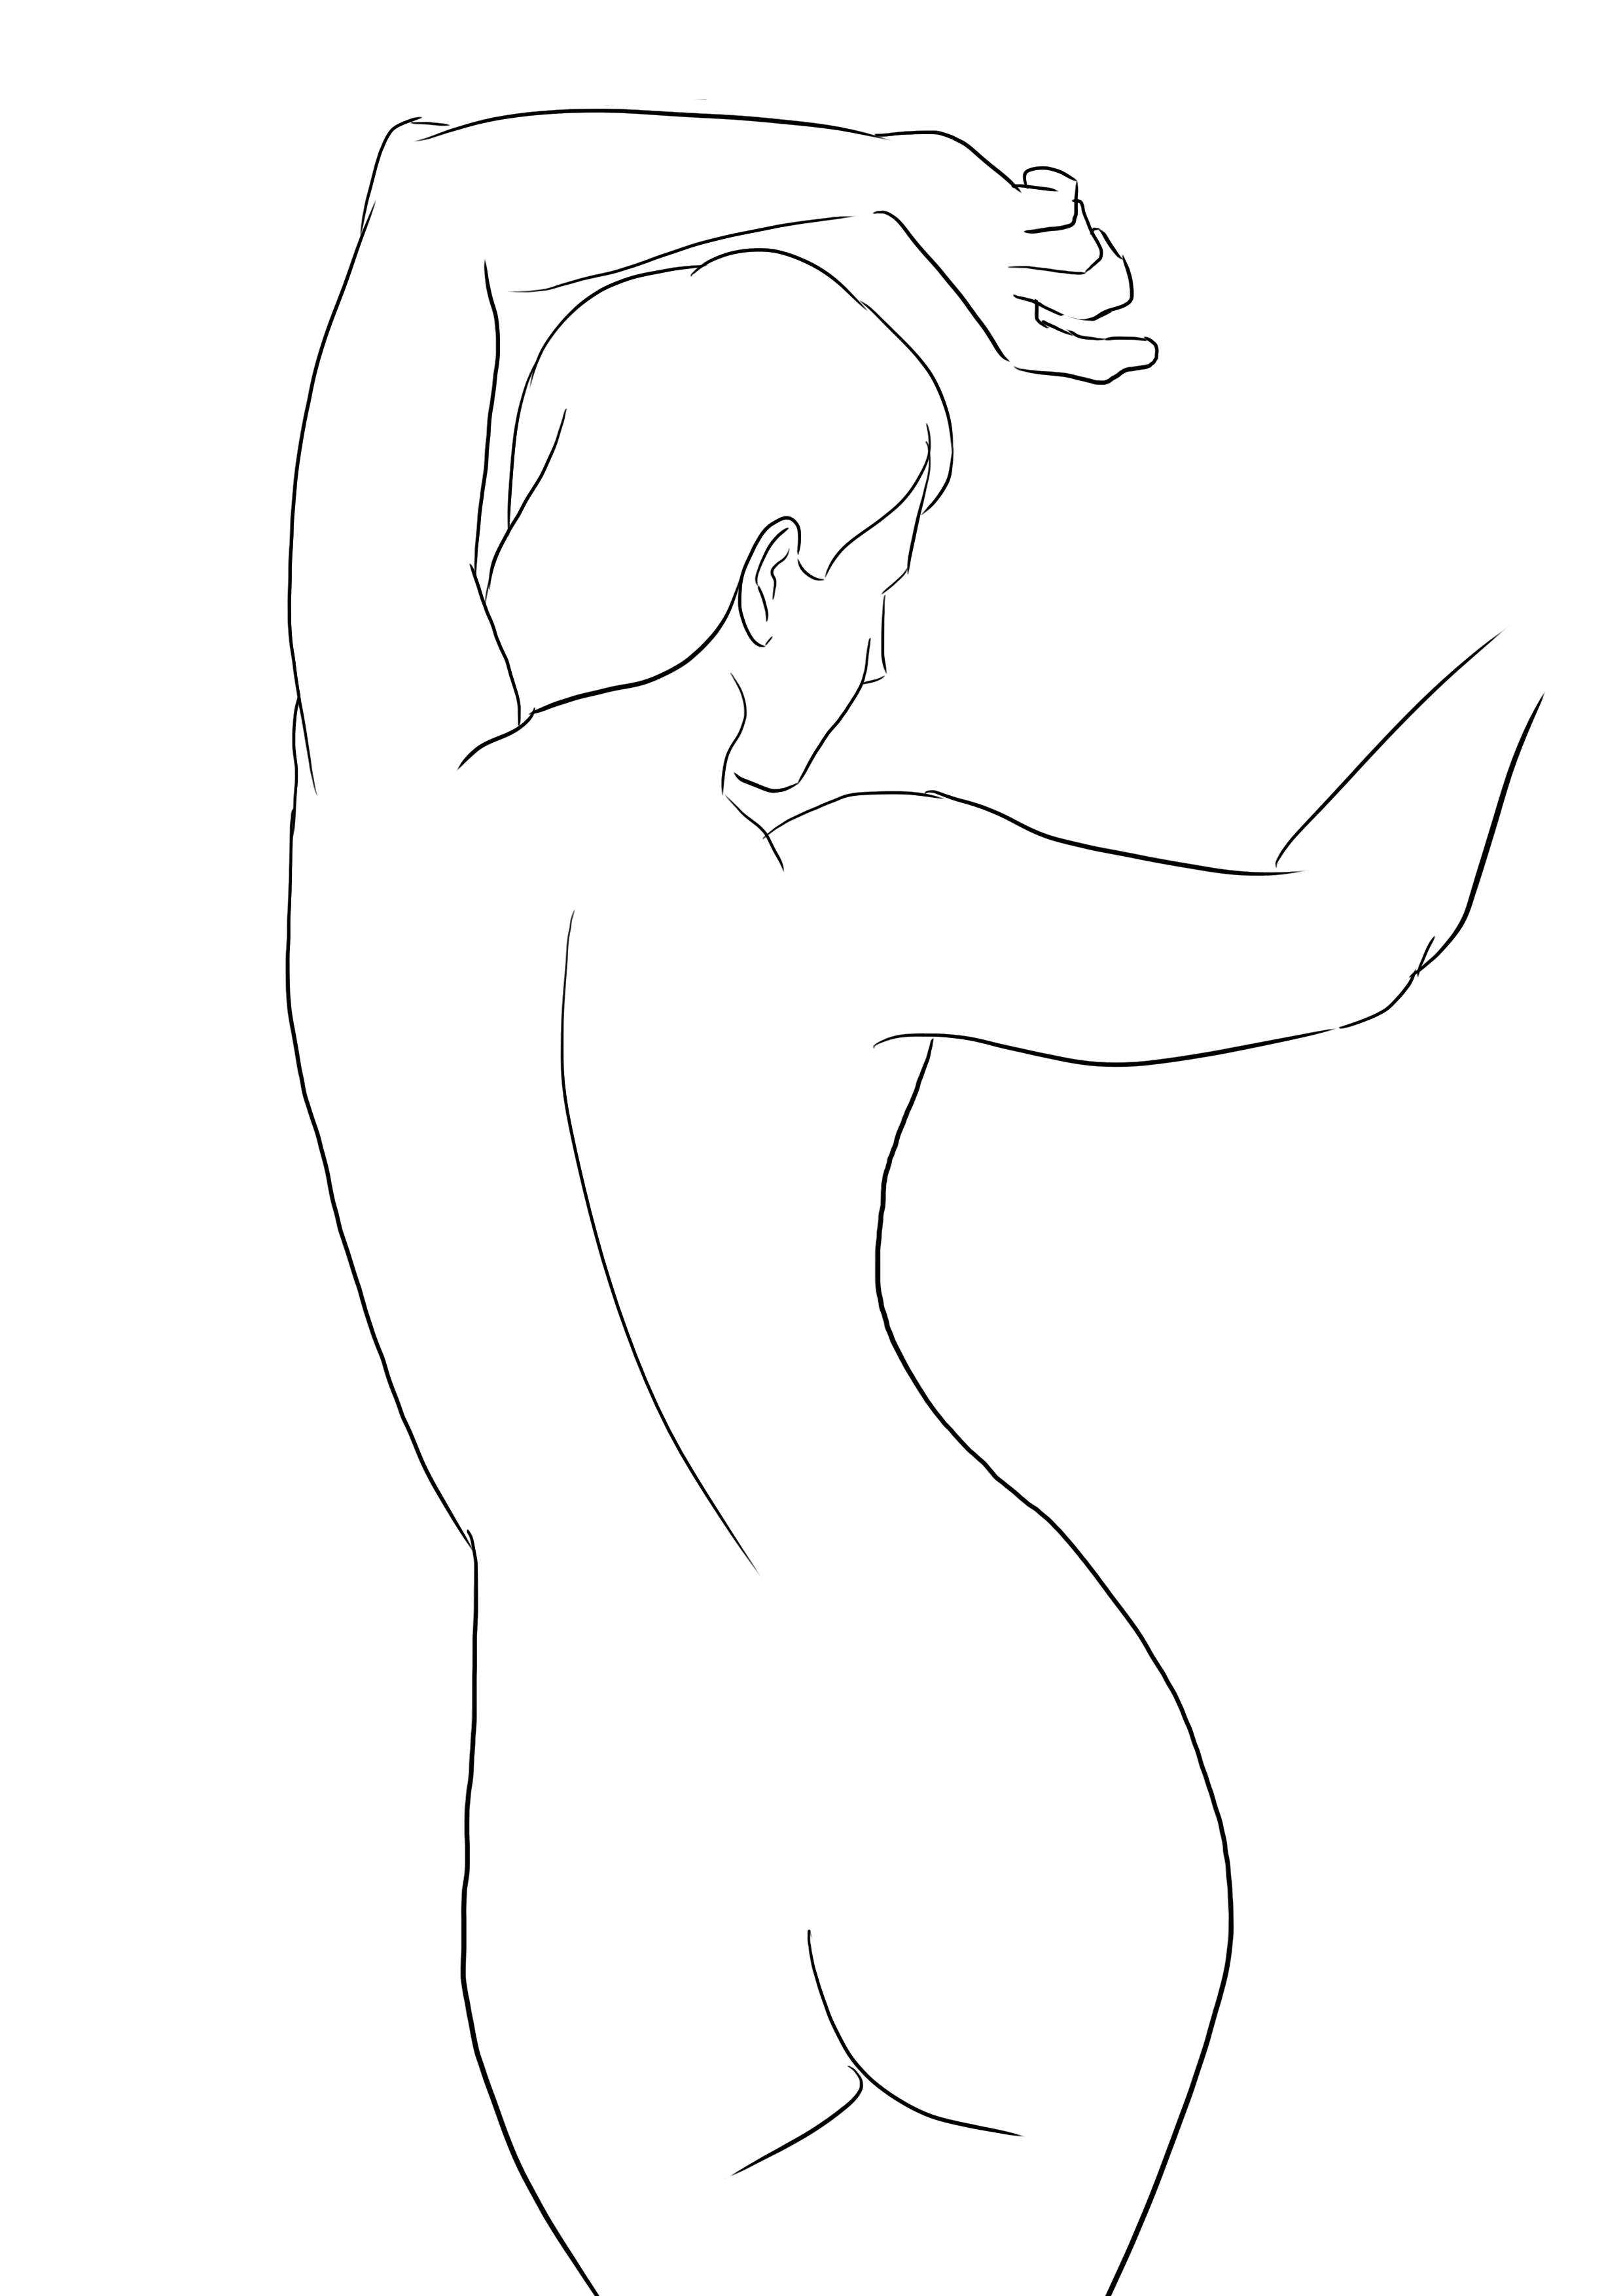
To draw my character from behind, I chose to depict a woman of average build, with slightly developed muscles, and, importantly, posed with her arms raised to have the skin taut, thereby highlighting the bones and muscles.
I will start by drawing the head, and I won't linger on the face.
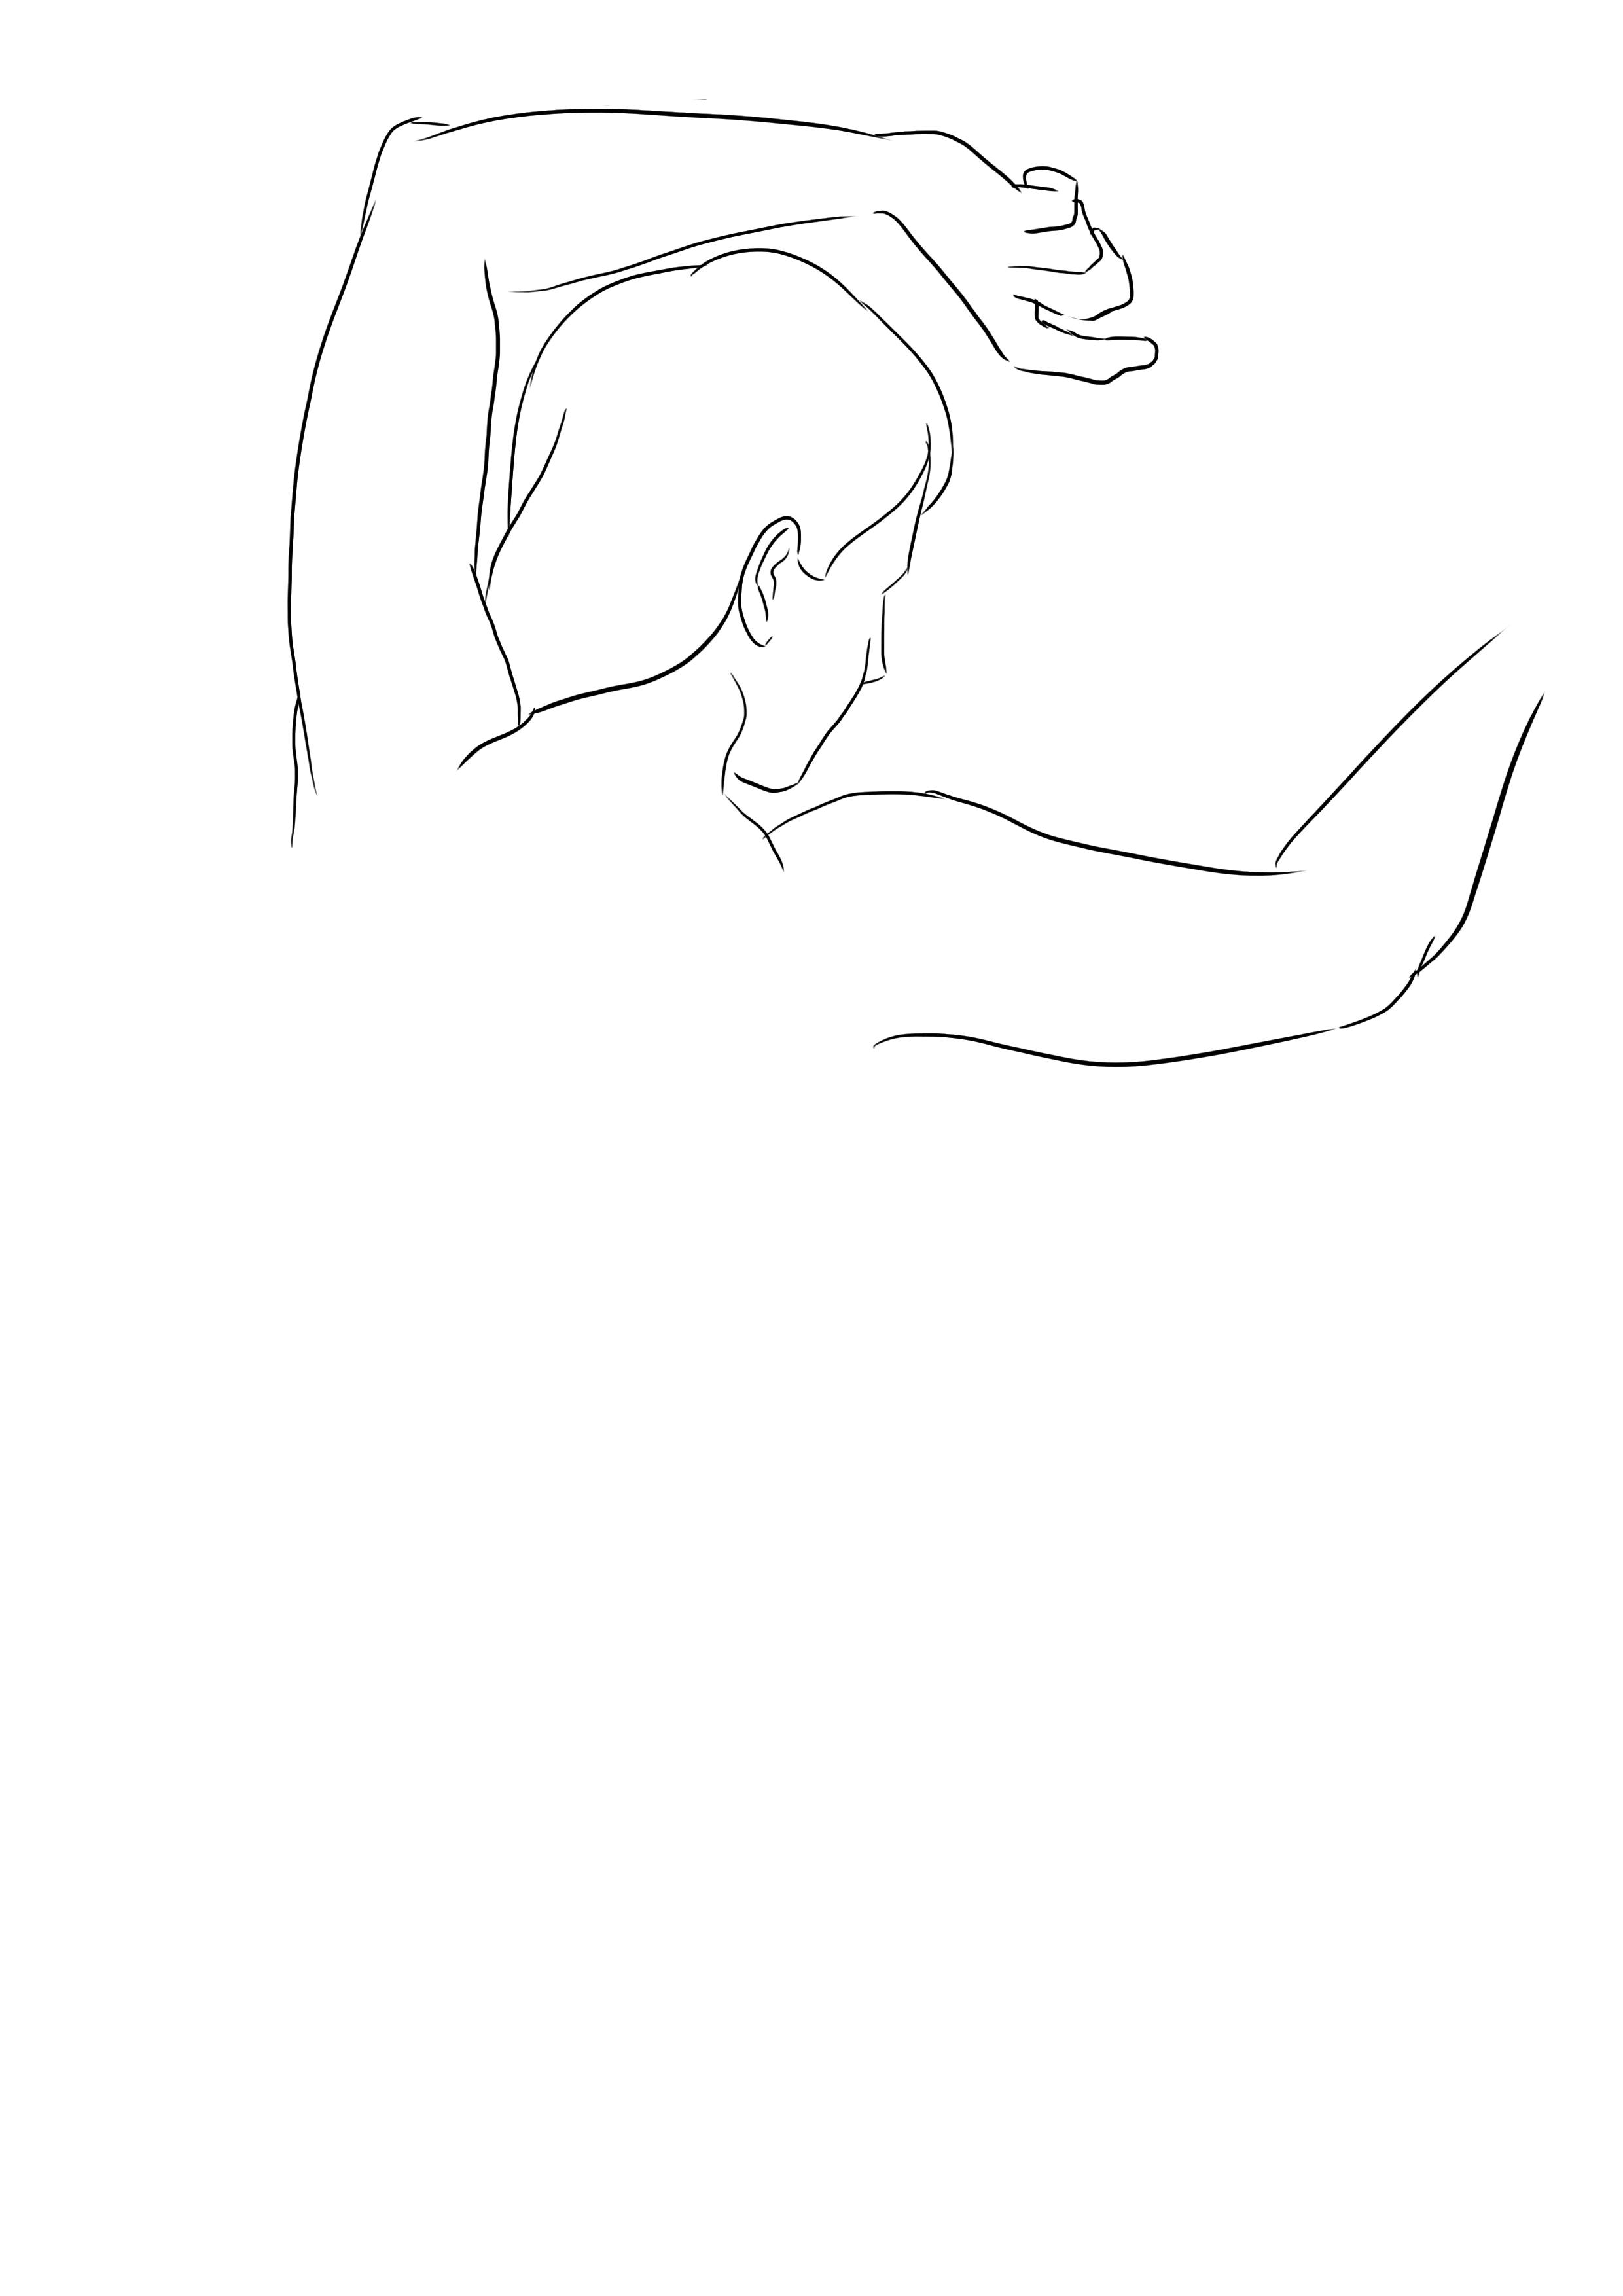
Then, I will add the arms. Same thing, I won't dwell on the details, especially the fingers. What interests me here are the shoulders.
Finally, I will draw the overall shape of the rest of the body.
I will use the center line of the back/spine to guide me in the movement of the back.
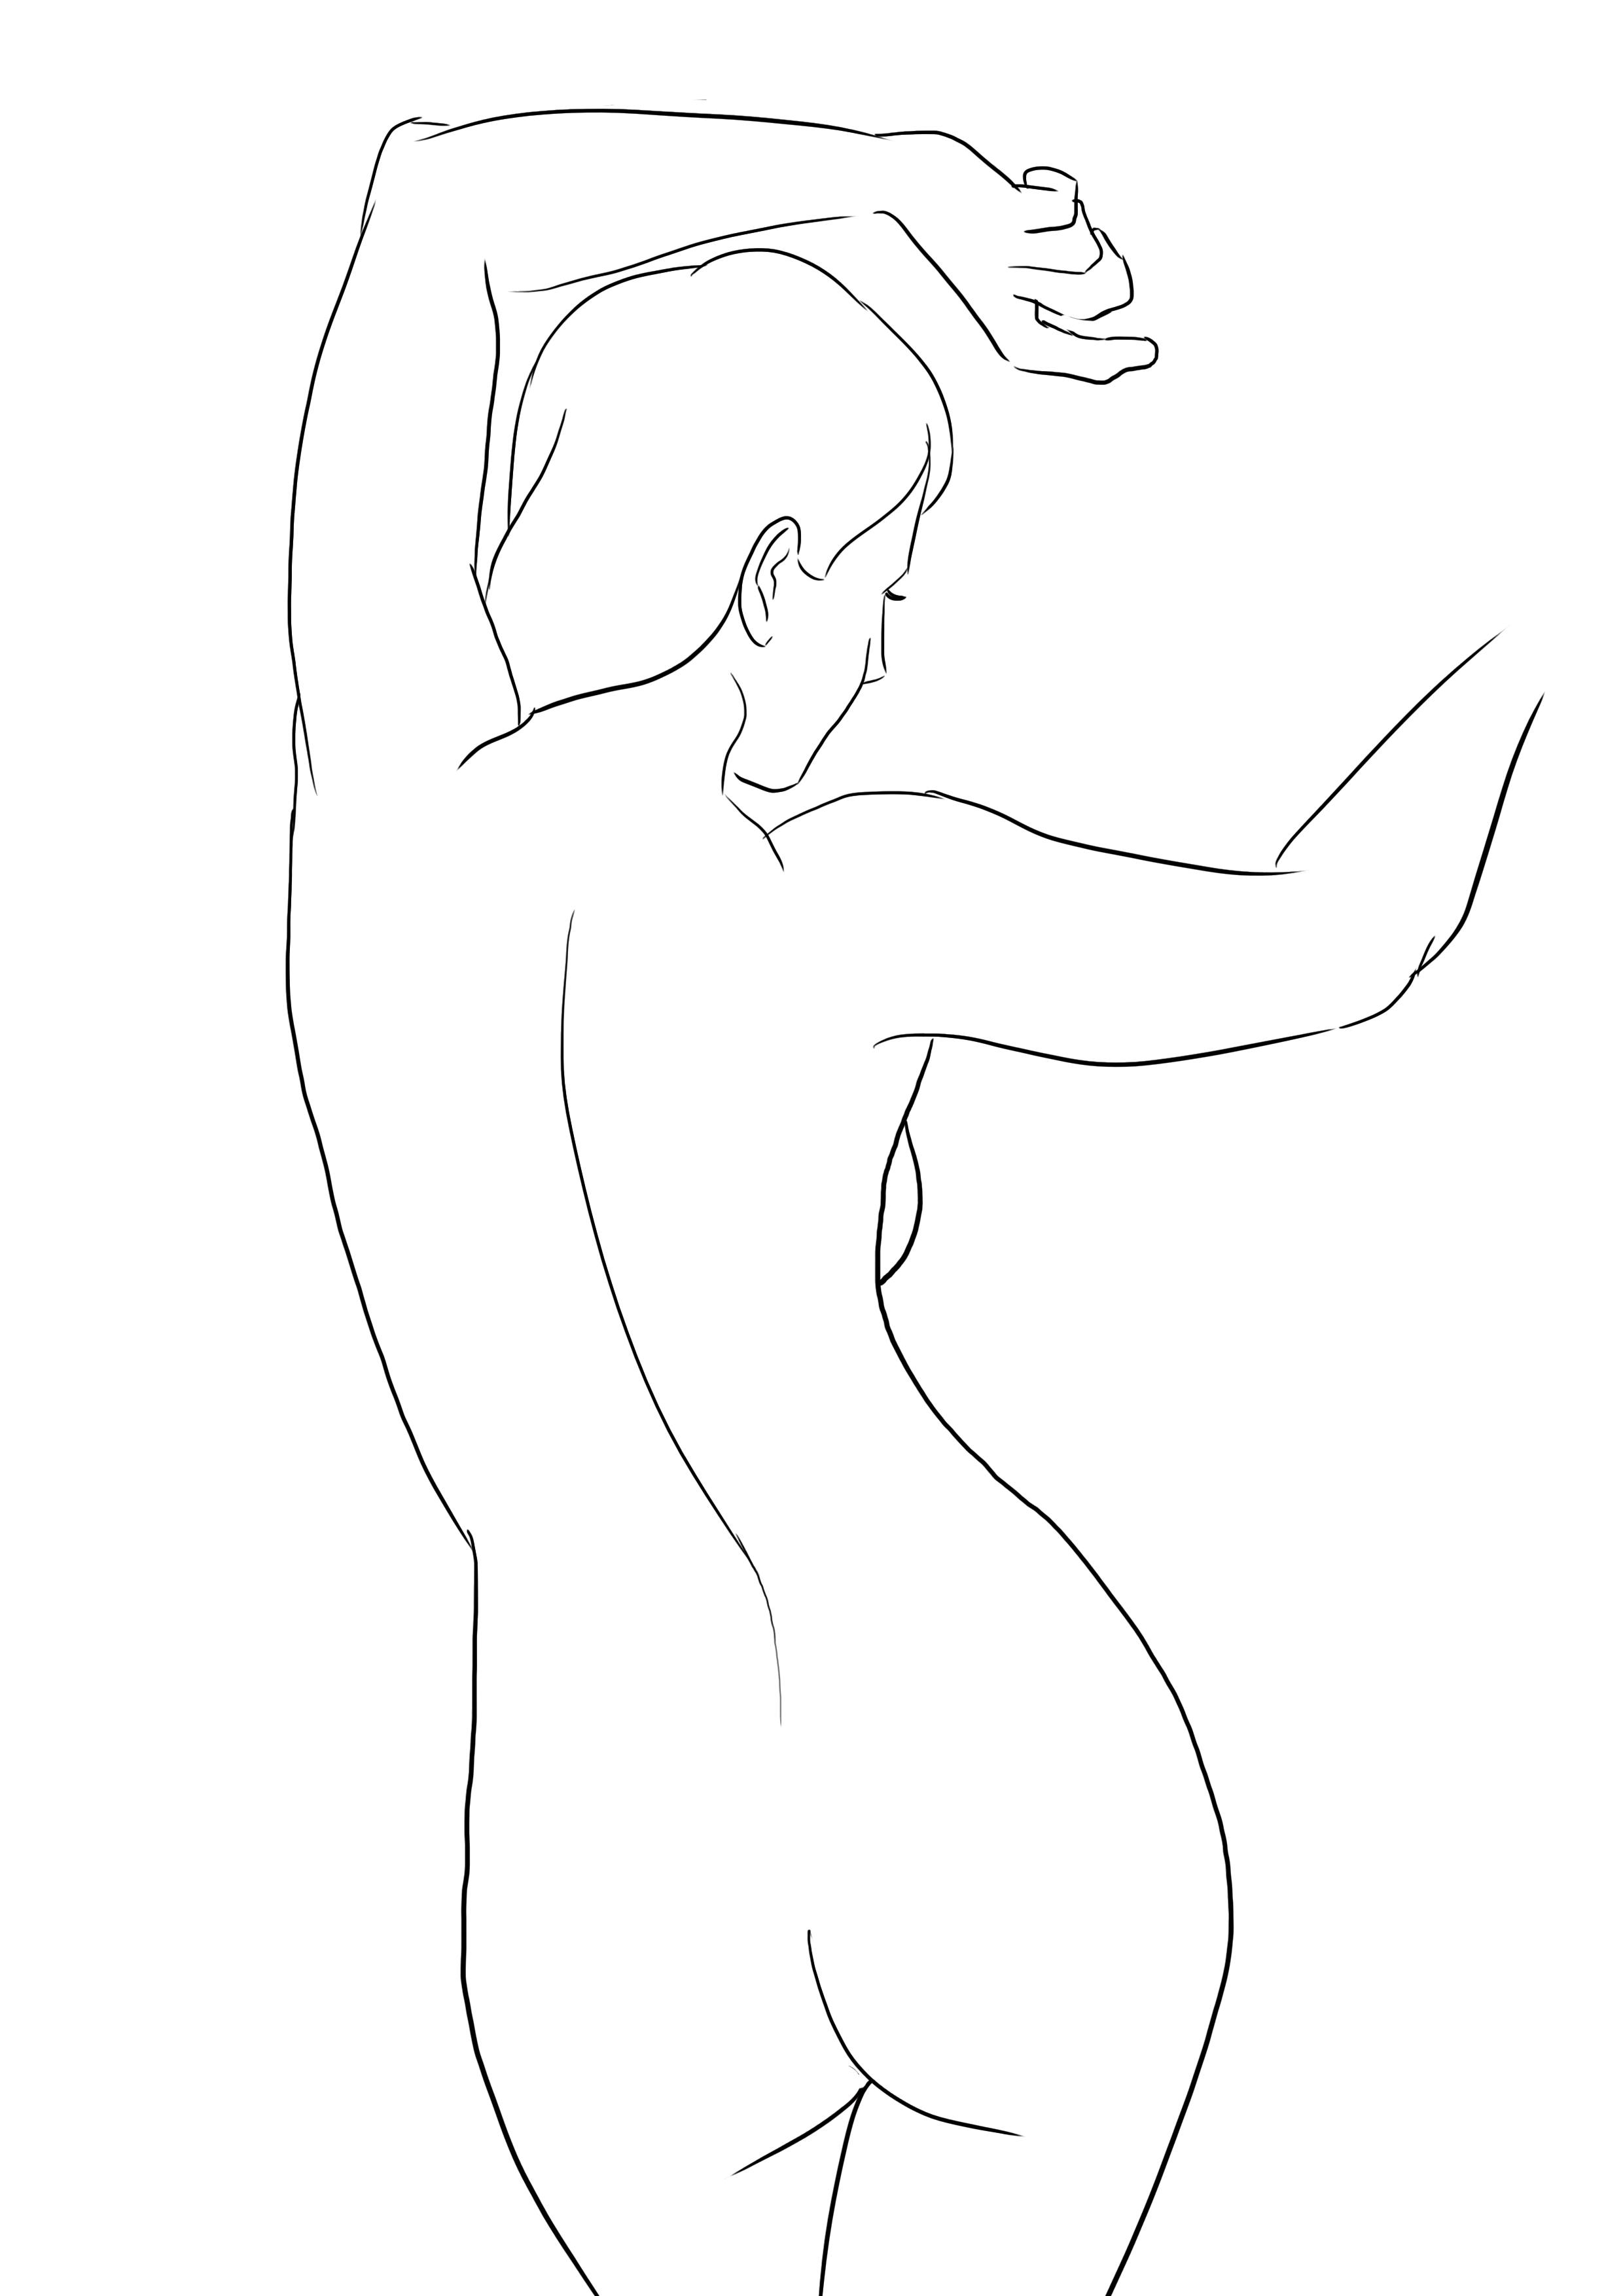
Once I'm happy with the shape and position, I will finish by adding the few missing details such as the chest, thighs, etc.
Before drawing the dips and contours of the skin, I will quickly sketch the skeleton to have solid points of reference.
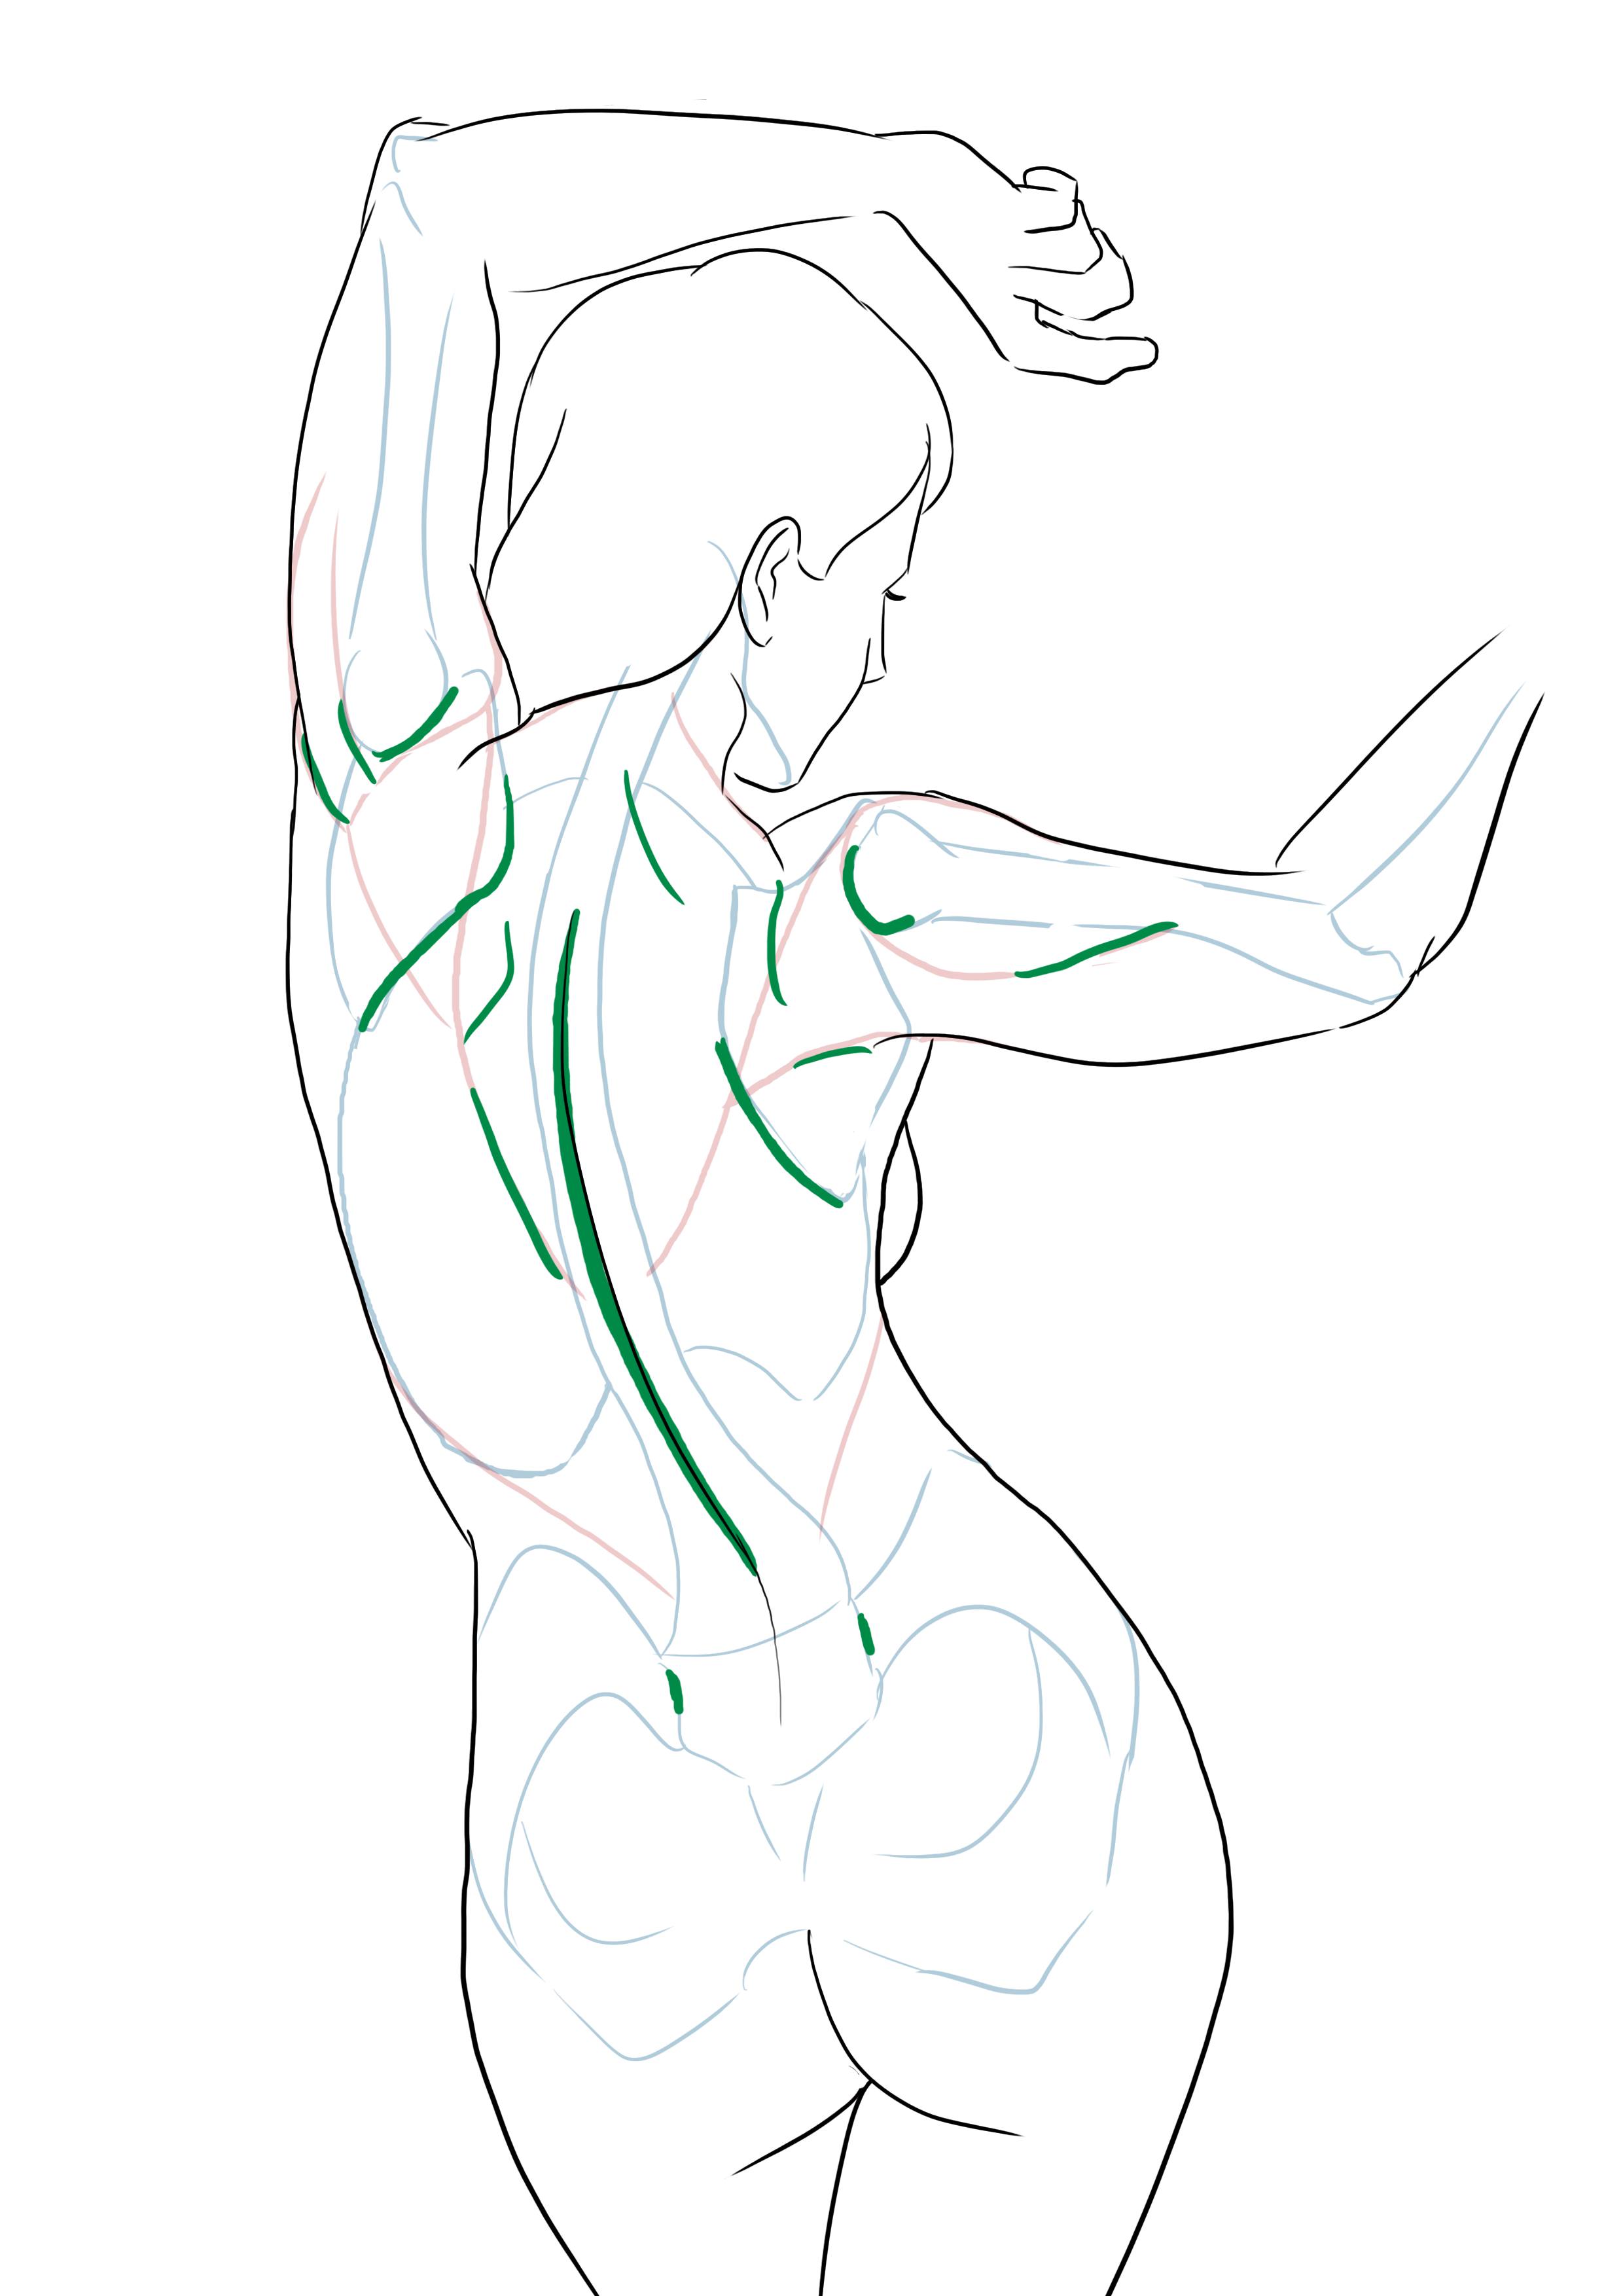
I will mark the places where the bones protrude and do the same with the muscles.
ADDING SHADOWS AND HIGHLIGHTS FROM BEHIND
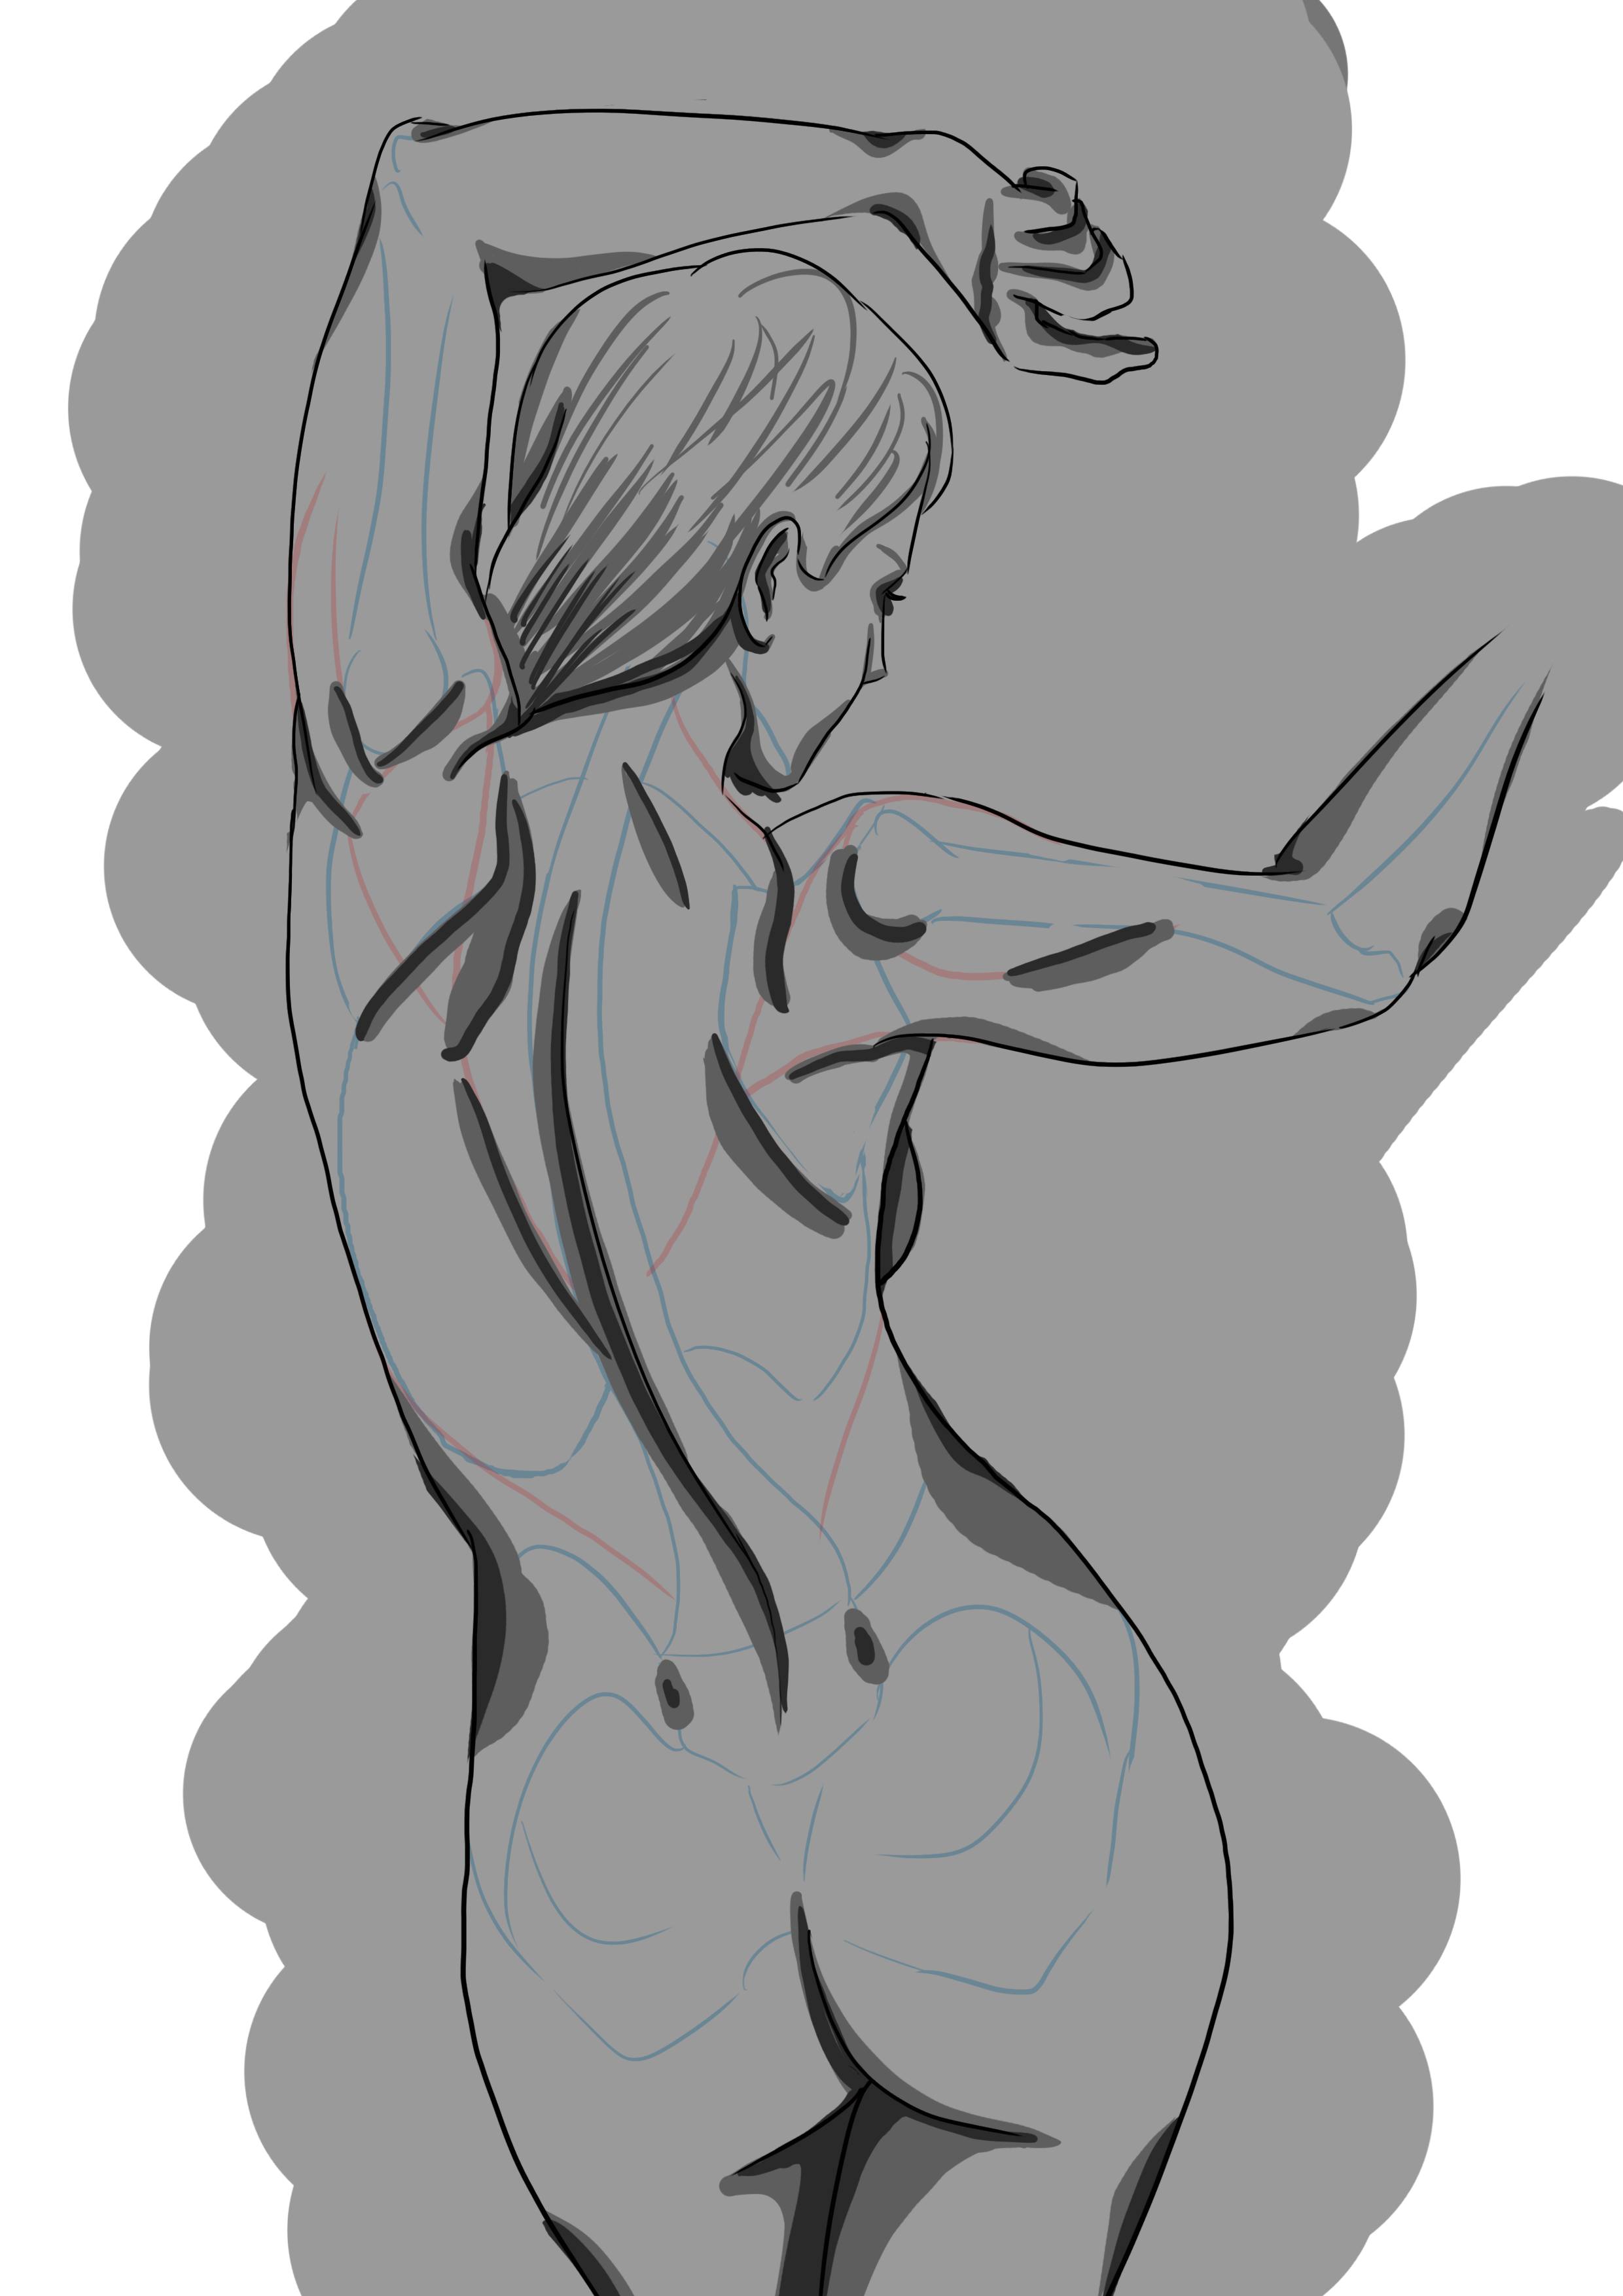
I will put a base color on my drawing: a medium gray. Then, with a slightly darker shade, I will mark the hollows.
With an even darker color, I will go over the hollows to accentuate the illusion of differences in levels on the skin.
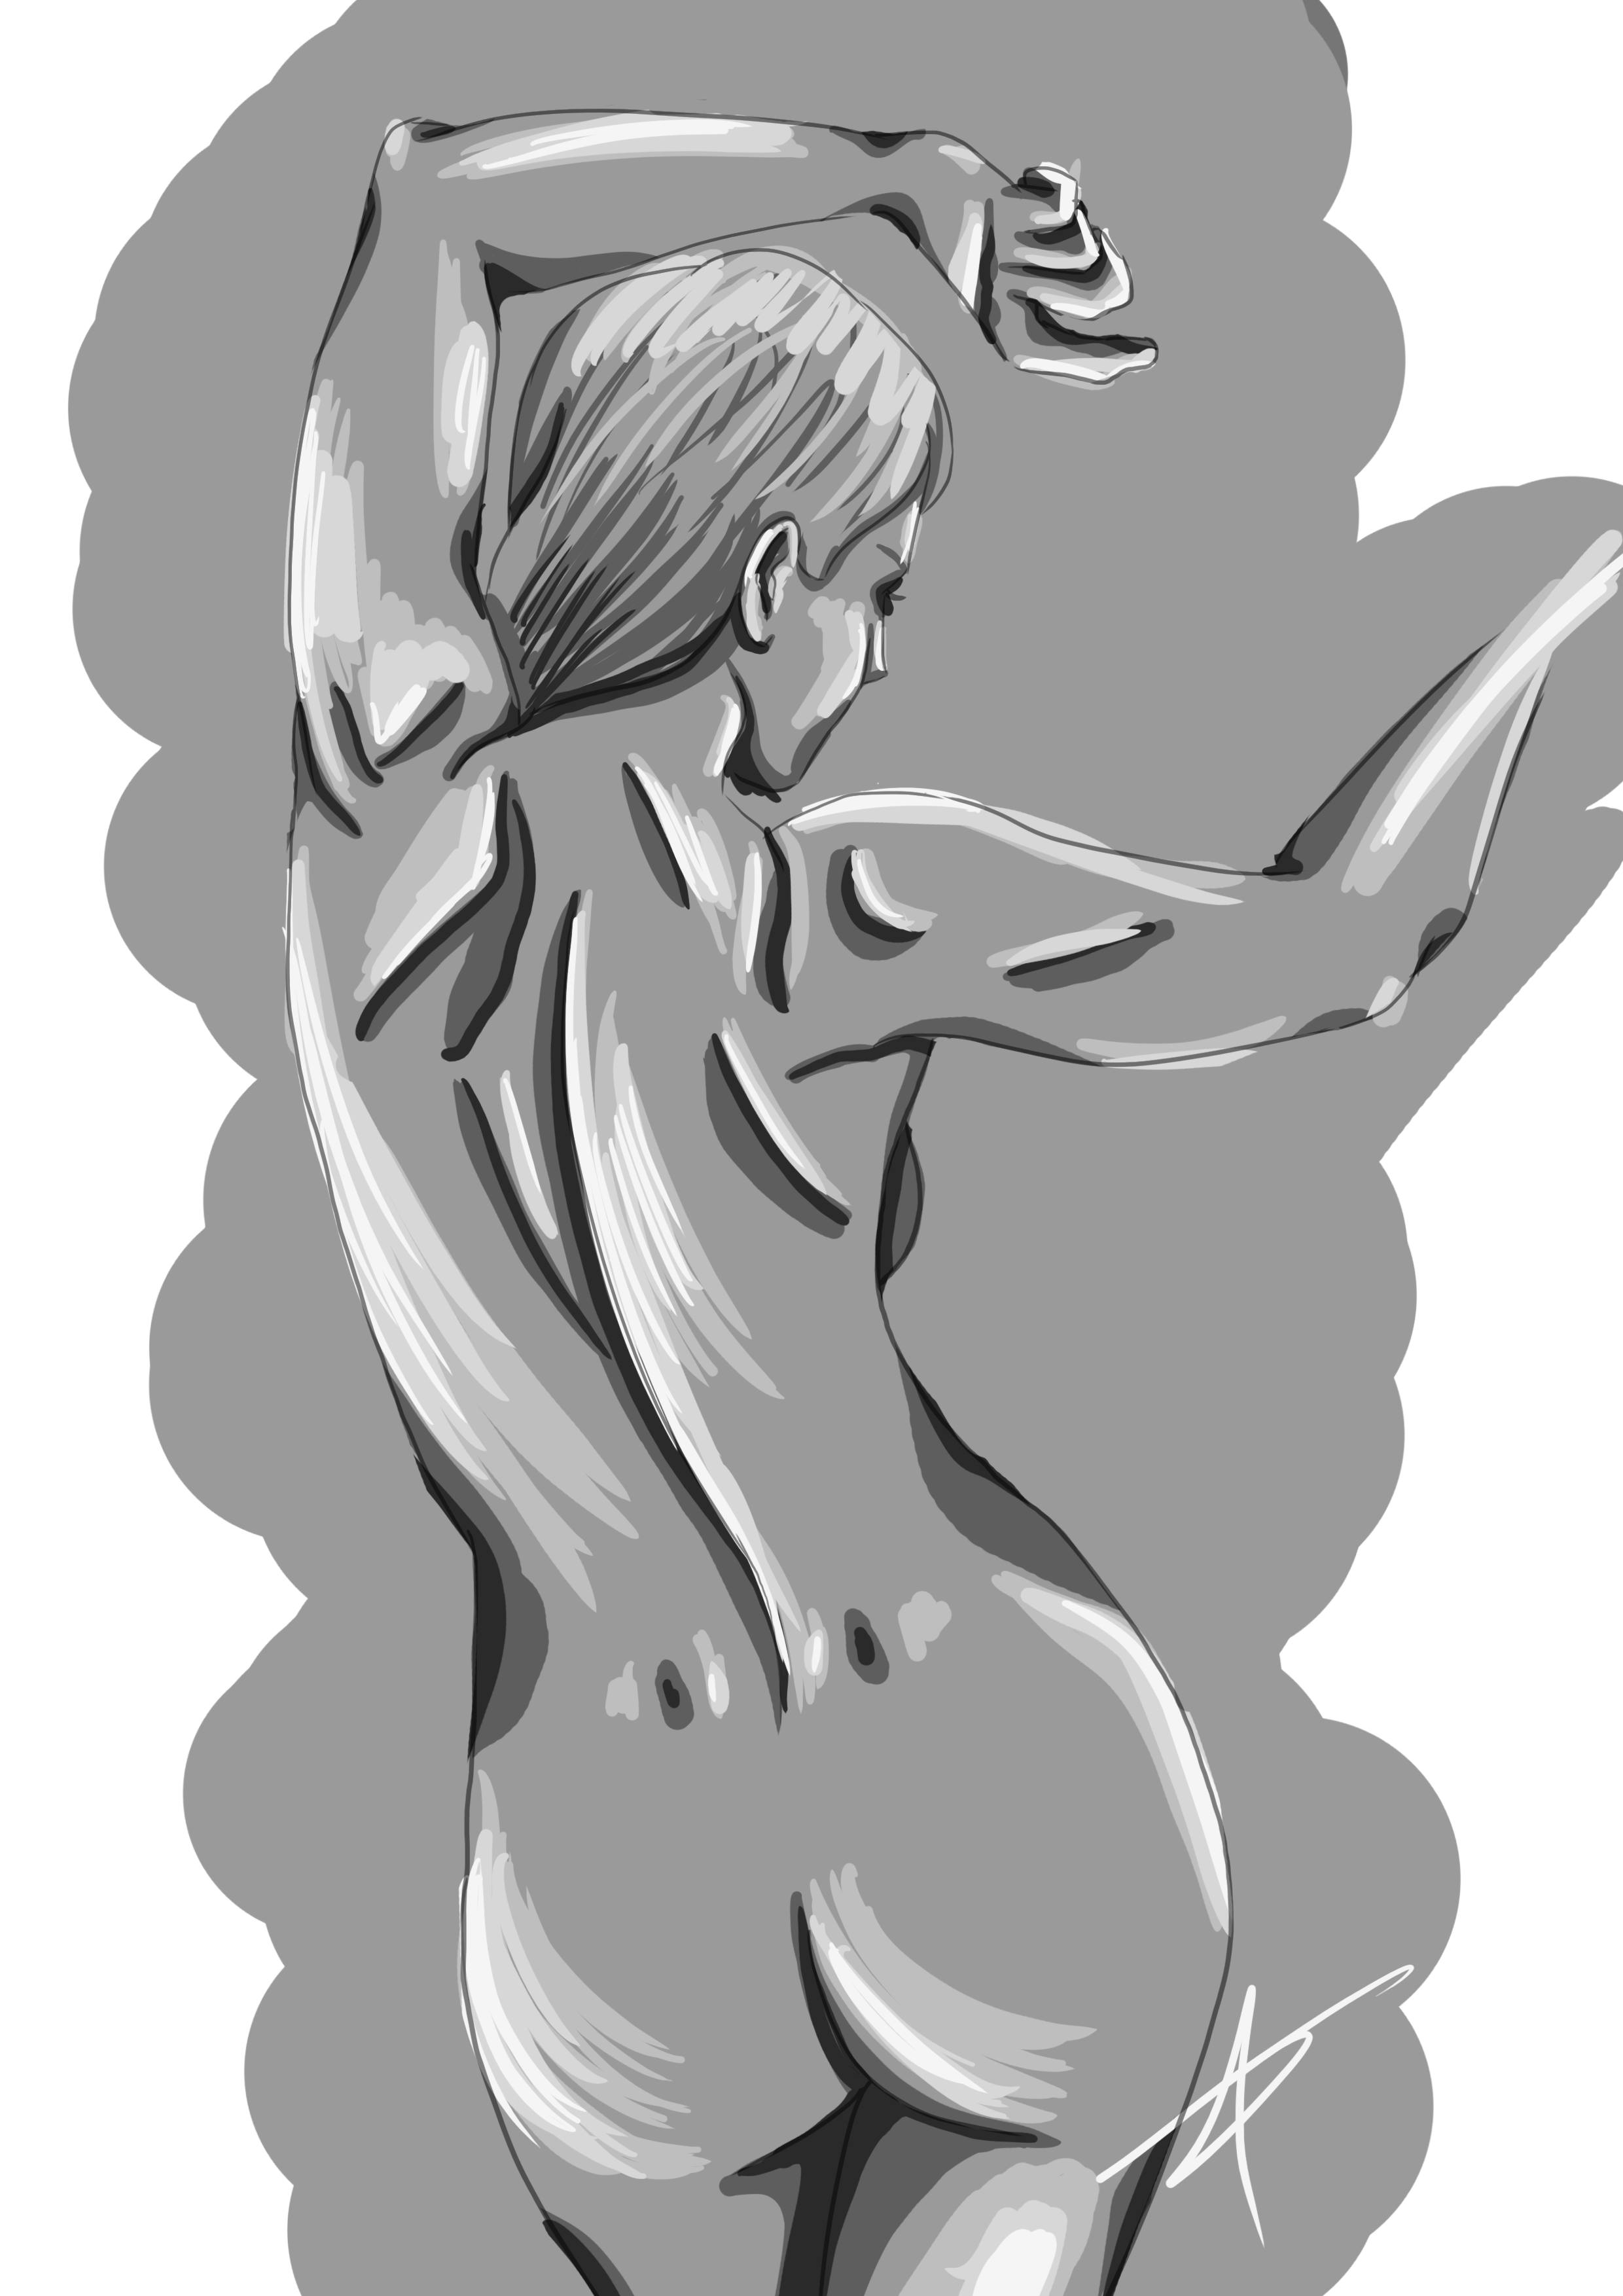

Using a very light gray, I will add highlights to give the body volume.
If you wish, you can either leave the pencil marks to give your drawing a dynamic effect or smudge them to create a softer effect.
Your drawing is now complete!
The best way to learn how to draw someone from behind (or from another angle) is to have a model in front of you. You could use someone who is posing for you, or people in the street. This will help you to progress.
Ask your friends to pose for you, just 5 minutes per pose is more than enough to make a quick sketch to add to your base.

Discussion
11 comments