Drawing Exercises for Beginners

Starting to draw is good. However, we often tend to quickly dive into very complicated things and faced with too much difficulty... we get discouraged.
It's a pity.
So, here is an article that will give you some small exercises to do regularly to help you improve :D
We will discuss three things:
- Improve your pencil stroke
- Improving your sense of observation
- Improve your understanding and your colors
What could also help you progress is to read the article on learning to draw, available on our blog. Another article that could also be helpful is the one for making easy drawings, so for those interested, feel free to take a look! ;)
EXERCISES TO IMPROVE YOUR DRAWING SKILLS
This first series of exercises isn't very appealing, I know, but it pays off :3
THE LINES
It simply involves drawing straight lines without a ruler or any other aid. Just freehand. Try to be as regular as possible. The difficulty increases as the format enlarges and thus the line becomes longer.
Why do this exercise?
Simply to learn how to make straight lines freehand, which is very practical for objects, backgrounds, and also because you will master your movements better. You will quickly notice that drawing a small straight line and a long straight line is not done in the same way. It also allows you to identify from which angle you are better at drawing your straight lines :3
THE CIRCLES
Same principle as before with circles, ellipses. Vary the sizes, the angles, look for the most pleasant method to draw regular circles, ellipses, beautiful curves. This exercise in particular will be particularly useful as soon as you need to draw objects. Because ellipses, if you don't know how to make them... well, you don't know how to make them. There are no tricks to solve the problem. As much as for circles, we have the compass, as much as ellipses, it's much more complicated.
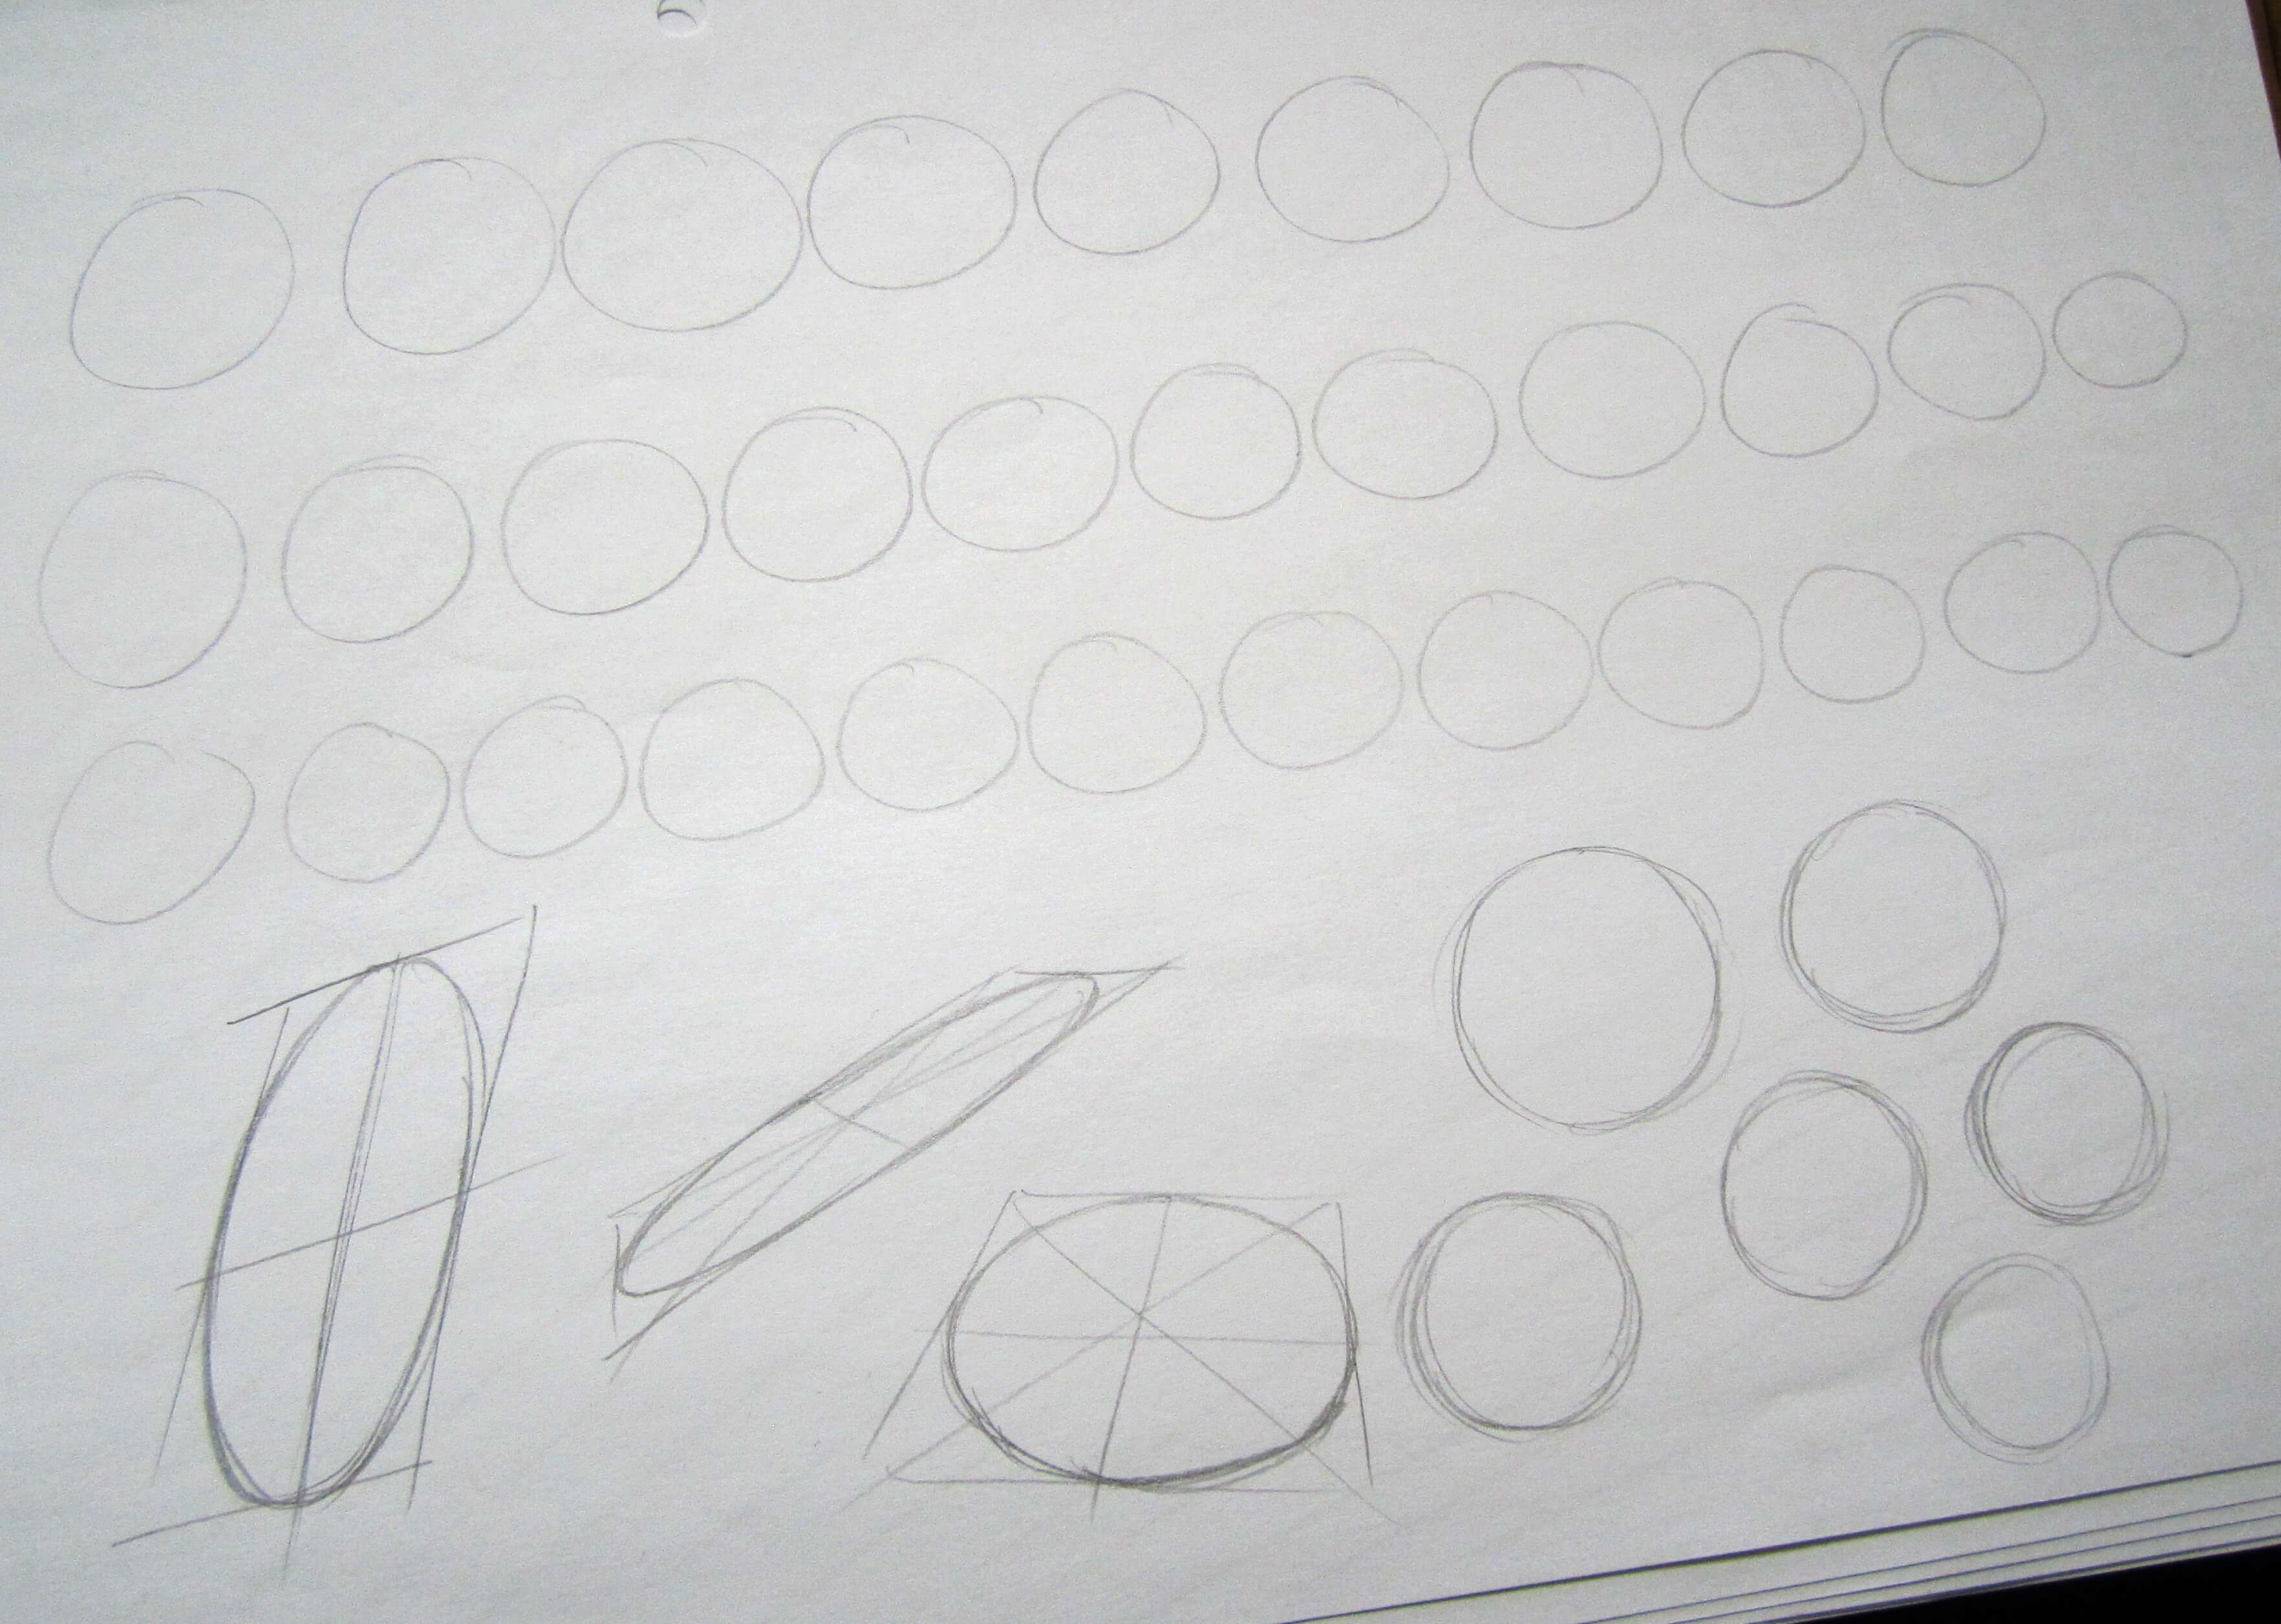
In this case, my circles are very irregular if I try to draw them in one go. But they are much more regular when I draw them "piece by piece" (bottom right). The same goes for my ellipses ^^
So, prefer to create this kind of shape several times. The result may seem less "clean", but this will allow you to have greater precision when doing your final version.
THE HATCHINGS
Here too, the goal is to find the method you prefer and make the most regular hatching possible. Because to have beautiful "solid fills" or beautiful "gradients" with hatching, you need to be very consistent.
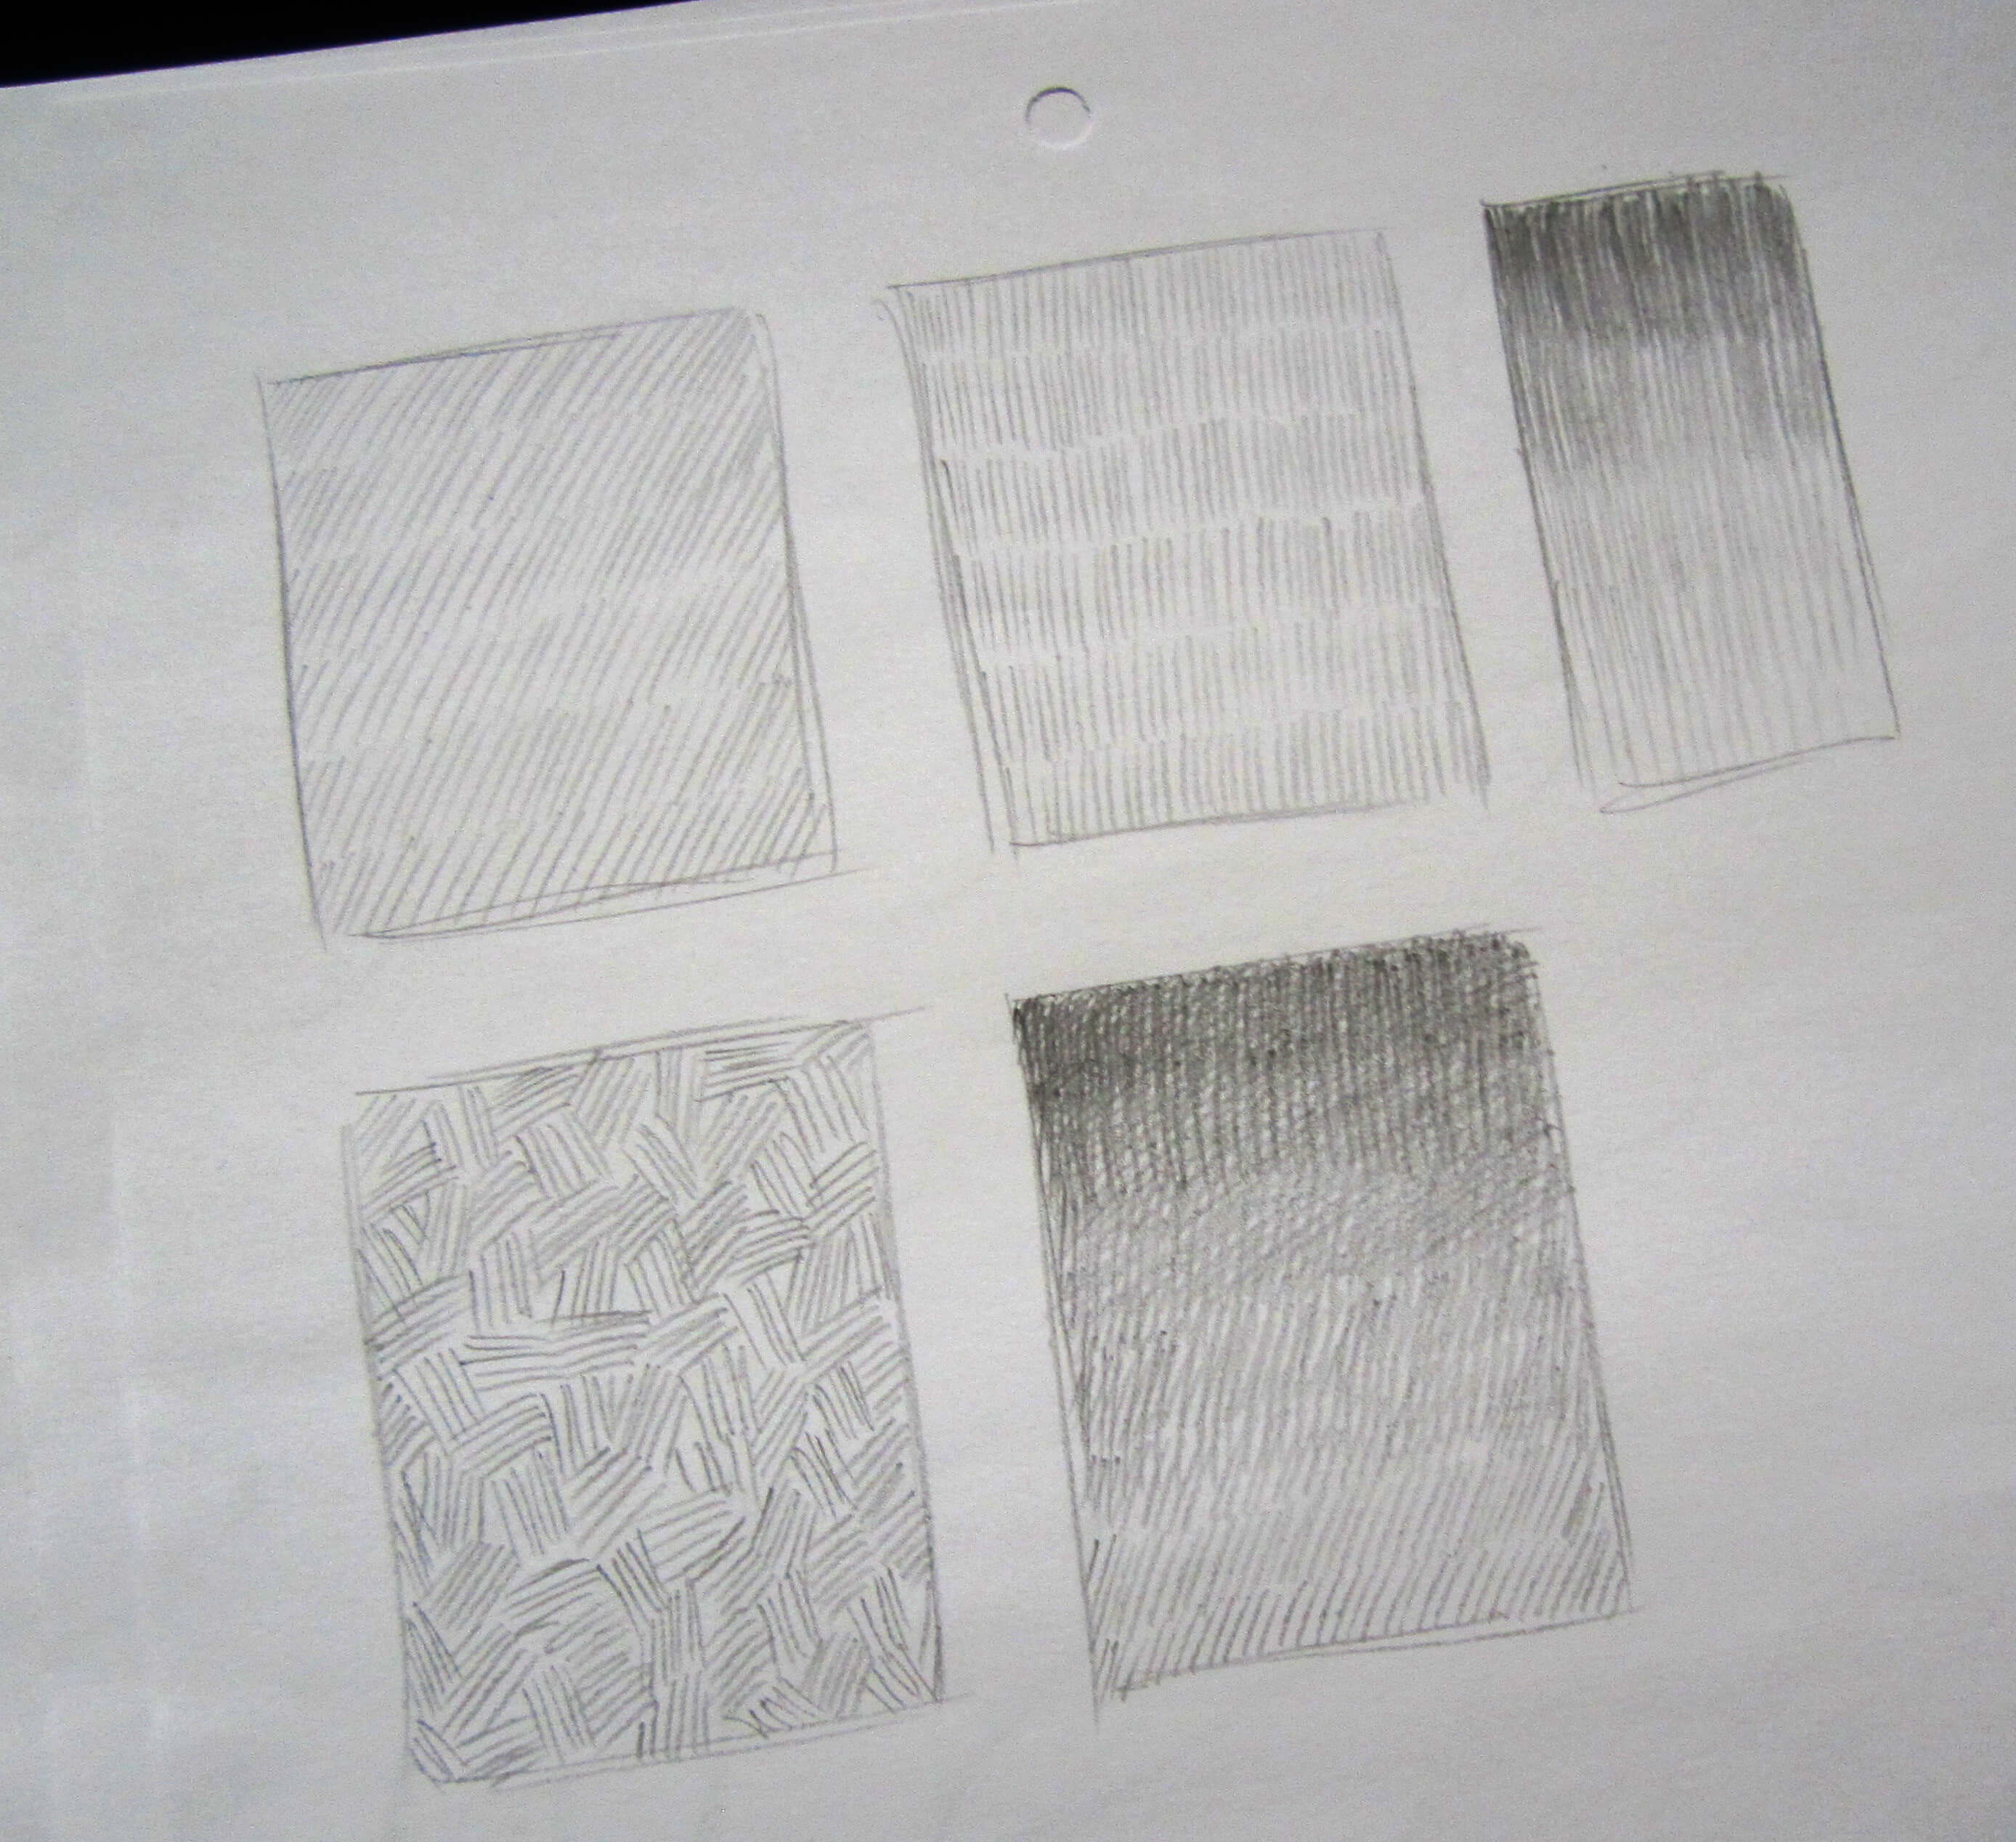
Well, that was for the purely practical side. It's quite daunting, but when you start drawing, it's something quite useful to do, even if it's not very thrilling. Little by little you will get better at it and it will help you go faster and be more efficient with your "real" drawings.
This also allows you, by varying the direction of your hatching and their intensity, to explore different textures which can be useful for your future illustrations.
EXERCISES TO IMPROVE ONE'S SENSE OF OBSERVATION
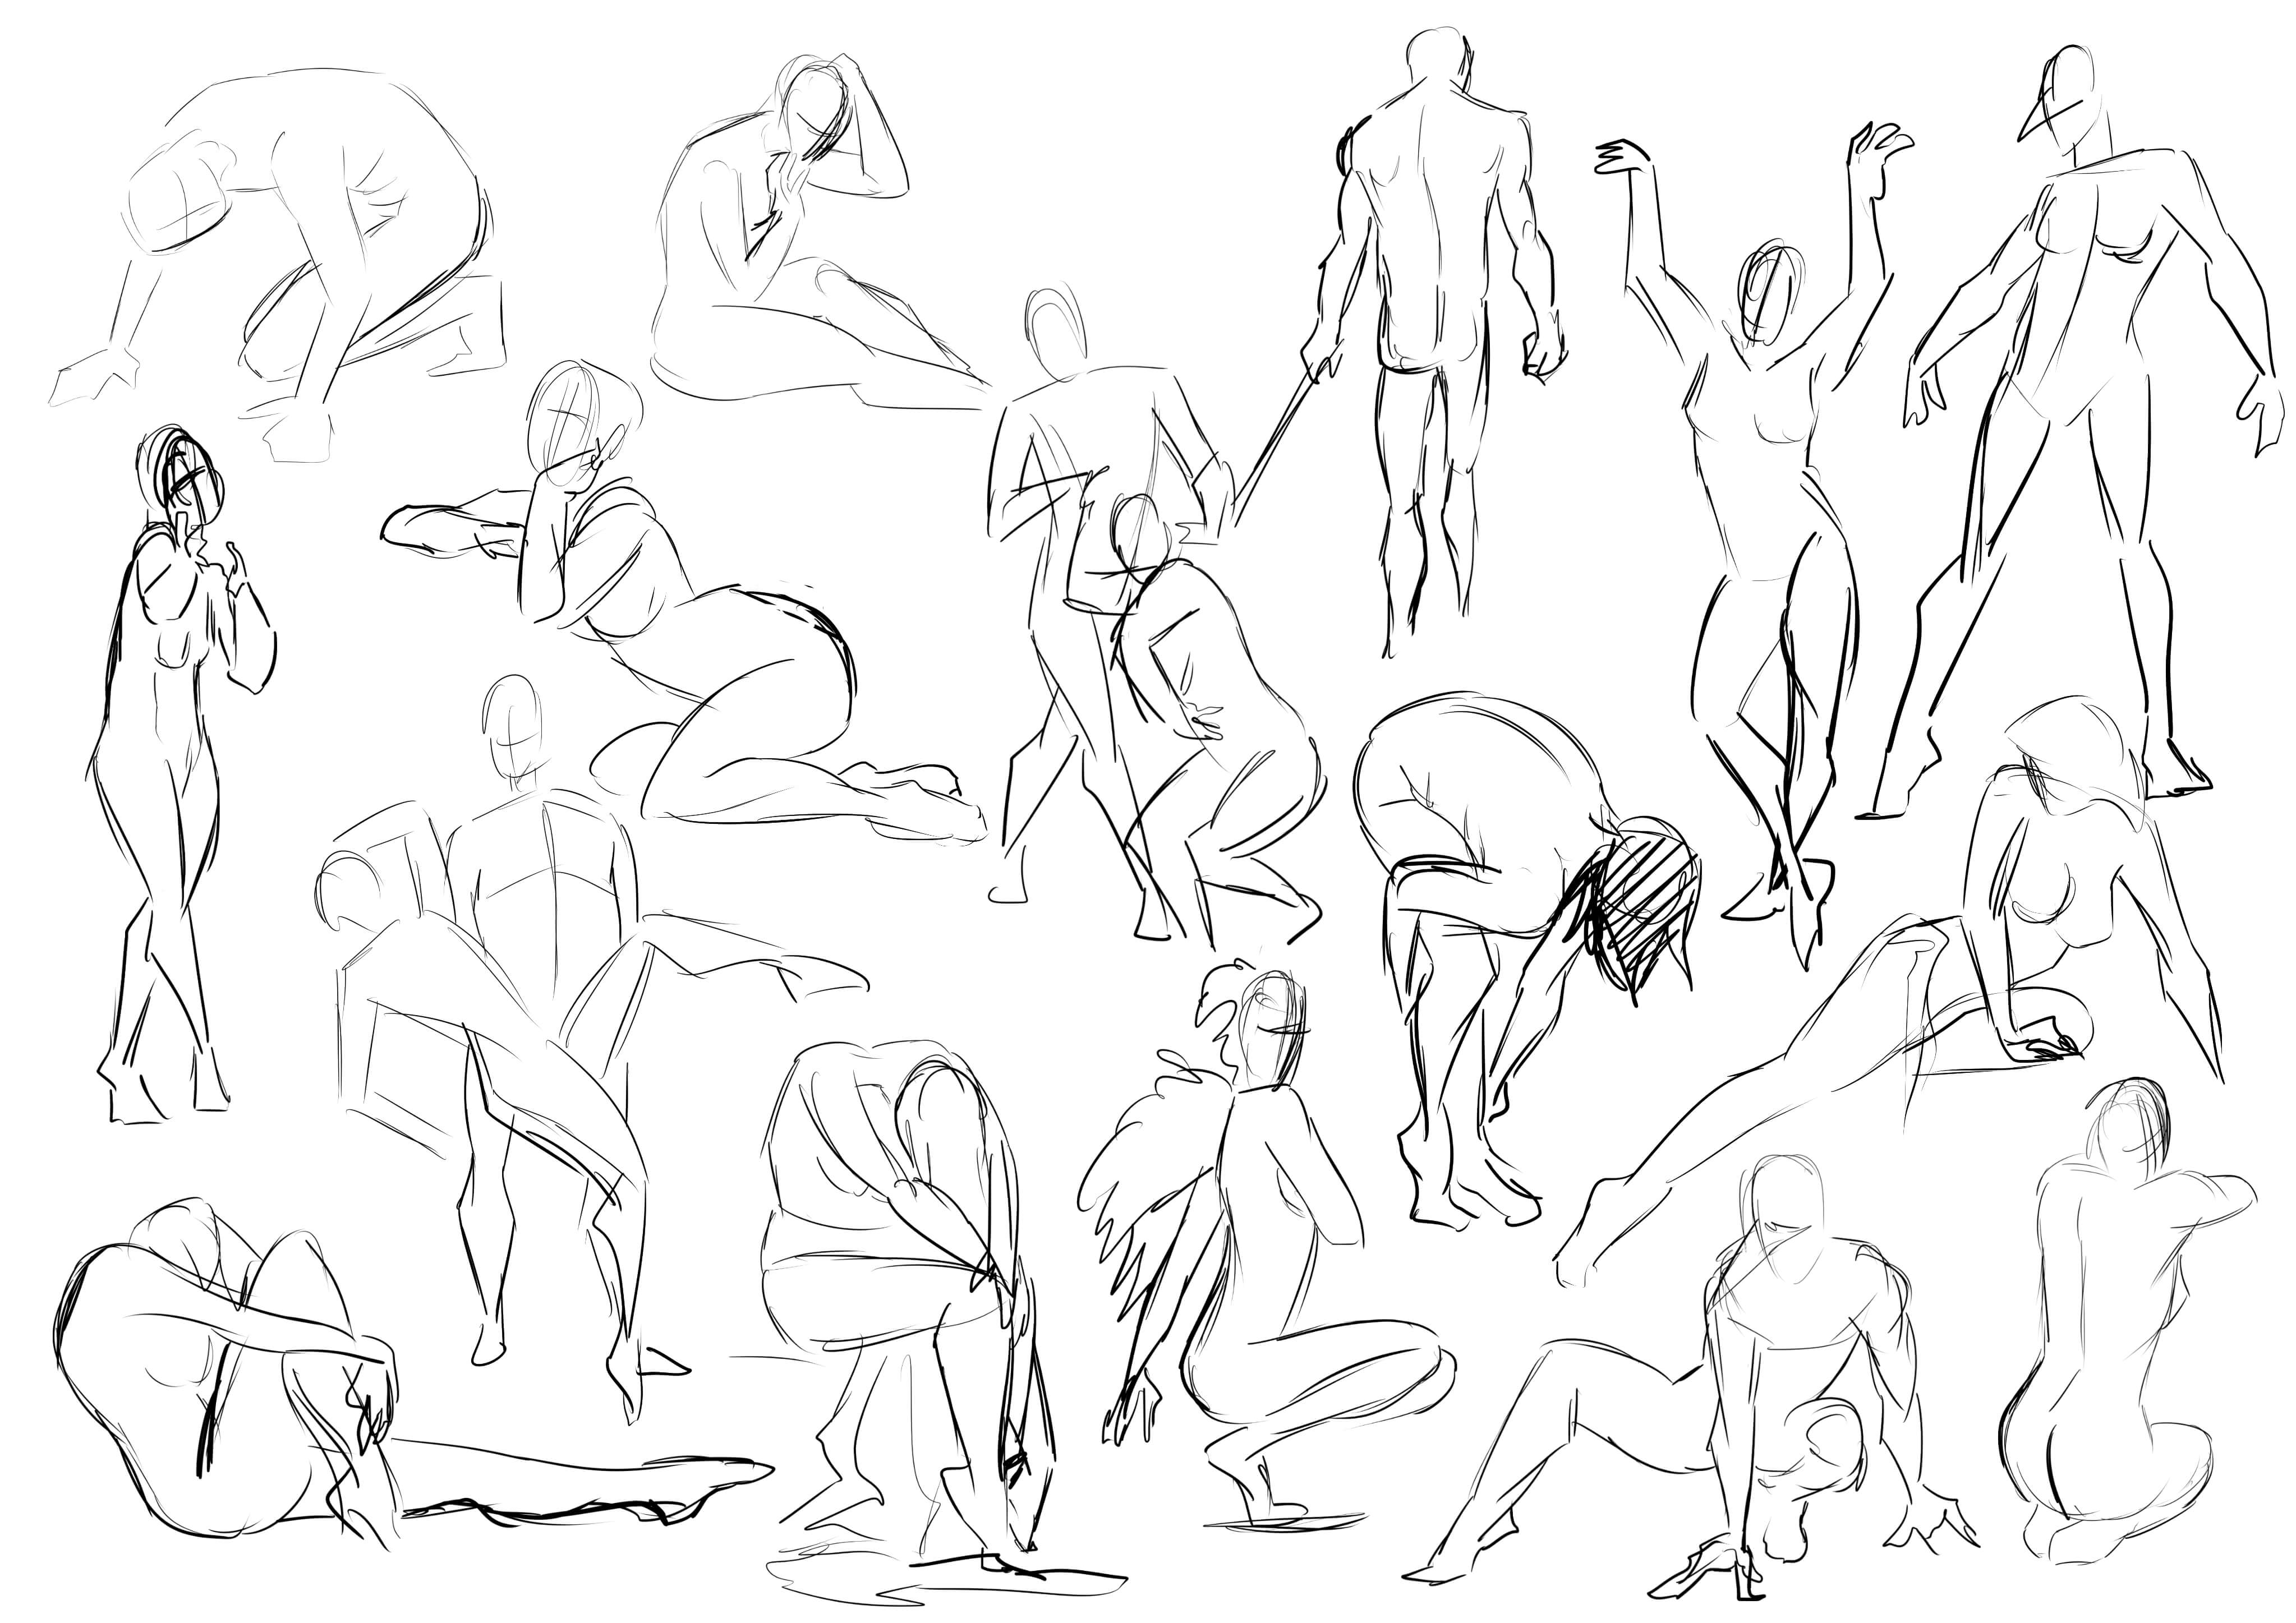
For this, the king of exercises is of course the observational sketch. I remind everyone that a sketch is not supposed to be finished, nor neat. Seeing construction lines, having small errors, shaky lines, etc. that's the principle. Don't try to make something perfect; it's not an illustration.
Nevertheless, there are various ways to proceed.
MAKE SKETCHES UNDER CONSTRAINT
We can already start with a predetermined duration.
DRAWING IN A LIMITED TIME
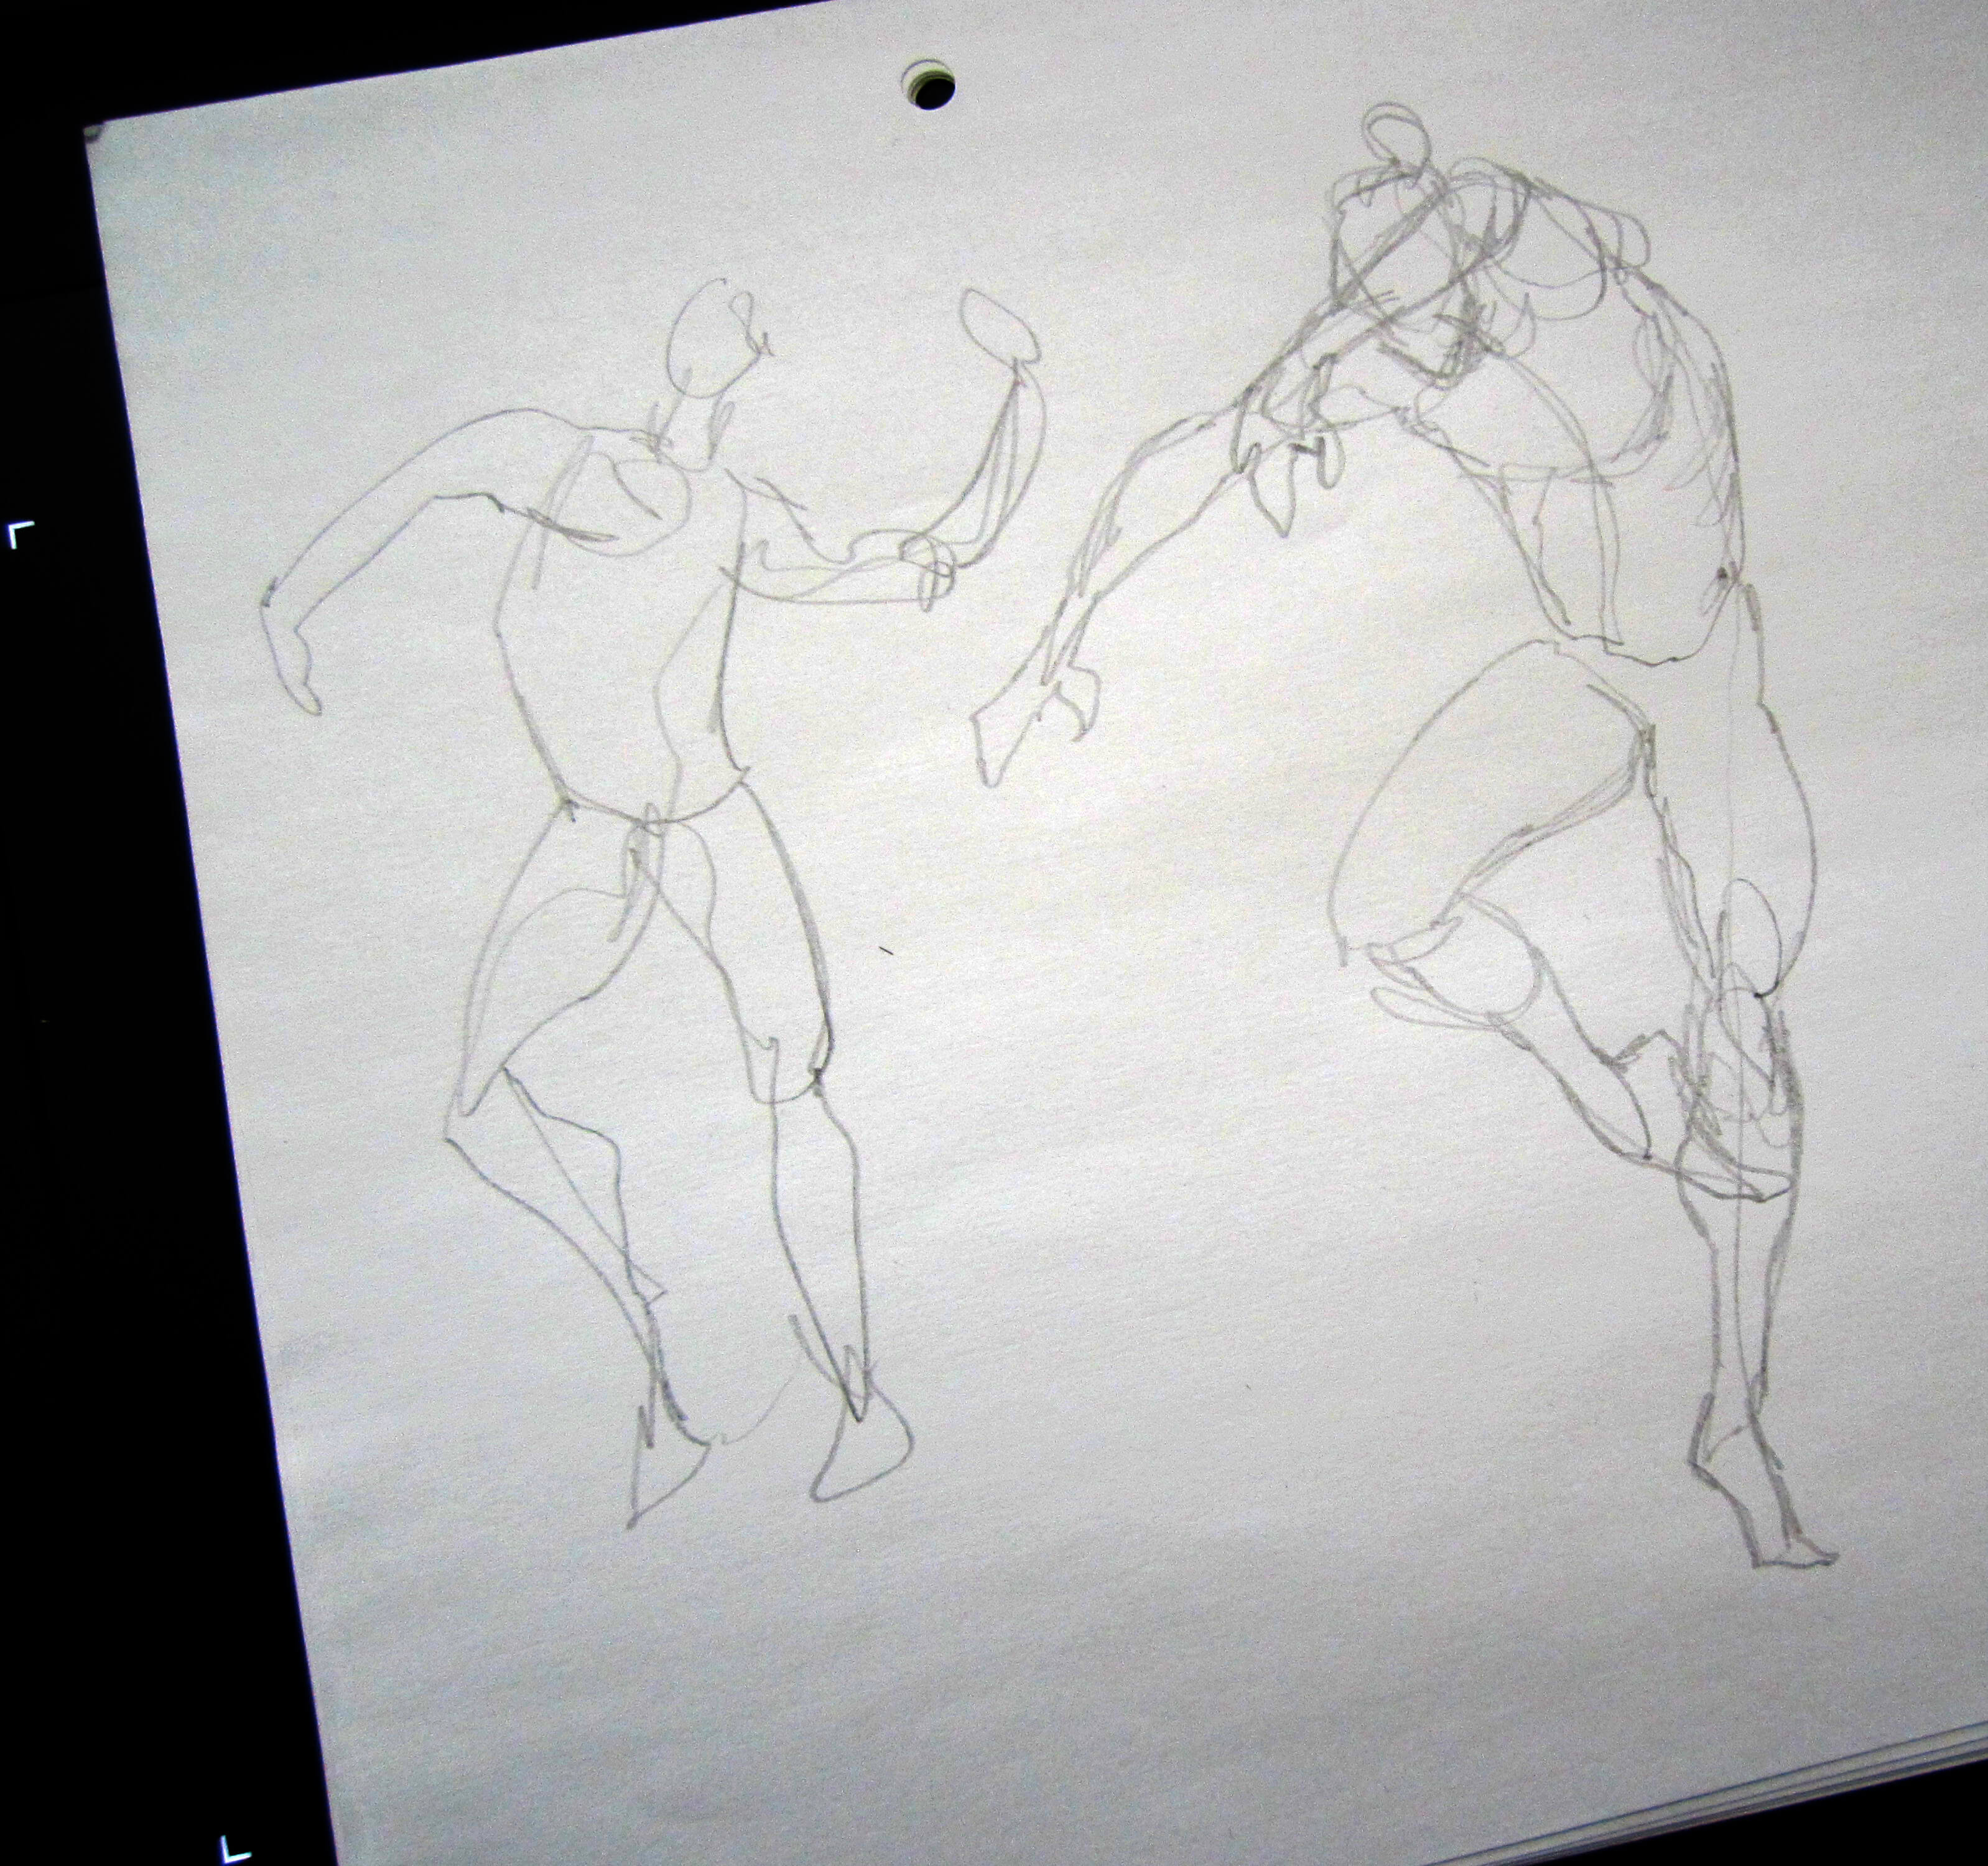
Ultra quick sketch (between 10 and 30 seconds)
It's literally a quick sketch. 10 seconds go by very very quickly. No time to linger on details. This kind of sketch is very useful for movement studies (when someone is moving). If you tend to create stiff characters, this should greatly help you :D
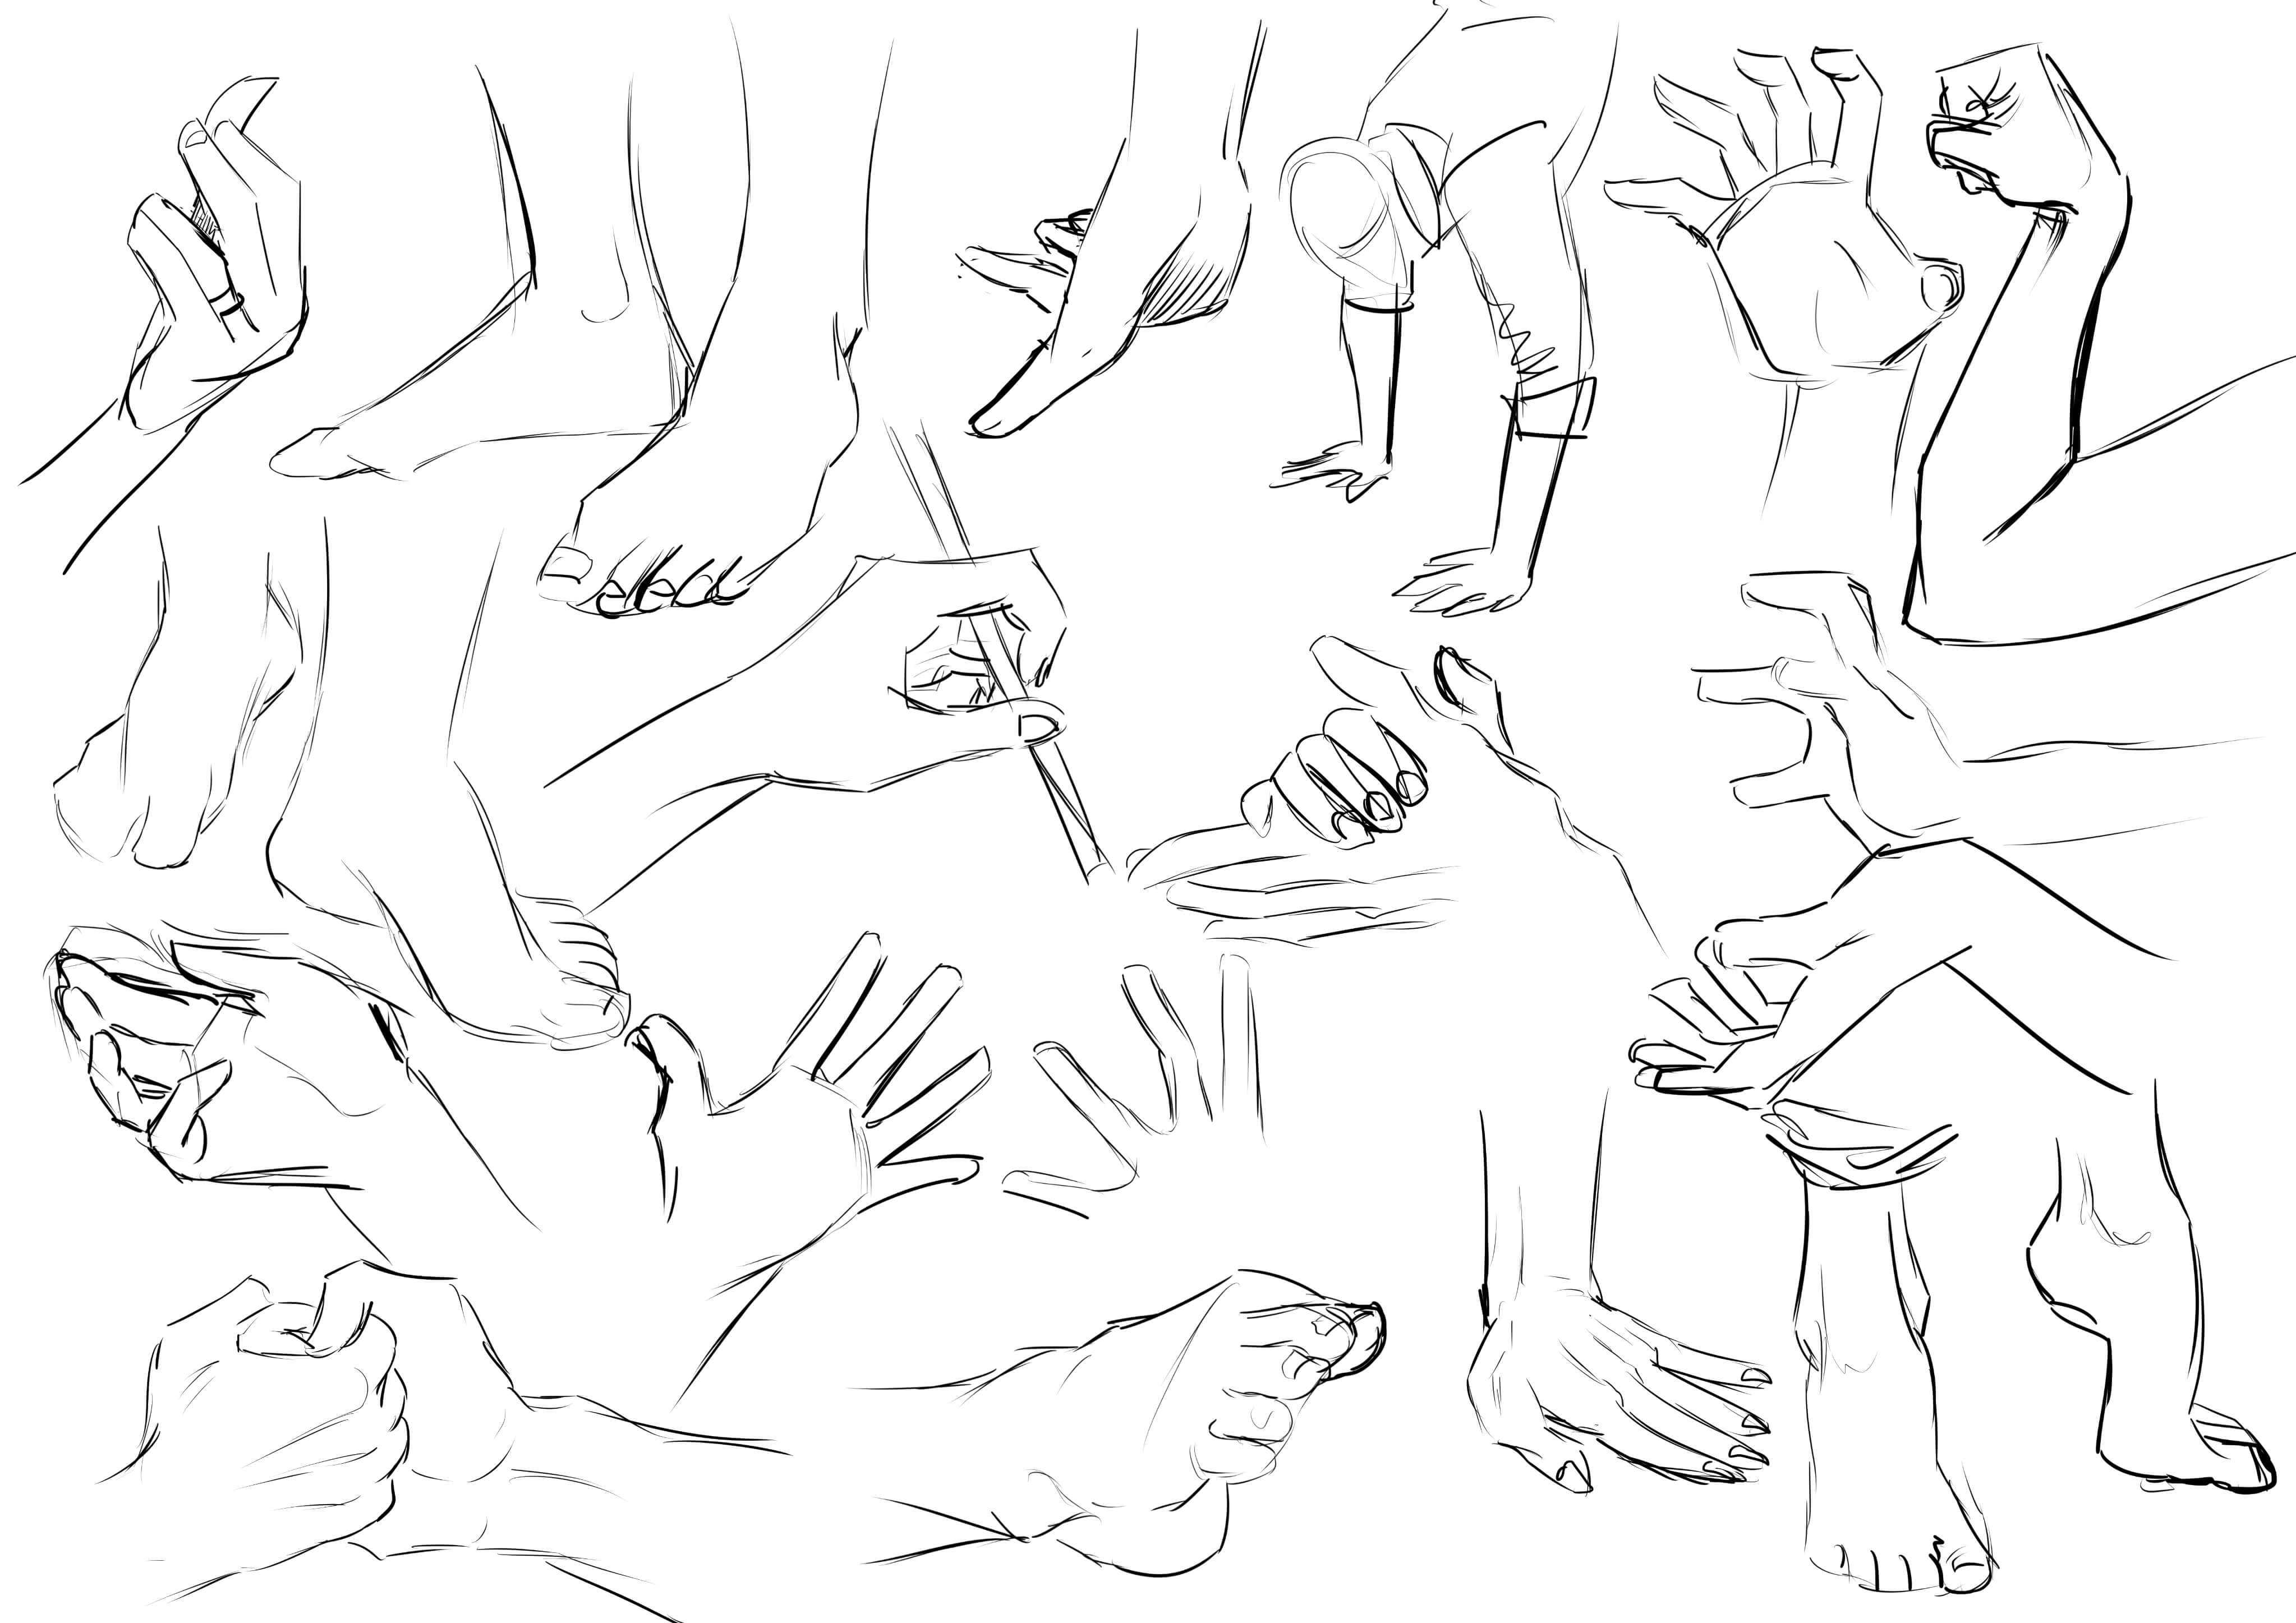
Quick sketch (between 45 seconds and 3 minutes)
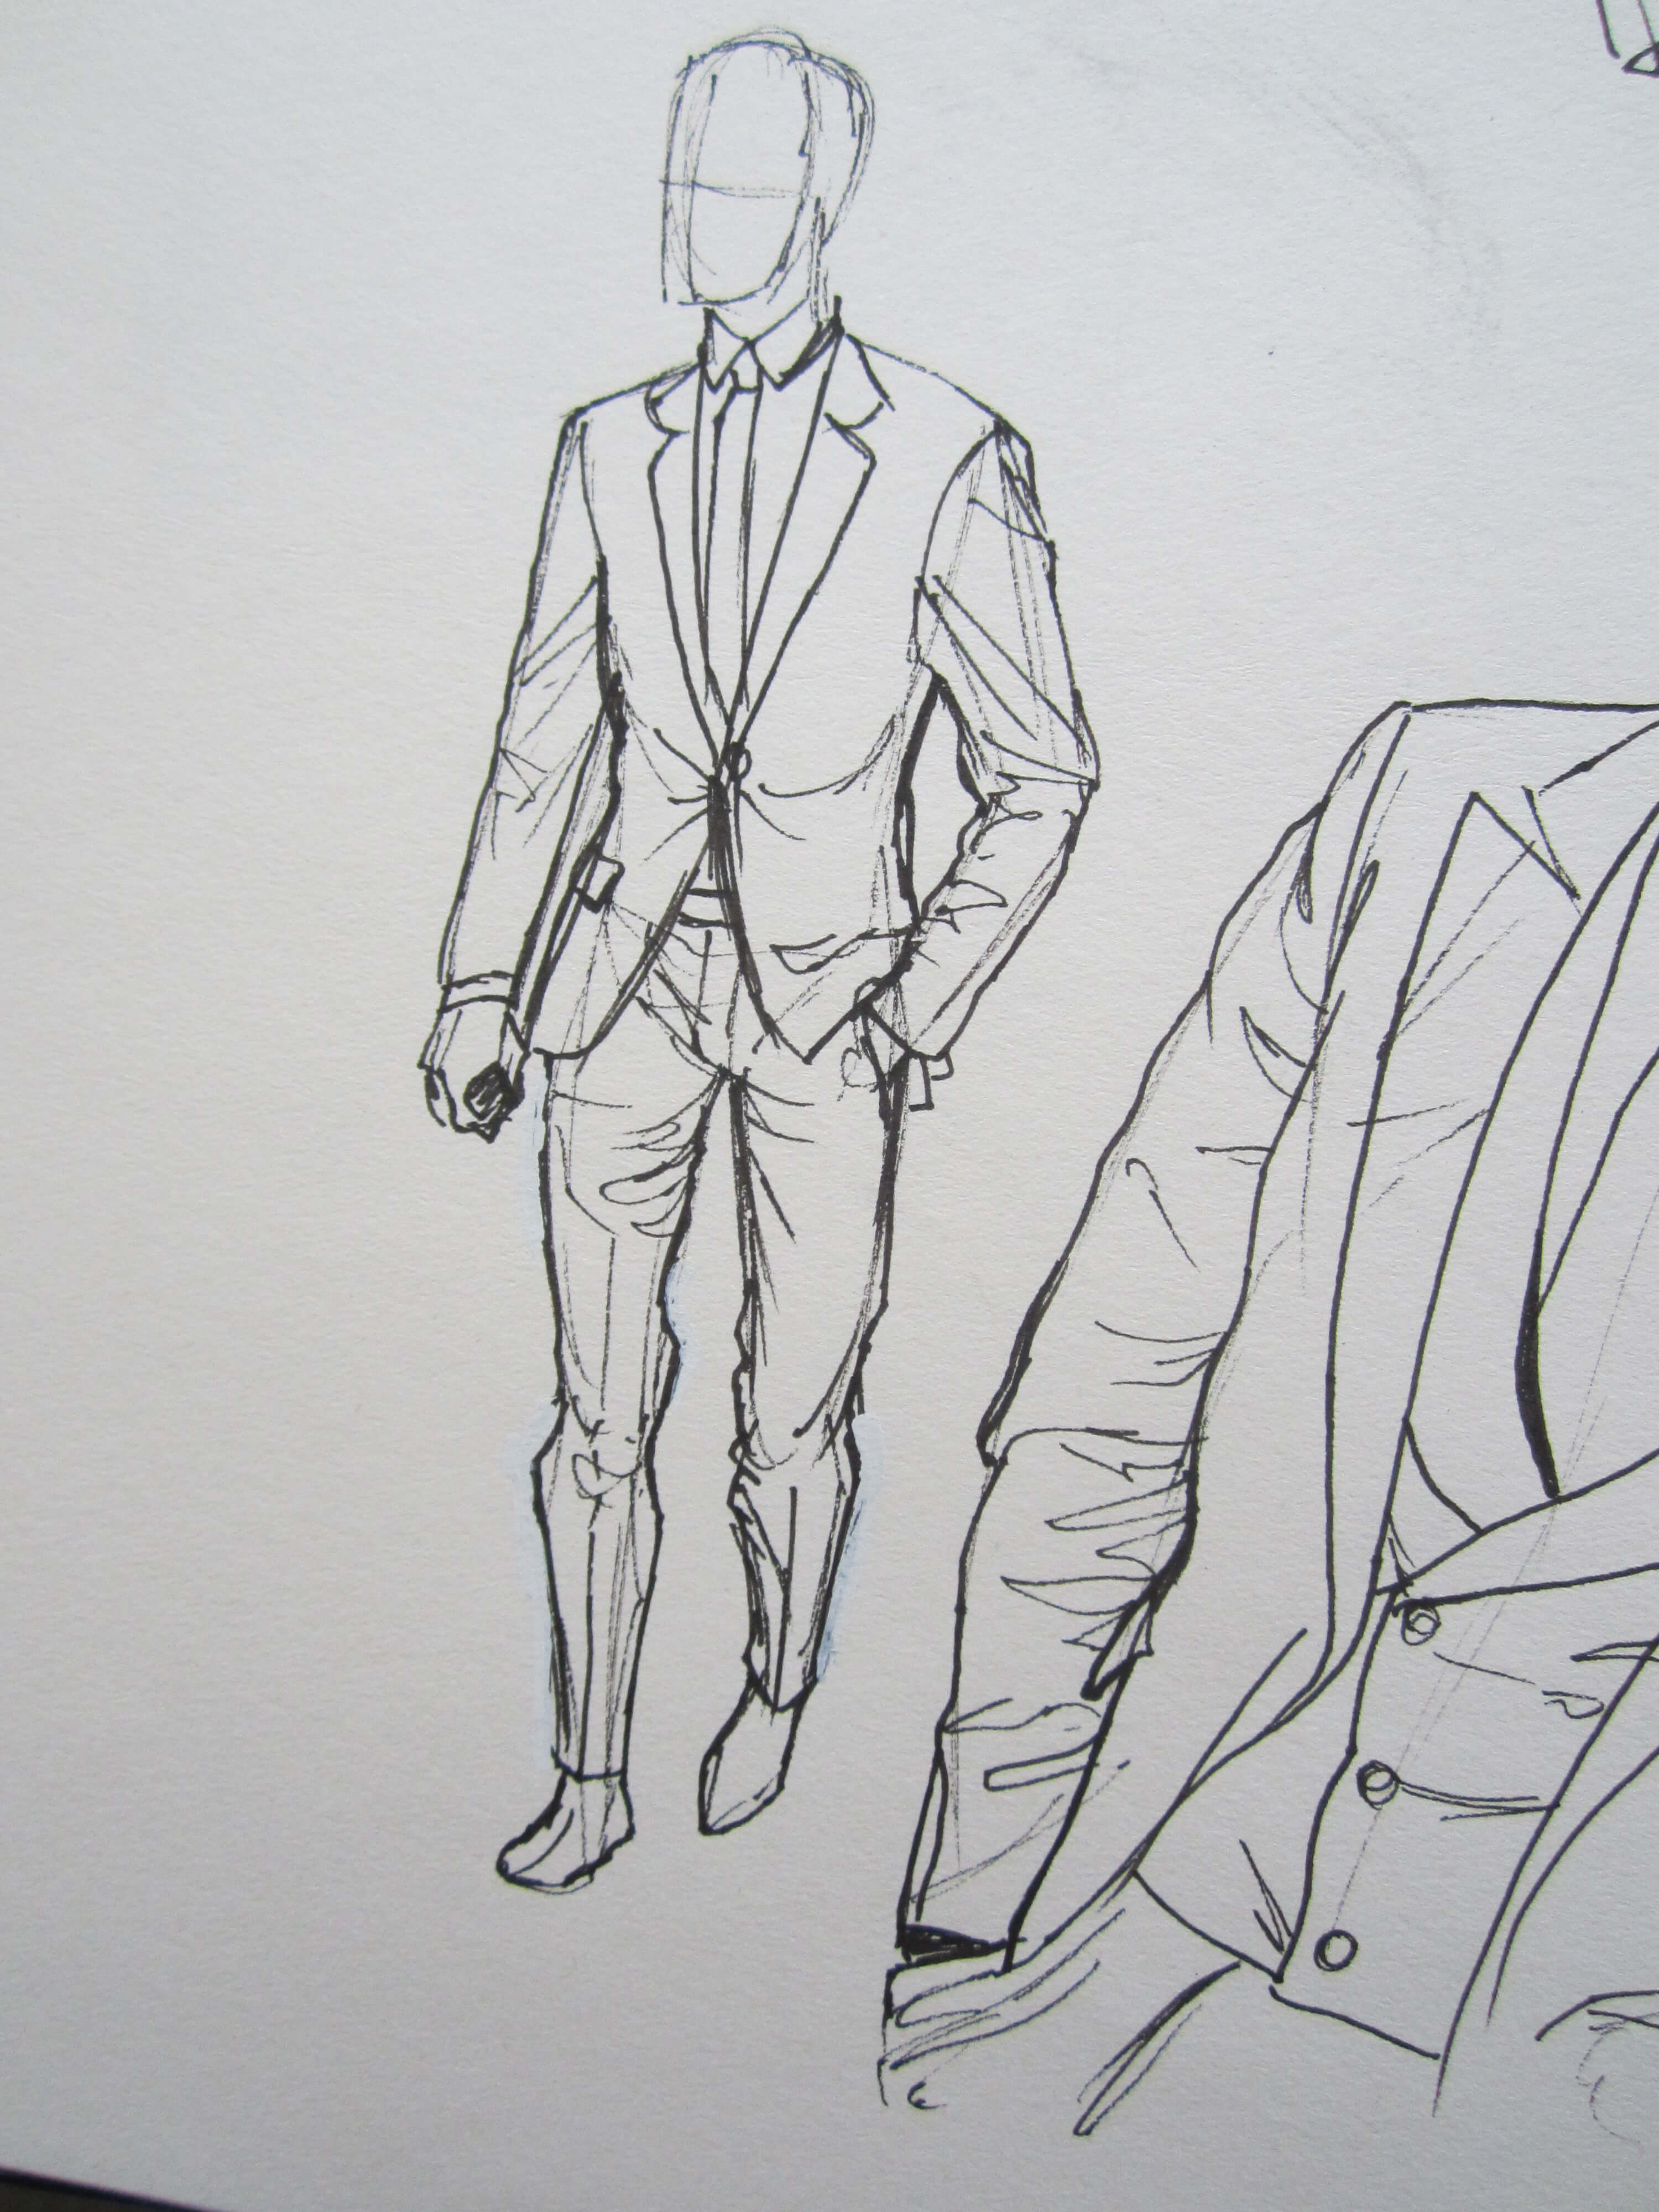
This time, the timing is more pleasant. But it still remains tight, no time to dawdle! This time, we can linger a bit more on the details, but not that much. We still stay on something quite lively. If you're doing hands and feet, for example, the time it takes to draw the fingers with their joints, assuming you don't make a mistake: there you are at the 3-minute mark. For me, this is the most useful type of sketch that really forces you to synthesize the structure of things while maintaining a sufficient level of detail so that it can be directly reused afterwards in an illustration.
Example here with one-minute sketch series.
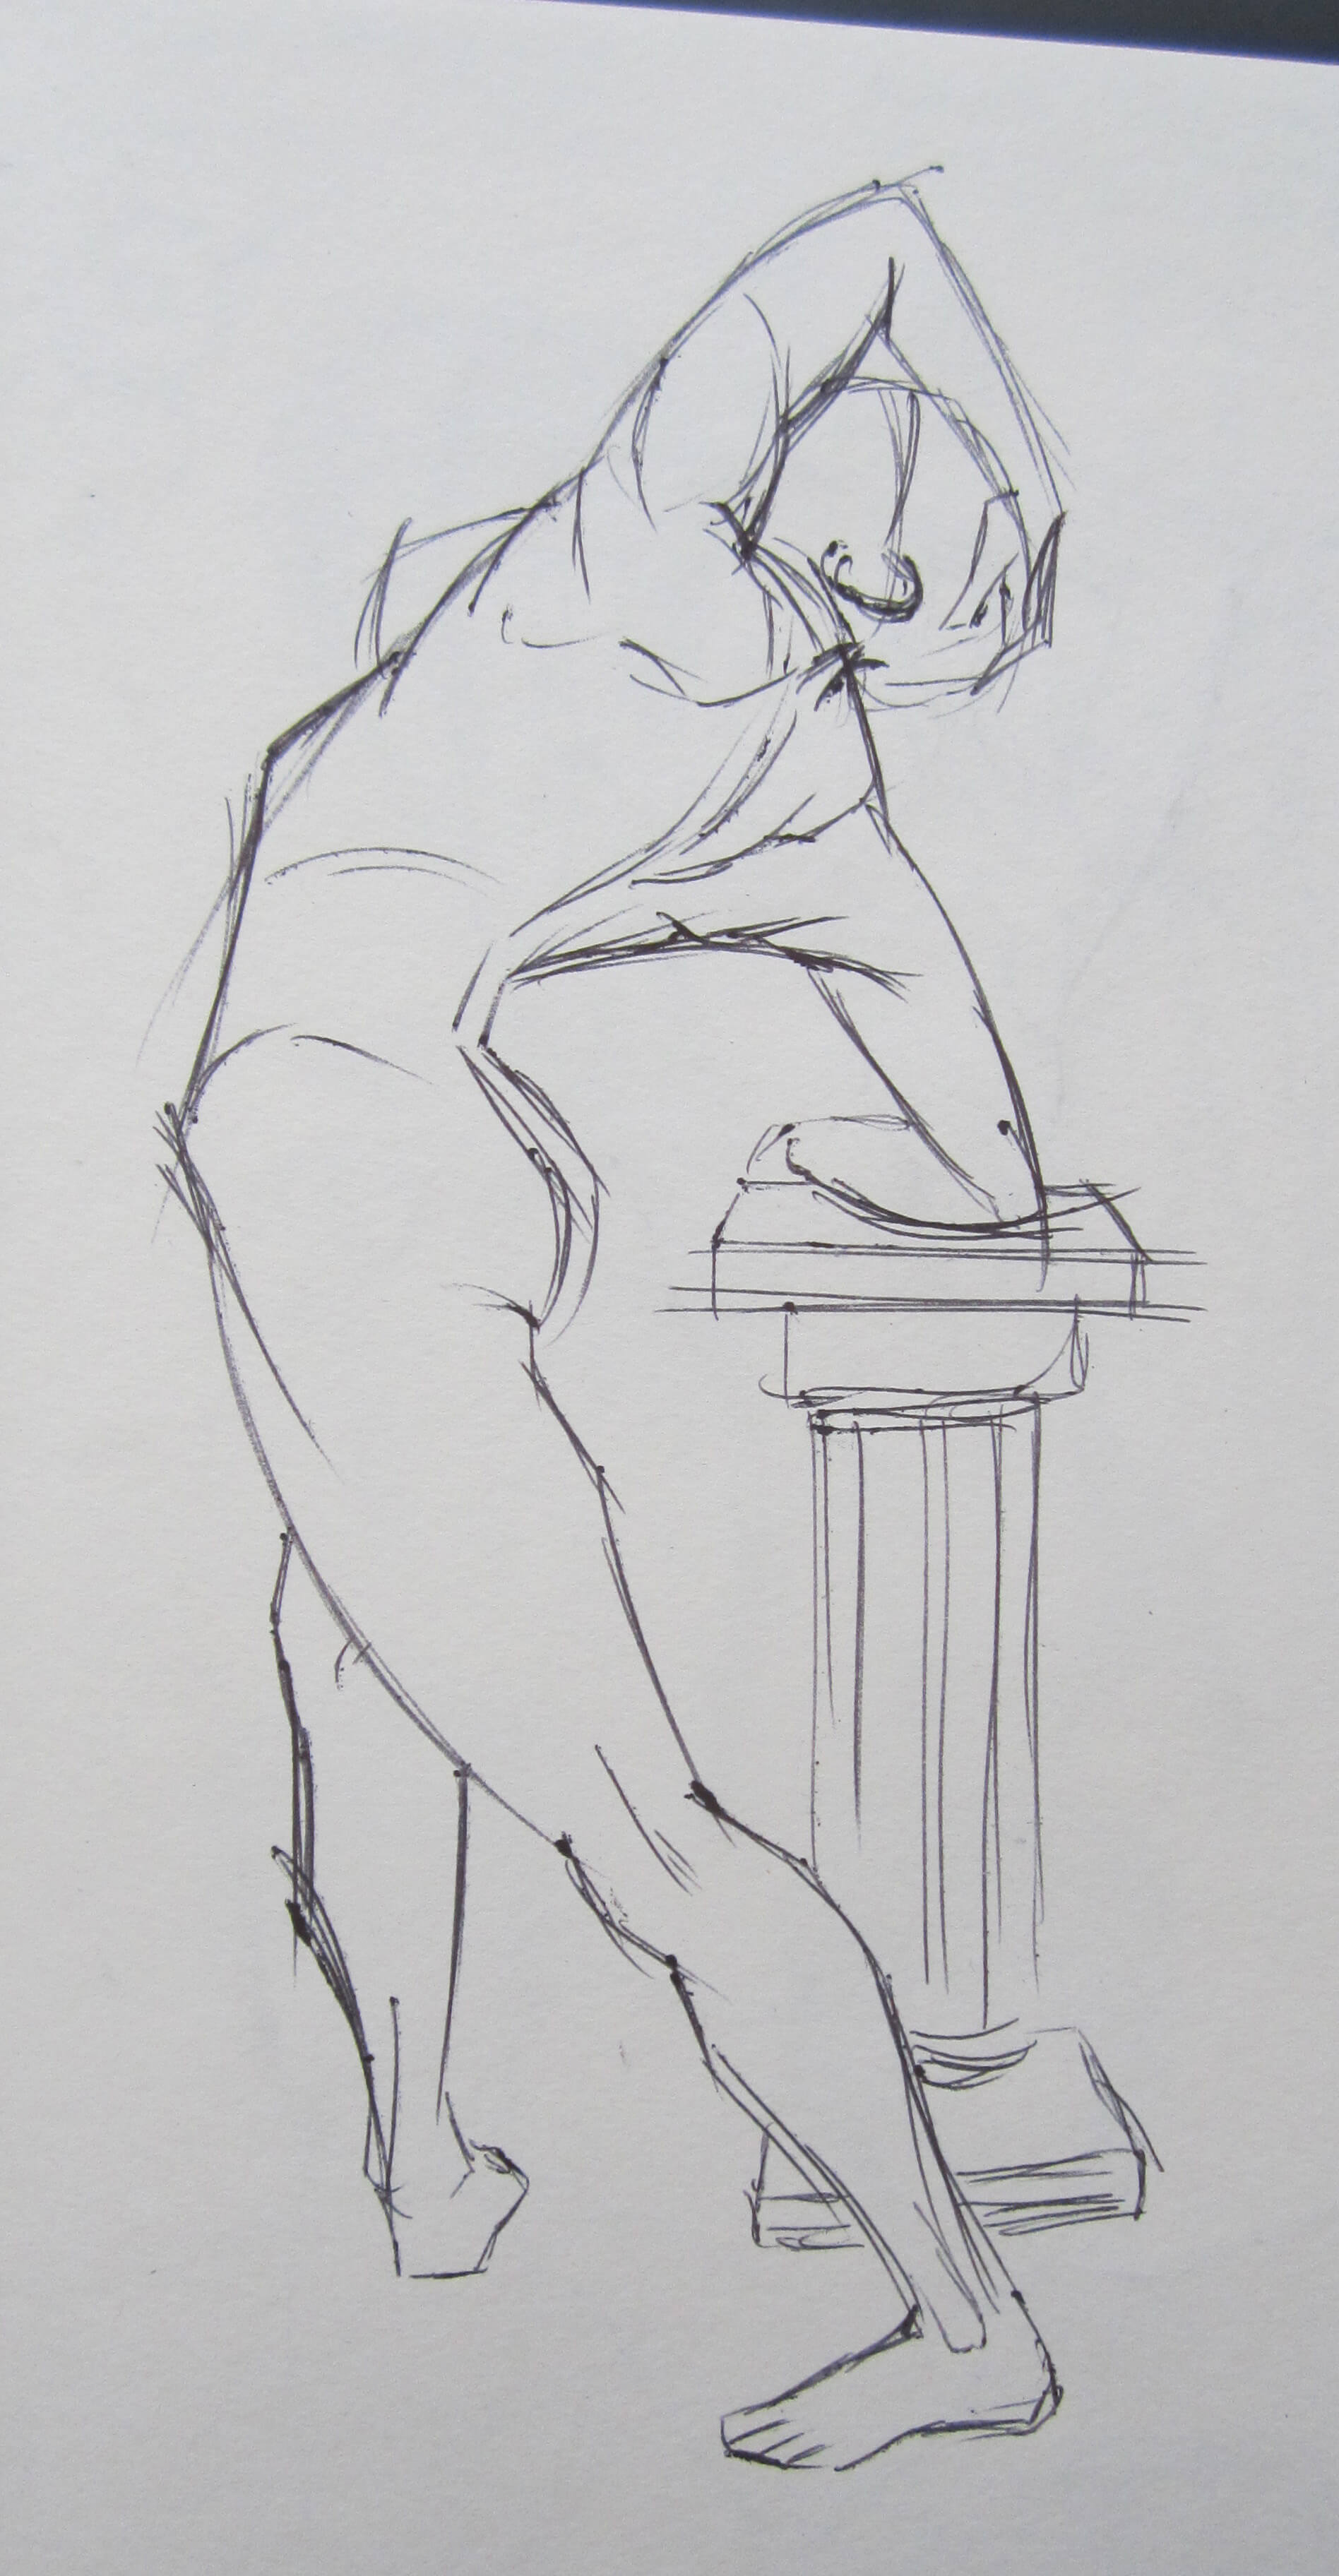
Medium sketch (between 5 and 10 minutes)
This time, we have more leeway. It's a type of timing used for more complex poses that would be difficult to achieve with shorter timing. It's also quite useful if you want to add information about volume and light, for example with gray values.
Long sketch (between 15 and 30 minutes)
These are sketches that can stretch up to about thirty minutes in my opinion. They are the ones that deviate the most from what a sketch is because the more time you have, the more you can refine. However, they are useful for complex models such as some buildings, for example.
In this instance, it's a type of sketch that will encourage focusing on details, where the previous ones concentrate on the general form, structure, and movement.
TESTING OTHER WAYS TO DRAW
Without lifting the pencil
The rule is quite clear I think: from the moment you put the pencil / pen / marker / other on the paper to start drawing, you don't lift it anymore. This will give a very particular rendering and will force you to think differently because, of course, if you have to go back to avoid making random strokes across your image, you will lose time on an already tight schedule :D
In negative
You take a black sheet, or a white sheet (granular side of canson) that you cover with charcoal, and you draw in negative. For those on the black sheet with white paint, for example. For those on the charcoal, use eraser and charcoal. So, you are forced to draw the lights and not the shadows as is usually done. The results are super interesting :3

Without the eraser
Or rather, without erasing or with a tool that does not allow erasing. So either pencil without an eraser, or a marker, a pen, paint, ink, etc. The goal is quite clear: to immediately find the right strokes and never mind if you make mistakes. It will create a construction line, it can add all the charm to your sketch ;p That said, you will quickly realize that you generally do not have time to erase :D
According to model in motion
Whether by sitting on a terrace and observing your surroundings, going to a zoo to see animals, or staying cozy at home and watching a dance video, for example, it's very interesting to sketch something in motion rather than from a photo that has already done the work for you.
It's much more complicated and requires you to be very quick. We're in the case of live sketching if it's a fast movement. You will need to choose the right moment in the movement. Almost take a mental photograph of the scene or draw without looking at your sheet almost to be able to faithfully transcribe your model.
The sketches also have the advantage that you will have to look at your model very often to be able to copy it, and this is a very good reflex to develop ^^
If you don't have the opportunity to do sketching sessions from life models (including nudes) near you, be aware that there are specialized YouTube channels like Croquis Café. You also have the website Line of Action which allows you to choose your timing and the subject you want to sketch (including animals) ;) Very practical, tested and approved!
EXERCISES TO IMPROVE YOUR UNDERSTANDING AND COLORS
[No text]
DOCUMENTARY STUDIES
It's the same principle as sketching, but without a time limit and much more developed. The principle is simple: you choose a reference of your choice (a still life, a live model, a photo, or a movie screenshot) and you try to reproduce your model.the most faithfullypossible. The time you spend on it is not important. The goal is to transcribe things as well as possible.
I've included two old set studies that I did and for which I unfortunately can't find the basic references anymore.

Here are gouache studies from real models:
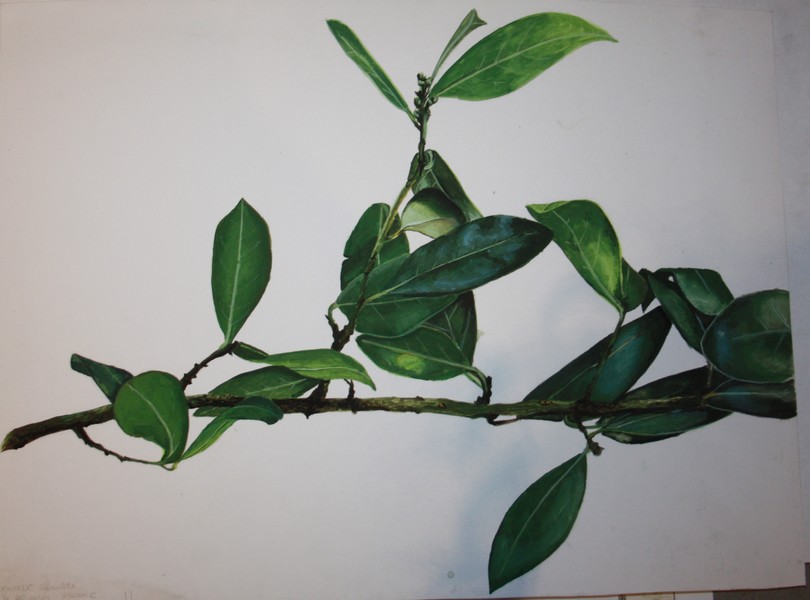

ATTENTION.It's not about mindlessly copying. We don't trace, we don't pick colors with the eyedropper tool, otherwise the exercise loses all its meaning. The goal is to train your eye and to force you to analyze and push the renderings to their limits.
There you go, now you have all the keys to make beautiful things and improve in drawing :D
Obviously, there are thousands of interesting exercises. I have given you some ideas that you can follow and of course be inspired by to create your own exercises.

Discussion
I still have work to do on certain topics
Magnificent, full of tips and tutorials to improve ourselves and create beautiful drawings
This article helps me a lot. I learn a lot about colors.