5 Easy Drawings to Create

I was calmly doodling on a sheet of paper when it suddenly occurred to me that it would be really nice if you too could easily scribble! So it only made sense for me to put together this article with a small selection of 5 easy drawings to make! We also have on our blog smalldrawing exercises for beginnerssimple to perform, for you to improve in drawing, such as in the field of observation or pencil stroke! Feel free to take a look! ;)
DRAW A BLACK CAT EASILY
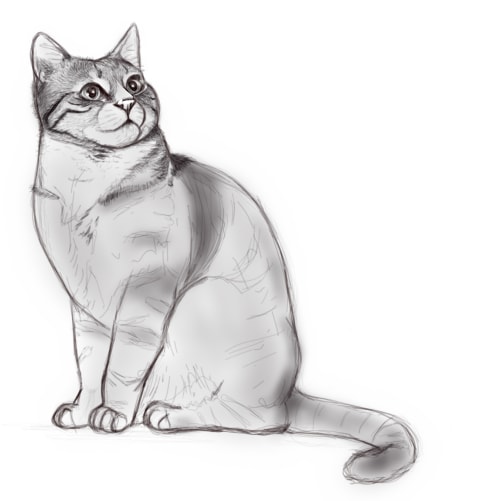
To make this little kitty, we'll start by drawing three circles. One for the face, and two for the eyes. In each eye, we'll add two small circles for the pupils.
Just in the middle, below the two eyes, we draw a small nose that looks like a slightly rounded inverted triangle.
To this we can add the two ears, in the shape of triangles, then 3 whiskers on each side, just below the eyes!
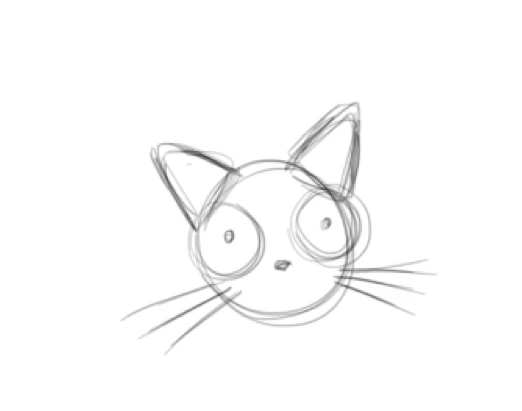
And voila, a cat head!
Next, just add the body. To do this, draw a vertically elongated oval, then a circle at the bottom left (or right, ultimately, you decide :p) After that, redraw the outline and erase the sketches inside the body! Also add a tail, personally I like to make it rounded.
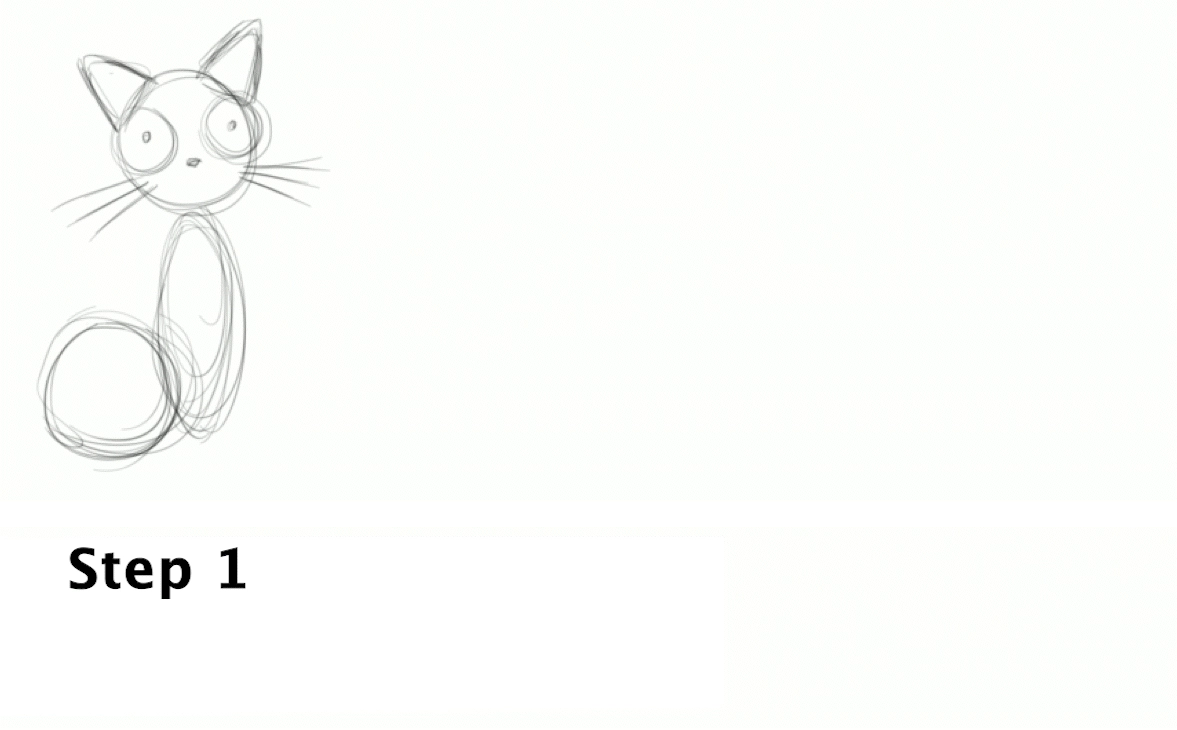
A body and a tail for our little cat!
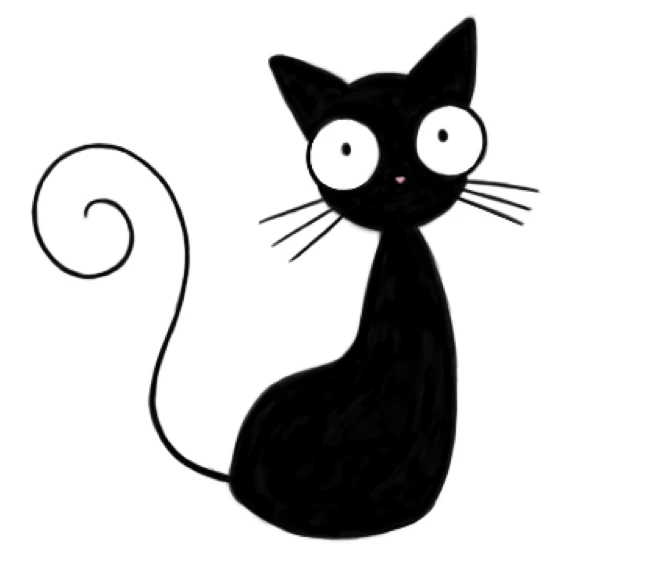
And there you have it, we color it in black (and a little pink nose?) and our cat is done!
As a reminder, come and follow the "drawing basics" training to progress and improve your drawings with lots of advice, tips, exercises, and exercise corrections. More than thirty progressive courses that give you all the basics to draw as you dream of:

MAKE A MARIO GALAXY STAR DRAWING
I don't know about you, but I really like Mario. It's my childhood, all that! And there's one character I particularly like, because he's really cute…
They are beautiful, they shine, they are... The Mario Galaxy Stars! Shall we draw one? Let's go!
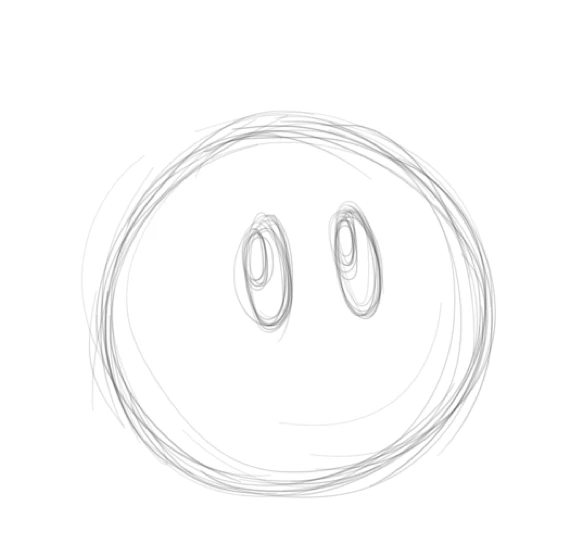
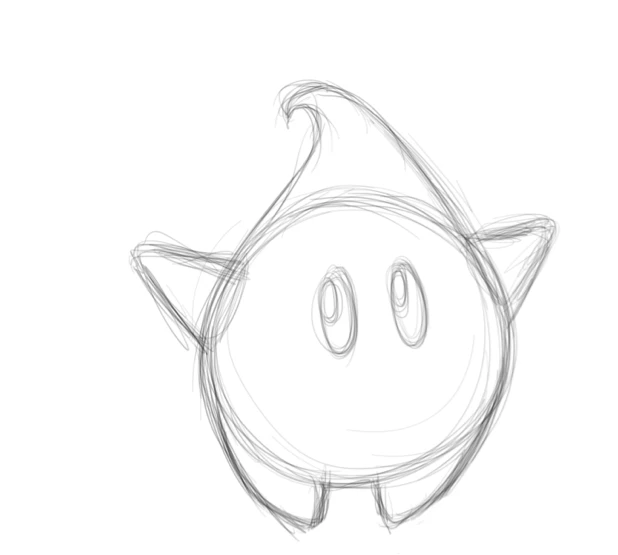
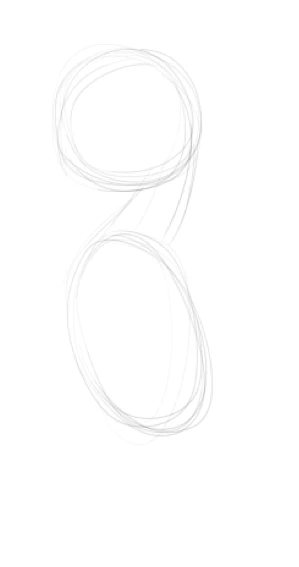
So, we start with a circle, at the top center, we add two ovals in which we add another two ovals at the top left.
After that, we draw the feet as well as the arms (arms whose top is about at the top of the eyes) which strongly resemble rounded triangles. Then the little tuft on the head!
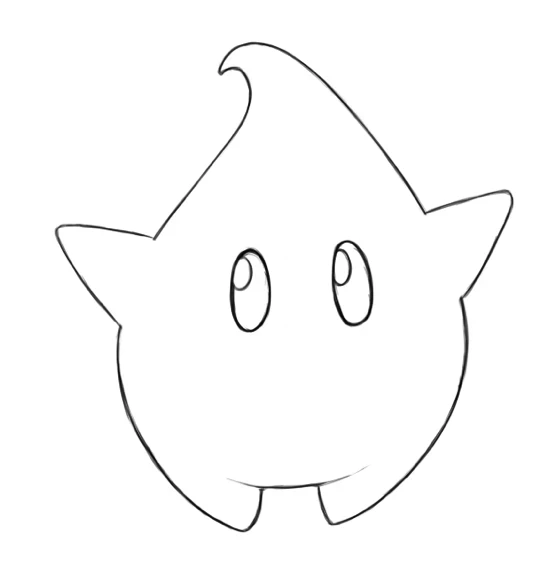
And finally, we erase our sketches and at that moment we do not hesitate to slightly modify before completely erasing if we realize that something displeases us (I, for example, spaced the eyes apart and made the lower belly rounder) and then we better define our outline.
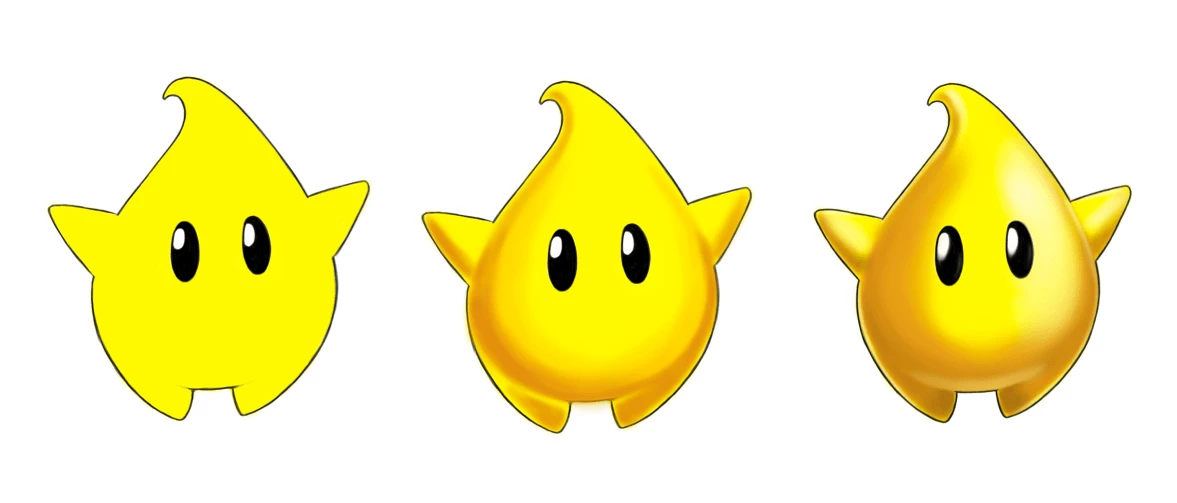
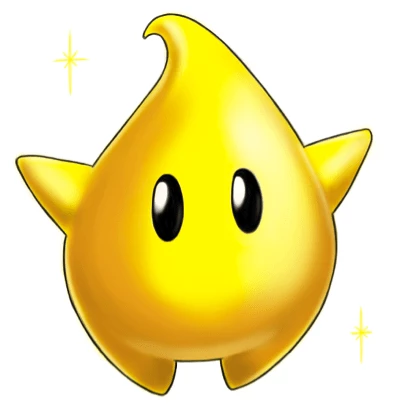
And there you go, you can color the eyes black, the body yellow, with light orange/beige shading and add some white to give it a bit of 3D!
We can also add other small "stars" around it, and for that, nothing could be simpler! A cross with a vertical line longer than the horizontal line, then two small lines that cross our cross through the intersection point!
A CUTE EASY CLOUD
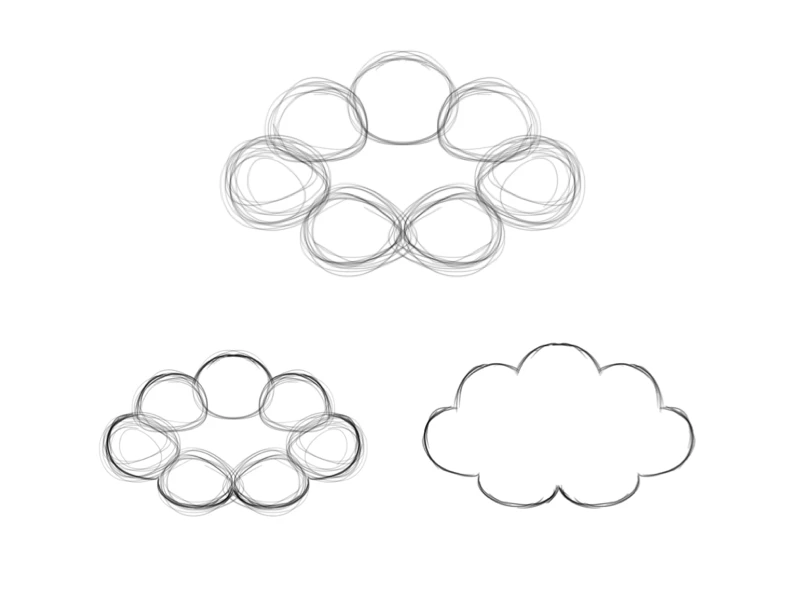
So, as usual, we'll start by drawing ovals. 7 exactly, 3 on top, one on the left and one on the right, then two at the bottom.
We trace the outline, erase the internal sketches, and we have the outline of our cloud!
After that, we draw the eyes, so we make two circles, in which we add two smaller circles again, as well as two new circles in each eye, one on the top left, the other on the bottom right. Then the mouth, for this we make a horizontal line, then a half oval underneath, which joins the two ends of the main line.
And finally, two little eyebrows above the eyes!
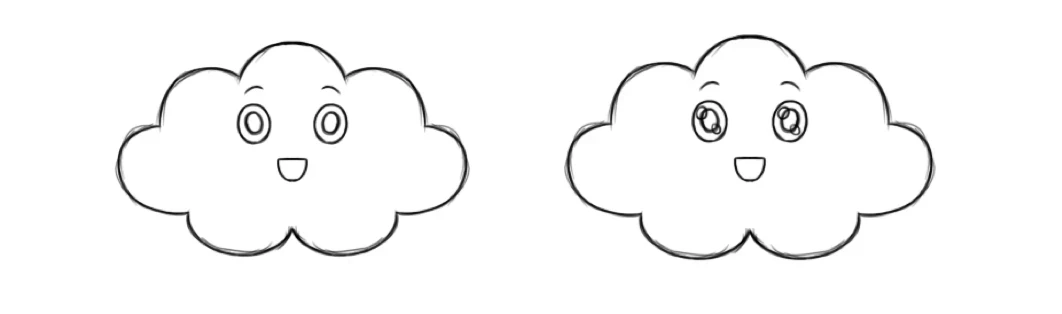
We erase the excess lines and better redefine what we keep.
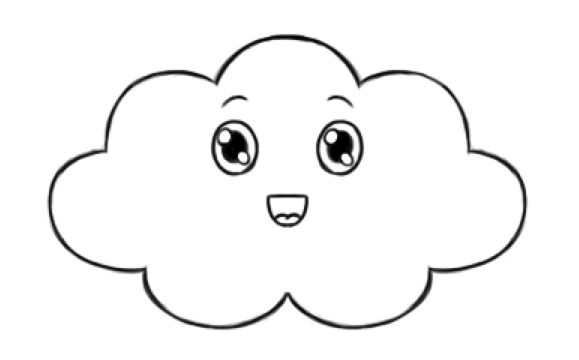
Now, to give it a kawaii touch, let's move on to colors! Pink under the four bottom ovals, light blue in the eyes (you can add a bit of darker blue at the top of the eye to add some life) and two little pink "sparkles" under the eyes, to give it a shy look. The tongue in light pink, the inside of the mouth in dark red/pink, and there you have it!

And there you have it, kawaii cloud finished!
In case you would like to have other tips related to drawing, there is an article that gives advice forlearn to drawfound on our blog, for those interested!
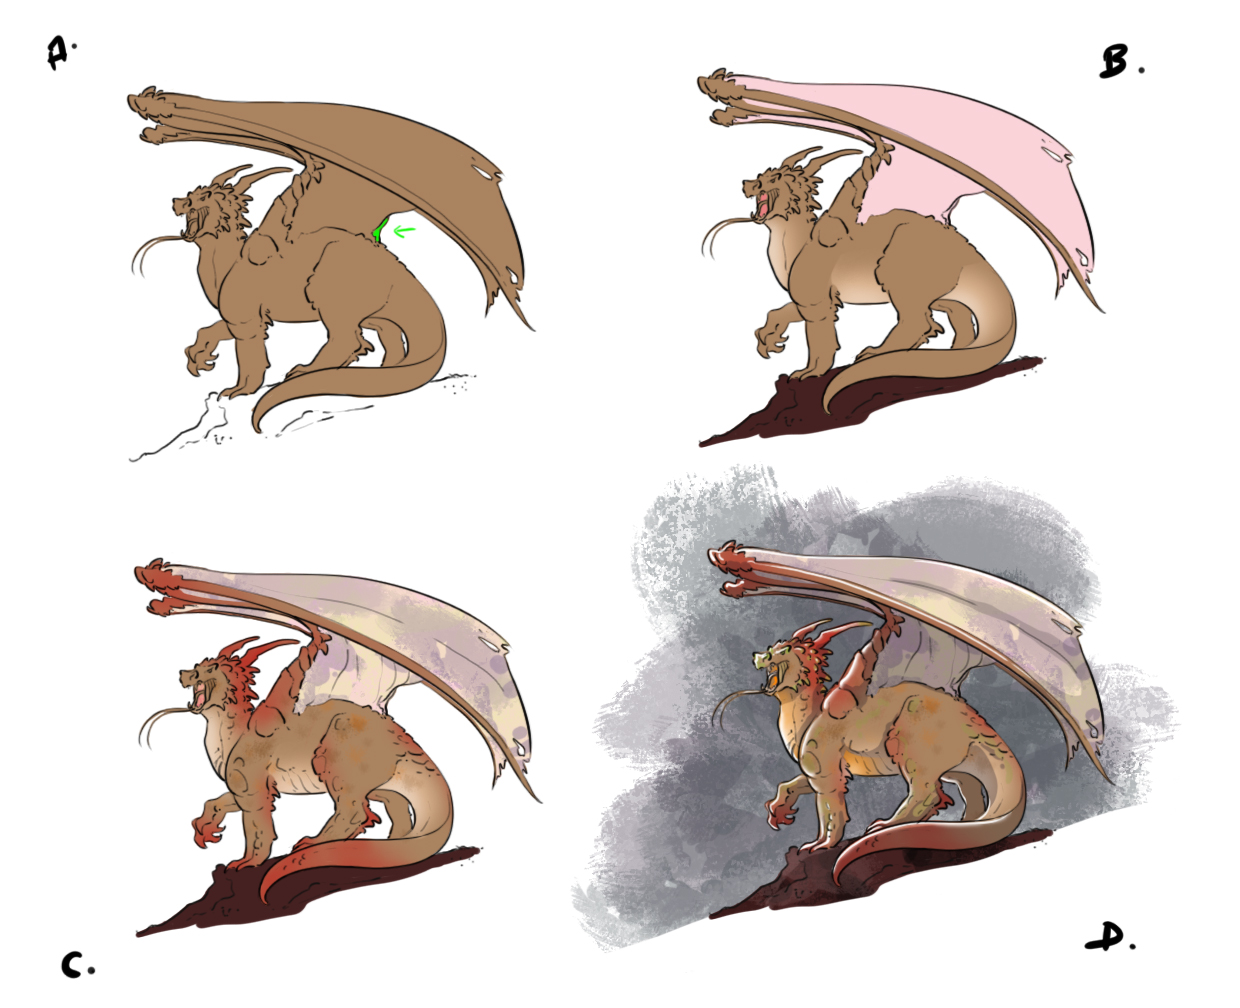
DRAW A DRAGON
Ah, dragons. You can make millions of different ones, European or Asian, or even mix the two styles and the details are infinitely customizable! Here, we're going to start with the basics!
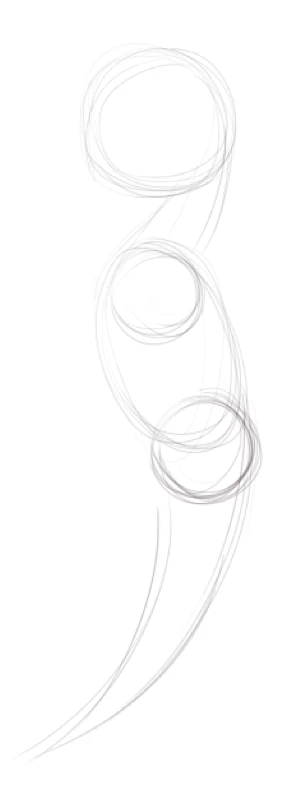
We start by drawing a circle for the head, inside which we draw another, smaller circle, which will be the eye, then the neck, and at the base of this neck, we draw an oval, which will be the body!
After that, we draw two circles, to decide the placement of the shoulder & the hip, at that point, we can also add the sketch of the tail!
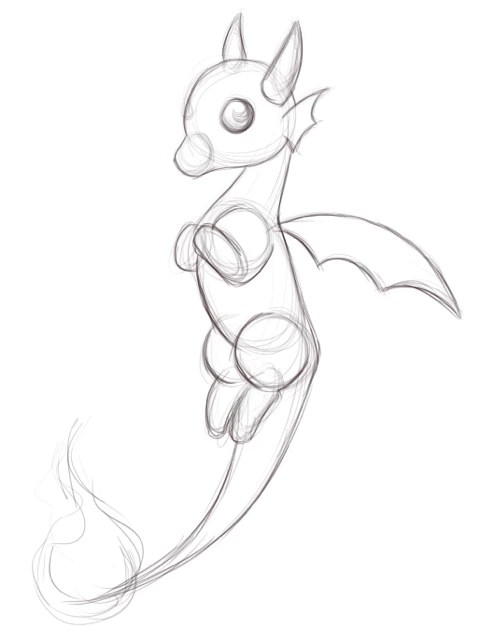
Then, we add the muzzle, more or less long, depending on what we want.

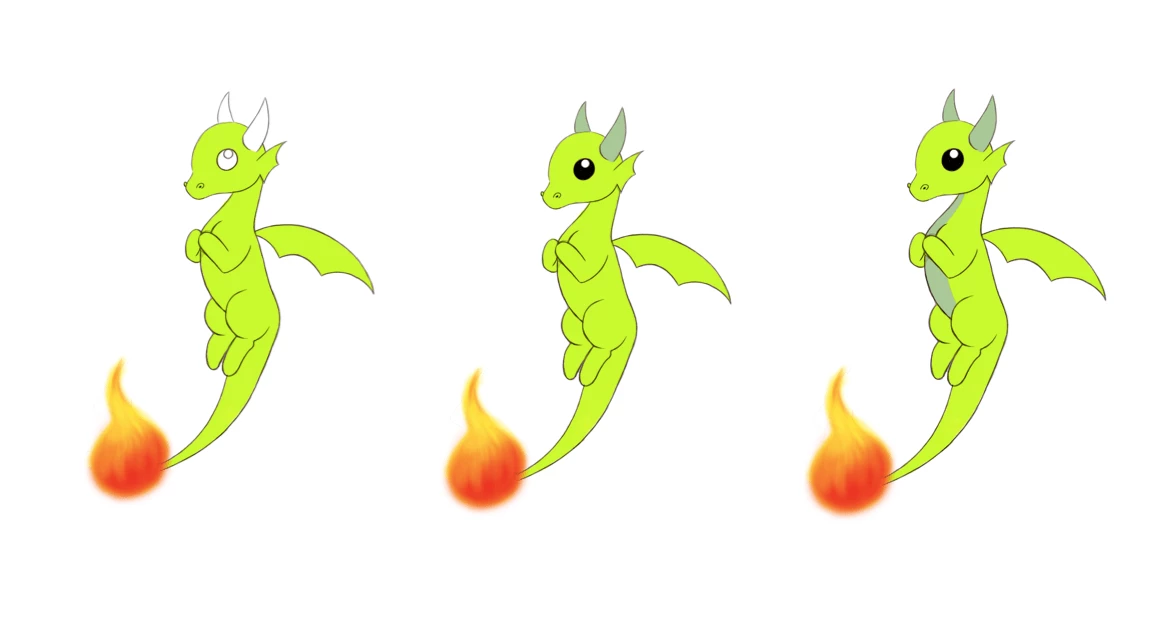
Then we add the eyes, with two circles (and the reflection inside, also a circle!), the legs using ovals, the horns and a small fin on the cheek! The fin is like the webbed feet of ducks, split into 2 parts. We can do exactly the same thing for the wing, which we draw above the shoulder, on the back, but with 3 parts! Personally, I also added a flame at the end of the tail, but this is not mandatory.
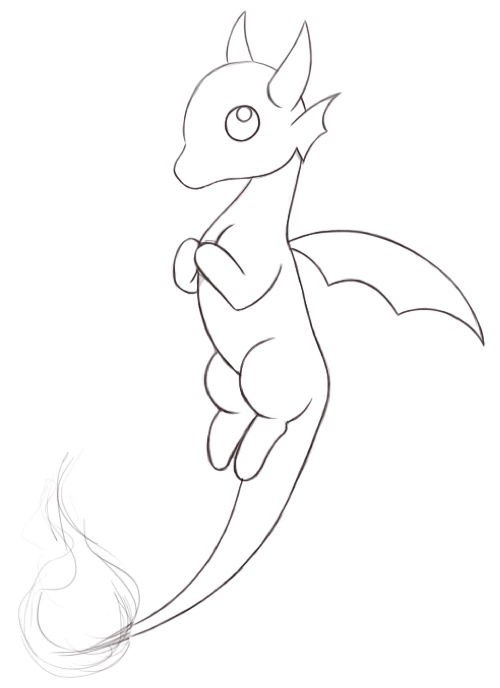
Then it's time to redefine all that neatly, erasing the internal sketches, but not those of the tail.
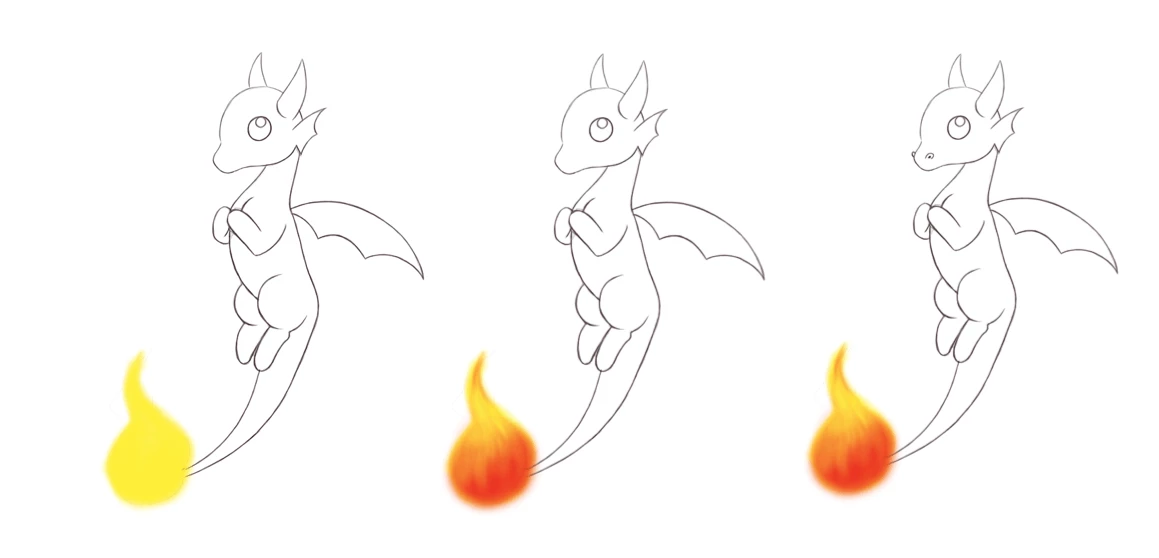
Now if we want, we can color our little dragon, I start here with the flame.
First, by adding yellow, then subsequently blending in orange & red on top.
(I added the little nostrils of our friend along the way!)
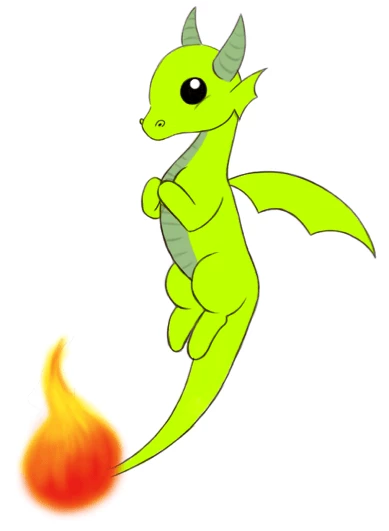
Then, we can color the body, in green, for example! Here, I used light green for the body & "military" green for the horns and the belly.
Then we can color the eyes black and we have a little dragon!
Of course, if you want to add more details, there are no rules!
[Non-breaking space]
MAKE A GIRL'S FACE
Here is a short video I made especially for you in Speed Drawing where I show the key first steps of this drawing. Enjoy watching :)
For more explanations on the correct proportions to give to your faces to make them accurate and coherent, come see the course on the topic by clicking below:

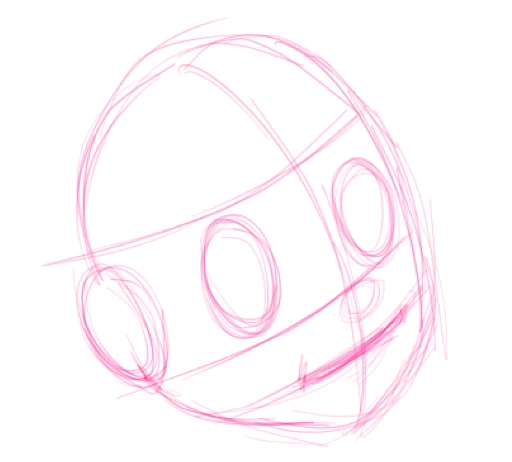
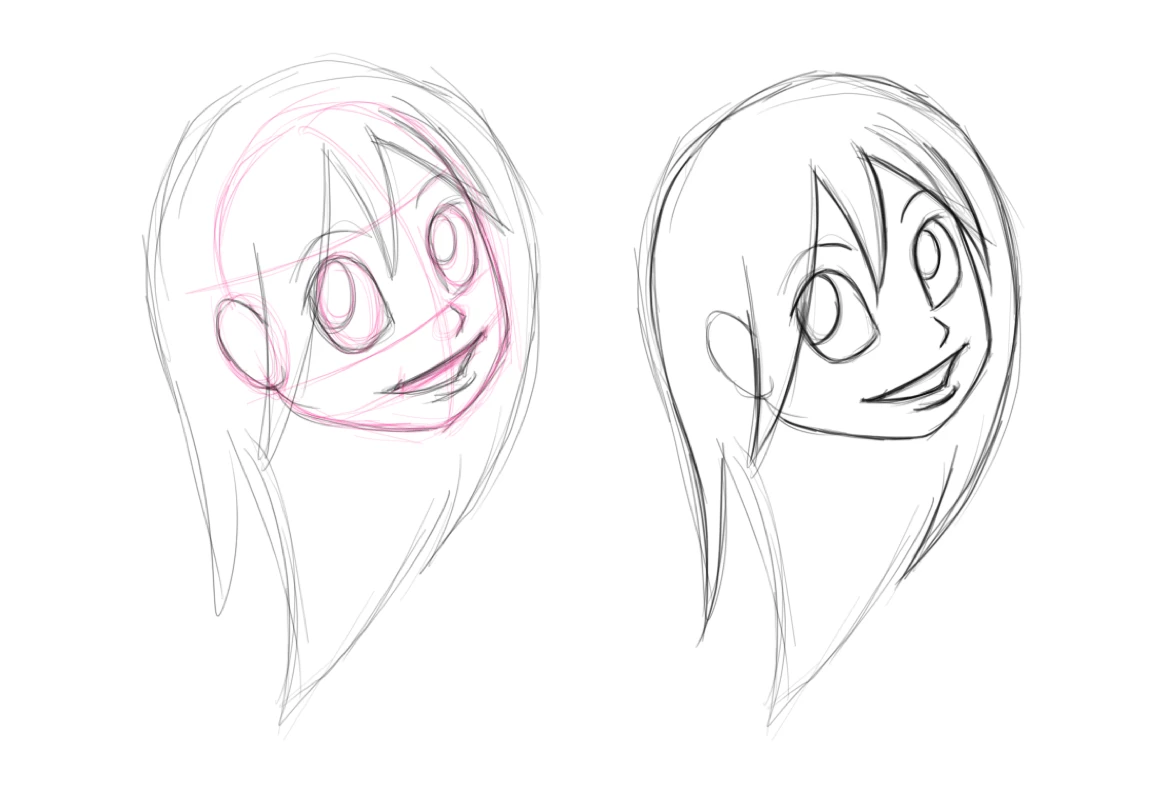
First, we begin by drawing the shape of the face, an oval with the bottom slightly pointed. To this, we add another oval on the left, for the ear.
Then we make two more ovals for the eyes and from there, we draw a vertical line, slightly curved to the right between the two eyes, from the base of the skull to the middle of the chin.
Then we do the same horizontally, one just below the eyes, then another one lower down, for the mouth. From this, we draw a circle for the nose and a line for the mouth.
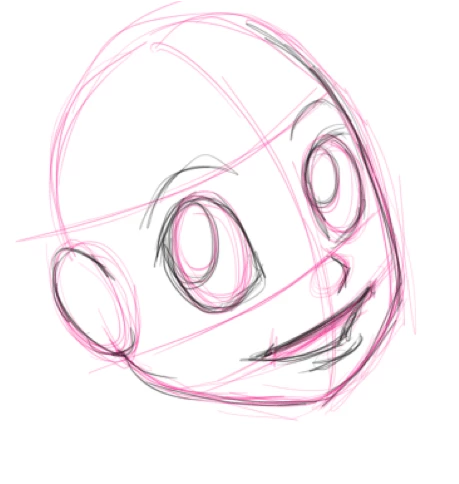
Once that is done, we better define the contours of the face, the ear, the eyes, the mouth, and the nose, and we add the eyebrows.
For the eyes, mouth, and nose, I've added a video so you can see exactly how I do them :)
Now let's draw the hair, two strands on each side of the face, one in the middle of the forehead, which descends between the two eyes, and the rest of the hair, which you can style as you like!
No visible text to translate.
Now we can remove our sketches, we have everything we need!
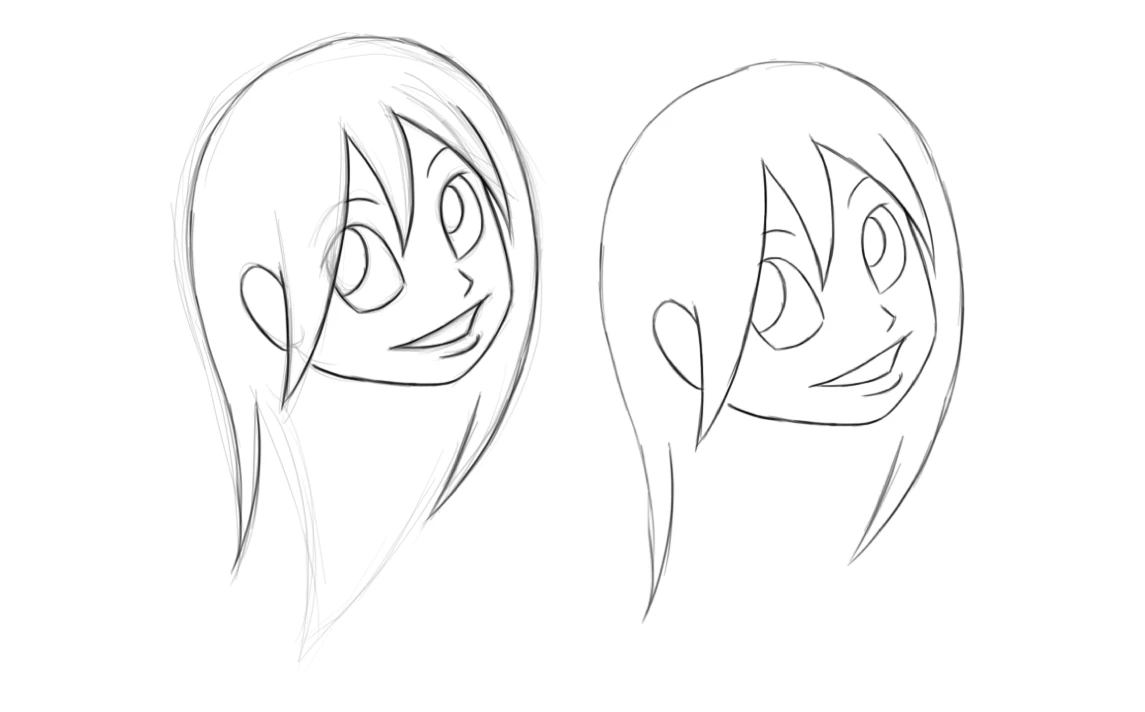
And there you go, now you can add the pupils as well as a small circle in the upper corner of the eyes and color everything. I chose these colors, but obviously, you choose the ones you prefer!

And there you have it for today, I hope you liked this selection and that you will have fun doodling them everywhere, well… Everywhere it is allowed, obviously!
Feel free to modify them your way!
Illustrator: Alison
Popular Articles


Discussion
not bad at all I would do them again to have fun.