Learn How to Draw
Hello everyone and welcome to Dessindigo!
If you're here, it's probably because you've decided to start or get back into drawing. Or maybe you're hesitating to learn!
The benefits of learning to draw
Drawing is a form of writing that has the advantage of being almost universal. You can thus communicate a message to the entire world without needing to learn another language! It is also an excellent learning method. When you draw something, you are forced to understand it, even if it is just a simple diagram. It allows you to tangibly lay out your ideas on paper and display them. Want to redo the decor of your living room, or change your hairstyle radically? You can do tests before diving in by drawing it all out to give yourself a clearer idea of what you want (and therefore determine if it only looks good in your head).
Finally, the practice of drawing requires a particular state of mind that subtly mixes self-sacrifice, will, curiosity and humility. Staying open to criticism, admitting that we are not perfect and that what we do is therefore also not perfect, that we can always improve, that perfection does not exist. All these elements lead towards an open mind and accepting one's mistakes, flaws, and wanting to work on them to improve :)
Whether we are already quite confident or totally beginners, drawing, like any other discipline, is governed by a whole set of rules and principles that must be known, understood and mastered in order to learn effectively. But like any discipline, it is accessible to everyone, no matter their age.
A quick overview!
Just before starting, feel free to take a look at the training section, where you will find a comprehensive step-by-step course showing you everything you need to know to have a solid foundation in drawing and thus create all the illustrations of your dreams:

The 3 golden rules for learning to draw
To start, learning any discipline involves three essential stages: observation, understanding and practice.
To put it simply, if I draw a parallel with cooking, for example:
You want to make a recipe. To start, you need to know what the dish is supposed to look like and what it tastes like. What are the ingredients to prepare it. Then, find a recipe. This is the observation.
Once we have the recipe, we need to understand the steps, in order to get organized and follow the steps of the dish we want to prepare. Why prepare these elements separately and those together? Why use a spatula instead of a whisk? Why chill or sear on high heat? This is the stage of understanding.
Finally, practice. Because even if someone knows the theory perfectly, a famous French saying goes that it is by forging that one becomes a blacksmith. Well, it's quite true. The more we repeat the recipe, the more comfortable we will become, and the more efficient we will be and the quicker we will go through the steps for a consistent or even better result.
For drawing, it works the same way, except it’s crucial because if something isn’t understood: it shows. Even a novice will be able to tell that the drawing isn't working, that there’s something odd, or even manage to identify the mistake.
Observation
If I bring this back to drawing, then, it's important to know what you're going to draw and not hesitate to go and look yourself, take photo references from books or online, or videos. If you want to draw a bicycle for example, go see what it looks like and observe carefully how it's put together. What are the different parts, etc.
Most professionals spend their time relying on photo references. When they do without them, it's because they have already drawn an element so many times before that they no longer need a model to refer to.
If I take my case as an example, I don’t need a model to draw a human. However, if I have to draw a cat, I will use a whole array of cat photos from every angle to understand how they are structured and redraw it the way I want, even if it means mentally combining various photos to achieve what I want ^^
To continue the analogy with cooking, the more you make a recipe, the faster you get and the less you need to consult it, until you are almost able to make it with your eyes closed.
Do not hesitate to look at photo references or real ones to draw something if you are unsure, and try to understand the structure and function of your model.
More information on the use of photo references and how to create a small personalized catalog can be found here: View the course: Inspiration at your fingertips!
Understanding
Then, it's important to understand what we are going to draw. To stick with the bicycle example: where is the chain placed? Why is it there and not somewhere else? How is the handlebar attached to the rest of the bike’s body? How does it turn? What is the size of the wheels, etc.? Asking these questions leads to becoming curious and seeking to understand the logic behind the object / the morphology of the subject we want to represent.
Practice
Finally, the practice of drawing. On that note, it's better to draw a little bit every day than once a month for hours. It's a bit like sports. A little every day is more effective than a big session once in a while ^^
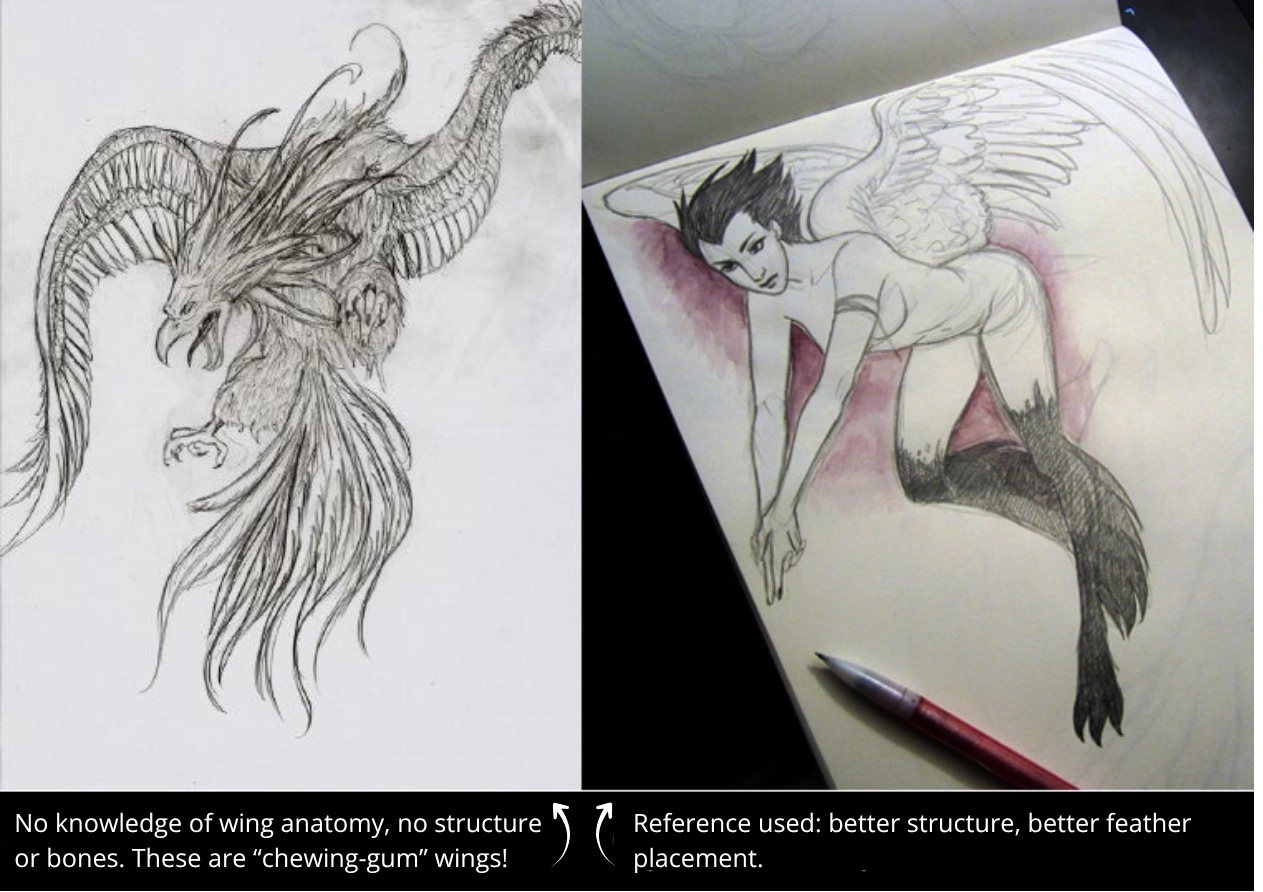
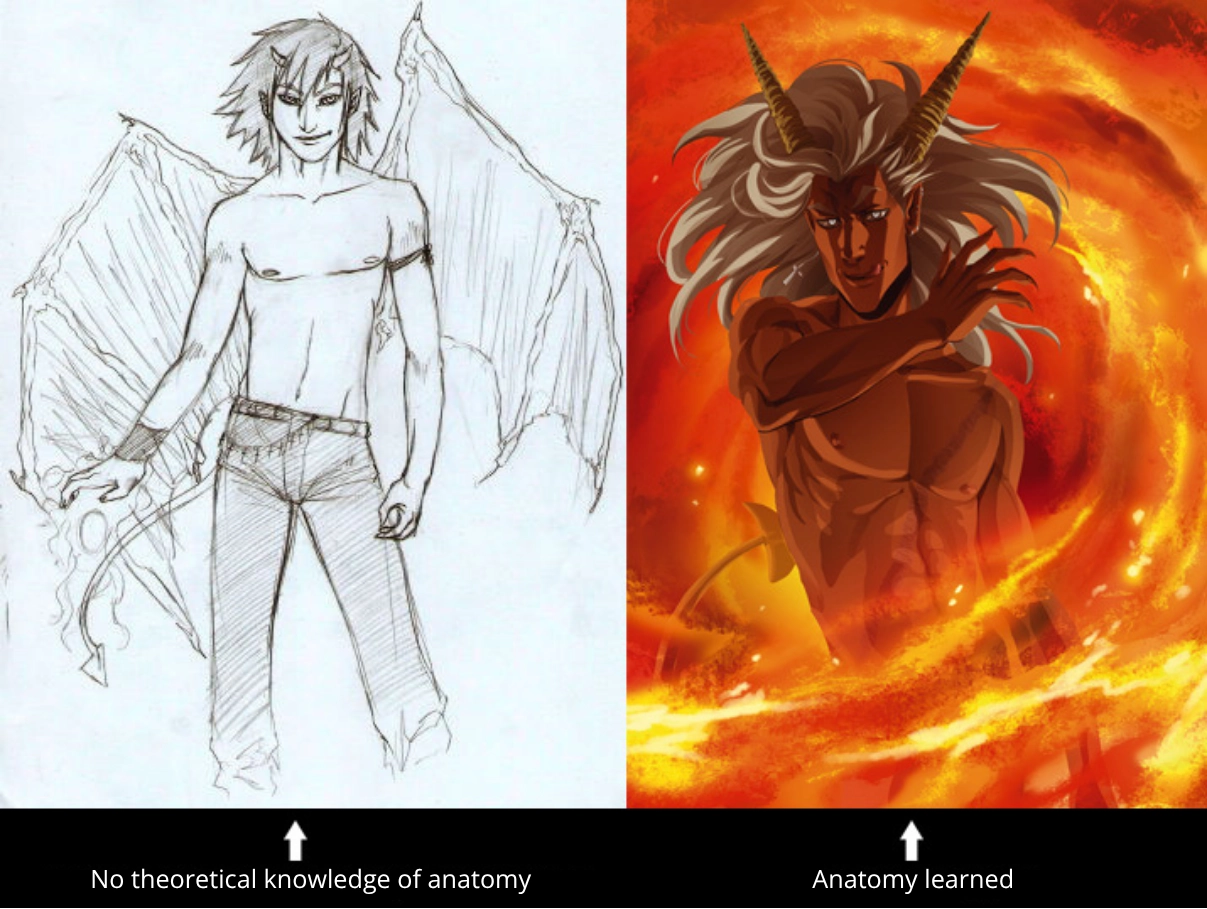
Below, I have shown you the progression of my understanding of bird wing structure. The drawing on the left is old and I had thought I didn't need references. The one on the right is more recent, and I now consistently use a reference when drawing wings to avoid making mistakes.
Exercise for learning to draw
These three golden rules seem obvious when said like this, right? For the skeptics, I suggest a little exercise to see if you have a good sense of observation and understanding. Take a paper and a pen and ask a relative to list everyday objects for you. About ten, for example, like a bike, toothbrush, phone, etc.
The goal of the game is: without looking at any model (don't cheat otherwise it's pointless), to draw these objects that you see every day and know well without a model. No time limit, no need to go into a lot of detail, as long as it's understandable what it is.
Normally, in front of the blank sheet, you should be thinking something like, "what does it look like again?"
Once you are finished, compare it with reality. Generally, you'll want to spontaneously check items you were uncertain about while drawing.
If the result is close to reality, then you have a good sense of observation and understanding of your surroundings, which is a great advantage. Otherwise, you will need to work on that 😊 Don't worry, it took me some time to acquire it personally. And you can see with the drawings throughout this article that it doesn't prevent progress, it just slows it down ^^ If you want more exercises, there is an article dedicated to that, called drawing exercises for beginners, which is also on our blog.
Do not go too fast
I know, it's hard, we want to create masterpieces right away. But to achieve that, you must proceed step by step. When you start baking, you don't immediately jump into making a three-tiered celebration cake. You start with cookies and simple cakes. Then you gradually increase the difficulty.
In drawing, it's the same thing; you must first master the basics before gradually adding more and more complexity.
Among the essential basics we can list:
- The proportions, whether it's for a character or objects, if your proportions are right, it will work. Even if it's extremely simple, not detailed, and all messy, the drawing will be correct.
- Perspective Yes, we'll have to go through this, but rest assured, it’s scary when you don’t know, but it really enhances the drawing. I also remind you that perspective applies to absolutely everything, not just objects and buildings. Even if you draw only characters or animals, you'll need some basics in perspective ^^ Here is a video that explains the basics:
WATCH THE VIDEO: What is perspective?
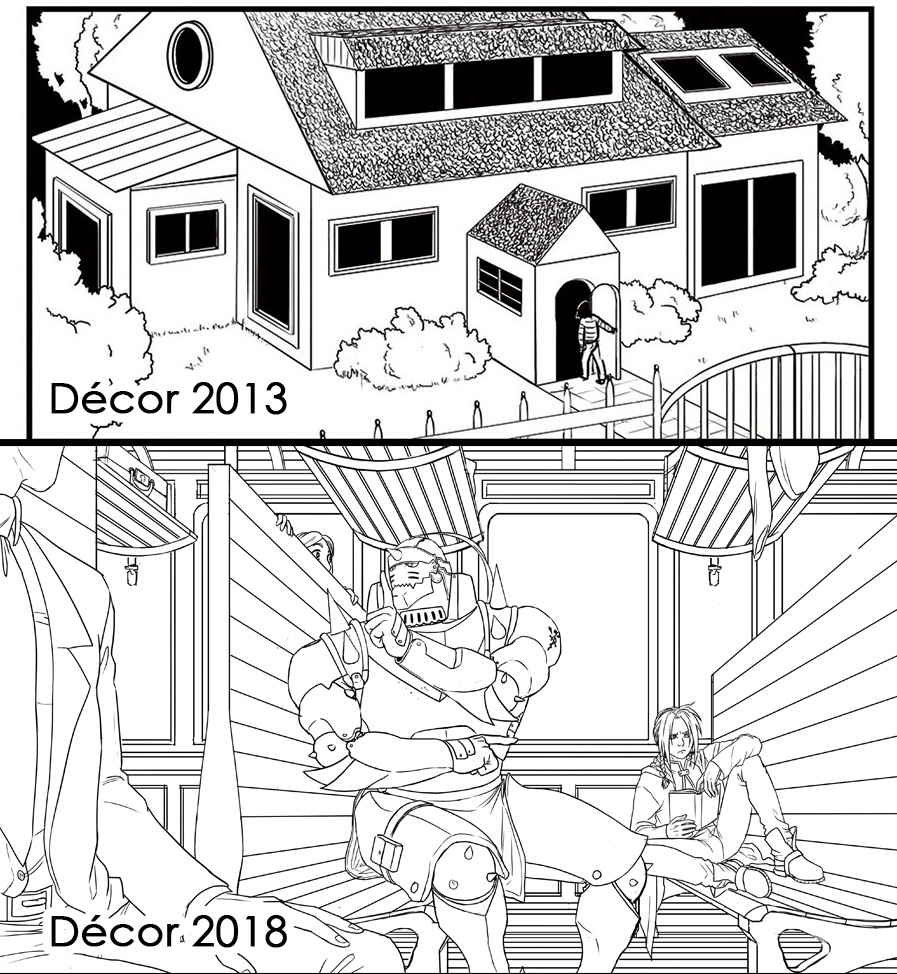
Here's a little evolution of perspective with regards to my own development. I'll add that on the left, I didn't use any reference for the house, so it looks a bit like a playmobil. However, I did take some for the old train setting on the right which turned out much better ^^
- The meaning of your drawings, what you want to say / convey with your image. A drawing that tells a story, even if it could technically be better, can deeply touch many people. Whereas a technically very accomplished drawing that tells nothing will have less impact. Give meaning to what you do.
And that's all for the basics. Not much in the end ^^ We can then gradually add depth management in the image, the use of grayscale and line values, anatomy, shadows and lights, composition rules, color management, etc.
The materials
Let's be clear about this, it's not the tool that makes the artist. Whether you use your little nephew's crayolas or an ultra-fine oil paint collection, a drawing is still a drawing. What matters is what it conveys. The way it is drawn is completely incidental.
You can start your learning with just printer paper, a pencil and an eraser without any worries. As you noted, the basics don't require colors (but I encourage you to experiment on your own if you feel like it, of course!). There is an article that discusses drawing materials, feel free to take a look!
It's not necessary, but if you feel the need, or if it's more comfortable for you to have more suitable equipment, obviously, do not hesitate. Conversely, if the more appropriate equipment does not suit you, you are under no obligation to use it.
Some prefer to ink with a ballpoint pen, even though there is a plethora of professional pens on the market. Yet, the ballpoint pen has a specific feel and output. So if you prefer to use it, even if it wasn't designed for that purpose, go for it! :D
How fast can I progress in drawing?
This is what you are all wondering, I'm sure!
To be honest, it will depend on you. If you are a beginner, you will generally progress faster than someone more experienced. It is also quite common for improvement to occur in stages. That is to say, you will suddenly understand something, have a breakthrough, and this will suddenly improve your drawings. Then you will stagnate until the next breakthrough, etc.
Grégoire explains this principle in more detail here: VIEW THE COURSE ON THIS SUBJECT
It also depends on the theoretical work you will do. Observation and understanding are absolutely crucial points. If you don’t make the effort to understand what you are drawing, it will show, but you will also stagnate. Challenge yourself, be curious, you will notice a lot of things you didn't pay attention to before.
The way this fabric falls on the sofa, the way the light reflects off this pan, the variations in shades in the foliage of this tree, etc. You will gradually rediscover the world and become curious about everything you see.
It is therefore impossible to give a time estimate. Already because everyone has different levels, not everyone can devote the same amount of time to practicing drawing, not everyone always understands certain concepts right away (those famous "aha moments," right? :D) and not everyone necessarily focuses on the same thing.
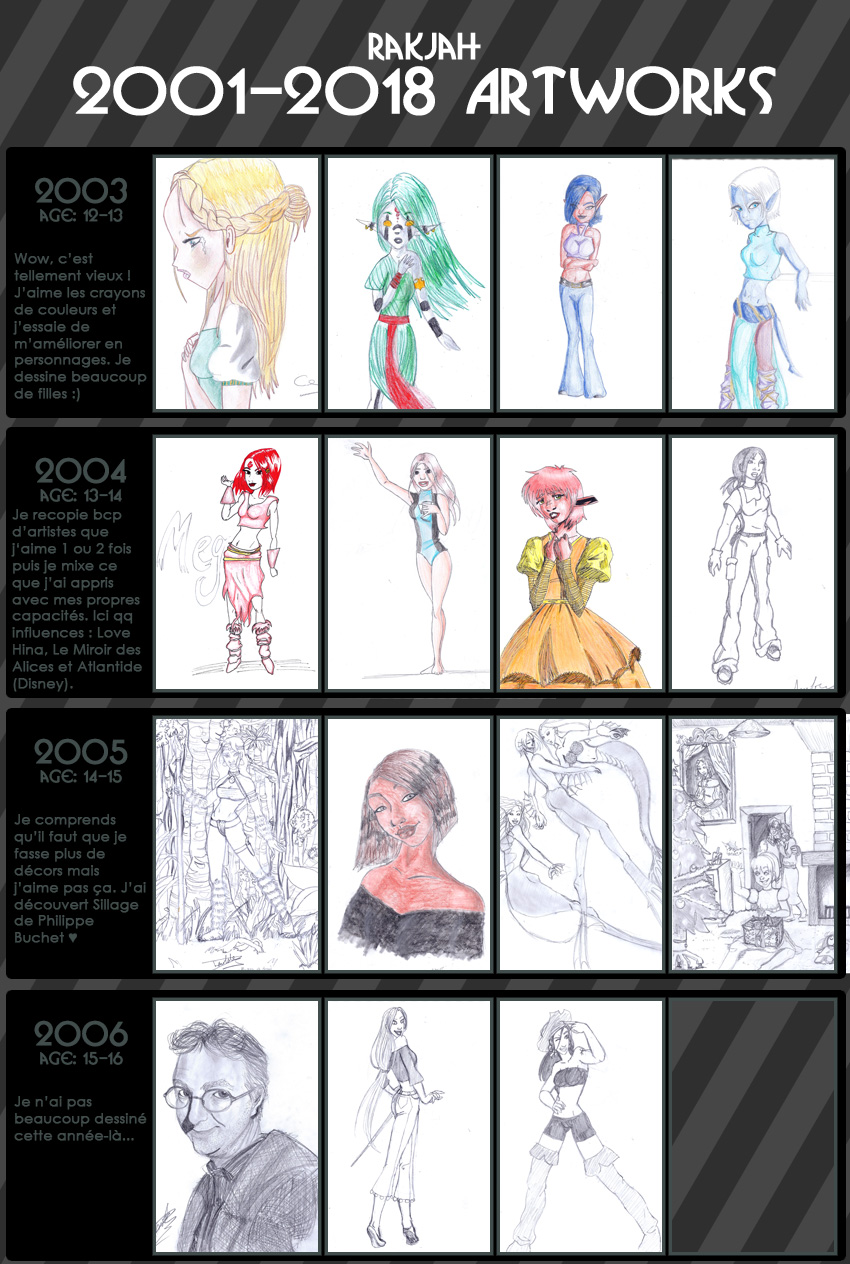
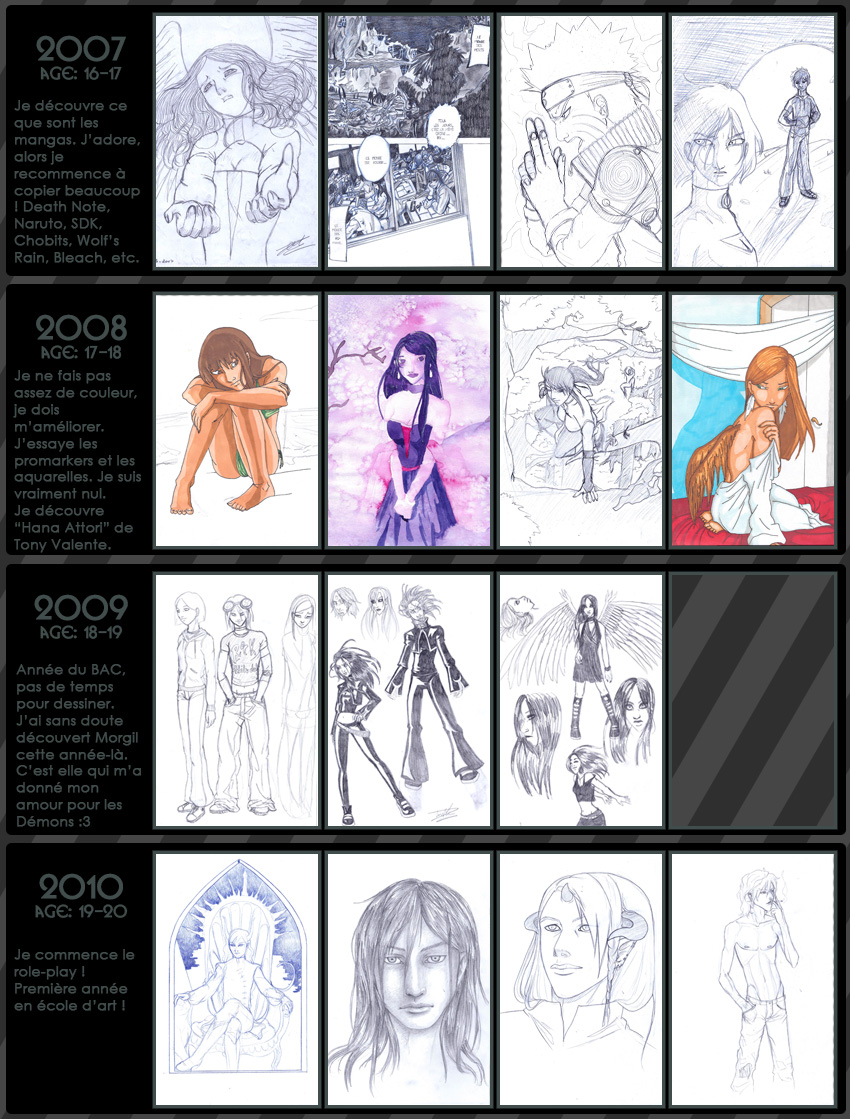
But if you want to see examples of artists' evolution, some on the internet regularly post memes (the "improvement meme" or the "draw this again", known to non-English speakers as the "evolution meme").
The first method involves posting a drawing from a past year alongside a recent drawing. Or posting several drawings for each year to observe the evolution over a long period of time.
The second involves redrawing an old drawing (usually at least a year old) and then noting the evolutions between the two.
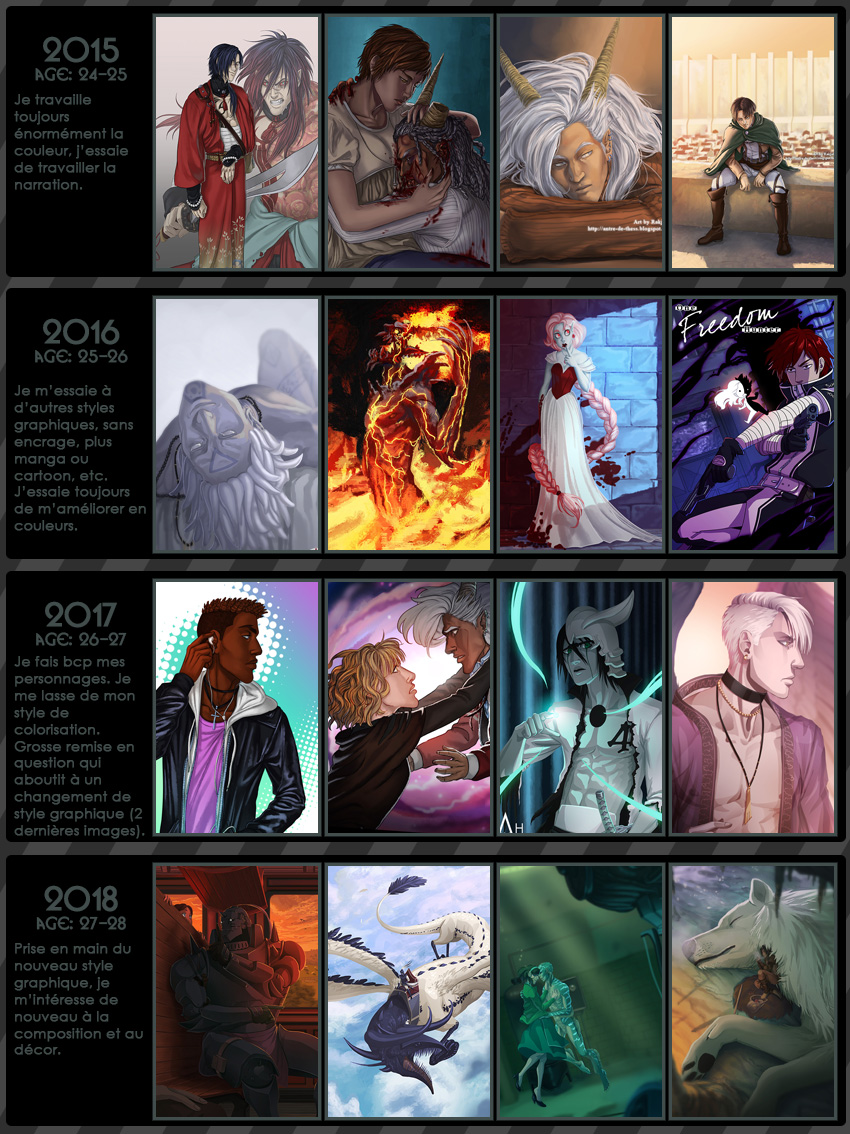
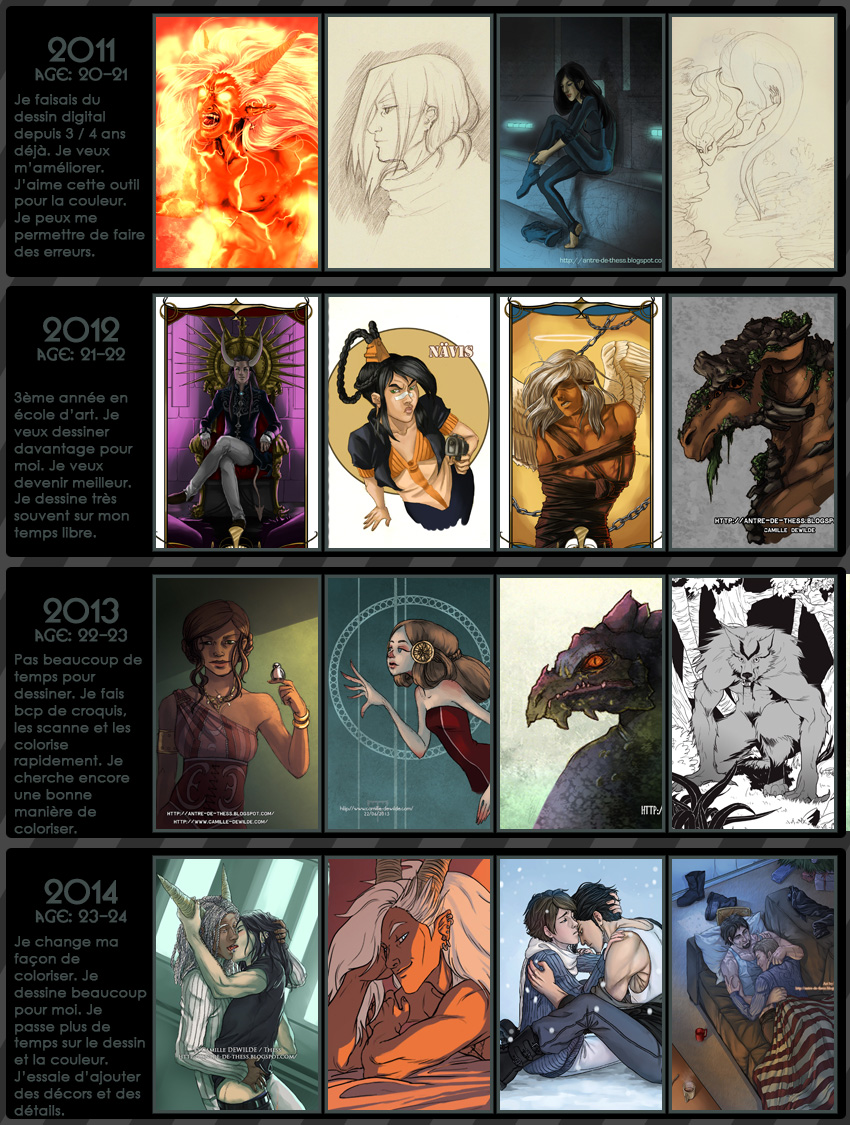
Here I put an improvement meme myself. Up until 2009, I was self-taught and even had put down my pencils at one point. No color, no background, primarily characters, no composition and few drawings that told a story. And since 2009, I started taking lessons, and the evolution was much quicker. Learning about anatomy, perspective, color. It still took until 2014 for me to start telling stories with my illustrations. We can also see an evolution in style.
In 2014 my courses ended, but that didn't stop me from having new insights and continuing my development.

Drawing classes
This is the advantage of taking classes. You can very well learn any discipline on your own. However, generally speaking, receiving instruction and finding a course that suits you will definitely enhance the learning process. Because it will either simplify the work for you or force you to work on things you wouldn't have tackled on your own (like, say, perspective :D).
This allows you to do specific exercises, calibrated to allow you to gradually increase the difficulty and strengthen your foundation. Even if you only take courses for a while, this can change your own self-taught learning method and then allow you to continue your progress without the help of a teacher ;p
Consistency is the key to success
I mentioned it earlier, but working a little every day is a very good method to improve in drawing. Even if it's just 15 or 20 minutes each day. As long as you are focused and working properly, following the 3 main rules: observation, understanding, and practice, there is no reason it shouldn't work.
By working every day, it will become second nature and you will refine your perspective and work on the theoretical aspects much more often as well. Things that may seem difficult and exhausting at first will quickly become second nature.
Here you are, now ready to start your training in "The Basics of Drawing", taught by my colleague Grégoire, which covers all the essential basics and guides you through the creation of an illustration step-by-step.
You will review the materials, the correct posture to adopt, but also the mindset to keep motivated before getting into the thick of it and tackling concepts such as image composition, perspective, character proportions, values and hatching, and follow Grégoire step by step in the creation of an illustration. All punctuated with small exercises with their corrections to see if you have understood the concepts of each lesson :D
Interested? Then, go check out the course on the basics of drawing.
For those who want to draw other things, there is the blog section with numerous articles on a variety of topics that enable you, for example, to draw certain elements step by step, such as animals, plants, characters, decorative elements, etc. Or even articles on the best drawing apps, colors, which I recommend to you, by the way.
Get your pencils ready!
Popular Articles


Discussion
Interesting and useful article.