Draw a Crying Eye
In this article, we'll look at how to draw a crying eye. Knowing how to draw a face with its different elements is good, but drawing emotions to bring the character to life is better! With this tutorial, we'll see how to draw sadness and, specifically, how to draw tears.
I won't dwell on how to draw the eye, there's already an existing article on the subject.
I therefore advise you to check out the article "How to draw an eye" before tackling this one. The better your anatomical knowledge of the eye, the easier this task will be for you.
Let's start without further delay...
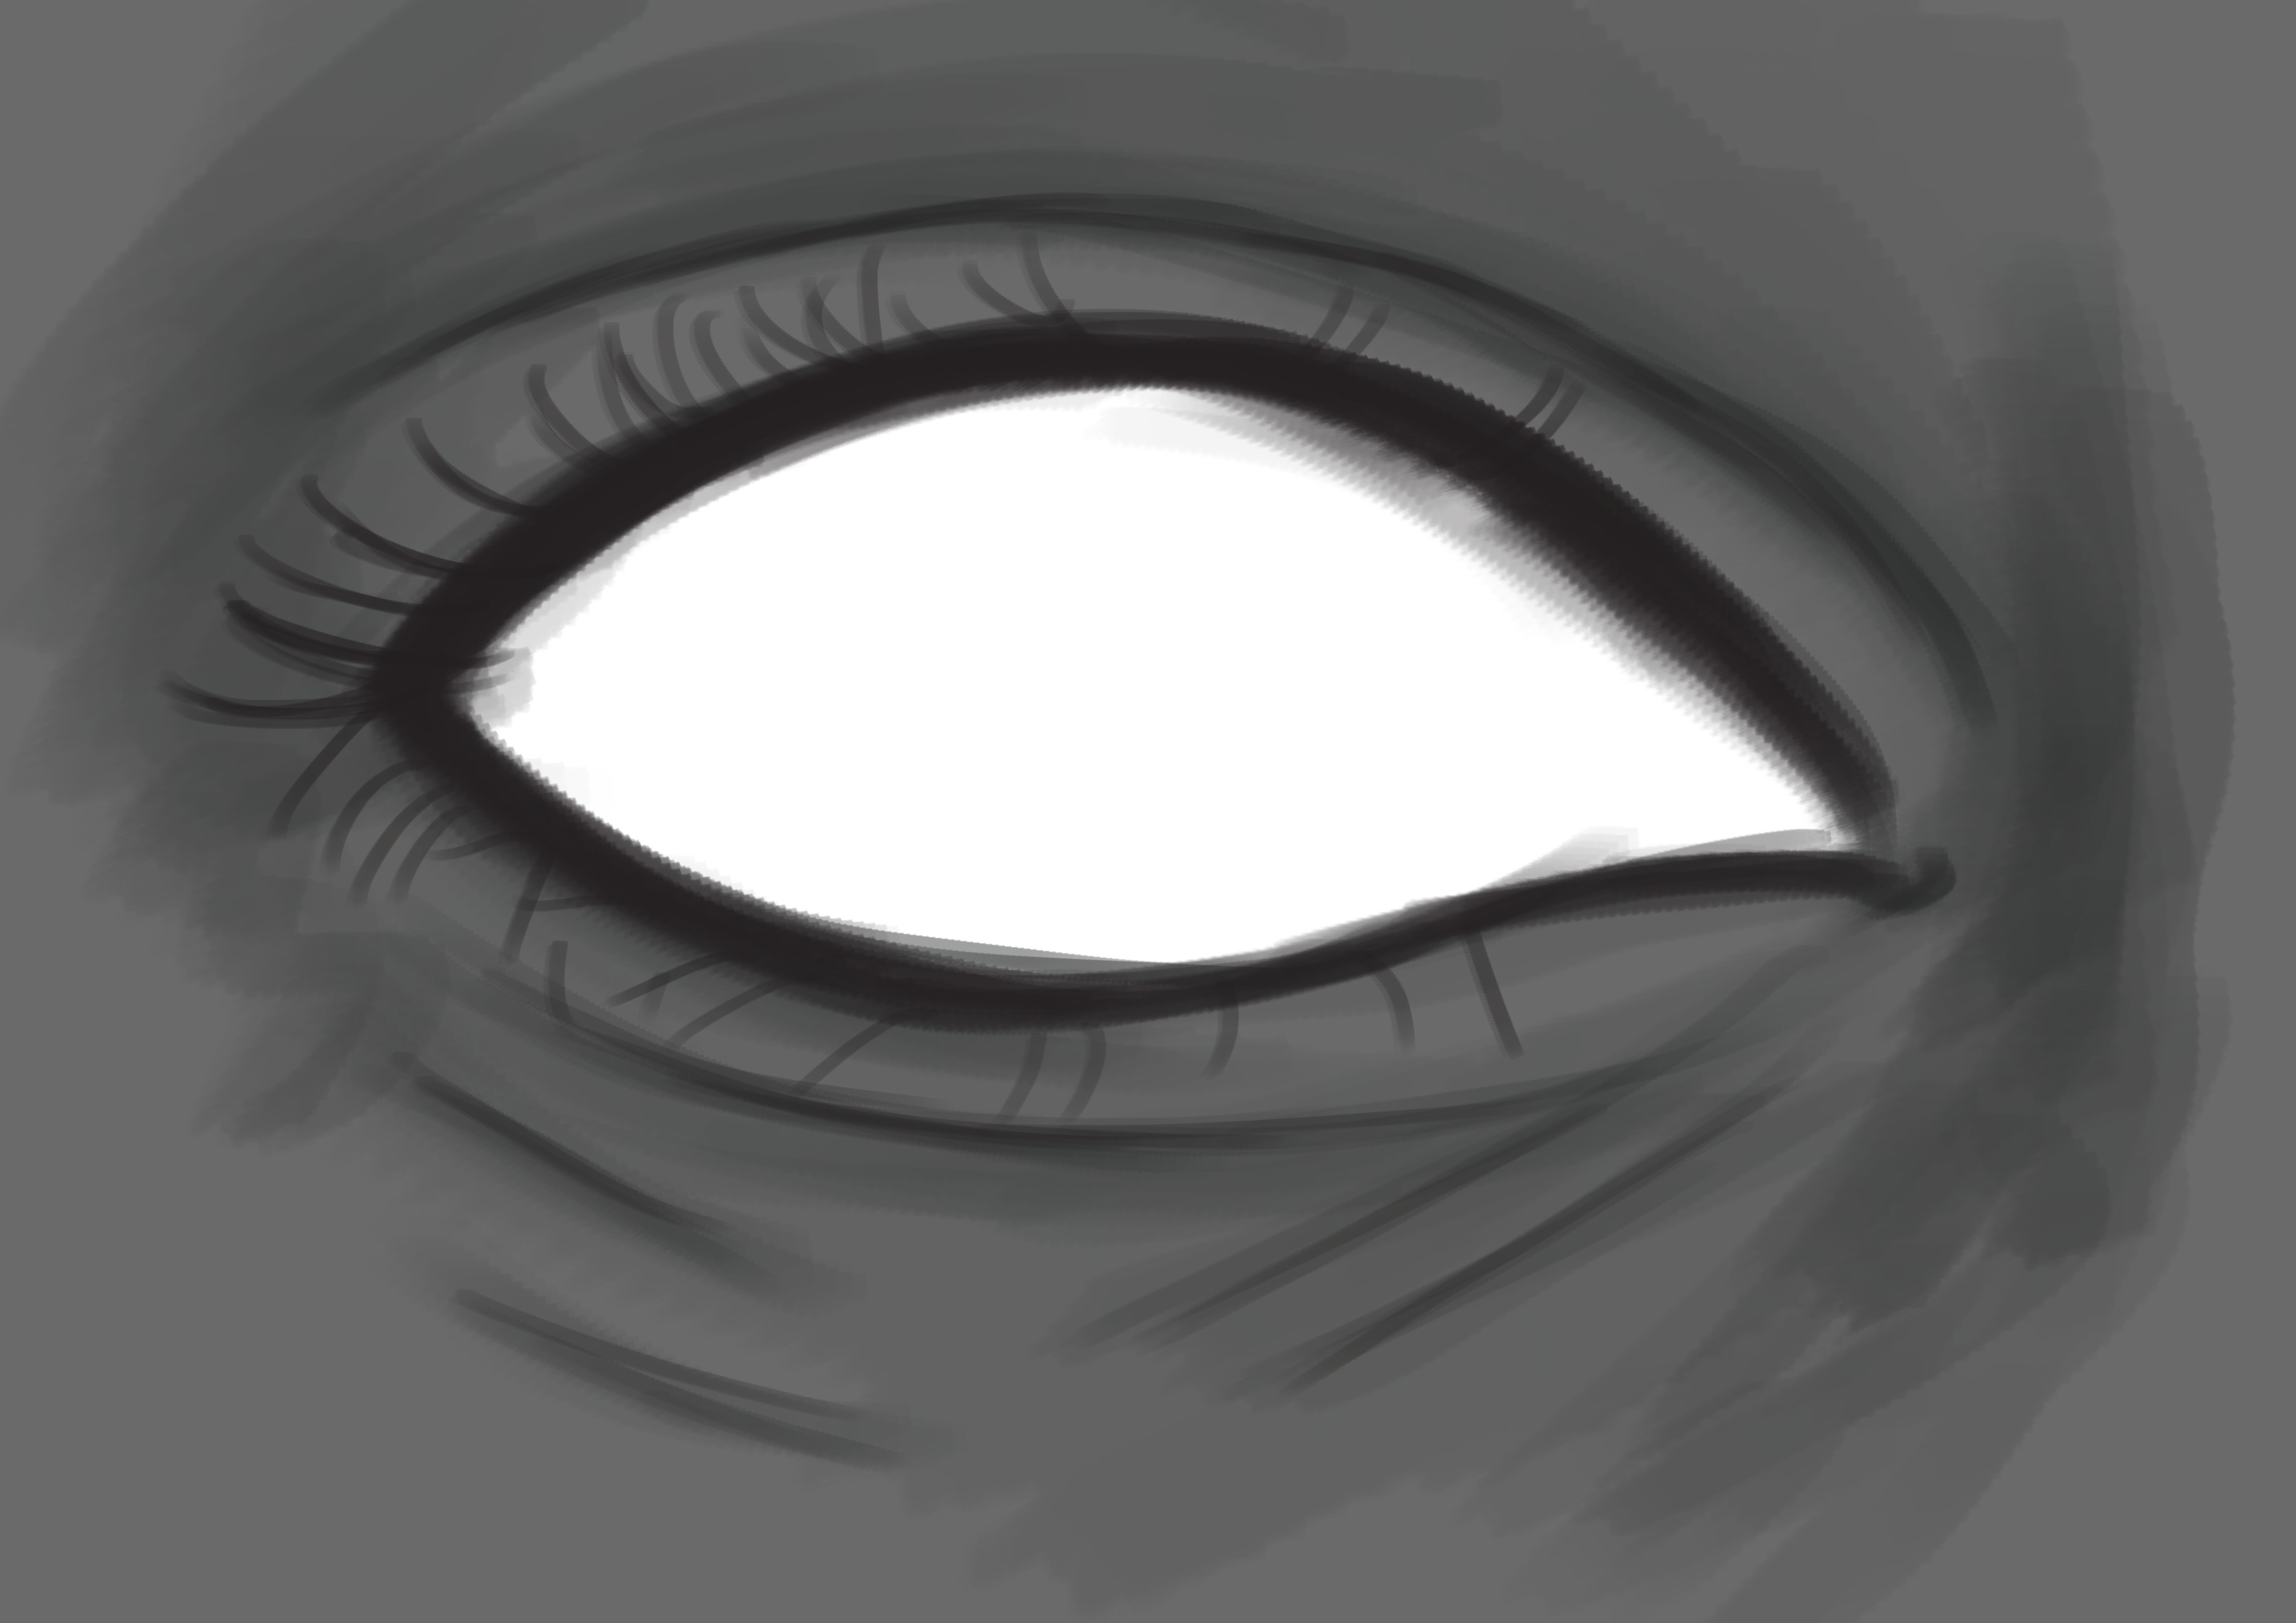
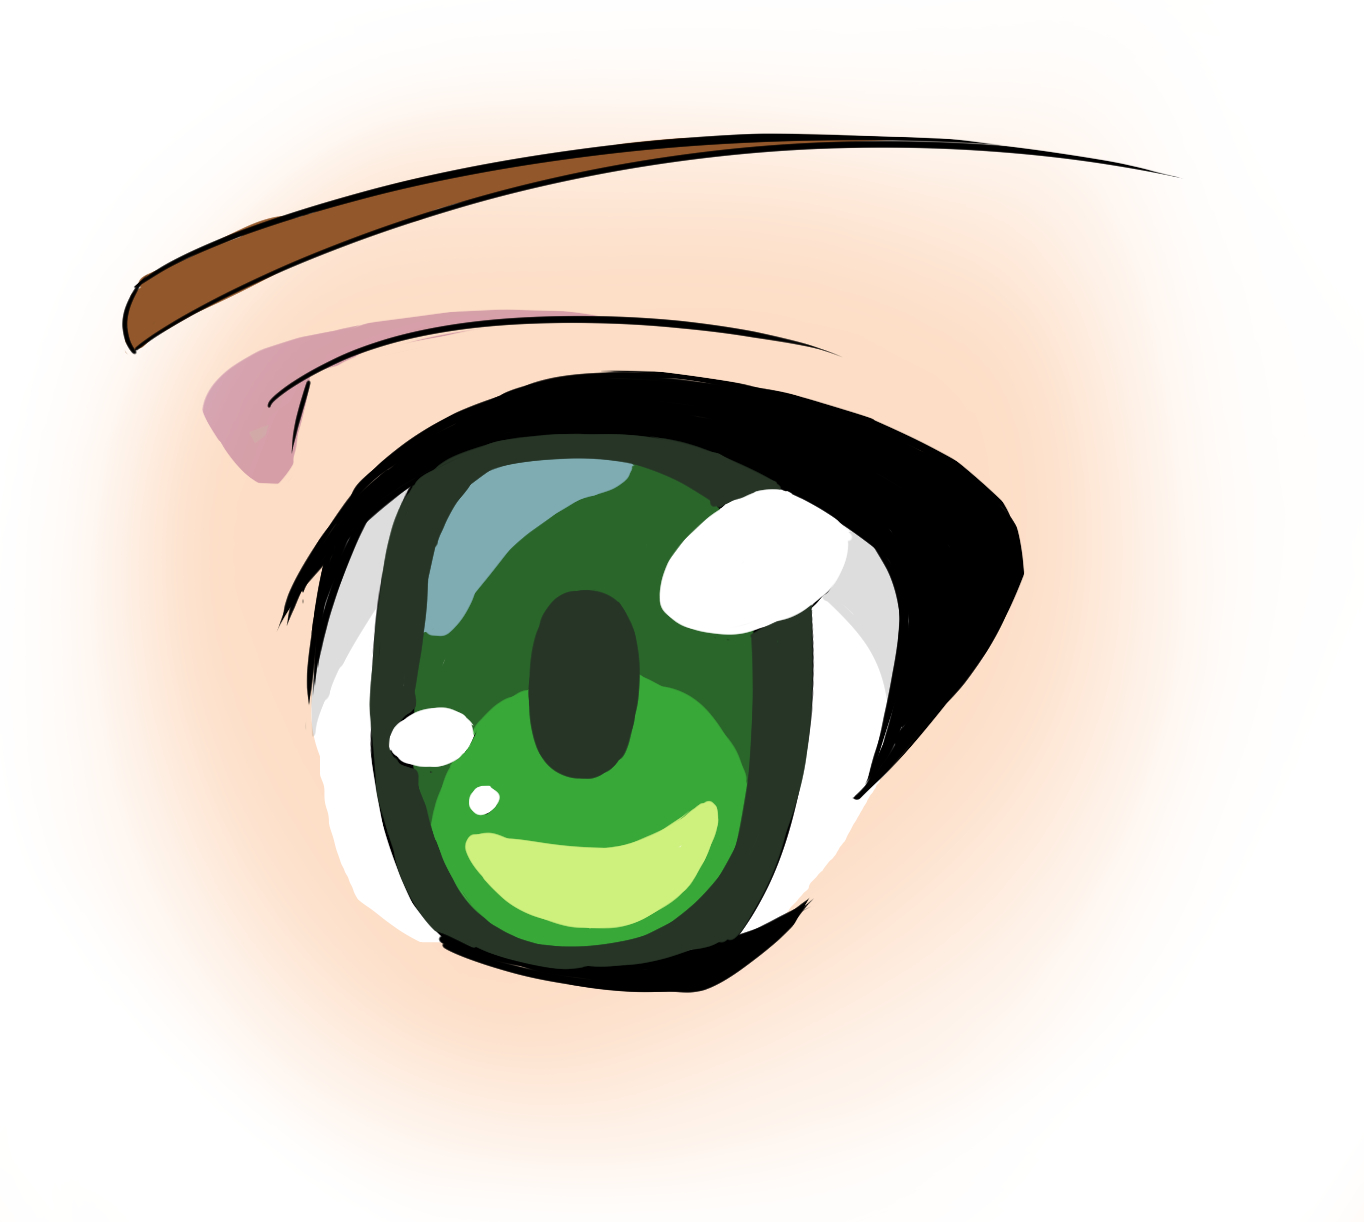
DRAWING THE EYE
As mentioned earlier, I will go very quickly through the drawing of the eye, so hold on!
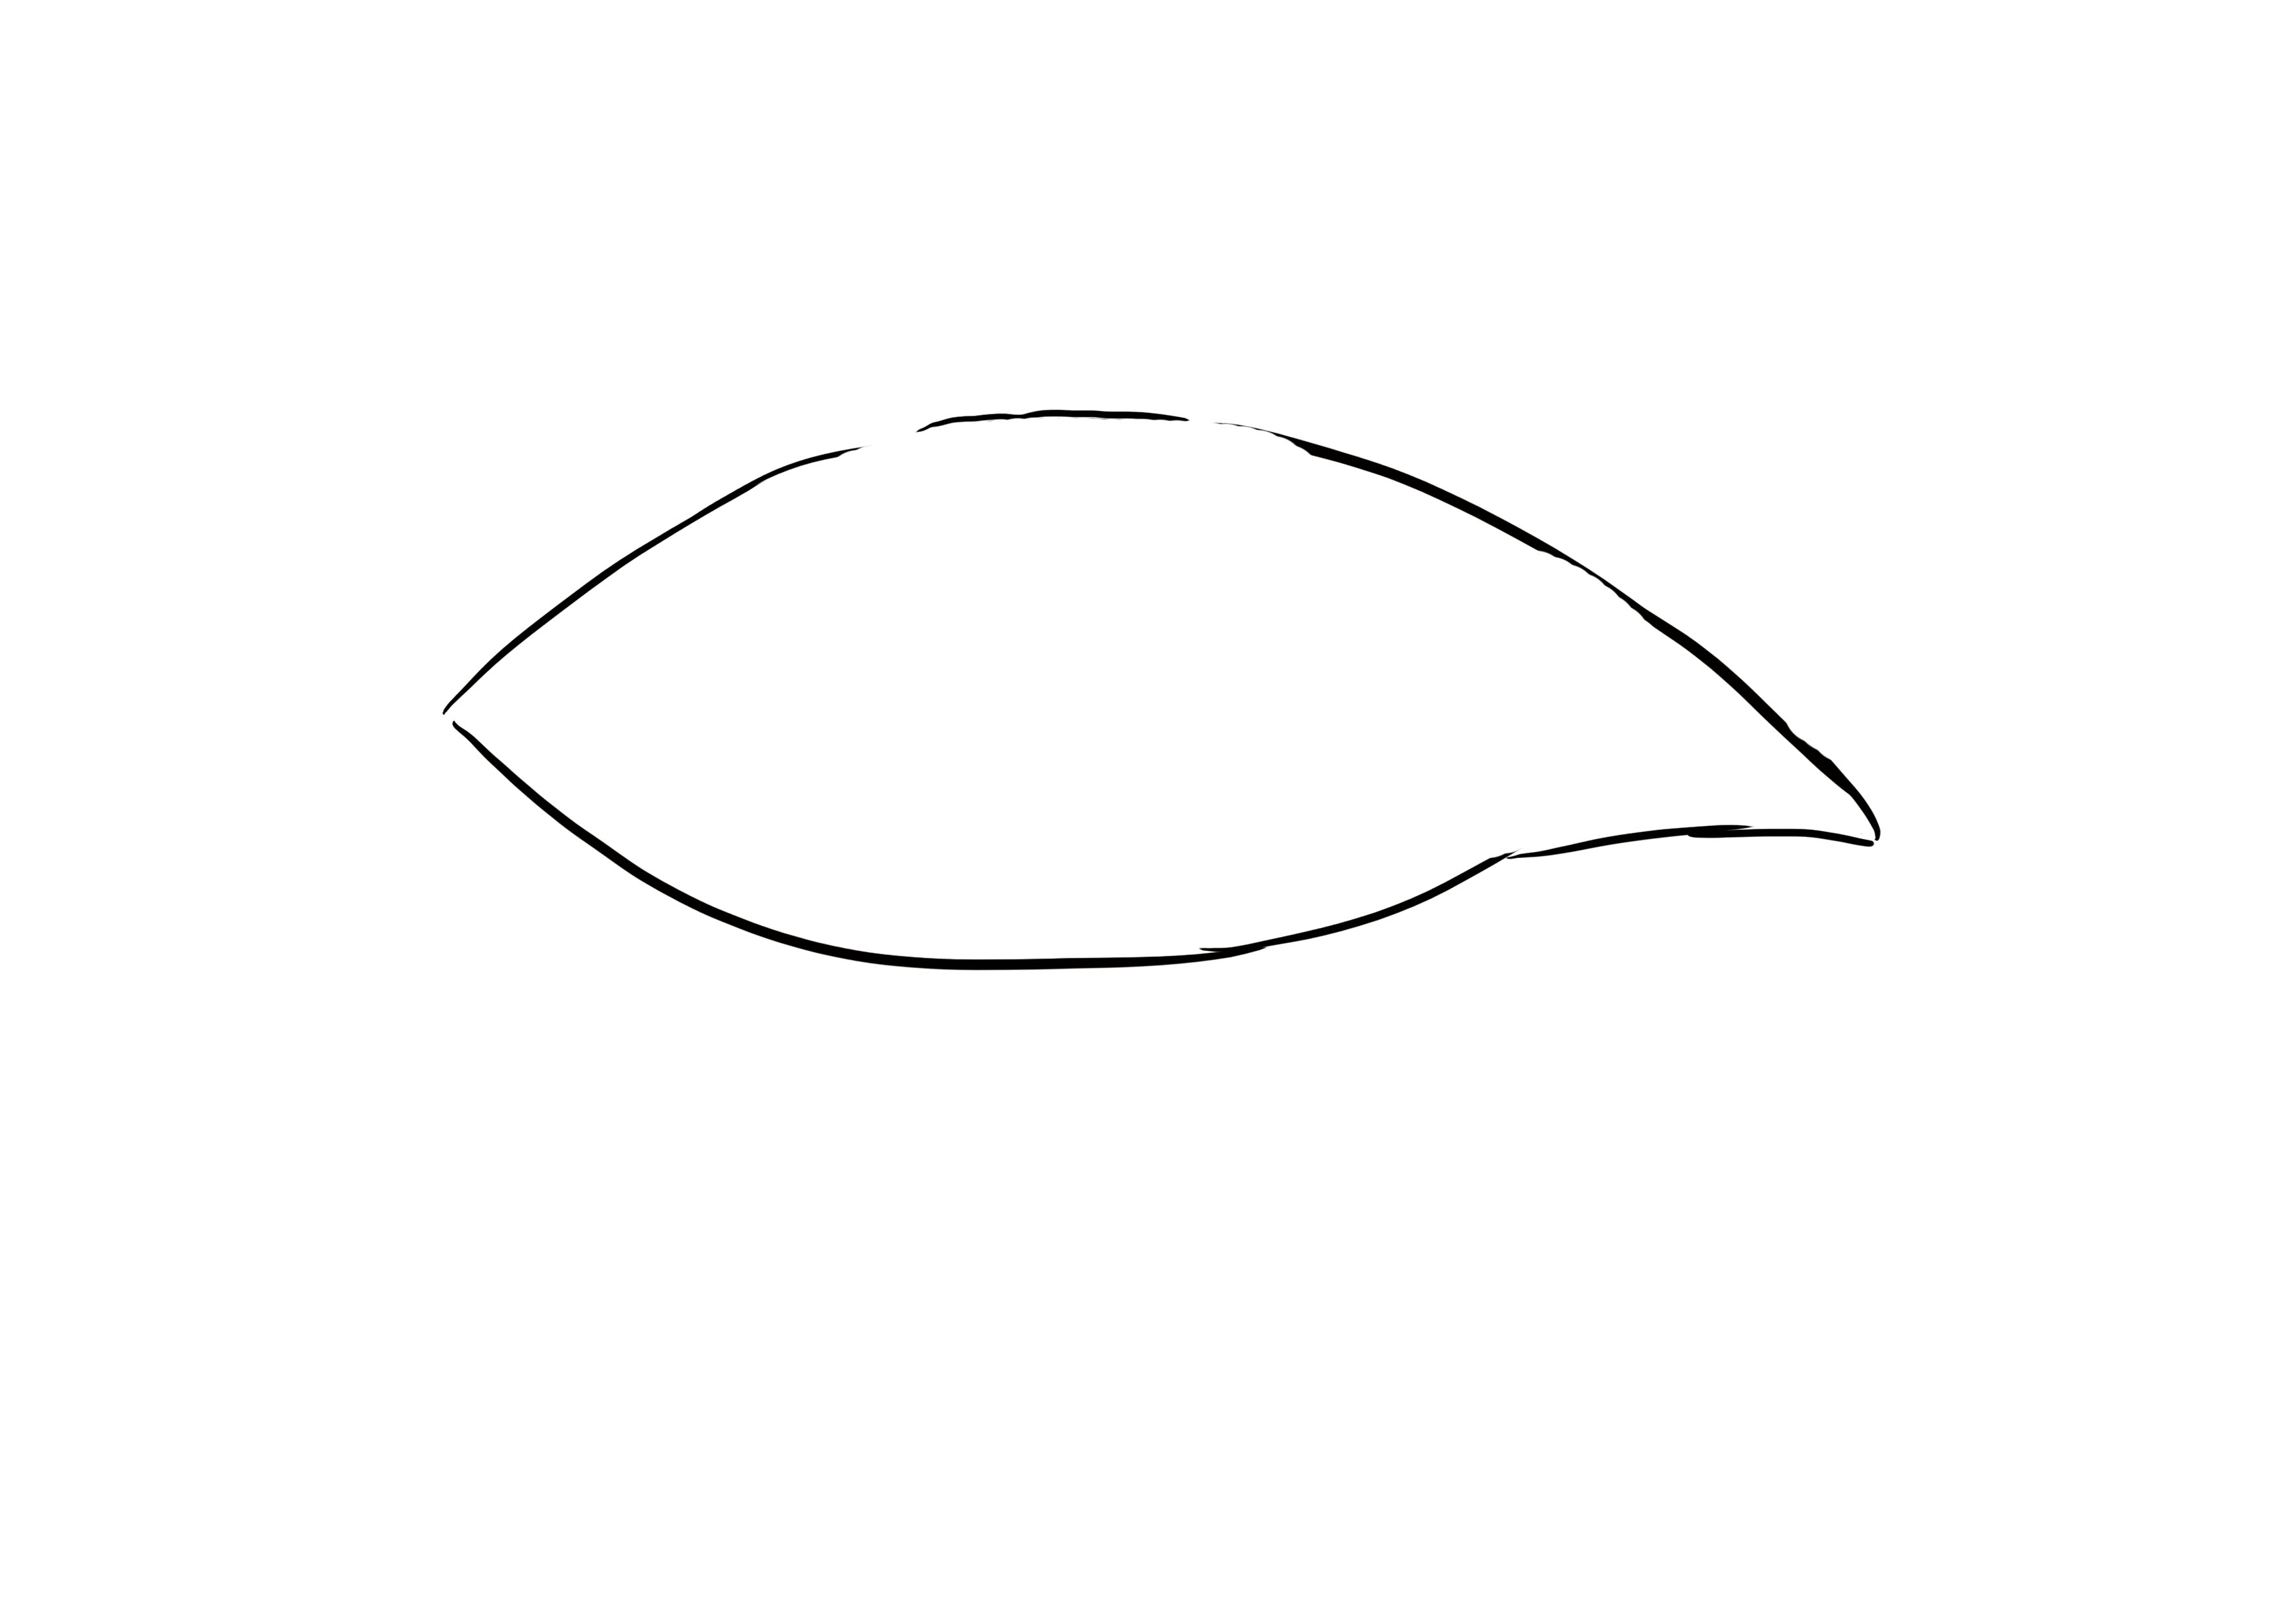
You will start by drawing the eye, with a somewhat oval shape.
Then, draw the iris (we'll suggest the eyeball later with shades of color).
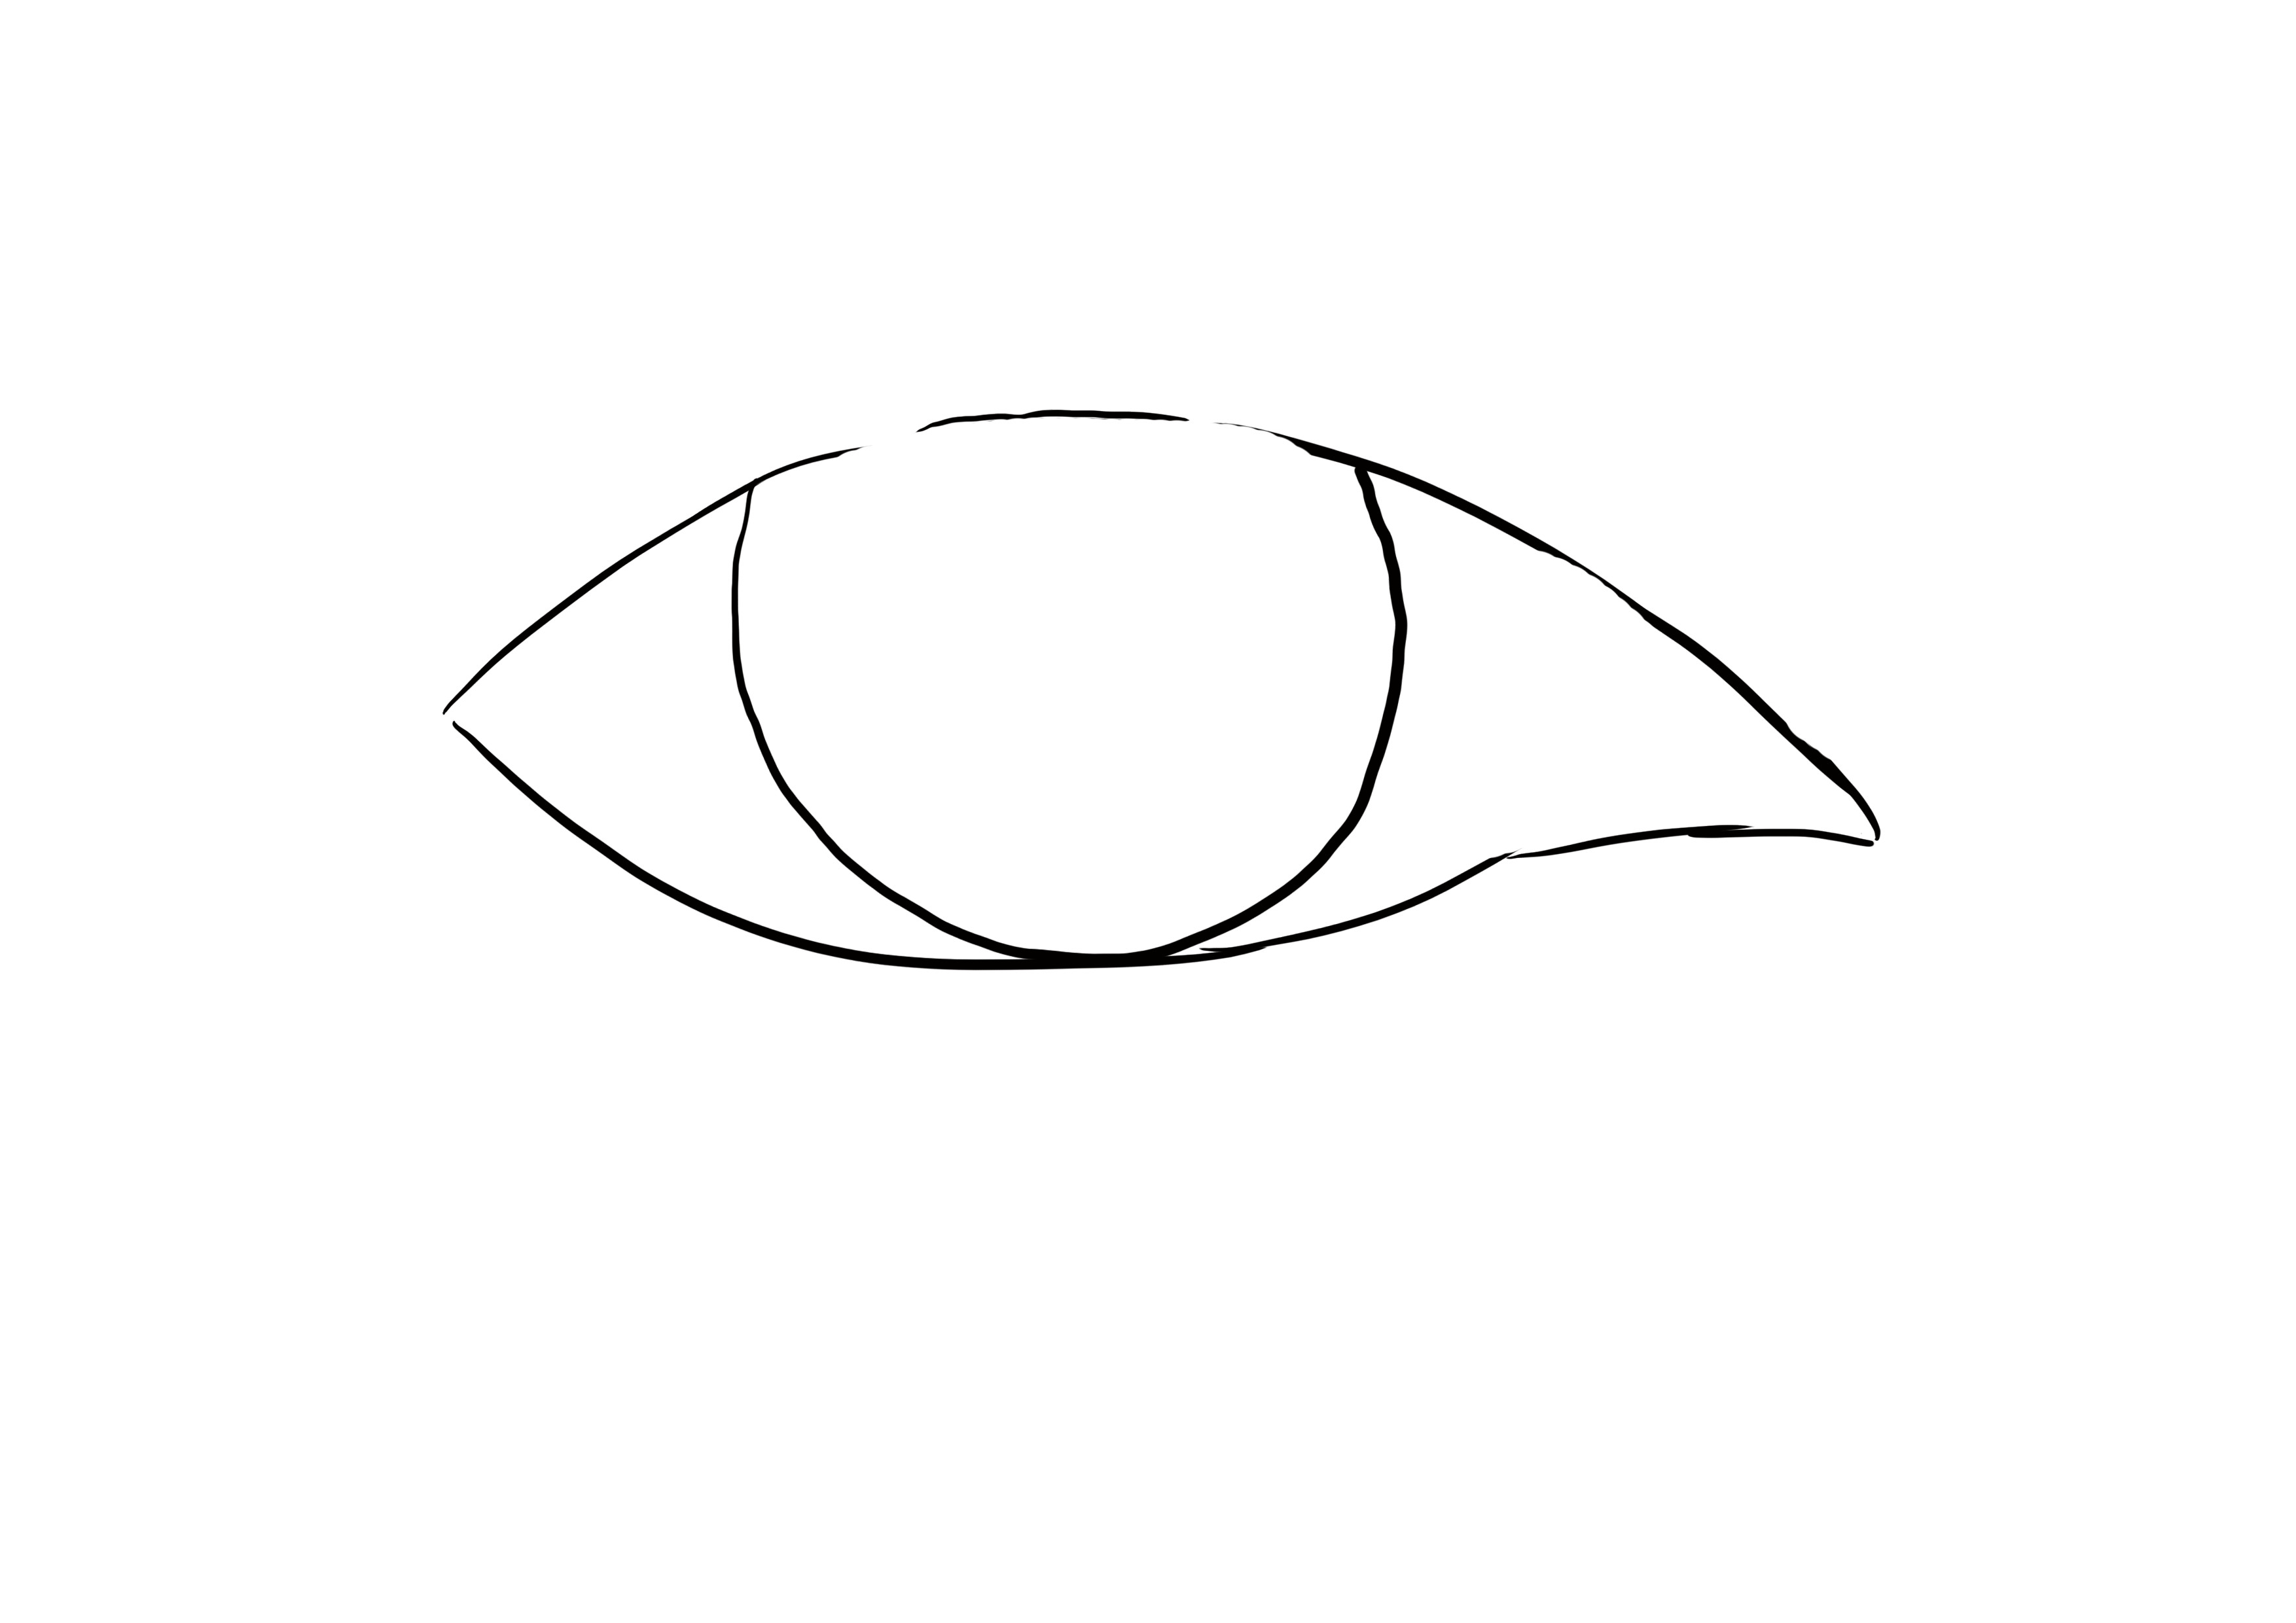
Start adding details like the eyelid.
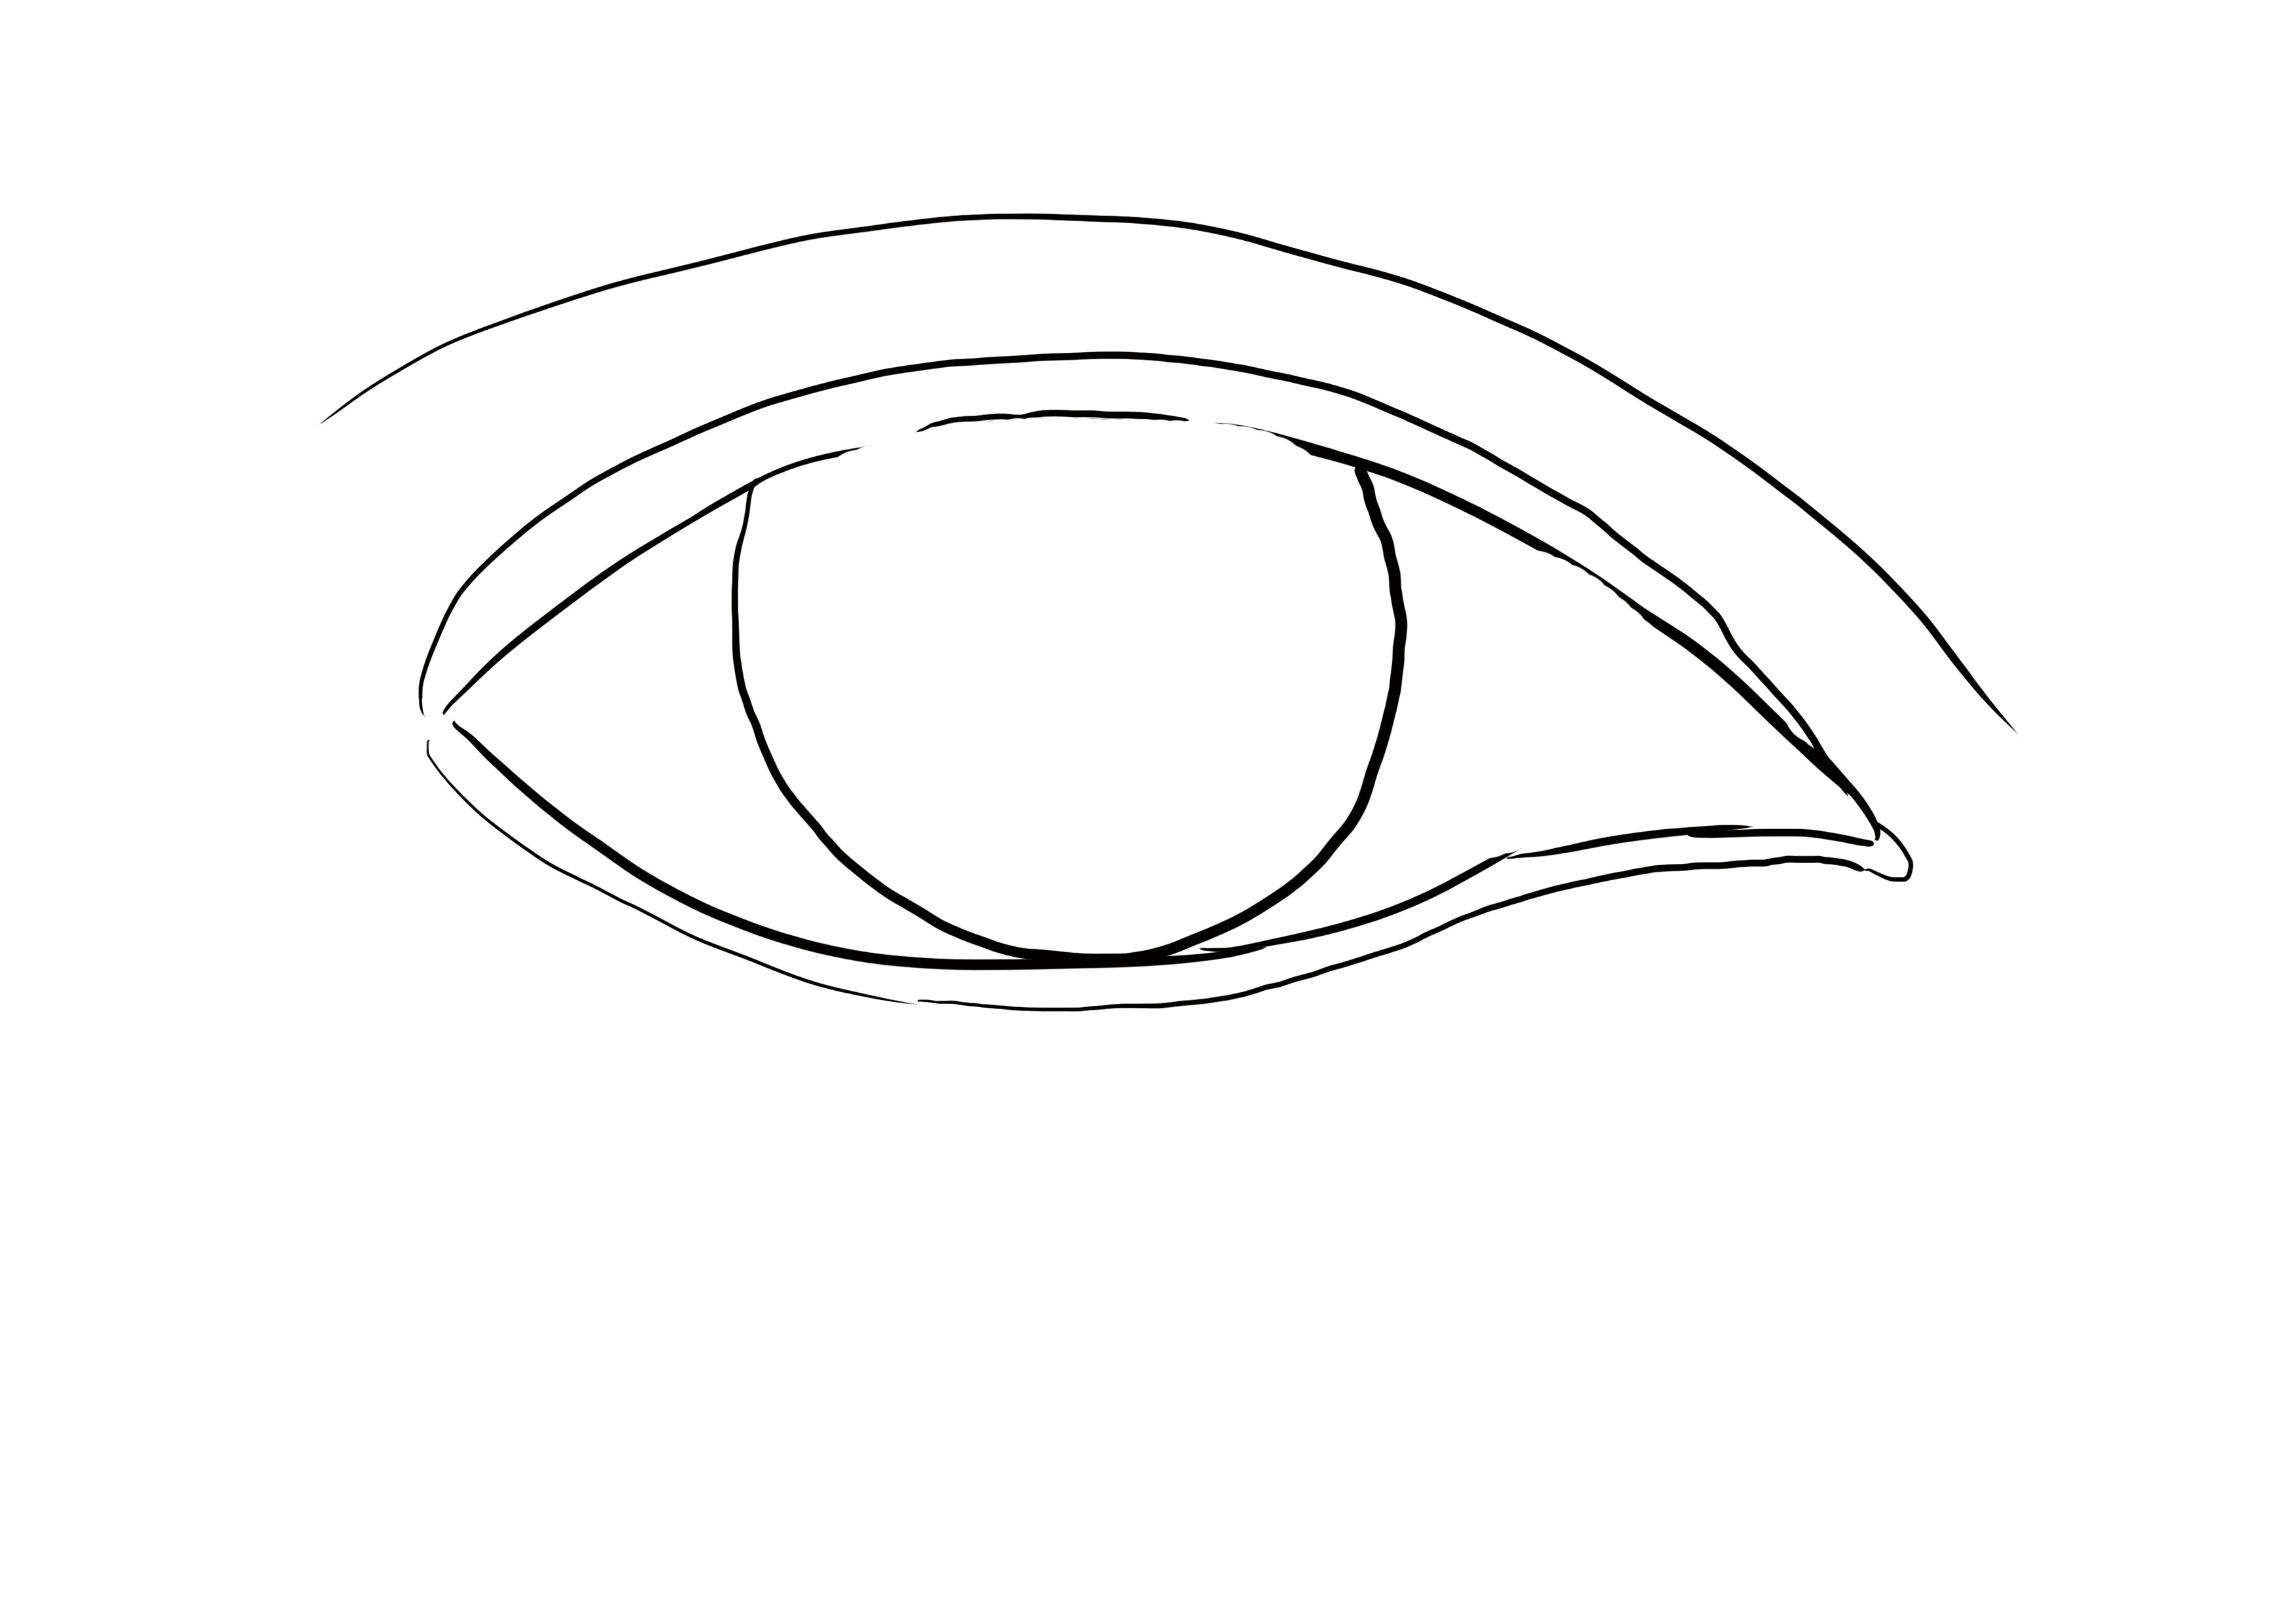
Finally, draw the rest of the details such as the pupil (dark part in the middle of the iris), some reflections, and light wrinkles under the eye.
Draw the eyelashes irregularly (irregular sizes and directions).

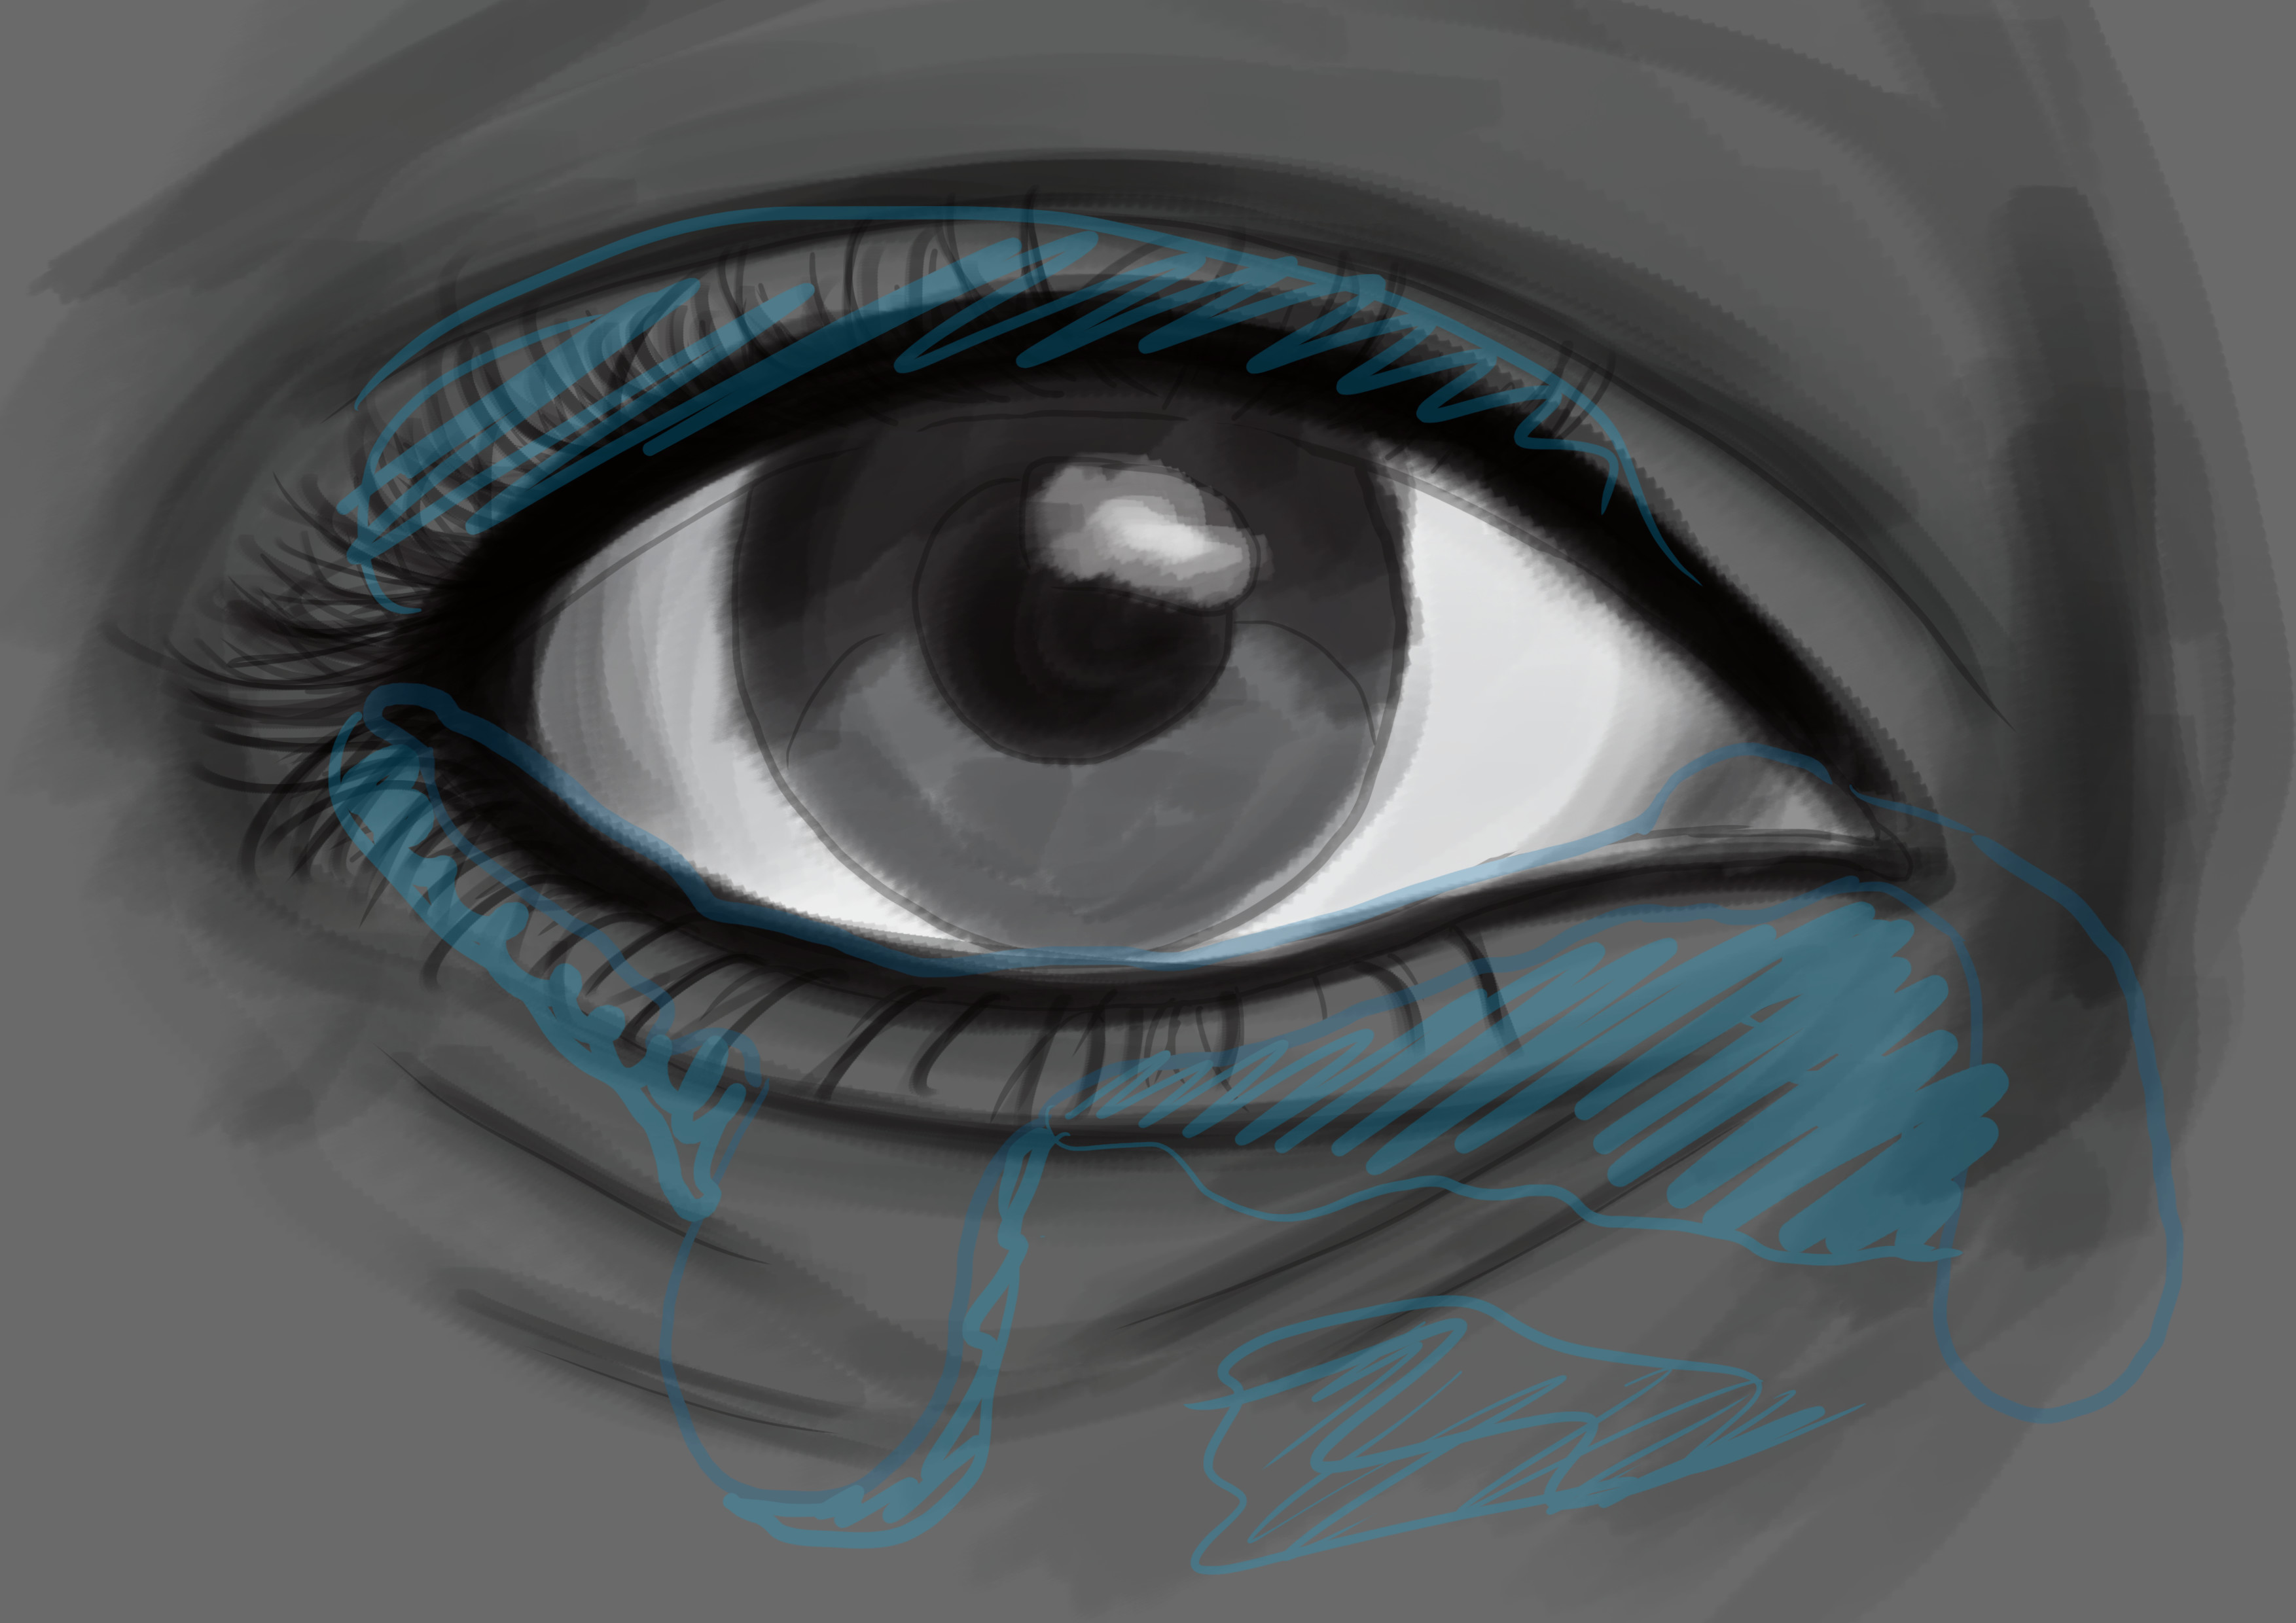
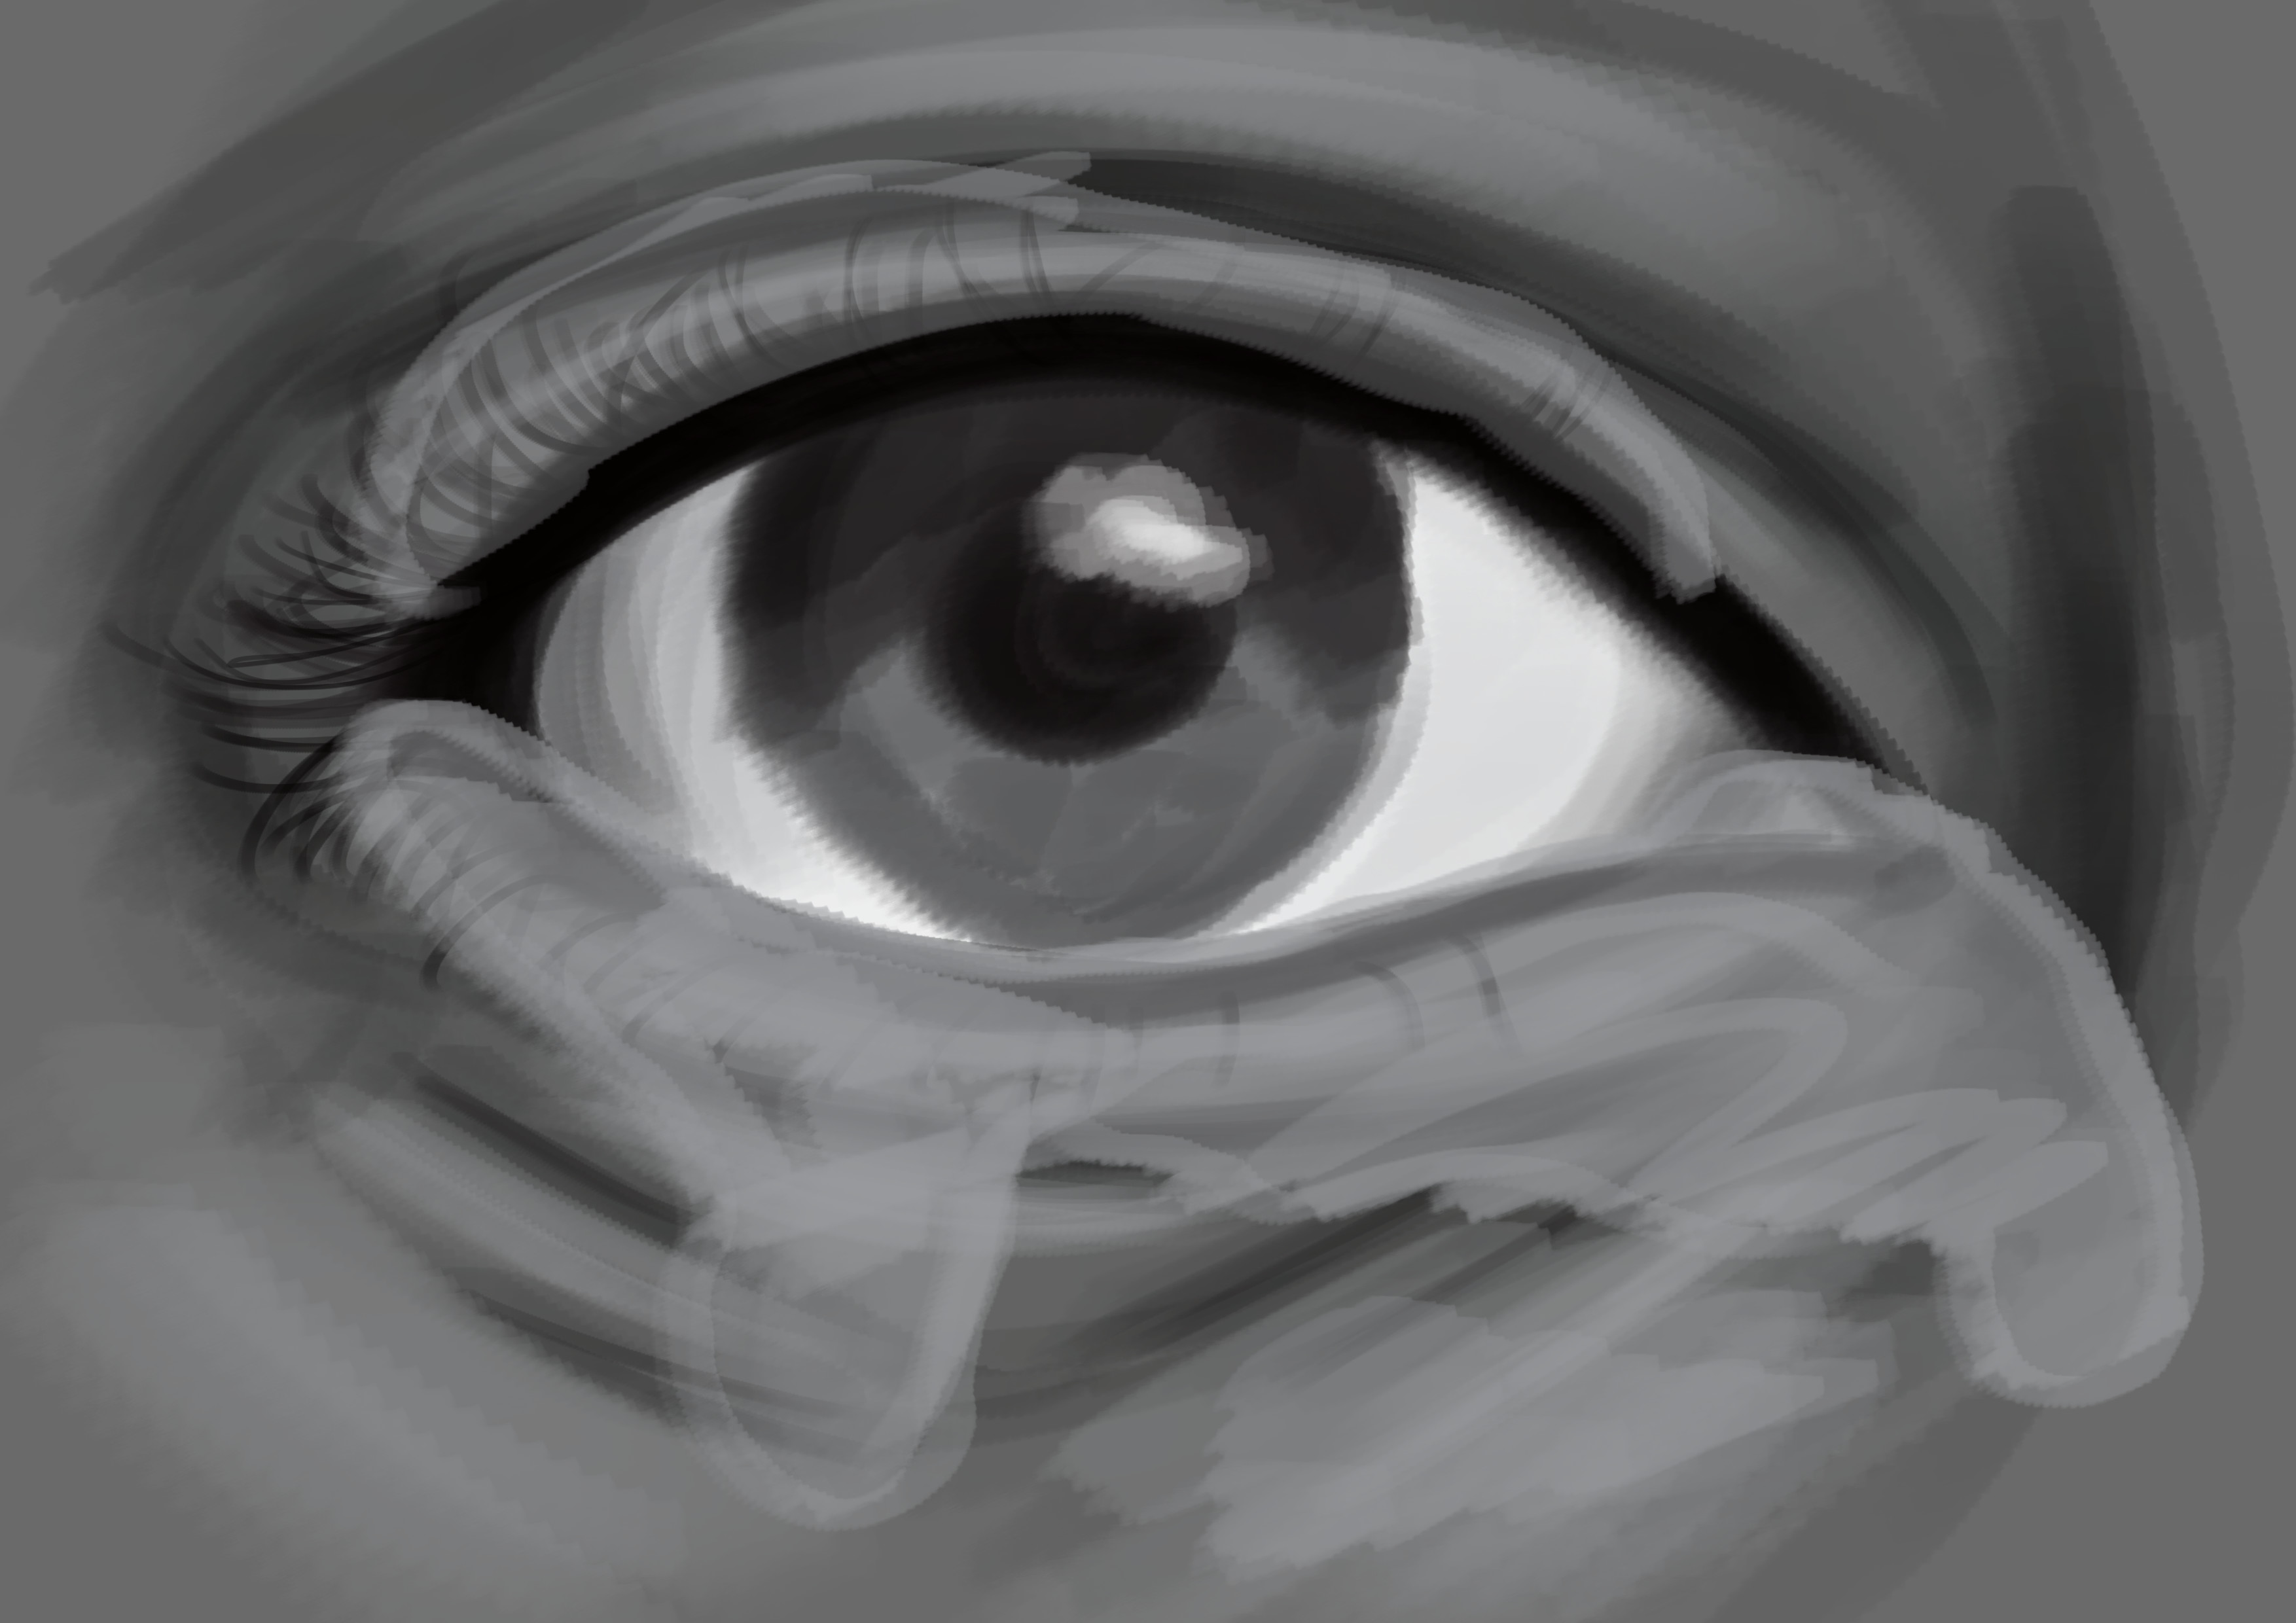
CHOOSING THE PLACEMENT OF TEARS ON THE DRAWING
Now that we've drawn the eye, we will decide where the tears will be.
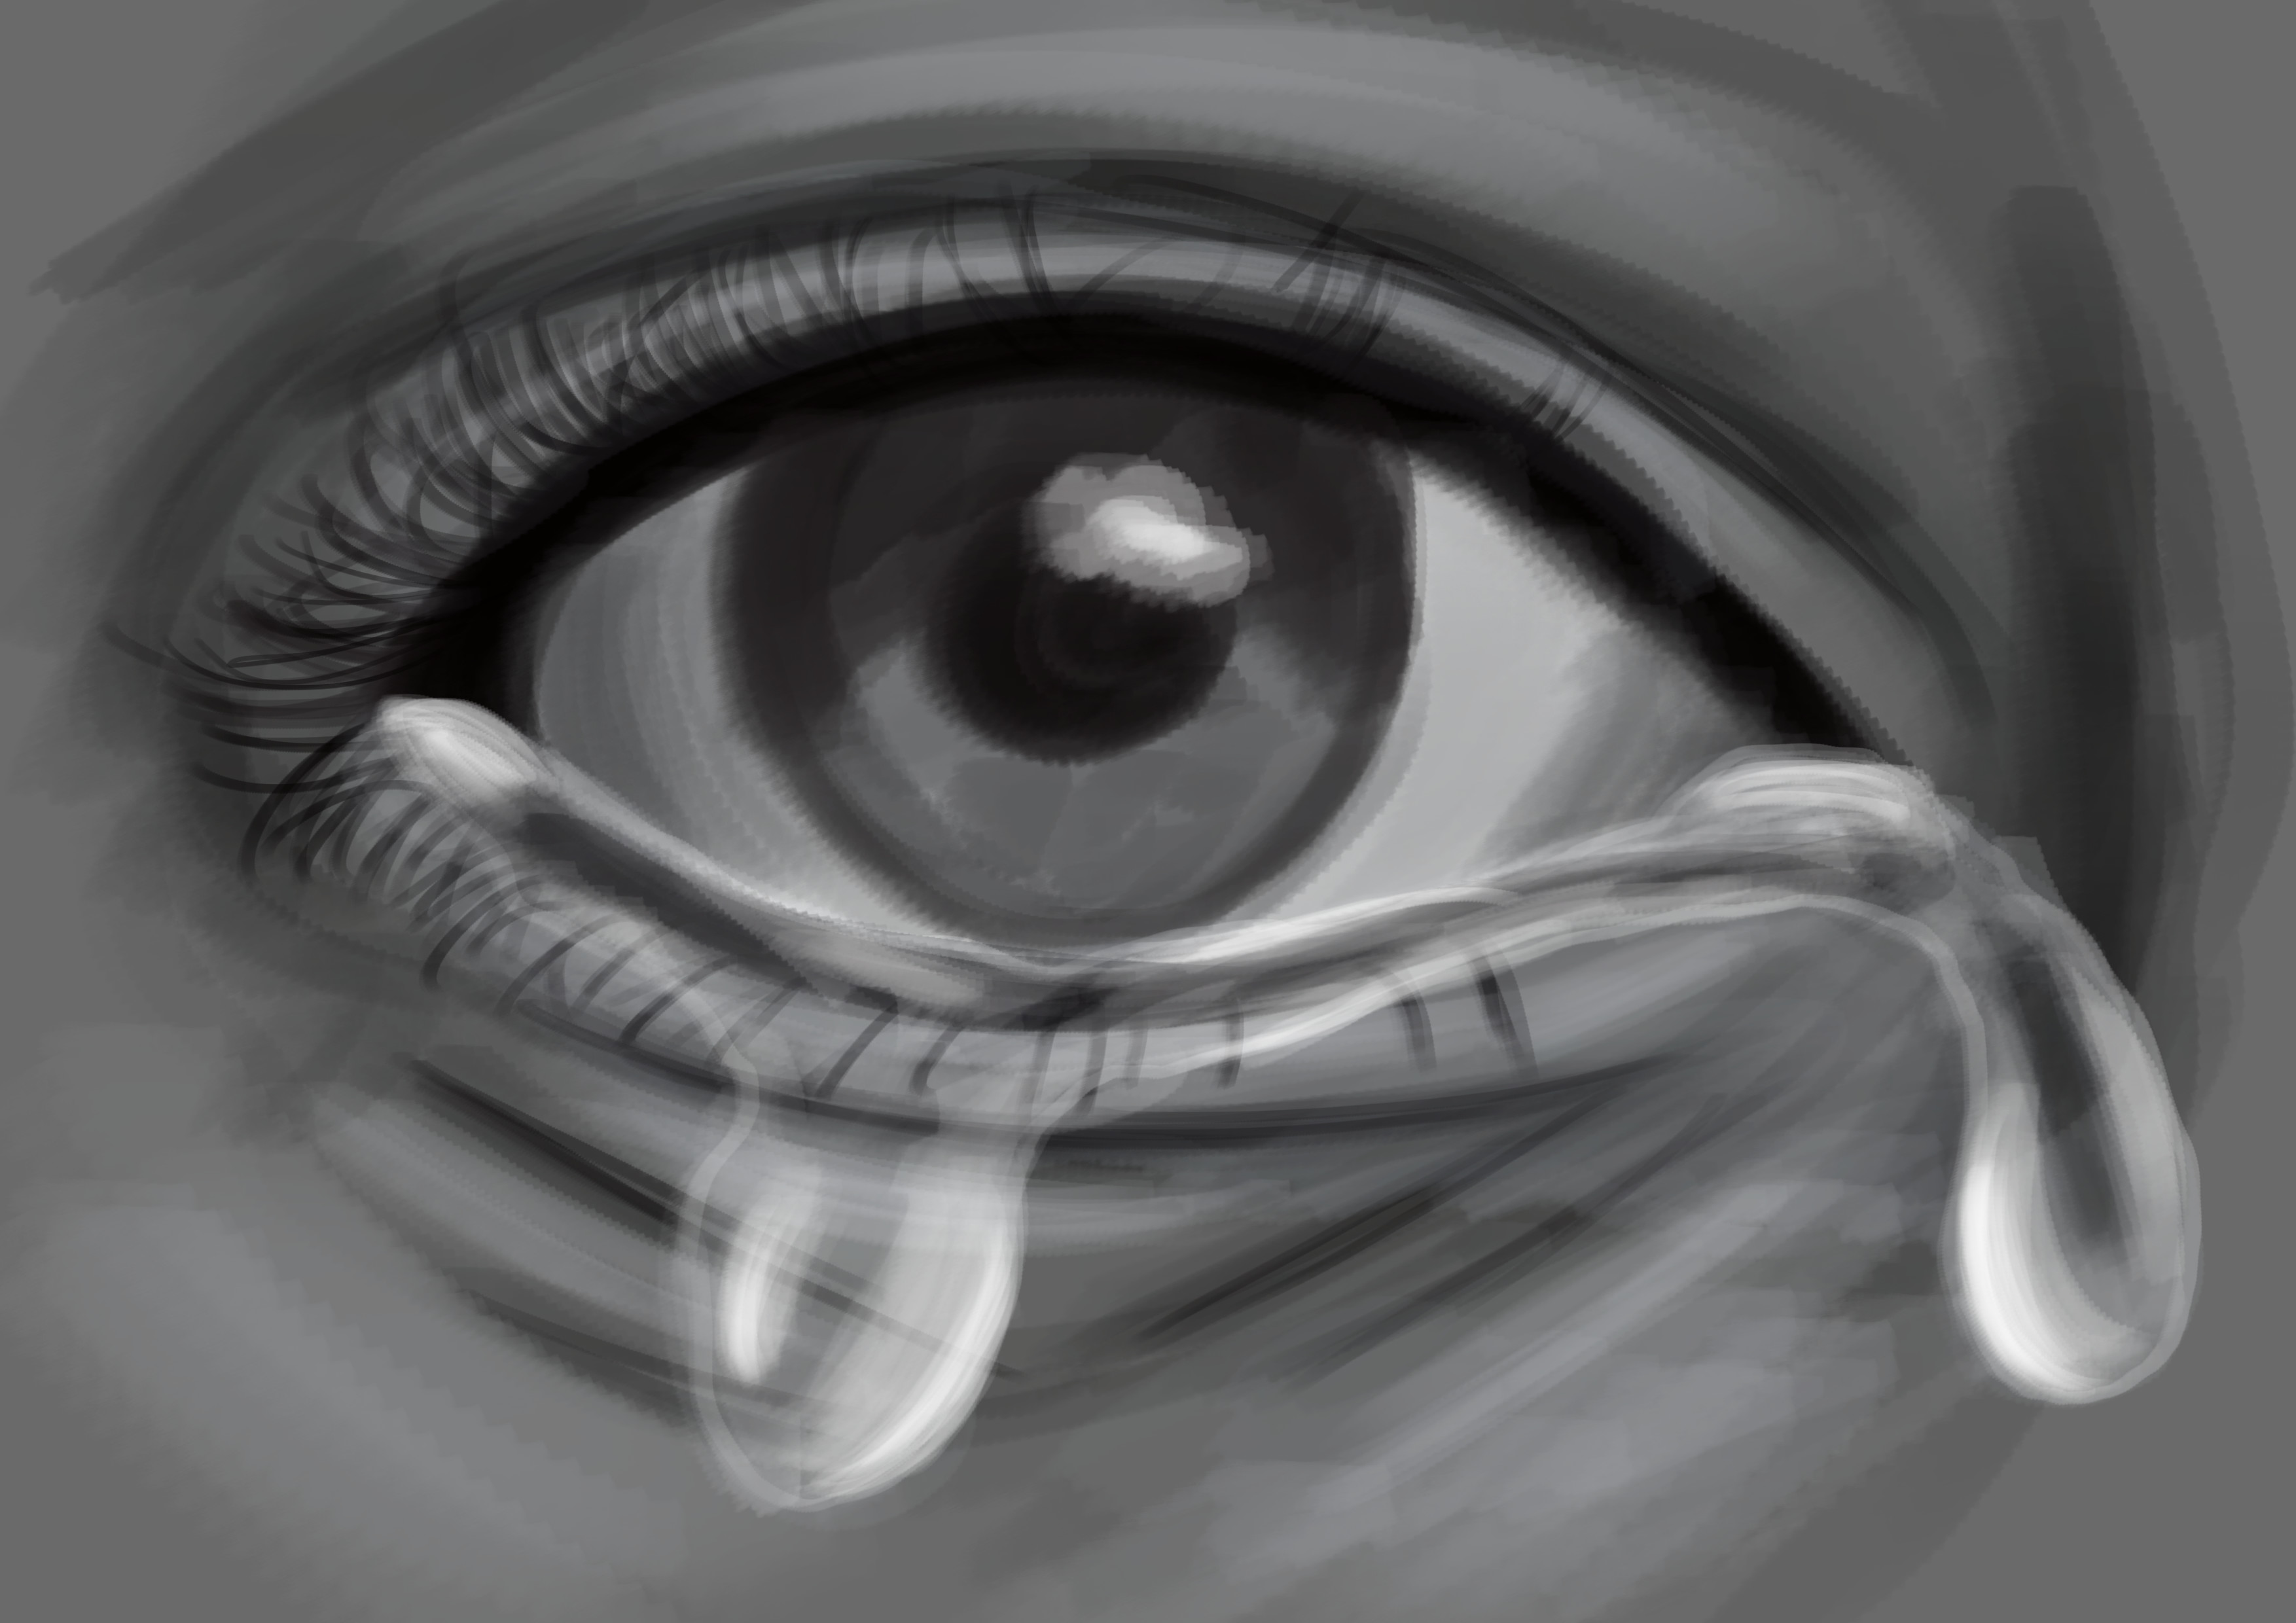
I decided to put a large drop towards the middle and a finer one towards the inner corner of the eye.
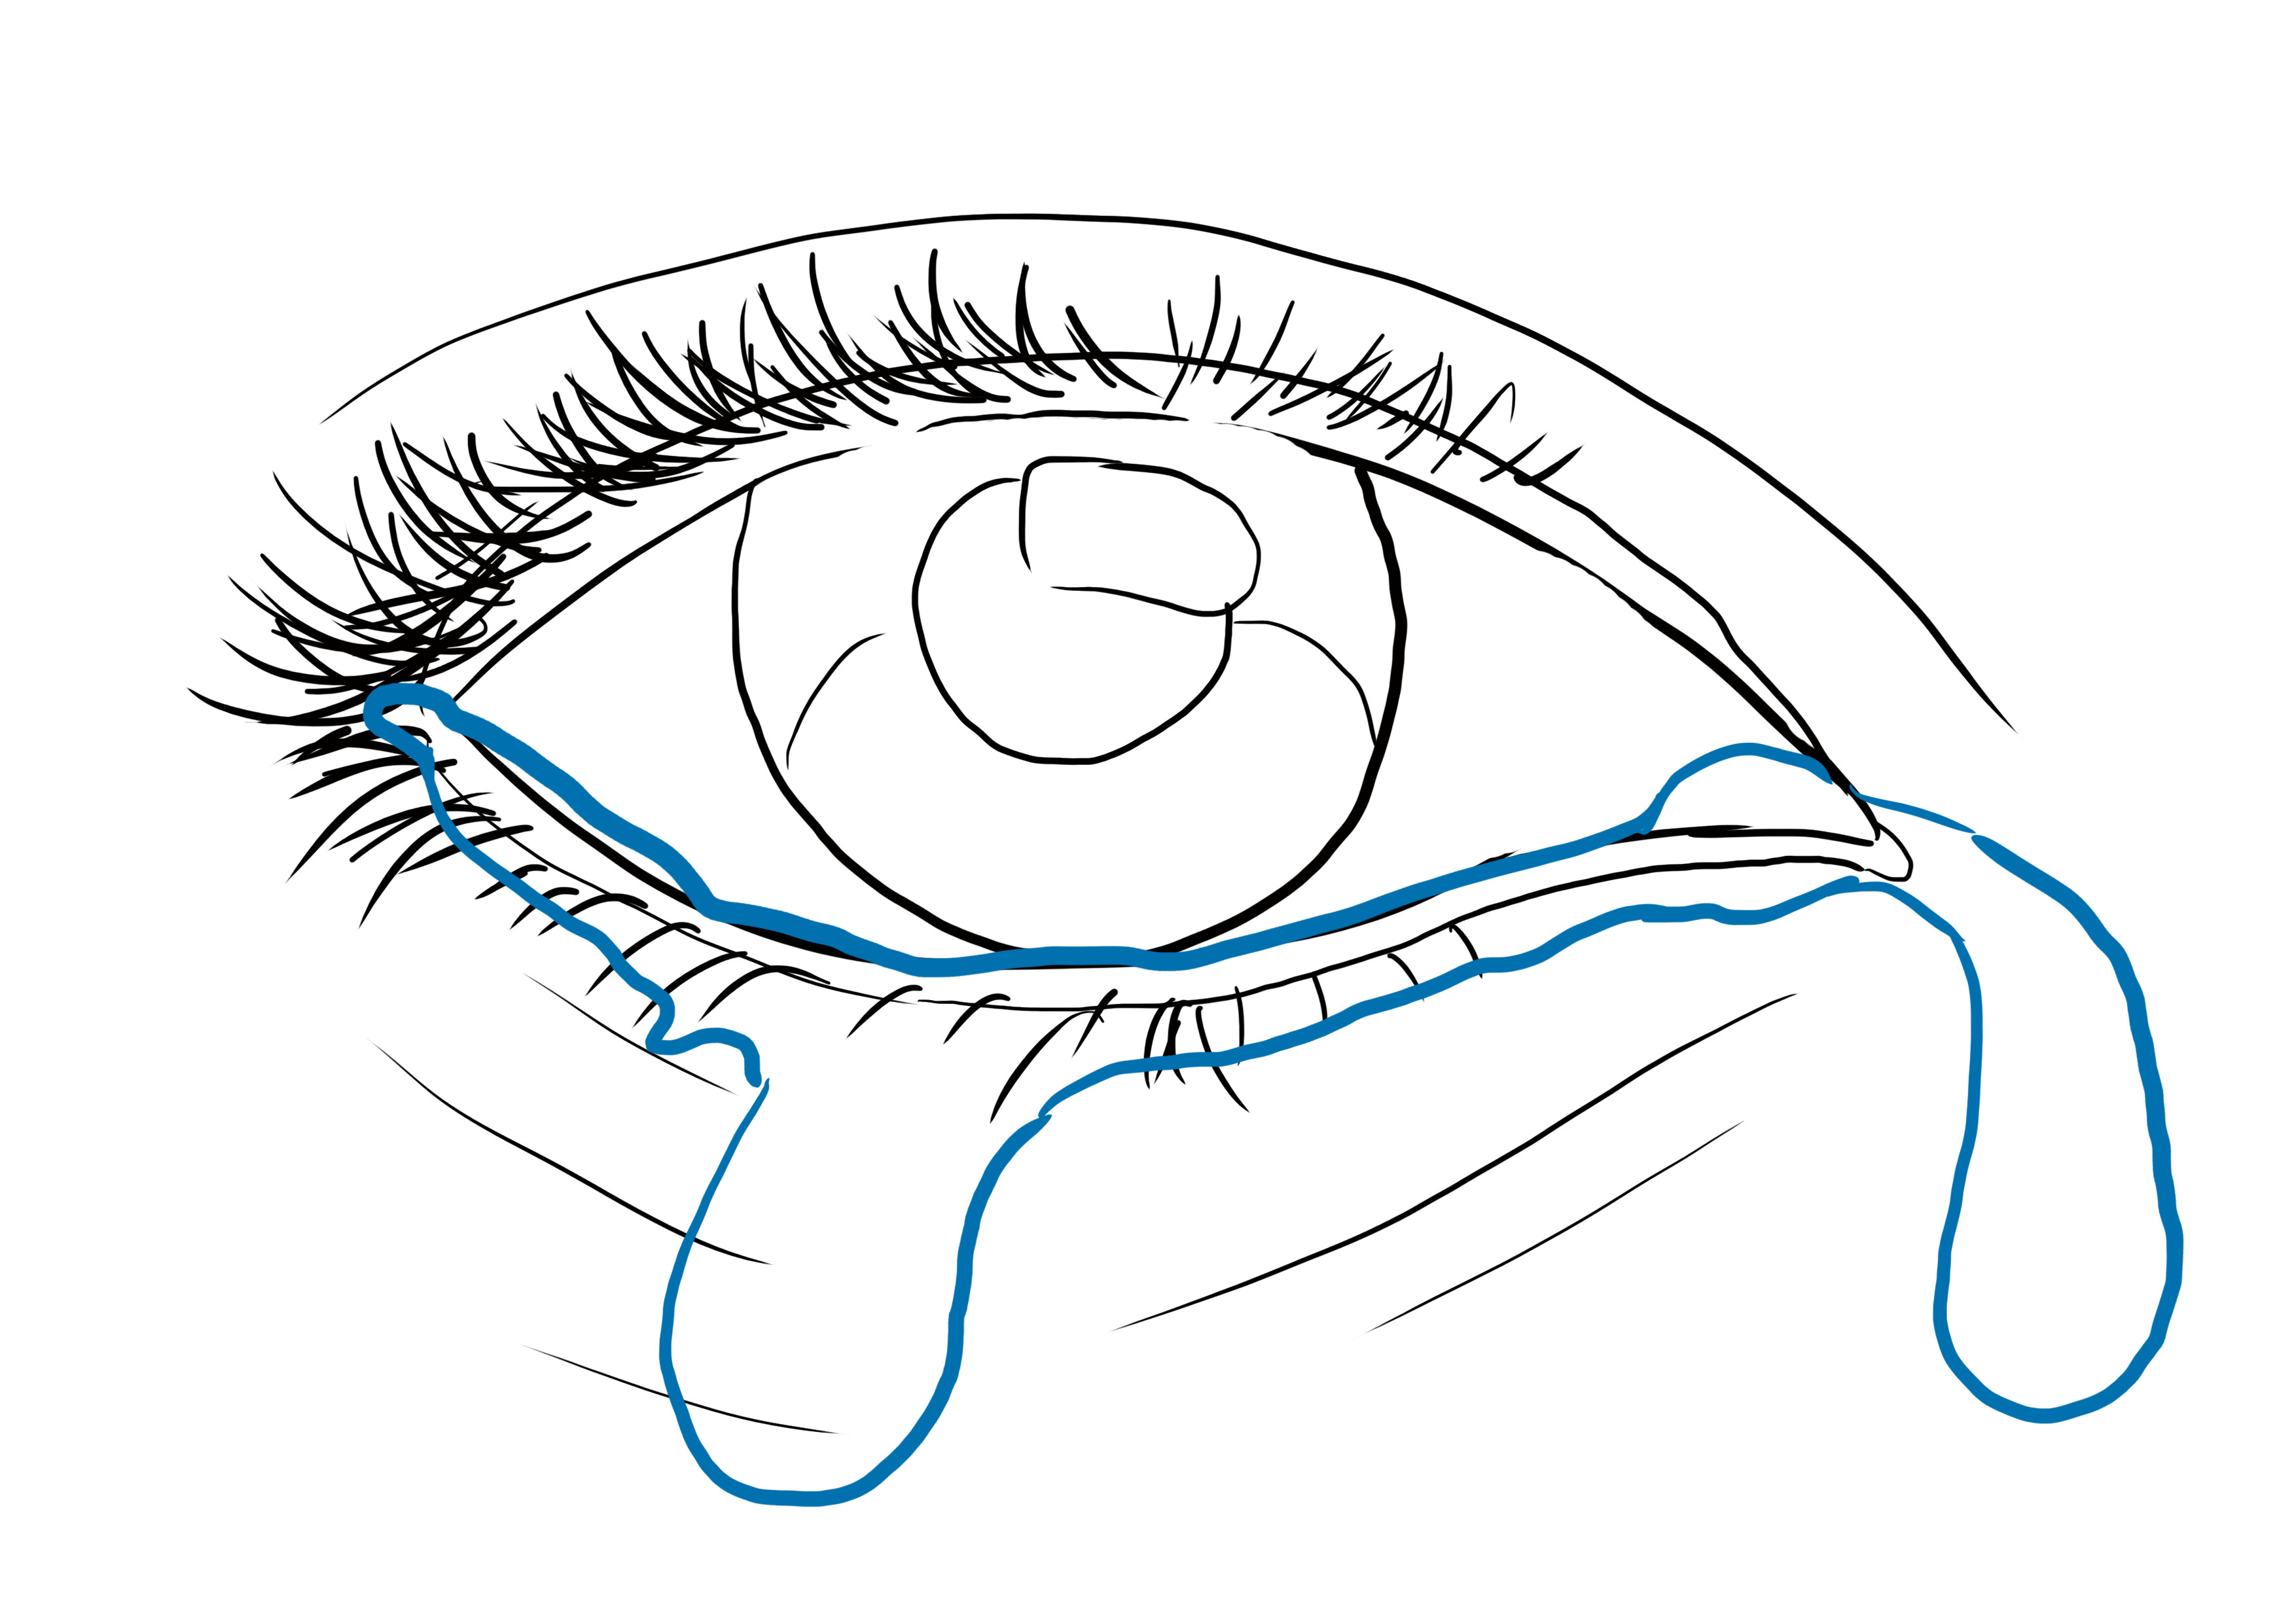
I am assuming that the person has been crying for a while, so their skin is wet. I will therefore define the areas that will be wet with light blue hatchings.
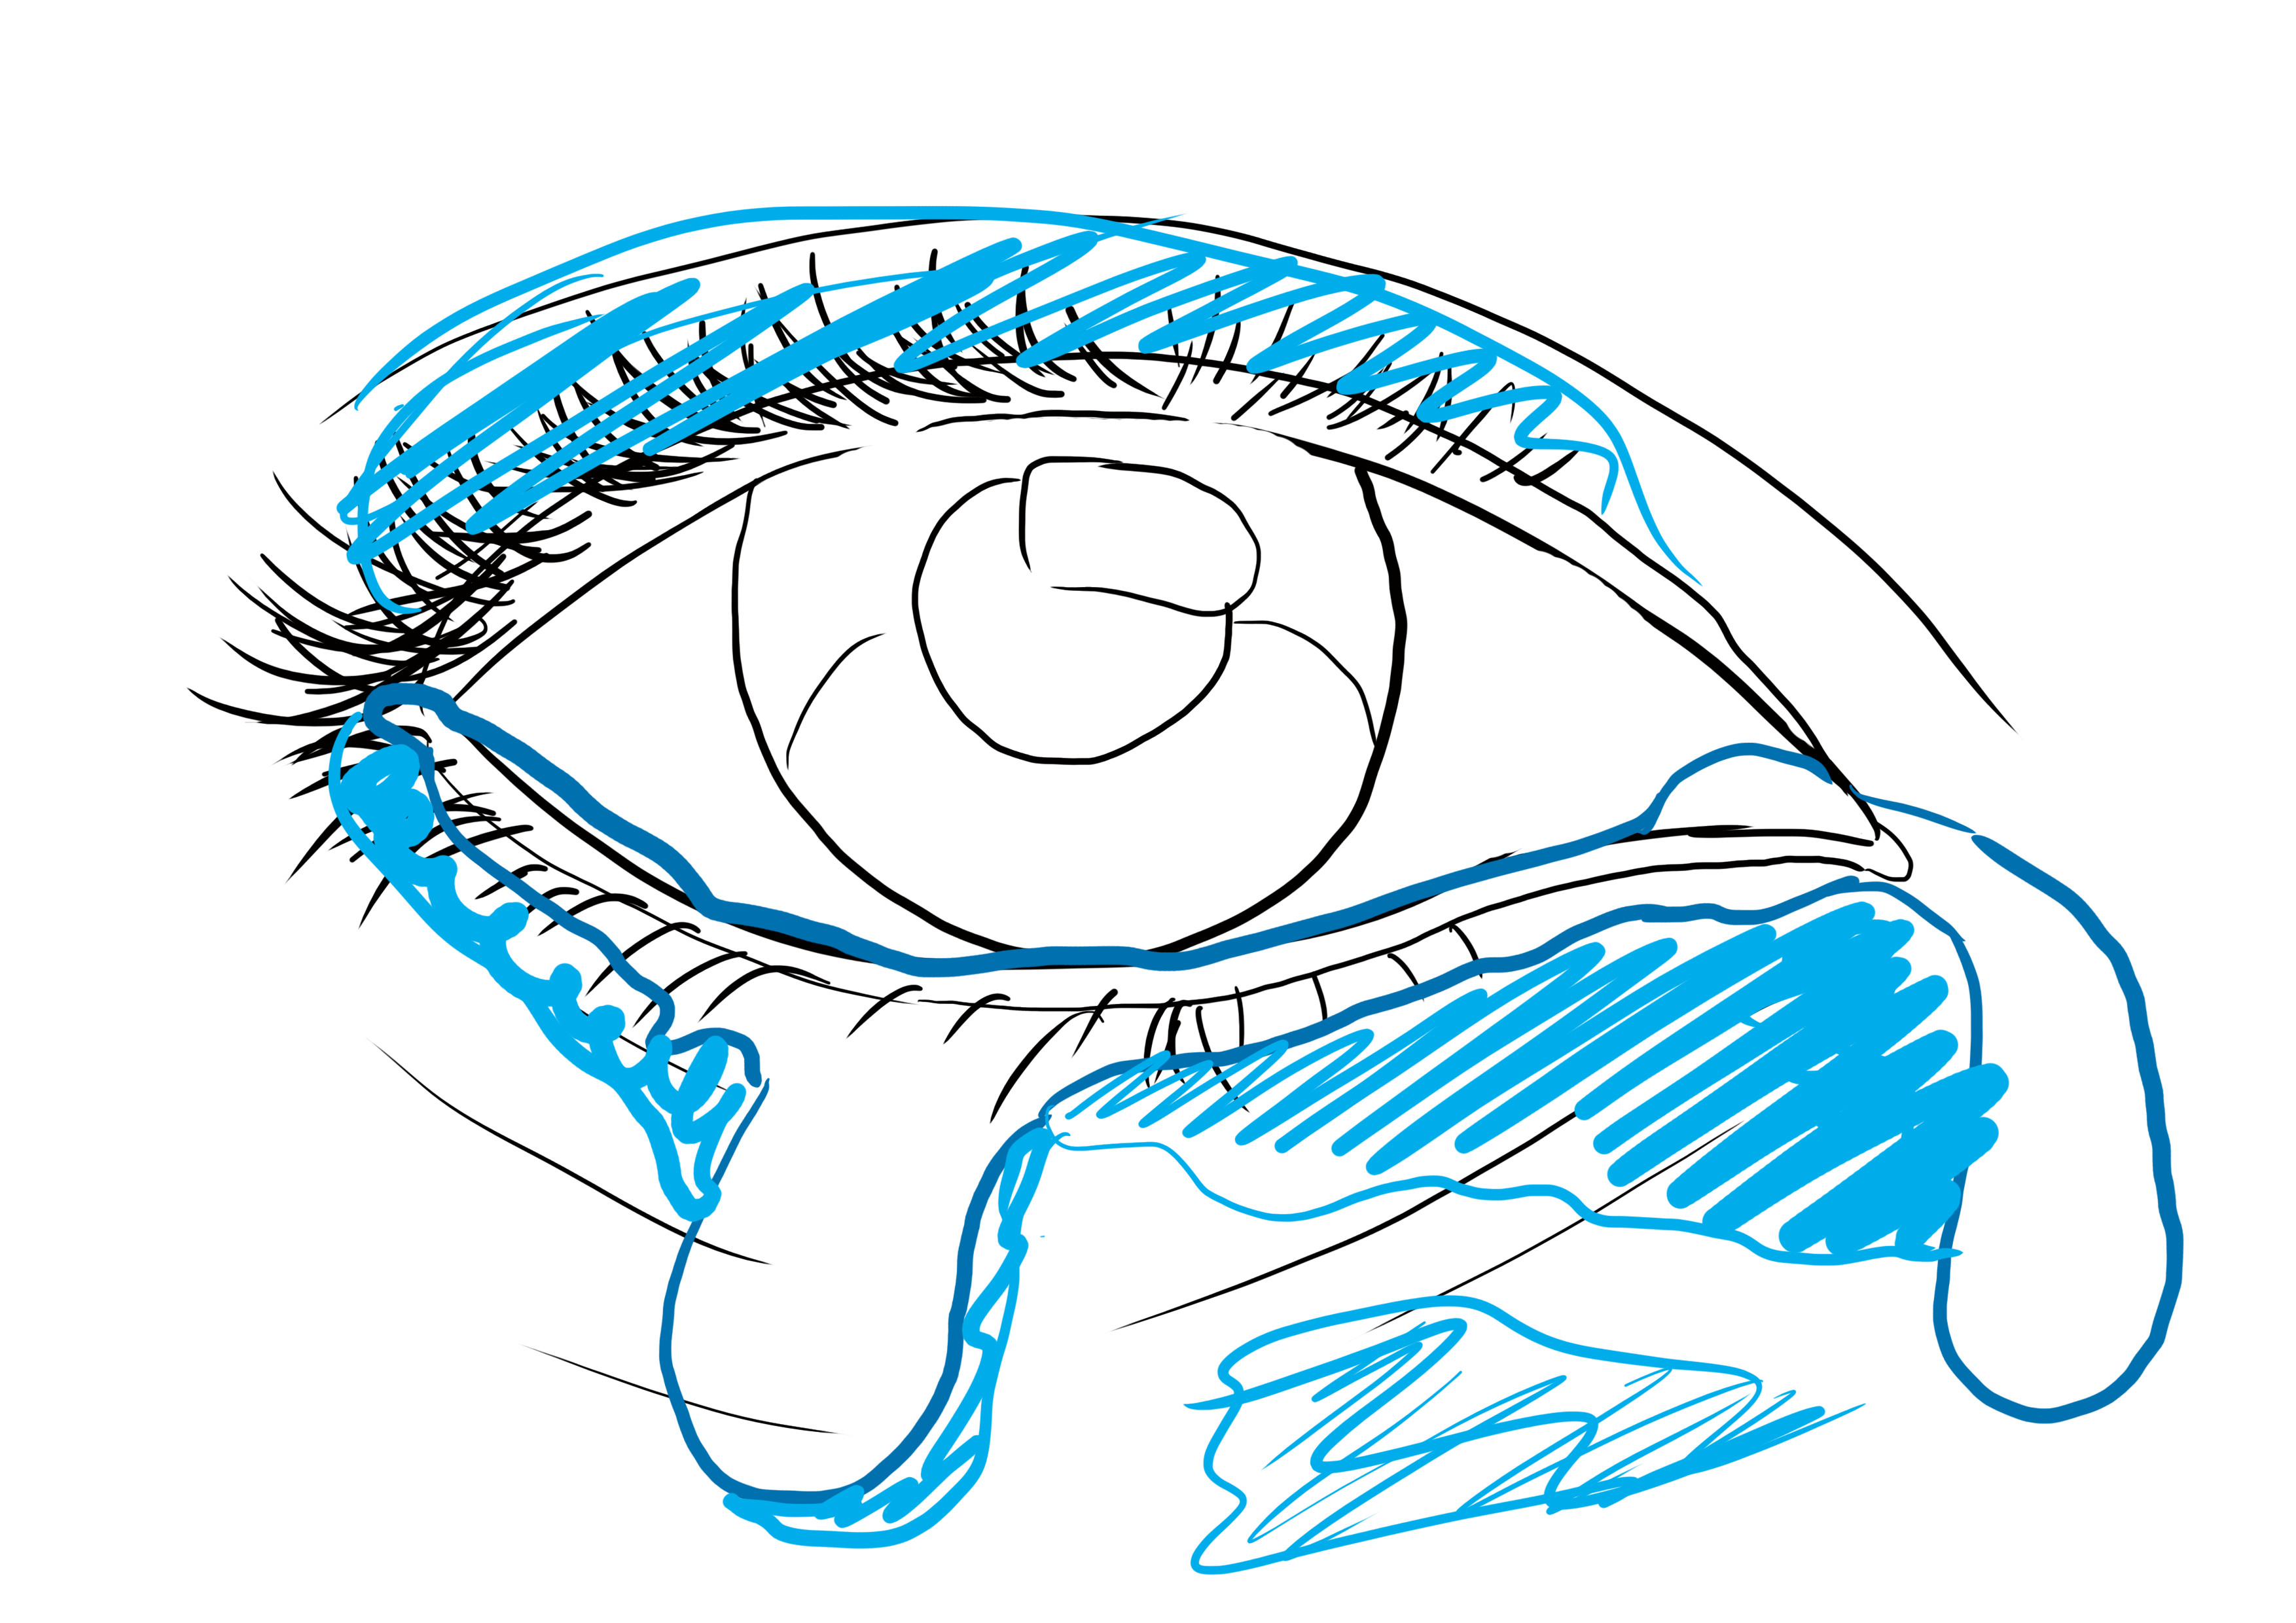
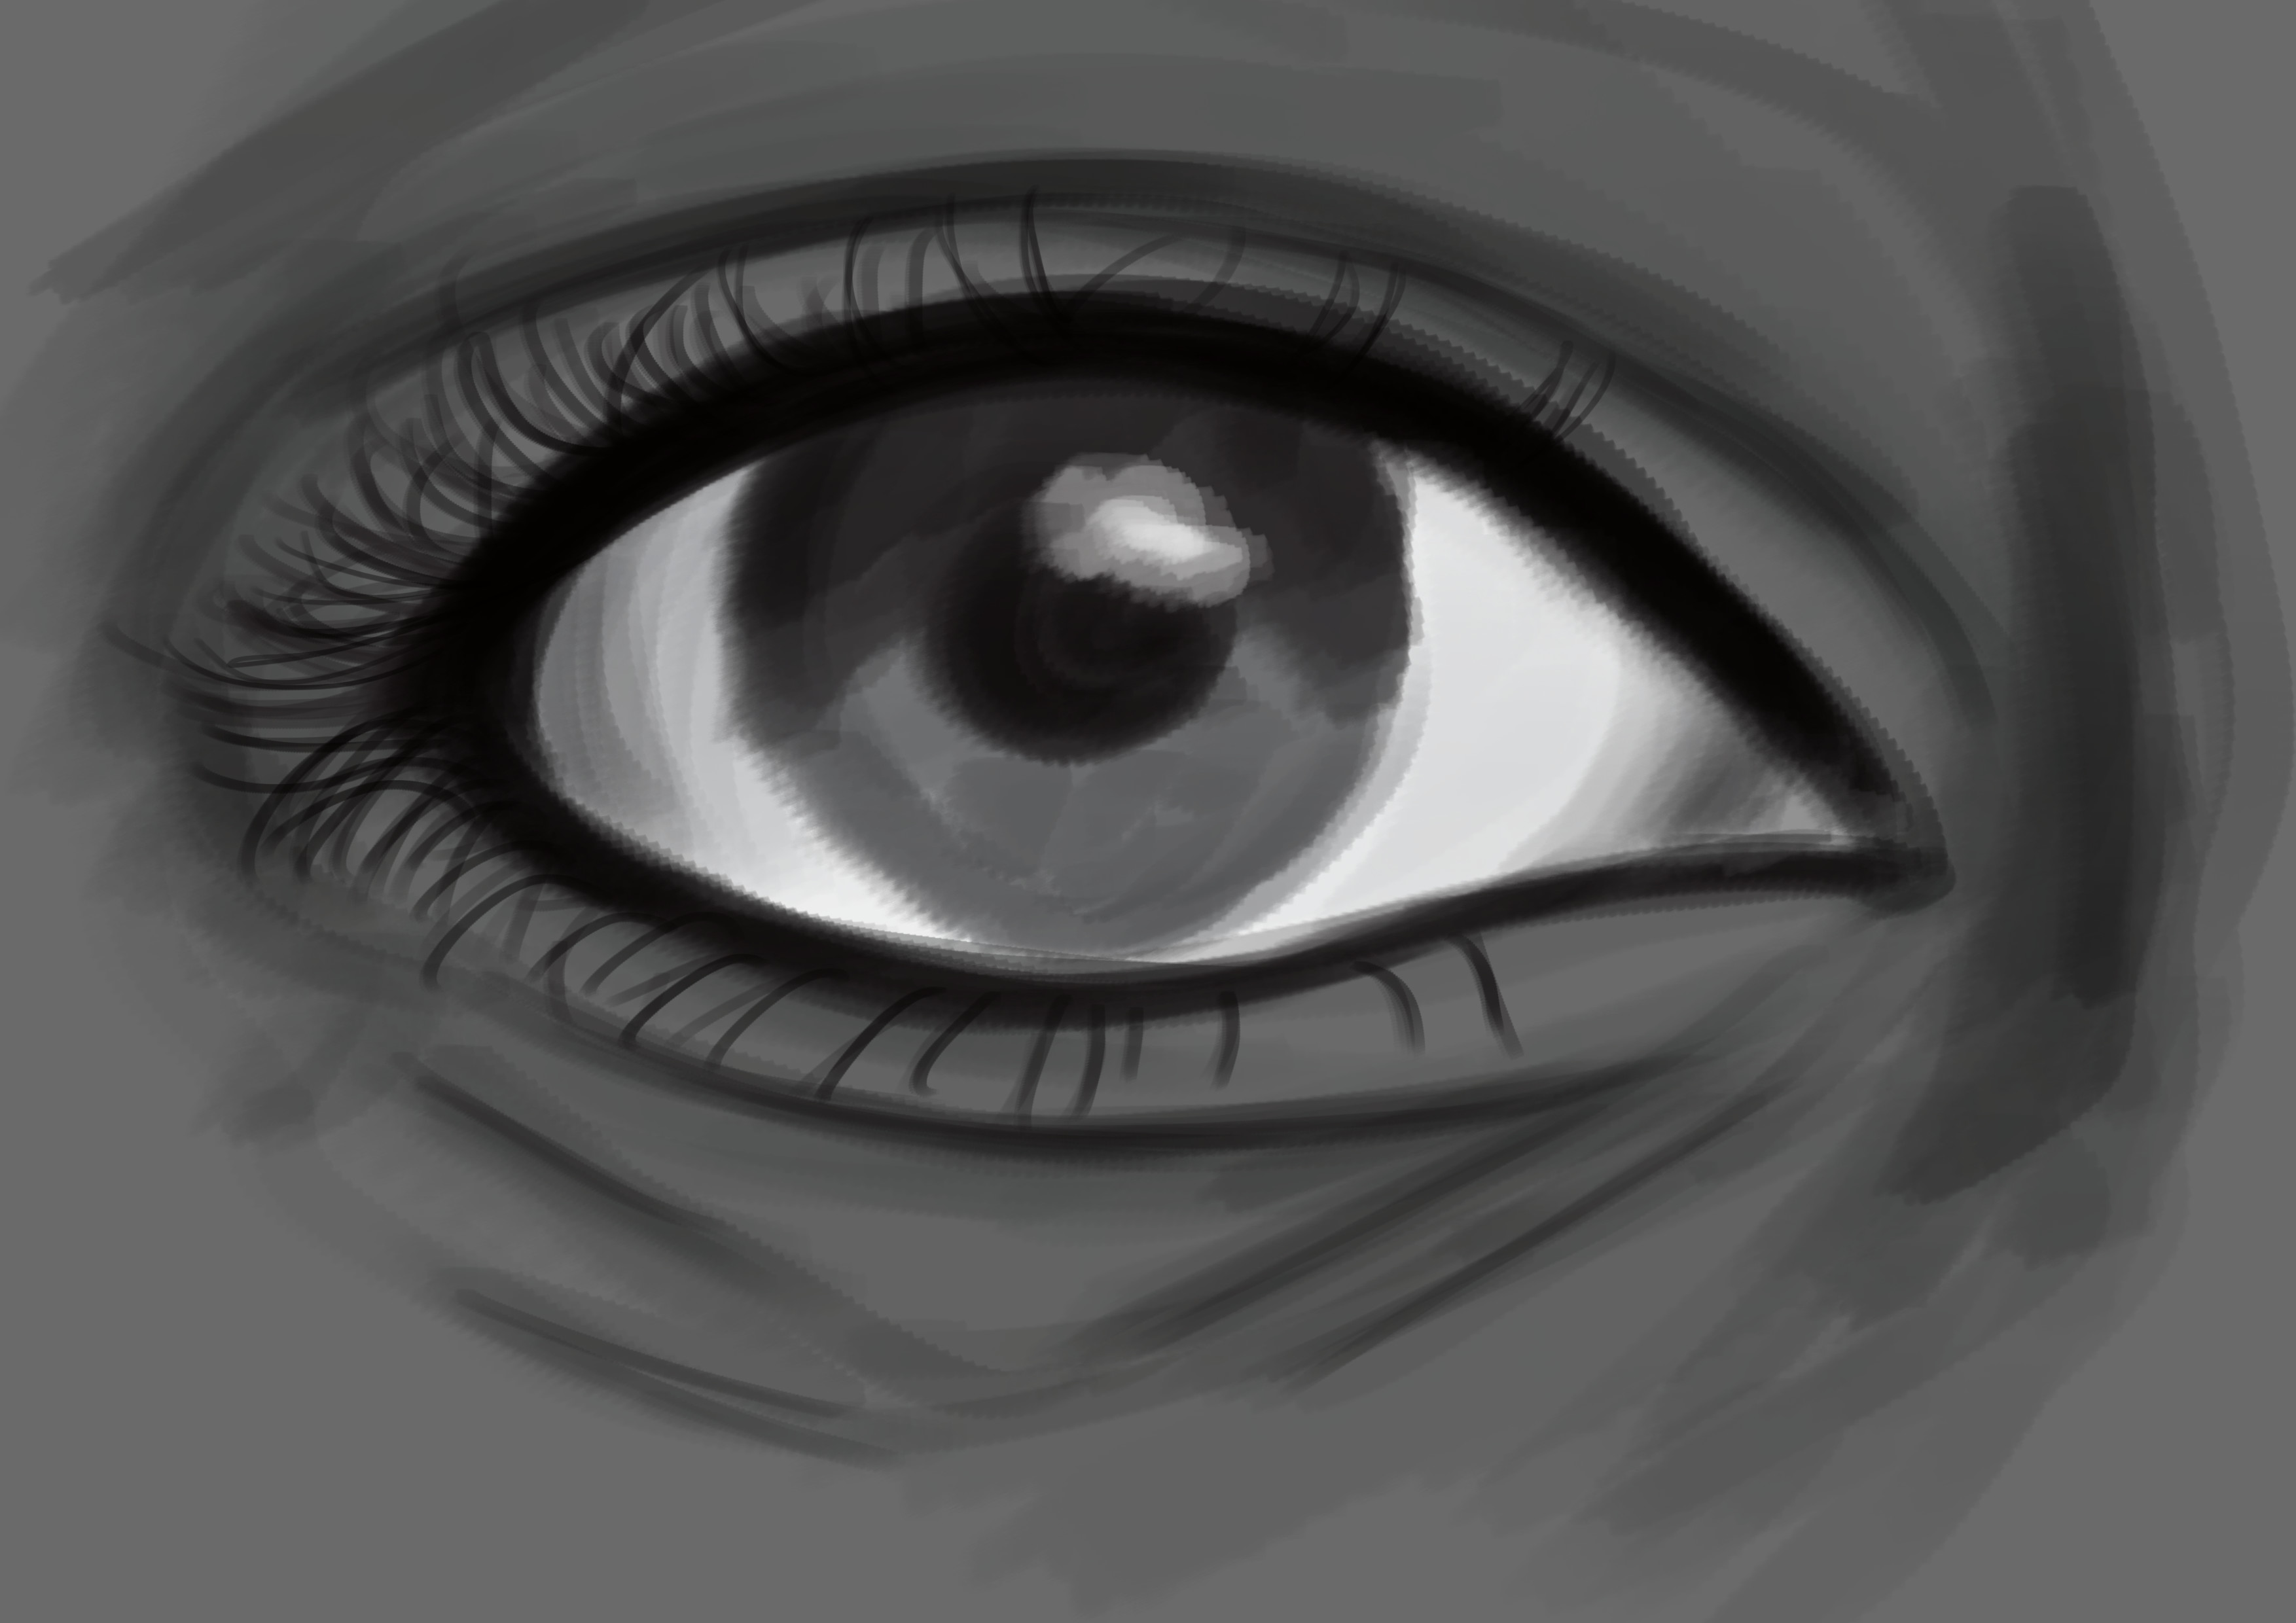
APPLYING CONTRASTS TO THE CRYING EYE DRAWING
To give our eye a slightly more realistic effect, I will color it in a way to create subtle shadows and highlights.
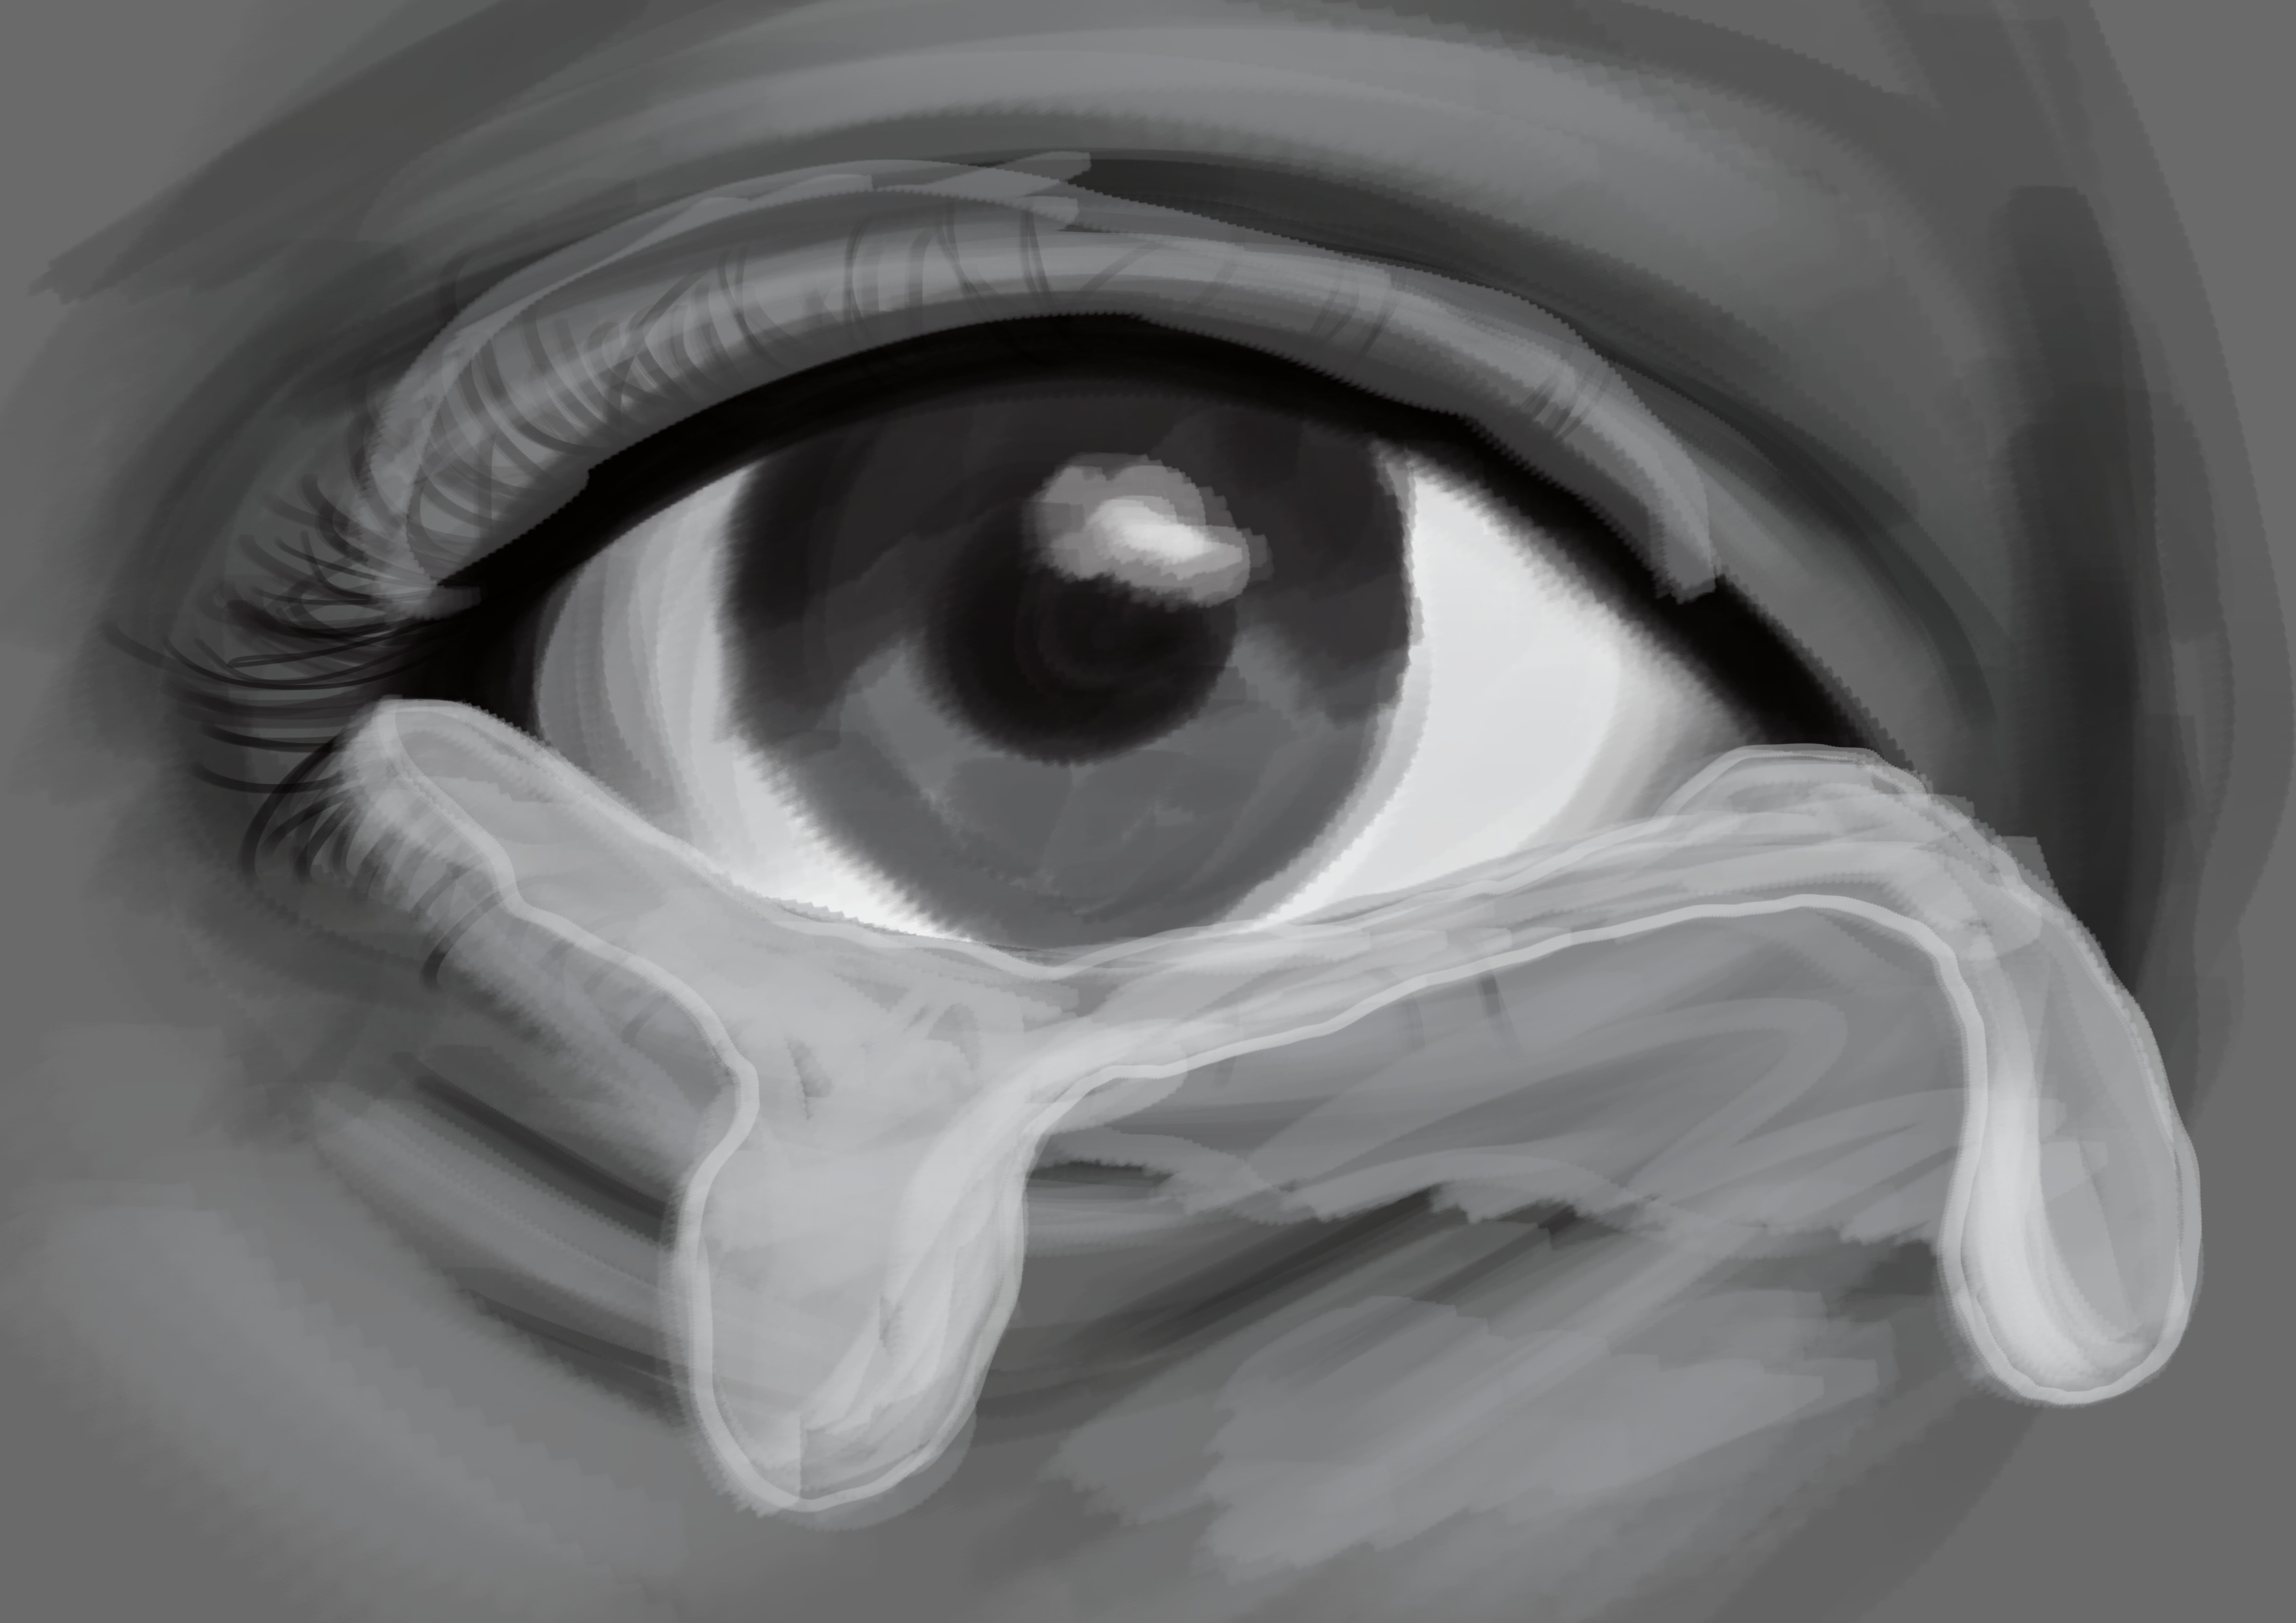
I will do the entire drawing in shades of gray. Never use pure black, as it flattens a drawing. Instead, replace it with very dark gray. As for white, the same rule applies. It should not be used because pure white does not actually exist (even if it seems like it, it's false) and even less so on a human body. So, I will replace it with a very light gray.
To start, I'm going to apply a medium gray shade over my entire sheet.

I will then start to mark the contrasts by placing shadows in the skin crevices, with a slightly darker shade of gray.
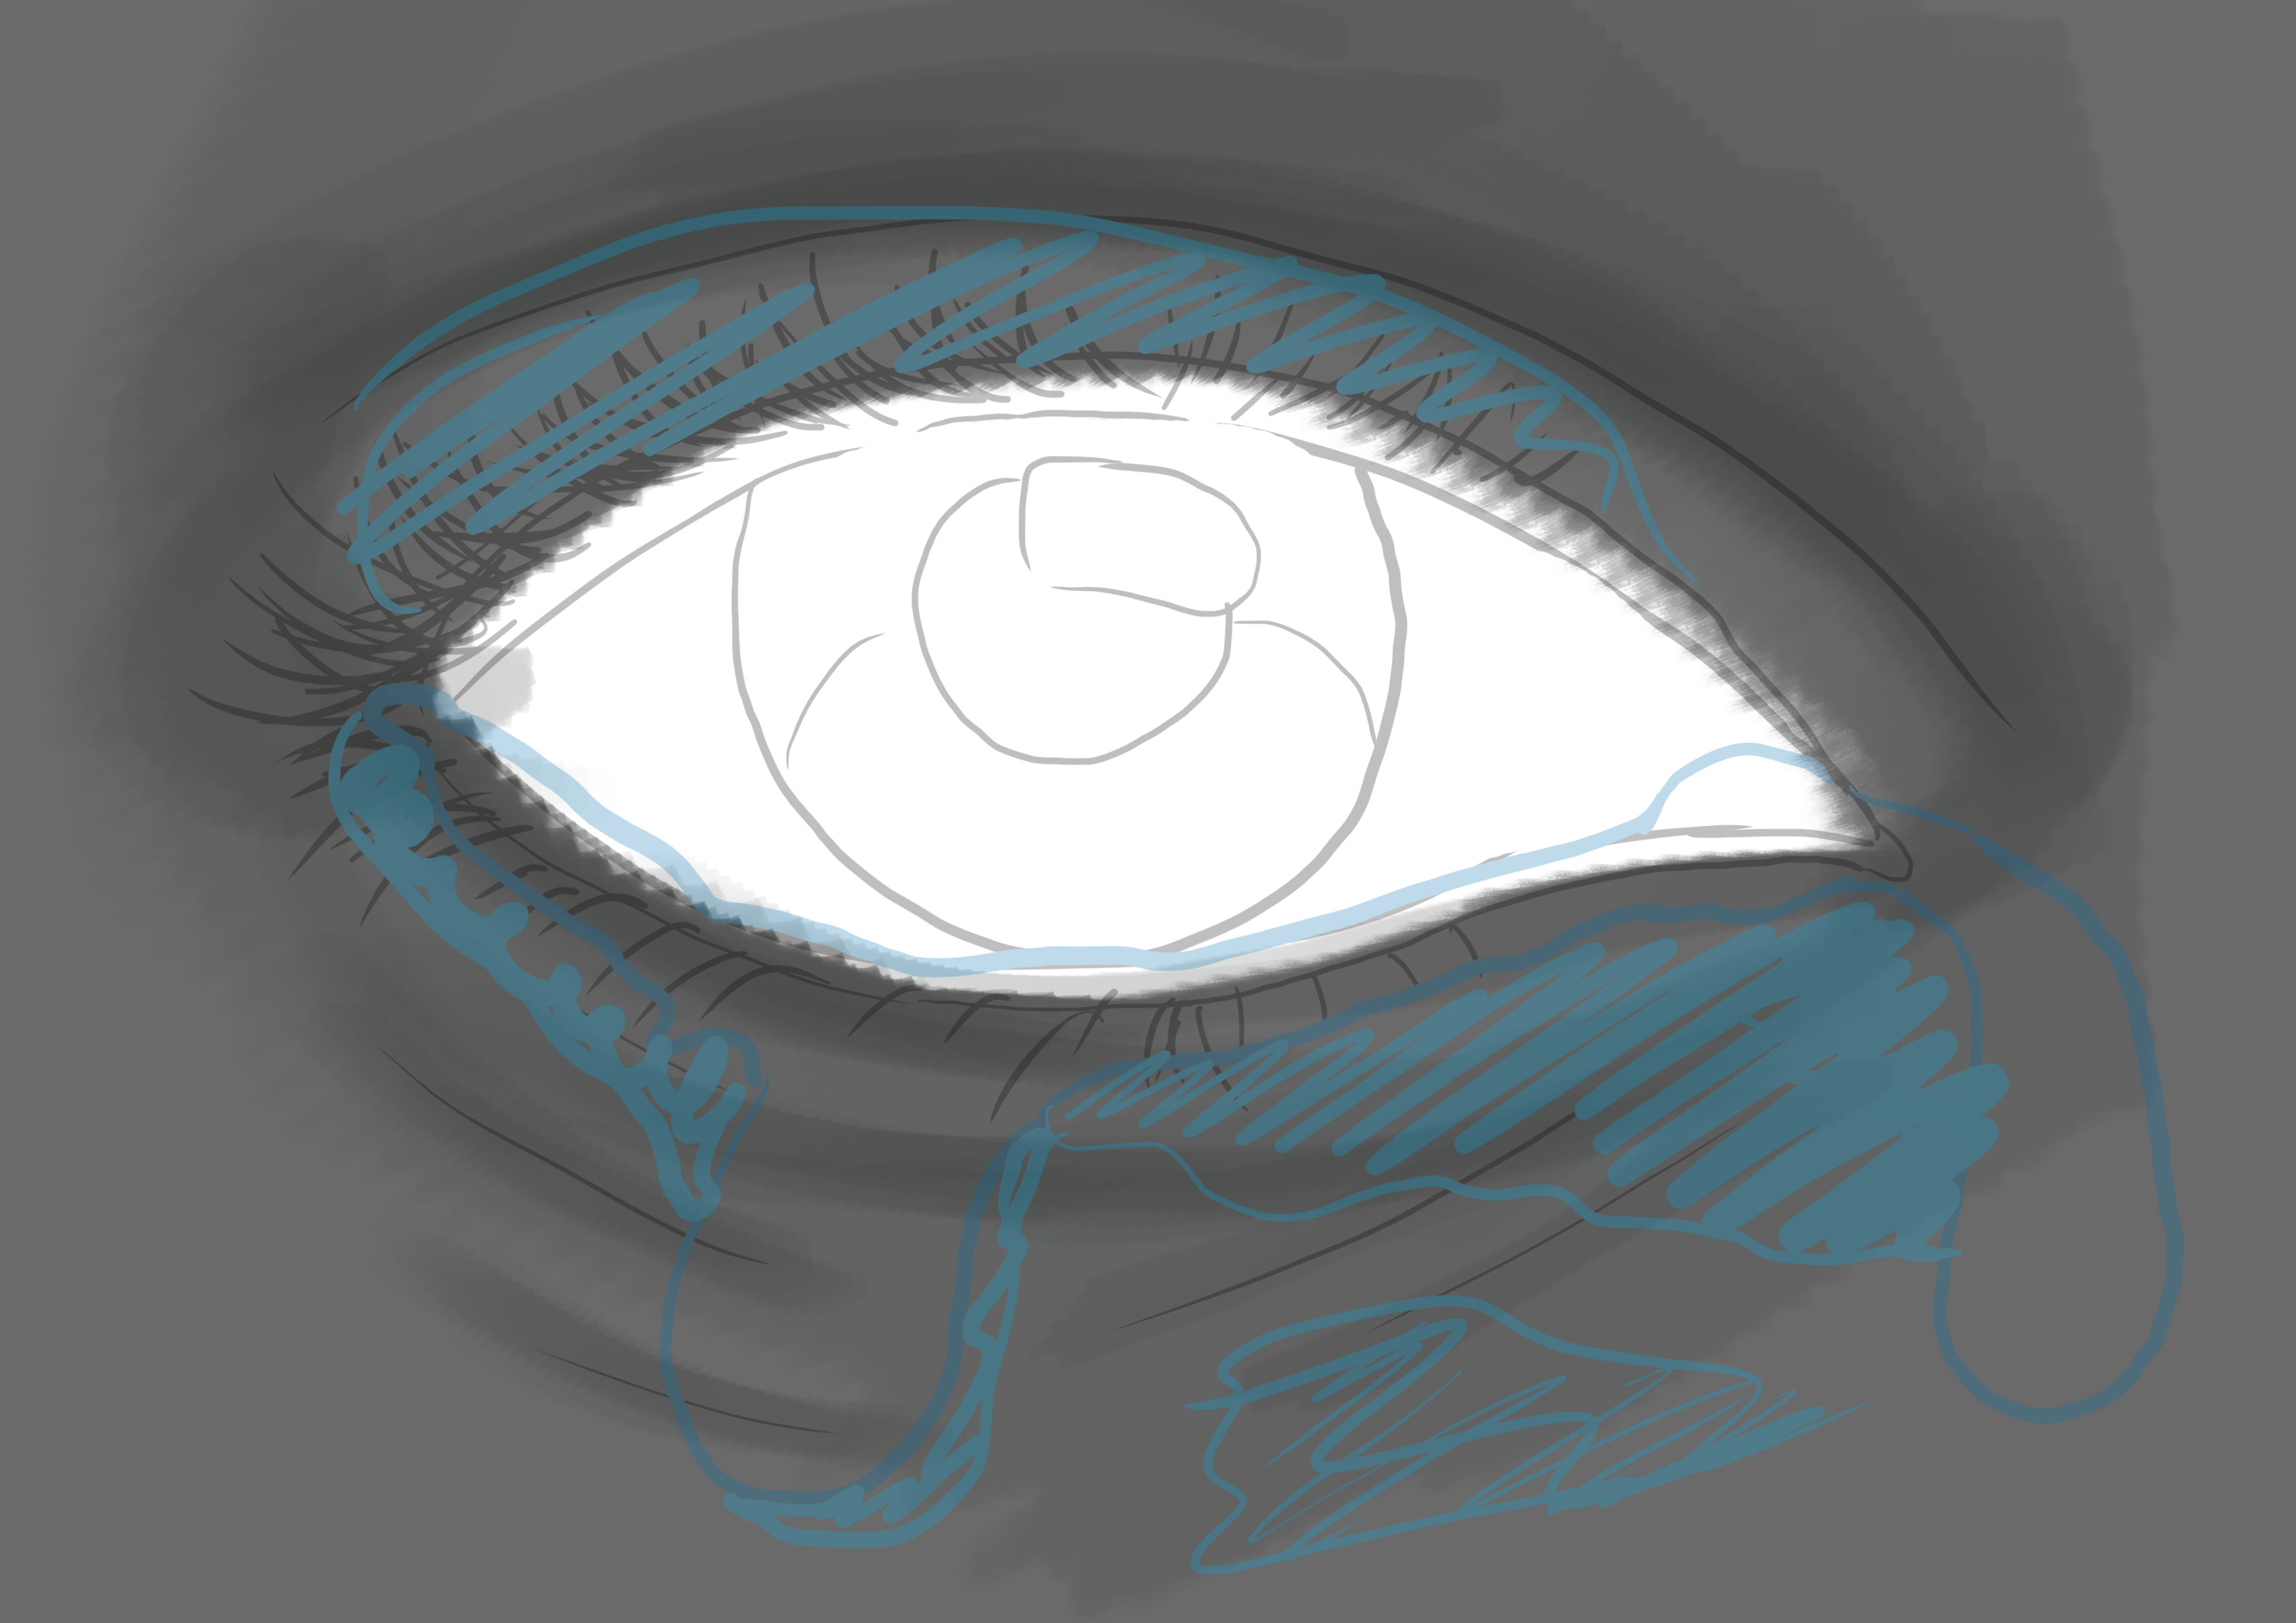
By taking an even darker shade of gray, I will continue to mark the recesses by emphasizing the shadowed areas.

I will draw the eyelashes and the outline of the eye using a very dark, almost black, gray.
I will now draw the iris, the pupil, and the reflections by playing with shades of gray.
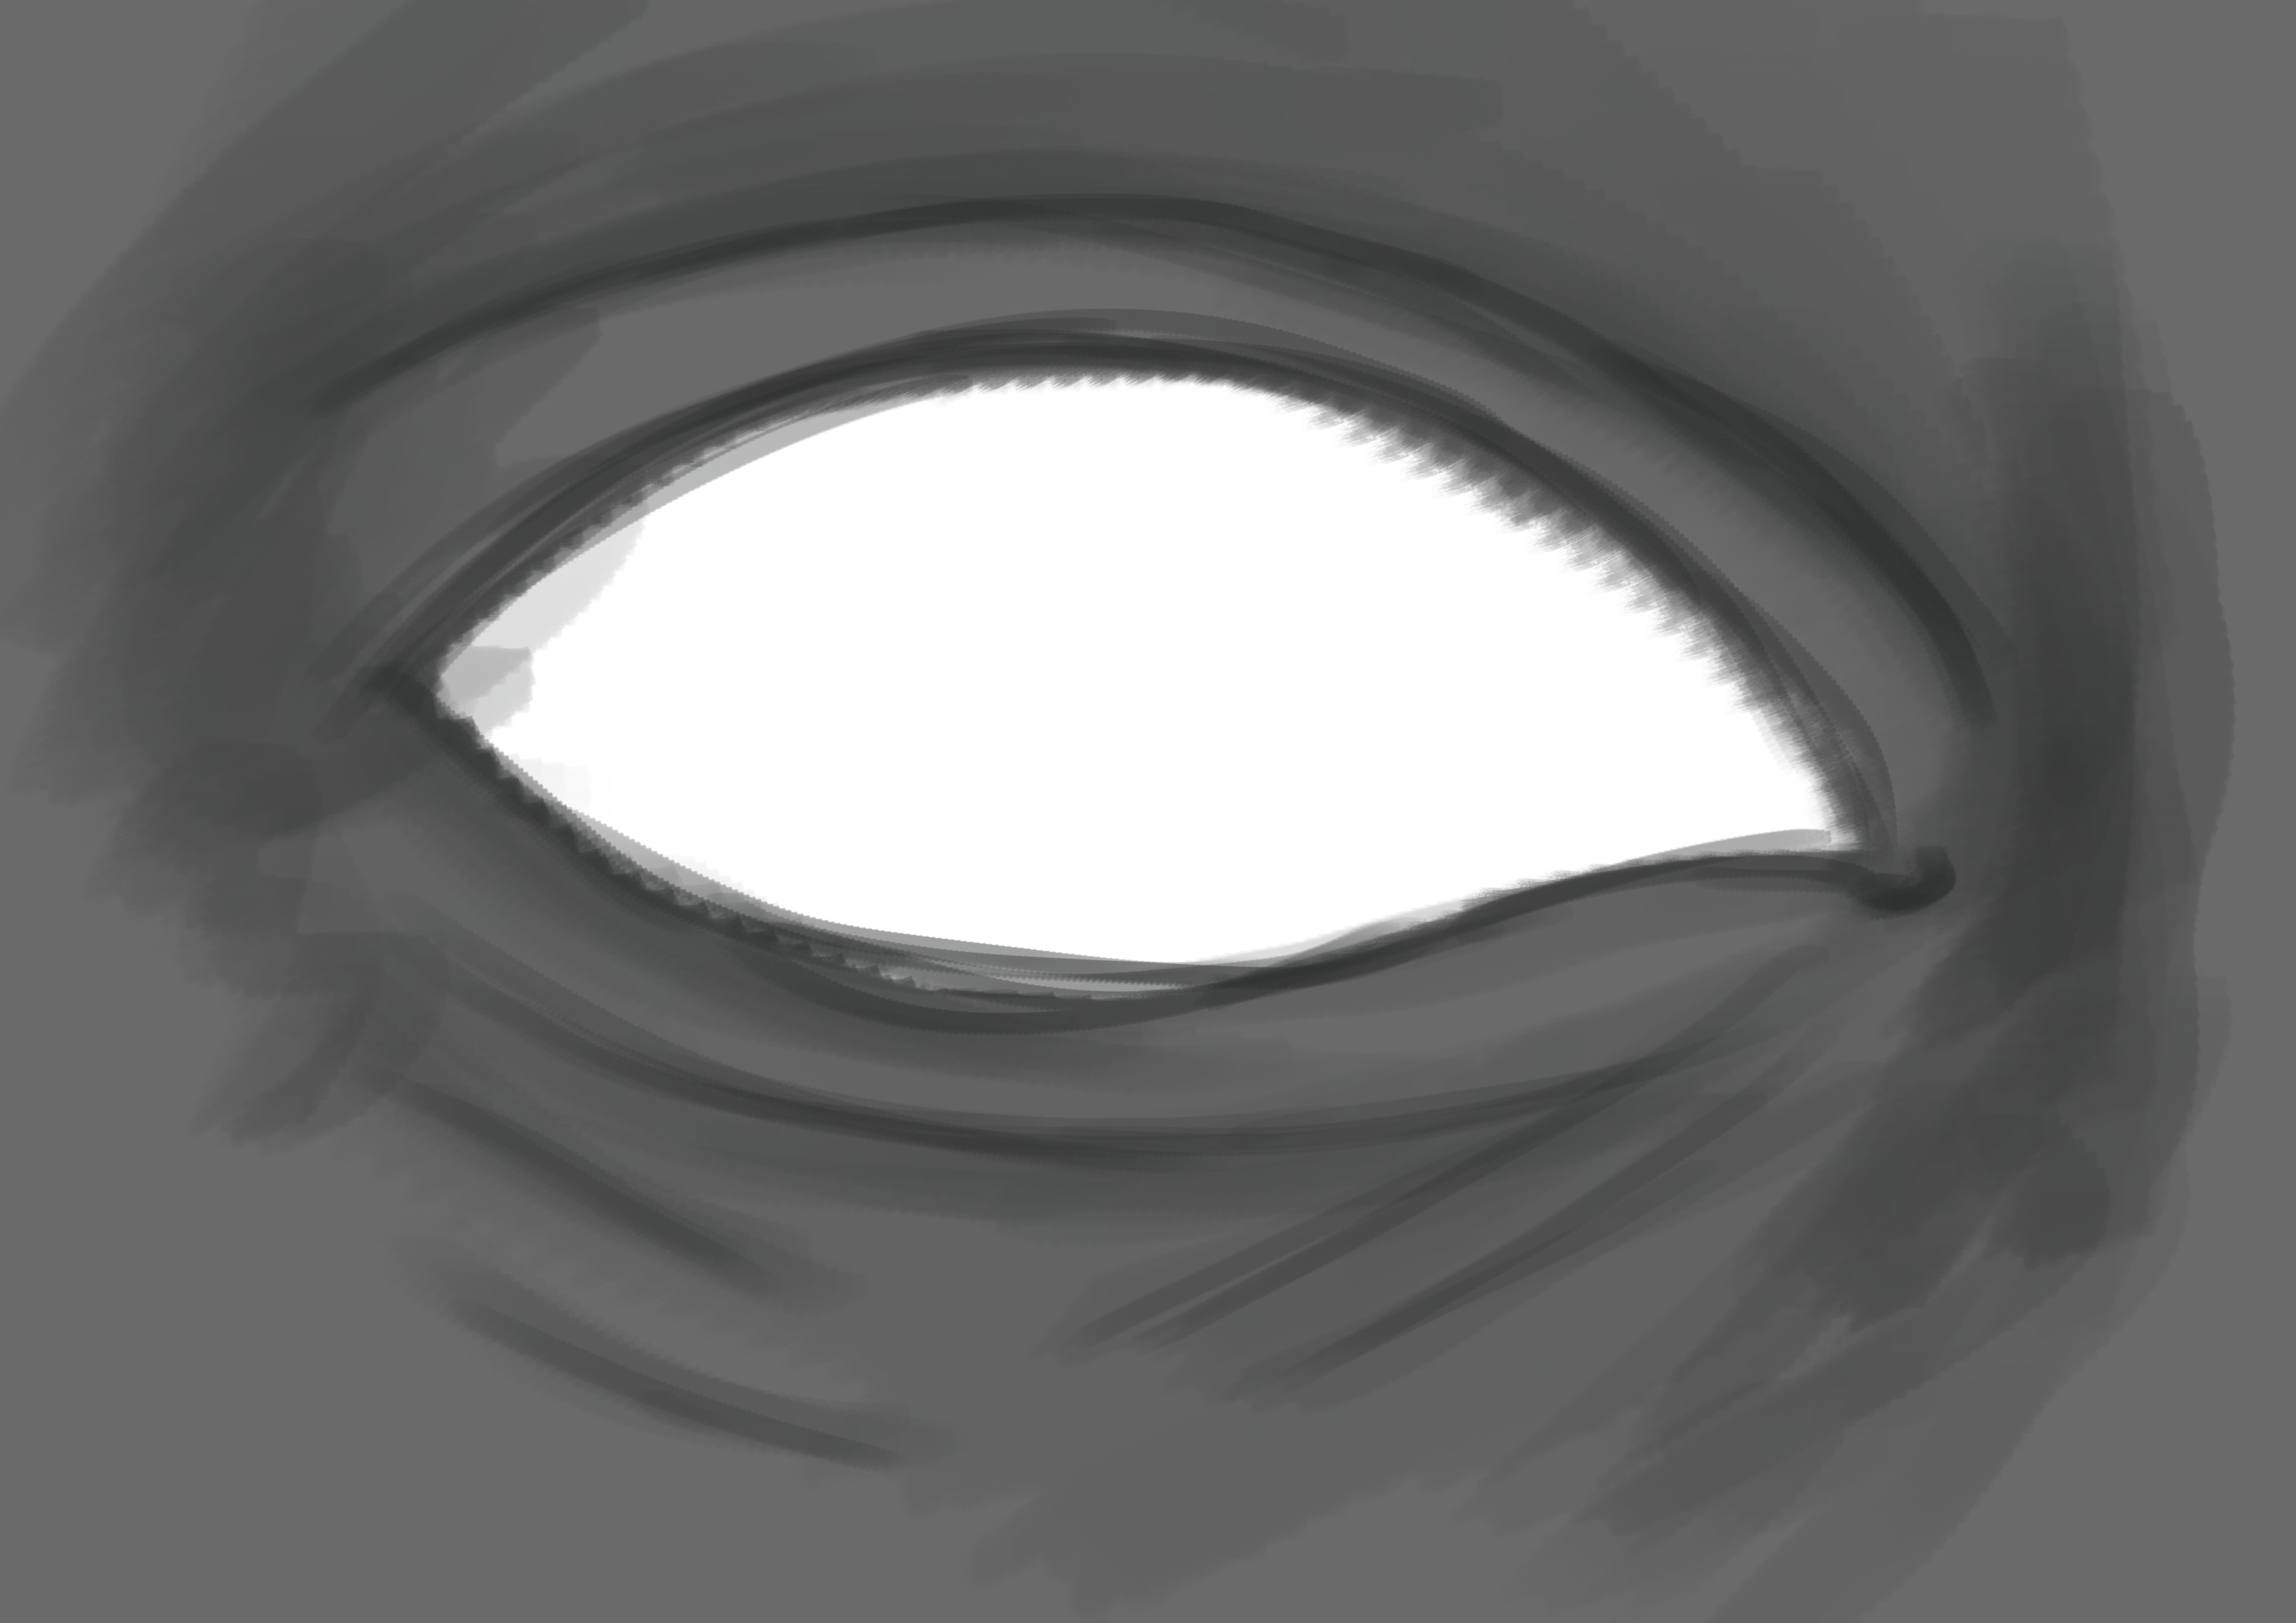
DRAWING THE TEARS
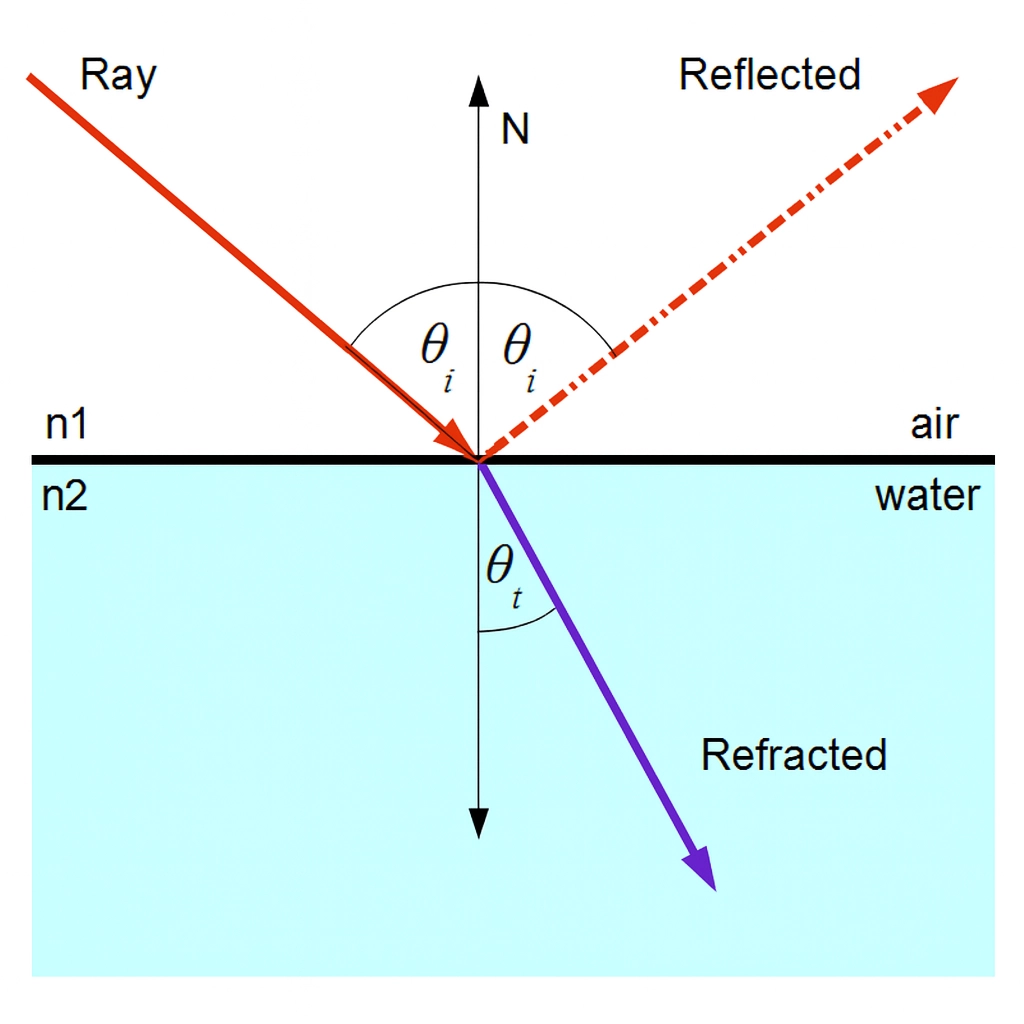
Tears are a liquid somewhat similar to water. The reflection and refraction of light are therefore identical. The light will "hit" the liquid and bounce off elsewhere. This is called reflection and it will give the liquid clarity.
When hitting the liquid, some of the light will enter it and bounce inside to create lots of small light bounces and reflections, this is refraction.
To draw the tears, I will start by drawing them with a very light gray.
I will add a slightly lighter gray on the sides to make the reflection of light on the tears.
I will accentuate certain reflections with an even lighter gray to indicate refraction.
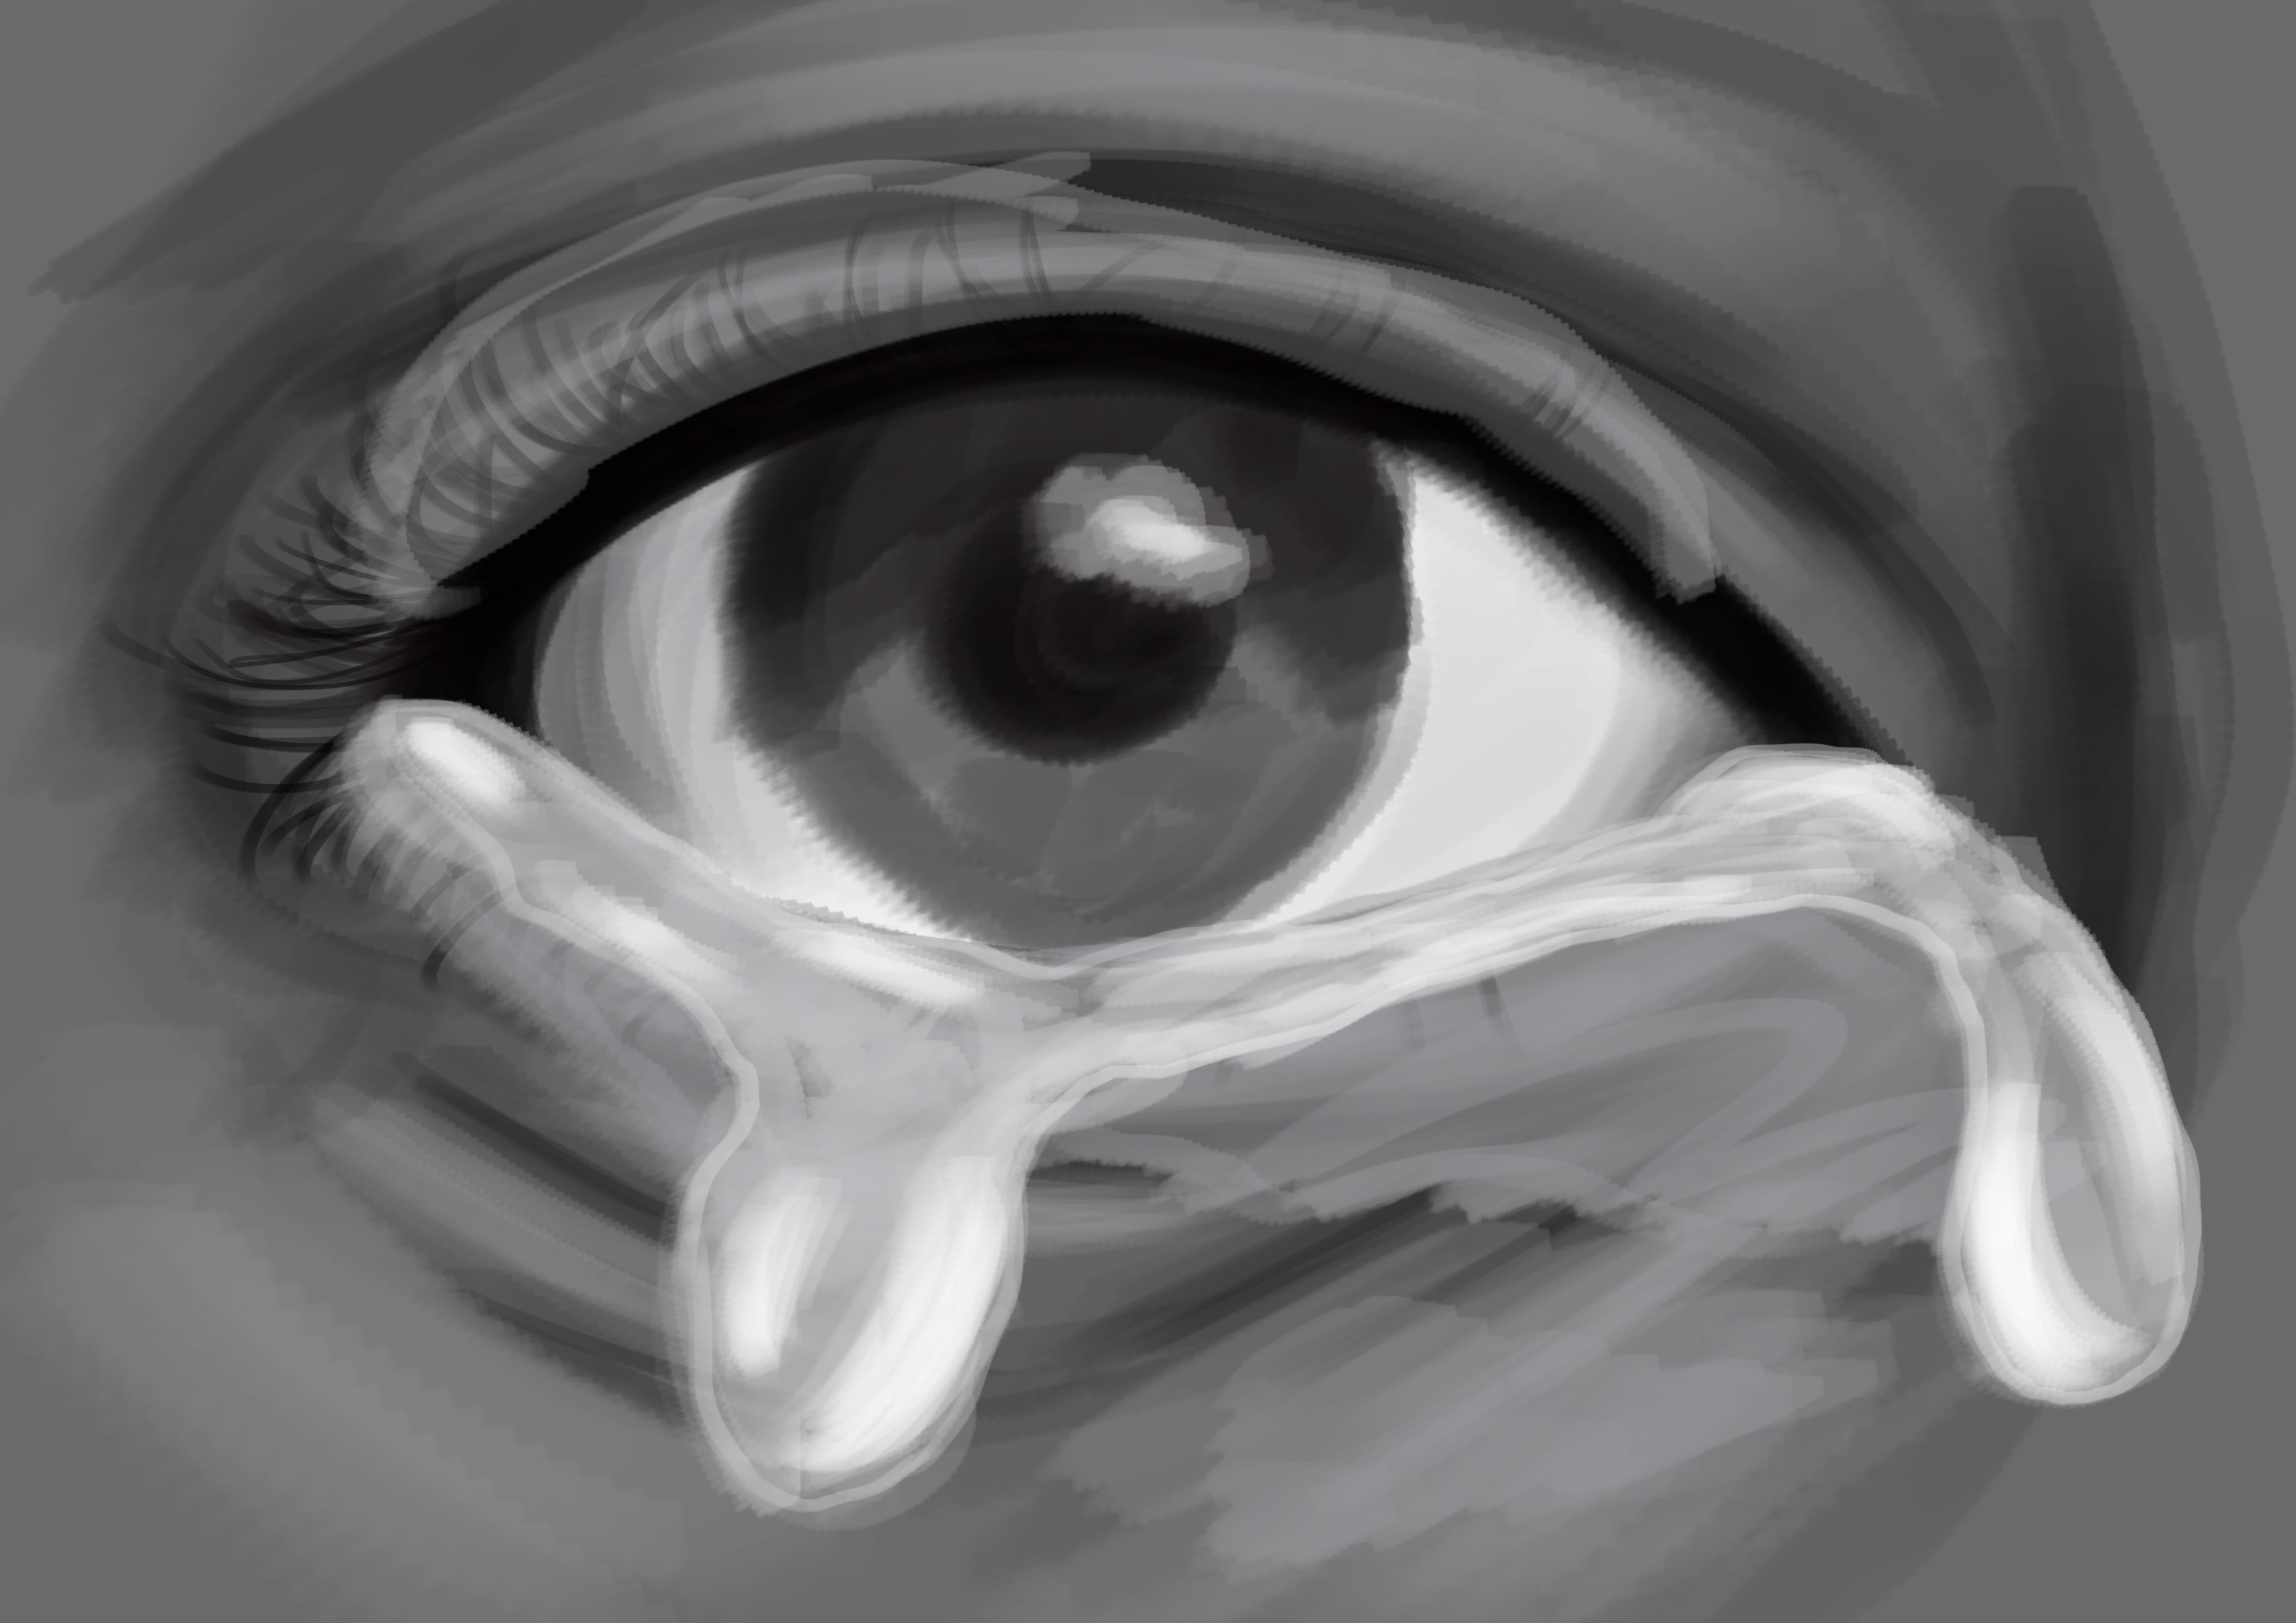
I will then add a bit of medium gray between the reflections to give the drops a "hollow" aspect, to show that they are empty inside.

I will fine-tune some details to my liking by adjusting the contrasts and accentuating a few details. And now you have finished your crying eye! :)

Don't forget, for a detailed tutorial on how to draw an eye, check out the article "How to draw an eye!"
When you draw liquid (or anything else), be sure to observe the phenomena of reflection and refraction, the more precise you are with your lighting the more realistic your rendering will be. To do this, go observe the things around you as understanding things helps you to draw them! ;)

Discussion
2 comments