Draw a Character from a Low Angle
When it comes to drawing characters, we are often tempted to depict them from dynamic angles. In this article, we will explore how to draw characters from a low-angle view. This perspective can be particularly interesting to give a special effect to your characters, making them appear almost larger than life.
WHAT IS A LOW ANGLE SHOT?
In drawing, we refer to a low-angle shot when our subject is depicted from a relatively low viewpoint, almost as if our camera was placed at ground level. This gives an impression of greatness to our subject. Typically, low-angle shots are used to depict large structures like buildings, but it can also be applied to characters to give them an imposing effect, or even to depict them flying, as in comic books for example.
DRAWING A CHARACTER IN LOW ANGLE SHOT STEP BY STEP
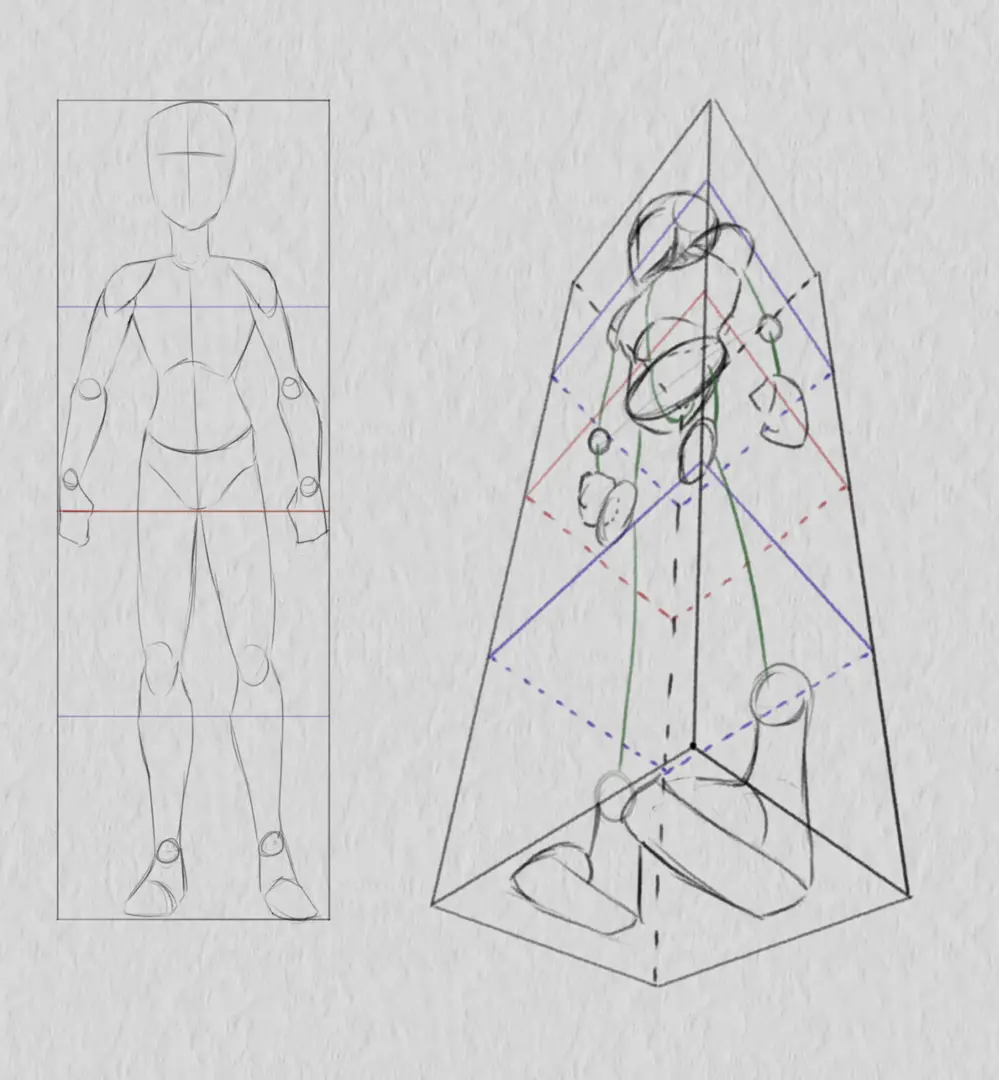
An easy way to represent a character in a low-angle shot is to enclose him in a box. For this exercise, we take a relatively simple mannequin. It will be easier to build it in a low angle shot than an overly detailed mannequin. Details can be added once the simple character is correctly positioned in the low angle shot.
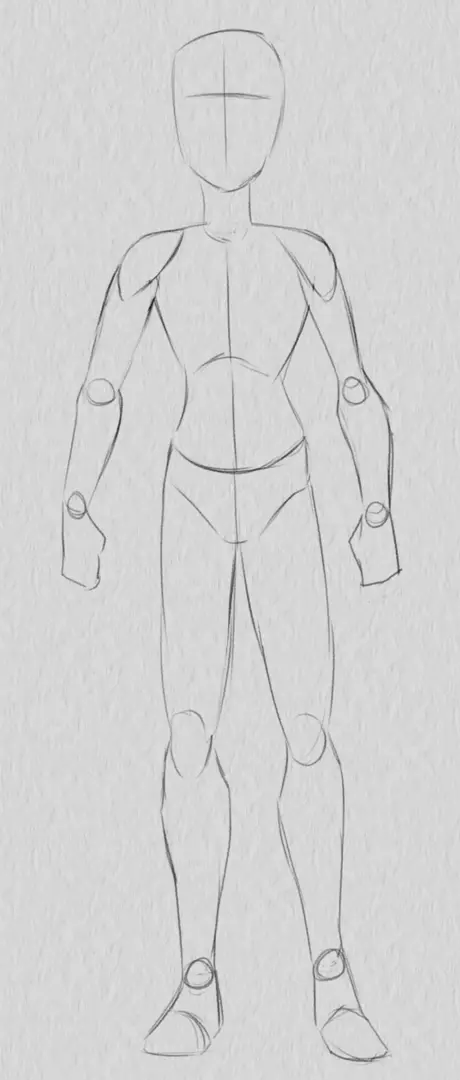
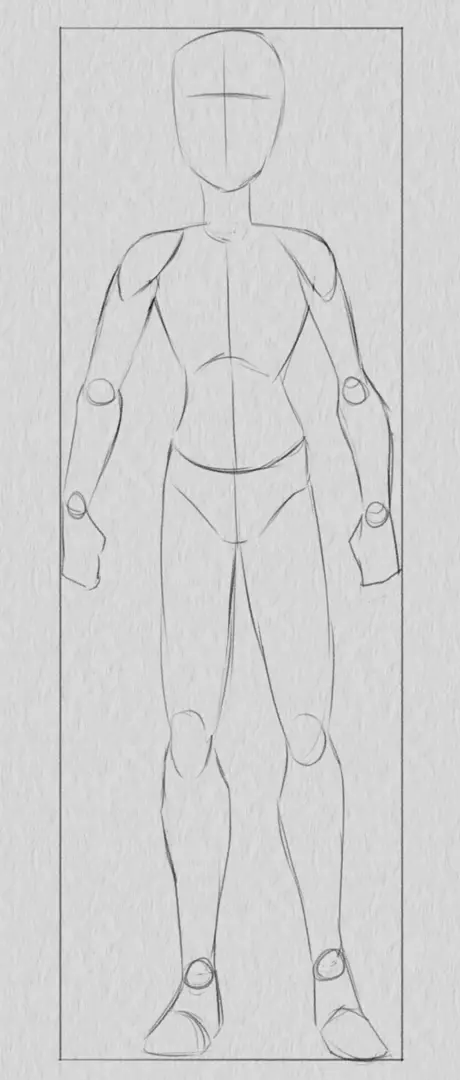
I'm going to build a box as close as possible to my mannequin. The goal here is to have a box touching the head and feet of my character.
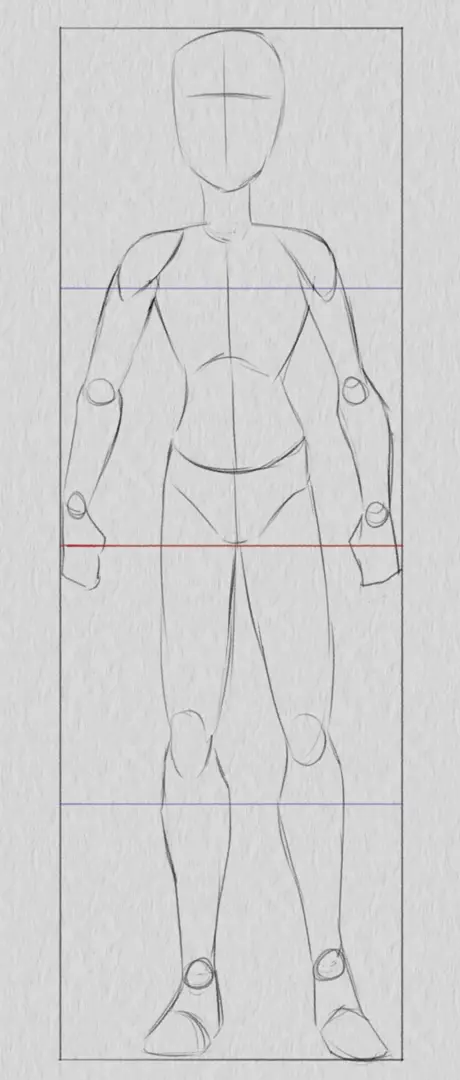
I will divide it into two and then into four, a bit like representing the shelves of a piece of furniture. The goal is to have subdivisions relatively close to anatomical landmarks: shoulders, waist, knees, etc. If you want more detail, you can continue to subdivide your box. As far as I am concerned, I will stick to these.
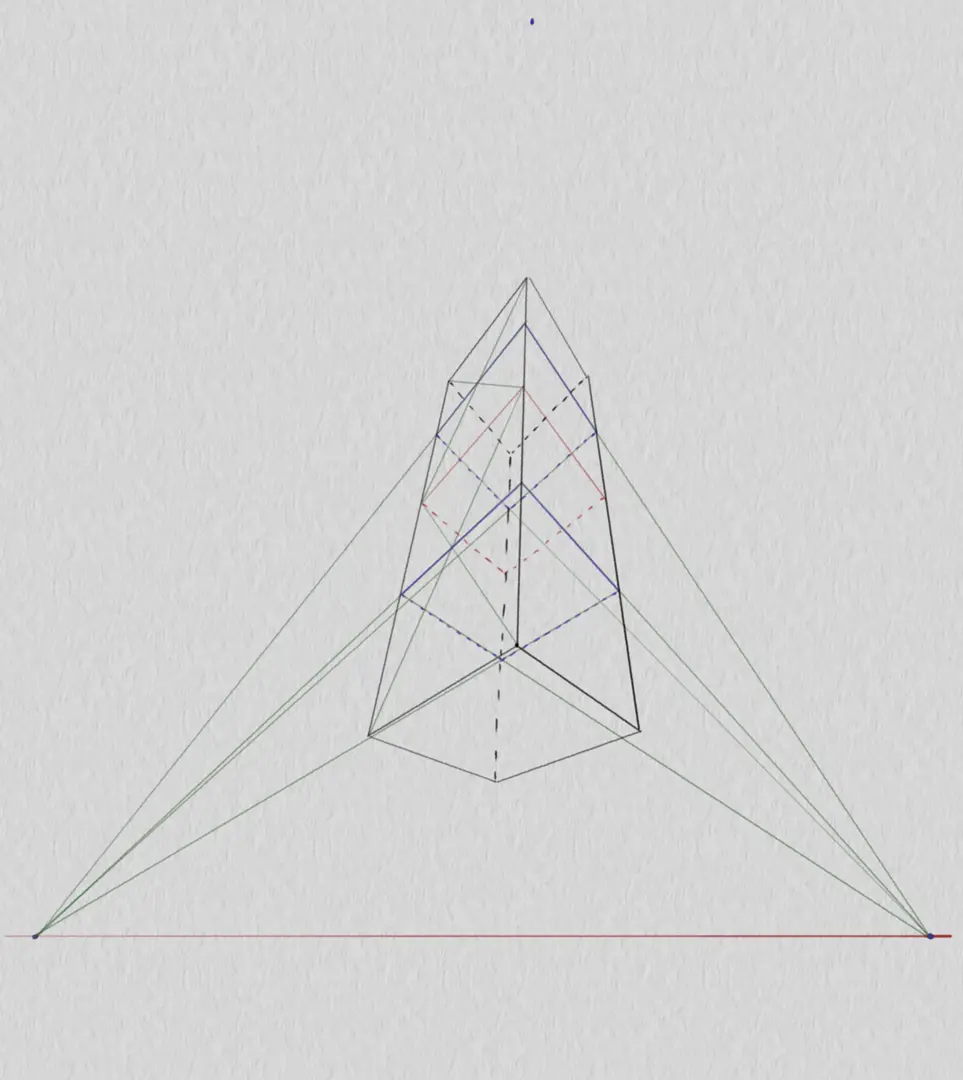
As mentioned earlier, framing from below is characterised by a relatively low viewing angle, which means a low horizon line on our sheet. Similarly, since the implication of height is significant, it will be necessary to understand perspective with three vanishing points to accurately represent our character in a bottom-up shot. If needed, see our articles on rules for draw in perspective and the horizon line, where we cover these topics in more detail.
The box drawn earlier is a relatively simple volume and therefore quite easy to represent in perspective. As mentioned before, the low-angle shot is a perspective with 3 vanishing points. So, I will represent my box in my scene with 3 vanishing points. In this case, two situations are of interest: the one where the frame crosses the horizon line and the one where it is above it. I will deal with the latter in the remainder of the article, but you may well practise in both situations.
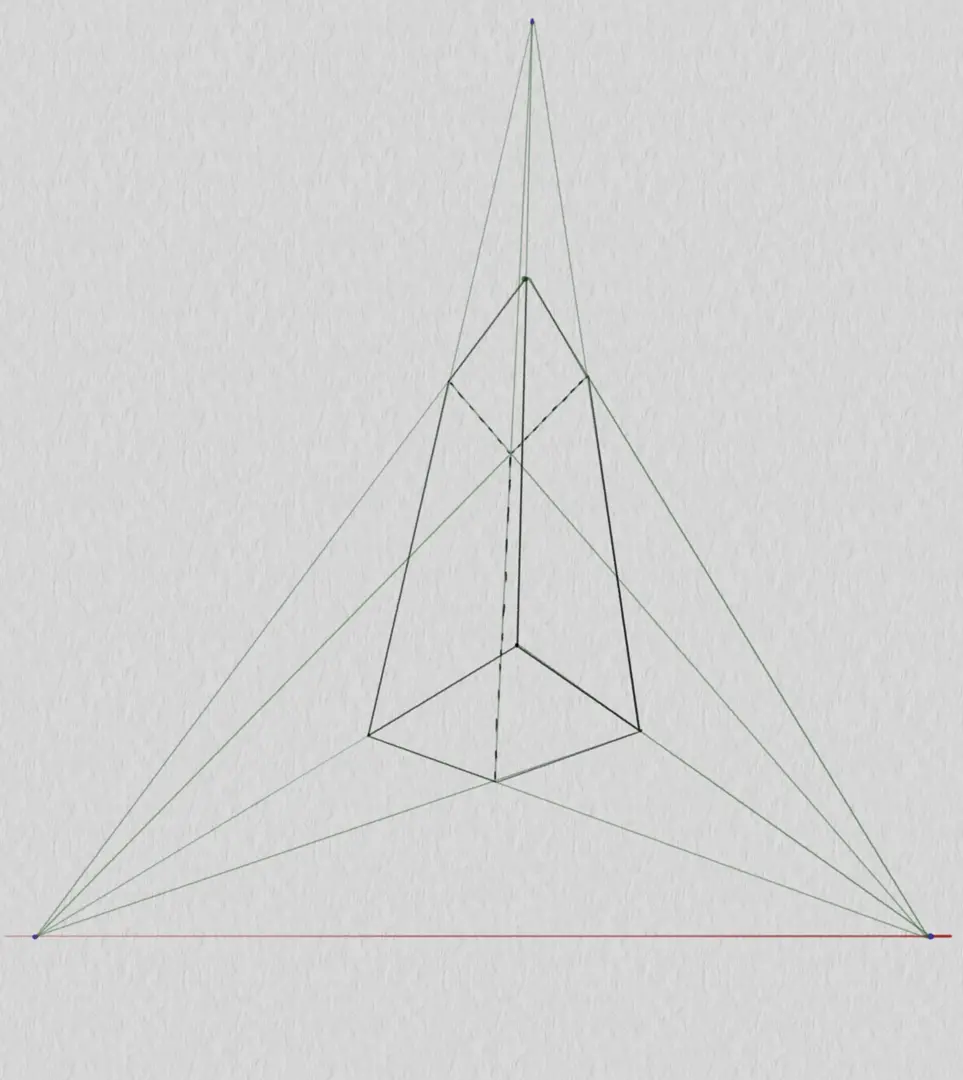
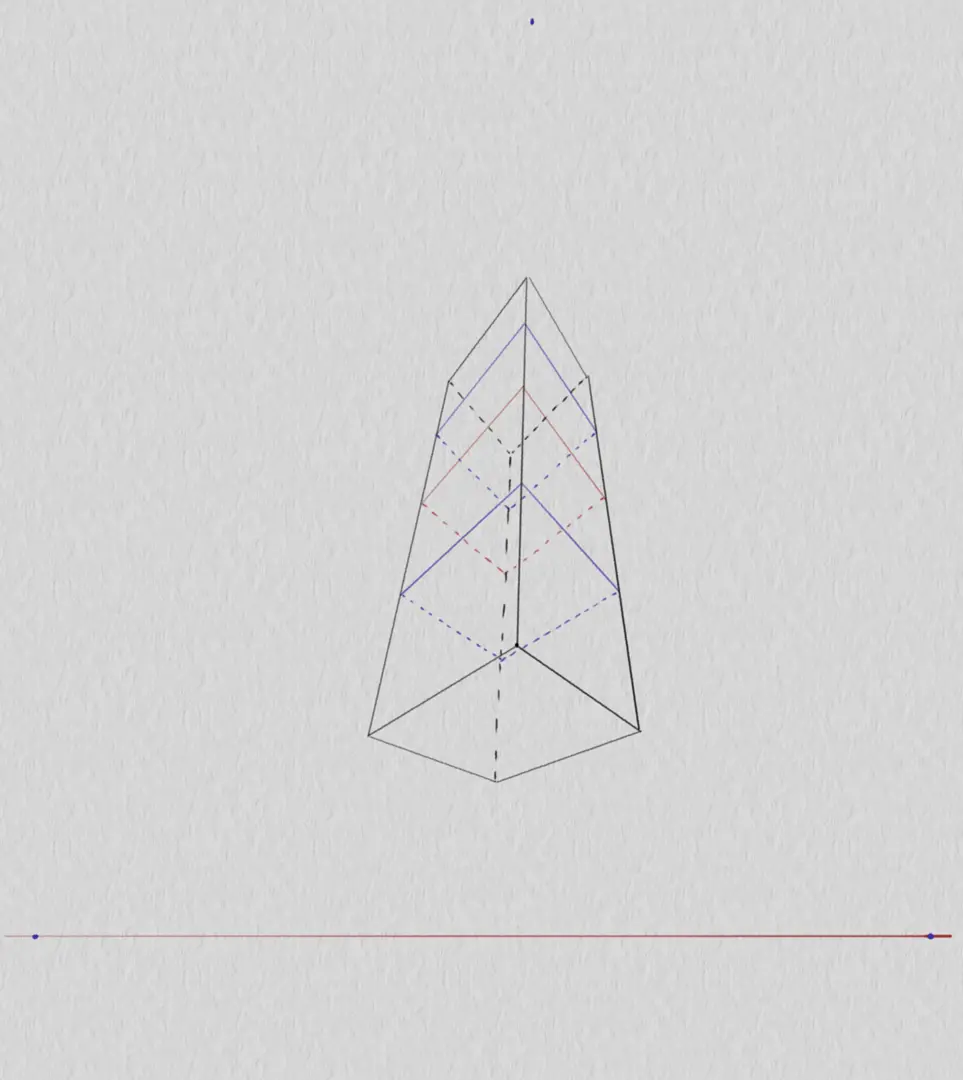
Now, I'm going to install my subdivisions. To do this, I need to find the center of a face in order to cut it. So, I draw the diagonals of the face, which will give me its center.

With the central point of the face, I can draw a first line following my perspective.
This line gives me two points on the edges of the face which I will use to draw the rest of my shelf, again following the vanishing lines.
My first shelf is installed! I can split the spaces above and below this shelf in half and repeat the same operation. First, I find the center of the two halves using the diagonal technique...
… And I mark out the shelves.
The box is ready to accommodate the character. If you want more subdivisions, repeat the same operations until you have the desired number of shelves.
ADDING THE CHARACTER IN THE BOX
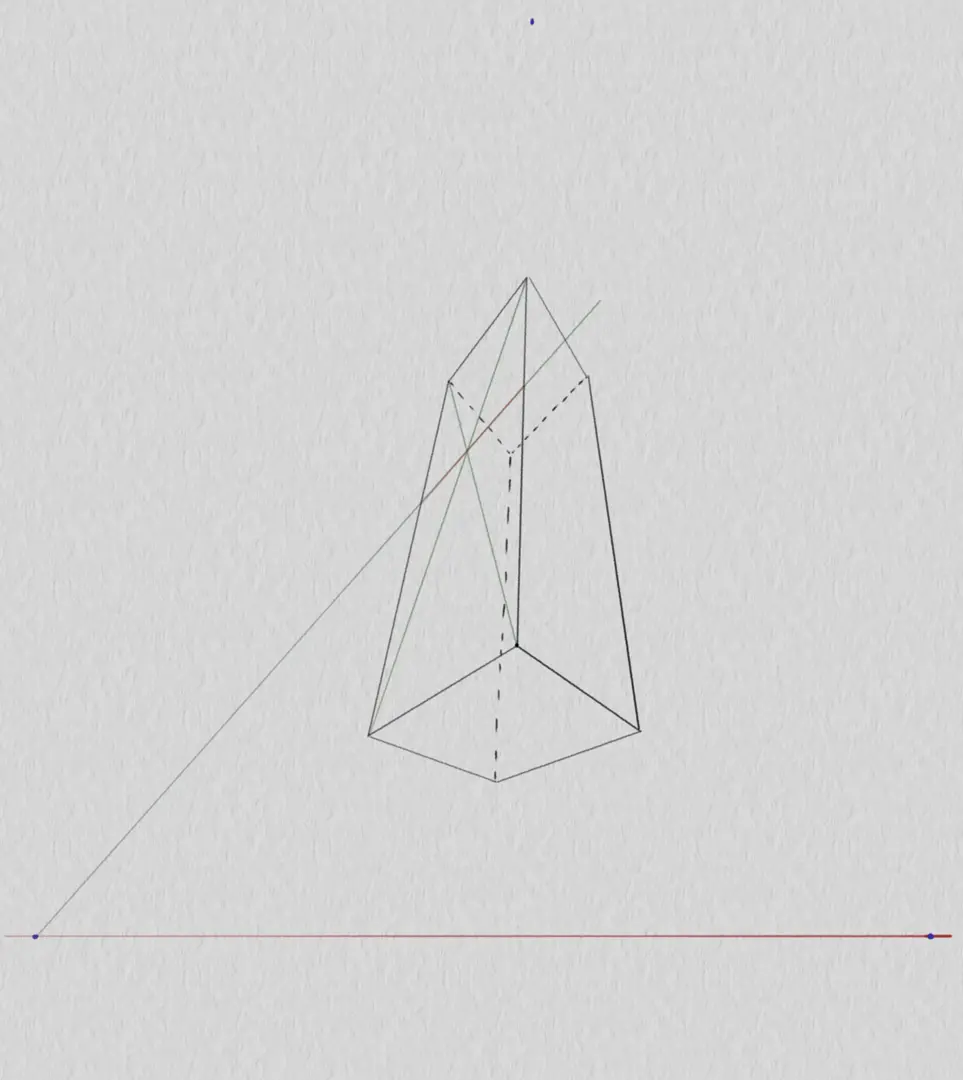
As already mentioned, each shelf in my box is close to an anatomical landmark of my character. The objective is therefore to replace my reference points in relation to these. Perspective distorts proportions, so it will be necessary to respect the space occupied by an element of my character on its shelf in relation to that on my flat diagram. Let's start with the head: it occupies most of the space on the top shelf. Therefore, I will represent it so that it occupies the same amount of space in a bottom view shot.
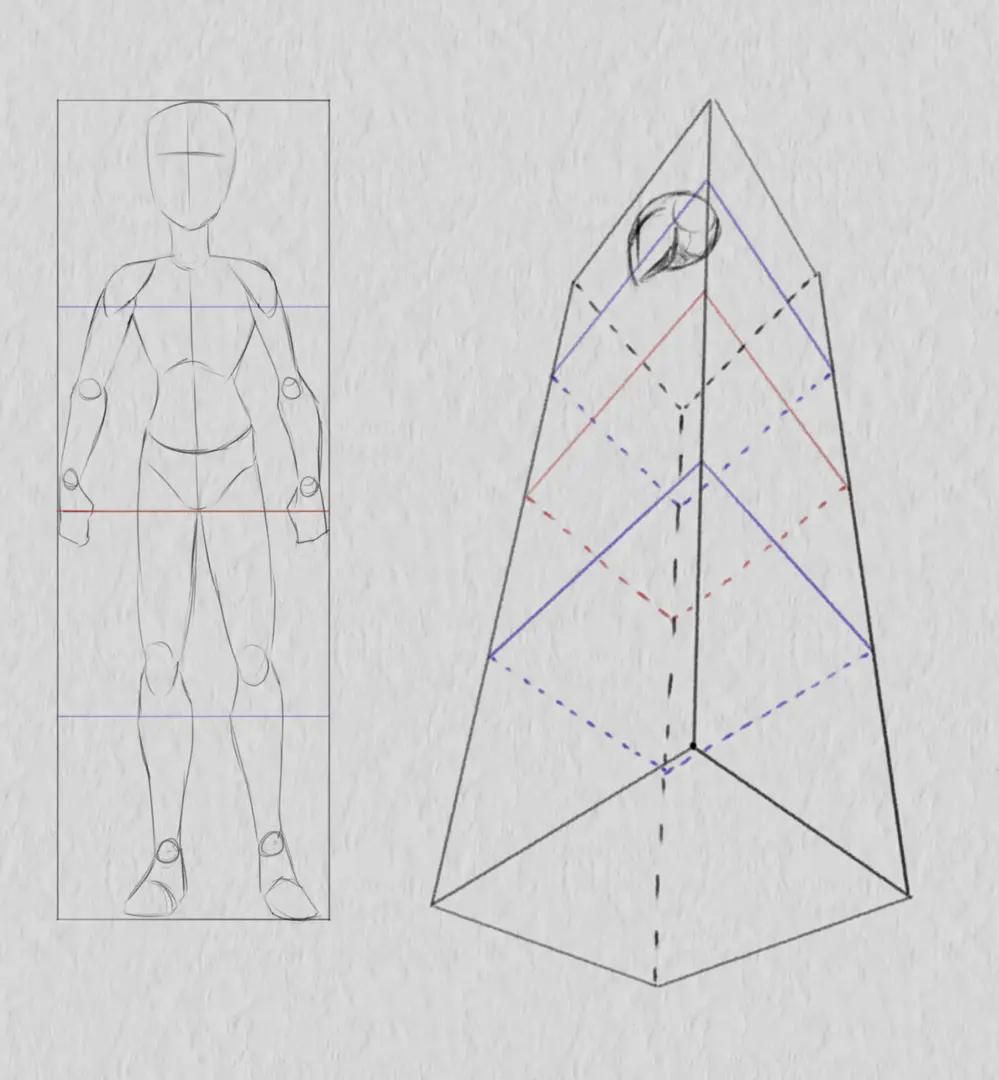
My character's shoulders are on the top shelf. I can then set up simple volumes to represent them at the level of my shelf.
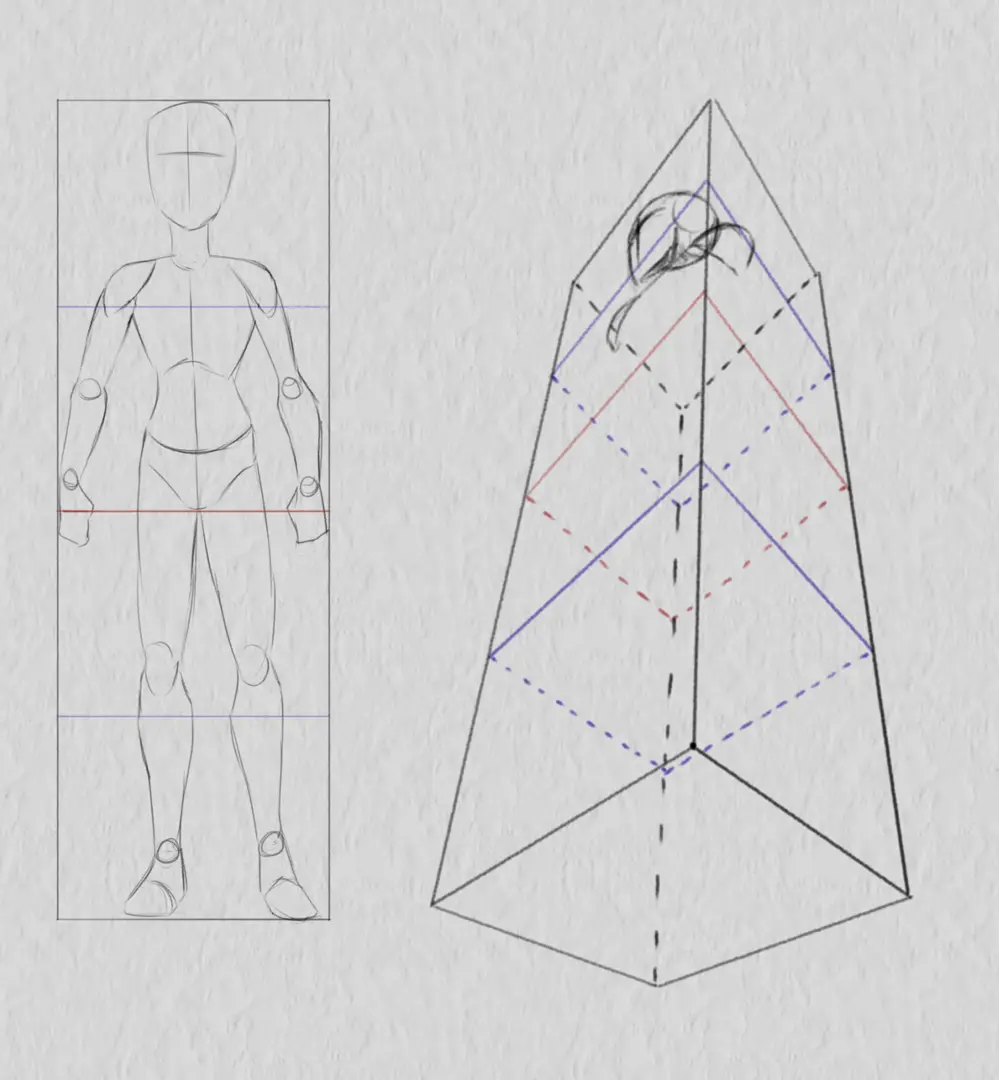
I will now represent a “straight” reference point, such as hips. In my flat diagram, the flanks are represented by a curve. In perspective, this curve turns into an ellipse.
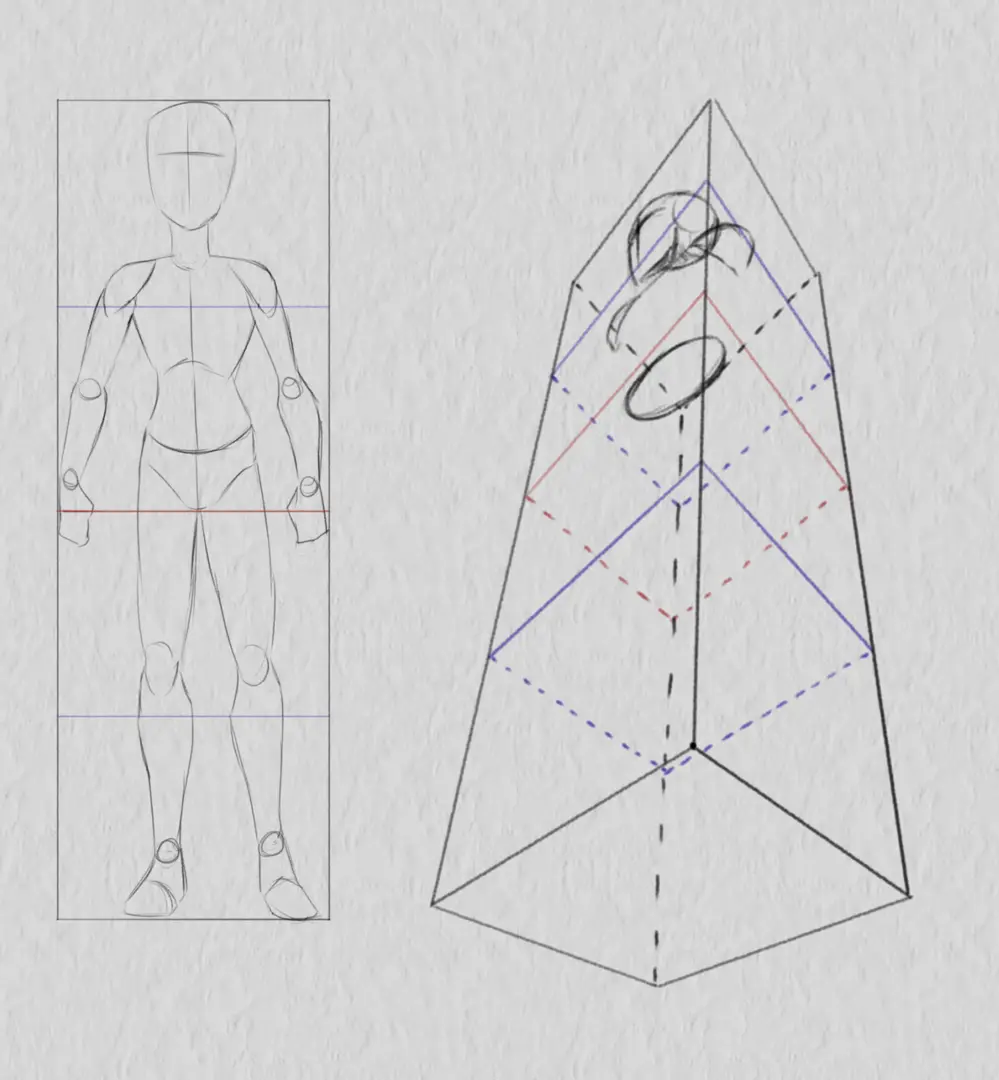
Now I repeat the same method to represent the other reference points: the knees behave as the shoulders, the waist as the hips, the feet as the head and so on.
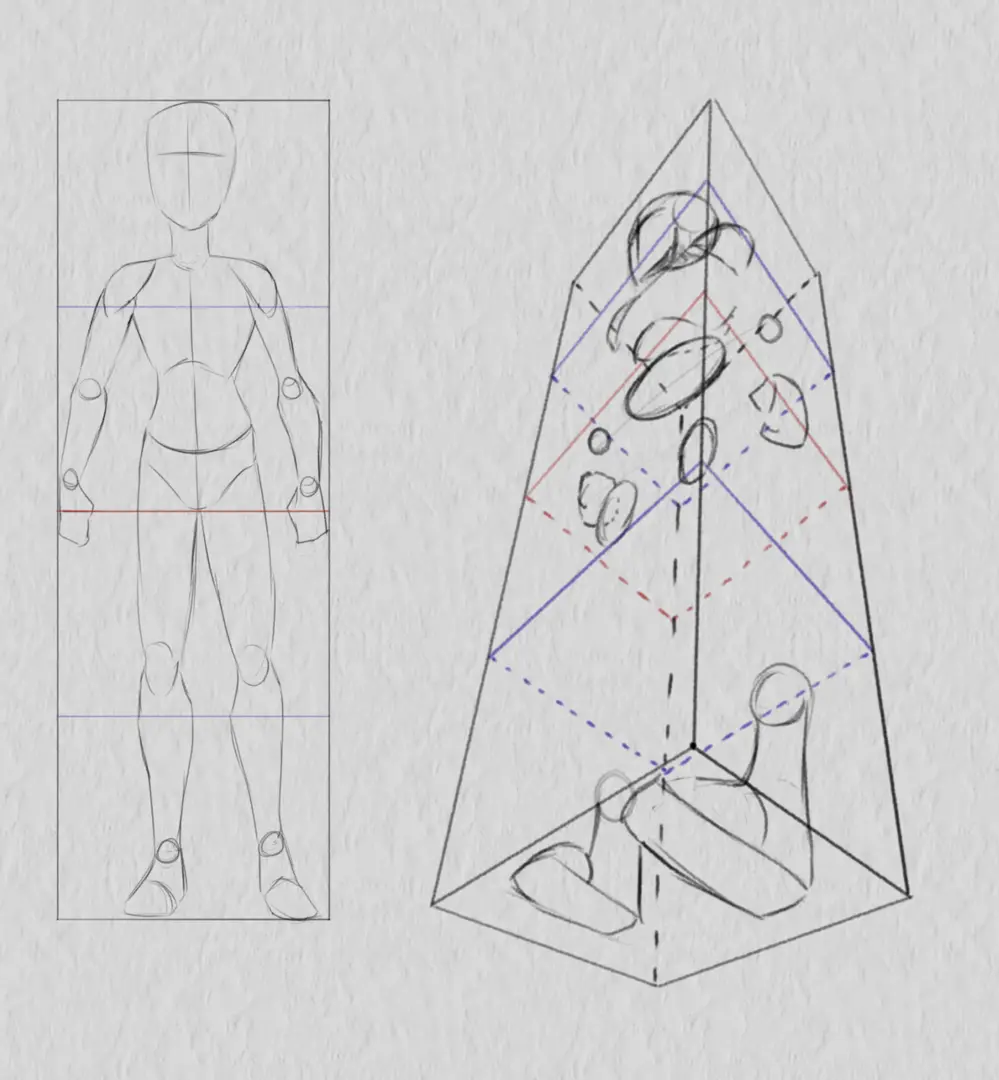
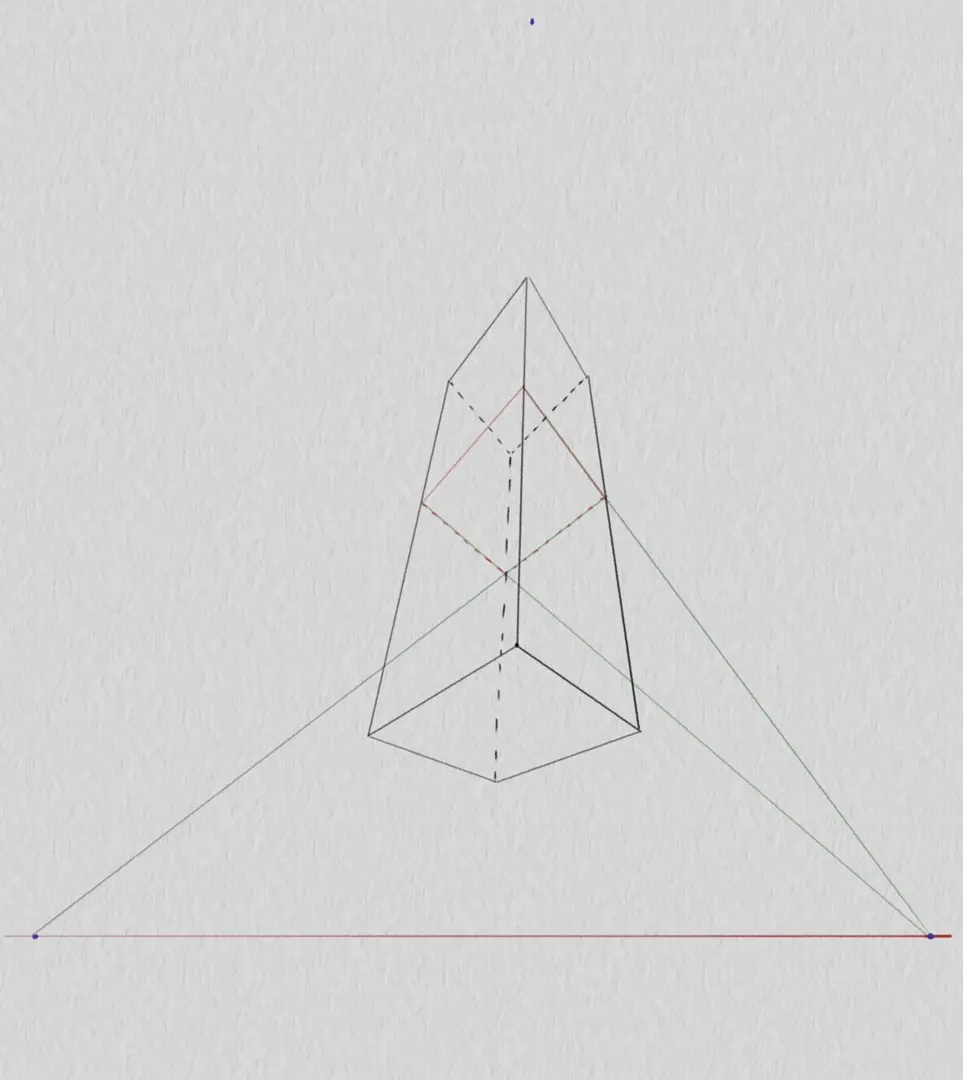
Since all references are in place, I can now install my volumes. As with the references, I will not immediately worry about which volume is hiding what and draw everything.
I start with the body. First, I establish a guideline to help me represent my character's torso.
Then I draw the trunk following my marks and orientation. I take care to manage the space the body must occupy in the box in the same way as before.
For the other body parts, I first install wire between my joints....
… then I sketch the volumes around it.
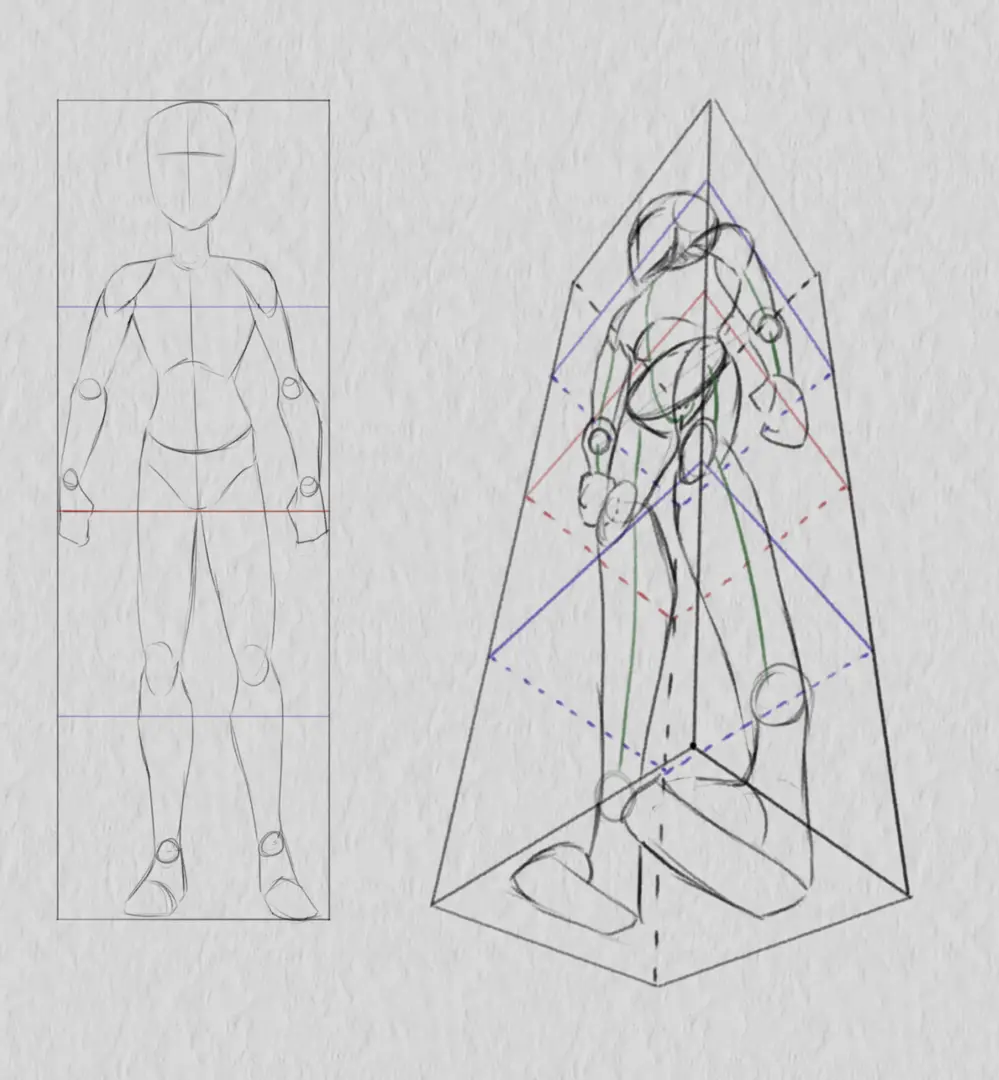
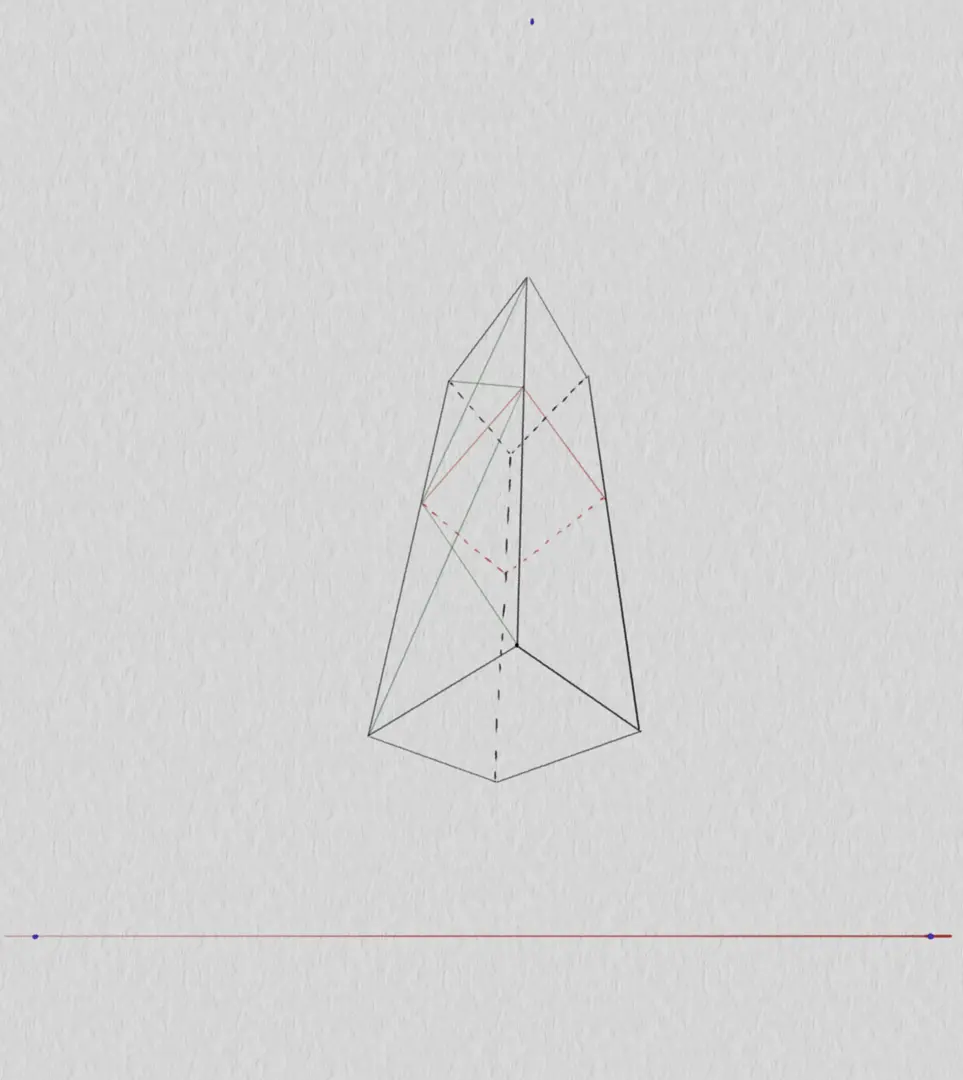
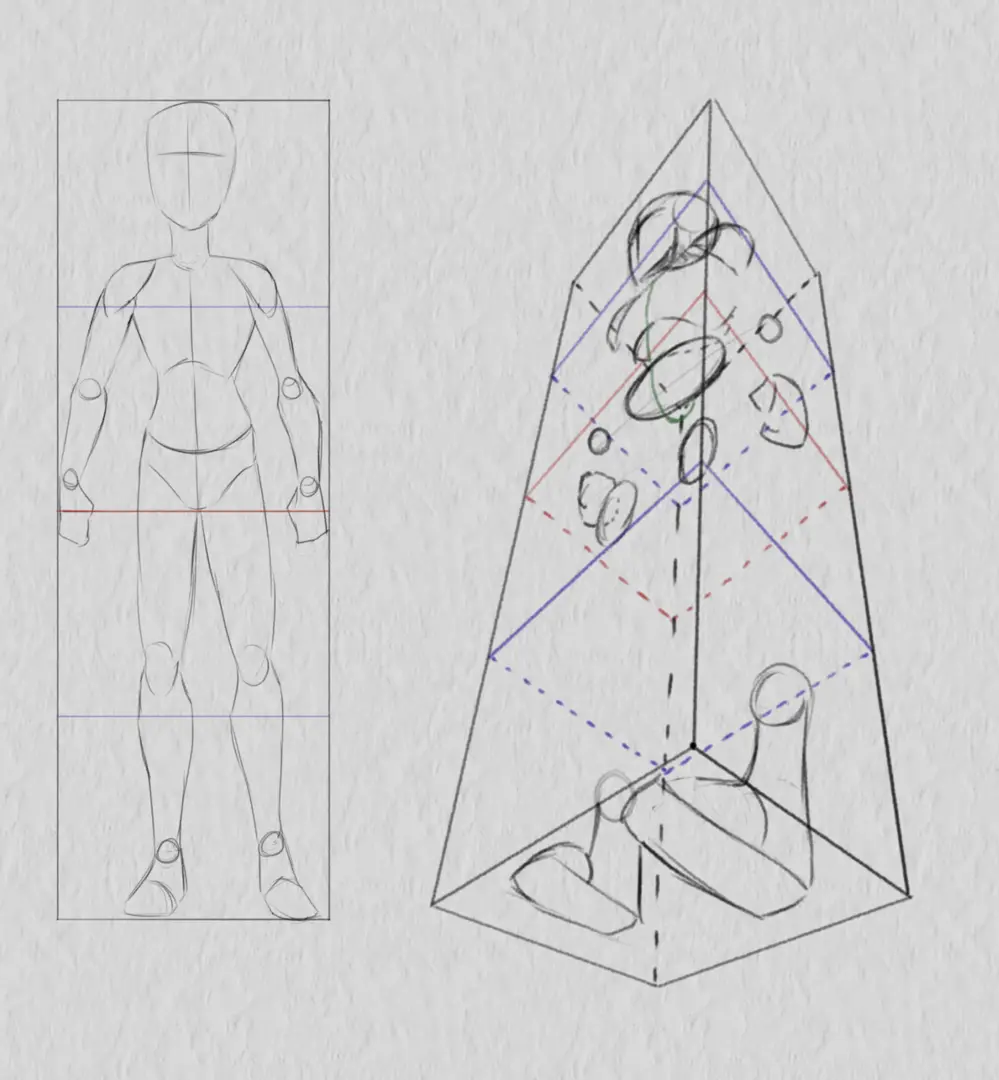
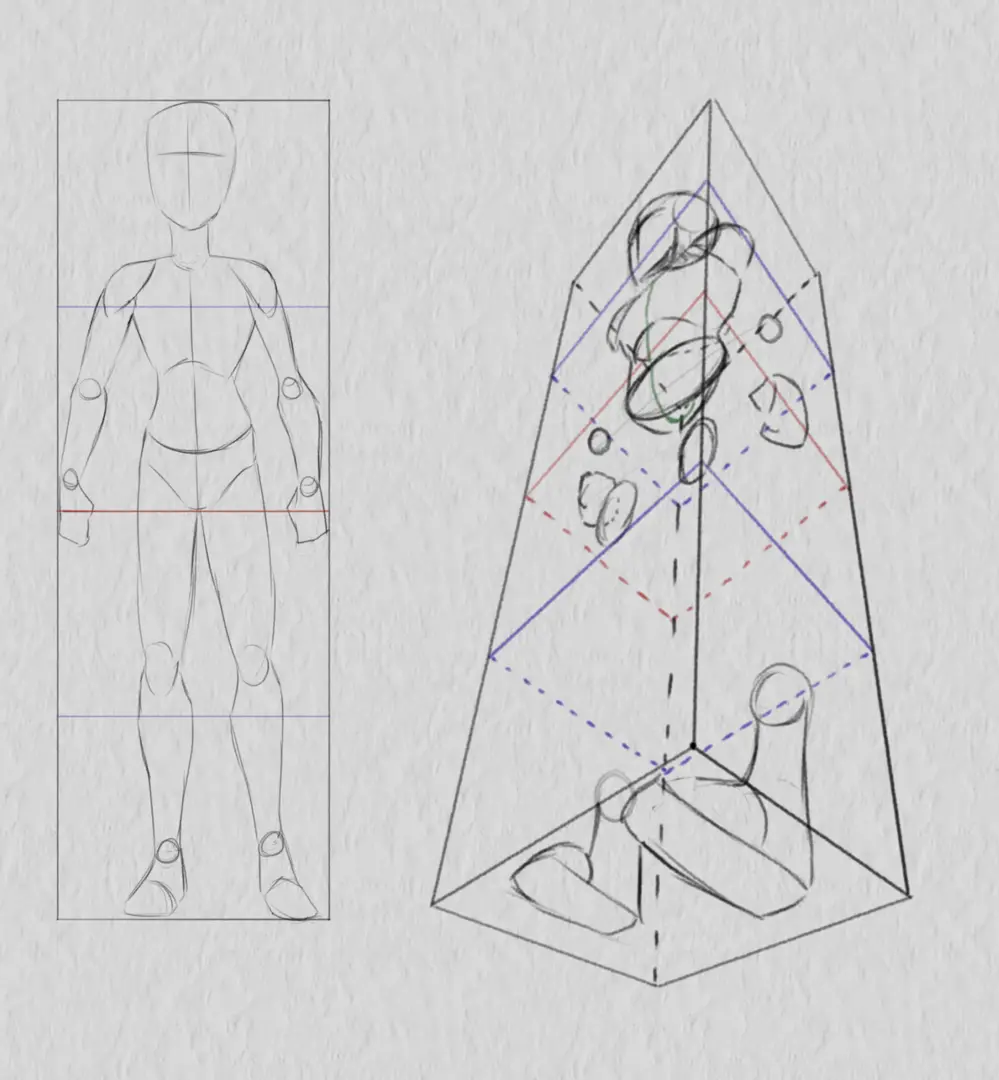
All our volumes are finally here! Now it is necessary to identify those that will be visible and those that will be hidden. The easiest thing is to start by examining the character from the bottom of the box. By gradually examining in this way, you will quickly see which volume to make visible. If I return to my character, part of the head will be hidden by the torso, and the same goes for one of the arms.
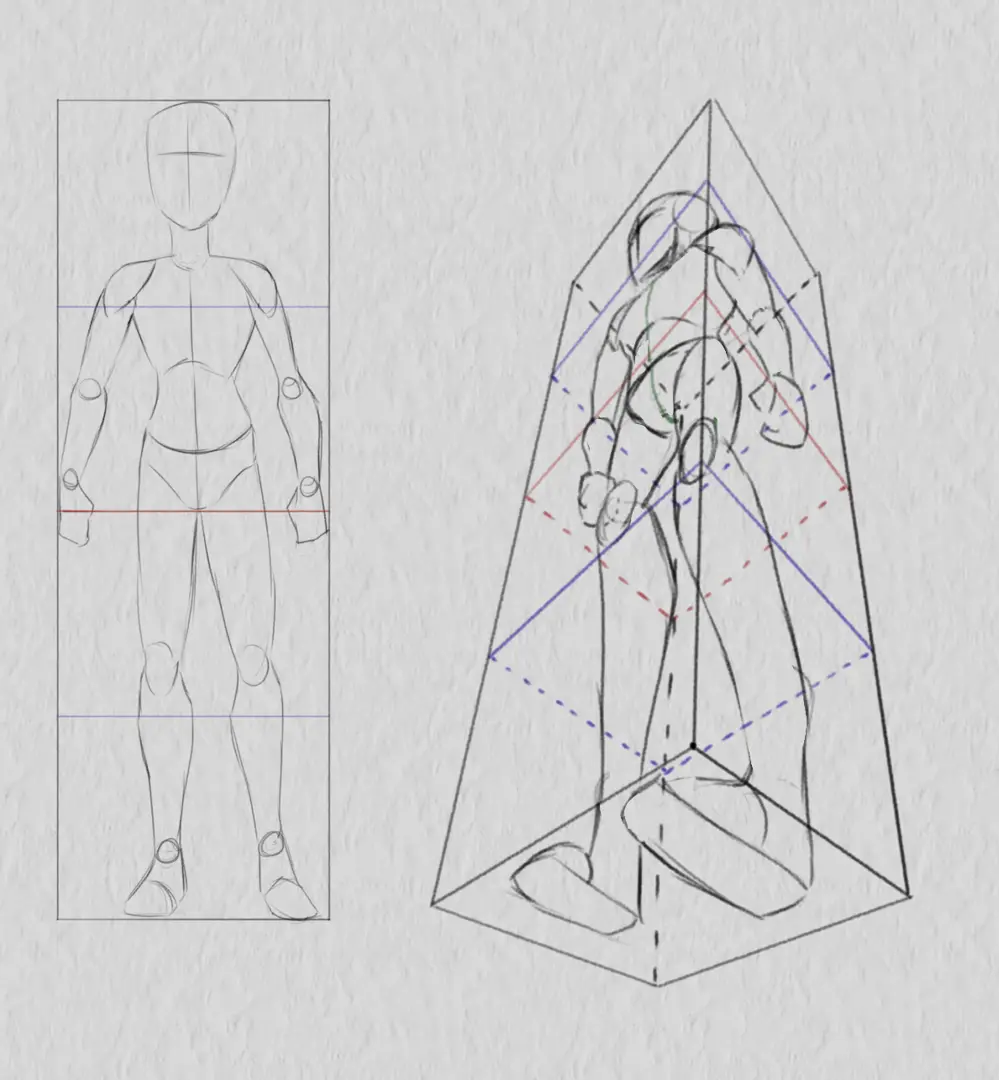
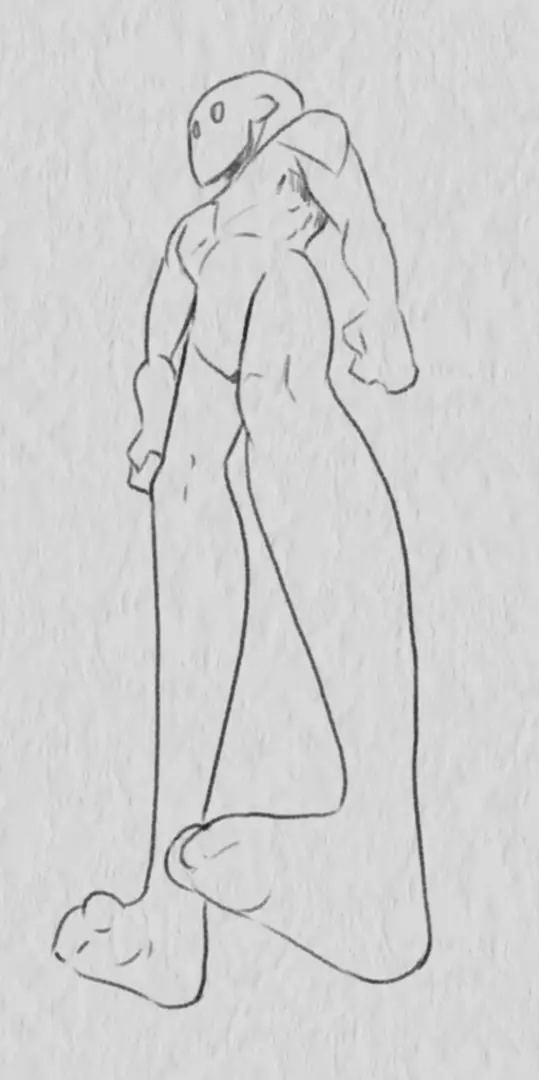
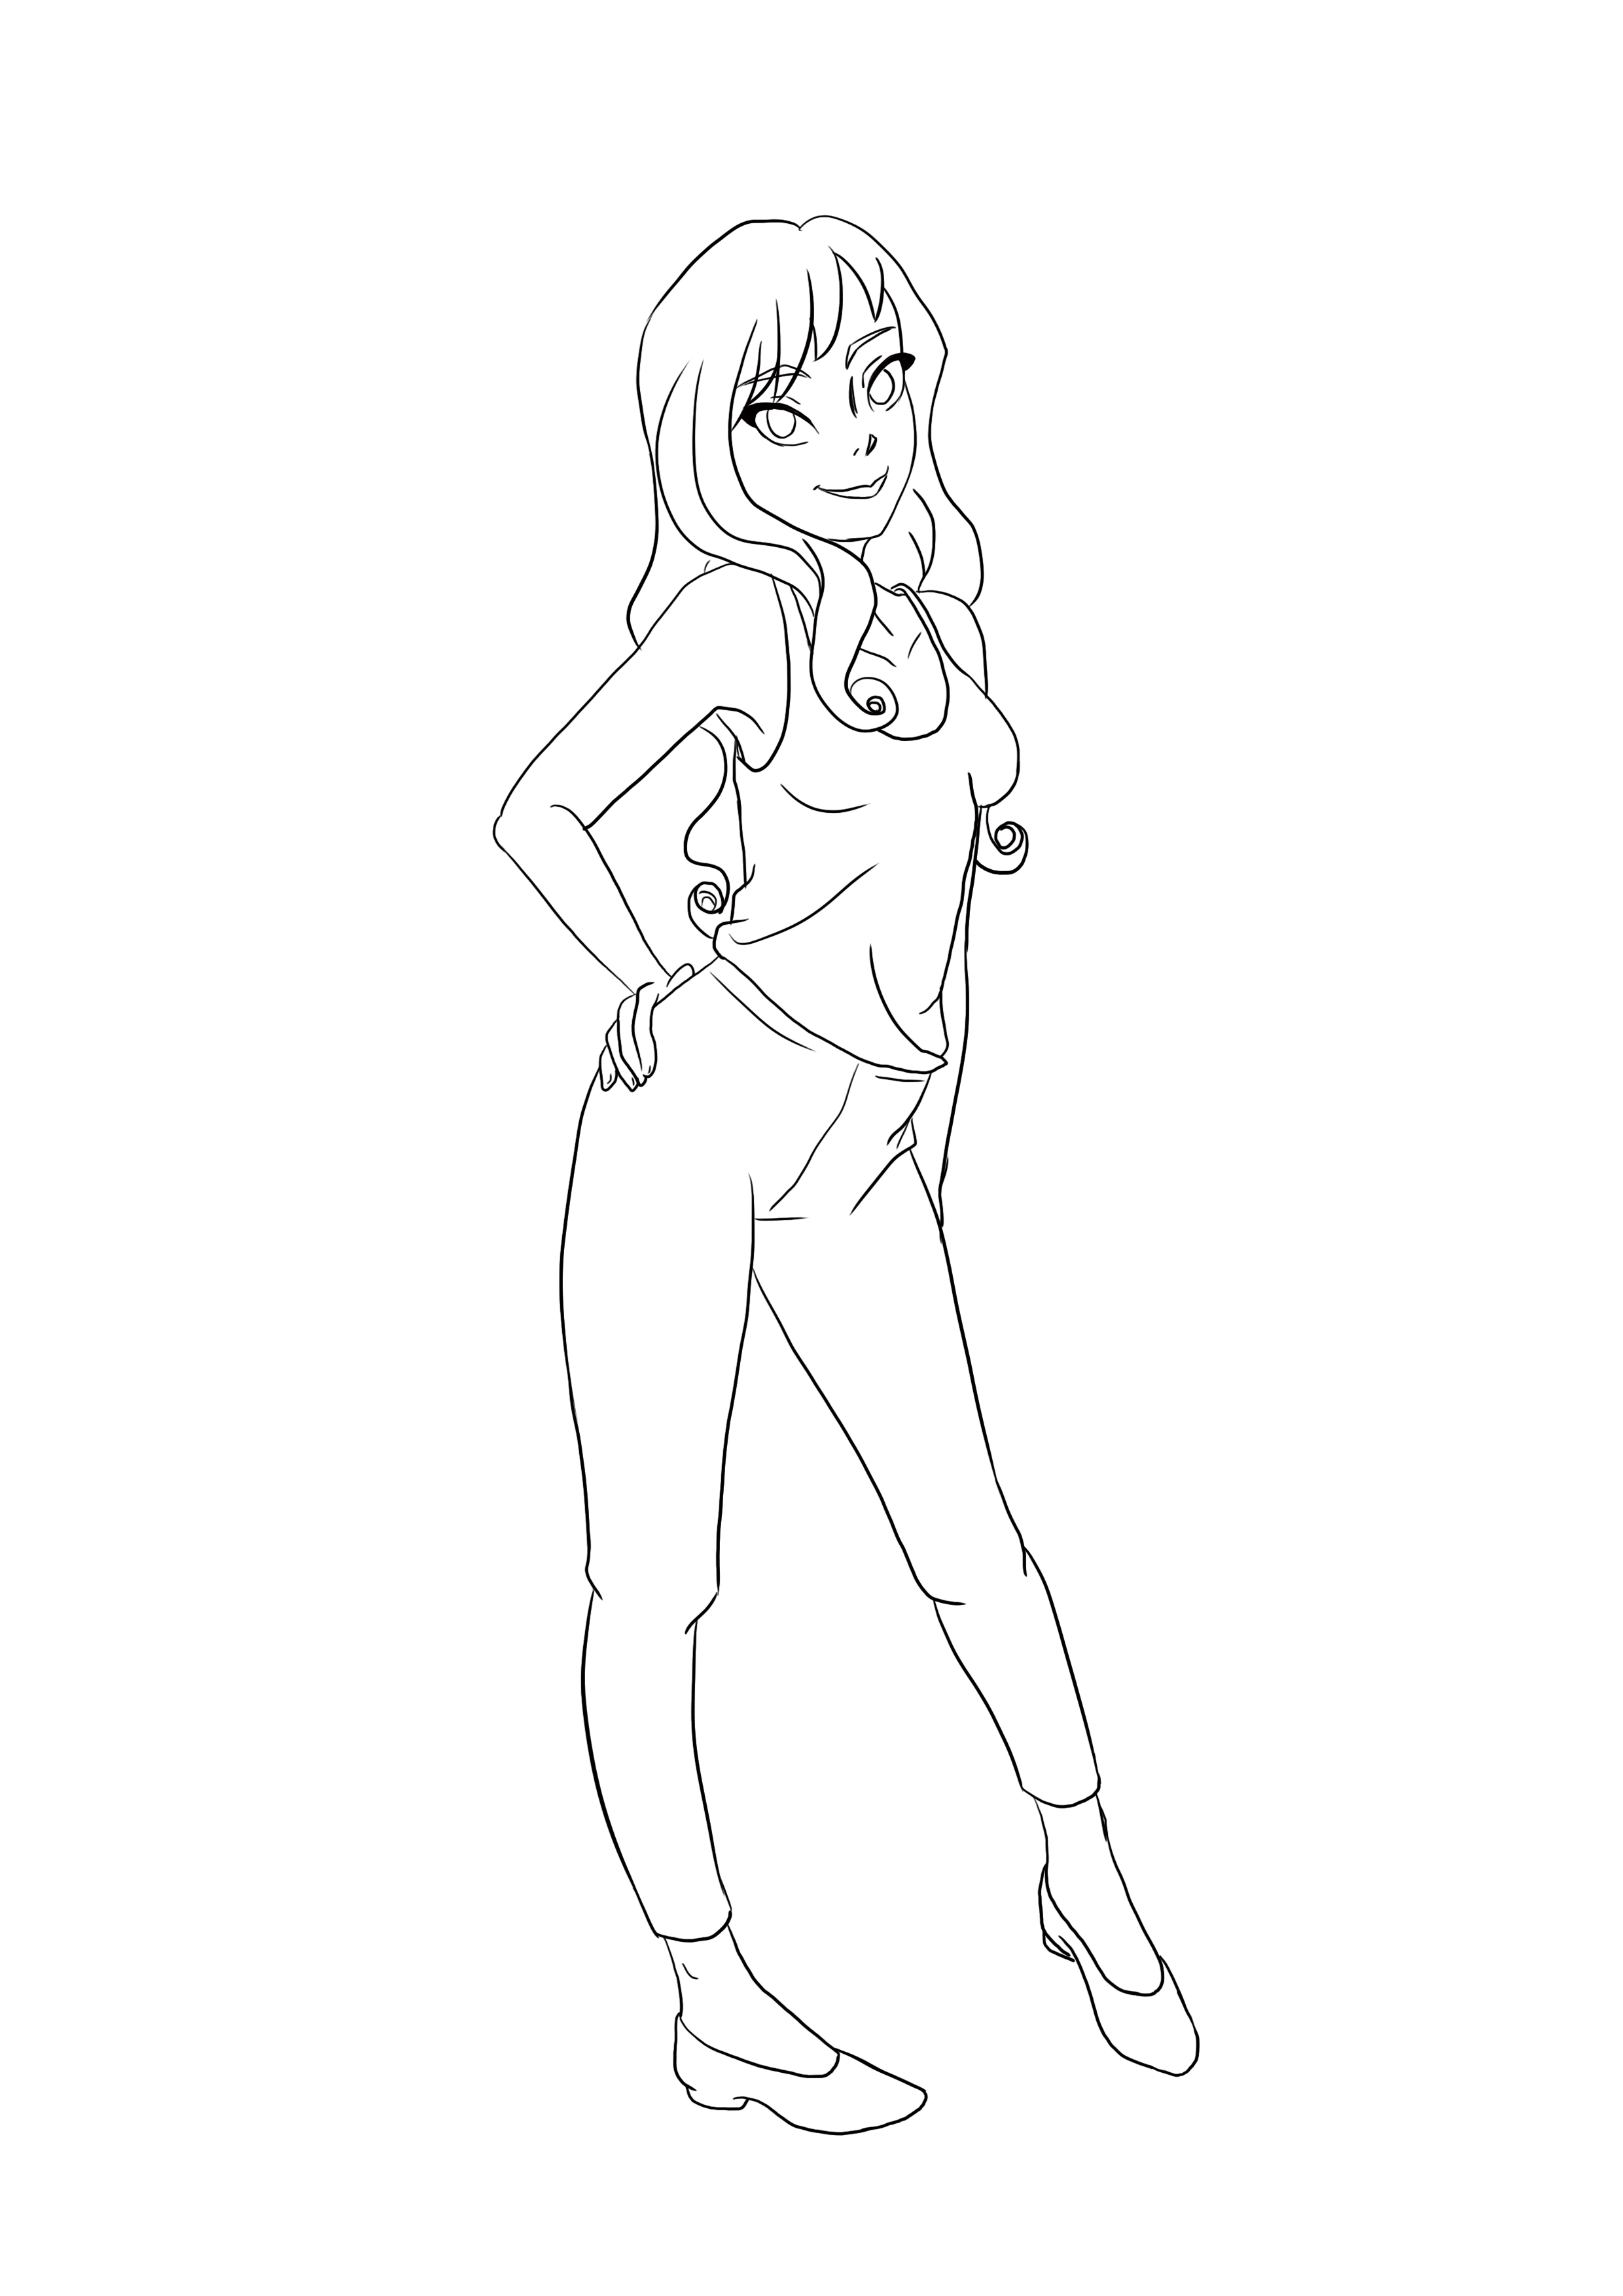
My base mannequin is finally finished! I can now use it as a base to draw a character from a low angle. Feel free to check out our articles on character creation for more details on this.

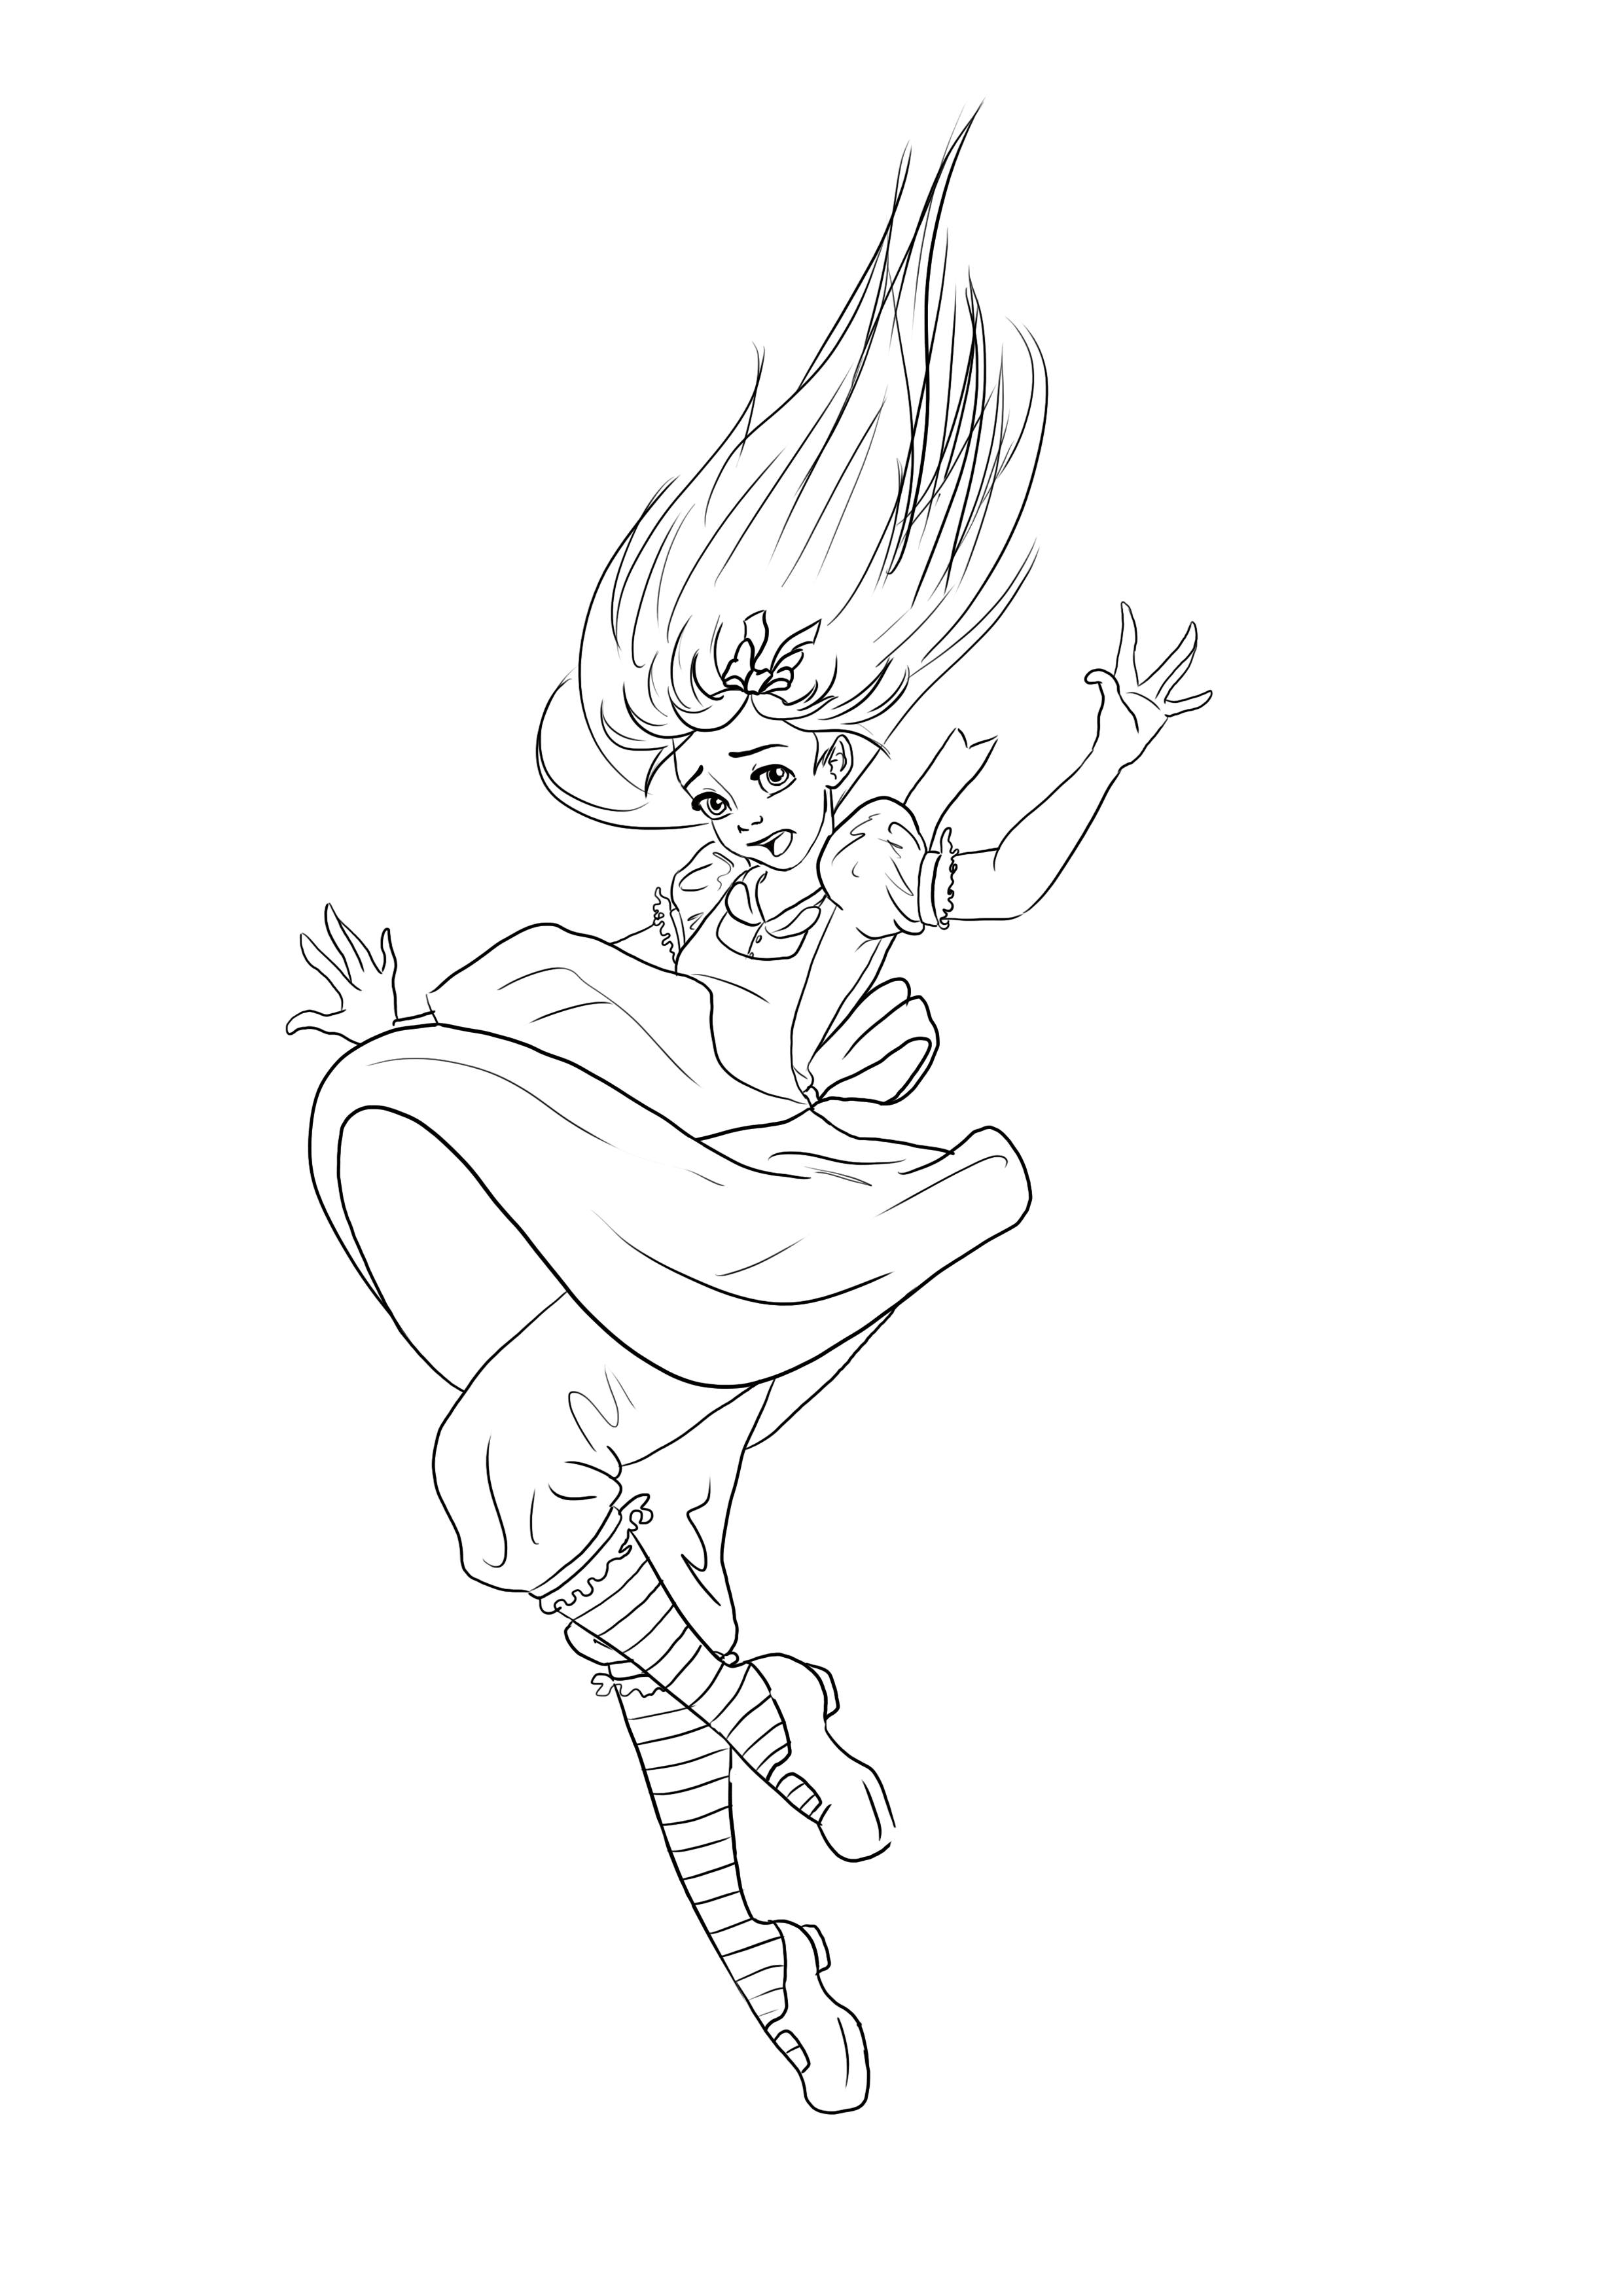
You now know how to draw a character using a low angle shot. Feel free to try the second low angle shot shown in this article, or use the same technique to depict your character from a high angle this time!
Discussion
No comments yet.