Basic Rules for Drawing in Perspective
In this article, we will talk about the fundamental rules of perspective. They allow us to give our drawings volume and depth. Before explaining how to use it, we will take a brief look at history to understand how perspective has been interpreted over the centuries. Later on in this article, we will see how to implement it, as there are several types of perspective that can be used for drawing.
A brief definition of perspective is necessary before delving into its history:
Perspective is the set of pictorial techniques intended to represent objects, such as animals, creatures, or a landscape, in three dimensions in an image on a flat surface, such as a sheet of paper, or on software such as Photoshop.
We can distinguish several types of perspective that use depth. If you want to represent the illusion of depth, you will need to use more complex techniques.
PERSPECTIVE THROUGH HISTORY
It is important to know that there are several types of perspective and there are different ways to represent them. Perhaps you have already heard of cavalier perspective, painters' perspective, or central perspective?
To avoid confusing you, I will give you a brief definition of what is called oblique projection:
This is a tool that allows for the representation of objects that exist in volume on a piece of paper. This representation does not have a vanishing point. The size of the objects does not decrease as they move away. It is a specific form of perspective. This perspective does not claim to give the illusion of what can be seen, but simply provides information about the concept of depth. Easy to create, it is a naive perspective that does not reflect a "vision in space." Often used in freehand drawing, it can produce an ambiguity in representation: an object distant from another may seem to be above or below instead.
I will also define central perspective because it is the first one that was used:
It's a way of drawing an object or a building as it appears from a determined viewpoint on a plan. The central perspective of an object is the central projection of this object onto a projection plane called the picture plane.
With these definitions established, we can now return to the history of perspective.
Among the Romans and the Greeks:
The Romans, as well as the Greeks, never possessed perspective as we know it, but they certainly had methods of implementing perspective. We can distinguish three periods, corresponding to three stages in the development of these methods:
The first corresponds to a superposition of the plans of the same figure. A second period can be characterized by the lateral staggering of the figures. The third is the painting of a scene where the staggering will be represented by the beginning of a cavalier perspective. It is then that vanishing points appeared in works.
In the Middle Ages:
The advances made in antiquity are being questioned, and until the 15th century, pictorial representations favored the narrative qualities of the image, at the expense of realistic treatment. The pictorial space is enclosed, defined by the sphere of fixed rules. Within this enclosed space, the artist stages characters governed by symbolic relationships, without concern for unity of time or space: the same character can appear multiple times, and their size is determined by their position in the social or religious hierarchy.
During the Renaissance:
In 1415, Filippo Brunelleschi conducted his first experiment in San Giovanni Square in Florence. He painted an exterior view of the baptistery and devised a mechanism that aligns this painting with the building: the Travolta. The painting is on one side of the Travolta, which has a small viewing hole. You hold the Travolta with the unpainted side facing you and look at the building through the viewing hole. Then, you insert a mirror at arm's length between the Travolta and the building. If all parts of the device are correctly placed, the image of the painting reflected by the mirror coincides with a part of the building.
CONSTRUCTION AND BASIS OF PERSPECTIVE
Now that we know a bit more about its history, we're going to talk about how to construct a perspective.
THE HORIZON LINE
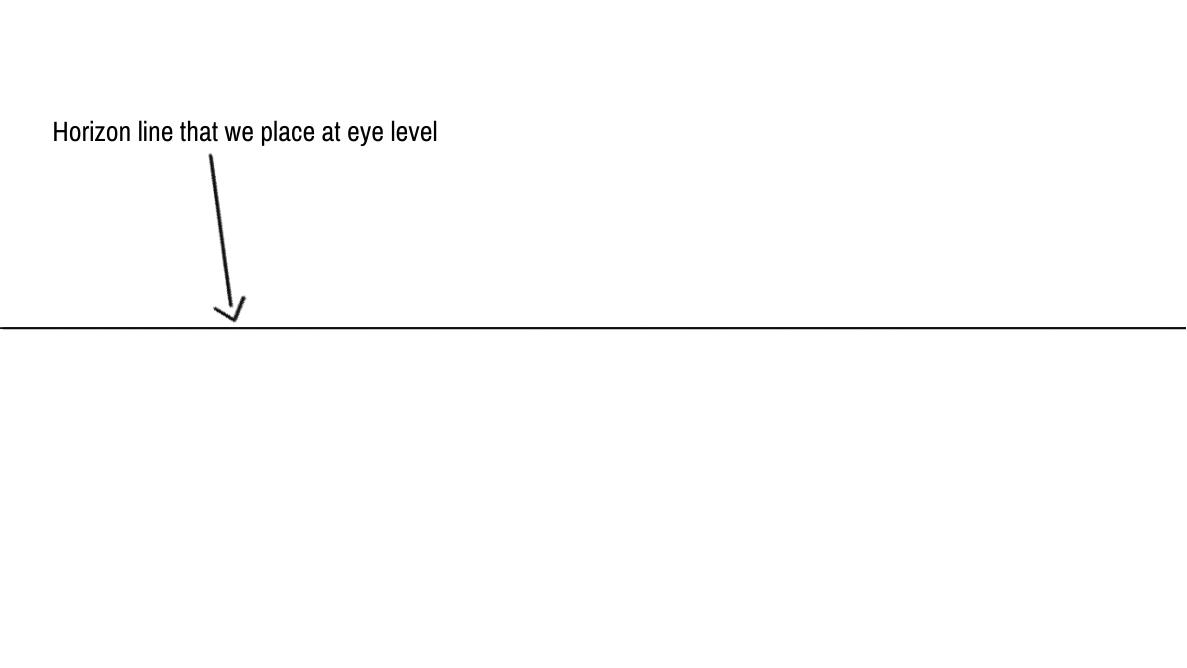
First, start by drawing a horizon line. It is located at eye level. This horizon line is a straight line that takes the shape of the Earth's curve and its form. It is observed in the distance and appears as a boundary between the Earth and the sky.
VANISHING POINTS
The vanishing point is the place where parallel lines in a perspective drawing converge. That is, each plane in a perspective scene has its own vanishing point since the lines that define it are not parallel to another plane. To put it simply, the horizon line is formed by an infinity of vanishing points.
For example, in a perspective drawing, each object can be constructed according to one, two, or even three vanishing points. You can use a vanishing point per element depending on its orientation and the orientation of the parallel lines of its representation. Increasing the number of vanishing points to represent an object increases the distortions applied to it.
It is worth remembering that the vanishing point is an imaginary point that we create to represent the optical phenomenon where parallel lines converge at the horizon.
A small drawing to summarize this:
There is an article dedicated to perspective and vanishing points, I recommend you check out our blog ;)
USING PERSPECTIVE
Use of perspective effects
It is used in industrial drawing to visualize the general shape of parts. The same is done in the film industry, as well as in video games for artistic purposes.
Representing volume involves successive planes, but it does not constitute true perspective because it is necessary to take into account the distancing of objects in the space that you want to draw. If you want to draw natural landscapes, you must refer to simple volumes such as circles, triangles, and rectangles to be able to draw them. Painters, when faced with a natural landscape, most often practice perspective by eye.
There are several ways of representing depth in perspective. I will mention a few examples.
The trompe-l'oeil consists of deceiving the spectator and creating an illusion.
The paradox is the perverse application of the rules of perspective and represents objects that shouldn't exist. This notion is the basis of optical illusions based on simple shapes, where most of the details that allow identifying a subject and its depth are missing.
The linear perspective dominates graphic representation in Europe. It is used in the field of painting and drawing, where it is part of academic teaching. It can be found in comic books, in advertising, and in illustration, where drawings often complement photographs, whose geometric structure is identical. It involves the projection of a line passing through the same point onto a surface.
The curvilinear perspective represents a slightly curved image. Linear perspective only reproduces a small portion of space. The field of view is quite limited. Beyond that, it sees the lines of the floors "descending" and those of the ceilings "rising" at the edges: this is curvilinear perspective. It shares the same idea as that of wide-angle lenses used on cameras, and therefore extrapolates the construction of the image to make it represent a viewing angle of 180 degrees.
There are also others, like aerial perspective or anamorphosis, which also give the illusion of depth. I invite you to read the article about adding a depth effect to your drawings, which can be found on our blog! :)
We will now move on to practicing everything we've just learned. That is, how to draw in perspective.
DRAWING WITH PERSPECTIVE
Perspective can be used in several types of professions. For example, it can be applied by painters, illustrators, architects, graphic designers…
In this article, we will look at three vanishing point styles, which, in my opinion, are the most used: one-point perspective, two-point perspective, and three-point perspective. We will start with the simplest perspective, which is the one-point perspective.
ONE-POINT PERSPECTIVE
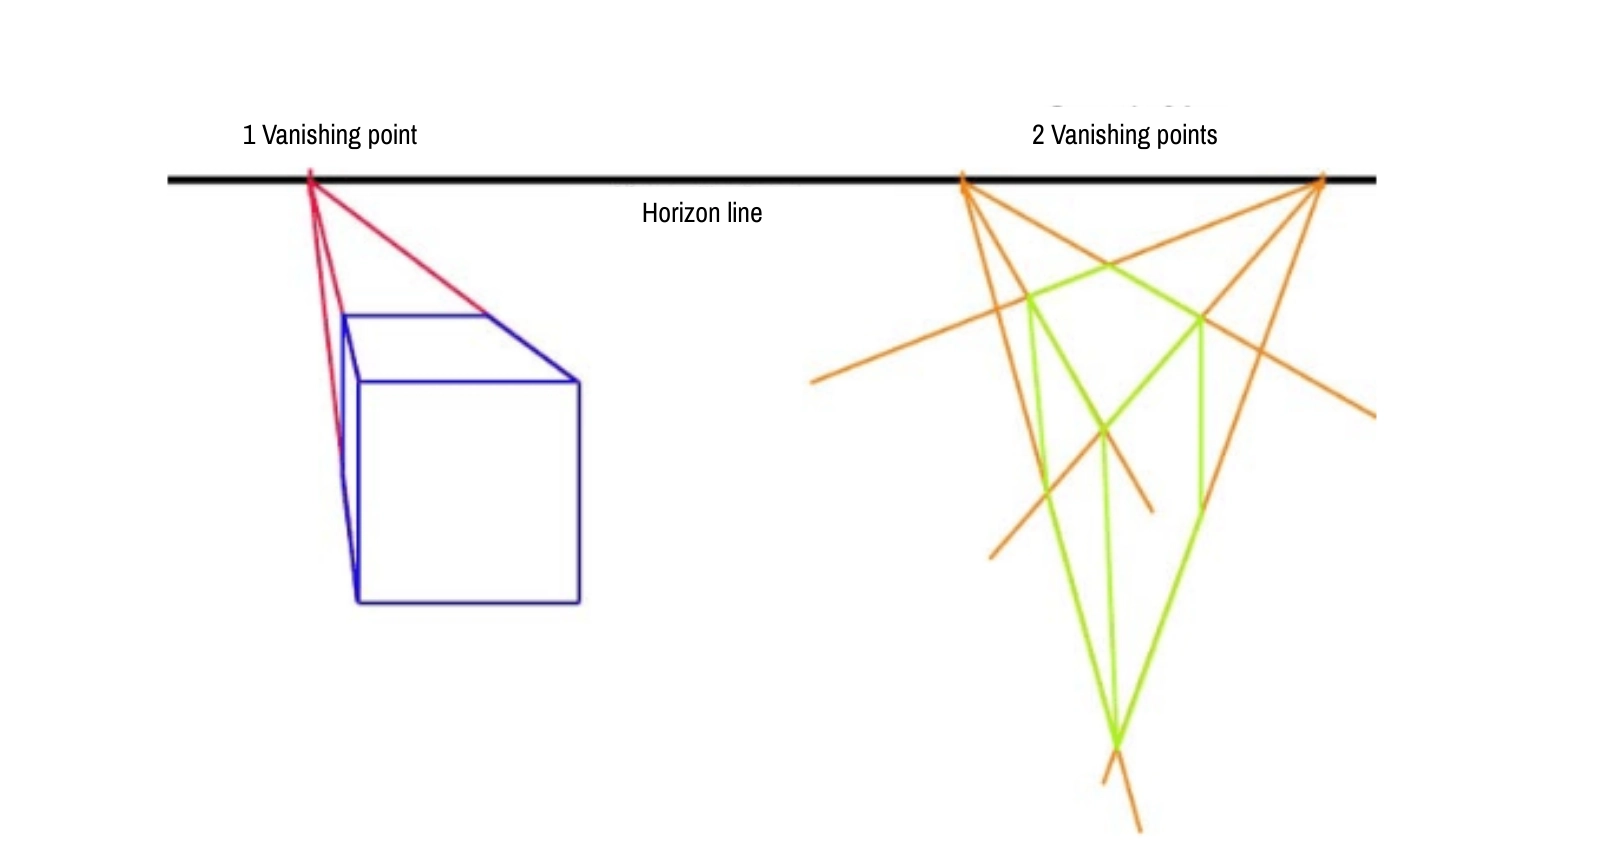
Just place yourself facing a landscape. Draw a line at eye level. This will be your horizon line where you will place your vanishing point. To draw an object, for example, a cube, you will draw a perpendicular line in the empty space. You will then take the ends of your line and join them to a previously chosen vanishing point on your horizon line.
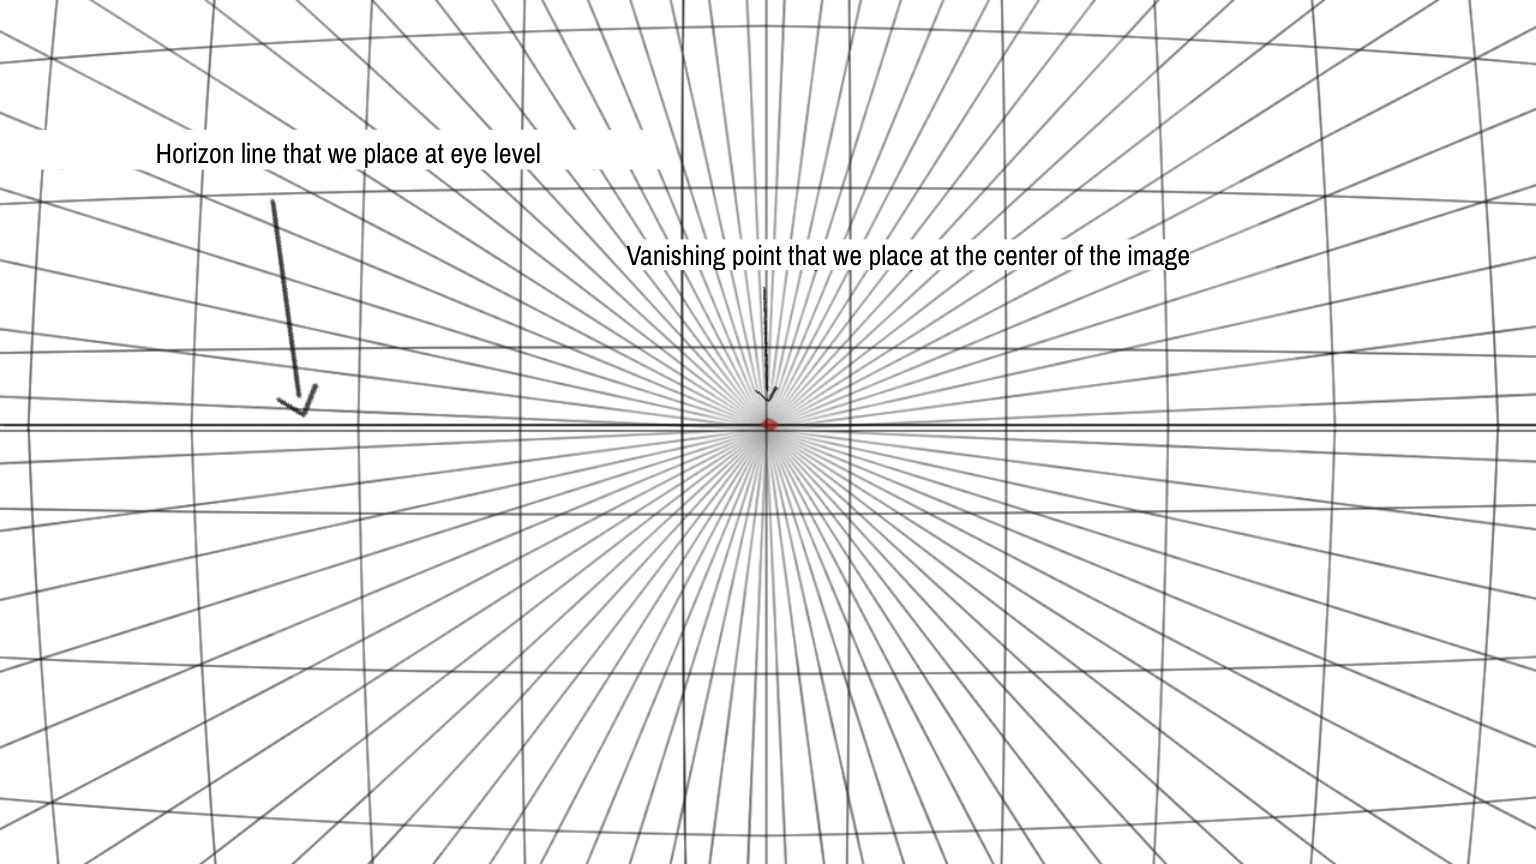
Initially, you will draw the horizon line.
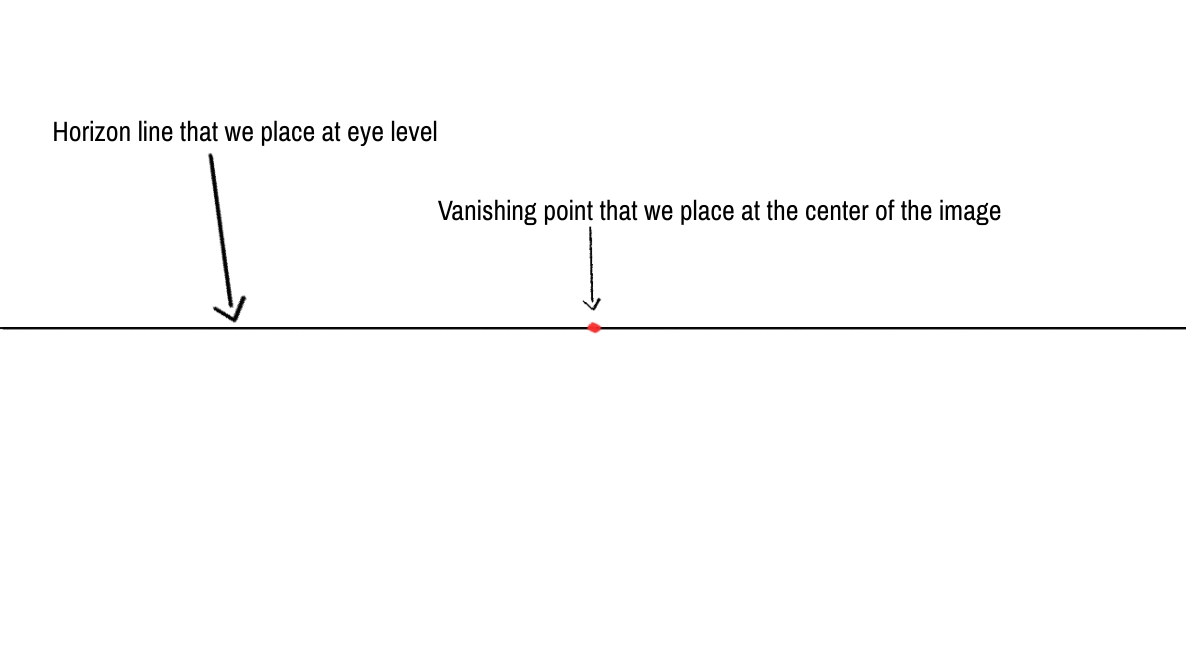
Subsequently, you will place the vanishing point, let's say, for example, in the center of the image.
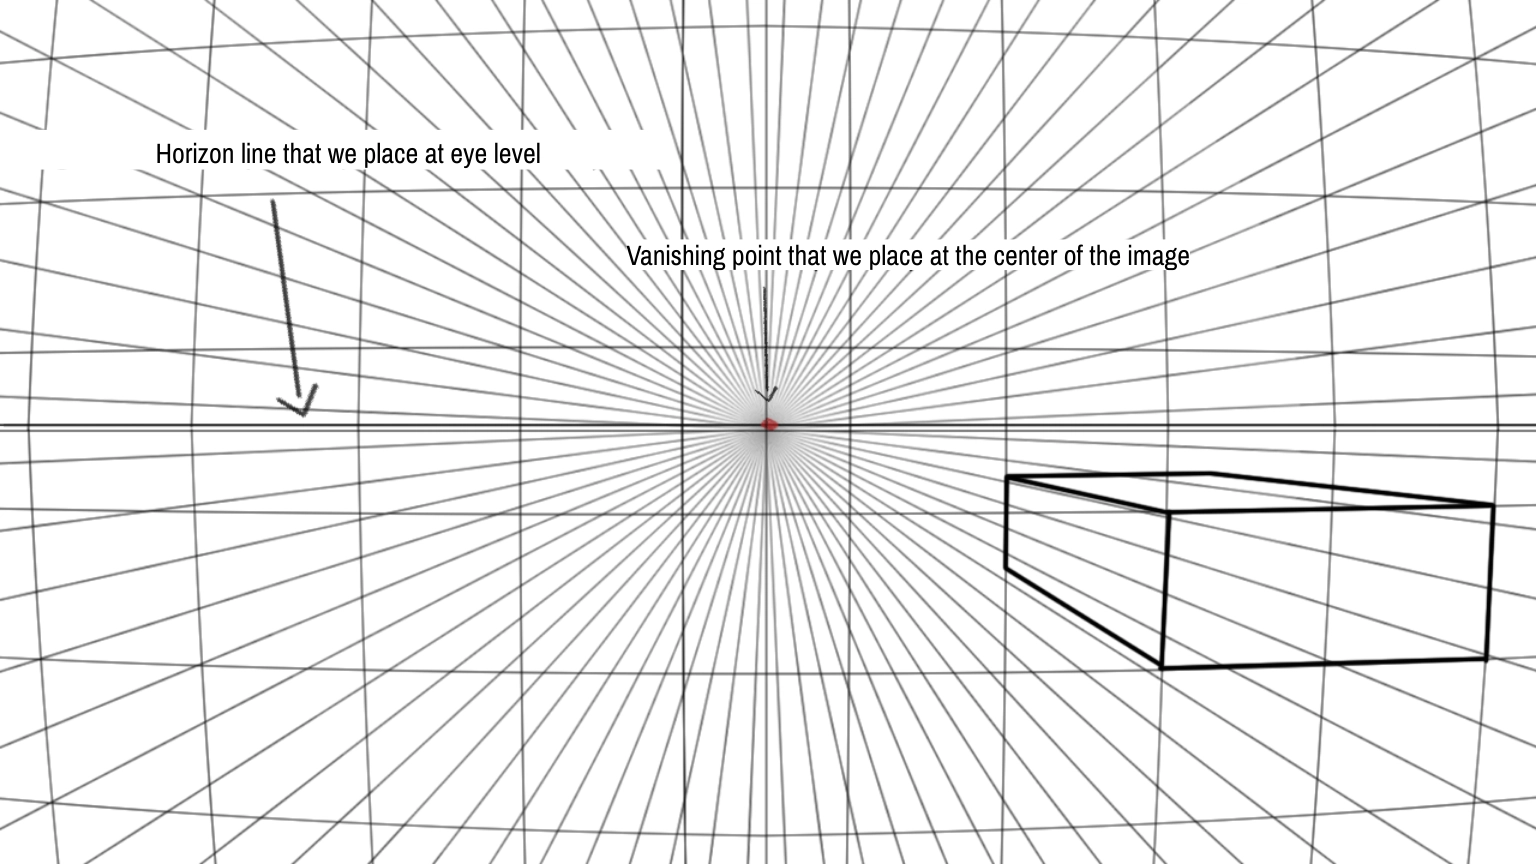
Place the lines used to construct the object in space.
And finally, draw your parallelepiped
Let's now talk about the two-vanishing-point perspective.
TWO-POINT PERSPECTIVE
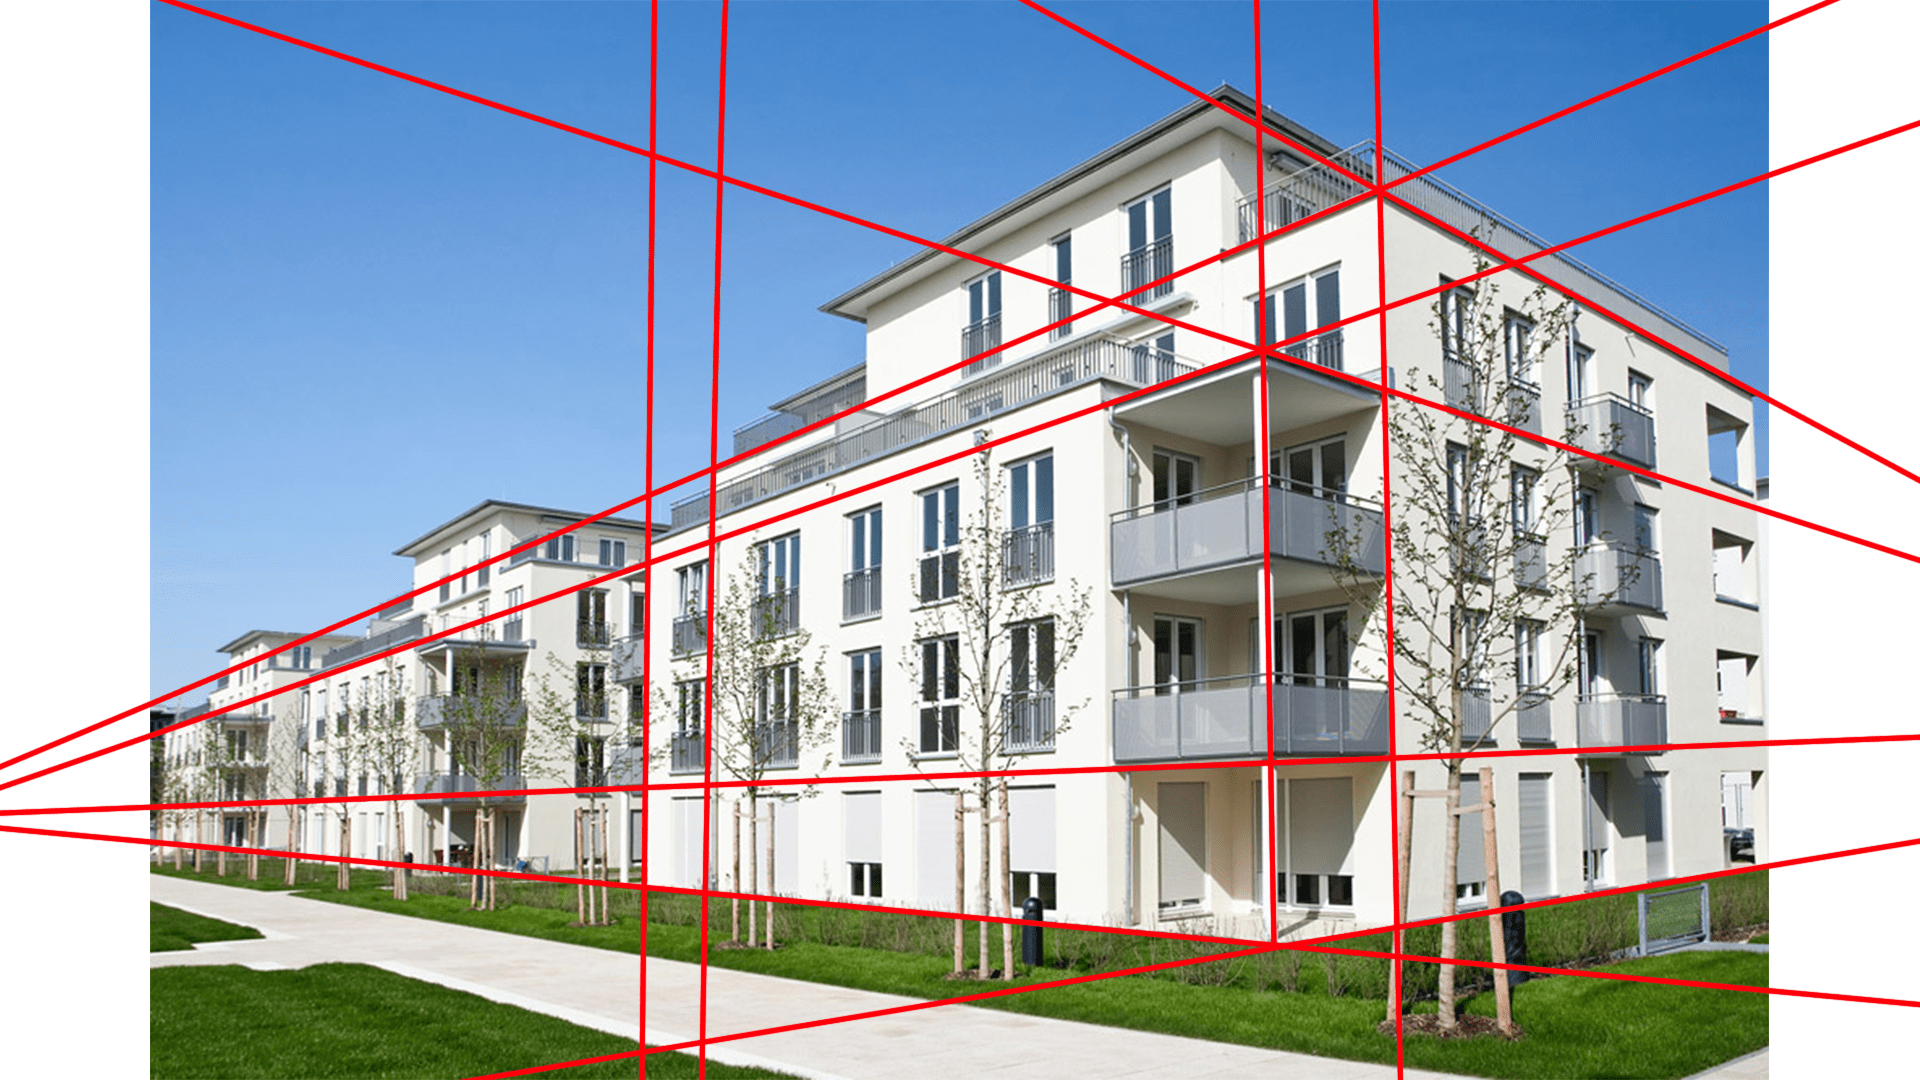
Now we will do the same process but with two vanishing points on the same horizon line. The two vanishing points will often be at the ends of your workspace. Notice that objects with a two-point perspective are slightly distorted by the angle used. This technique is often used for describing the viewpoint of an interior, a city, a garden, or a landscape.
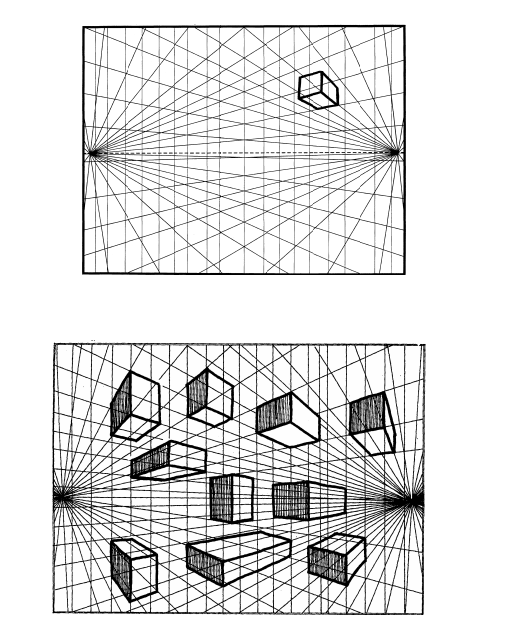
Using two vanishing points is well suited to drawing an interior environment where light enters through two windows not located in the same plane.

We will finish as planned with the perspective with three vanishing points.
THREE-POINT PERSPECTIVE
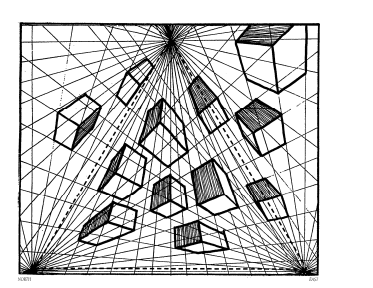
And finally, we will look at the three-point perspective, which consists of creating a triangle with the vanishing points. Let me explain: There will be two vanishing points at the edge of your workspace, either at the top or bottom. And the last vanishing point will be placed on the opposite side.

There is also the curvilinear perspective and the six-point vanishing perspective, which are a bit more complex than the previous ones discussed, but they can be useful for creating panoramas, for example.
In conclusion, we can see that it took mankind a long time to master the notion of perspective. To be able to draw a perspective correctly, you must analyze and use the following relationships:
Space needs to be analyzed and learned in order to create and separate empty and full spaces. Proper usage of parallels and perpendiculars is essential for creating the desired perspective. Obviously, you have to use simple shapes to create volume. And remember that perspective is an illusion effect that we depict to add depth to our image by including a horizon line, vanishing points, and simple volumes to build the drawing simply yet effectively.
If you want to delve deeper into the concepts of perspective, you can check out Grégoire's lessons on the subject in the article dedicated training on the basics of drawing.
Writer: Laure-Hélène

Discussion
Thank you very much