Perspective and Vanishing Points in Drawing
To place one or more vanishing points in a drawing, it is first necessary to understand what perspective is, and to use it, one must absolutely understand the volume of the subject of the drawing.
What better way to start discussing the topic than by taking a simple cube as an example. This geometric volume is found in all the perspective drawings you will make and serves as the construction base for everything you will want to represent in the future.
CAVALIER PERSPECTIVE AND CONSTRUCTION
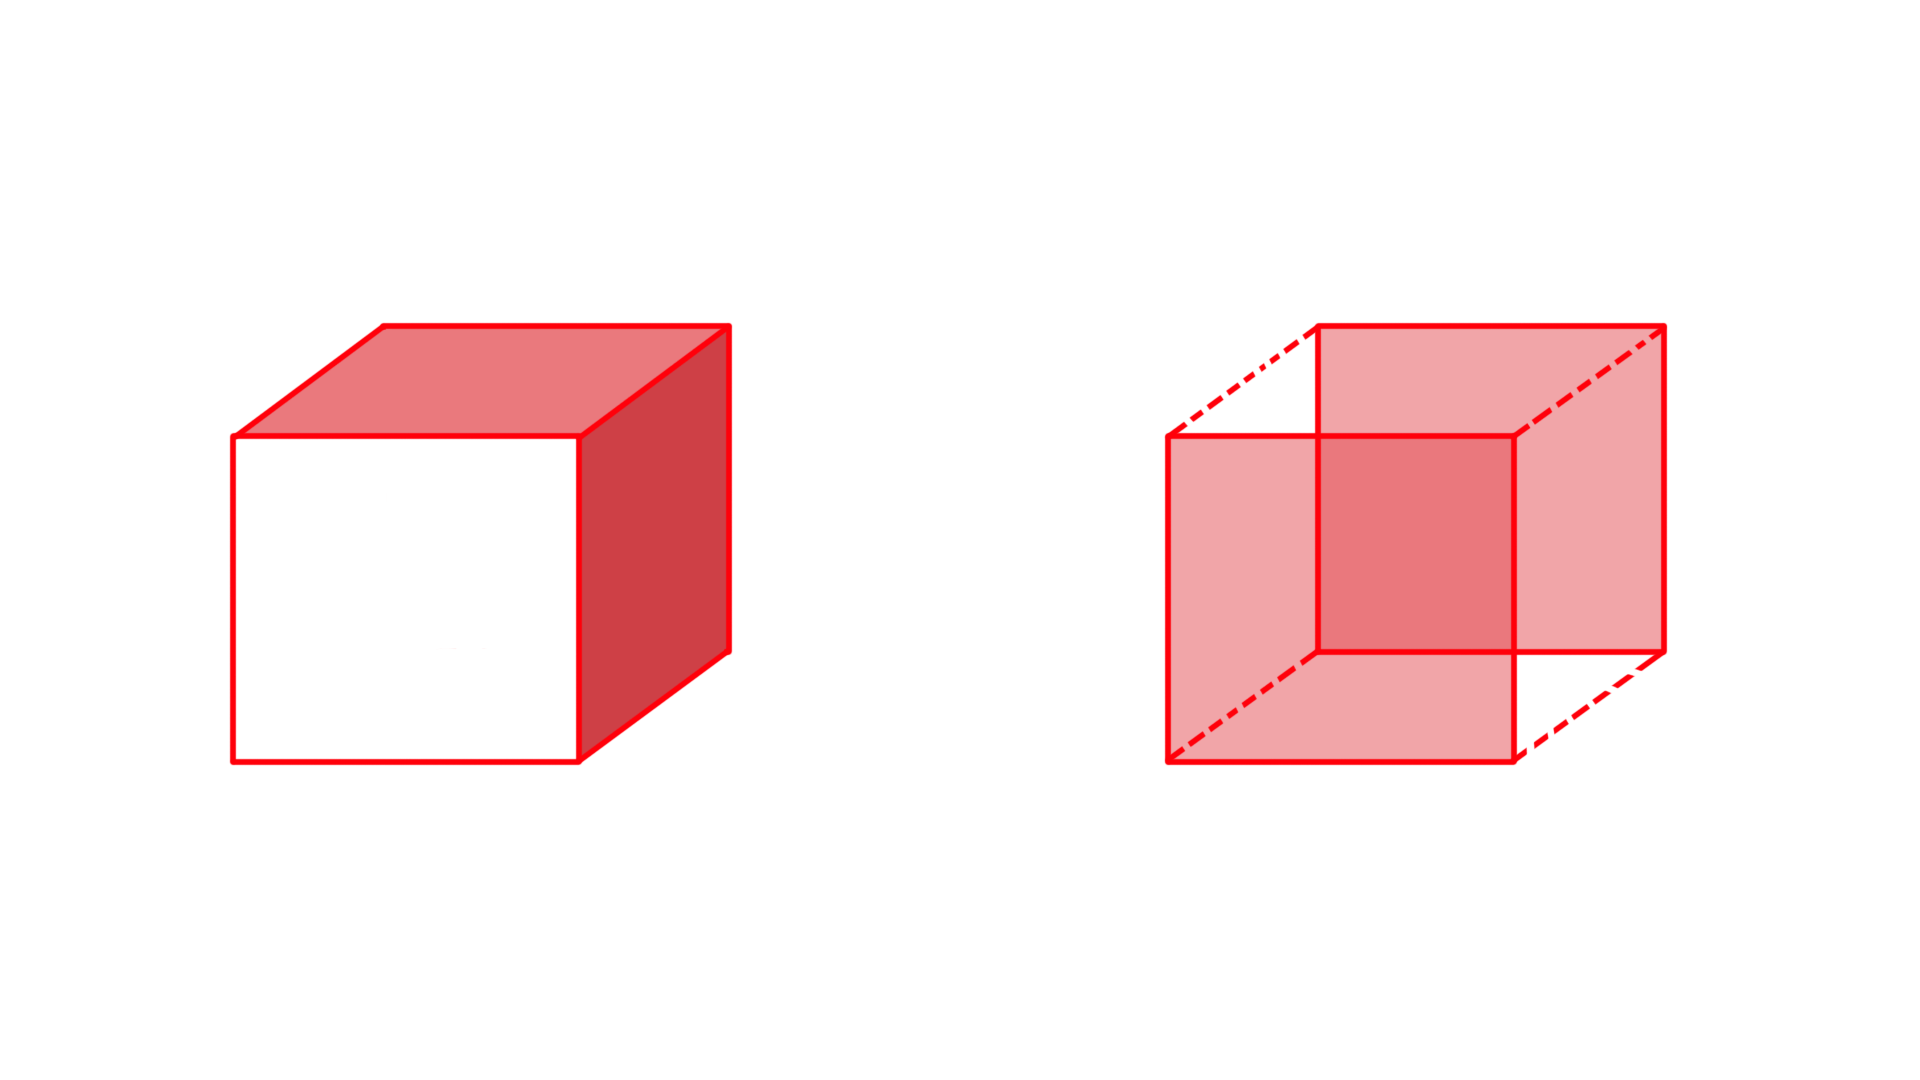
Though these cubes appear to be three-dimensional, no vanishing point is used, so the perspective is not "correct." The lines that indicate the depth of the object are parallel, which is commonly referred to as oblique projection.
This type of perspective can help you understand the volume of what you want to represent. It is imperative to visualize the internal volume even if it will not be visible in the final drawing, you must still imagine it accurately in order to avoid clumsiness and bring coherence to your drawing. To learn more about perspective, I encourage you to read the article on perspective drawing rules ;).
ONE-POINT PERSPECTIVE FRONT VIEW
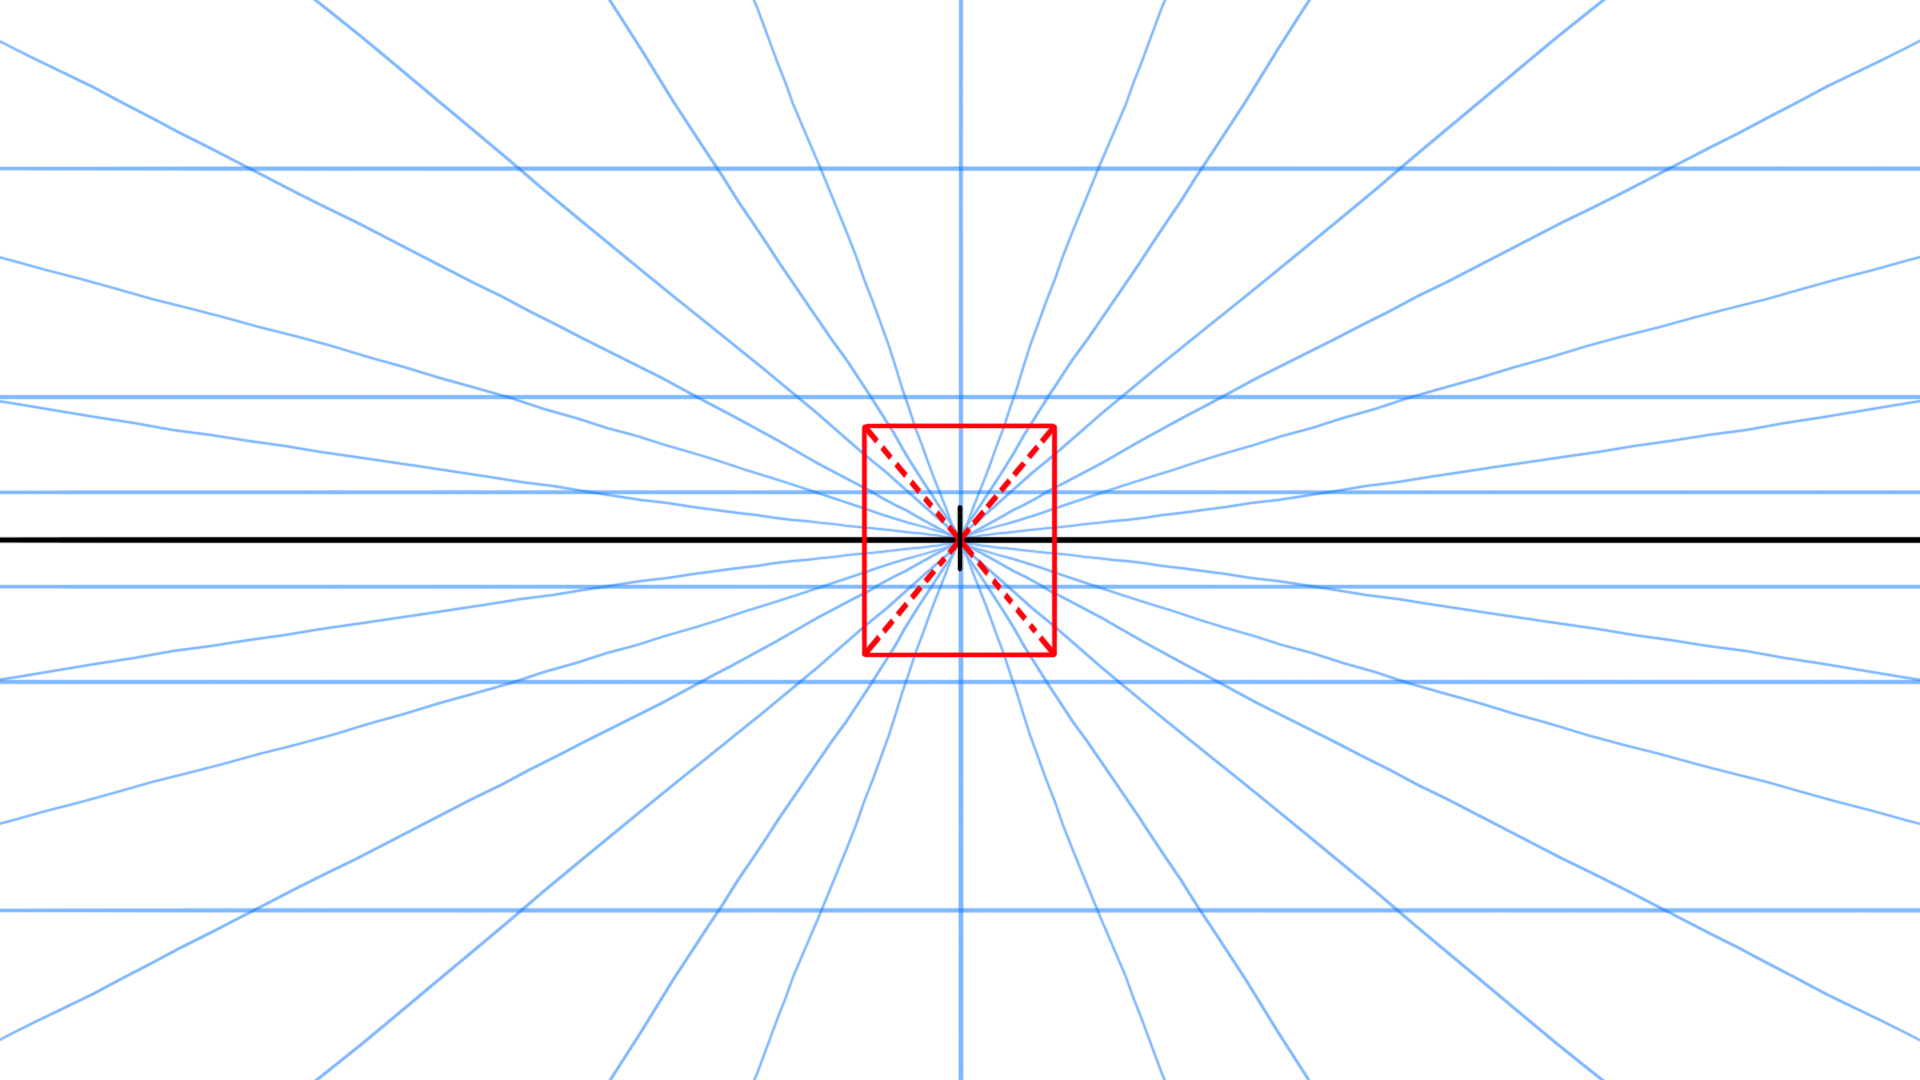
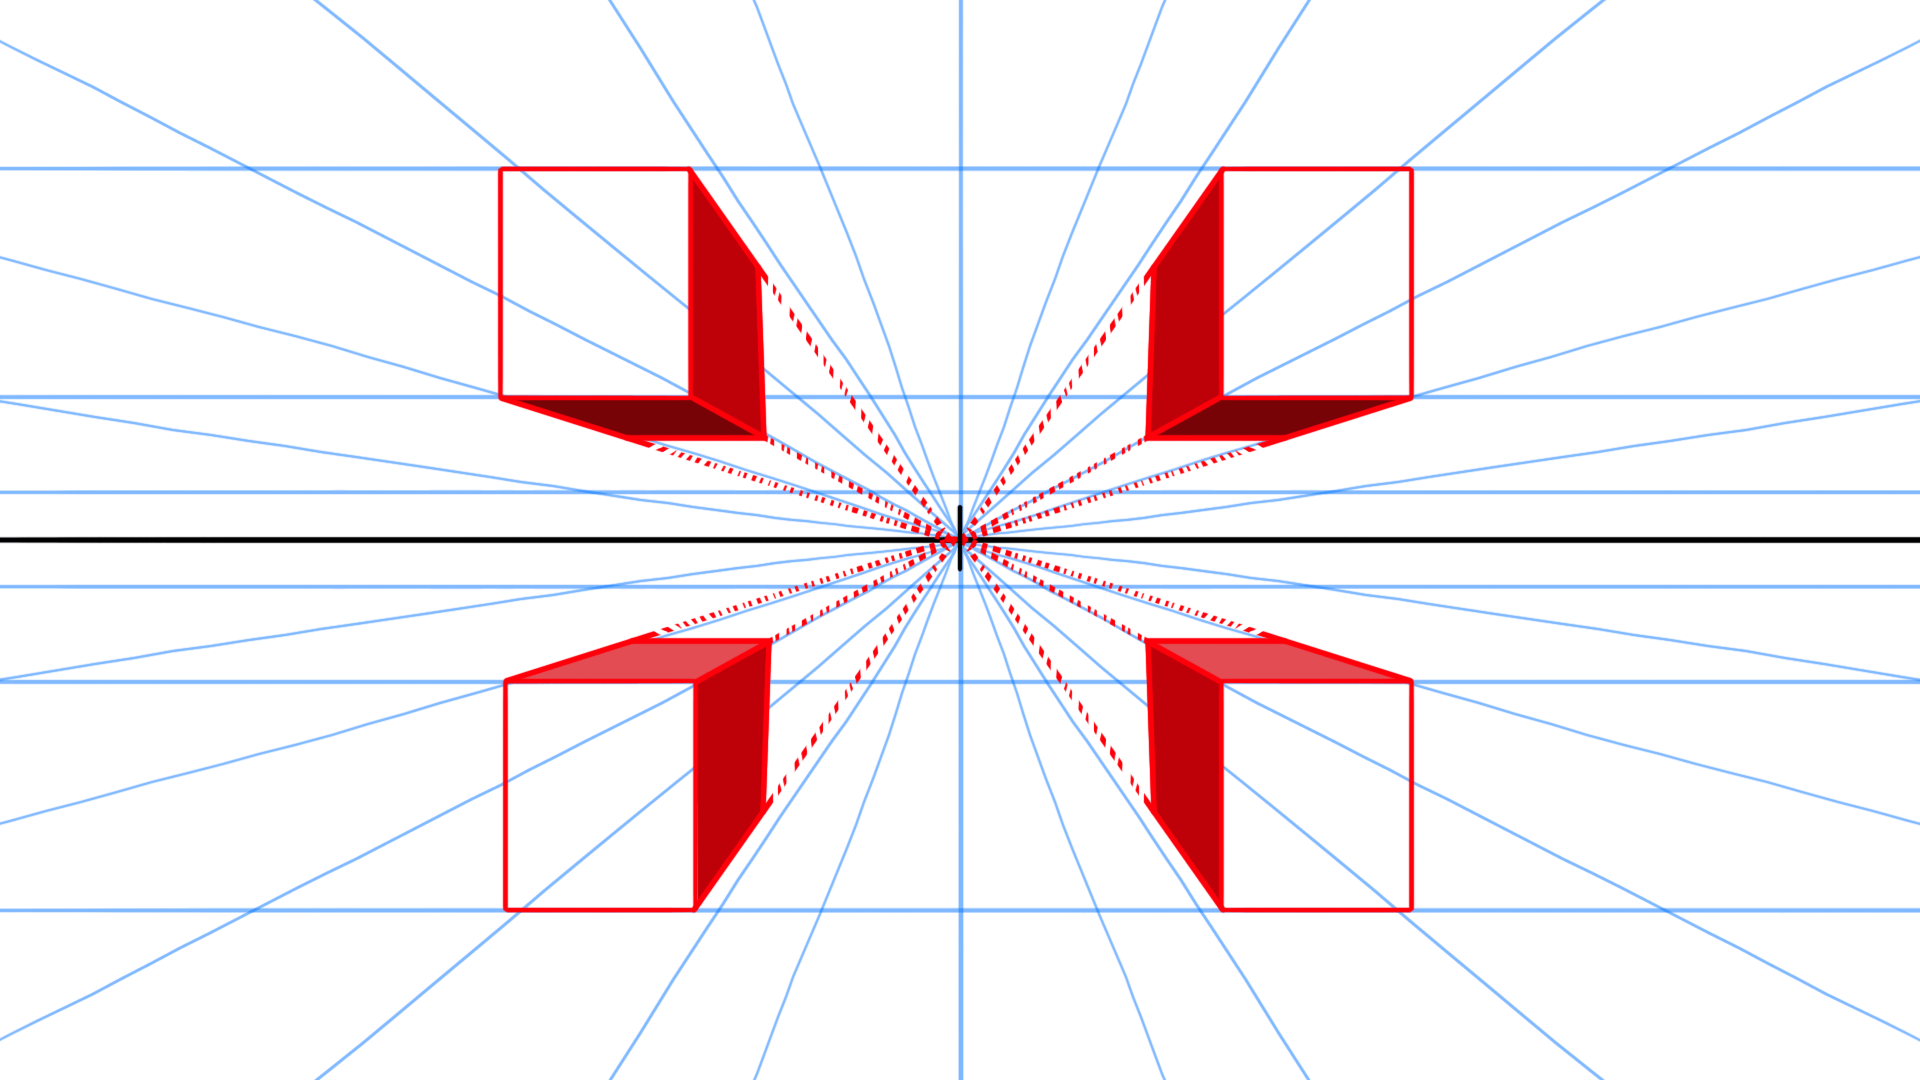
Here is a frontal perspective with a single vanishing point. The black horizontal line corresponds to the horizon line which indicates the level of the "camera" (the viewer's point of view) in space.
The higher the horizon line, the more you will be led to represent a high-angle view, conversely, the lower the horizon line, the more you will be led to represent a low-angle view. The vanishing point (here in the middle of the horizon line) is where all perspective lines (here in blue) converge, indicating depth.
The red shape in the middle of the image does not seem to have volume because it is exactly on the vanishing point, making it impossible to give it depth.
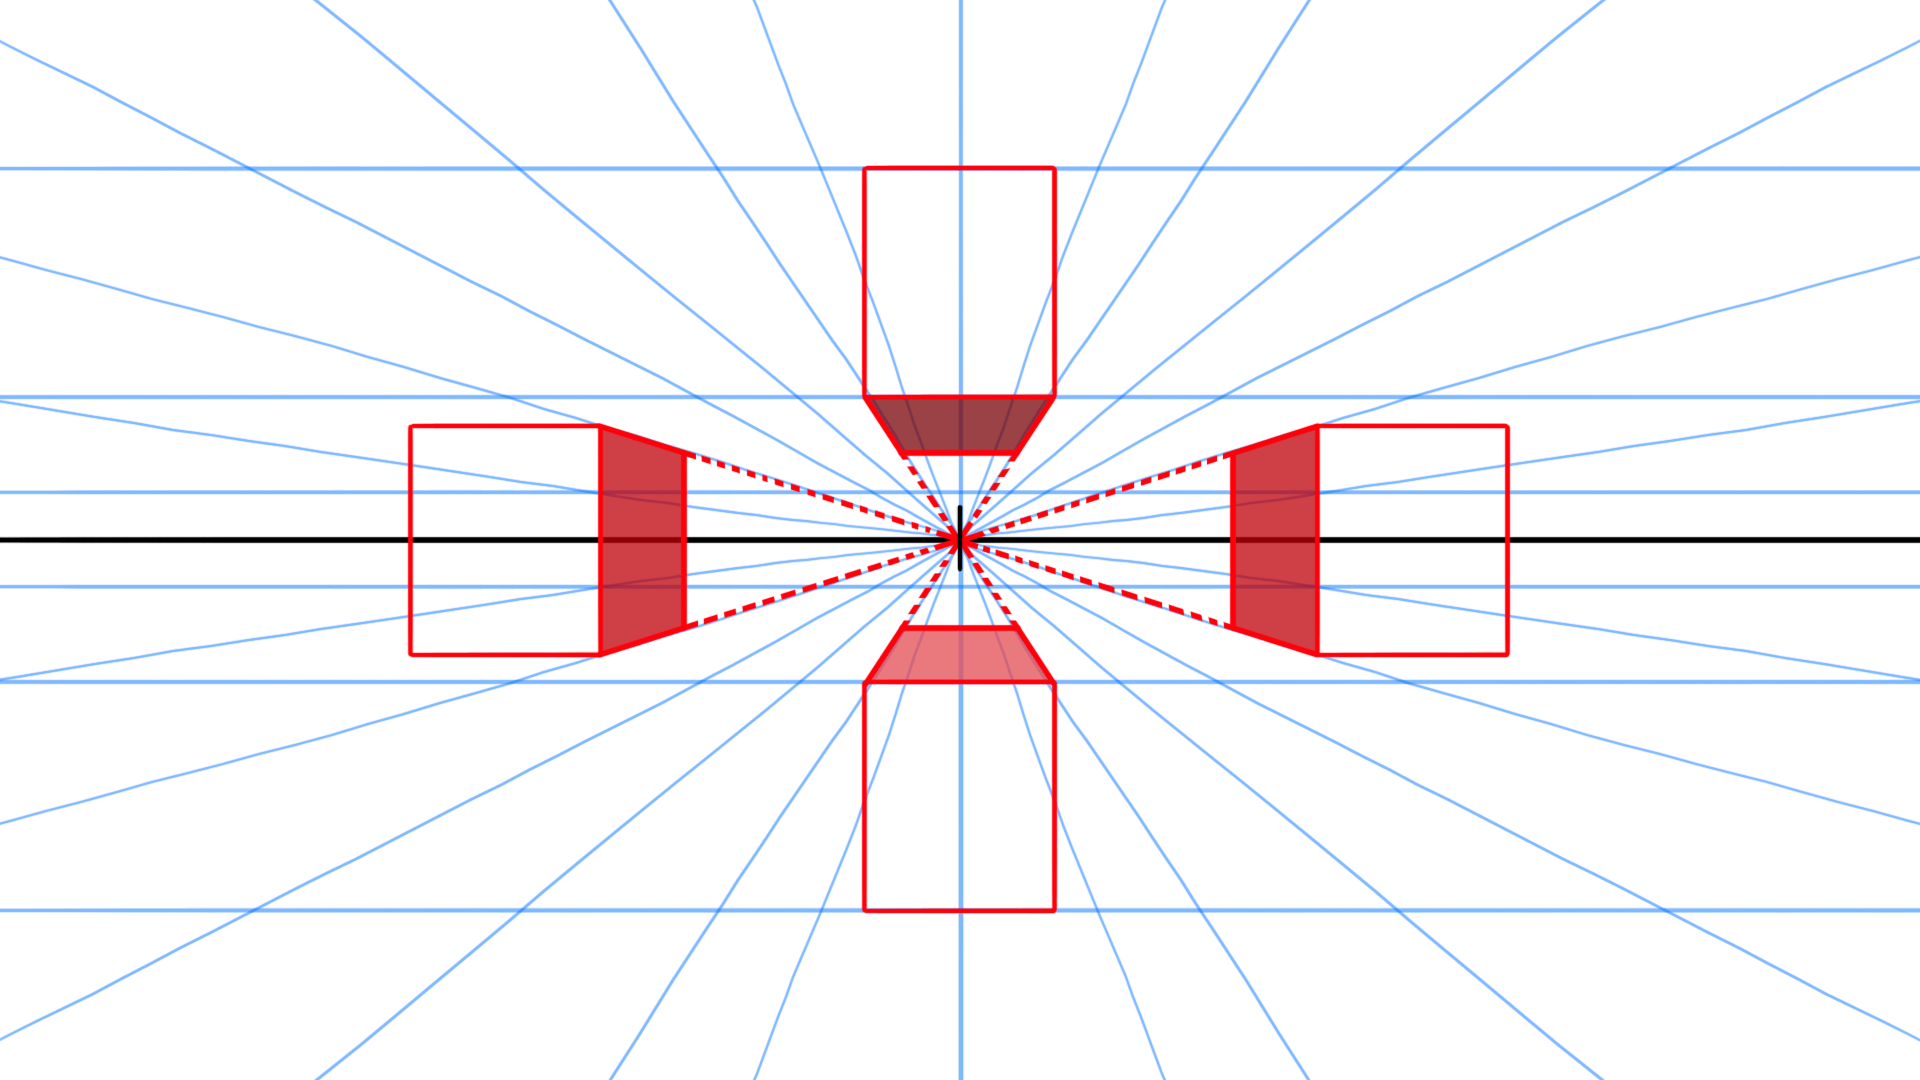
In this image, the objects indeed appear voluminous, with another visible side, giving us a sense of depth. An element above the horizon line (and therefore above the vanishing point) will necessarily have its bottom face visible in the drawing. An element to the right or left of the vanishing point will necessarily have one of its lateral faces visible, and then, following the same principle, an object below the horizon line will have its top face visible.
To position an element in space, we must first consider where we want to observe it from. From above? From below? From the right? From the left?
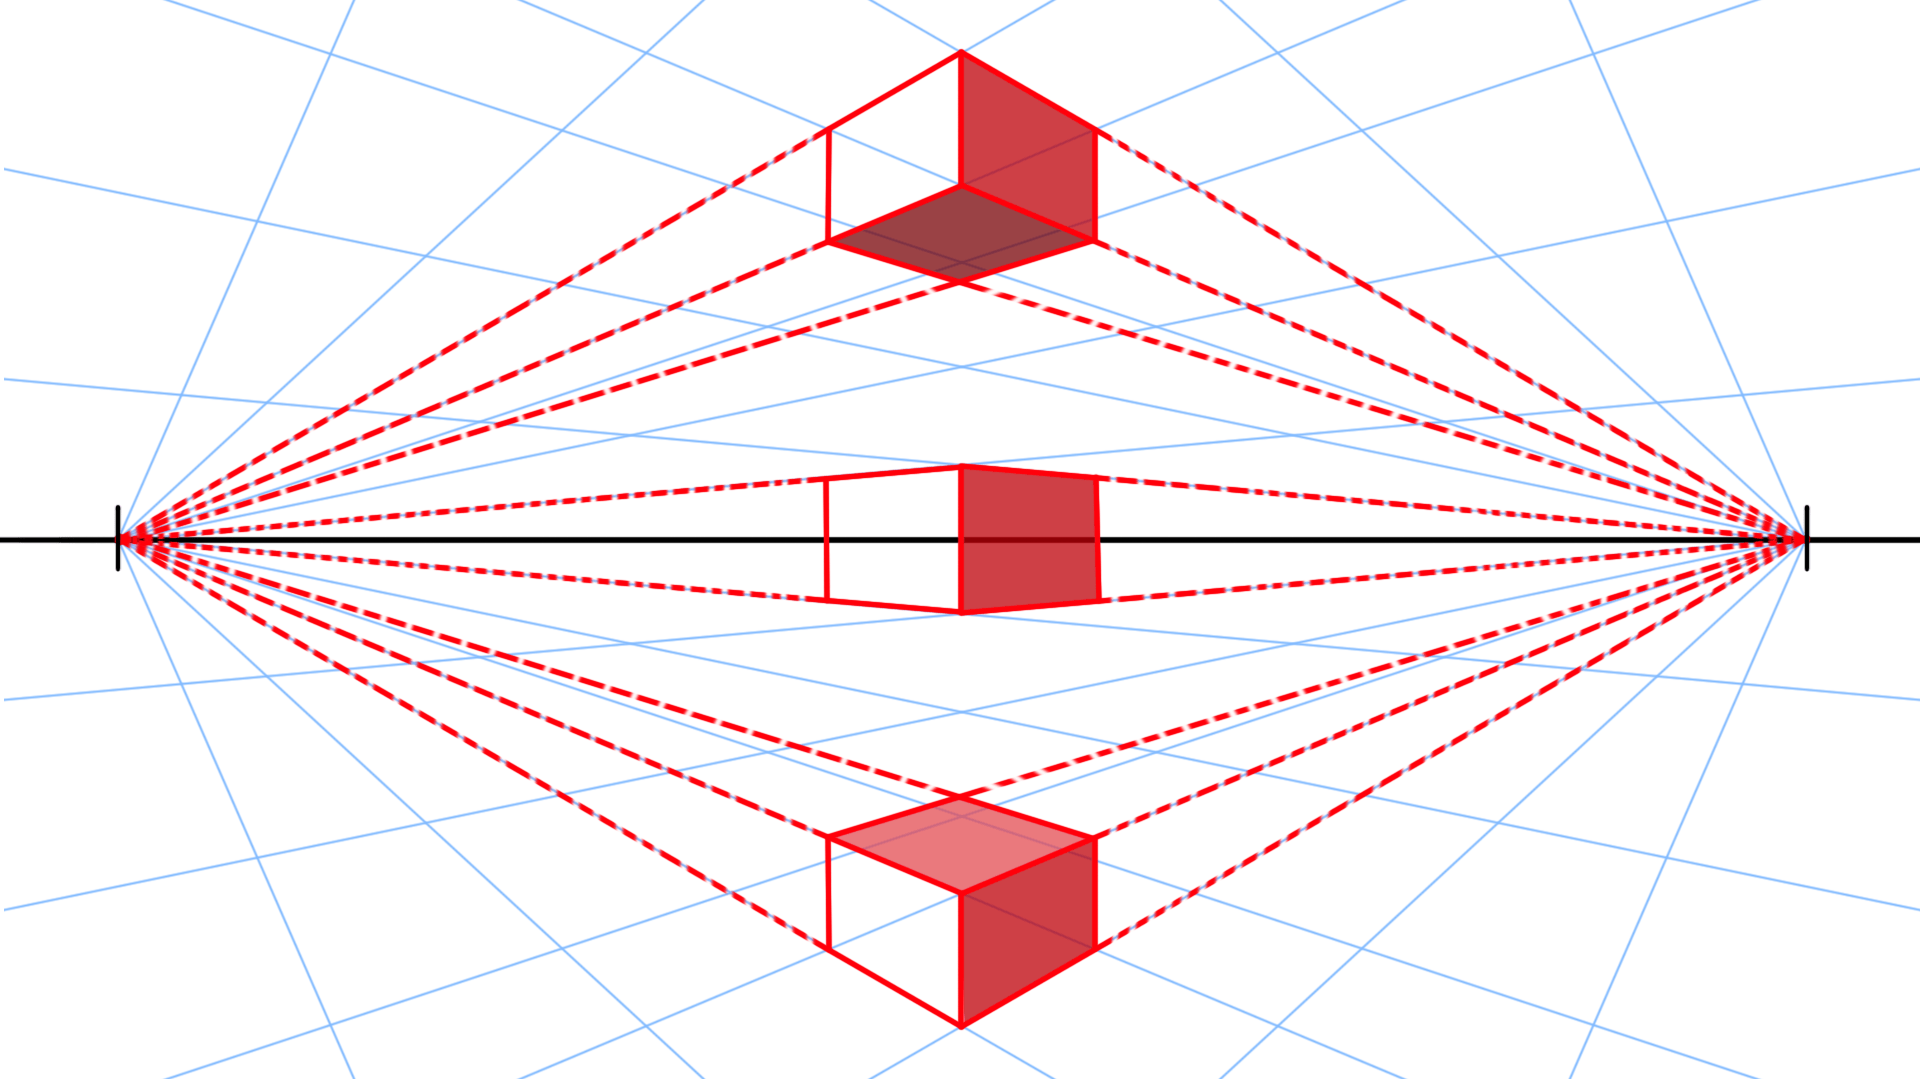
This image also features a one-point perspective, however, an additional face is now visible on each of the cubes.
All volumes are now either above or below the horizon line, and either to the left or to the right of the vanishing point. Previously, only one face in depth was visible on each of the cubes because they were either located on the horizon line or on the line located on the vanishing point, perpendicular to the horizon line.
VANISHING POINT AND OBLIQUE PERSPECTIVE DRAWING
Let's now consider a new type of perspective. In this image, we can observe three objects rendered in volume using a two-point perspective, also known as oblique perspective. This type of perspective is the most commonly used because it makes the image more dynamic and less flat than frontal perspective while remaining fairly simple.
Here, the two vanishing points are represented on the drawing for better understanding, but it is very common for at least one of these points to be outside the composition. Let me explain: the closer the vanishing points are to each other, the more the perspective will be distorted (somewhat like a fish-eye).
In general, the points are brought closer together to give the impression that the camera is very close to the subject being represented, and conversely, the more they are moved apart, the more it gives the impression of being far from the subject. For the visible faces, we reuse roughly the same operating principle as in one-point perspective.
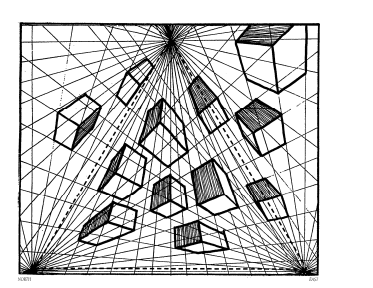
AERIAL PERSPECTIVE
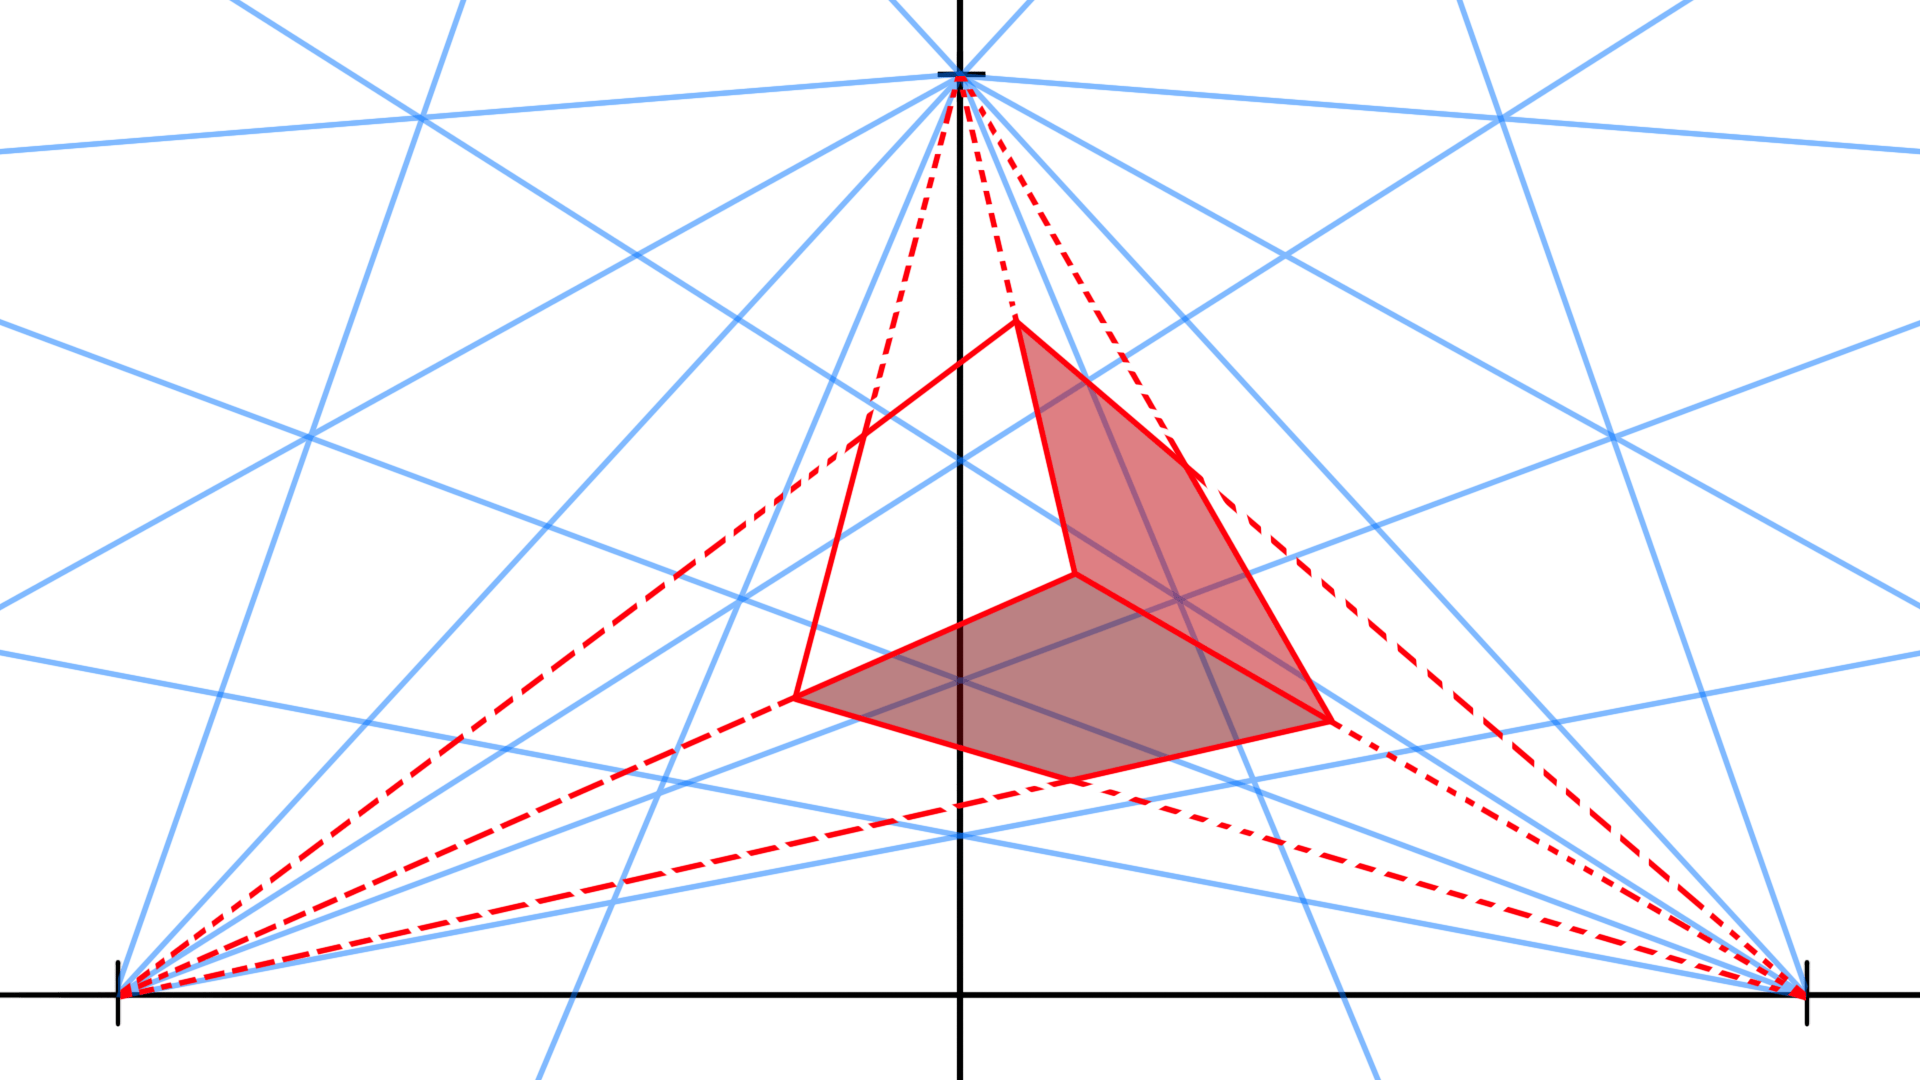
Let's now address the last type of perspective in this article, the most complicated to implement but also incredibly effective. Aerial perspective is a three-vanishing-point perspective. It is the only one that truly creates "three dimensions" in the drawing: length, depth and especially height.
It works like oblique perspective in that the closer the points are brought together, the more we will have the illusion of proximity with the depicted subject. Aerial perspective is most often used to give an impression of vertigo or to make the represented object imposing. In other words, to depict a very strong high-angle or low-angle view.
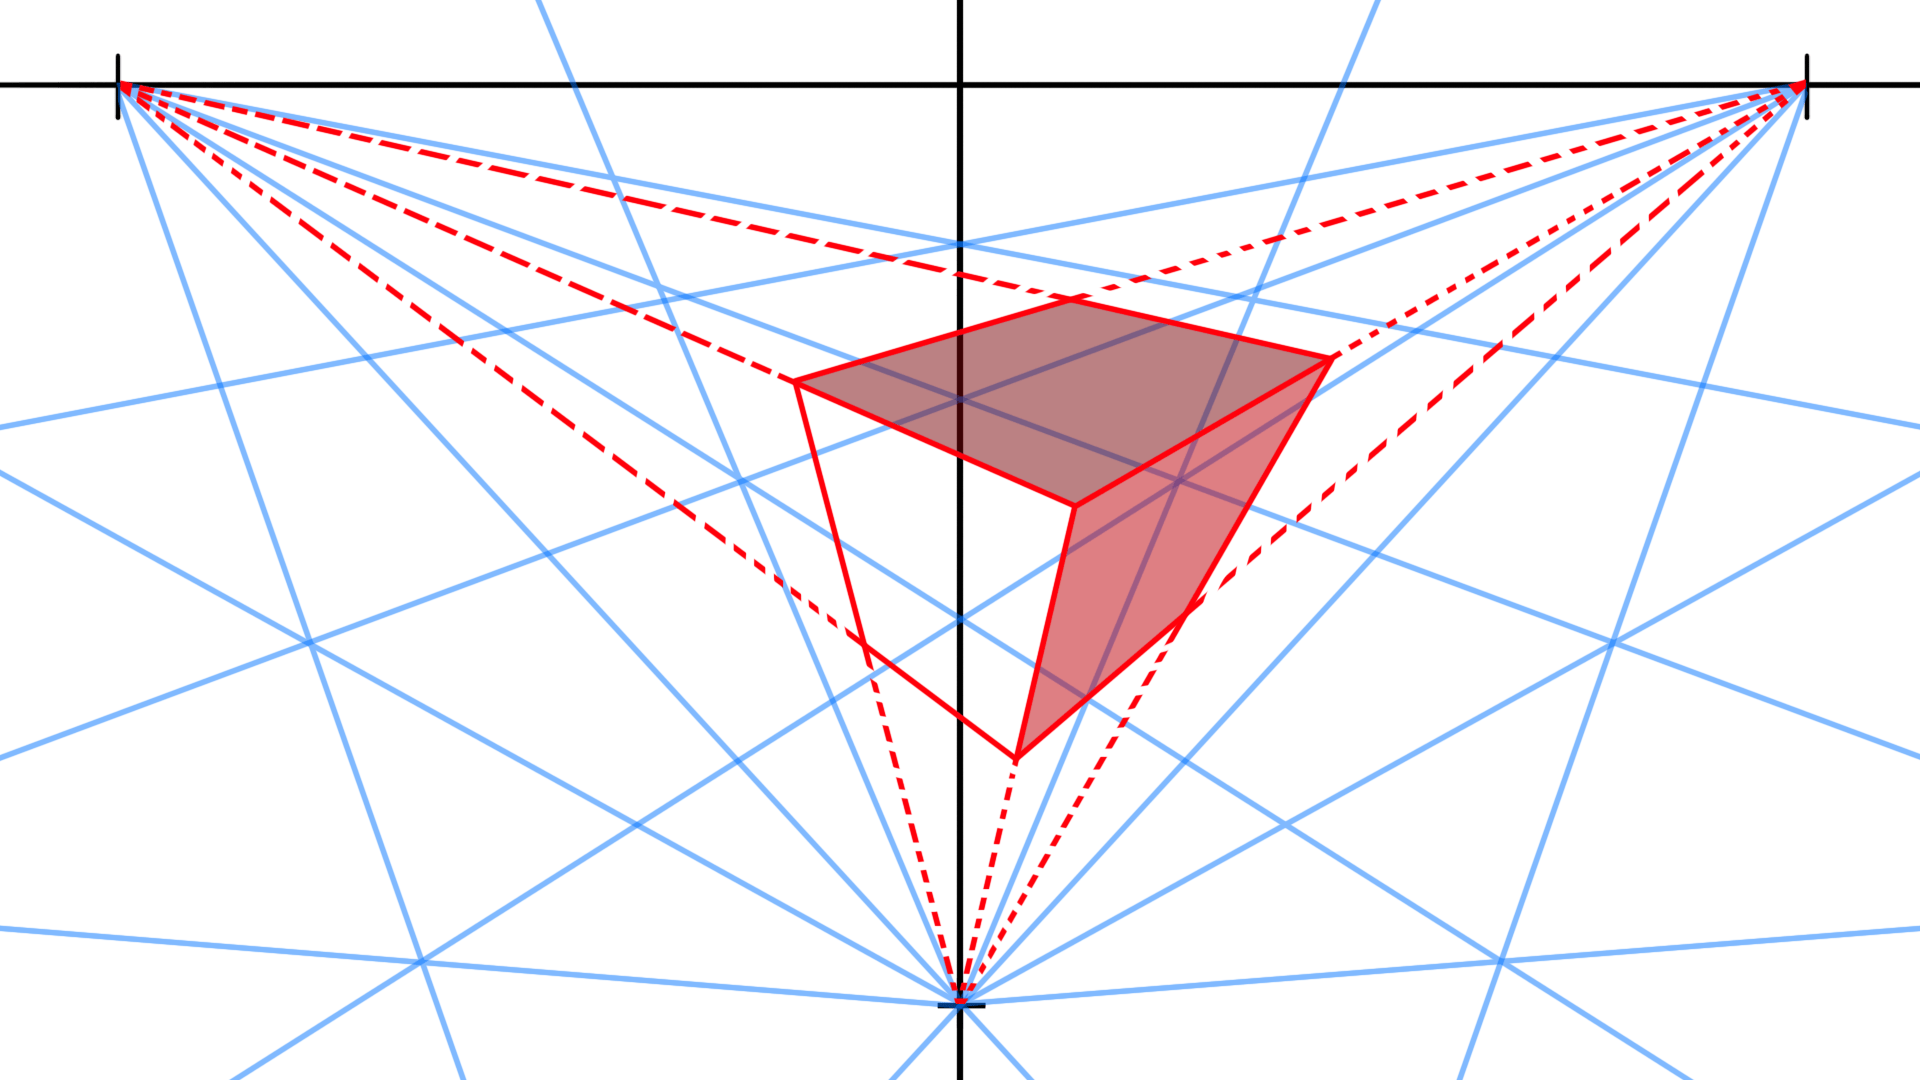
As with other perspectives, if an element is located above the horizon line, it will be seen from below and conversely, if it is located below, it will be seen from above.
Therefore, when the horizon line is in the lower part of the composition, the third vanishing point will be located above, and when the horizon line is in the upper part of the composition, the third vanishing point will be located below.
PRACTICAL ADVICE AND DRAWING EXERCISE FOR PERSPECTIVE AND VANISHING POINTS
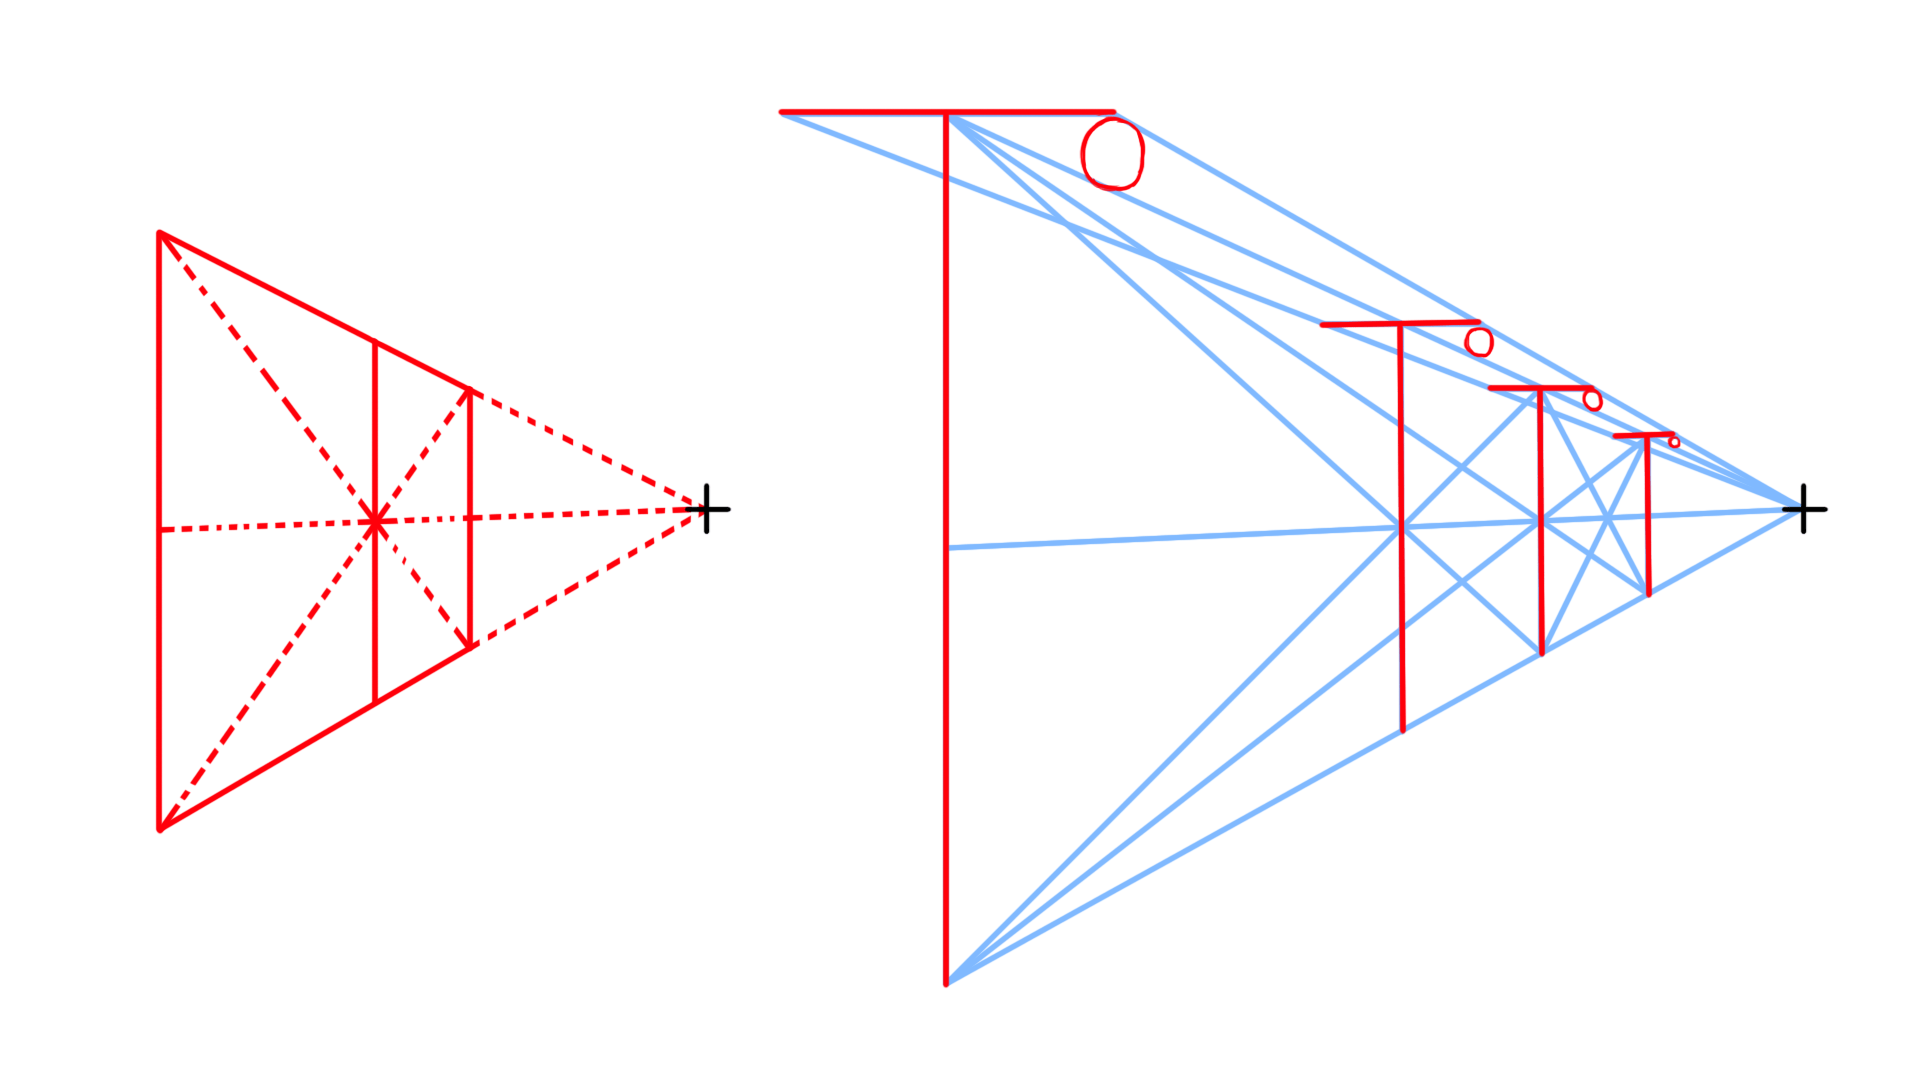
A question that is often asked by people who are starting to explore perspective drawing is: "If my drawing is in perspective, how can I accurately determine the midpoint of a surface or between two objects?"
A draftsman with a lot of experience will be able to locate this point by instinct without too much difficulty, but fortunately, there is a very simple and very accurate method for this kind of problem. You can observe to the right of the image a flat surface put into perspective, and by simply drawing the diagonals of the surface, you will find the middle.
We can also see on the left side of the image the application of this method to place, for example, street lamps at equal distances in perspective.
An essential exercise:

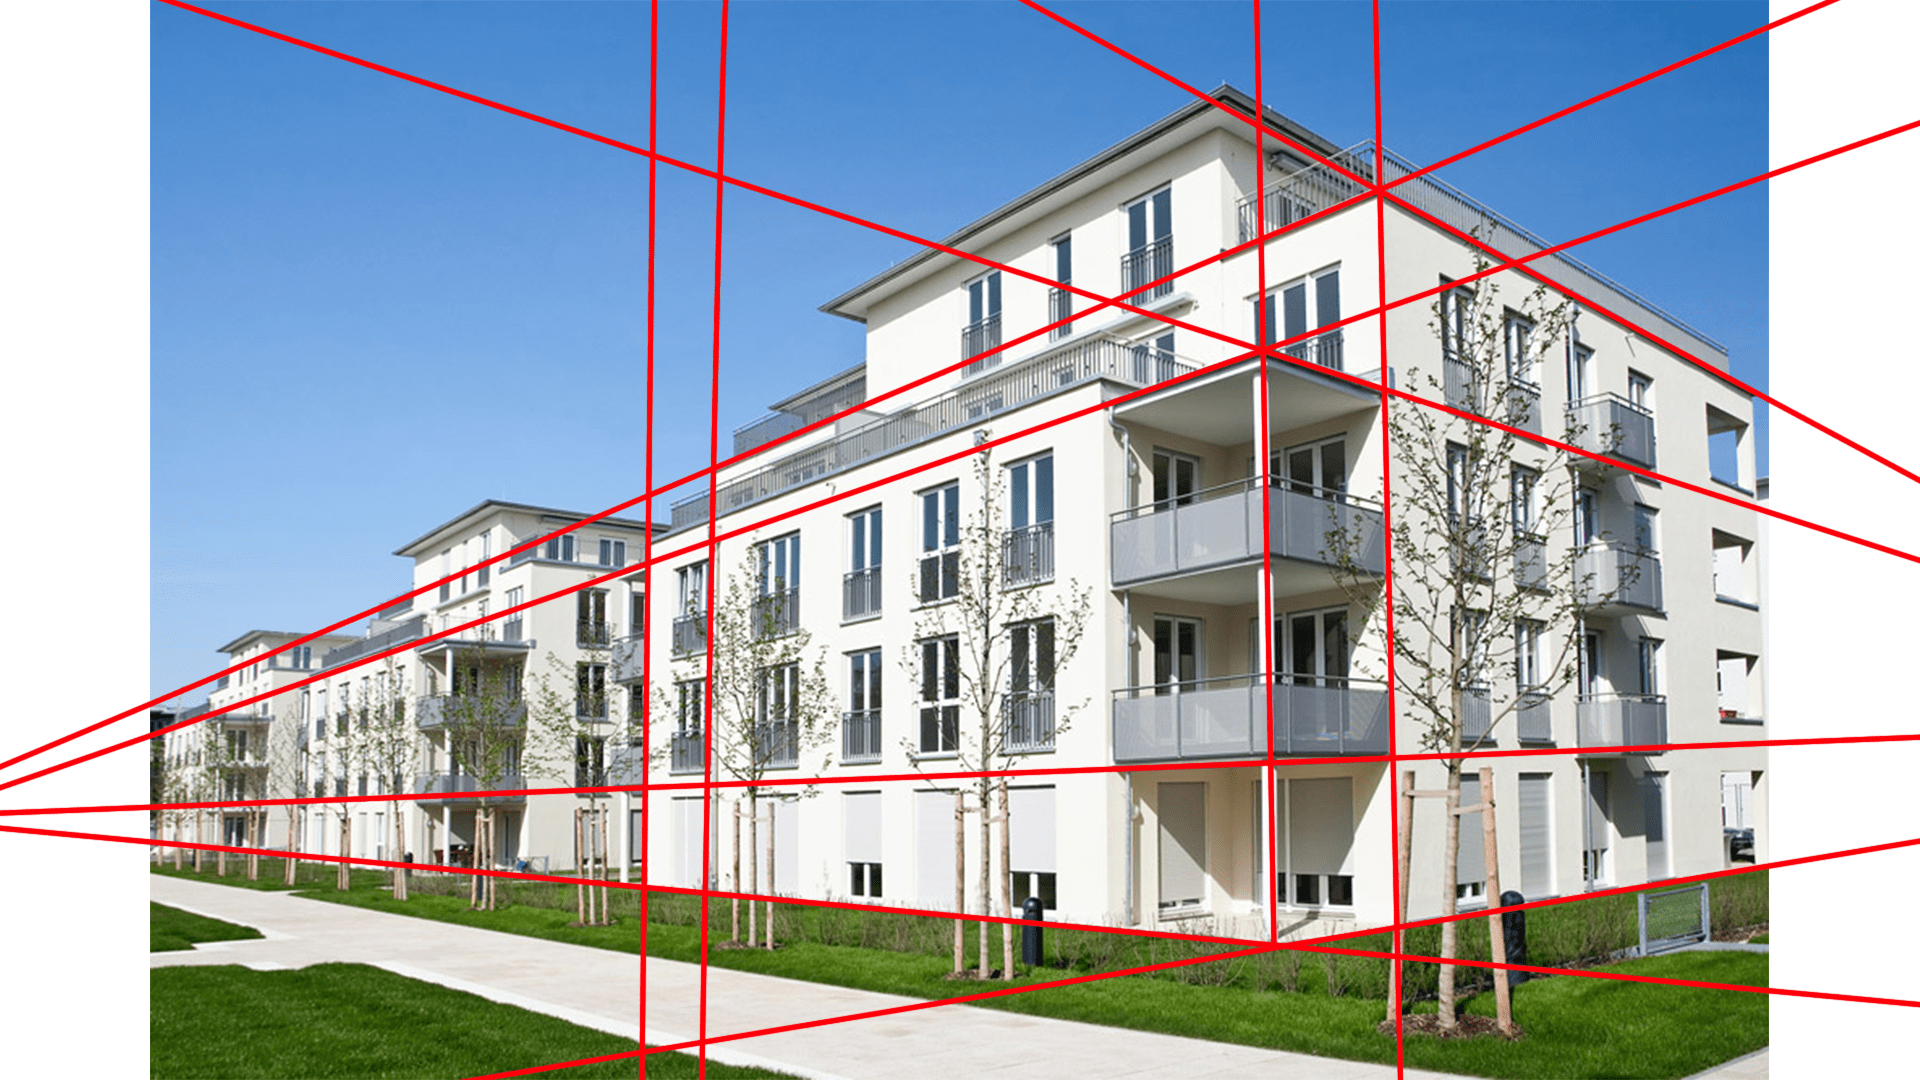
To better understand these perspective phenomena, I suggest that you practice this kind of exercise on photos by placing perspective lines. By understanding them better, you will be able to use them better.
You can also experiment with this exercise using images from movies to observe how directors use perspective to give strength, dynamism and meaning to their shots, because even though it is a natural and physical phenomenon, it remains above all an essential tool for designers.
I hope this article has shed light on some points for you and will help you progress, now that you have all the necessary tools to build a working perspective. Remember that it is by using simple construction methods that you will achieve a credible and coherent drawing.
So, it's time to get to work - see you very soon!


Discussion
7 comments