How to Draw Princesses
Hello everyone,
Today we are going to deal with a rather classic archetype: the princess!
Although in everyday life modern princesses are not necessarily recognisable at first sight, it must be admitted that we have a very precise stereotypical image of them...
First of all, first clarification: when we say "princess", you might think of "Disney" because it's true that the studio loves to tell their stories. However, this is not exactly the subject of our article, and besides, you can find an article "How to draw the Snow Queen" by Coralie.
Secondly, I assume that you are familiar with the basics of human body structure and proportions. On this topic, you can access the free course "The proper proportions of characters» from the on-site basic training.
Let's begin...
THE PRINCESS'S STYLE
So we'll draw a princess, a princess and not a queen. Do you understand why I'm telling you this? Well, the idea is that a princess is a relatively young person and, barring life's unforeseen events or narrative twists, a queen would be an older character.
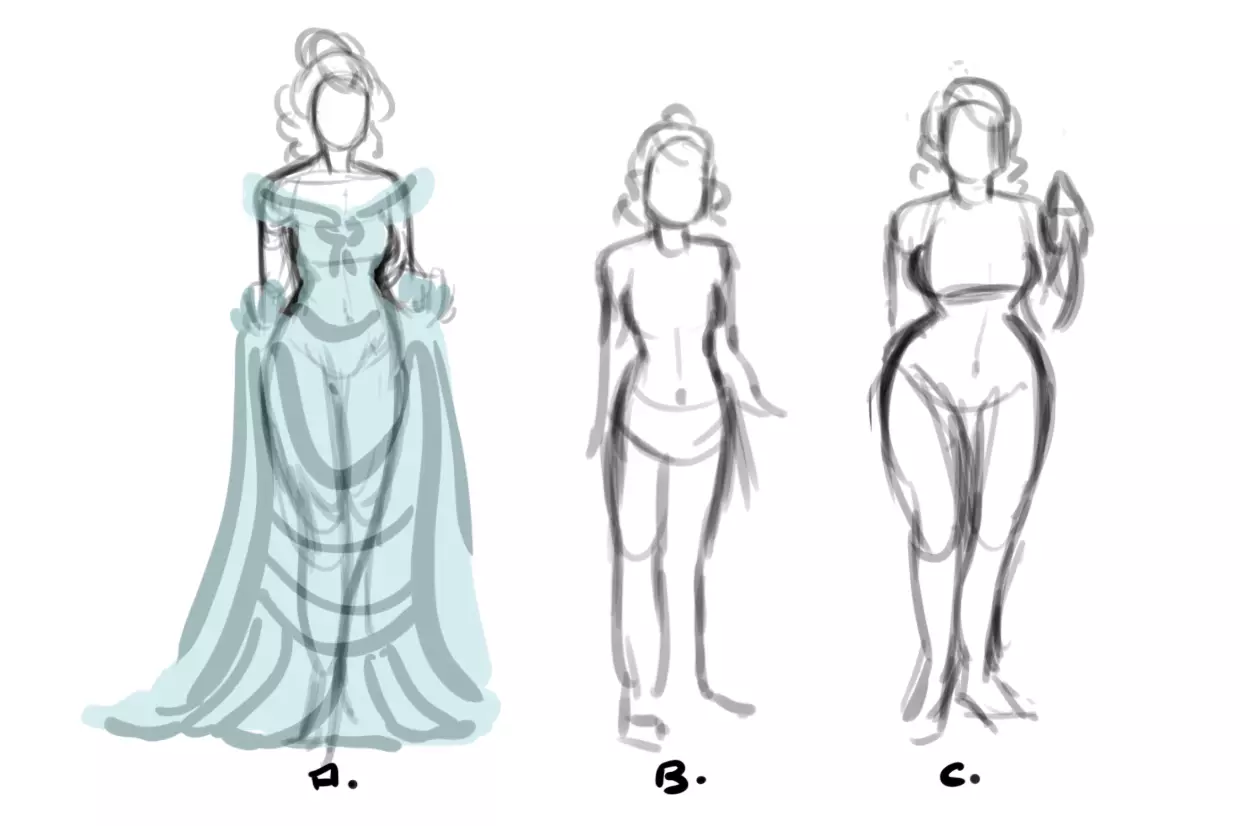
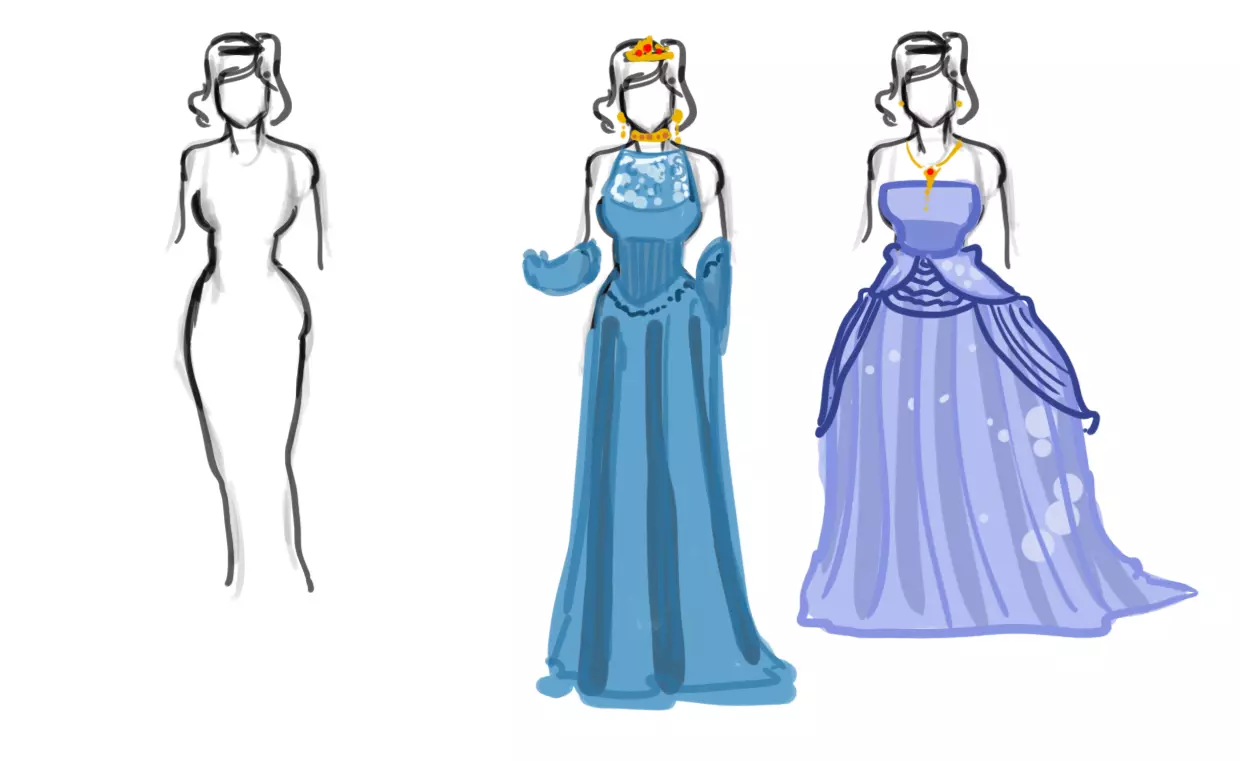
However, even if it is a young woman, it is good to remember that not all women (even young ones) are necessarily 1m80 tall with a waspish waist [design A].
Sometimes think about varying the silhouette of your characters, here in B a thinner character and in C a juicier version.
Likewise, your princess does not necessarily have to have long, blonde hair [B]. You've earned the right to have a little fun, even if the classic "bun and curls" [A] remains a basic.
Here in [C] a version with a small natural bob cut.
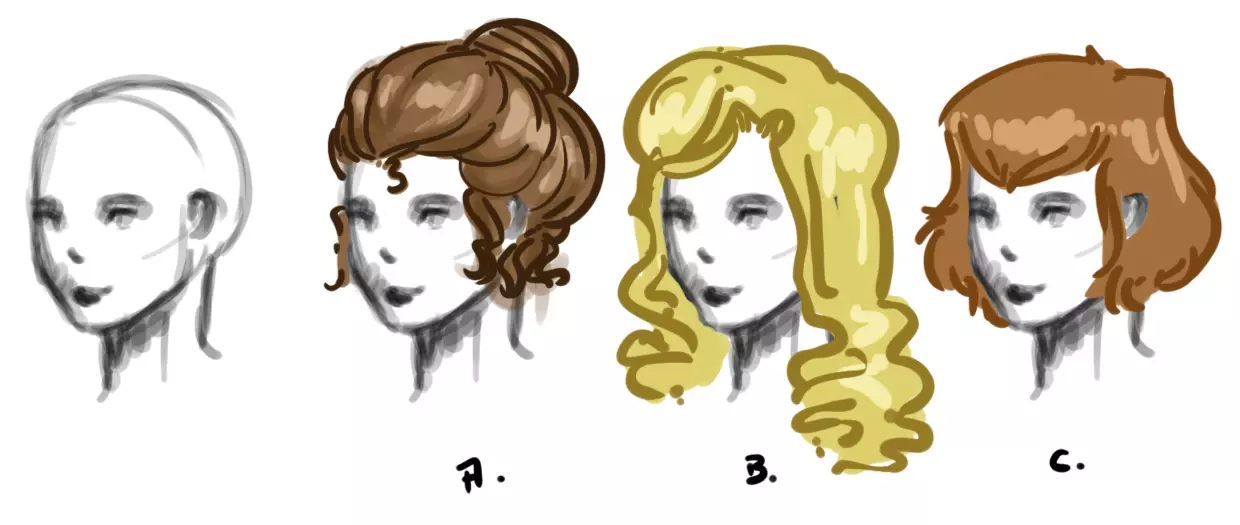
So, you may not have the soul of a hairdresser (neither do I), but you still have to consider this element for such a character.
THE CROWN OR TIARA
Also, once you have chosen your princess' dress, you will have to think about adorning her noble head with a crown!
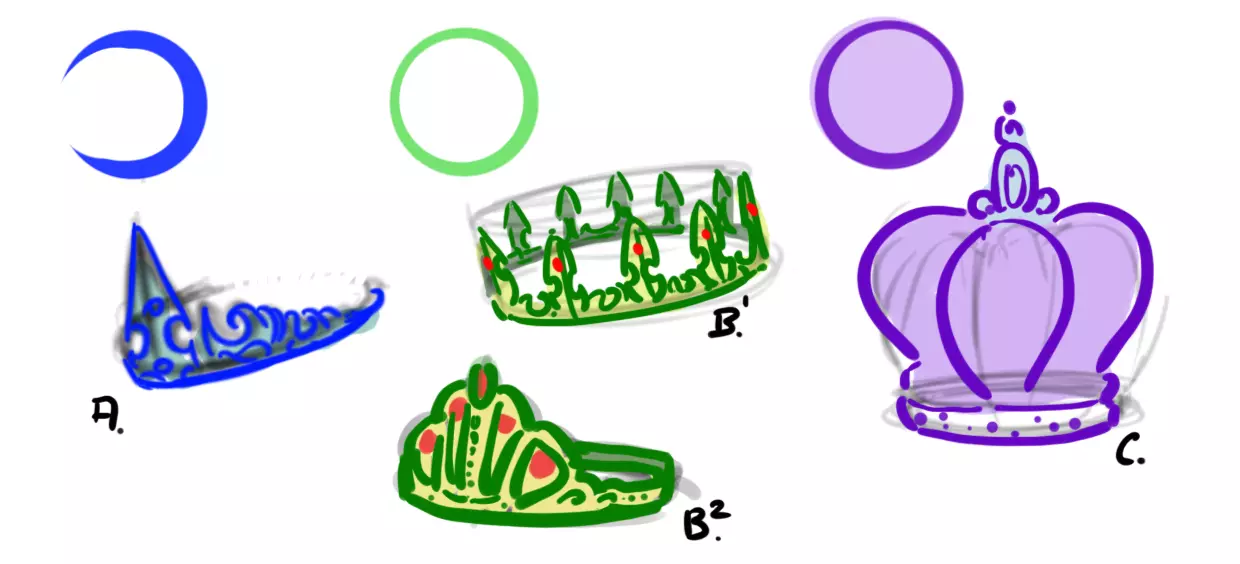
So the choice is free. Starting from a round shape, we can basically define 3 types of crowns.
In A a fairly delicate version that is not completely closed, we would rather call it a tiara.
In B and B² the crowns form a closed circle but with a variation. In B the crown has the same width all around whereas in B² there is a pattern on the front and the rest of the crown is thinner.
In C the closed version at the top. Here we are more on the queen's jewel.
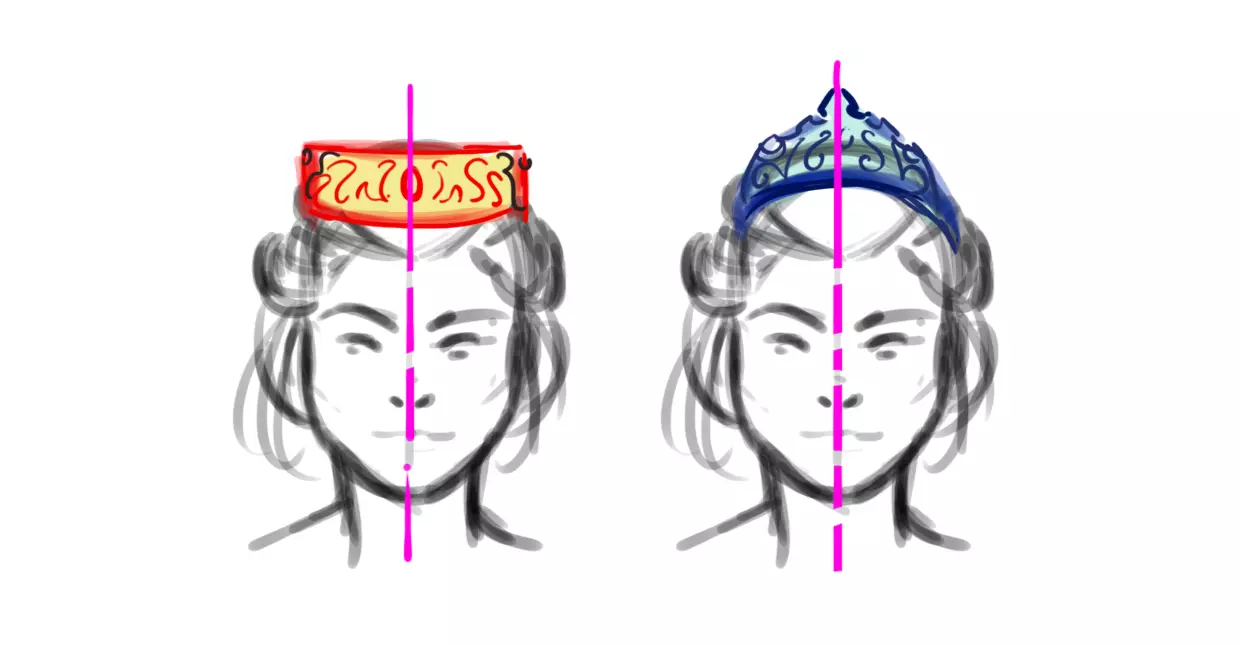
Regardless of the model you choose, pay attention to the diameter. If the wreath is too large, even the bulkiest of the band will not be able to hold it.
In A and B in green the boundaries of the head, prefer a slightly smaller diameter so that the jewelry fits perfectly (area in purple).
Knowing that the weight of the crown will necessarily affect the hair (drawing C/ strokes on the head in red). Also, if you opt for a model with a "front", align it well with the center of the face (pink line) for a more elegant result.

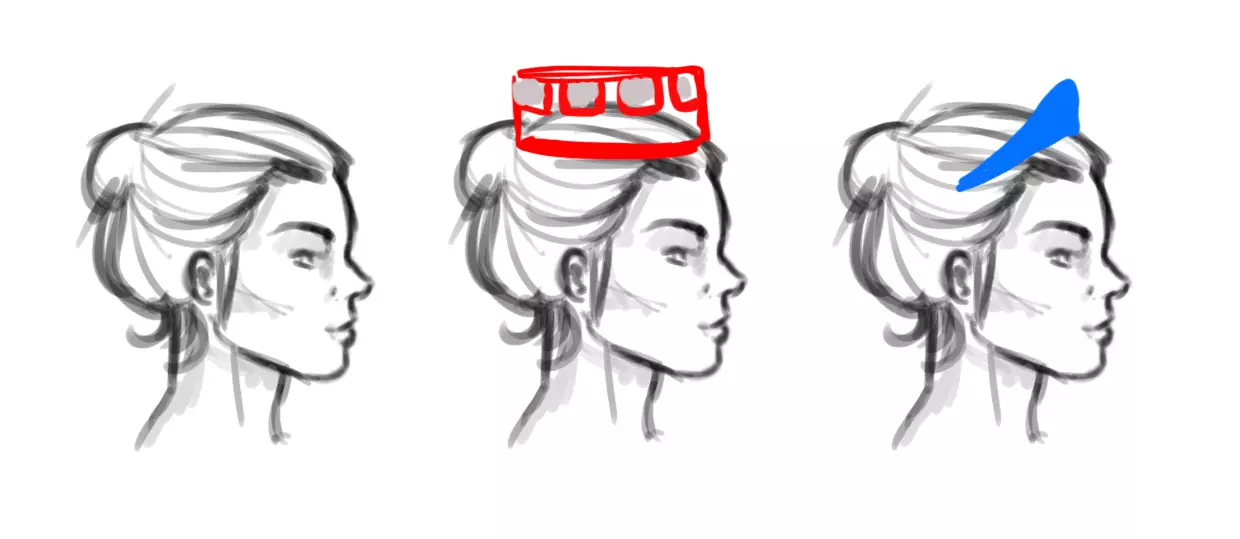
You can also opt for a more "tiara" style. In this case it is not necessarily a circular base resting on the head, but more of a headband. On the left a classic crown, on the right a lighter tiara.
Mind you, the way it lands on the hair will not be quite the same (in red the classic crown and in blue the tiara).
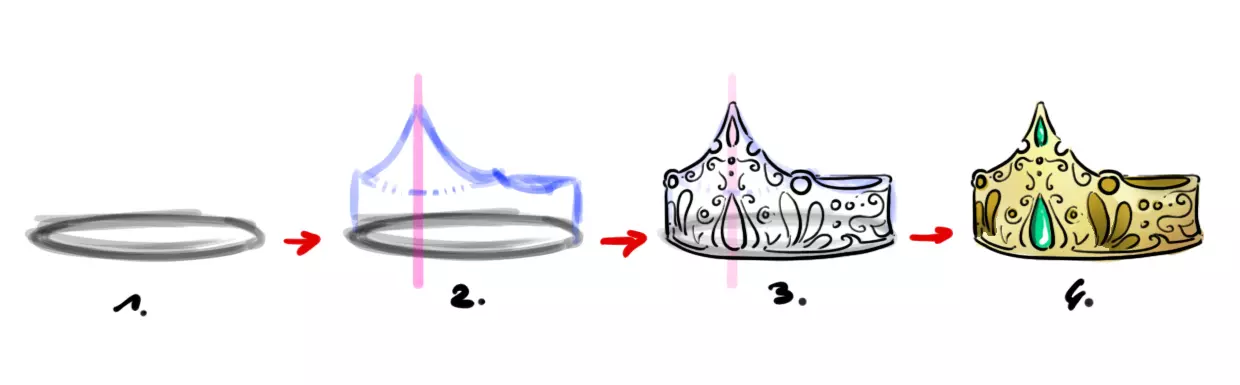
With exception for a model in which the same pattern is repeated throughout, such as the model B' above, it is customary for crowns to be constructed on the basis of strict symmetry.
1. Start from a circle, be careful with the perspective.
2. Define the central axis (in pink) and choose the general appearance (in blue).
3. Define the details, respecting the symmetry on either side of the central axis.
4. We colours.
The variations in shapes and colors are very numerous...
DESIGNING A PRINCESS DRESS
And, of course, we have to talk about “dresses”. Here, too, the possibilities are vast. You can opt for the classics, a rather straight evening dress or a very voluminous model like you might see at a grand ball. Do not hesitate to choose beautiful jewellery to enhance the regal look.
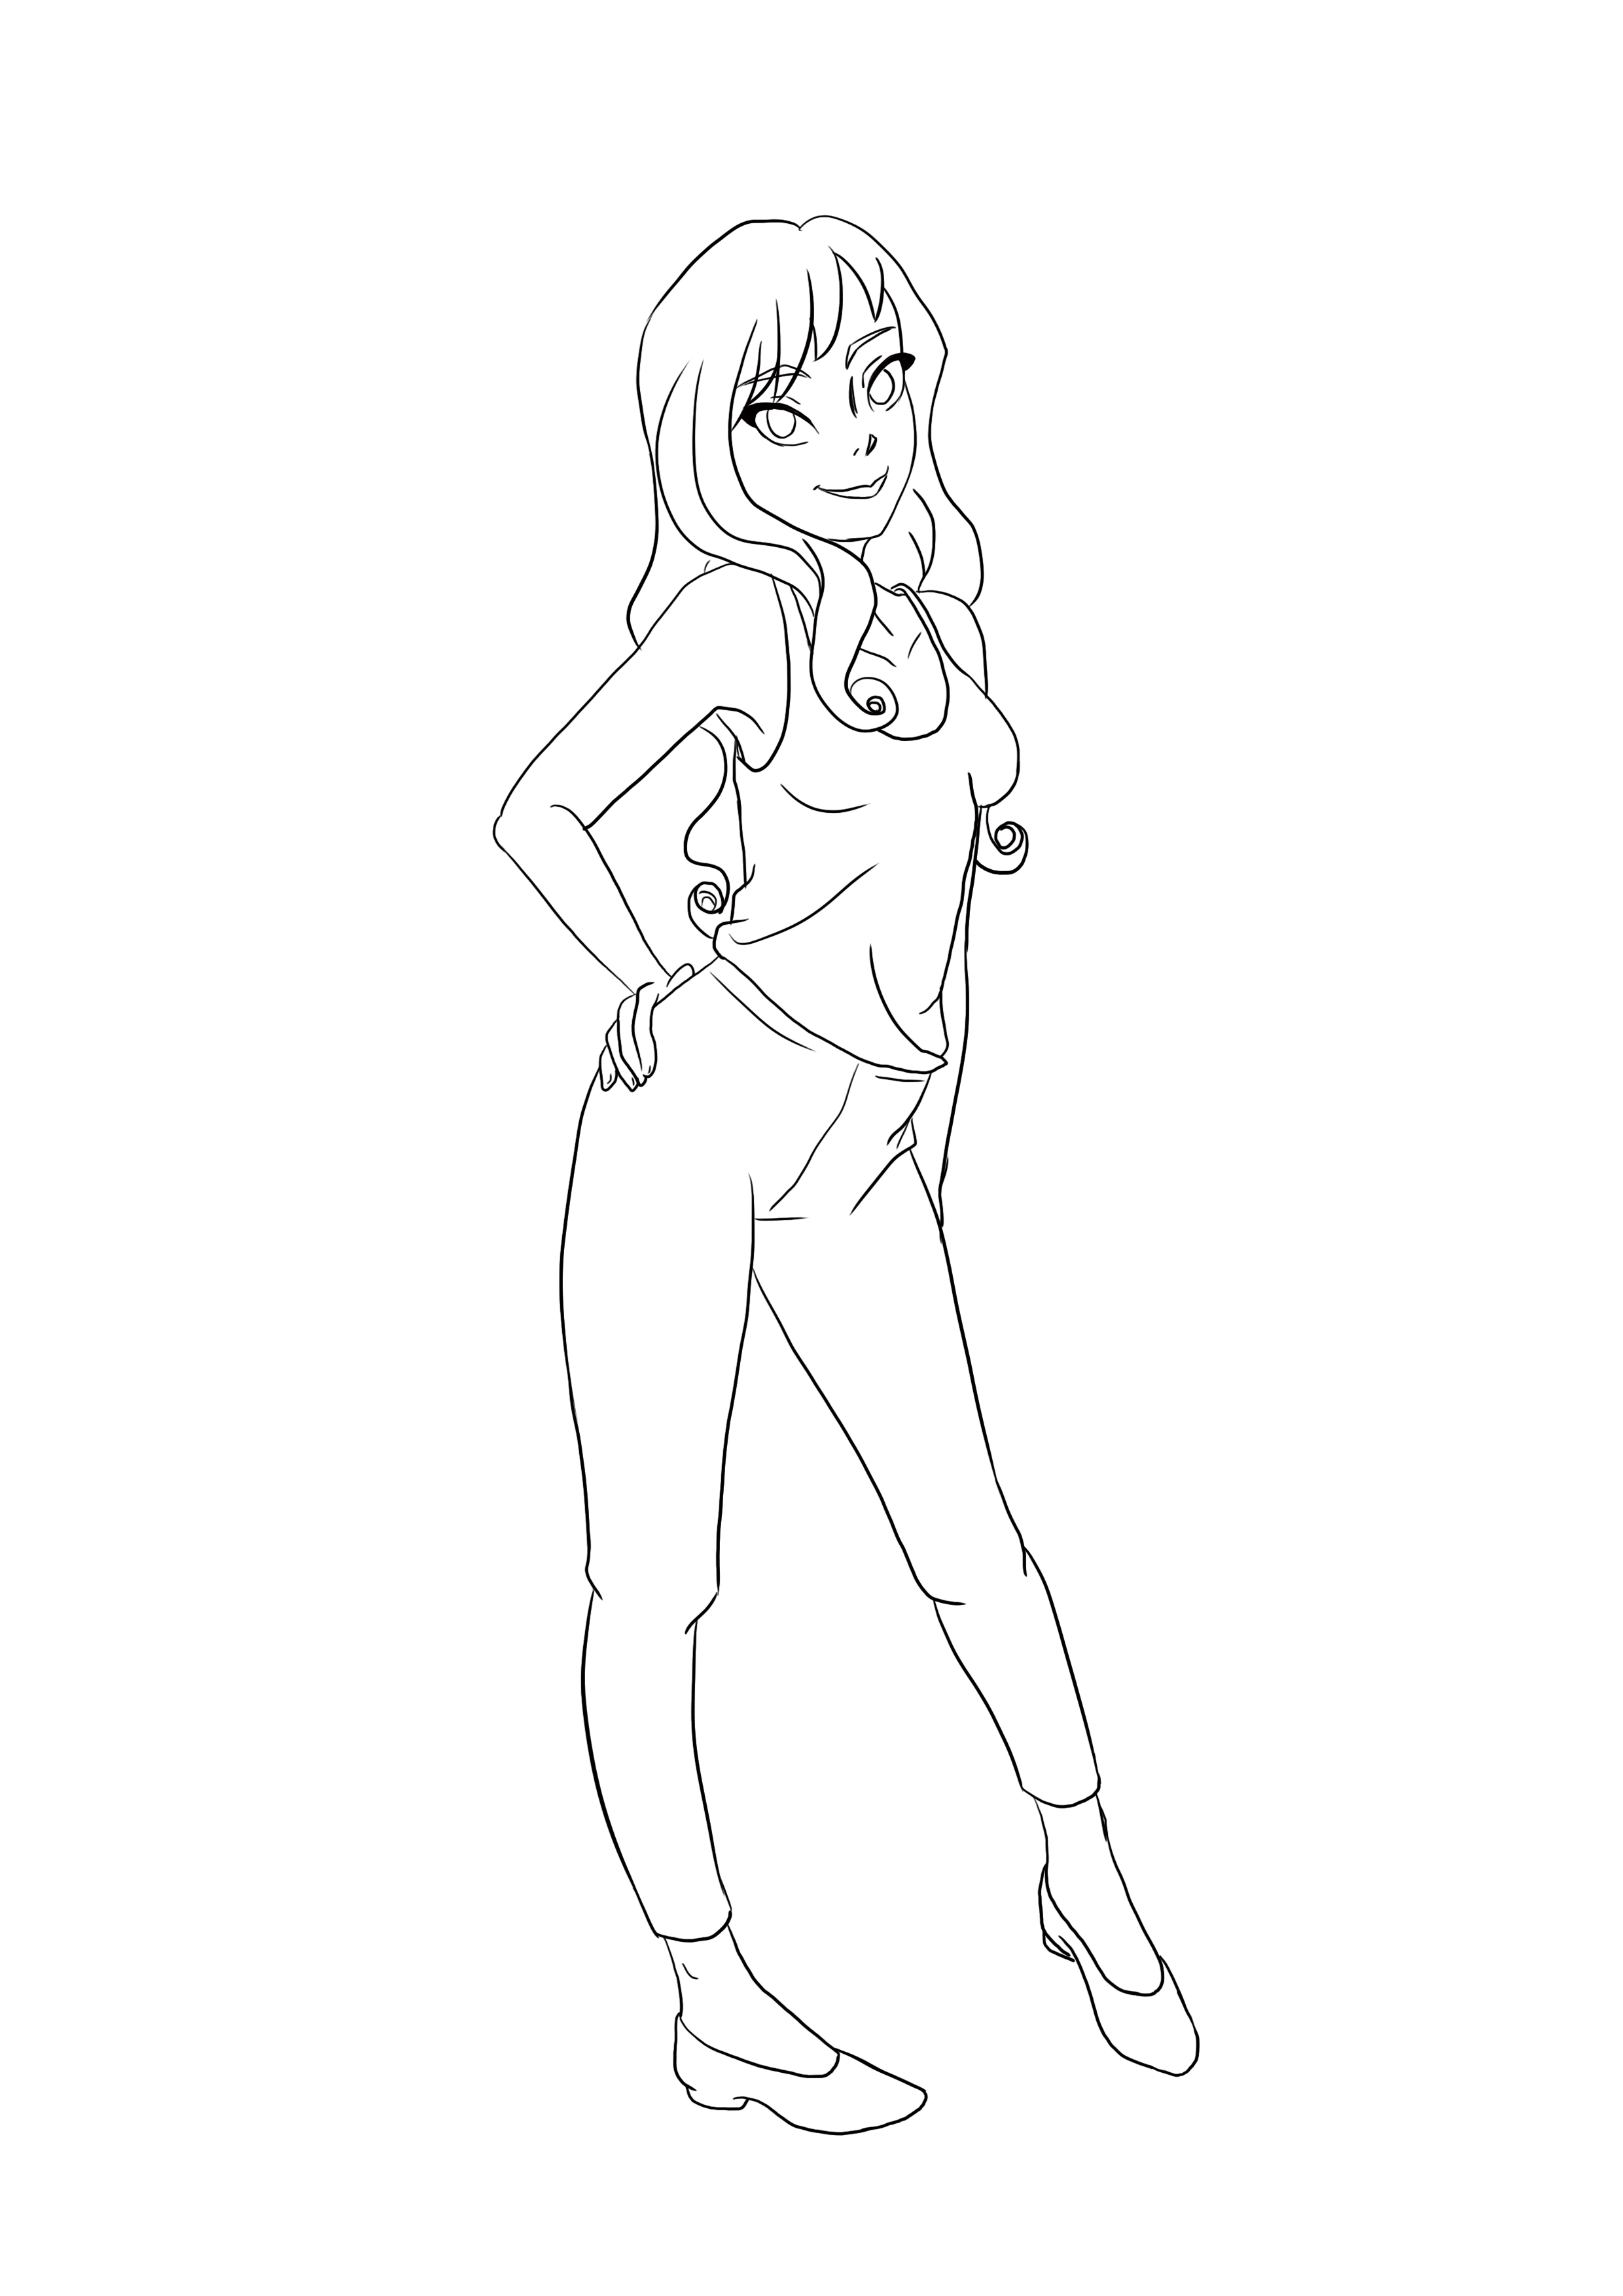
Finally, when your princess is not performing in public, there is nothing to stop her from dressing more simply...
If you want to further develop a princess character, I invite you to explore the fashion of various cultures and eras. Besides expanding your personal knowledge, this will enable you to enrich your graphic references and think beyond the classic princess model.
DRAWING A PRINCESS STEP BY STEP
So, as already mentioned, I will not go into the details of the anatomical drawing, because that is not our subject.
We will opt for a static pose, with a stand against a background that we will not develop. Nothing very original, our princess will be wearing a long dress. However, this will have the advantage of not having to manage her feet.
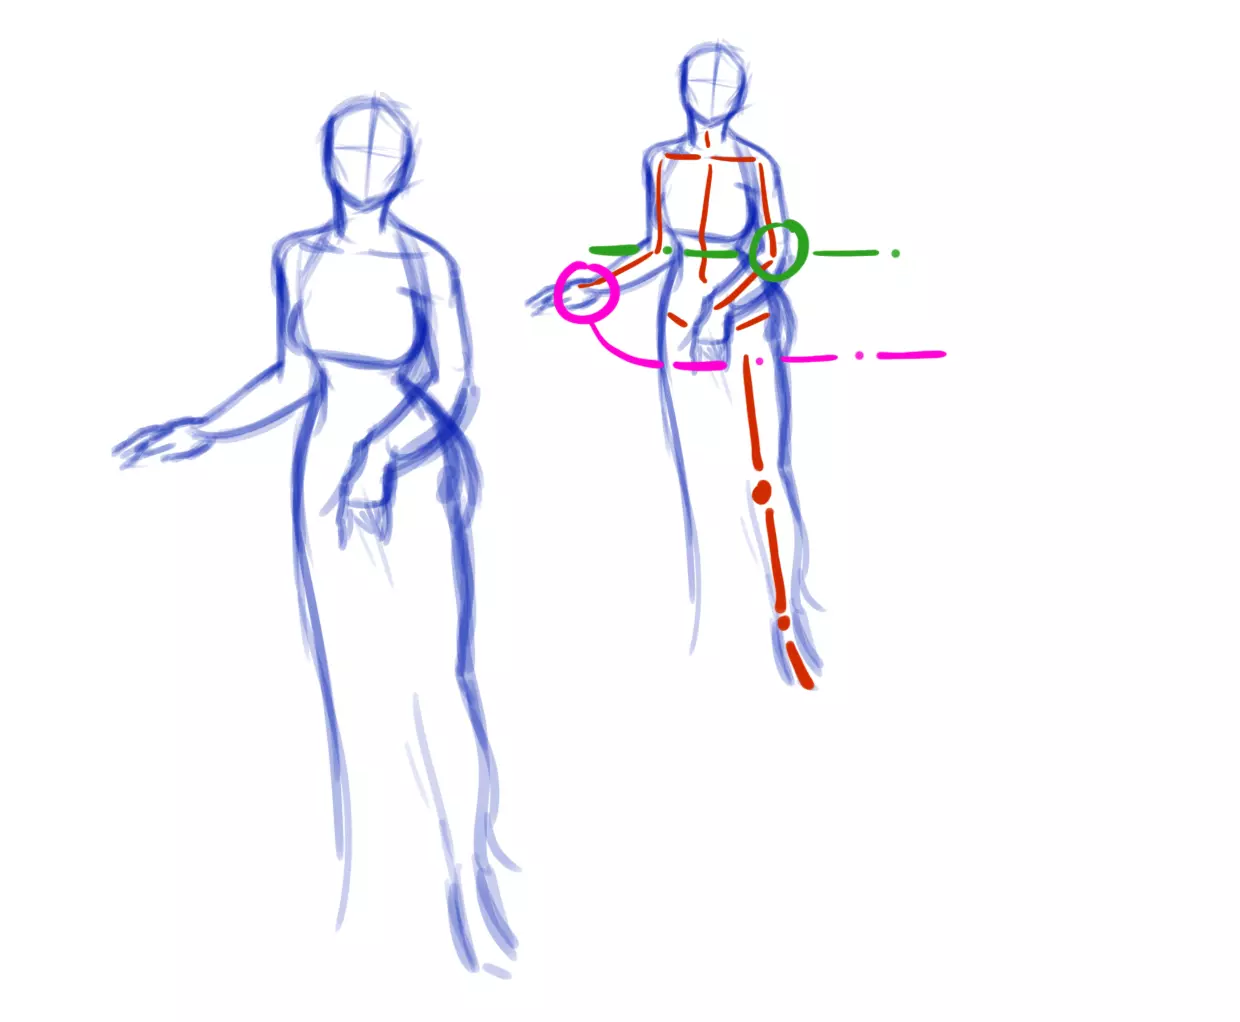
So I start by outlining my character. When you're not completely comfortable with a character or costume, it's better to first draw your character "naked" and then dress them up later. This way, you can better understand the base of your character and it can prevent some anatomical mistakes. Furthermore, when dressing the character, it will be easier to position the folds, e.g. according to the joints.
I place the main axes of the skeleton on the sketch that will serve as our base. In red I check the length of my arms: the crook of the elbow, in green, is at the narrowest point of the waist, the wrist is at about the level of the groin. These are personal reference points that can help you.
Then:
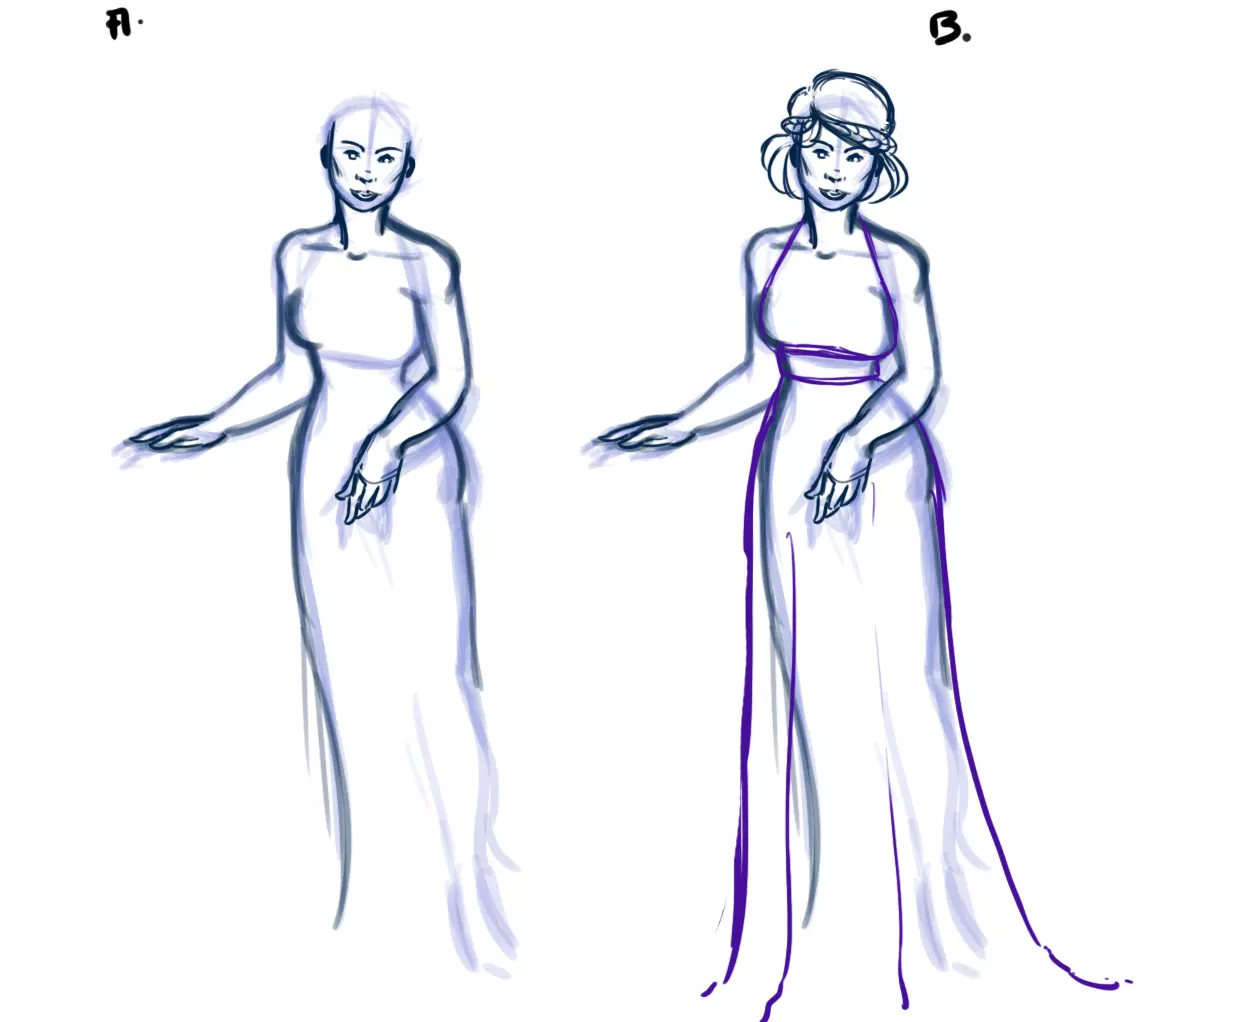
Step A: I outline the upper part of the character a bit more precisely. I don't work on the legs since they will be under the dress, and given the static position there is no need to further define these volumes.
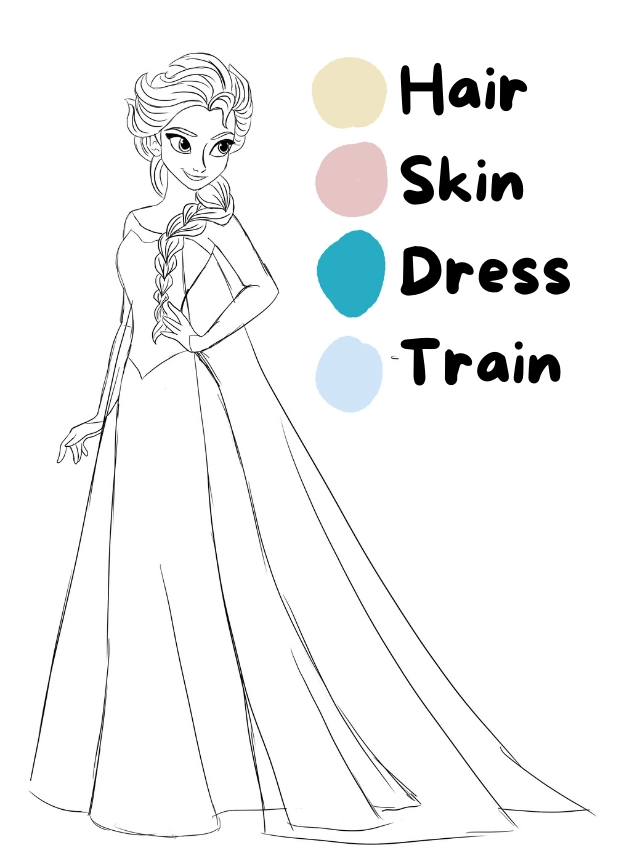
Step B: I opt for a fairly classic hairstyle, hair tied back, supported by a large braid. With the dress on, I chose a high-waisted, “empire waist” style.
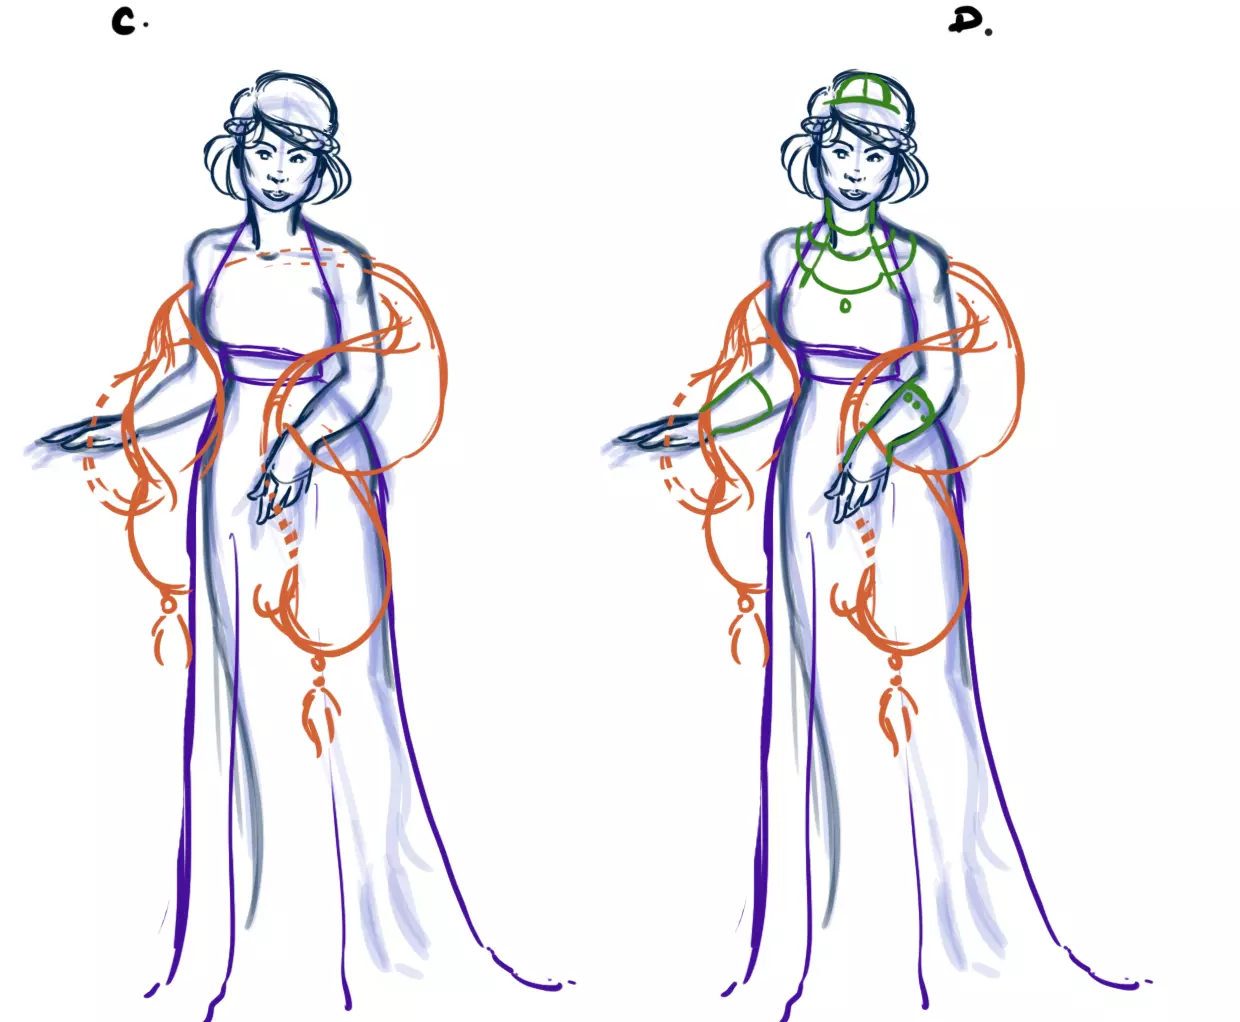
Step C: I give her a big fur coat (in orange) that wraps around her arms.
Step D: I choose (in green) a large necklace, a tiara, no earrings, and gloves.
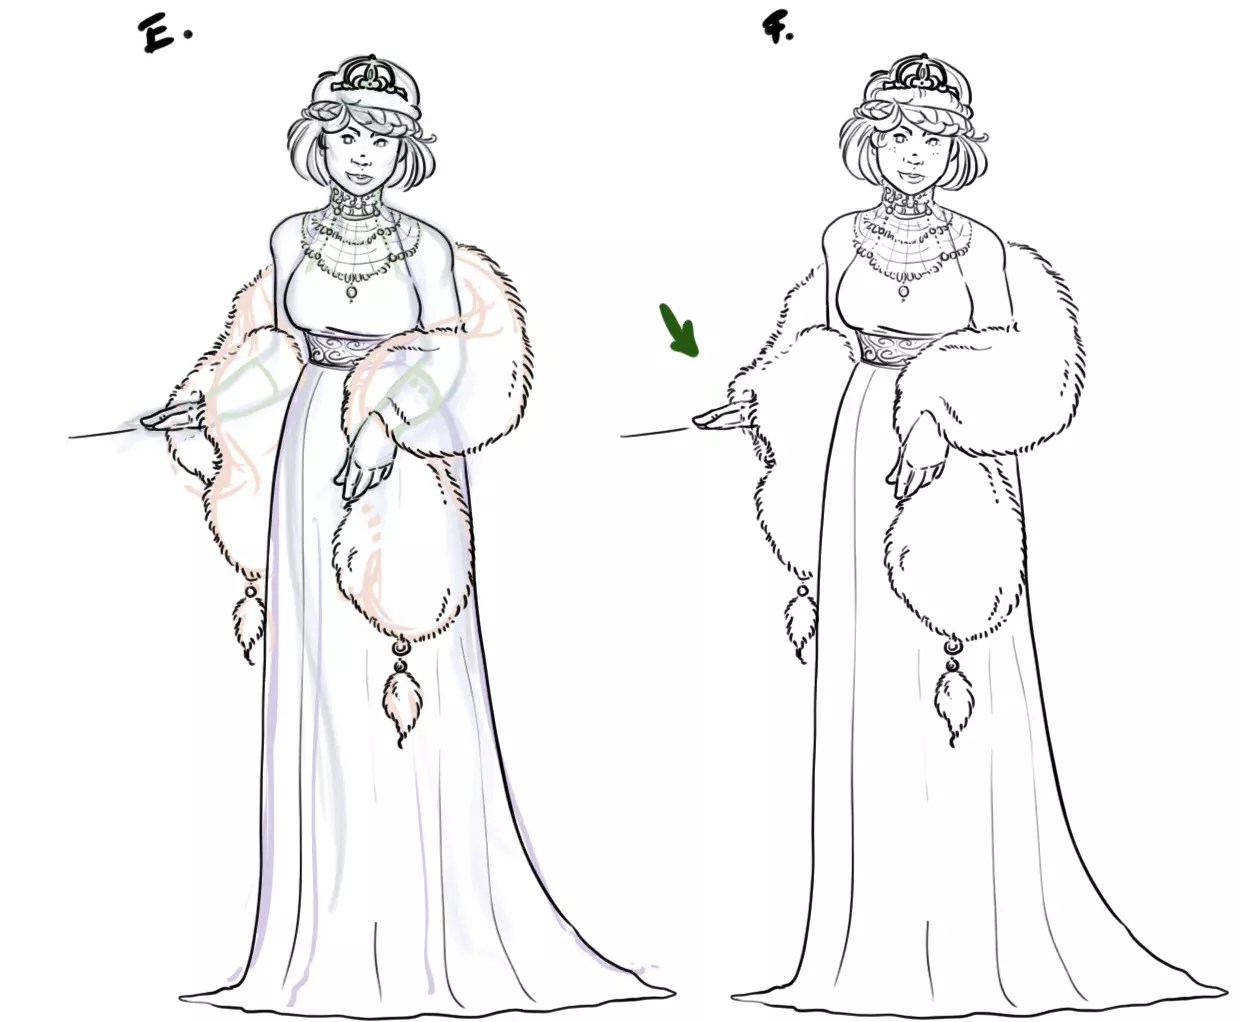
Step E: Over our sketch, I trace my clean outlines.
Step F: Once the base lines have been erased, I add some details, especially on the hair, and correct the fur a little (green arrow) to prevent it from obstructing the hand resting on the decoration.
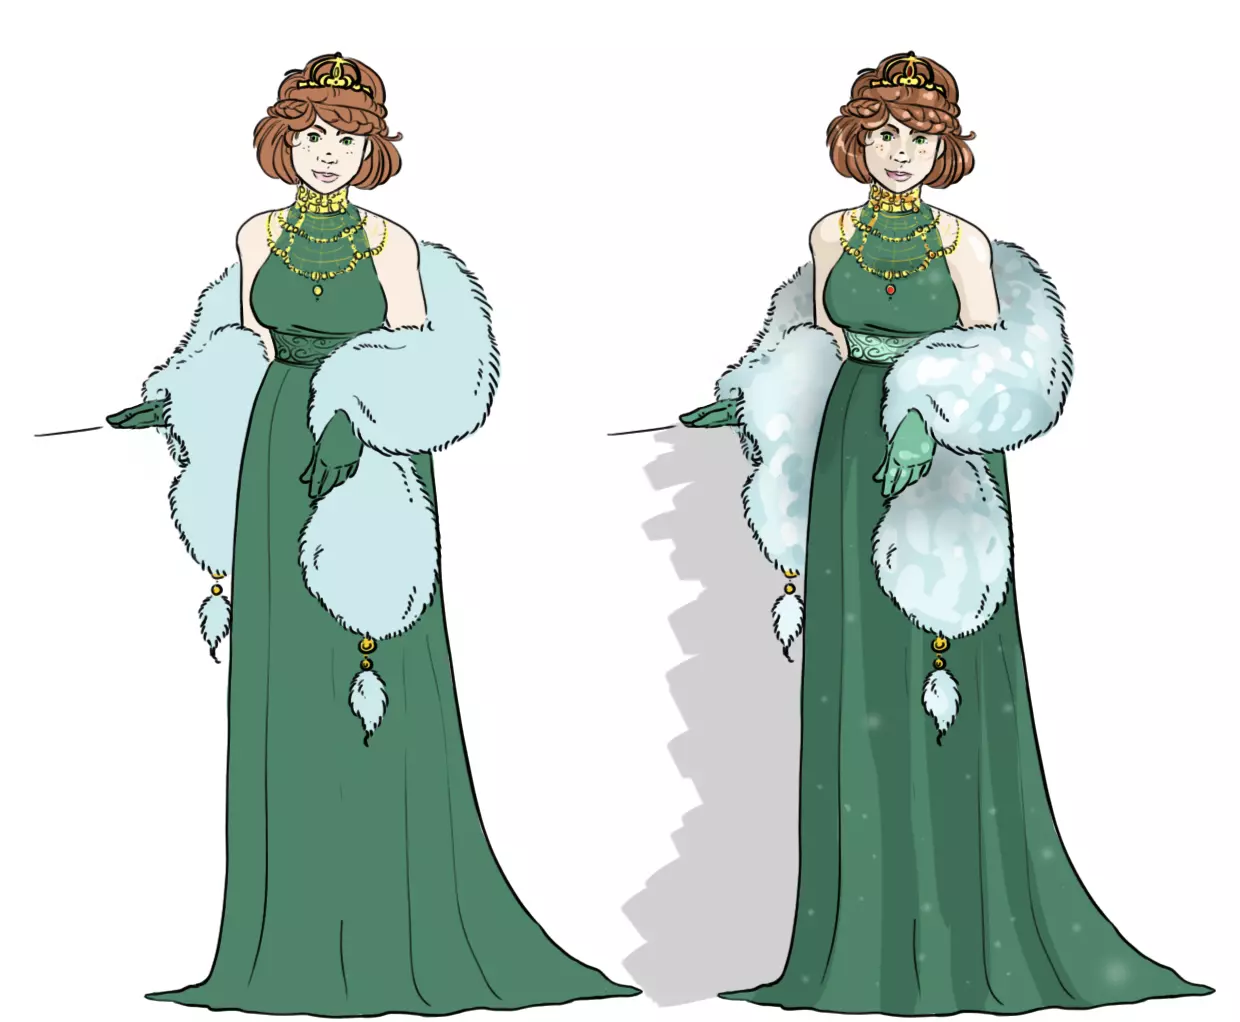
Colouring:
On the left only flat colours. On the right, I lighten the belt and gloves and set the shadows. I add some volume to the fur, punctuating it with darker and lighter dots.

See how quickly a fairly satisfactory result can be achieved.
To be comfortable with this subject, two fundamental points must be mastered:
* Human anatomy, and more specifically female anatomy.
* Dress styles and, by extension, the representation of fabrics and folds.
As always, practice, observe, practise.... Feel free to do more quick sketches, don't always aim for a finished drawing.
Illustrator and writer: Ello Illus
Discussion
No comments yet.