How to Draw Shoes
In this tutorial, I'm going to teach you how to draw different types of shoes, flat or heeled, by breaking down their various elements. Shoes are a challenging subject in drawing, but once you know a few types, it becomes easier to create variations based on that foundation.
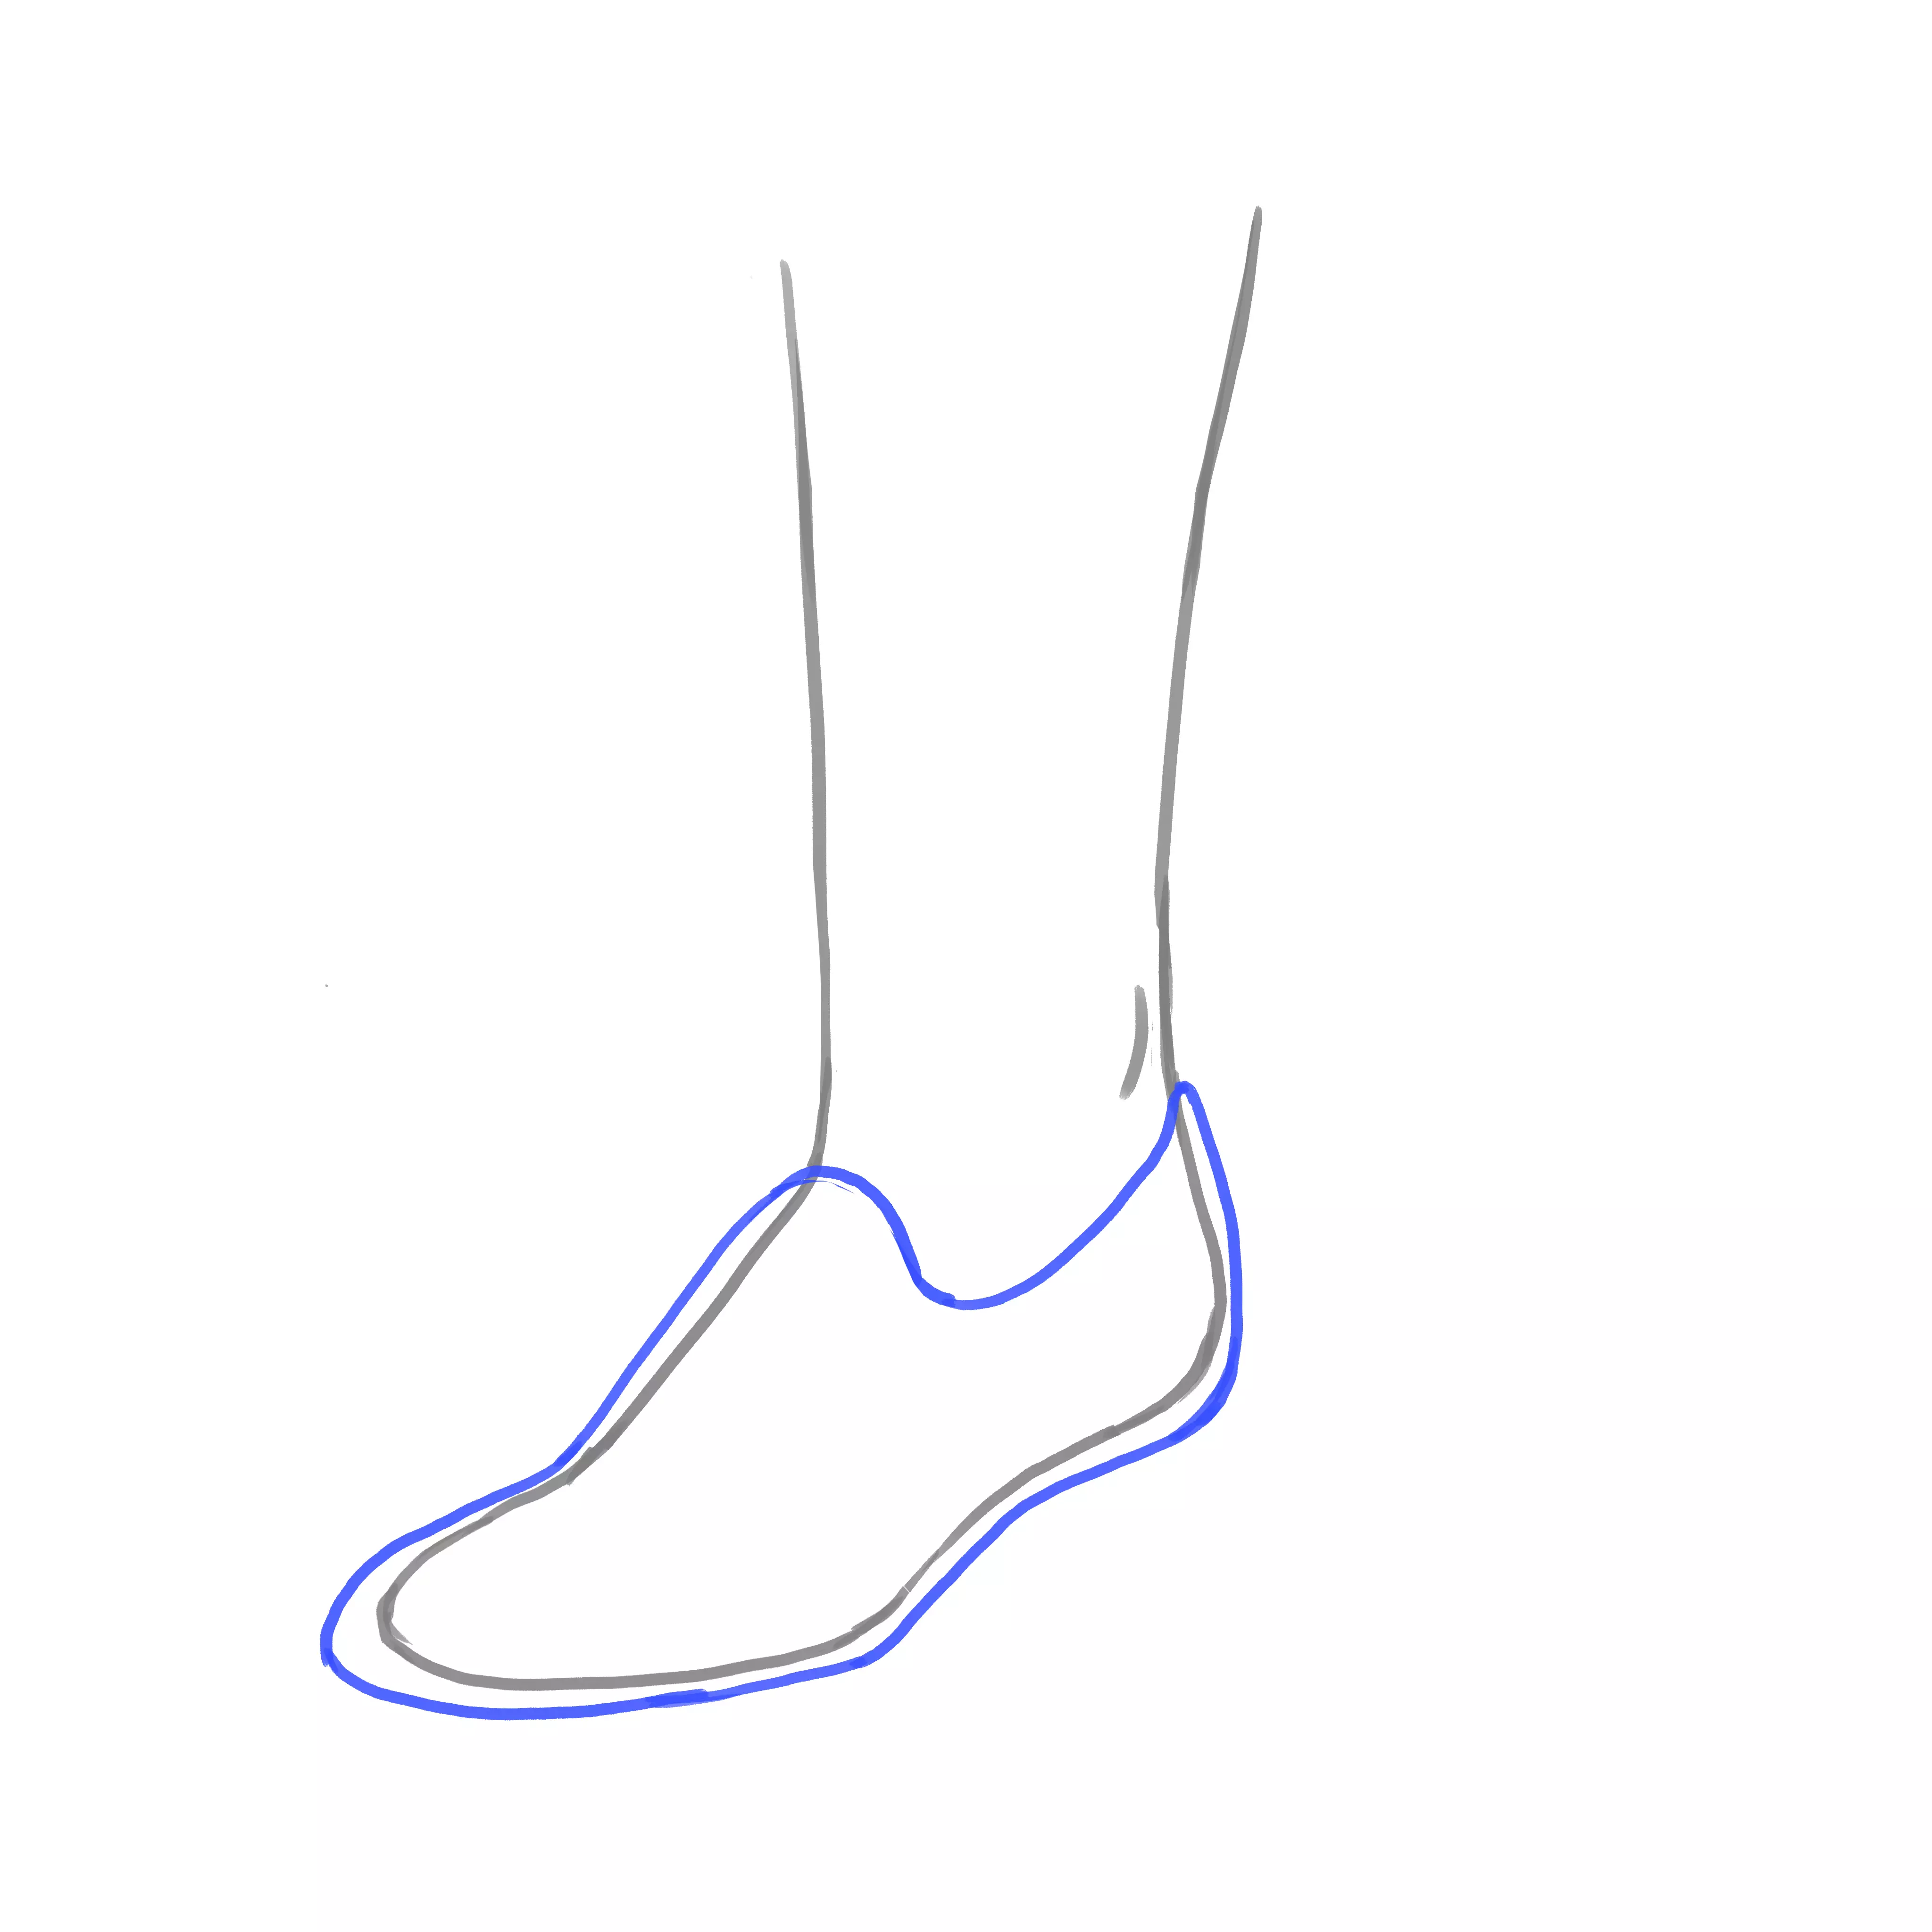
We will first start with flat shoes. Before diving straight into the shape of a shoe and risking it being all twisted, it's best to first define the shape of the foot inside it. The entire shoe will be built on that.
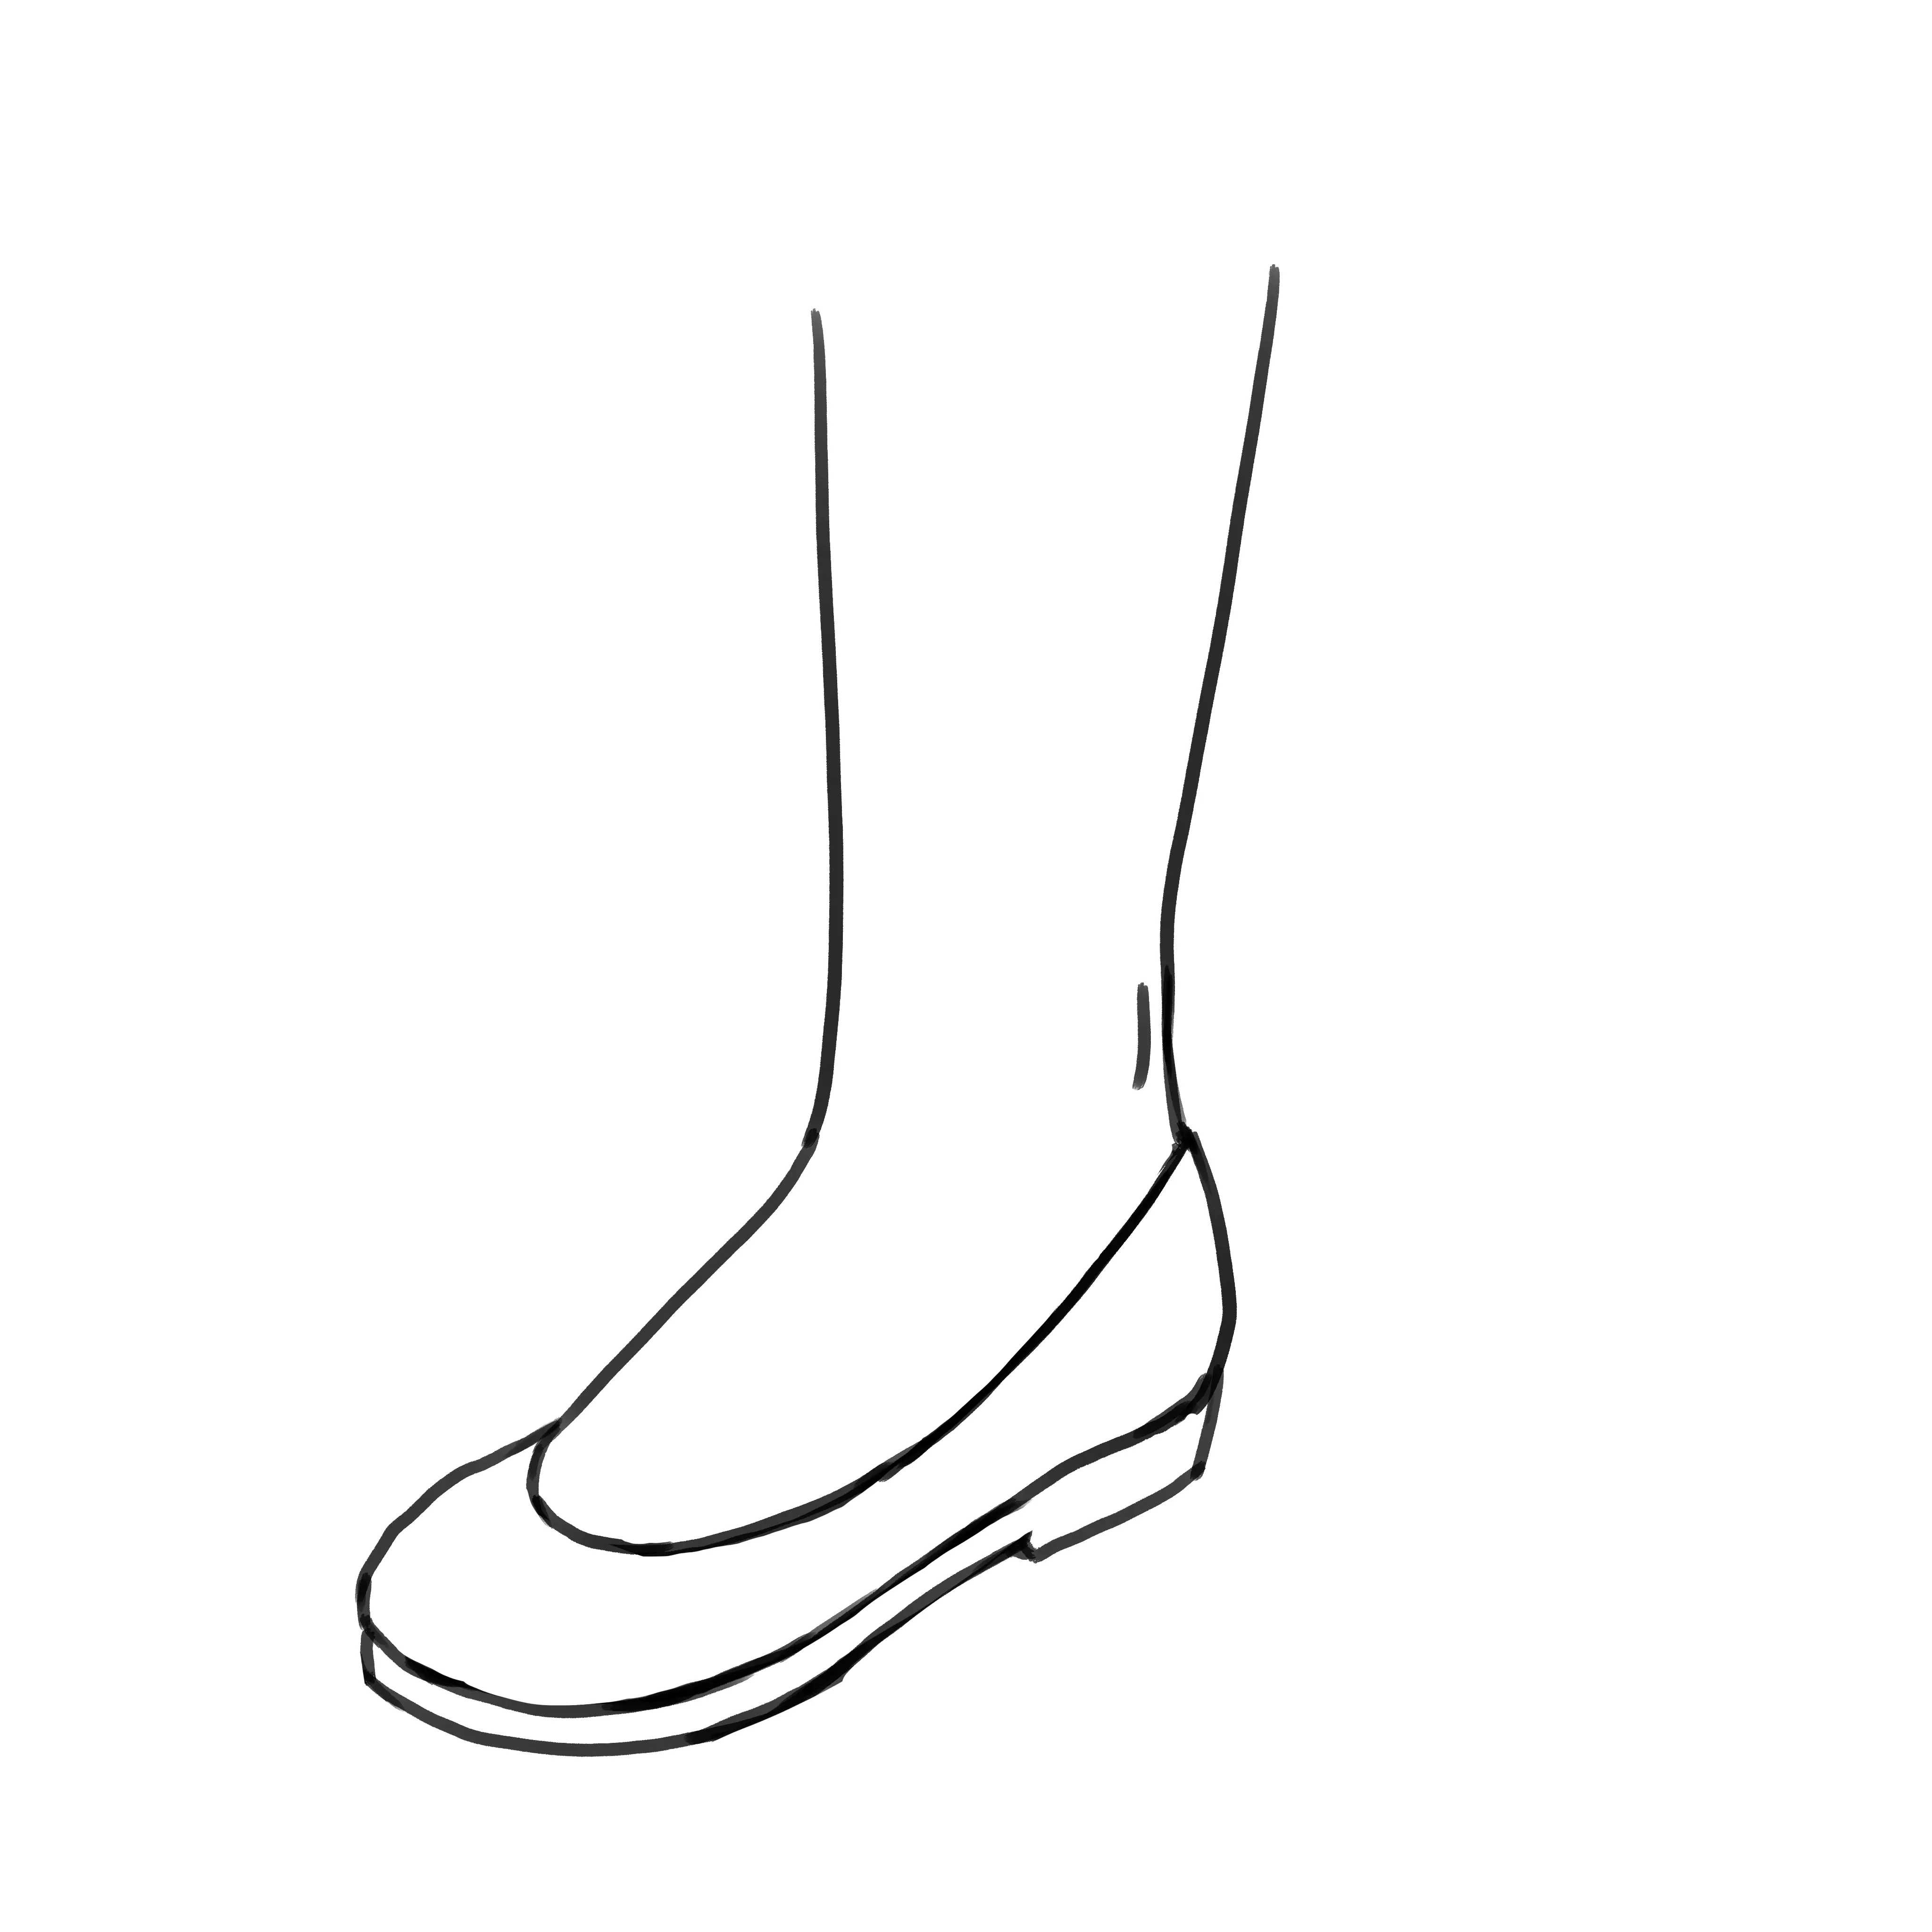
FLAT FOOT DRAWING
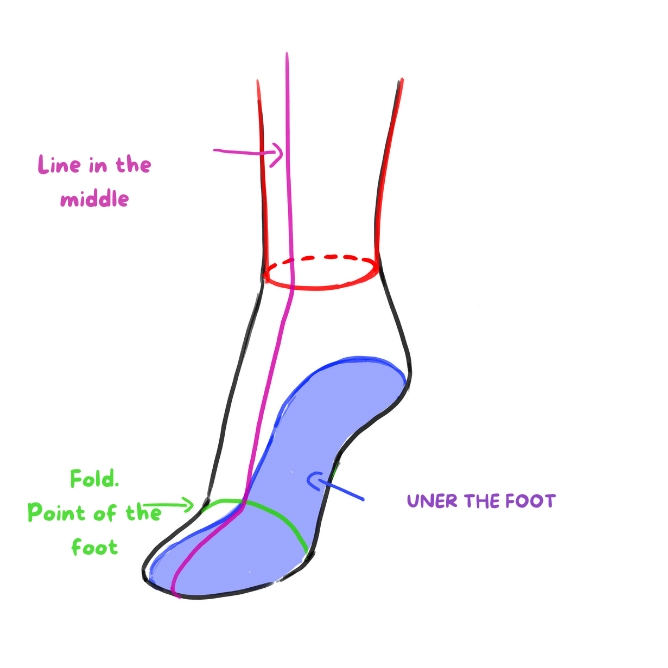
Here is a foot flat on the ground, viewed from a three-quarter angle, slightly from above. We will use this point of view for all our shoes. It is simplified as in a sock, that will suffice to put the shoe over it. I added indications on this sketch to better visualize its volume.
DRAW A BALLERINA
Now that we have a basic foothold, the simplest type of shoe is the ballet flat.
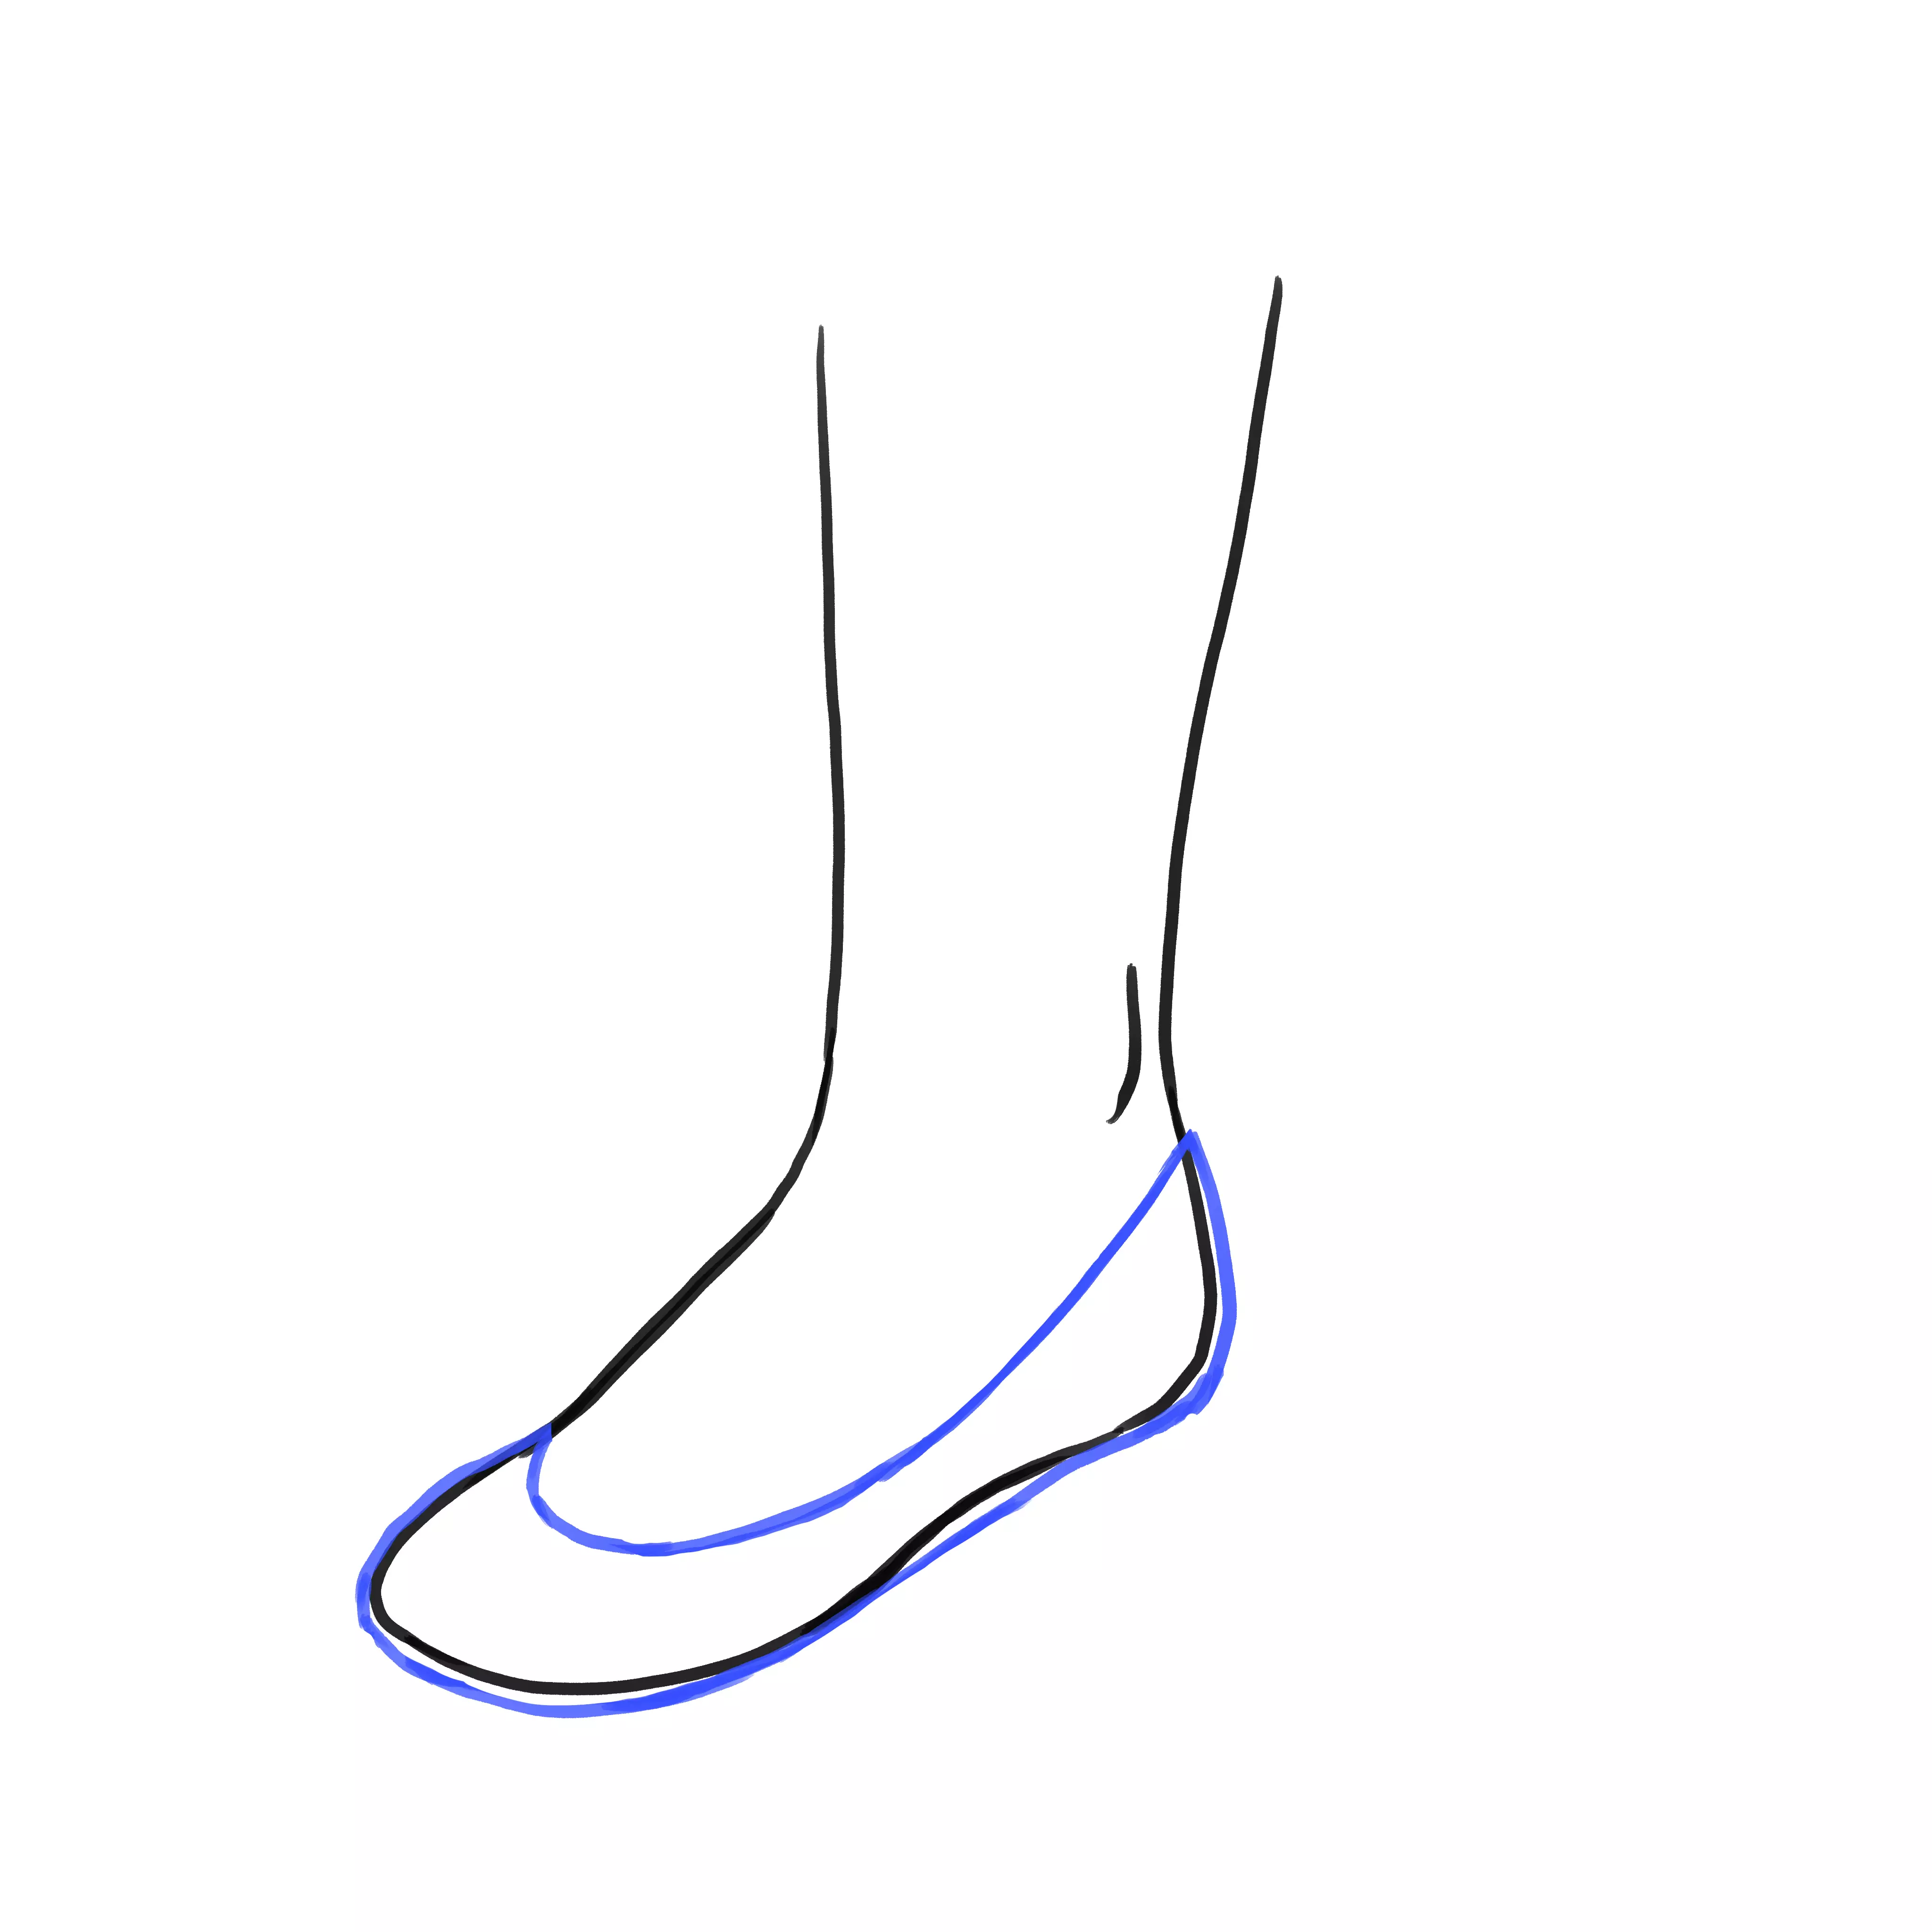
We add over the shape of the shoe. If one wants to be a bit realistic, it's necessary to consider leaving a thickness relative to the foot, it's a shoe, not a sock.
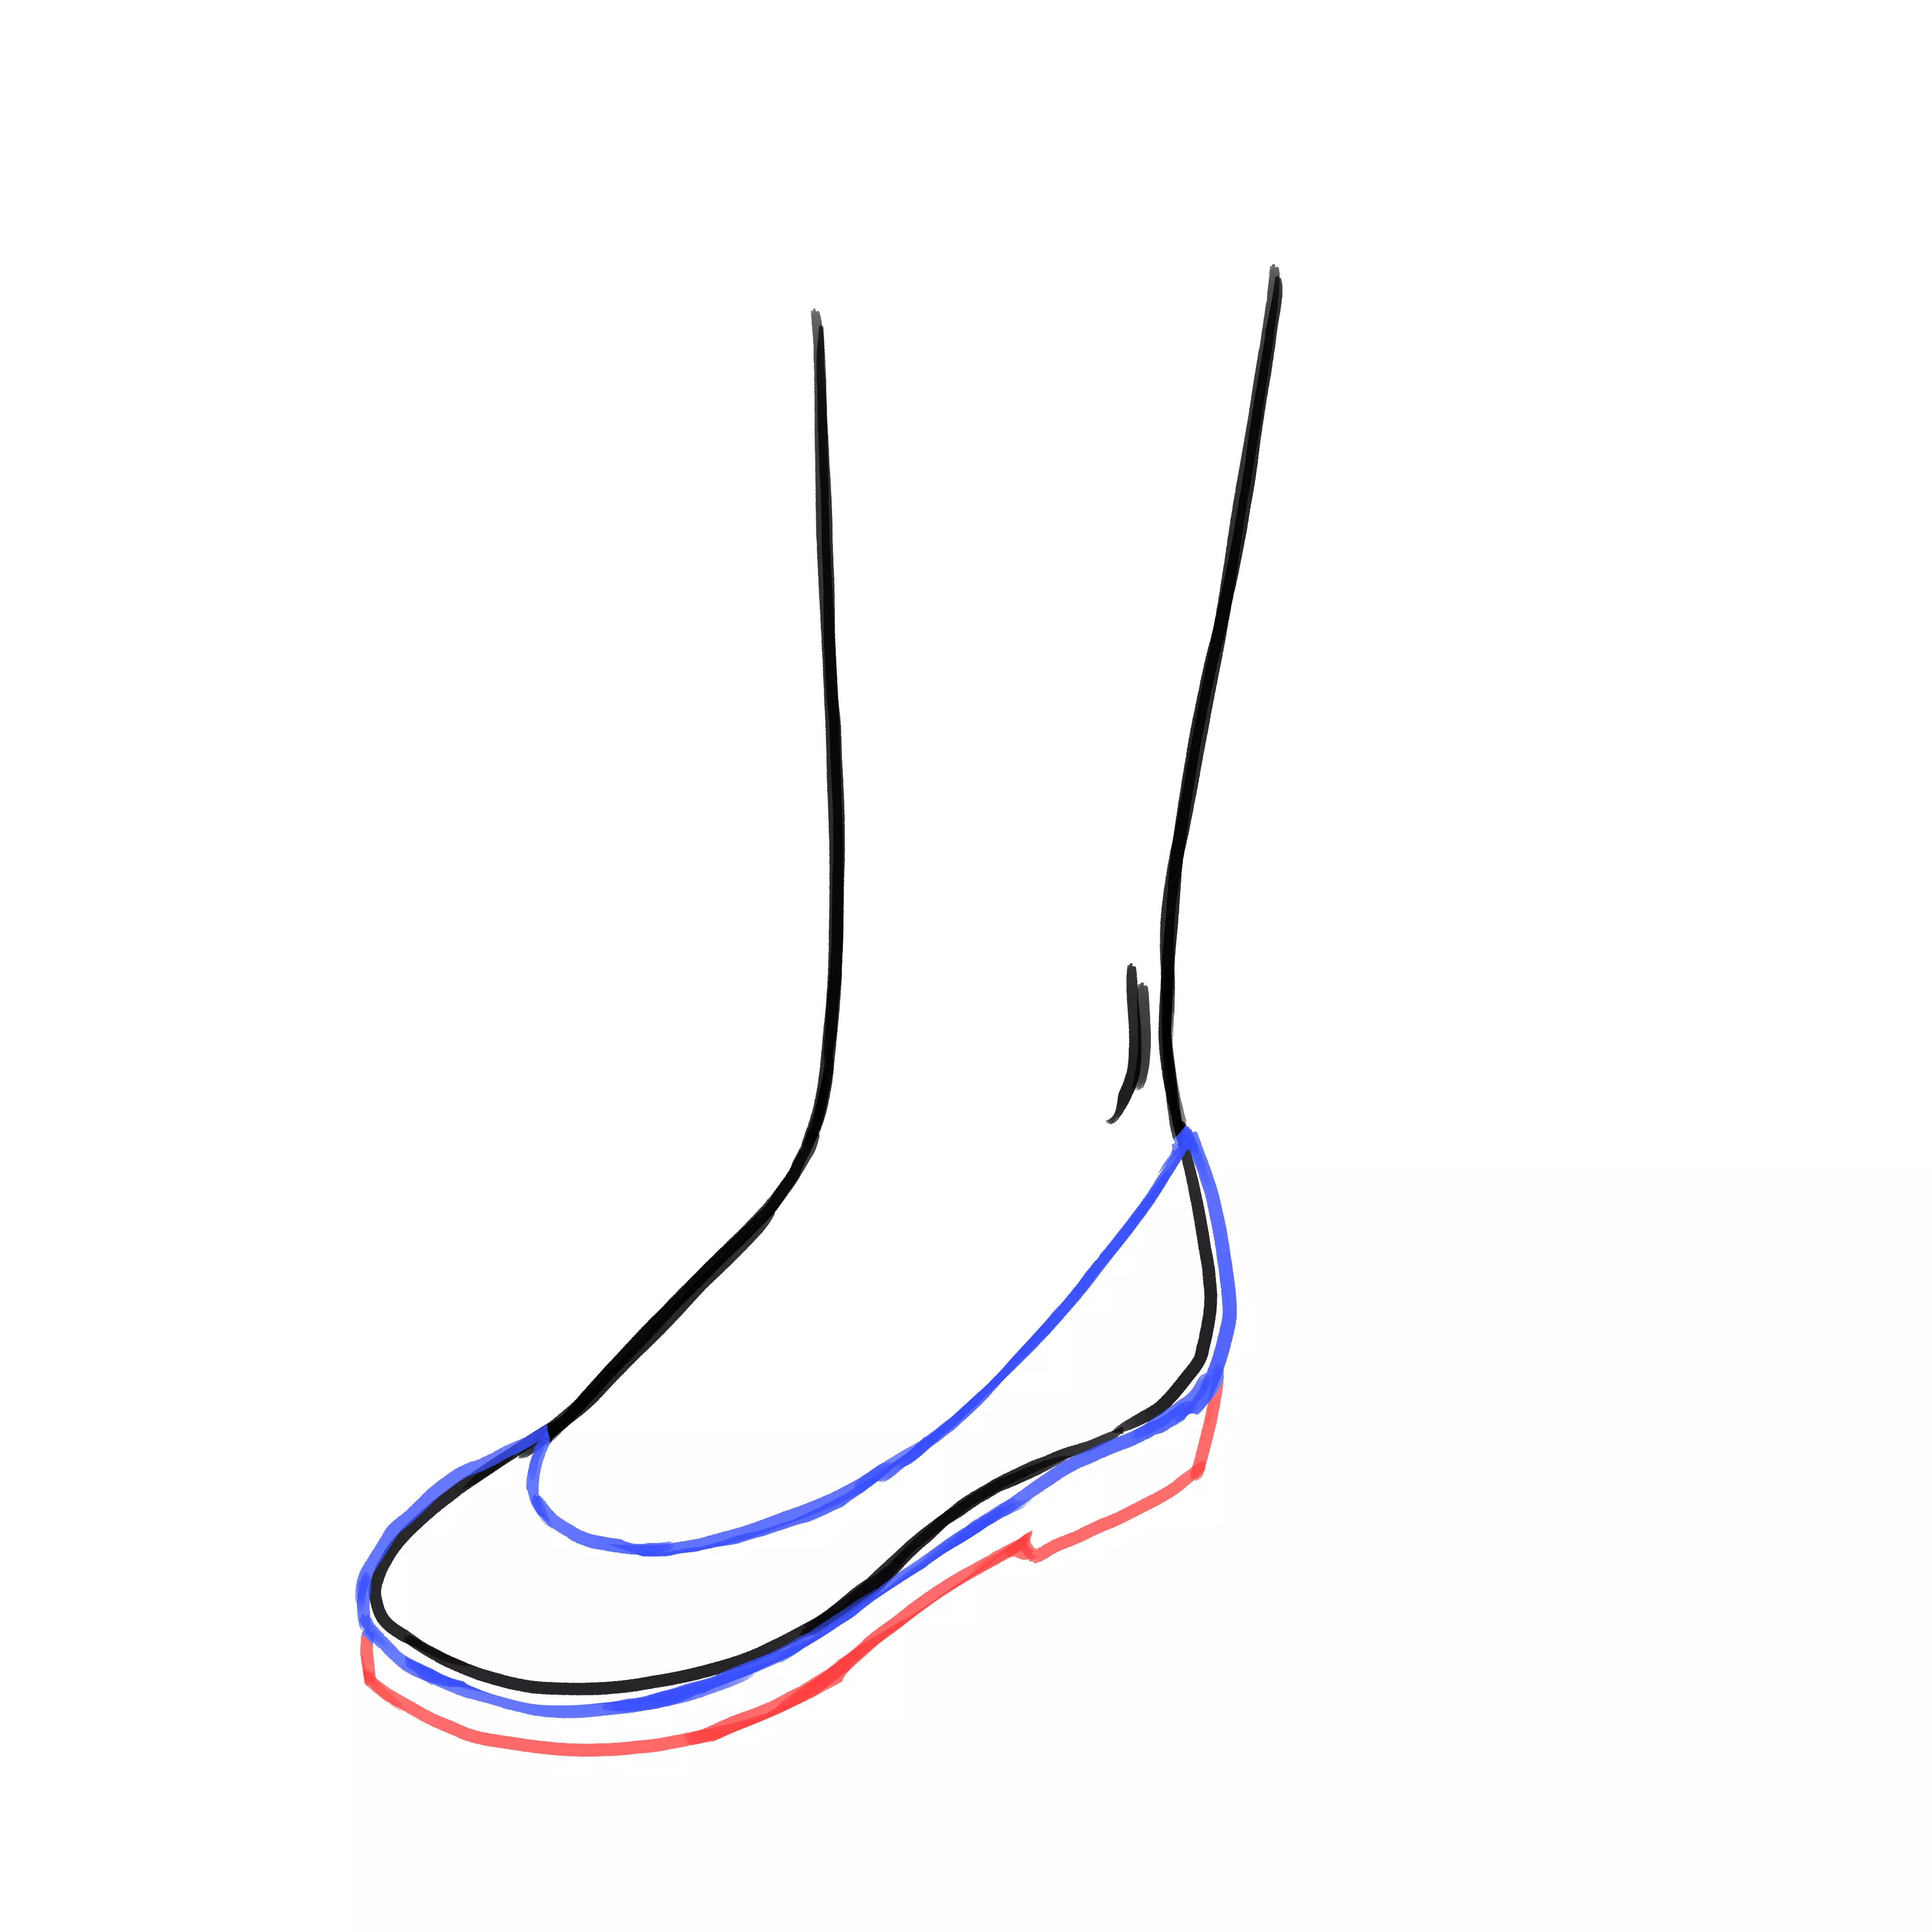
Then we add the sole, with its small heel.
And there you have it!
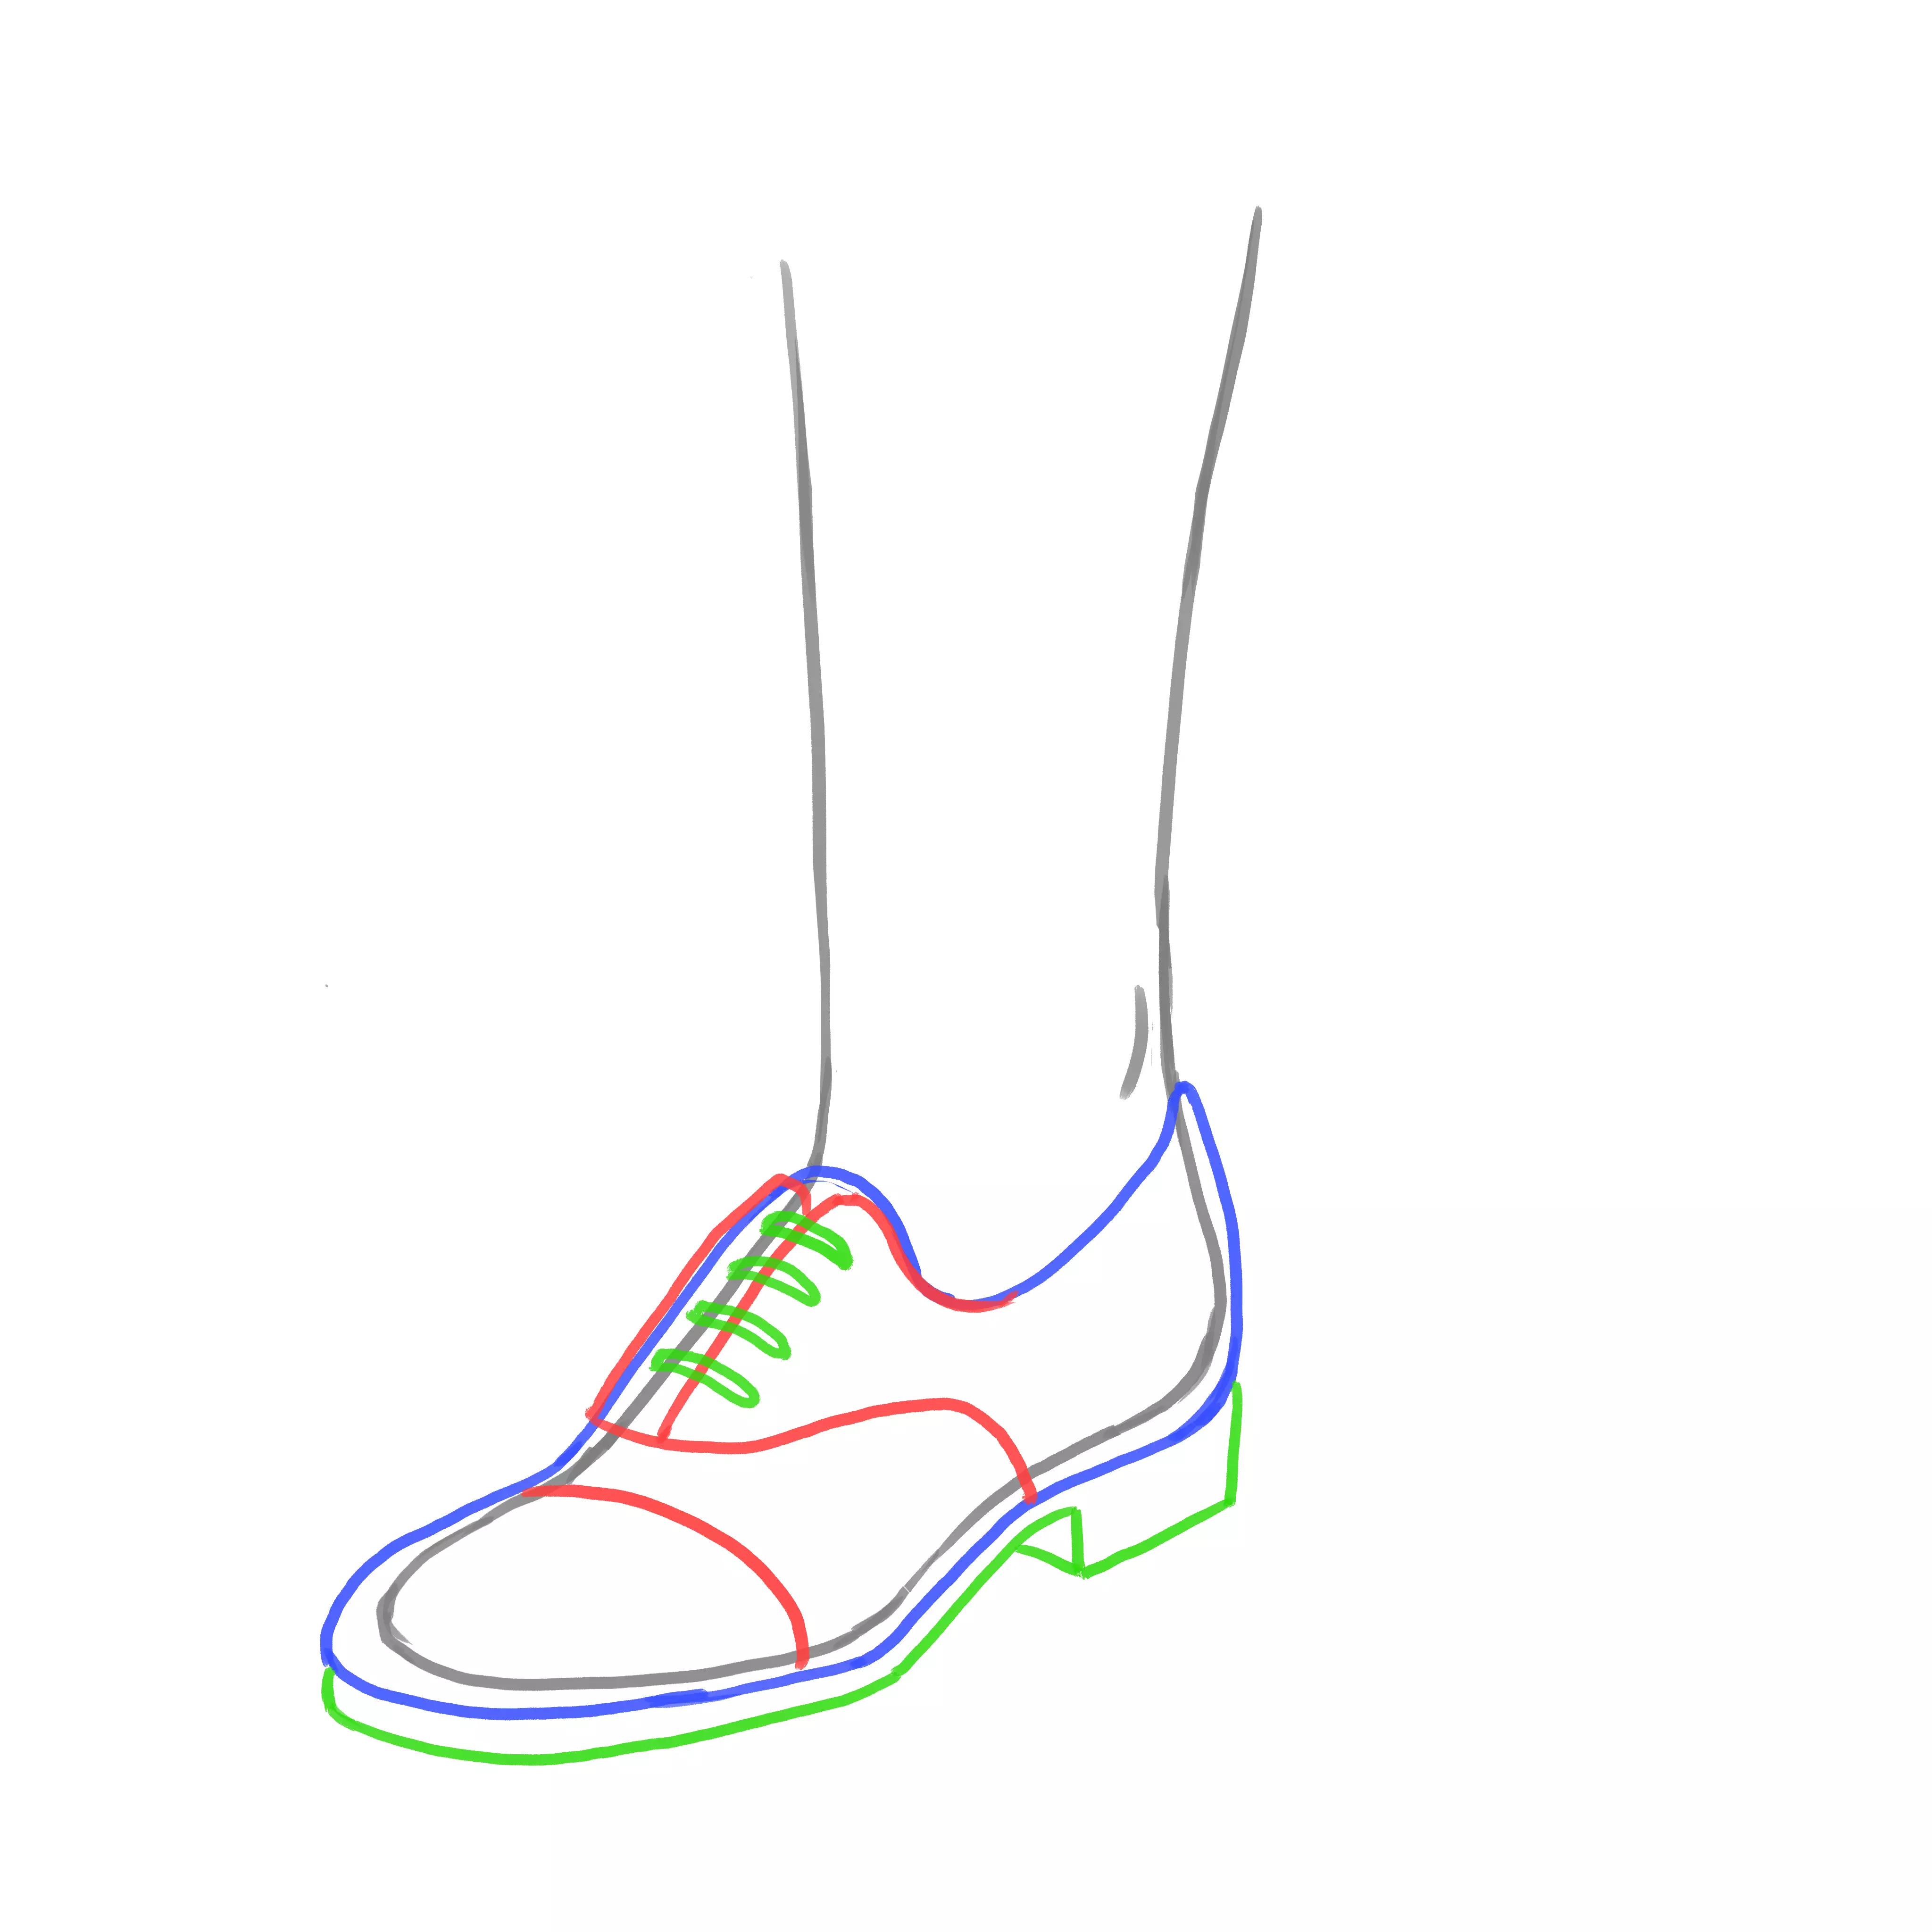
DRAW A SNEAKER
Drawing sneakers is not easy and there are a multitude of models, but similarities can be found between some. I offer you one that captures the style of what can be seen with some well-known brands.
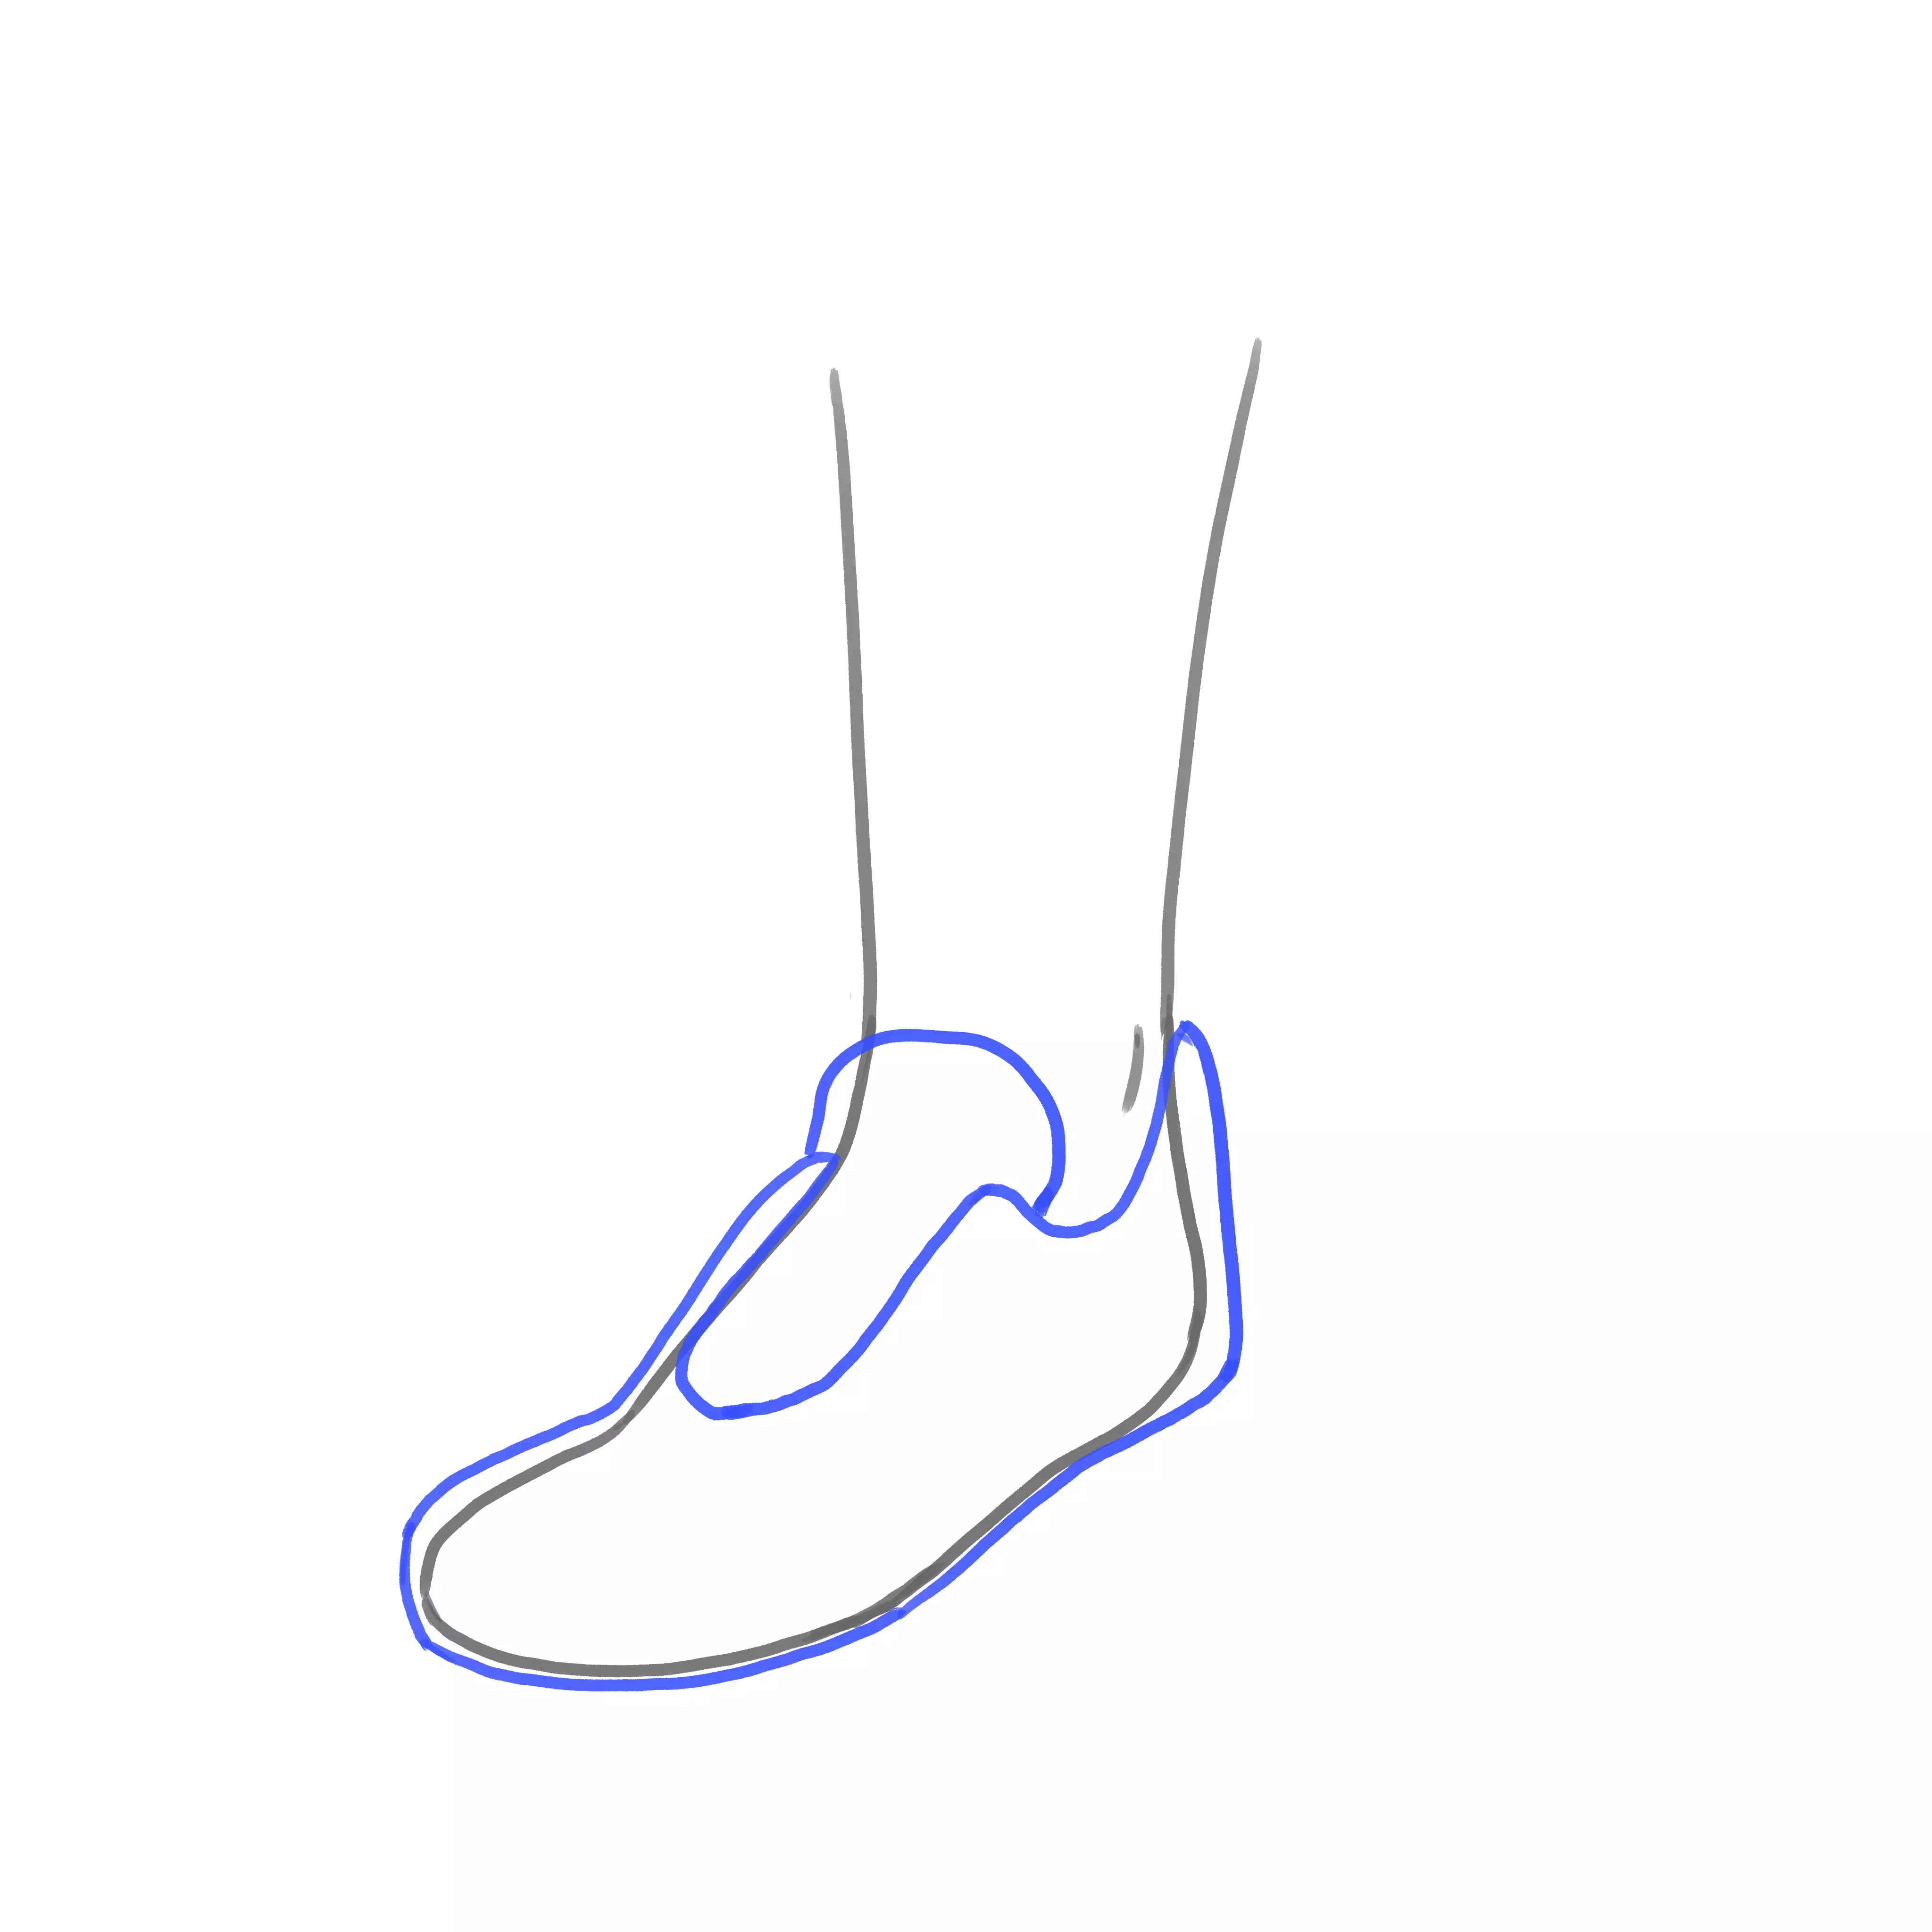
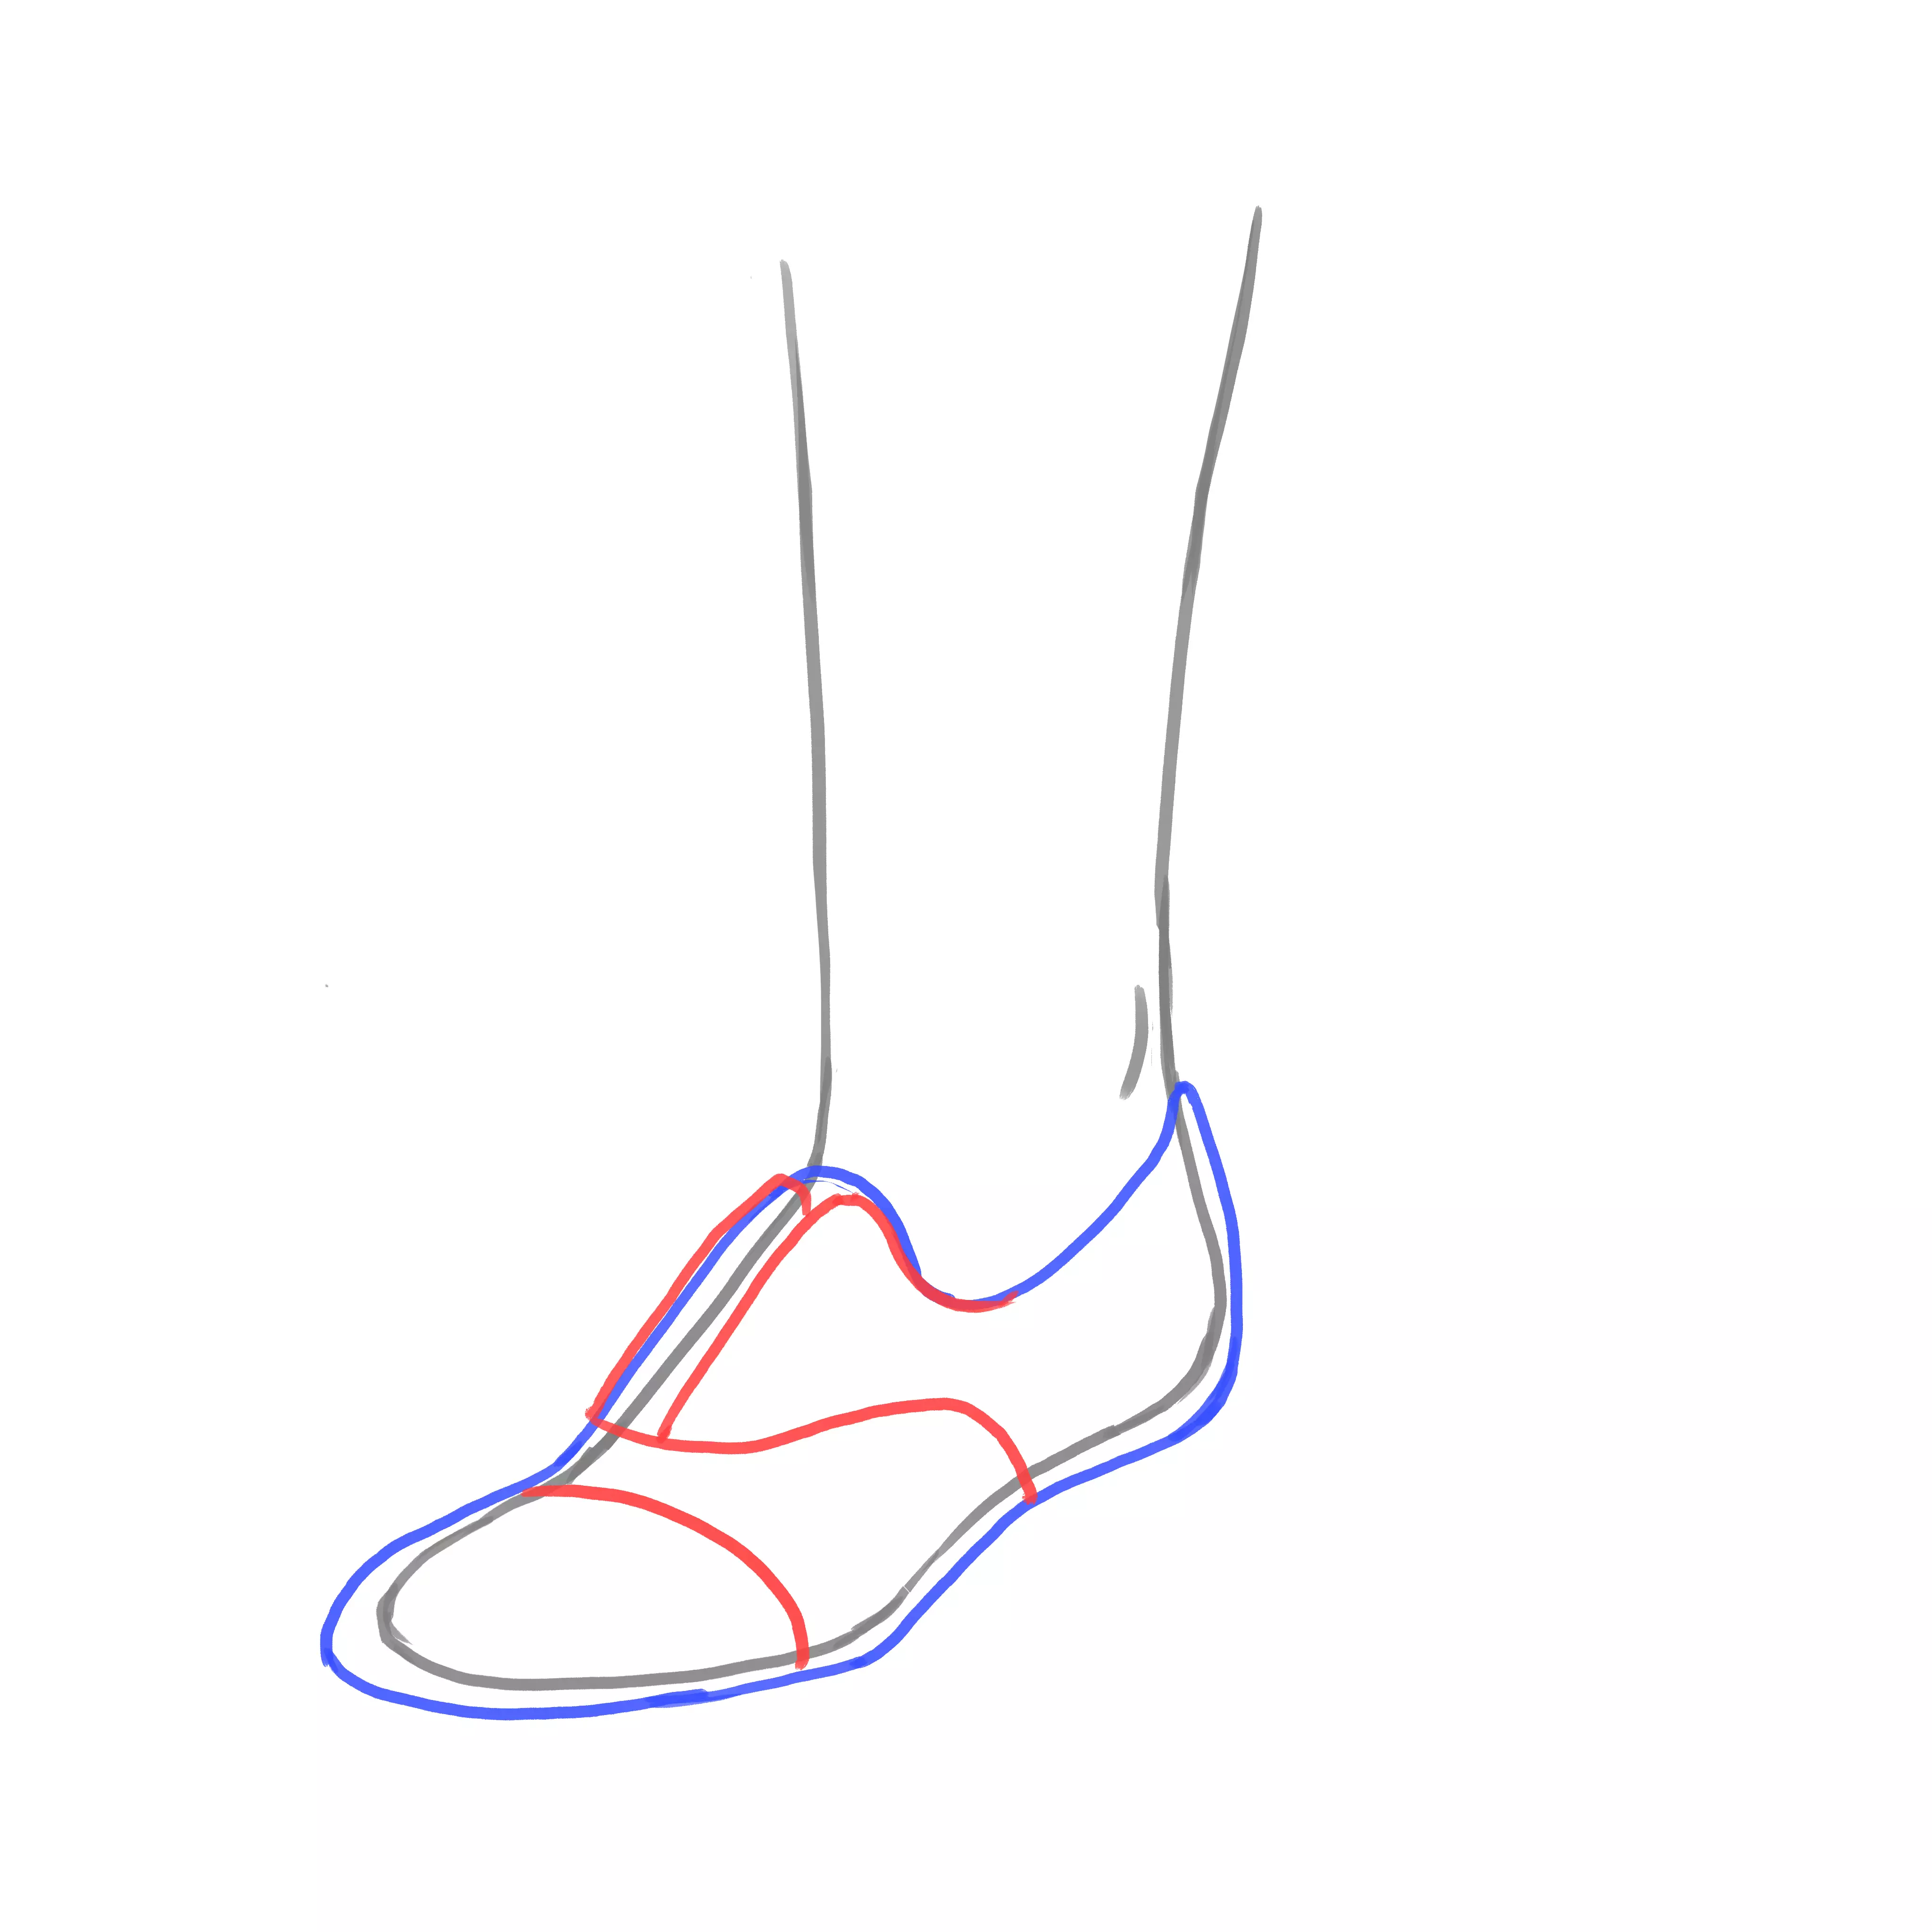
We always start with the foot, and we're going to build around the overall shape of the shoe, and its tongue, without worrying about the details. This helps to avoid getting mixed up.

We then add the main seams that determine the design of the shoe...
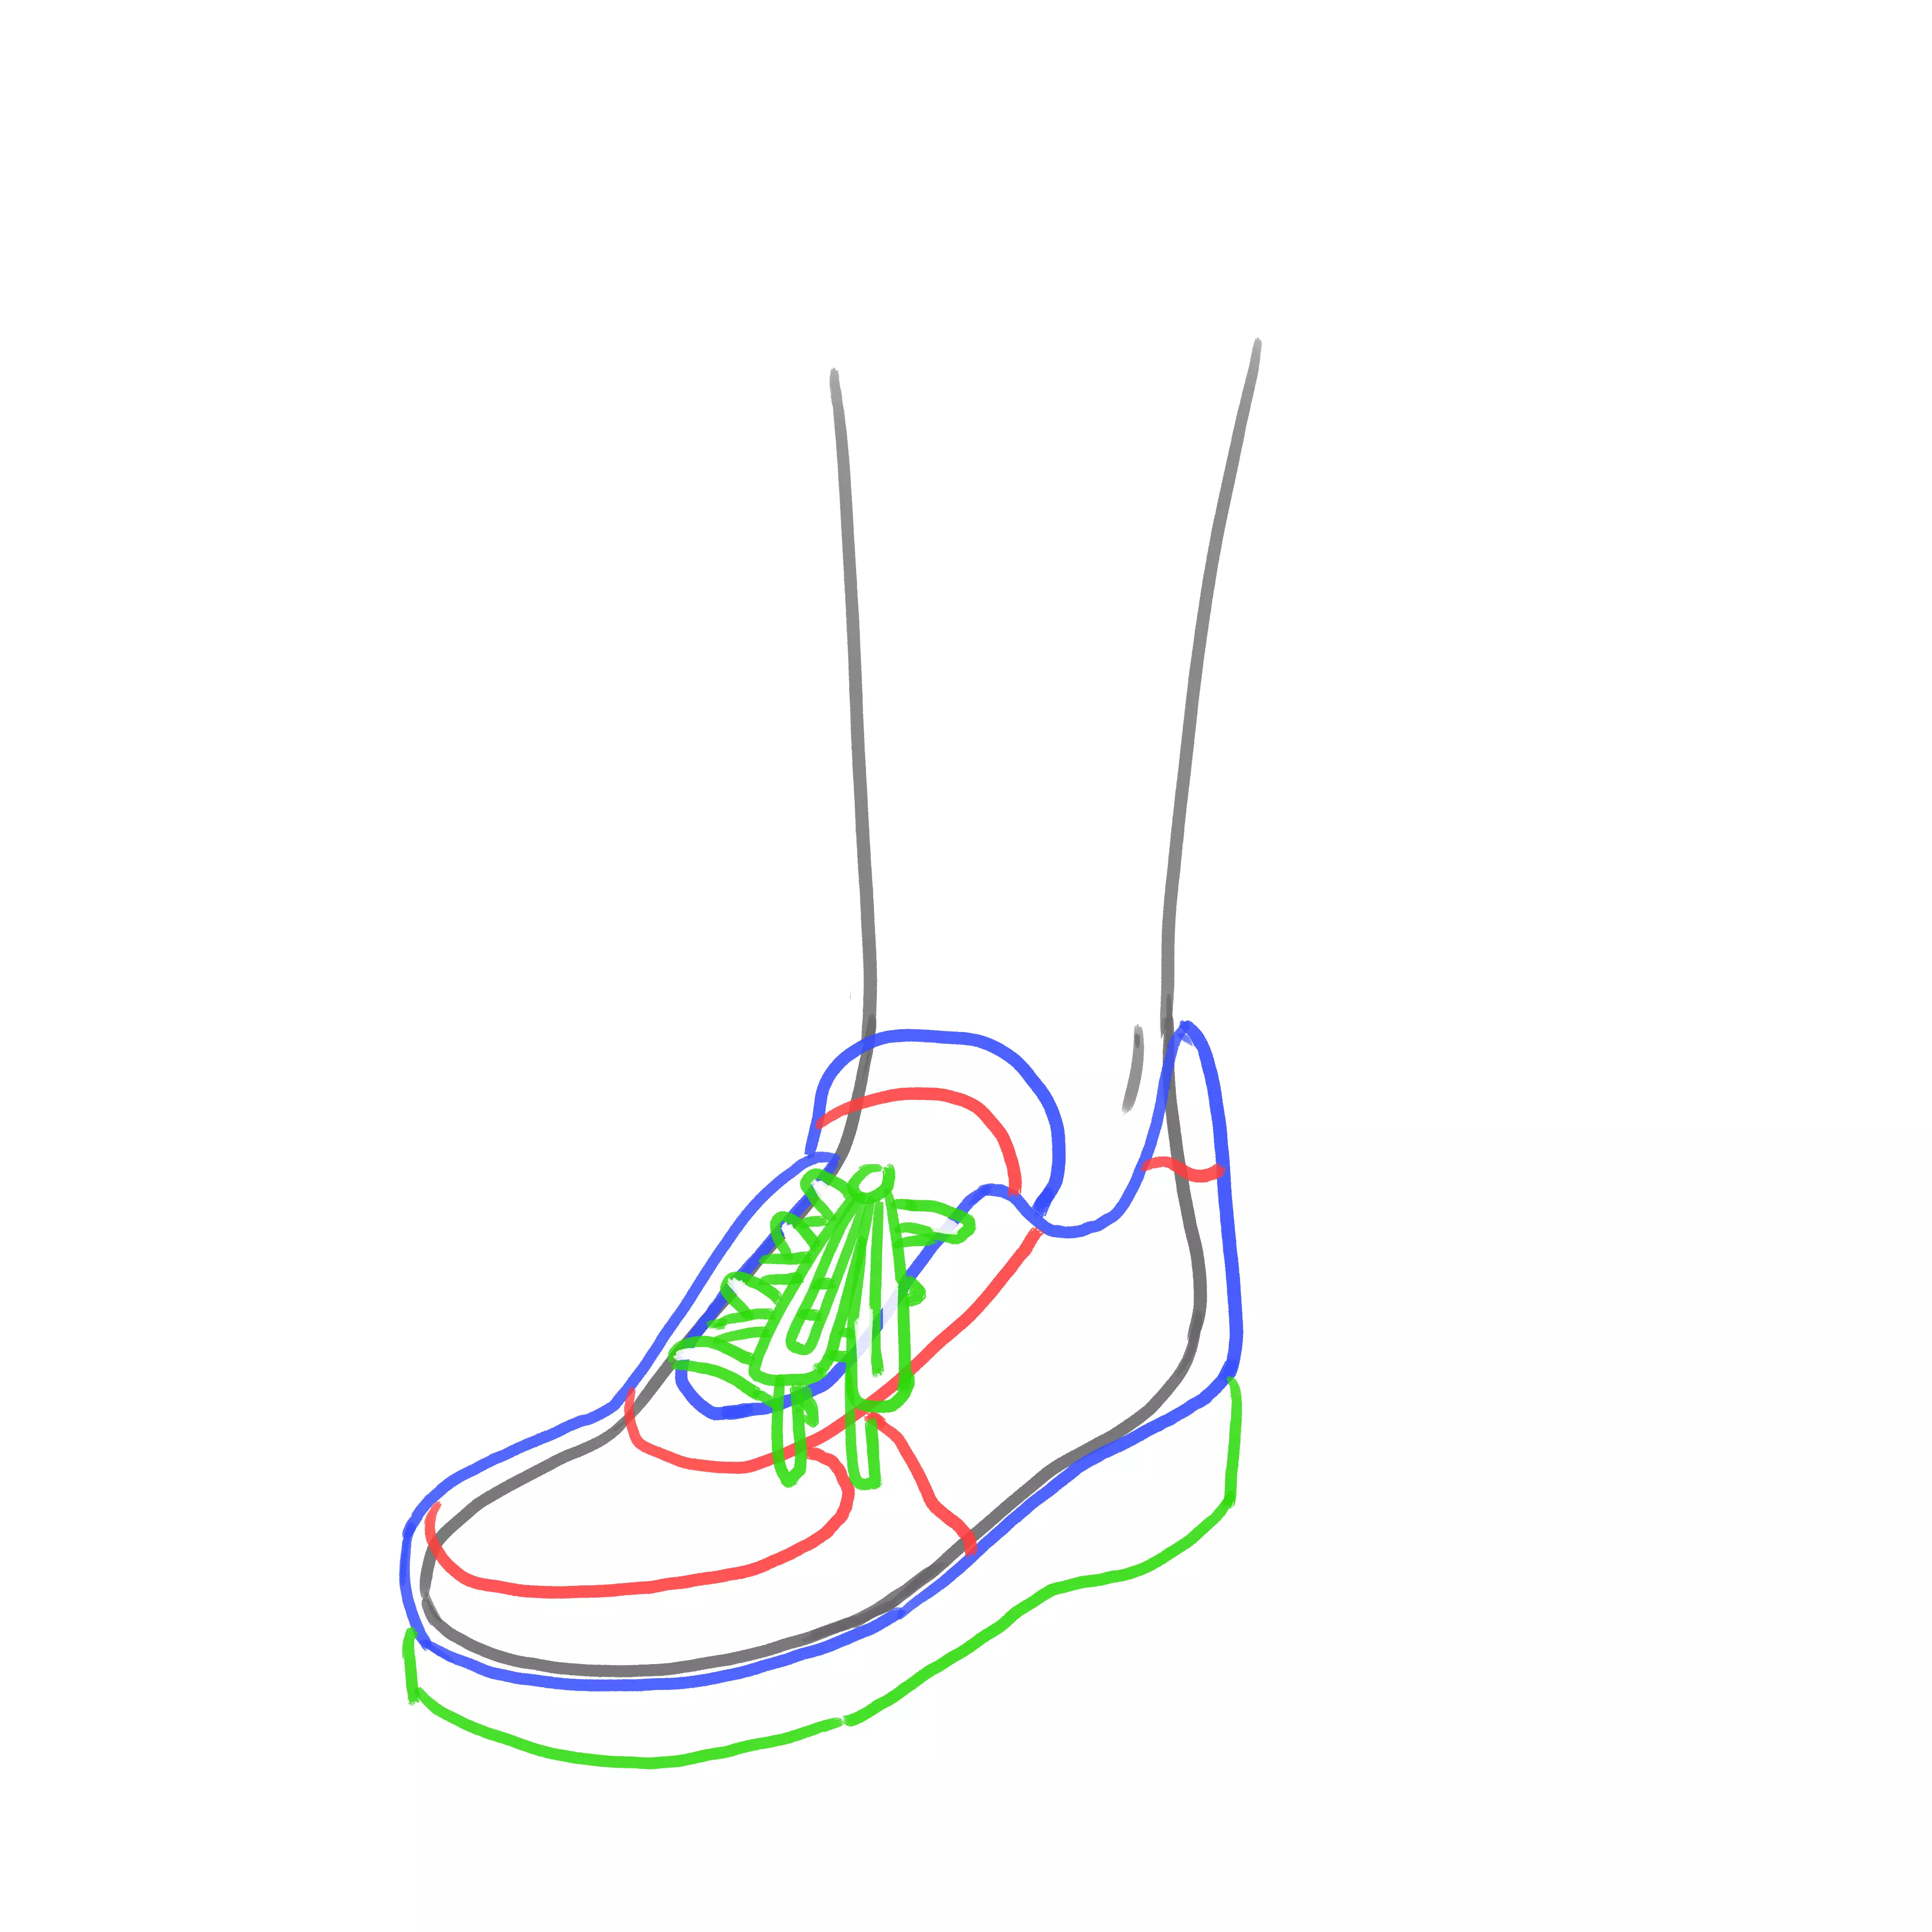
We then put in the laces and the soles.
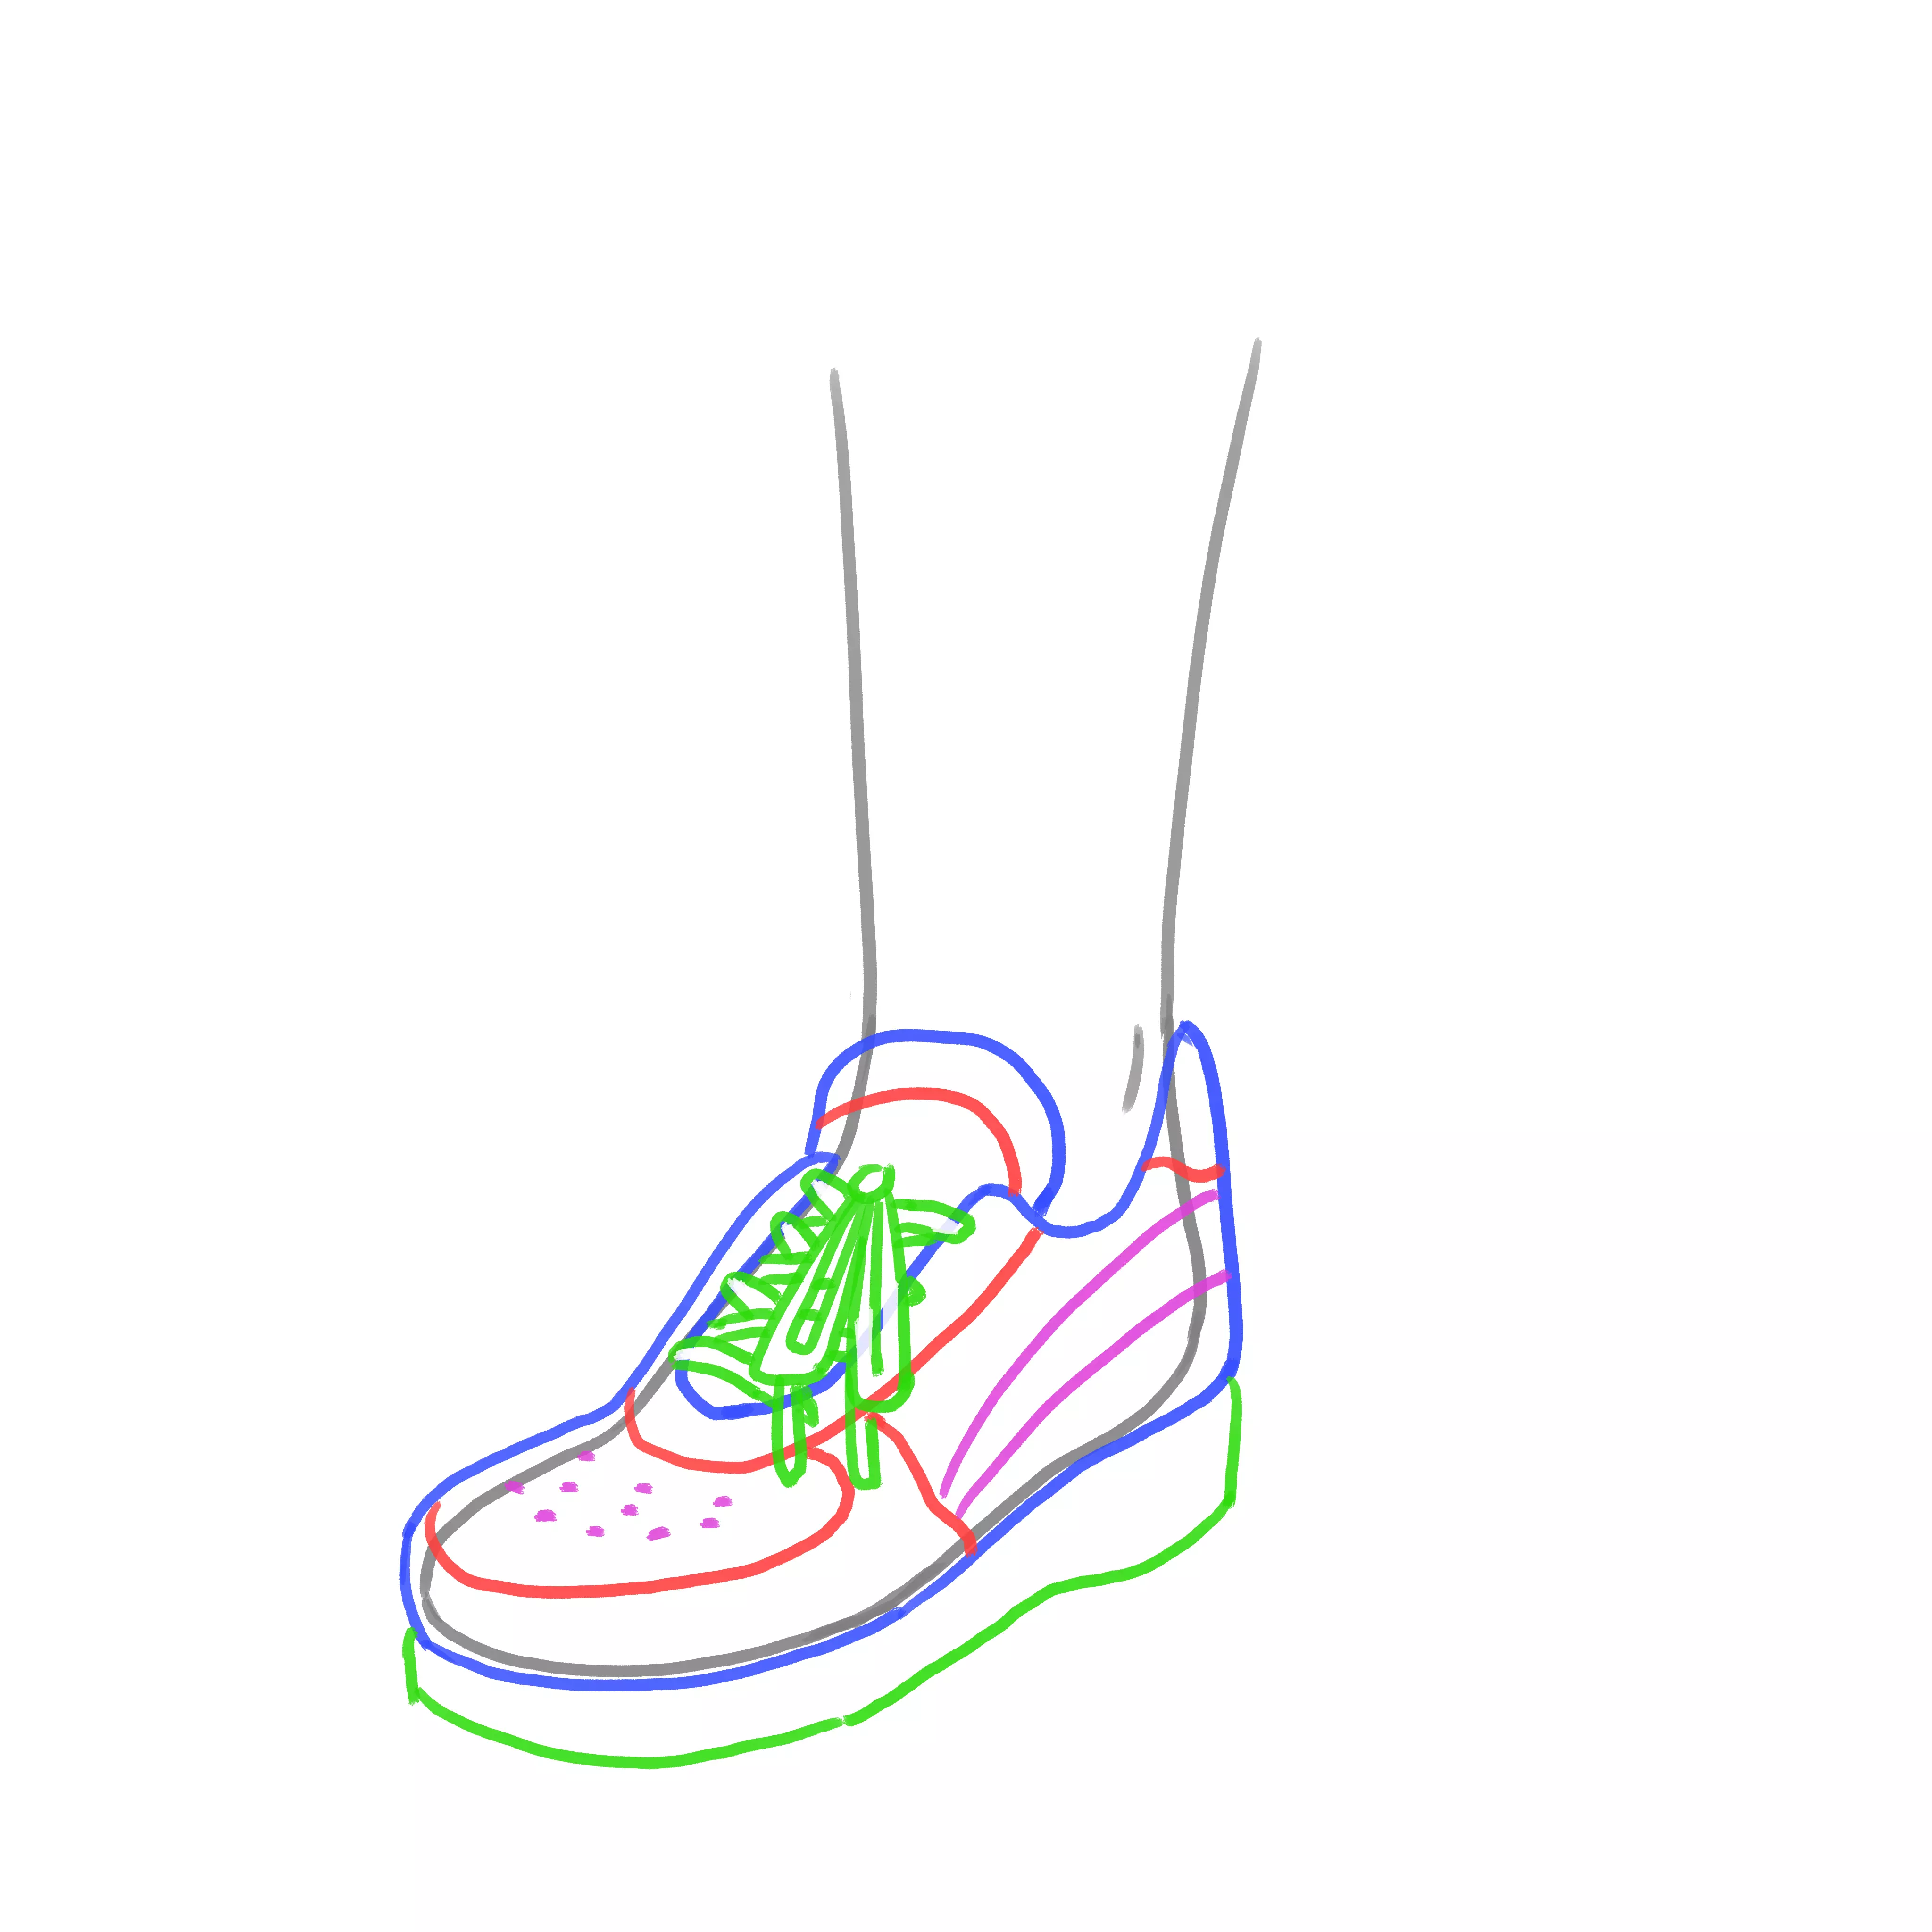
And the final details.
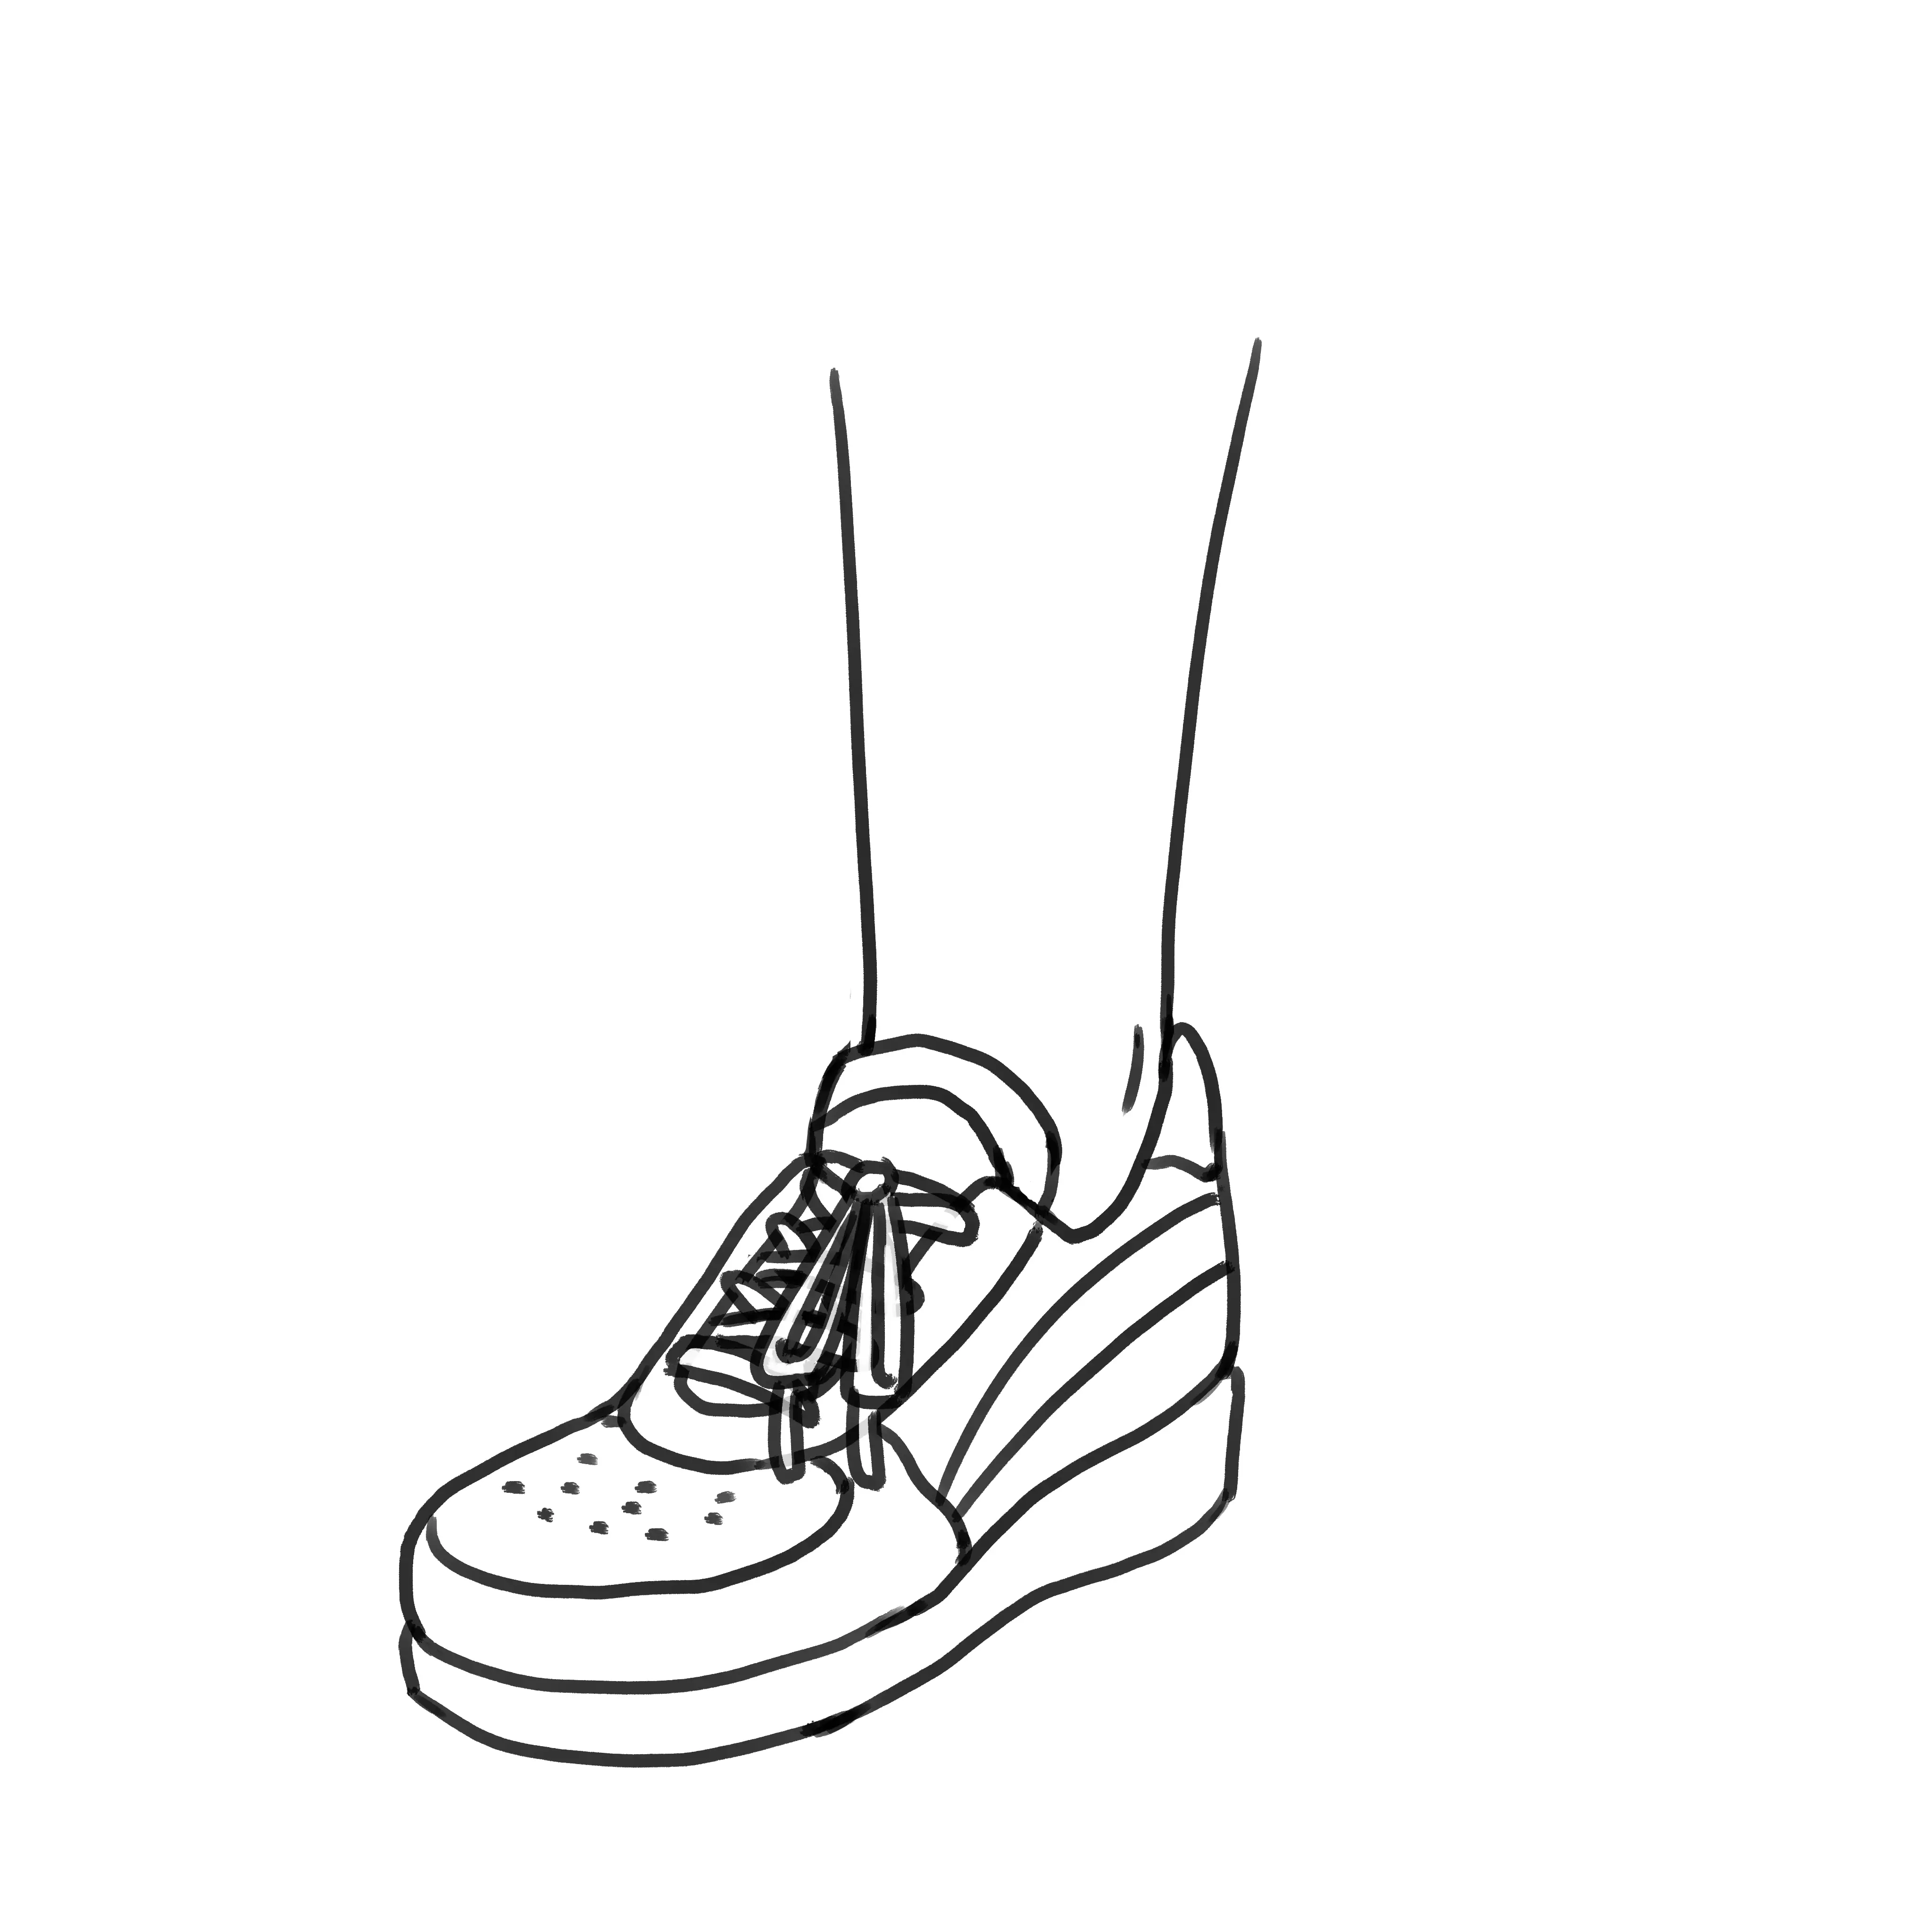
And there you have it!
Bonus:
DRAW THE SHOELACES
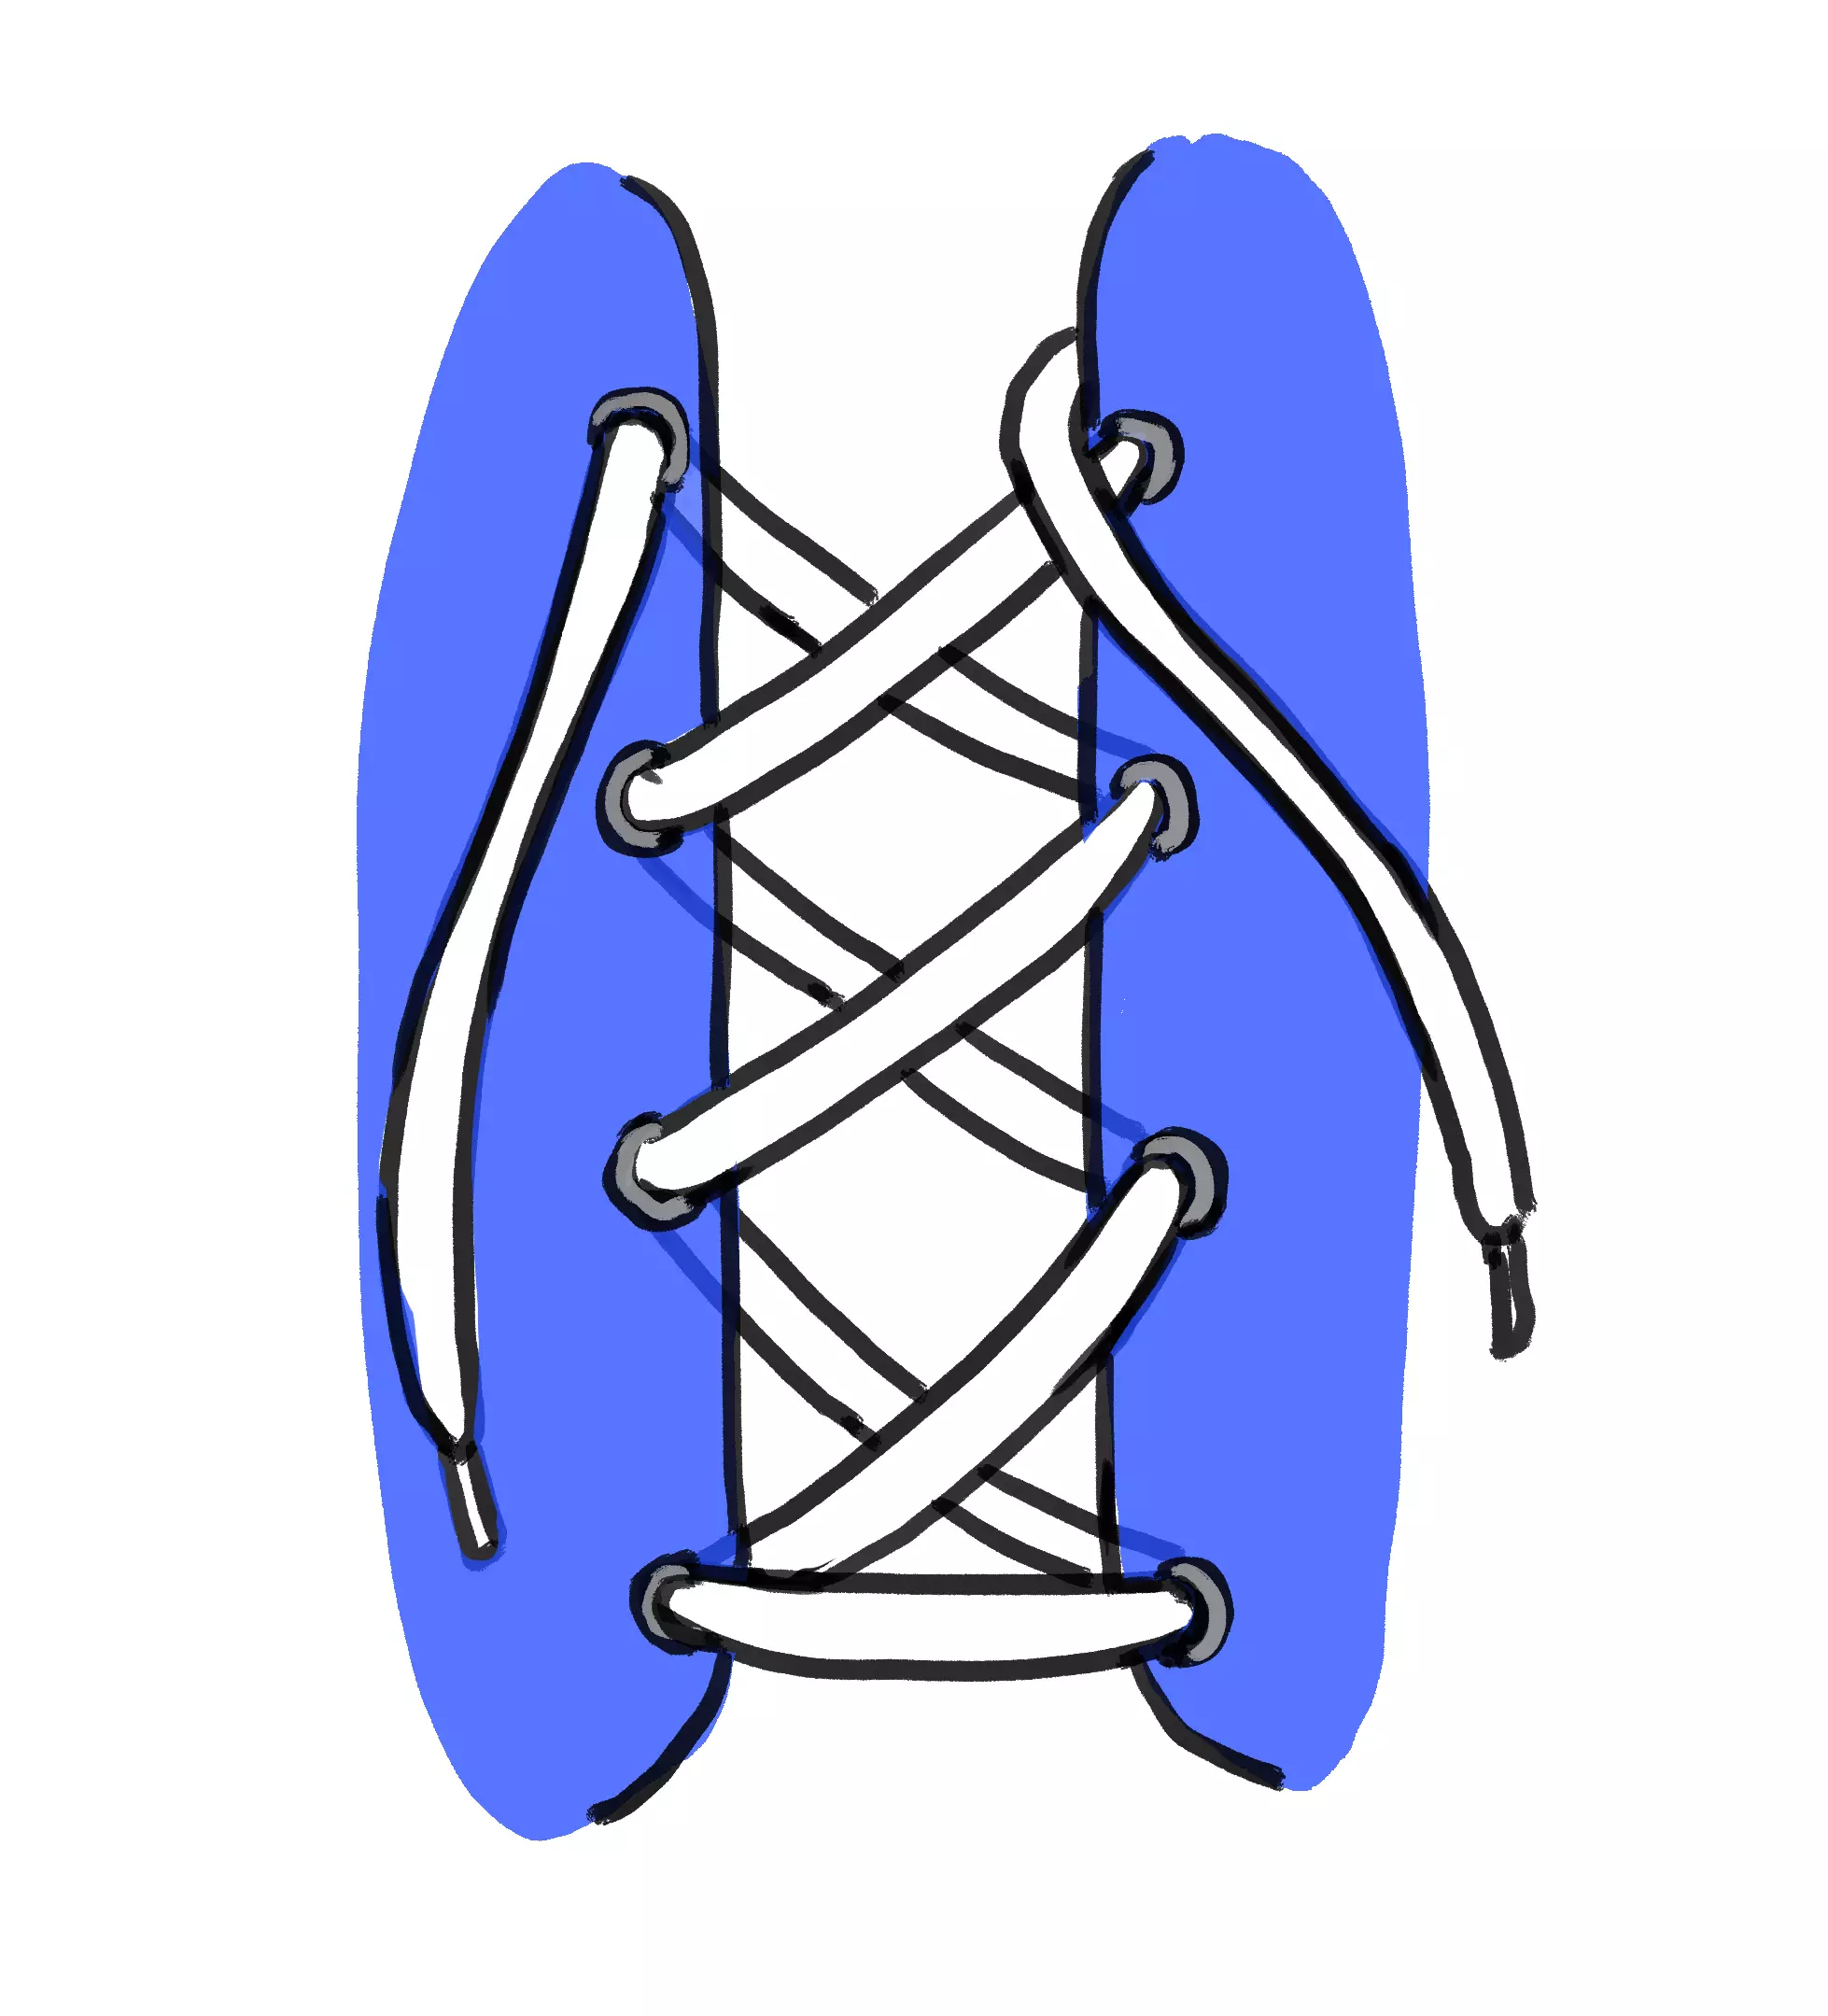
To help you understand how to install laces on a pair of shoes (here, sneakers, but it can be any type of laced shoe), I have made a diagram for you. The part of the laces under the blue area shows when the lace passes under the fabric. Instead of loose laces, you can tie a knot at the very top, as done in the drawing of the sneaker.
There may be different ways of lacing, but this example is common.
DRAWING DRESS SHOES
Perfect for going to work or a wedding! To make derbies more feminine, it will suffice to shorten the shoe a bit so it's closer to the tip of the foot, as dress shoes are often a bit pointed.
We start with the overall shape of the shoe, including the tongue because it will not protrude much.
We then move on to cutting fabric over all of this.
We add the laces and the sole! Be careful not to forget the heel volume.

And there you go!
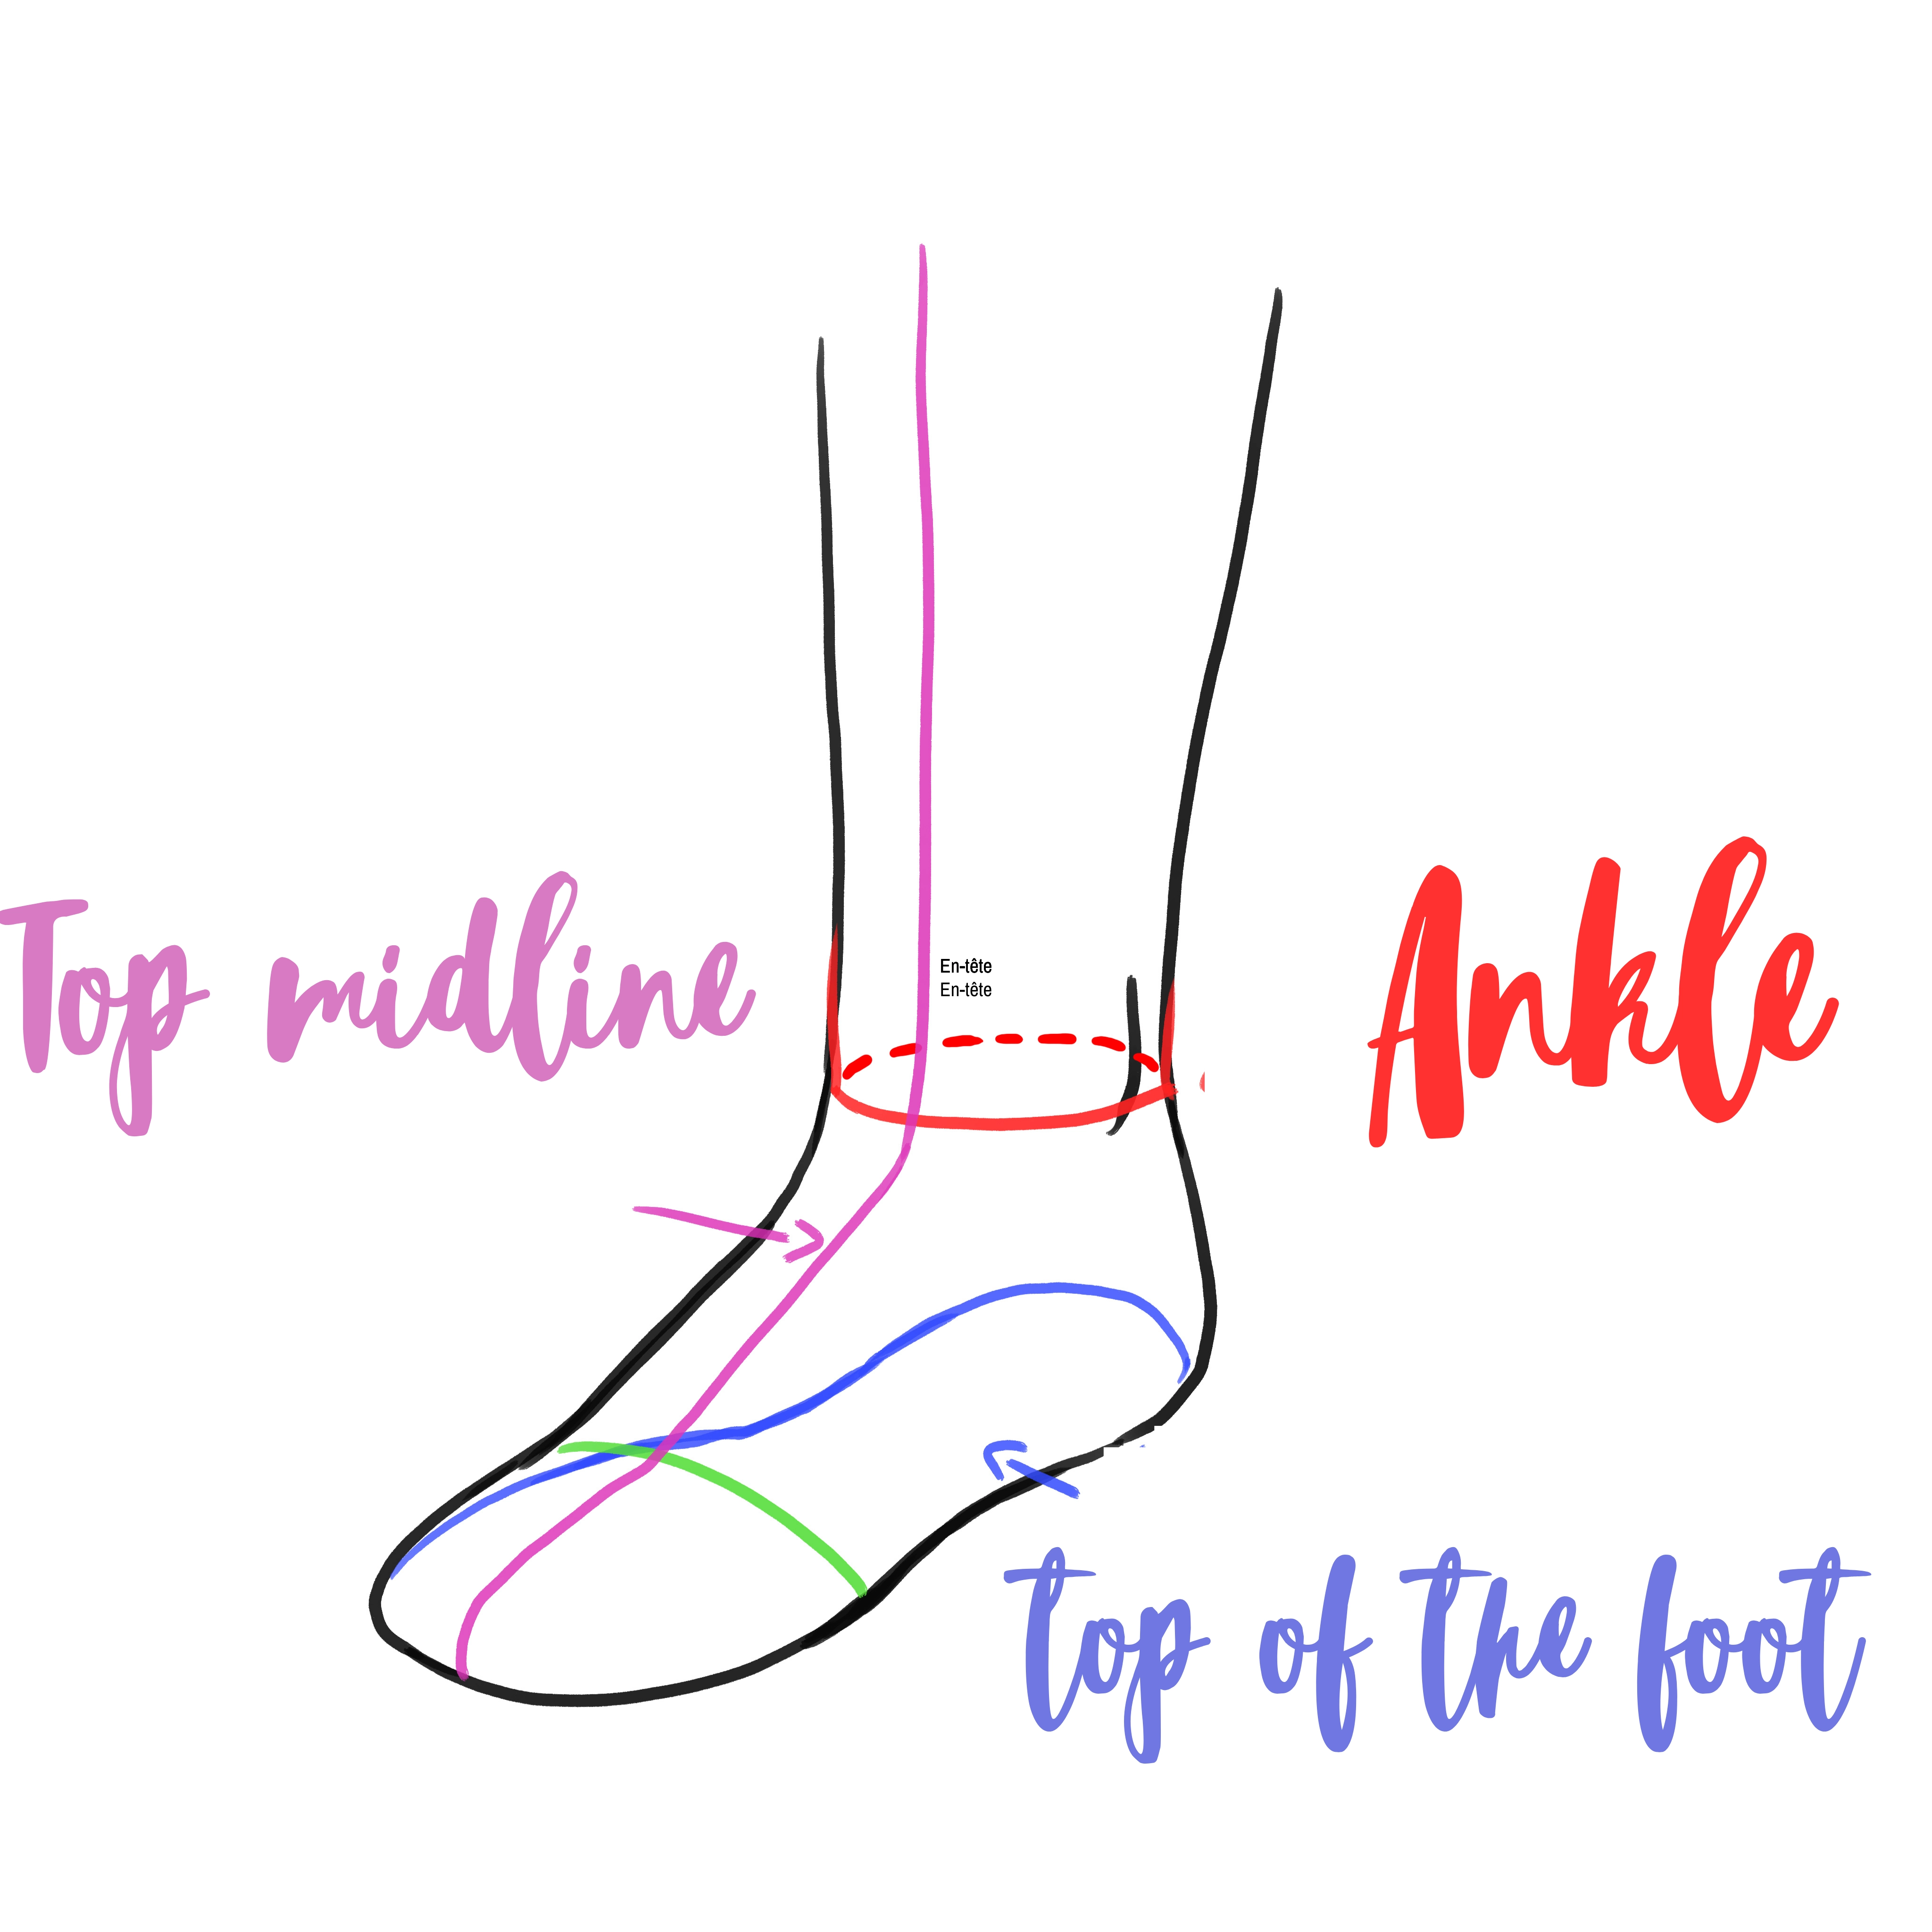
DRAWING A FOOT FOR HEELS
Just like with the flat foot, we will use this base to put the high-heeled shoes on top. I made you a diagram with the same information as for the flat foot, to see how the different elements have moved.
THE PUMPS
Pumps are often the first shoes we think of when we talk about heeled shoes. It's a basic model whose shape allows us to easily move on to other types of shoes later on.
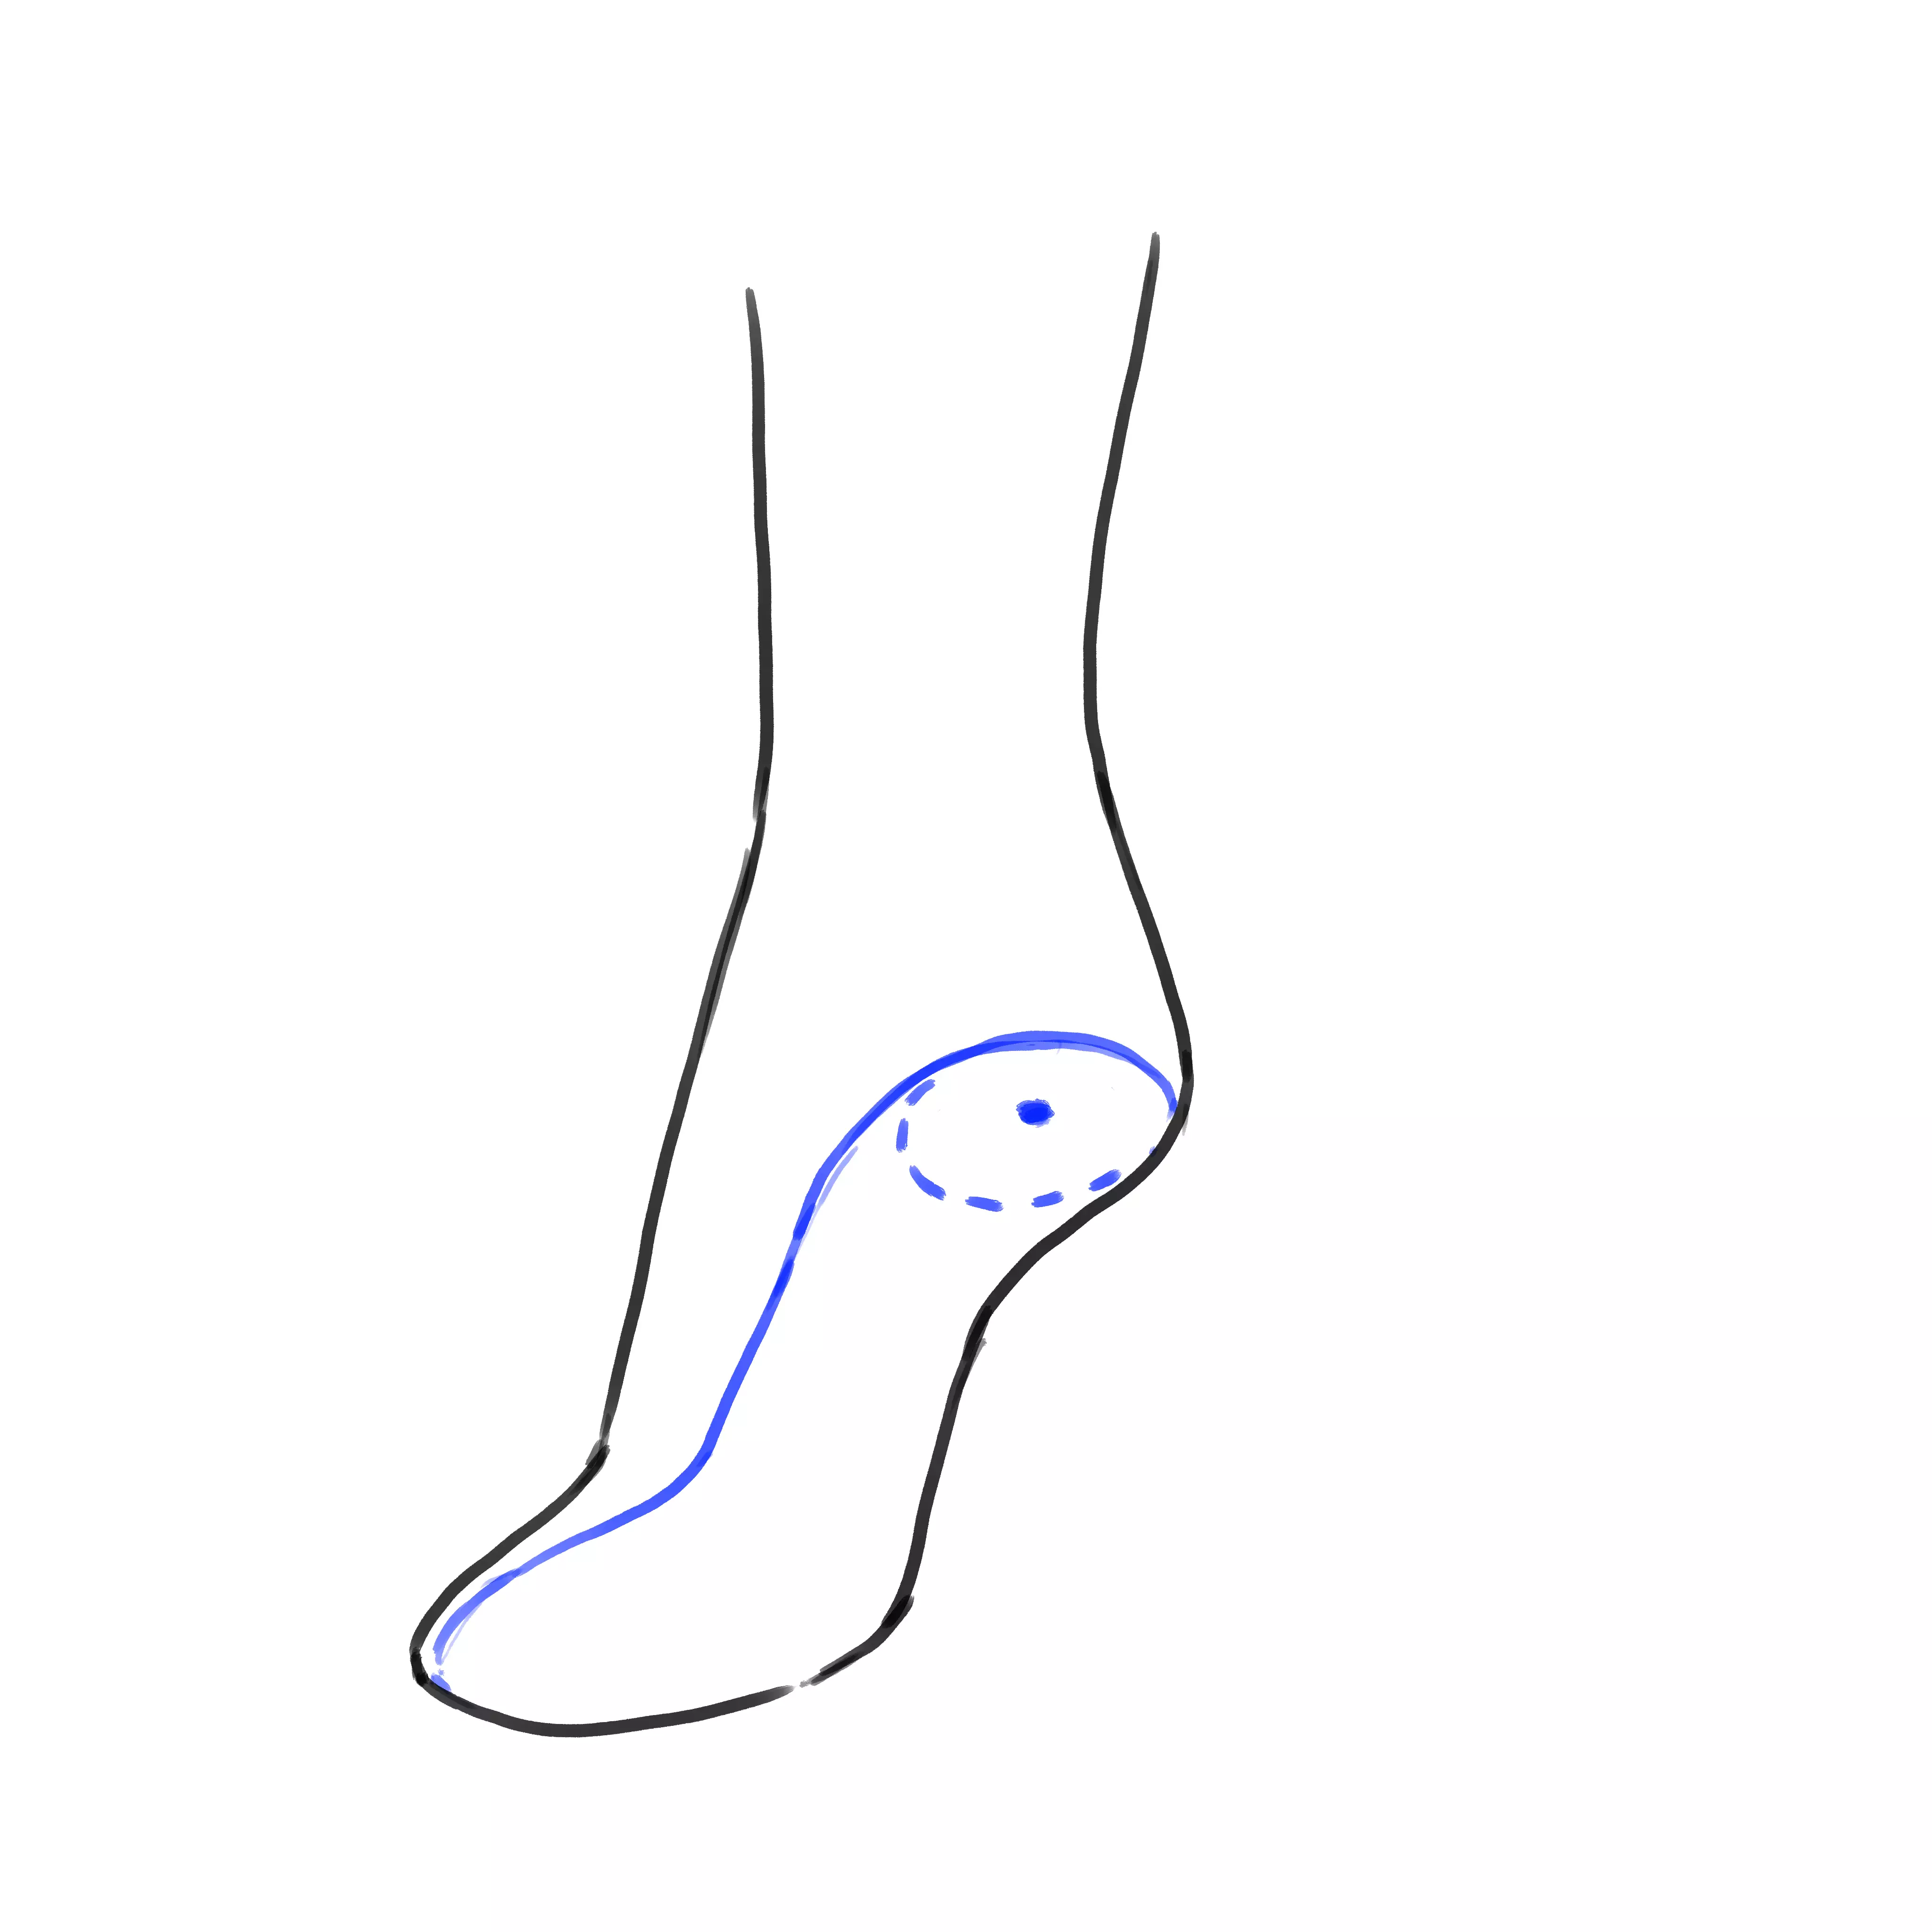
We start by identifying where the heel will originate from under the foot. This prevents us from placing it randomly.
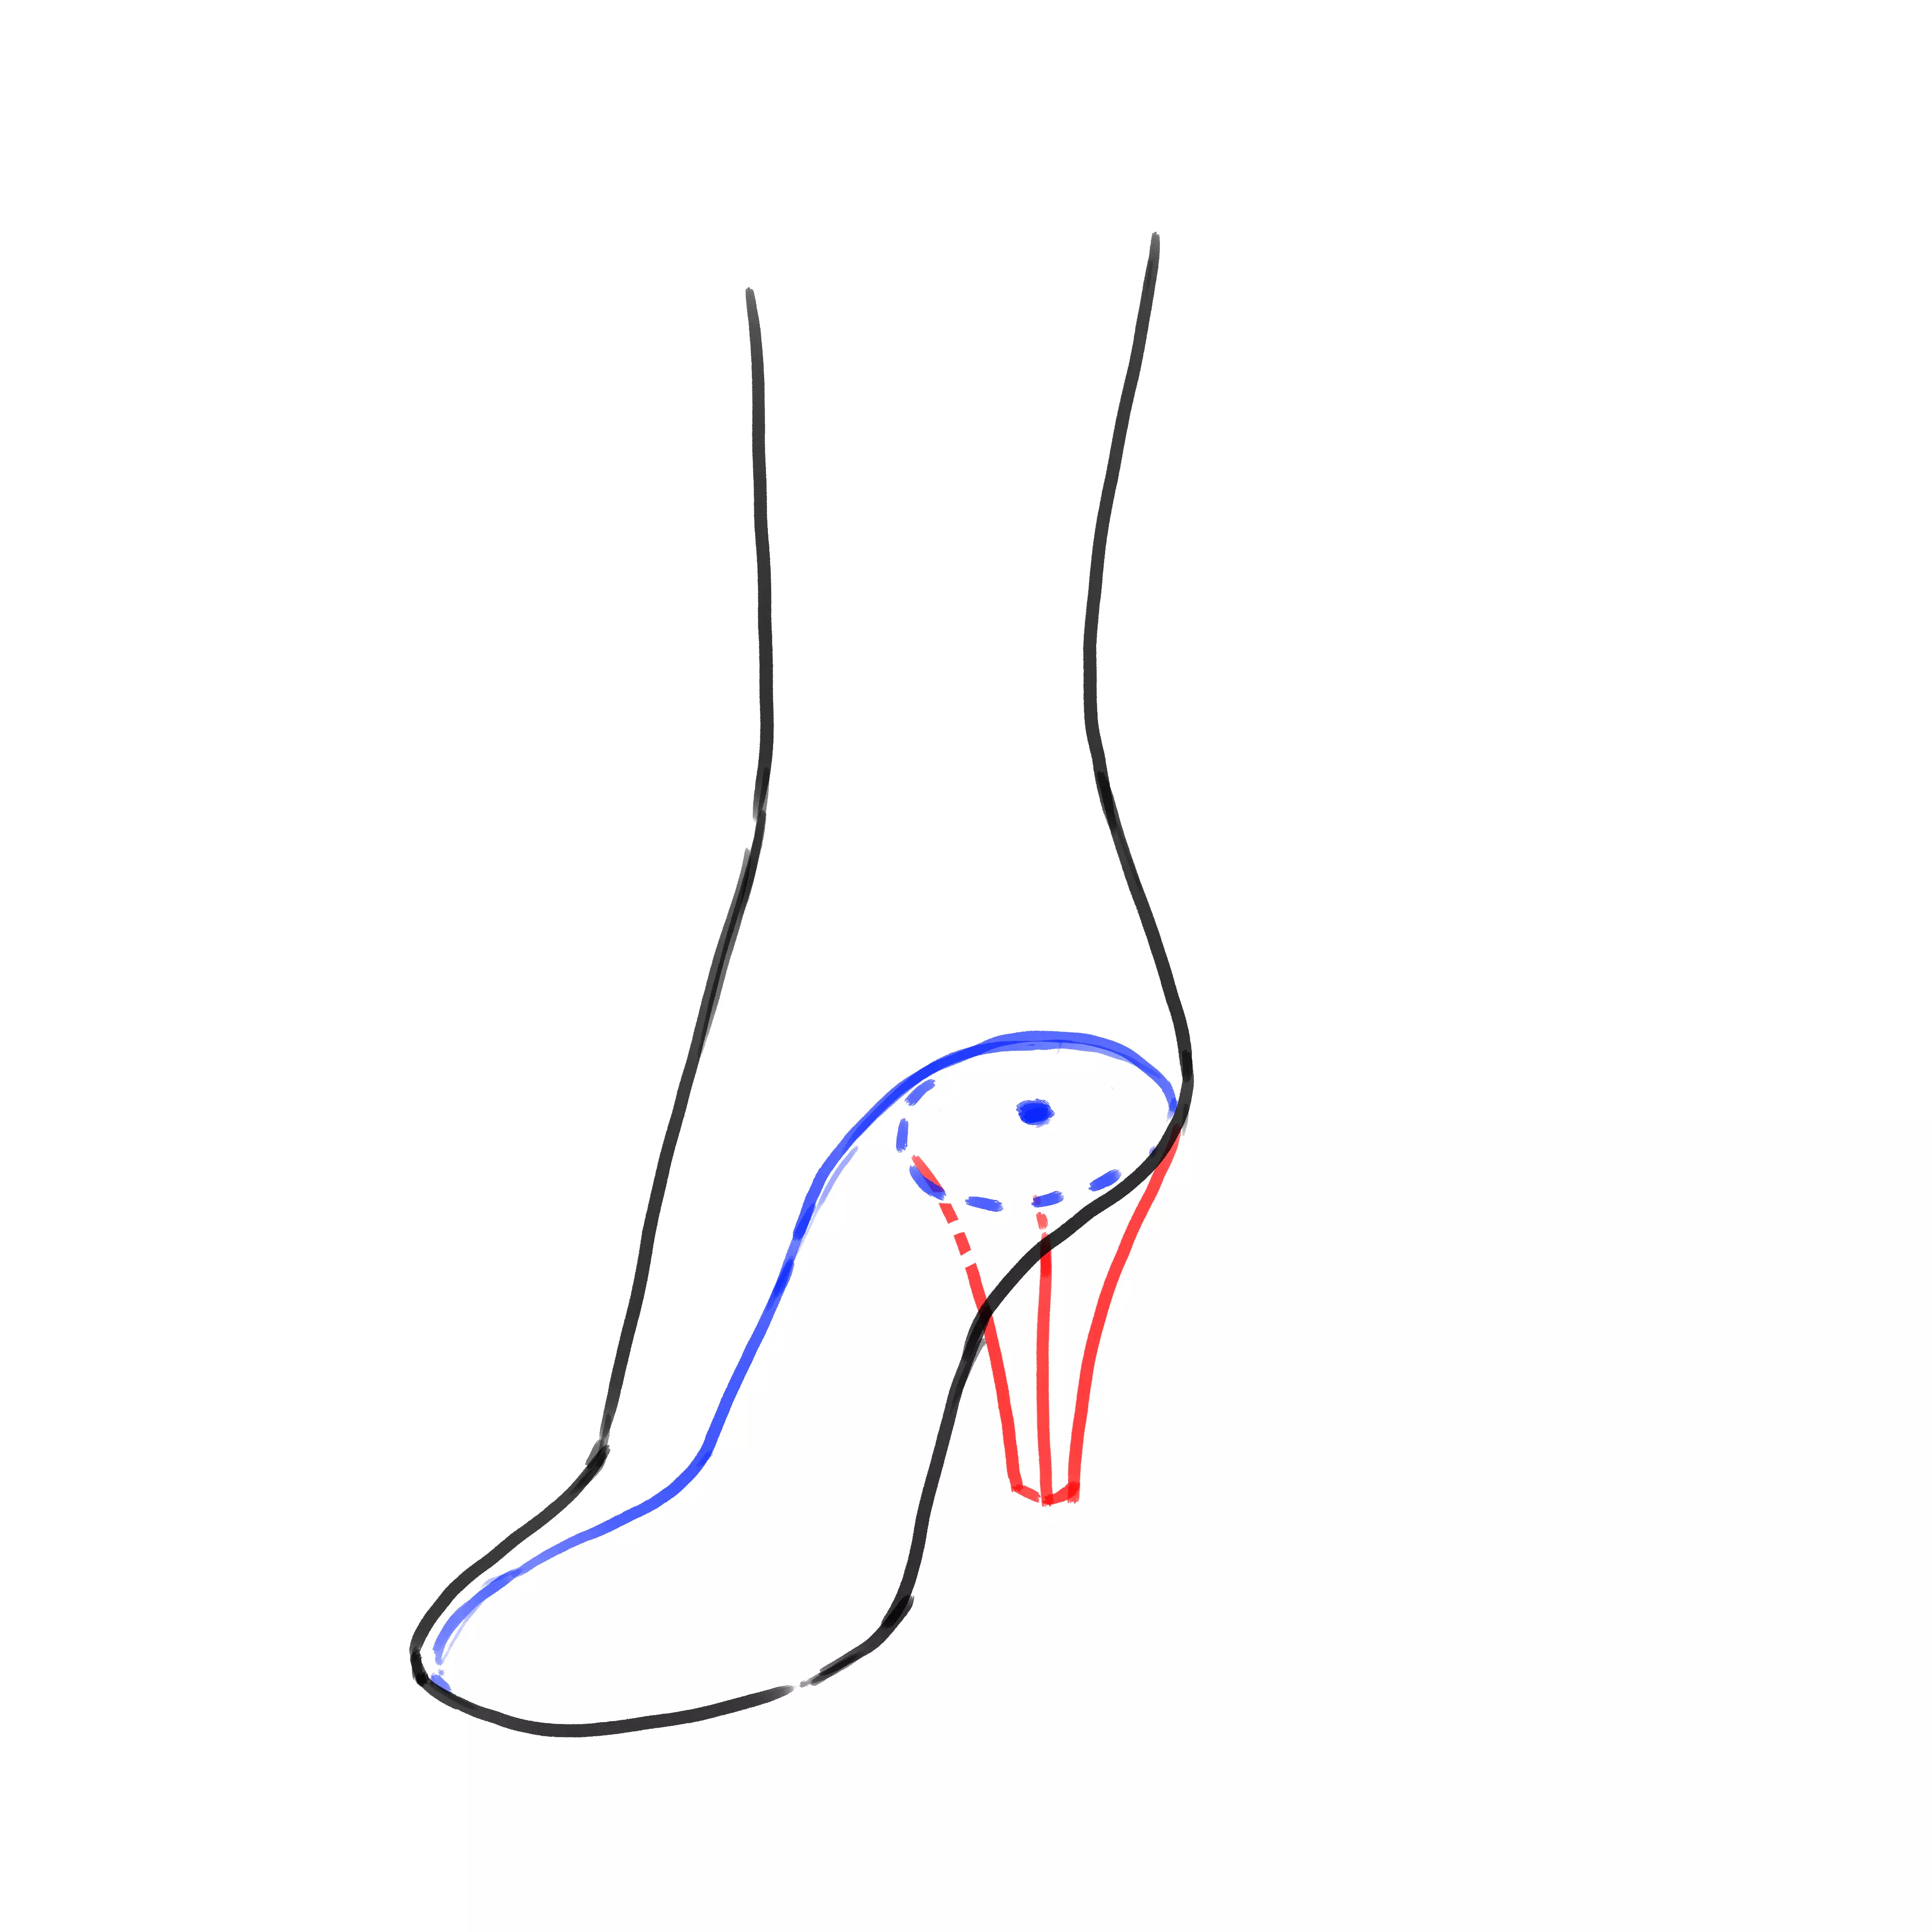
We make the heel from this area. Be careful not to lower it too much, it must stay in perspective. Lowering it too much could make it look like the heel is deviating to the side instead of staying well in its axis in the middle of the width of the foot.
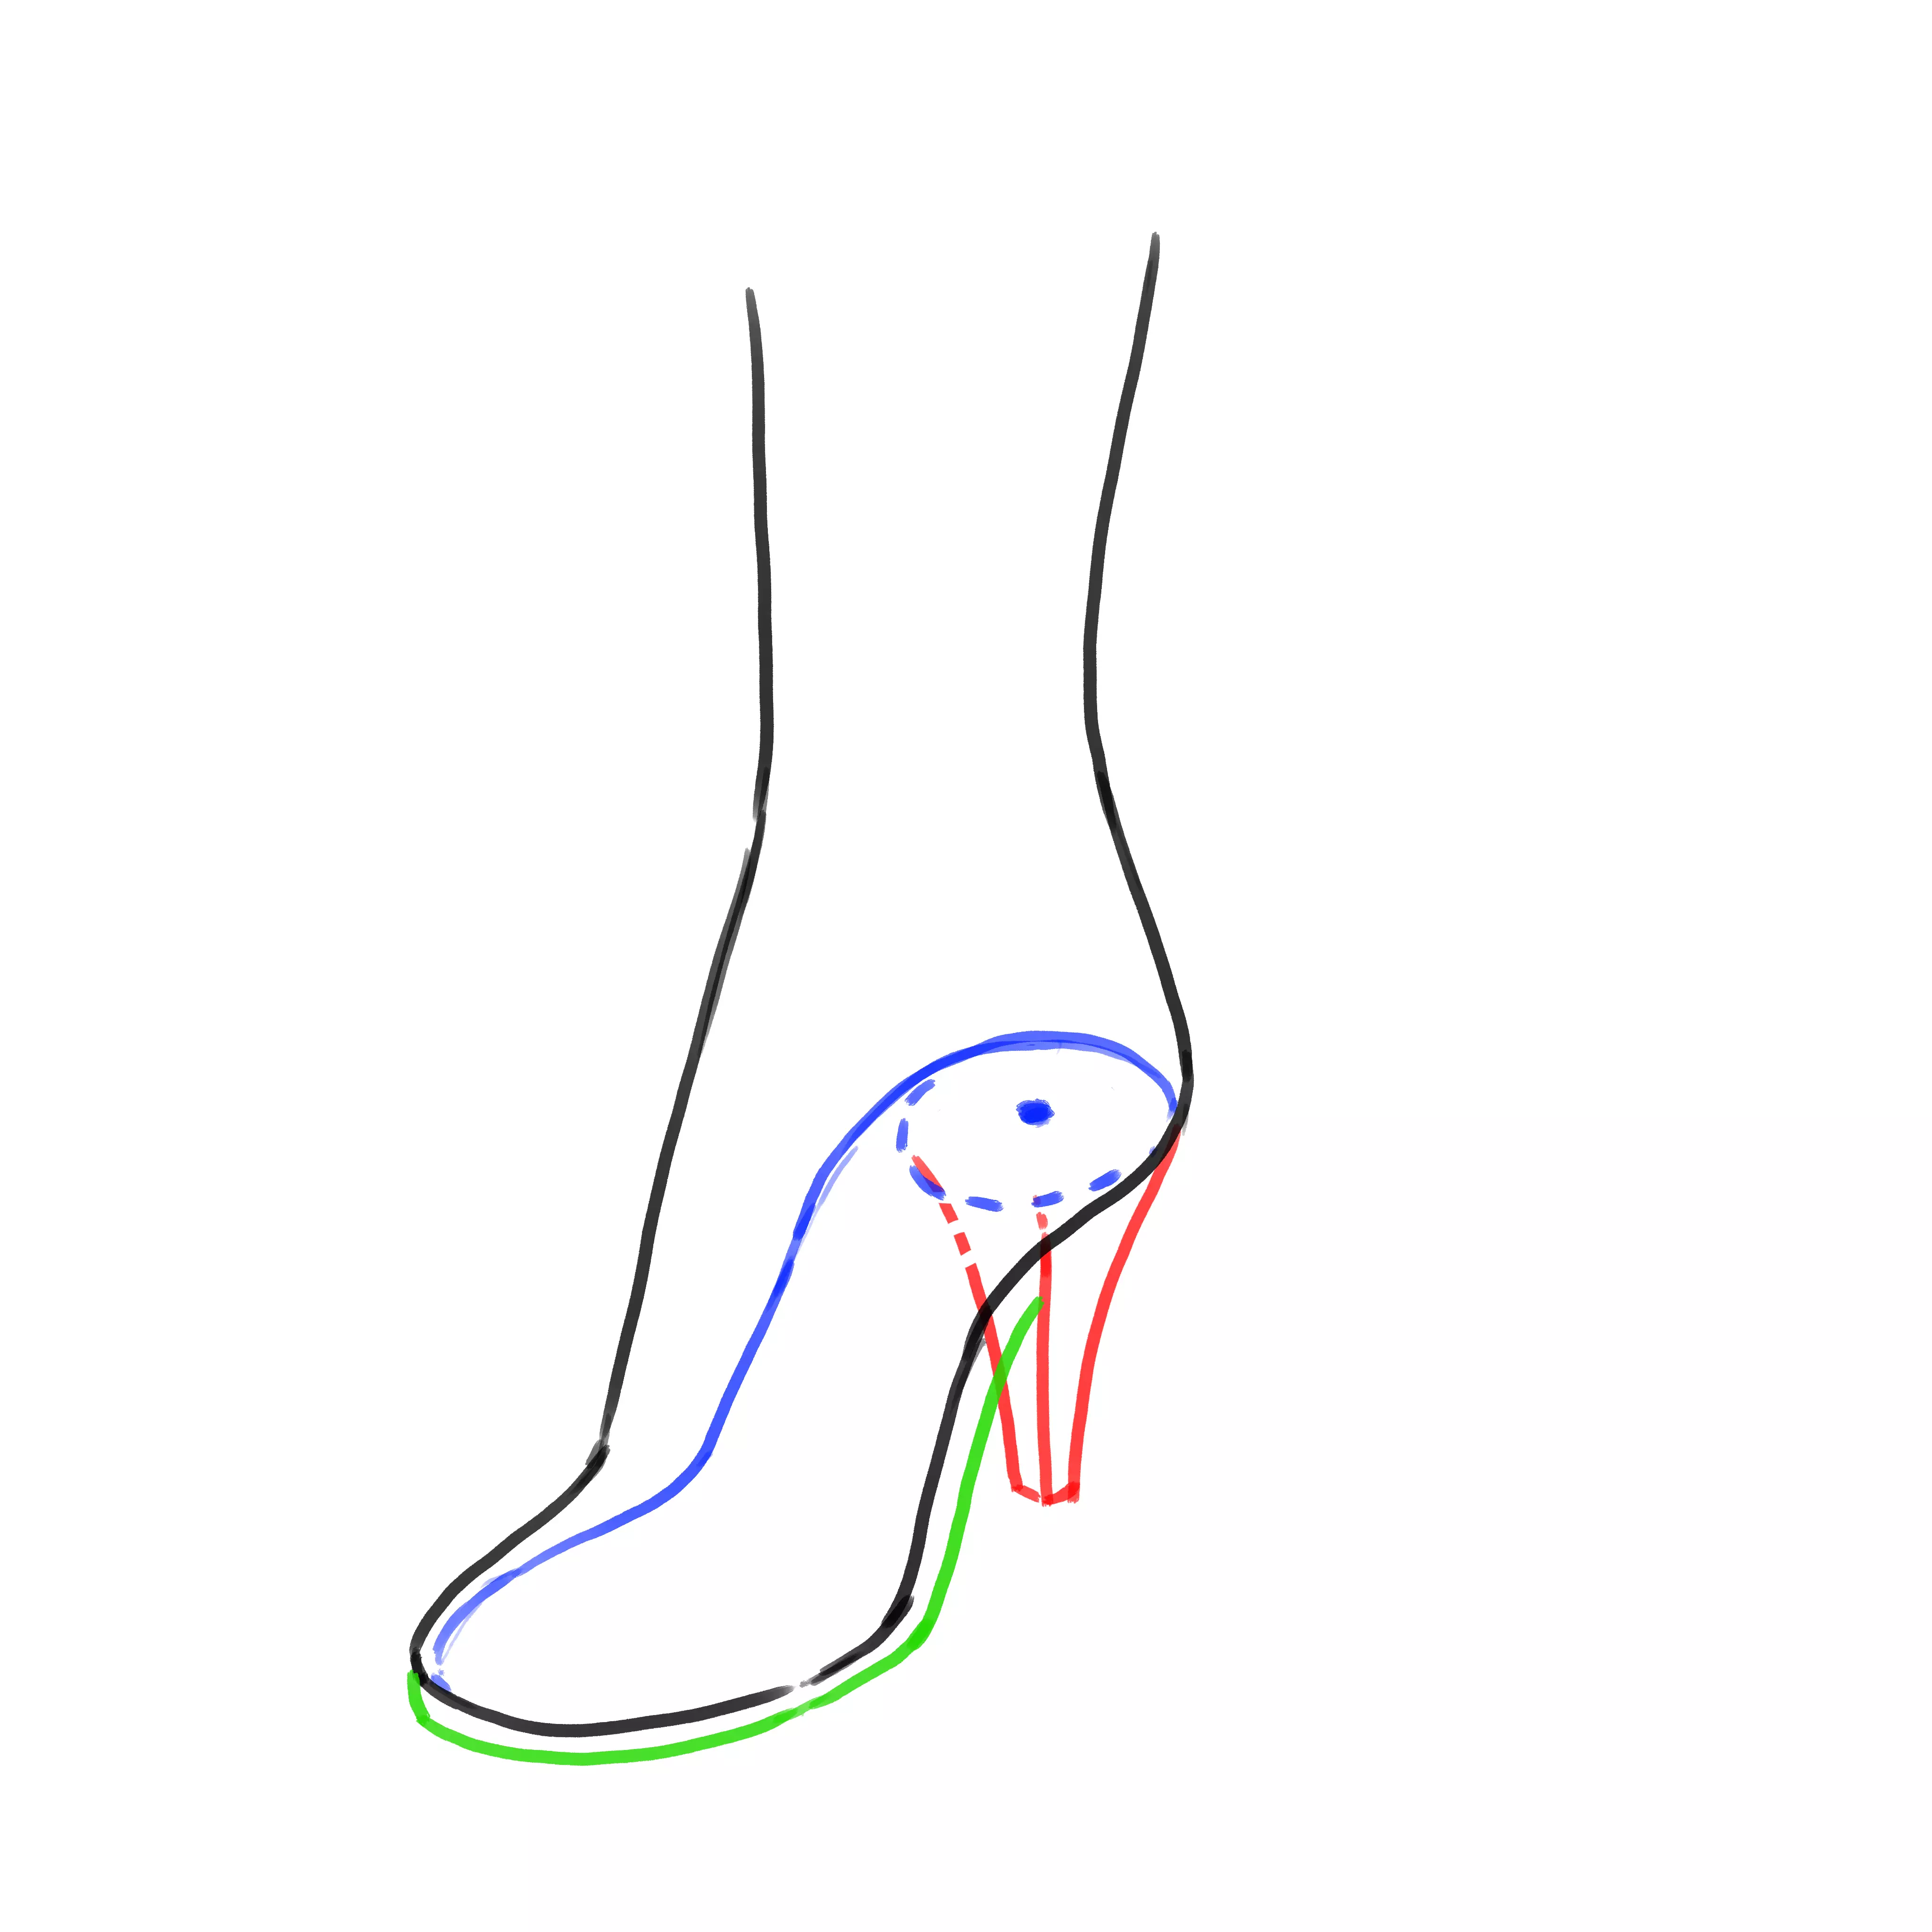
We add the sole. Sometimes it is so thin that we can't see it, but there might be one.
We are now shaping the shoe, a bit thicker than the foot if we want to be realistic.
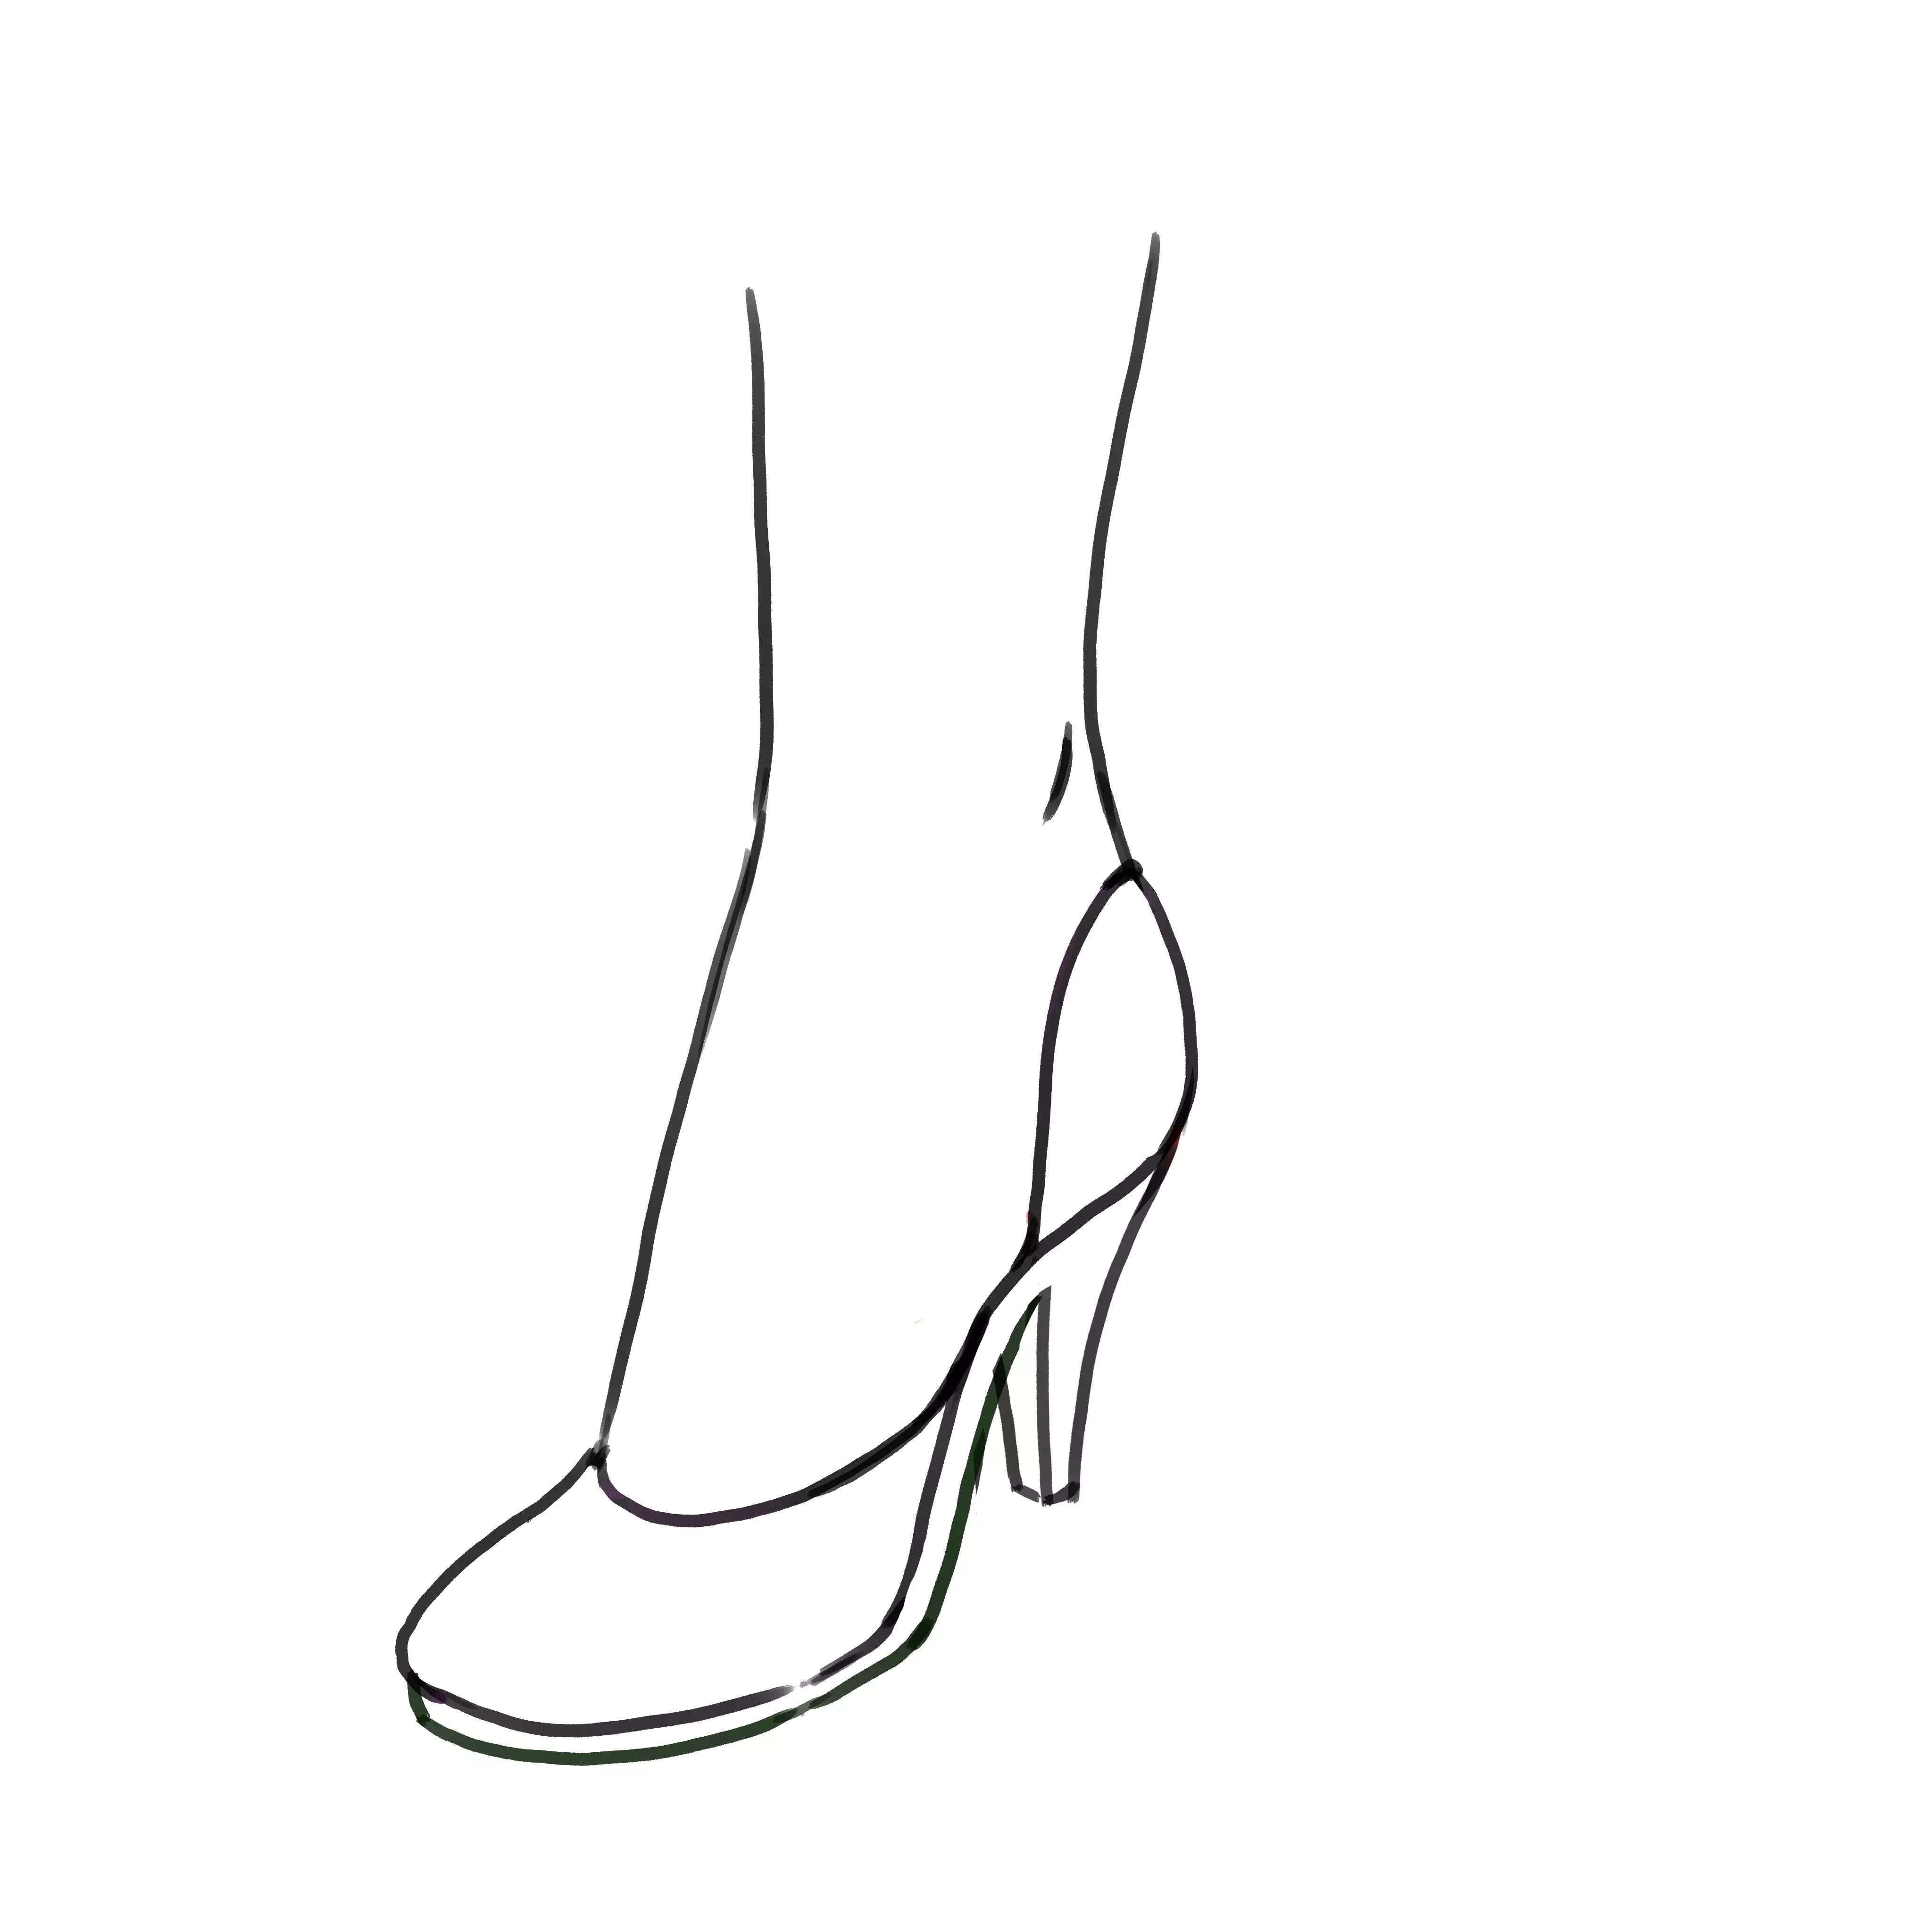
And here is the result!
THE HEEL BOOT
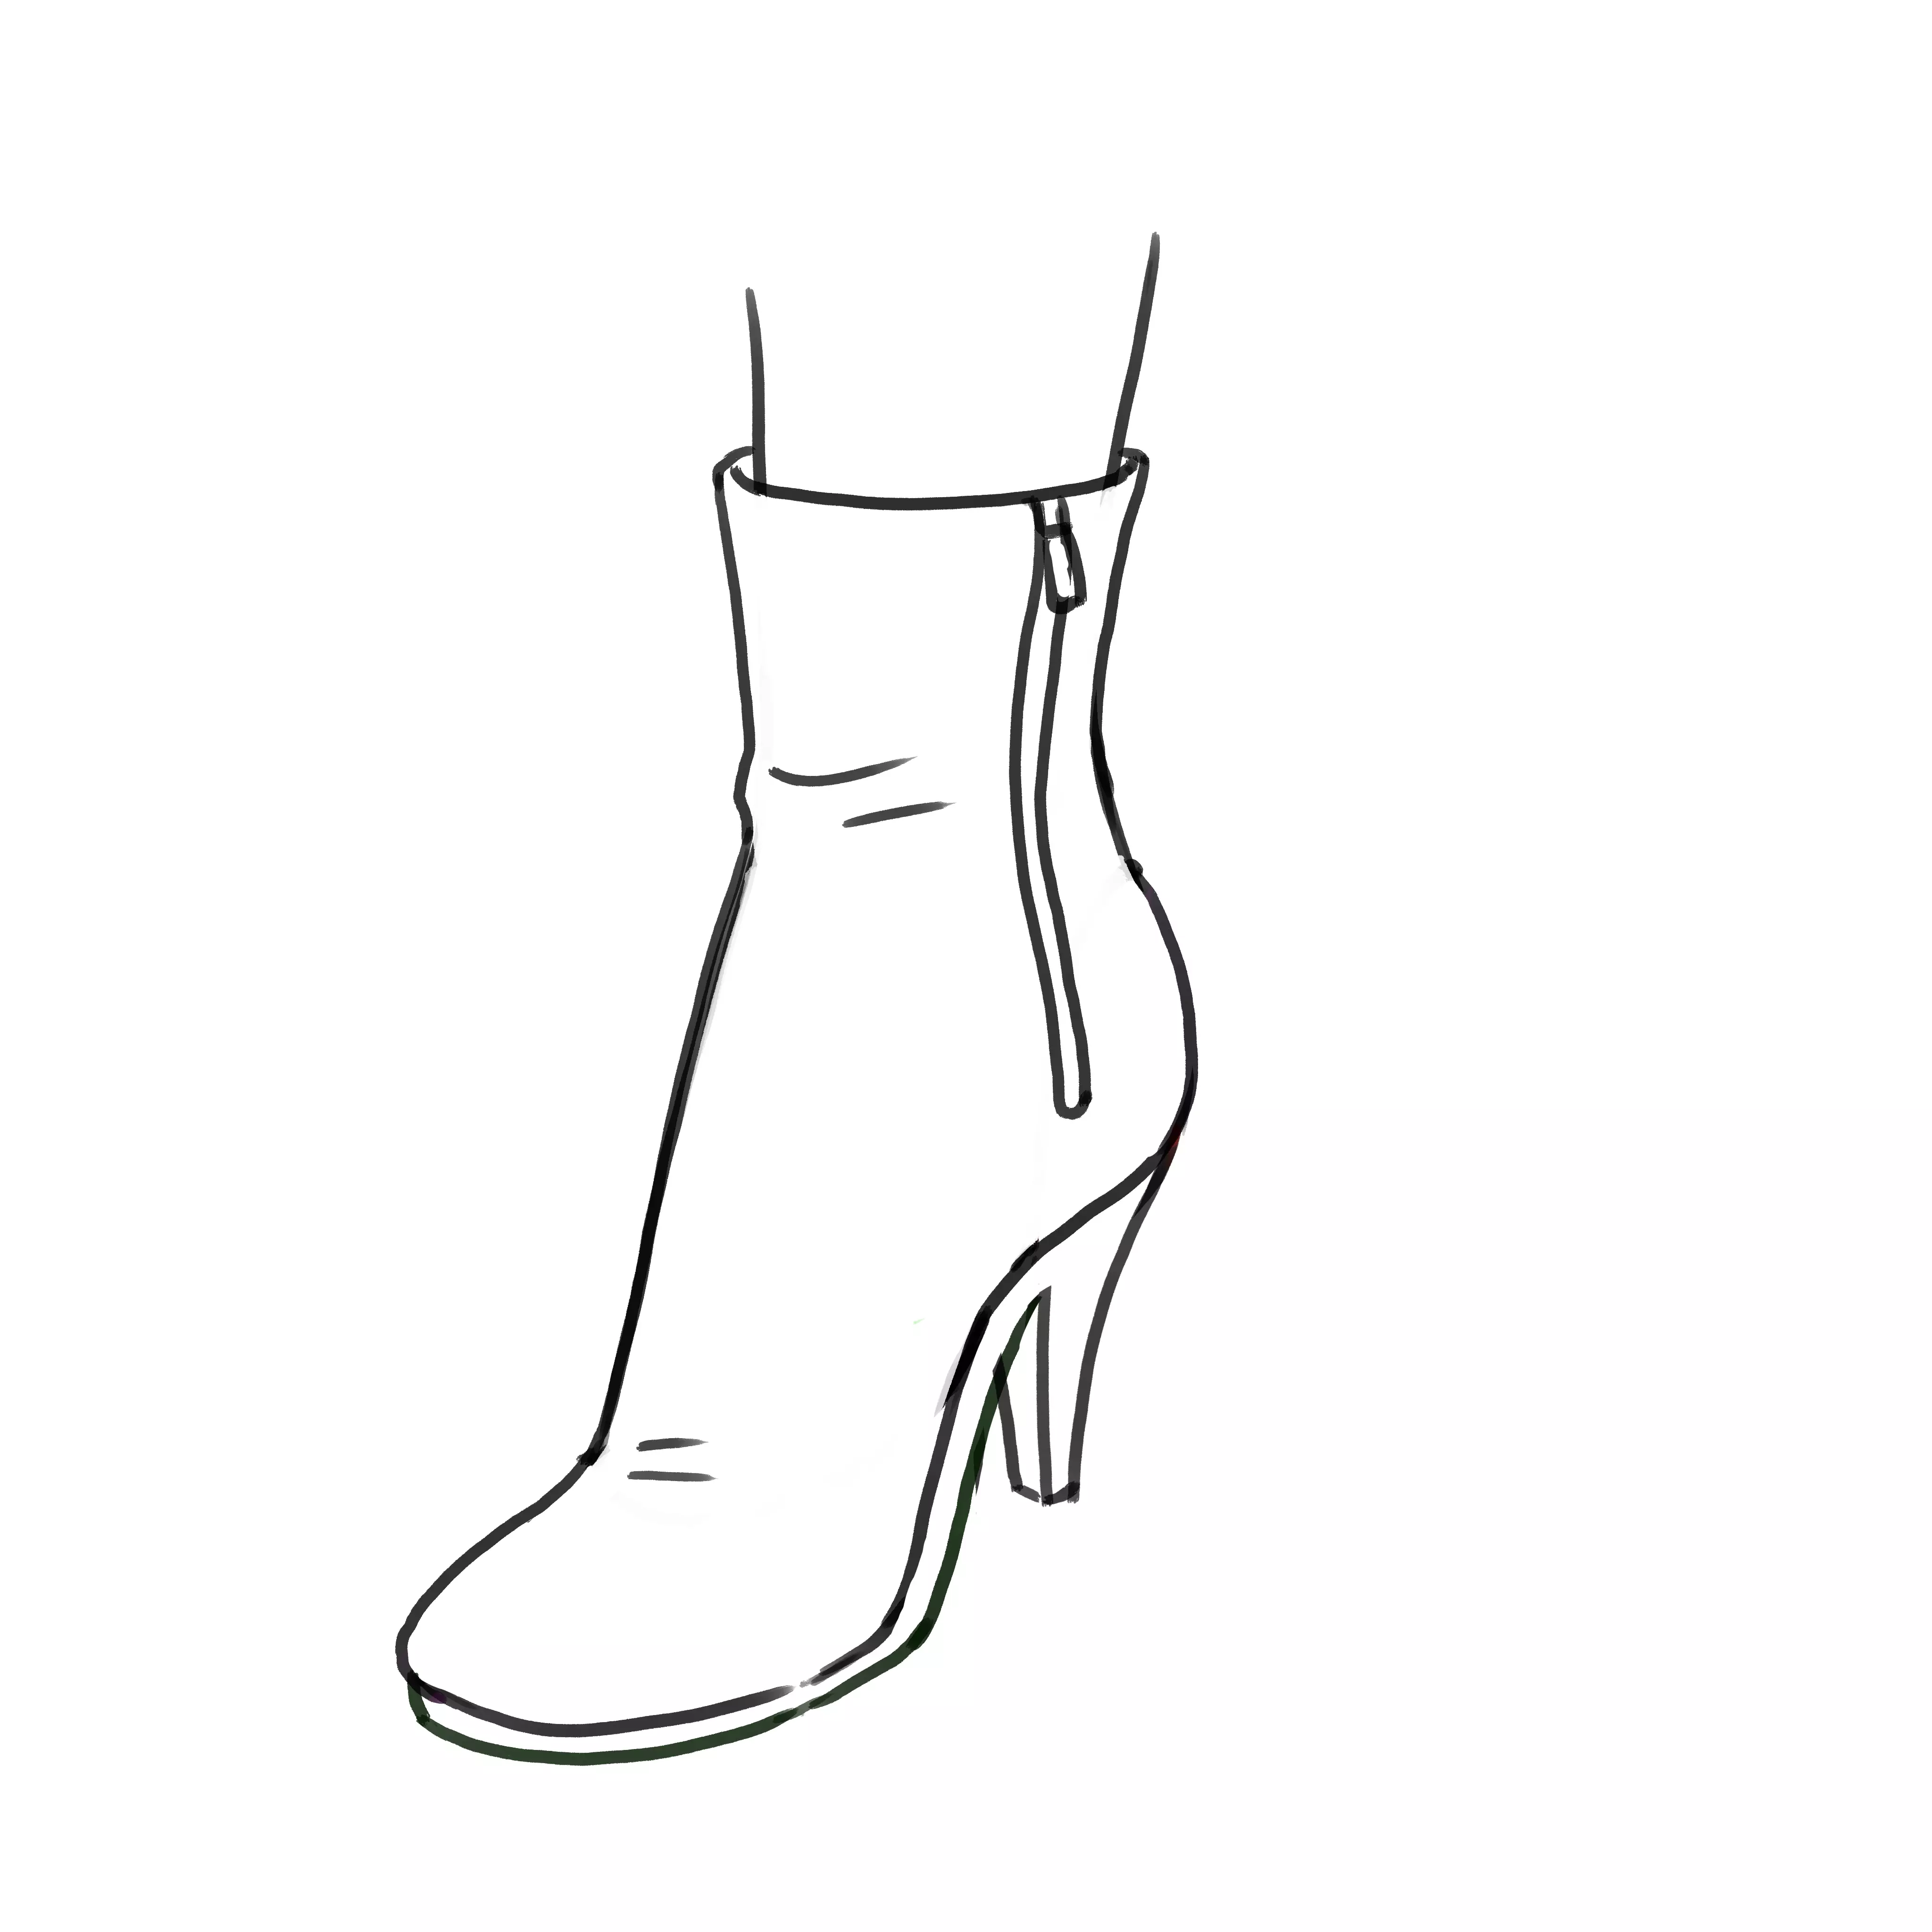
Now that we have this base of pumps, it's easy to vary. For ankle boots, we just change the shape of the shoe's body, making sure not to cling too tightly to the skin at the top of the shoe. It's not very thin, so it's better to make a few folds at the points of flexion. I added a zipper, but it's not mandatory.
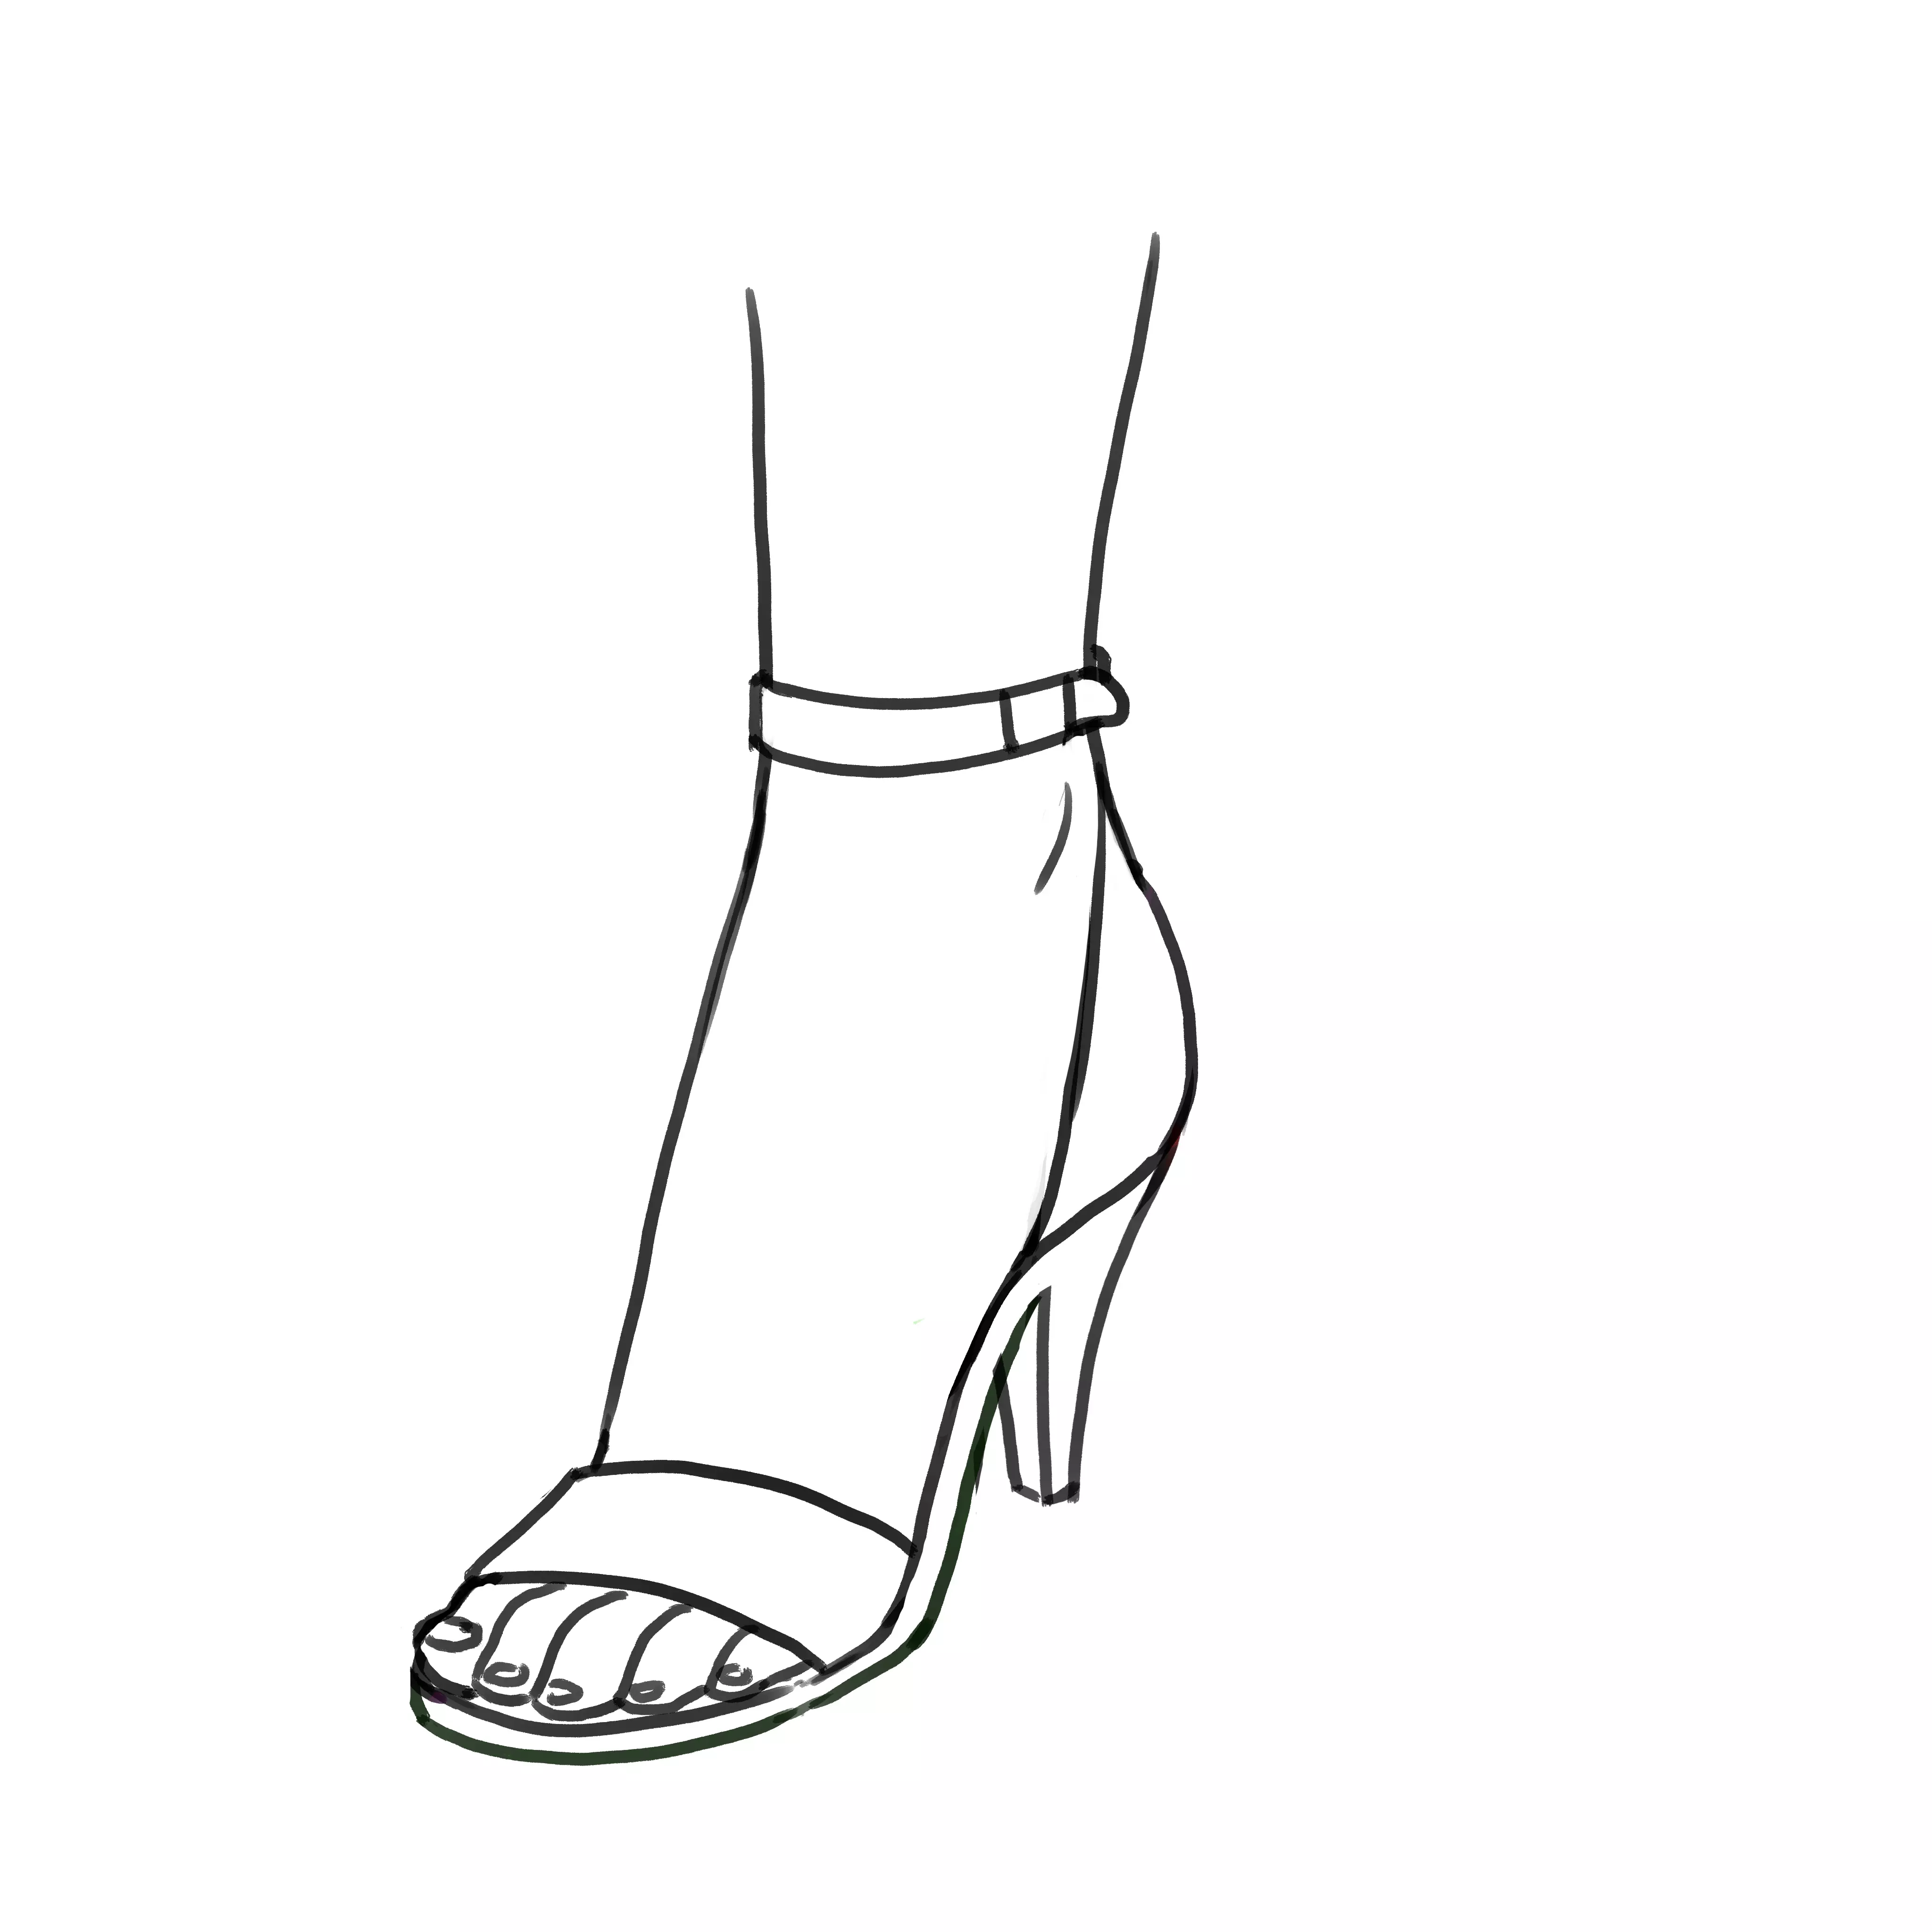
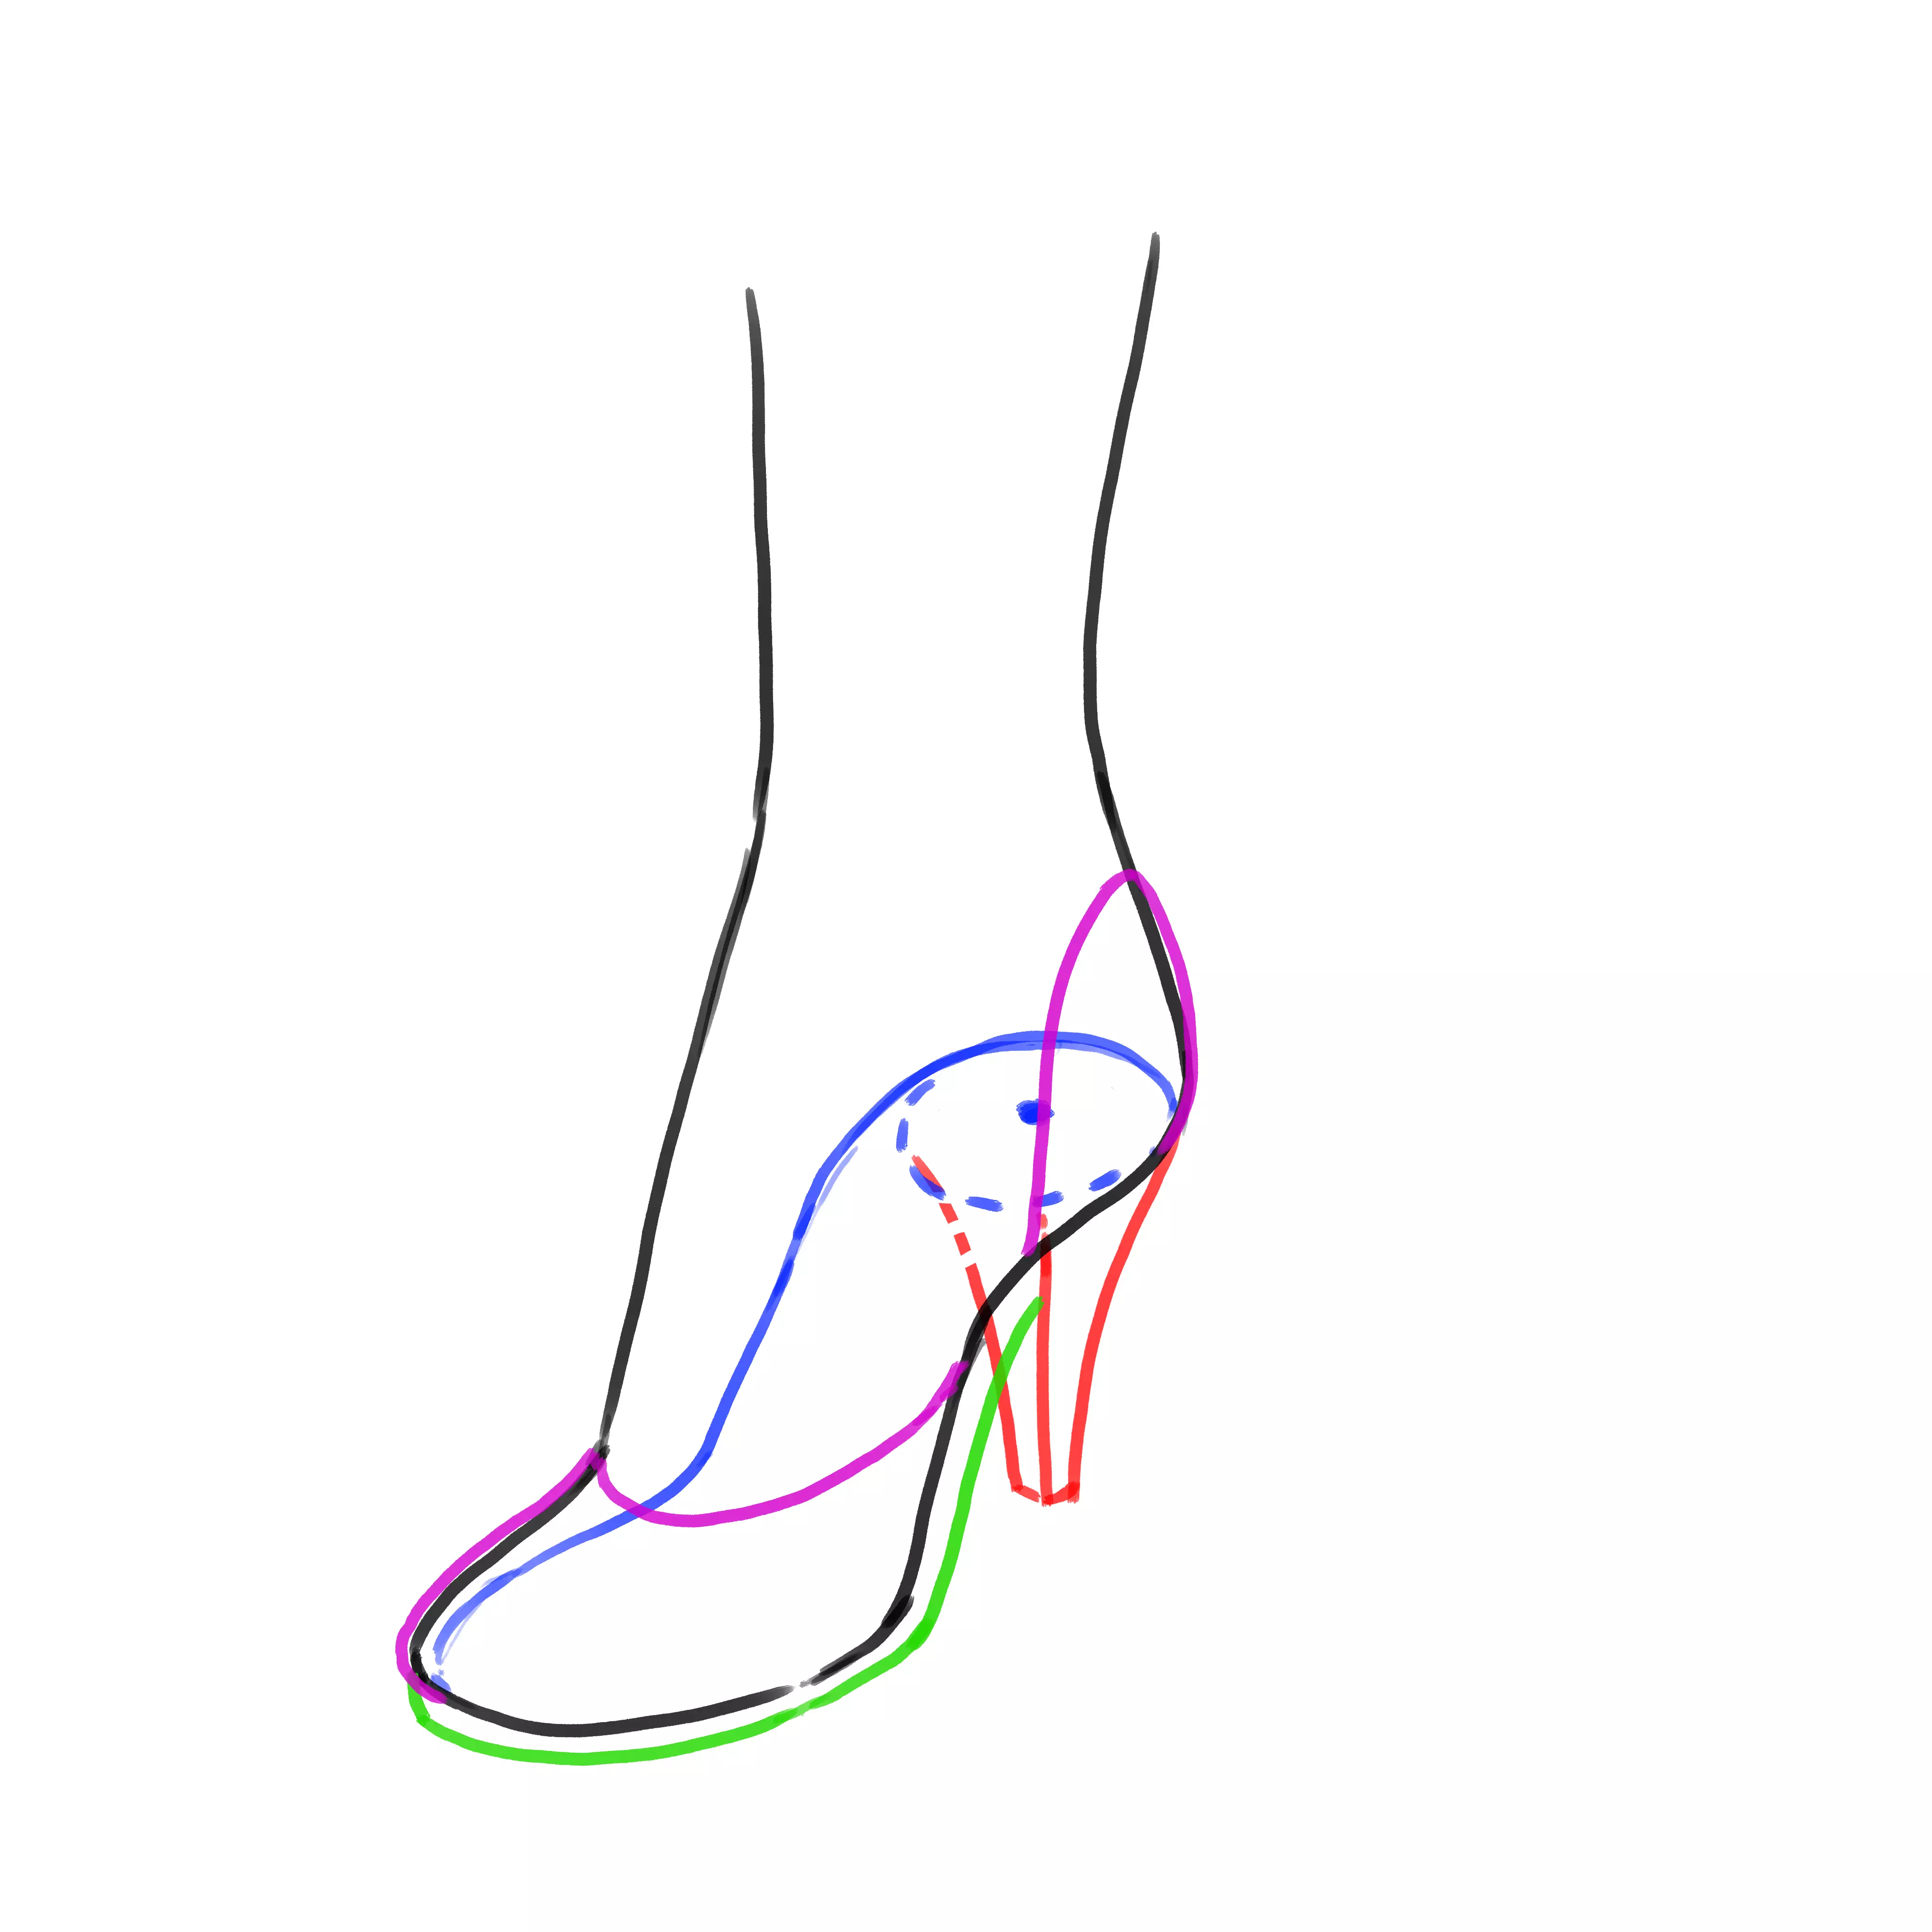
DRAW A HIGH-HEELED SANDAL

Starting from the shape of the pumps and opening them up, you can create sandals. I've added a strap here. For the foot inside, start with the basic “sock” foot shape and separate the toes from there. Erase any excess, and there you have it!
CONCLUSION
And there you have it, you now know how to draw different types of shoes and can invent variations from there. Whenever you hit a block, do not hesitate to take a model, then break it down into pieces in your head or in sketches to divide the steps as shown in this tutorial.
Here I have shown you only one viewpoint, seen from three-quarters and slightly from above. By observing carefully, you have the necessary elements to draw the shoes from other angles. As for the exercises in the chapter “Observation is the key to success” from the training “The Basics of Drawing,” you can create reference boards by imagining these shoes from different views (front, side...), paying attention to the proportions between the different elements.
I hope you find this tutorial useful and most importantly, have fun!
Illustrator and Writer:Natacha Peaster akaNayala
Popular Articles

Discussion
No comments yet.