How to Draw a Horse
Well then, I'm going to address a topic that many of you love and that features in a lot, a lot of stories! Horses! And because I know this subject is dear to your hearts, this article will be a bit longer than usual :)
THE OBSERVATION OF THE HORSE
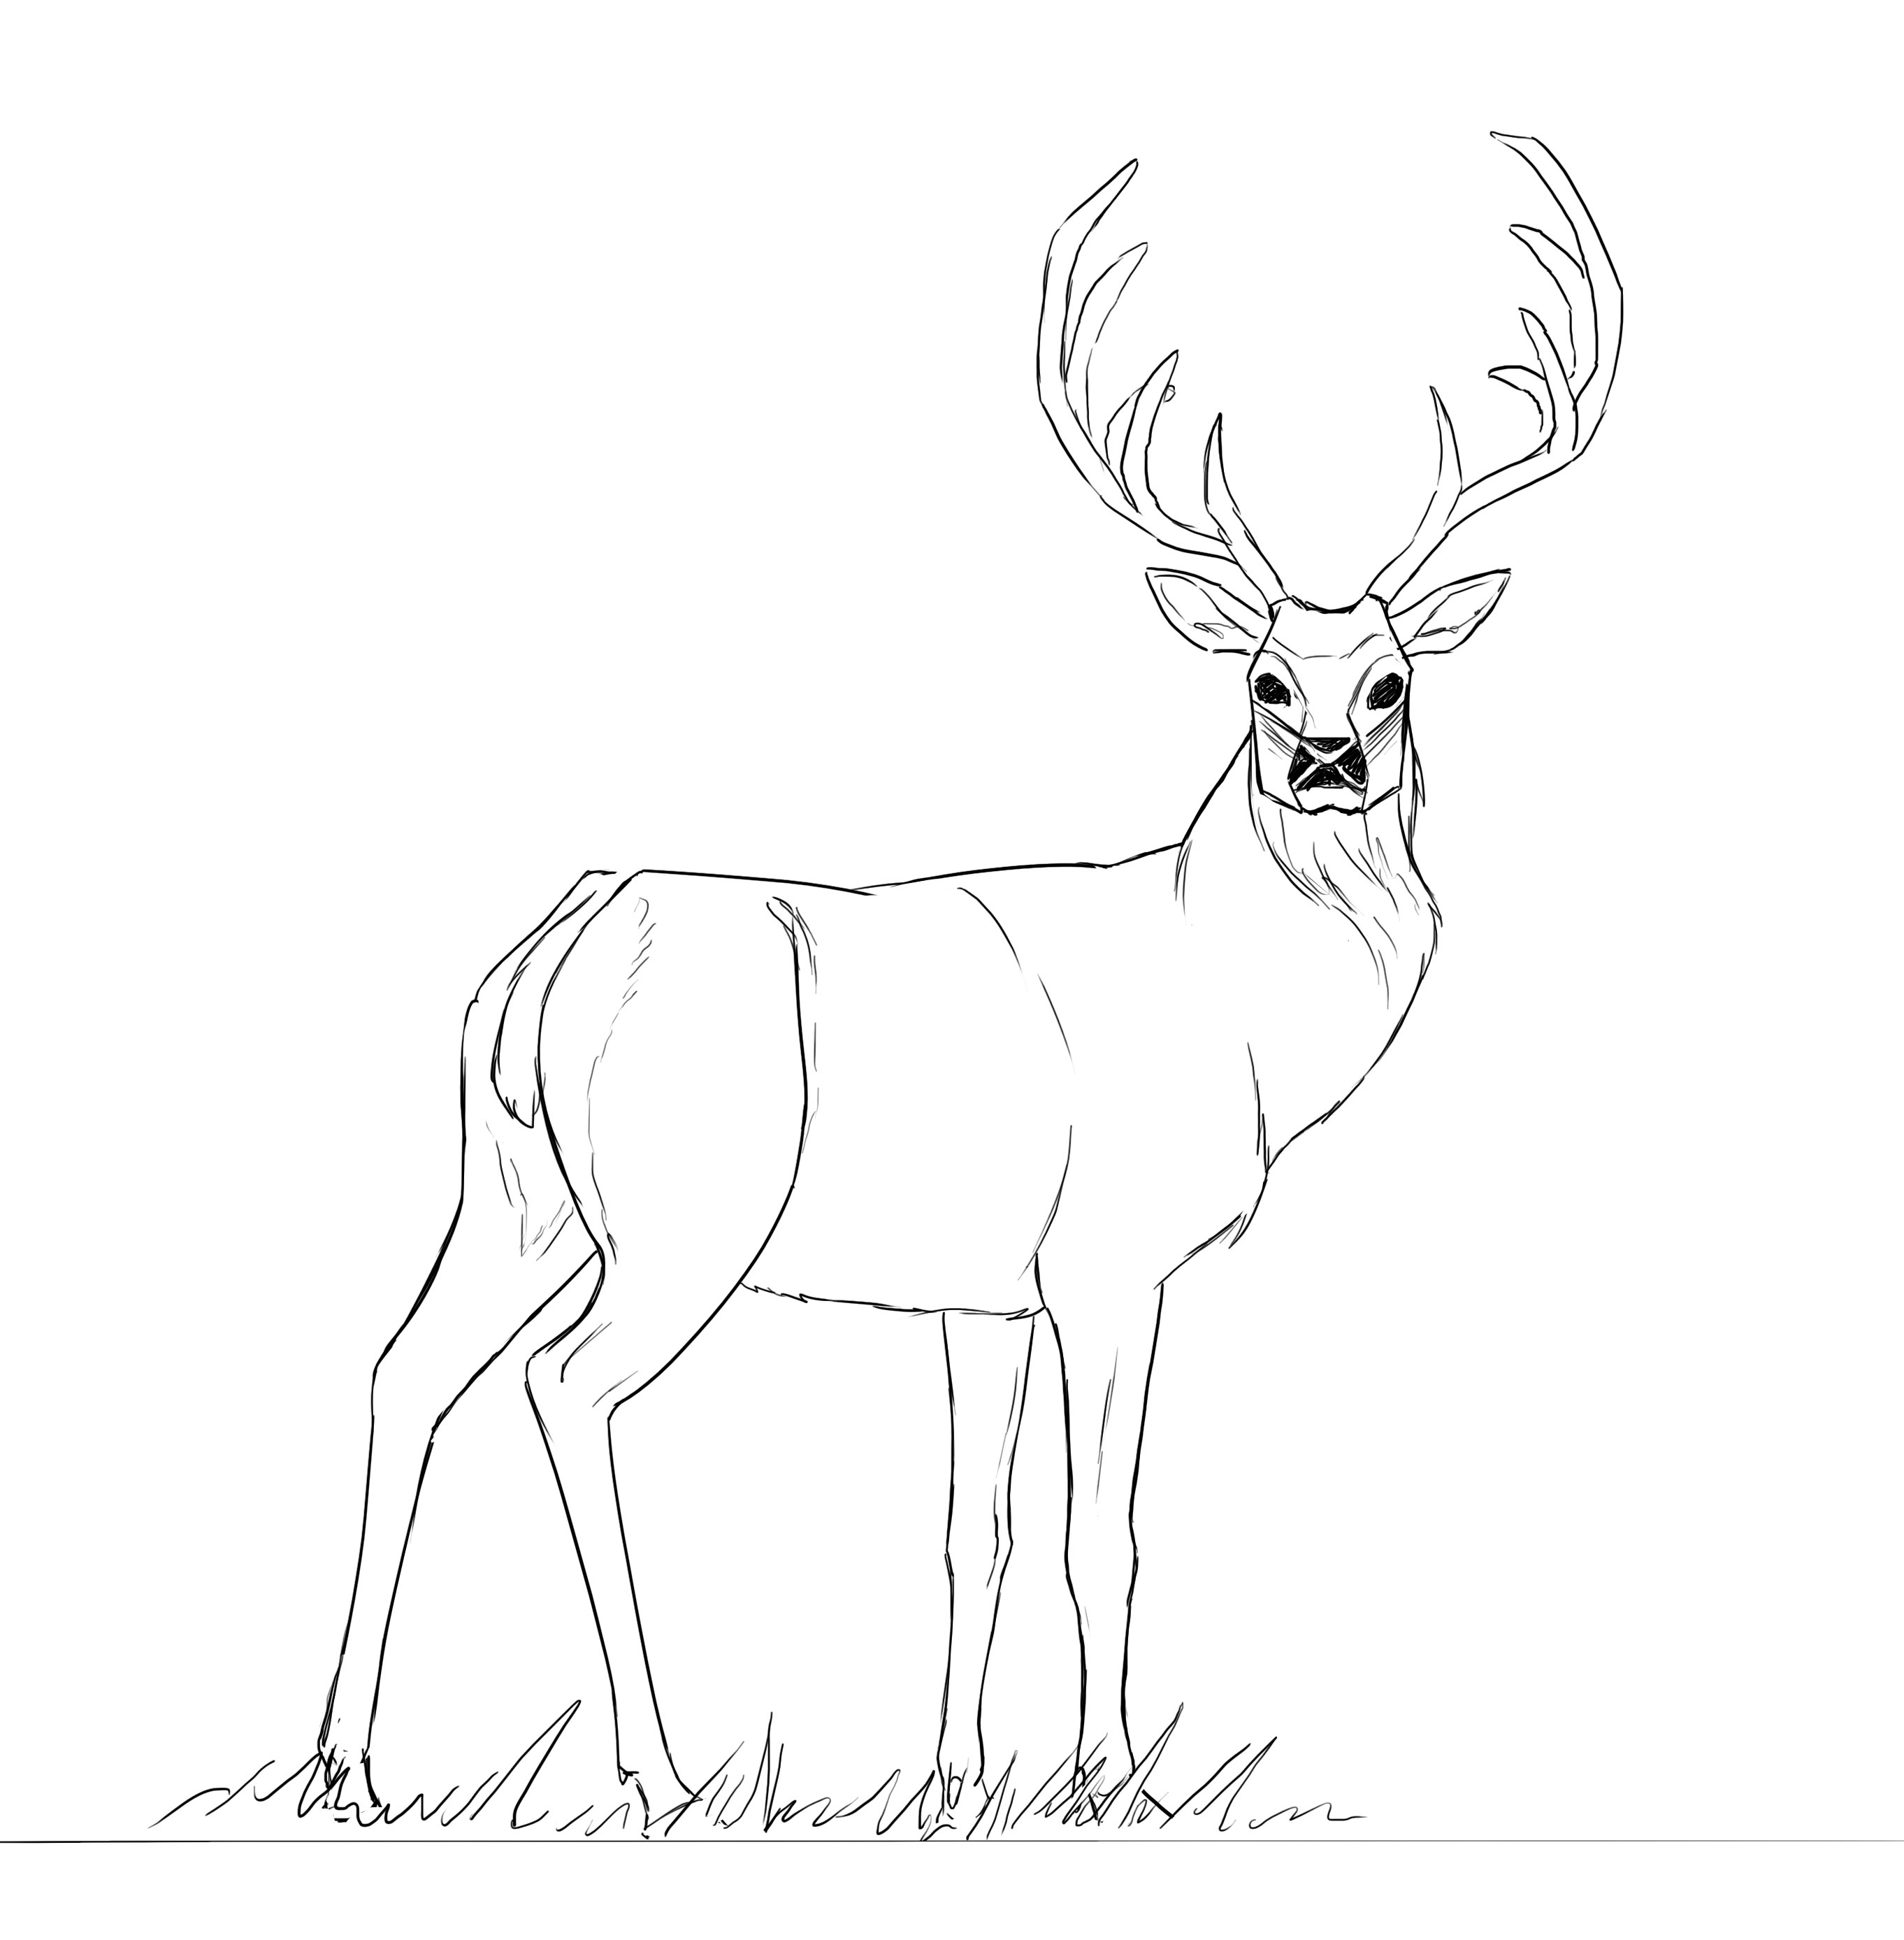
Do you remember the article about the deer? I was telling you that the structure of a deer is quite similar to that of a horse (at least for the body). It's obviously different, but it's quite similar in any case. In case you'd like to make the comparison, you can see the article on our blog how to draw a deer.
The rigid spine since we are dealing with a "ruminant" herbivore. It therefore has a fairly rigid spine to support its belly and digestive system.
The same proportional ratios are found: 1/3 of the body for the chest and shoulders, 1/3 for the abdomen, and 1/3 for the hindquarters. A second belly can be fitted under our horse's to find the ground line / leg length.
Besides that, we also have quite a few differences starting with the head which neither has the same shape nor the same size.
The neck that has a fairly triangular shape.
The back line much less straight and more curved (convenient for rider saddles :D).
A long tail flying in the wind!
A much more massive chest. Overall, the horse seems more massive than the deer (which I believe is the case).
And the hooves that are very different (no "finger" nor division in two like the deer).
OBSERVE THE HORSE'S HEAD
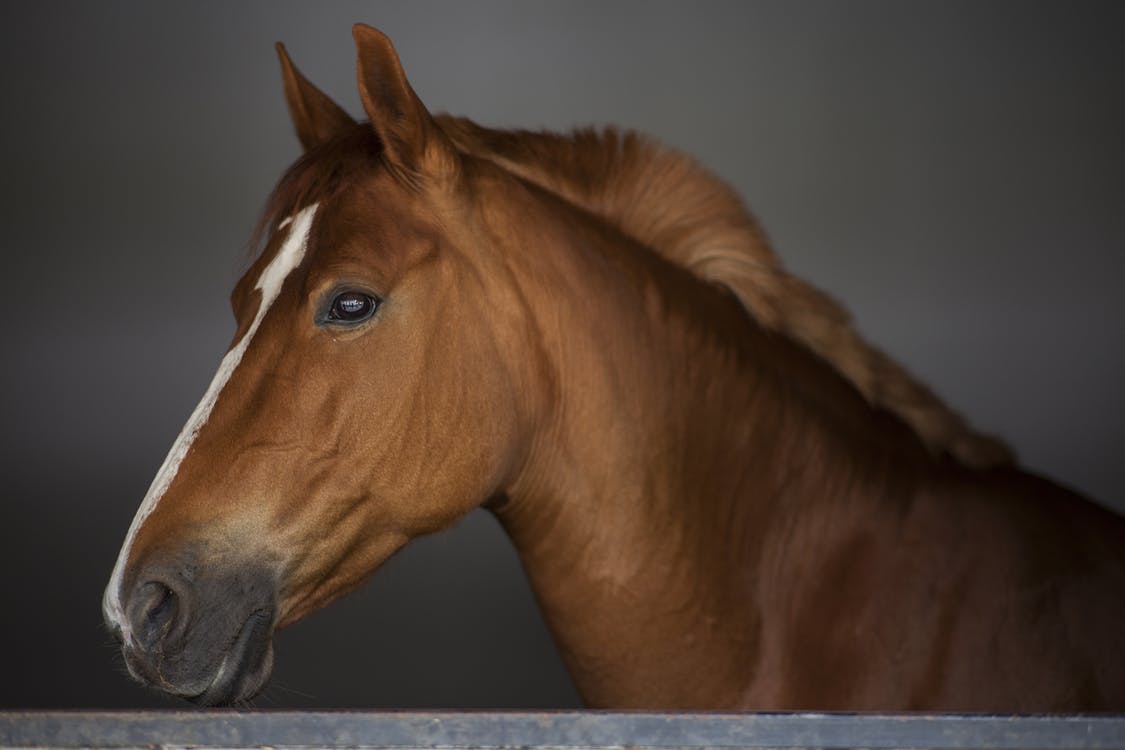
We will also talk about the head of the beast which, as always, can be broken down into simpler shapes:
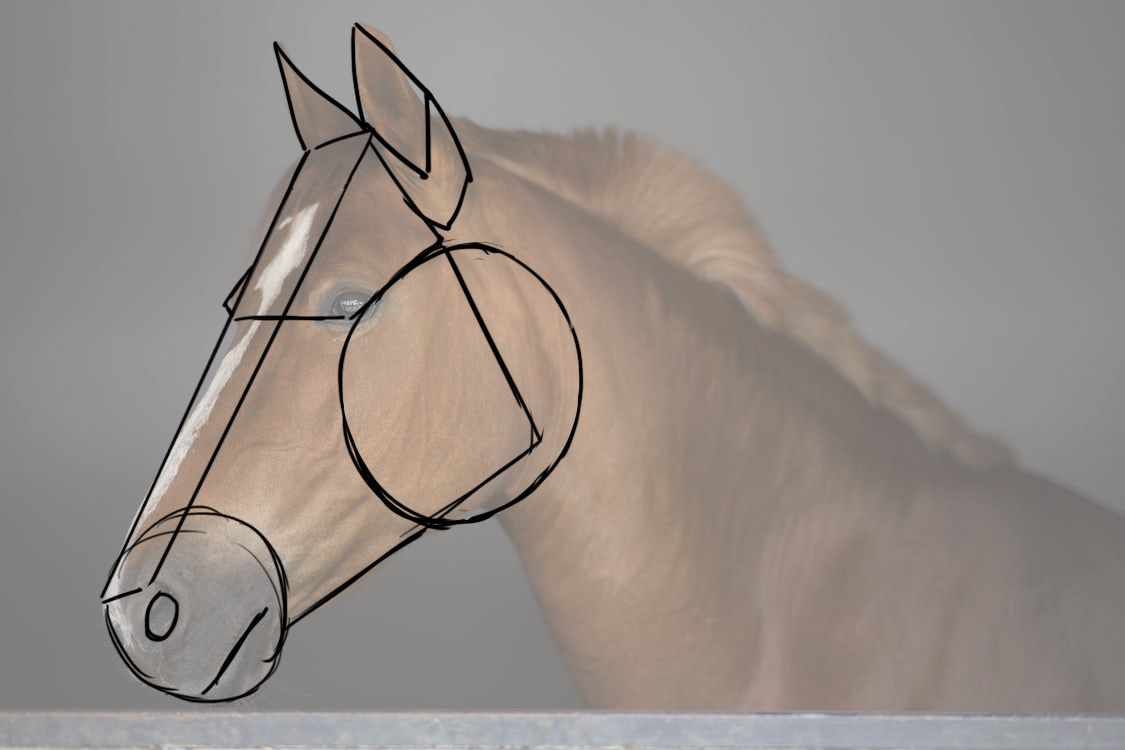
We start with a trapezoidal/triangular shape for the bulk of the head. To which we add a more or less round shape for the cheek and the same thing for the muzzle.
The eye is placed in the first quarter of the head and on the line of the third in height ;p
And we also have the slice of the nose, just a simple rectangle ^^
DRAW THE SKETCH OF THE HORSE
We're going to proceed in the same way as we did with the deer. You're starting to know me, I mainly use geometric shapes and the simplest possible proportion ratios to guide you because I find it much easier to understand and integrate.
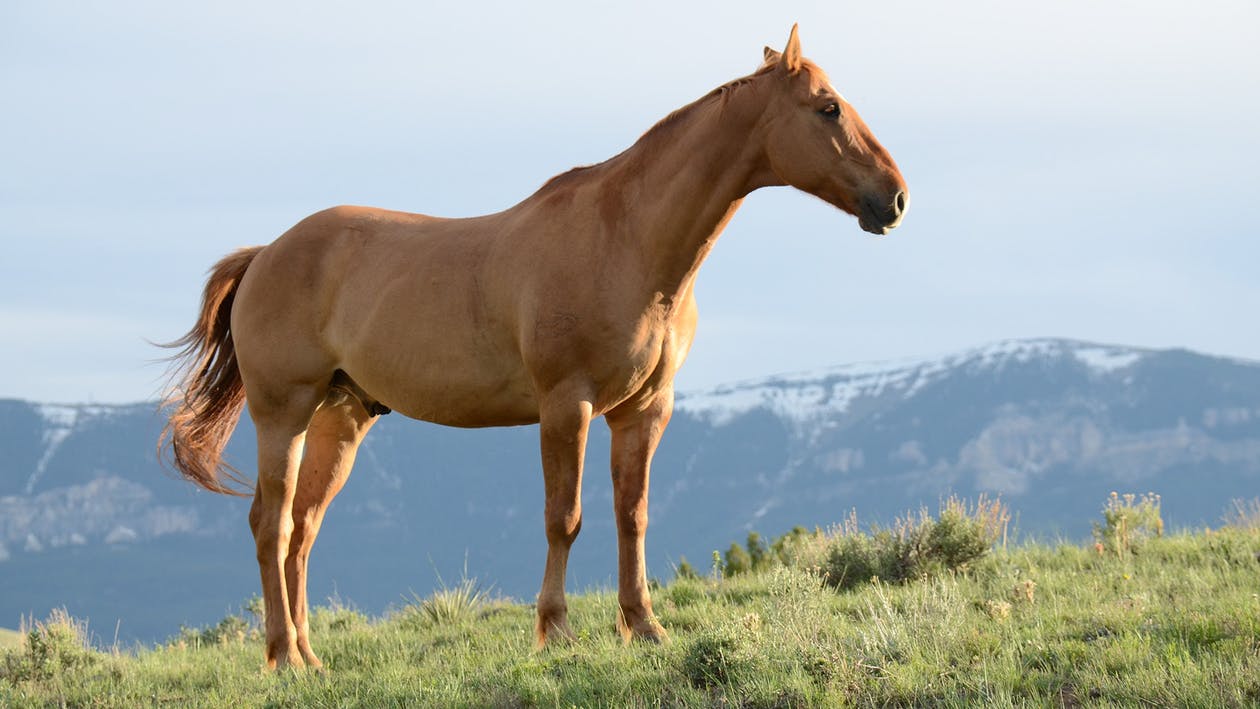
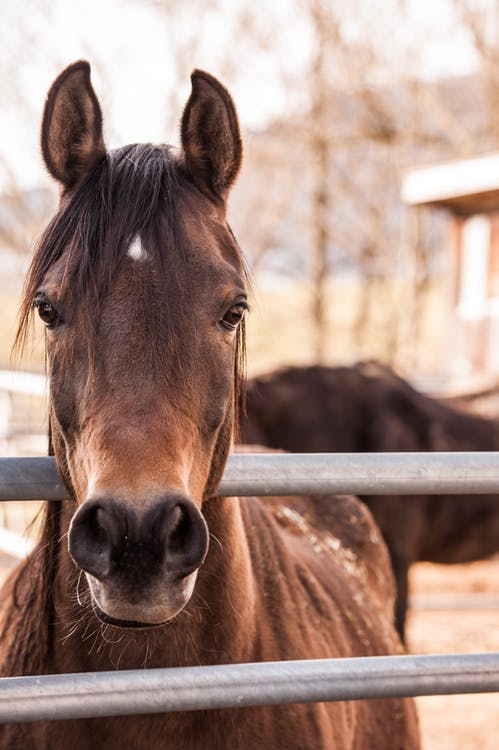
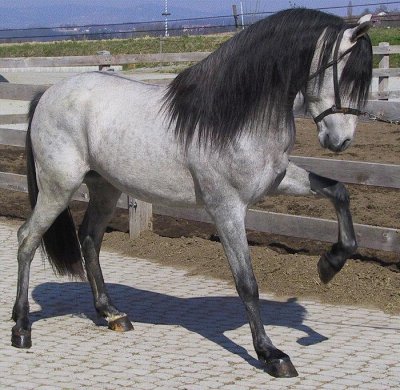
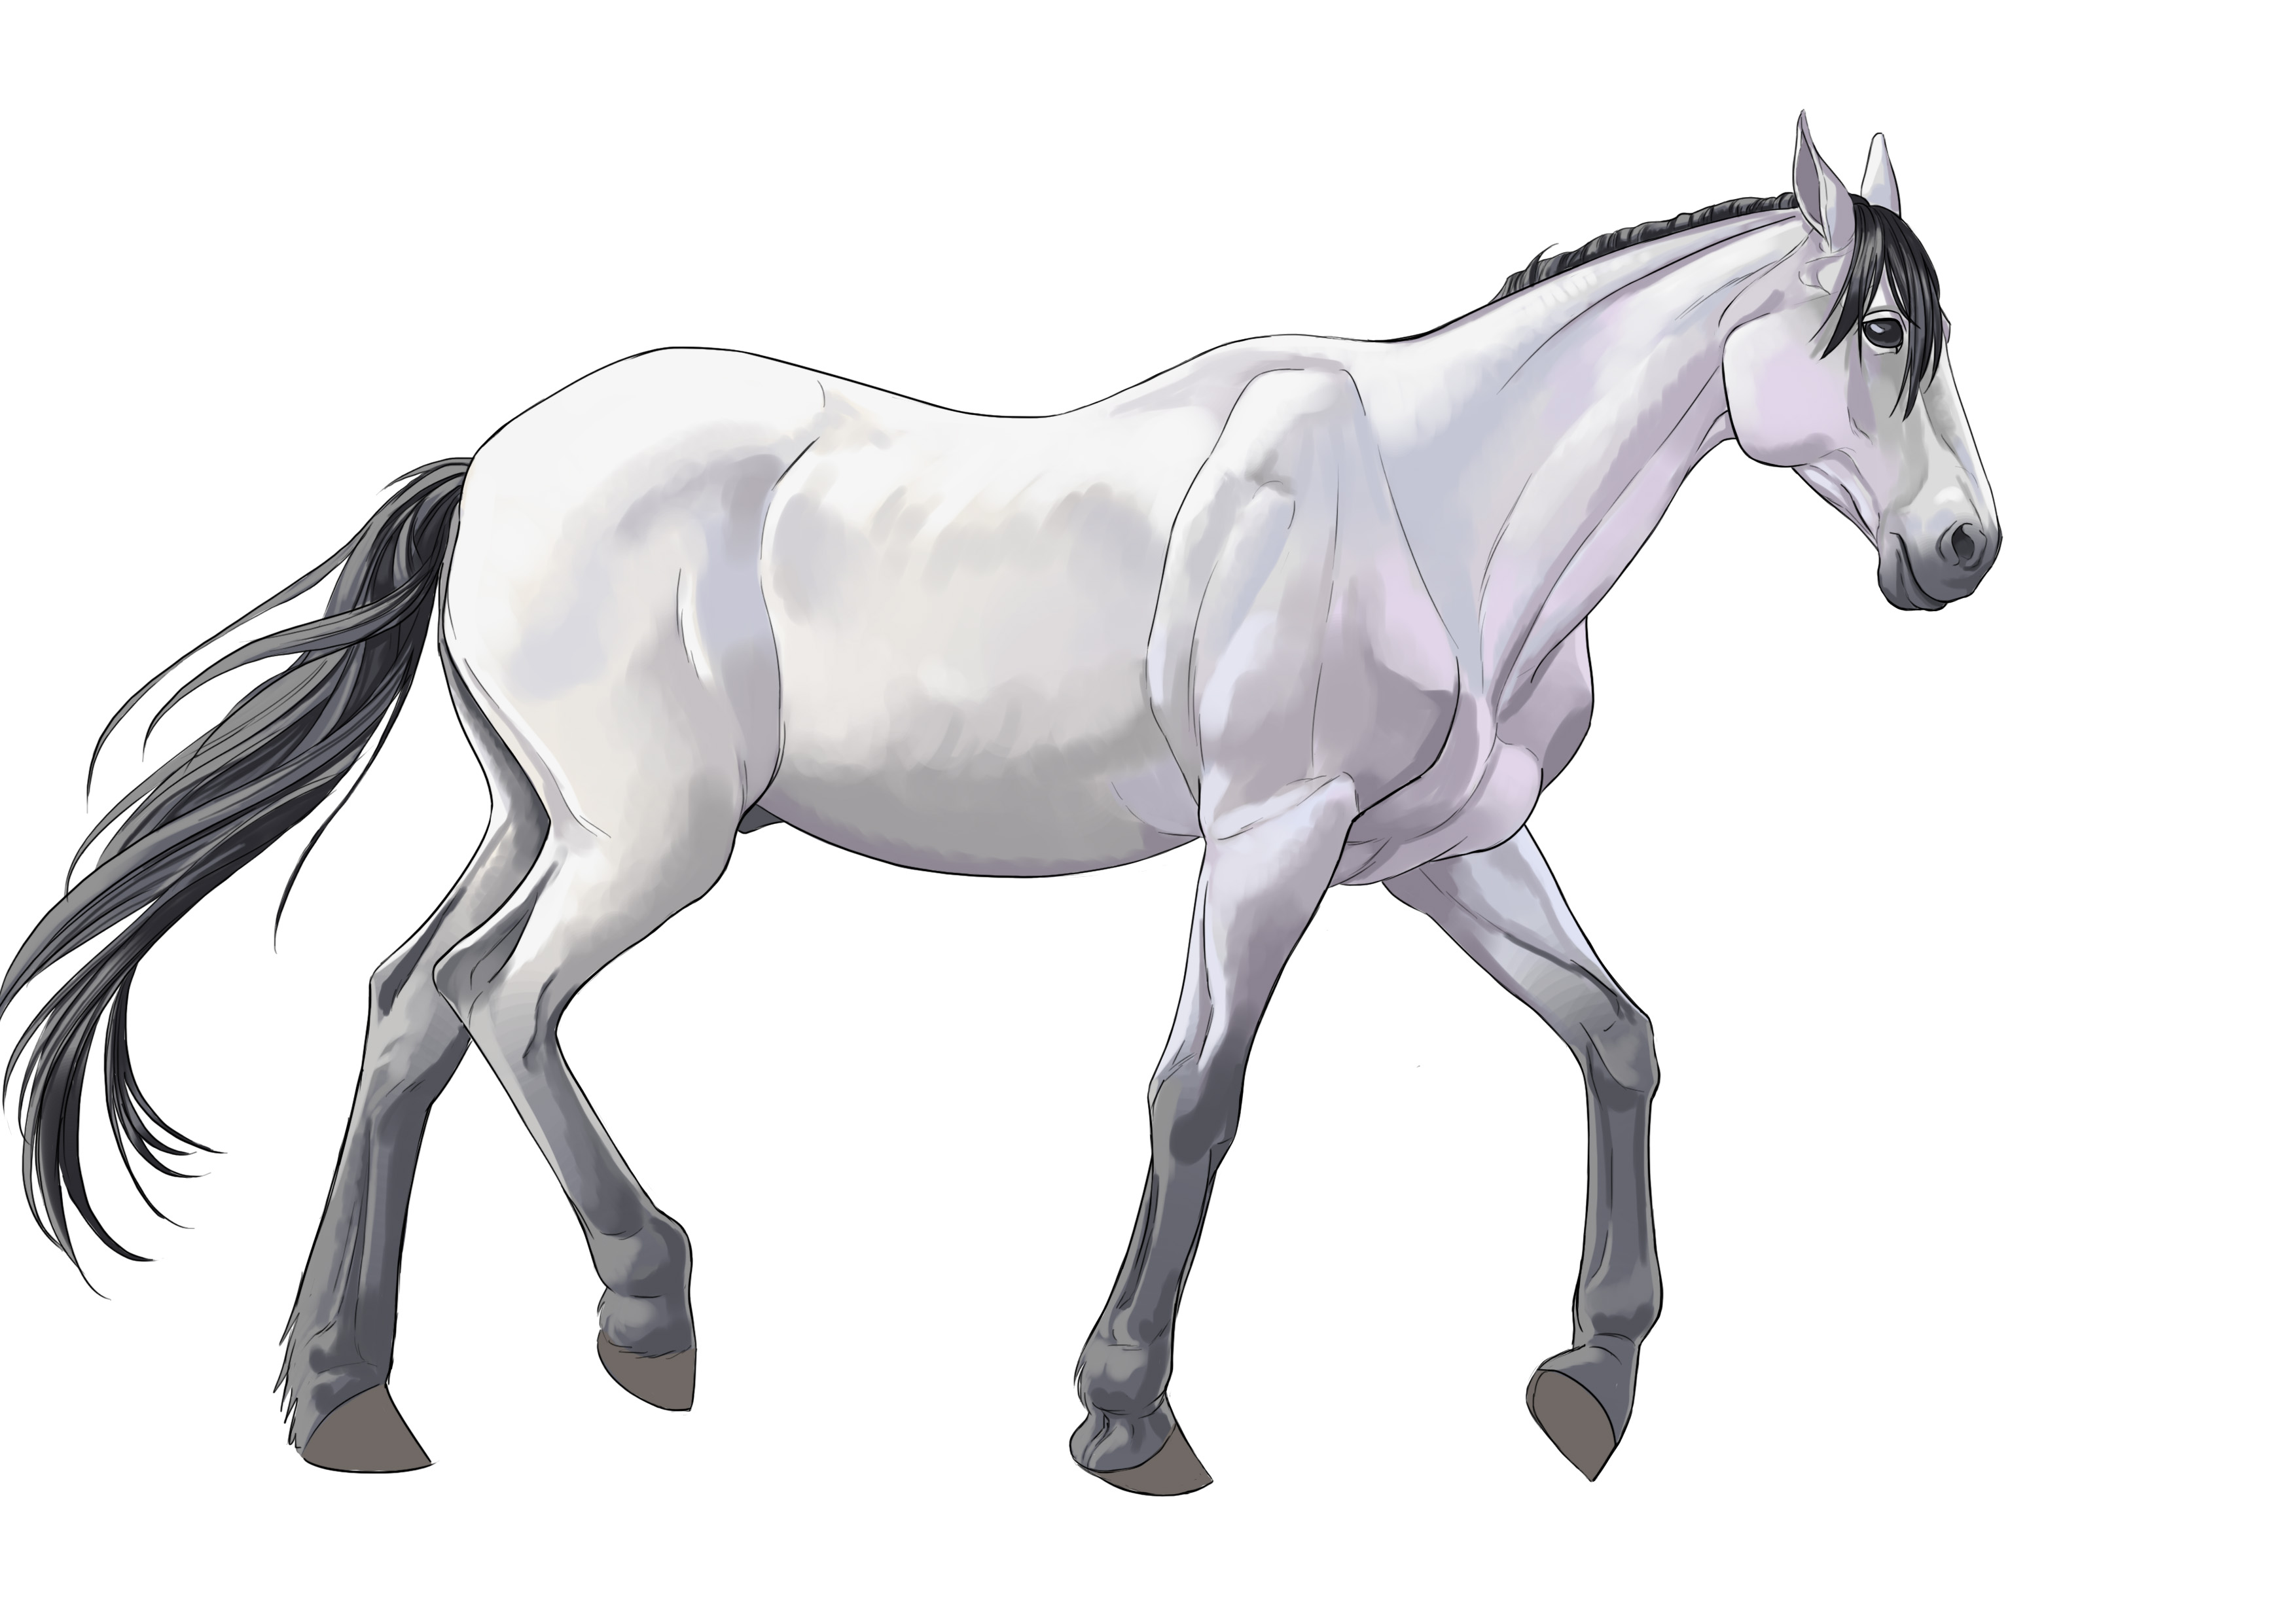
So, I'm going to base this on this photo to draw our horse. I'm just going to freestyle the tail floating in the wind because I don't feel like replicating the model, I think it would look a bit weird in the drawing actually (it happens sometimes that even when copying reality exactly, it doesn't work, because it's a drawing).
If some of you have read the article about the deer or even better: have drawn it, you should normally be more comfortable and recognize a bunch of things that we've already done :D
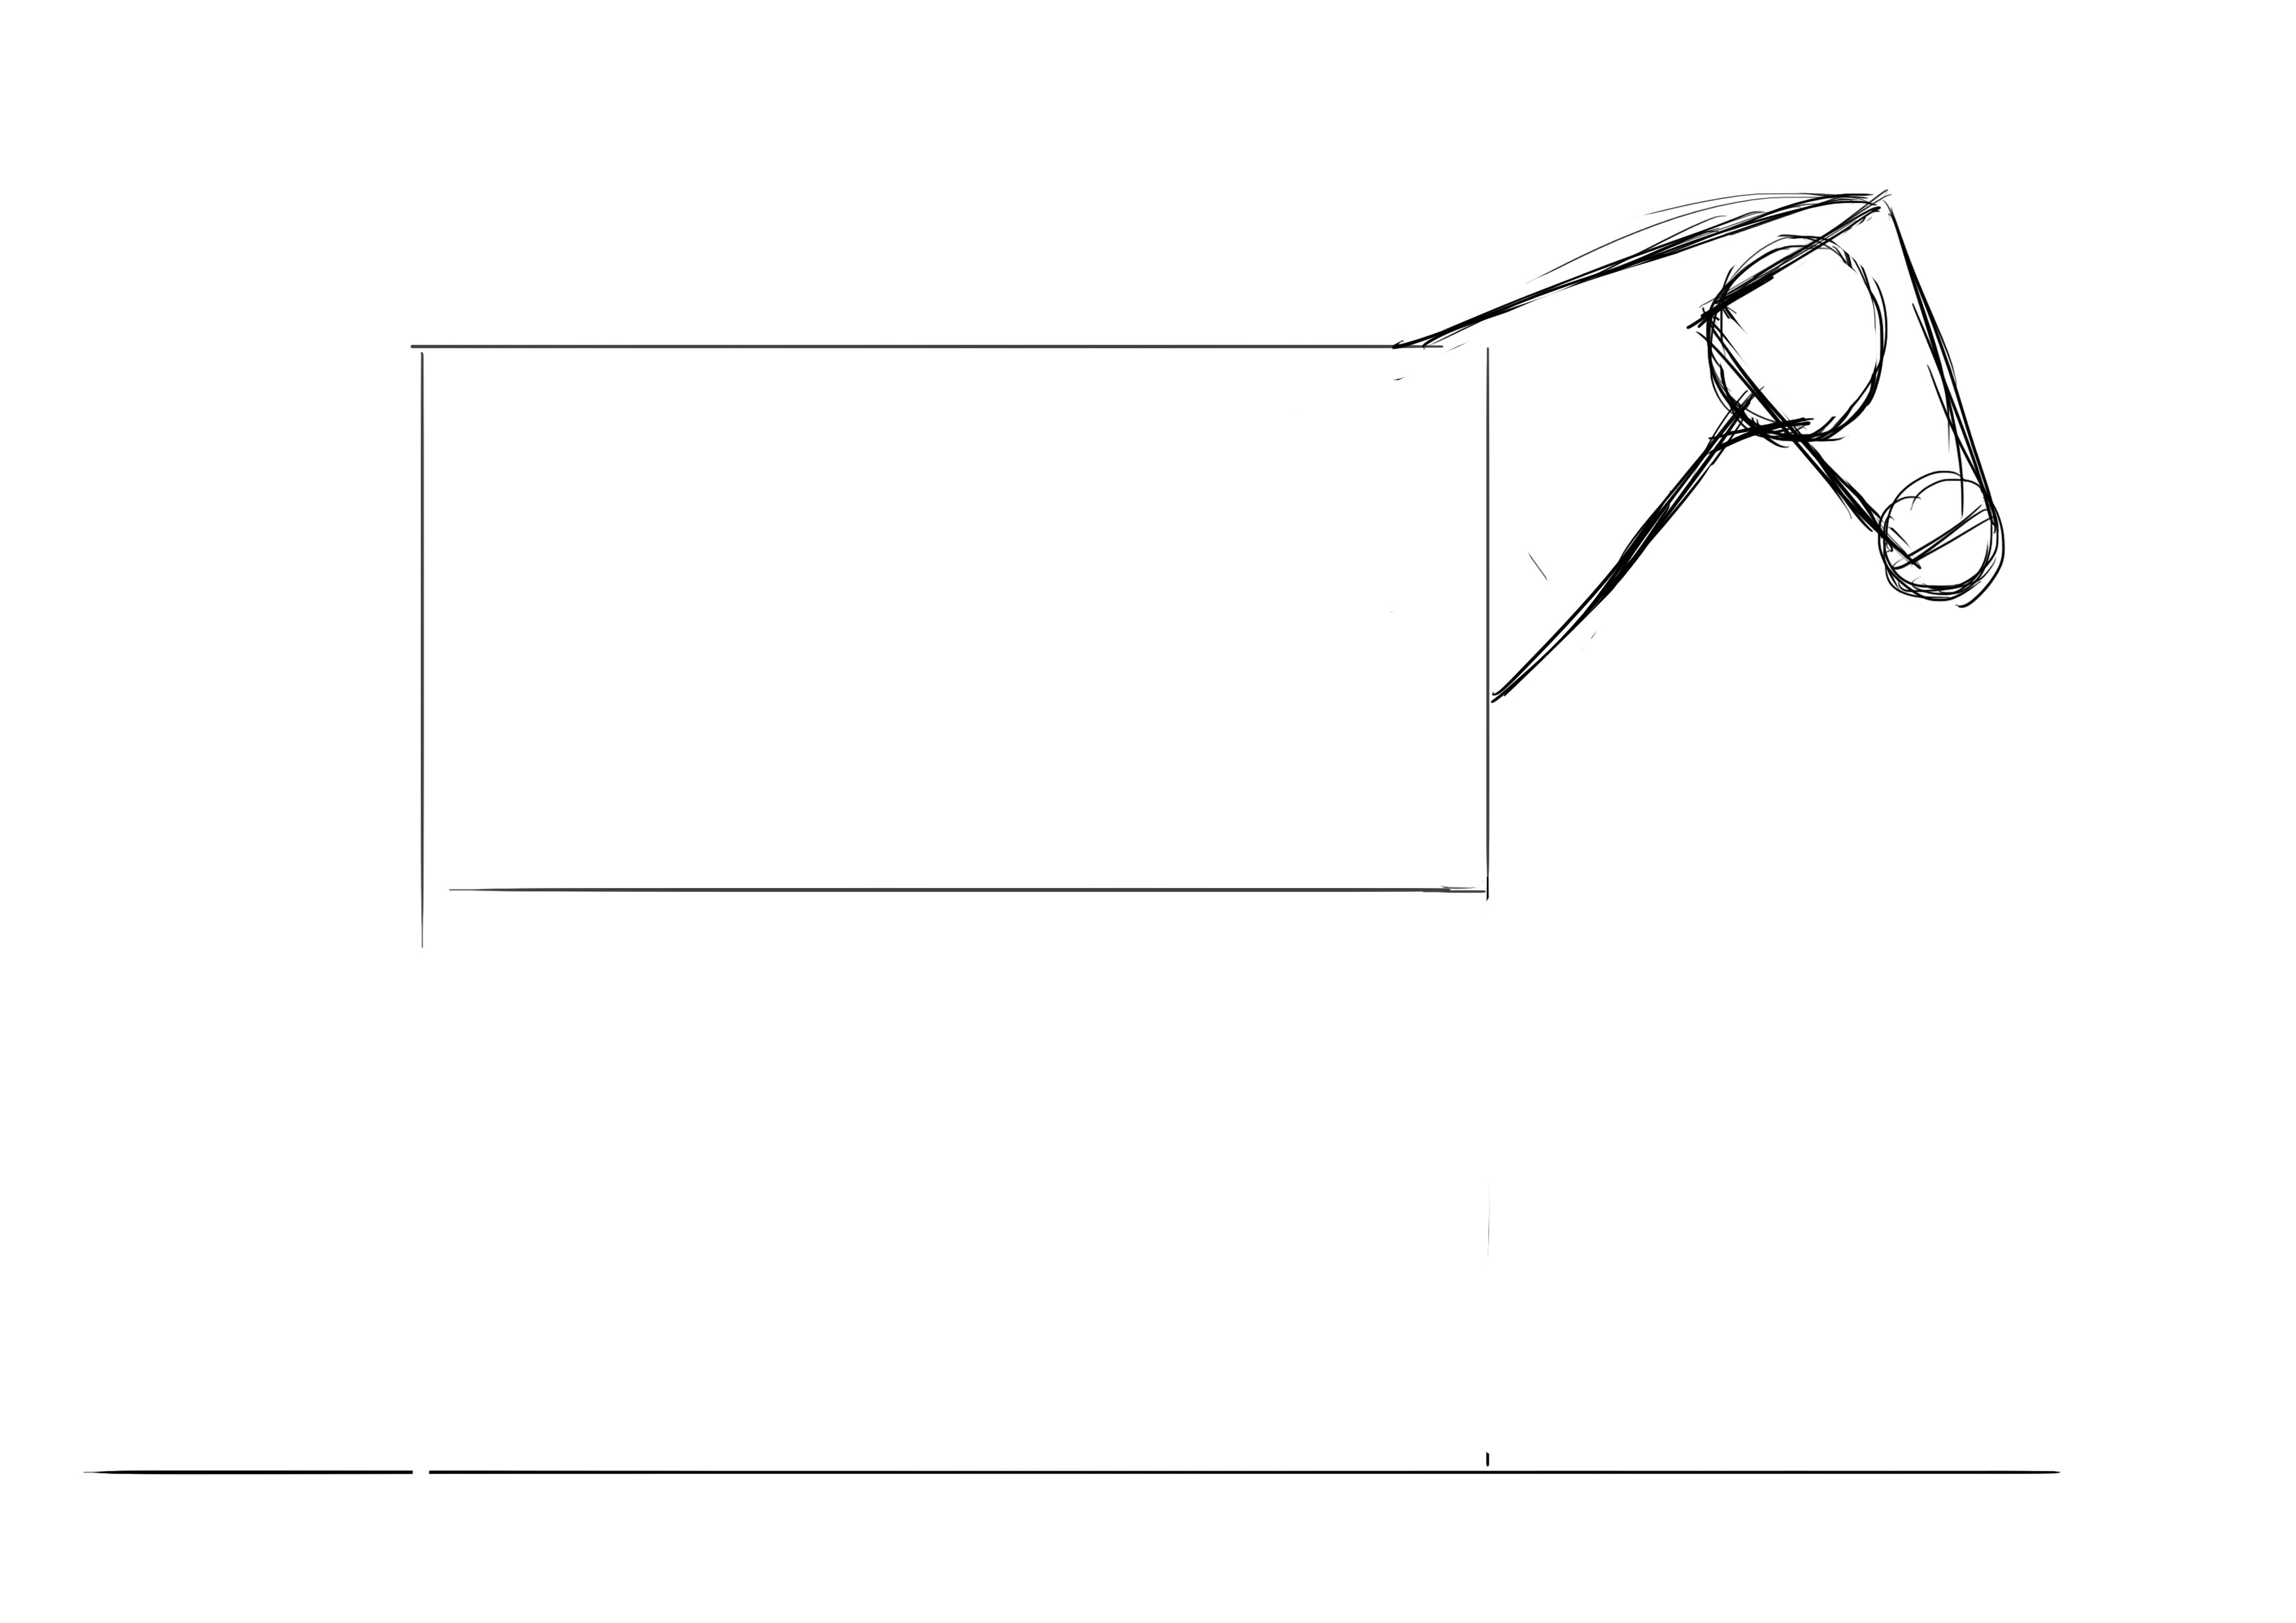
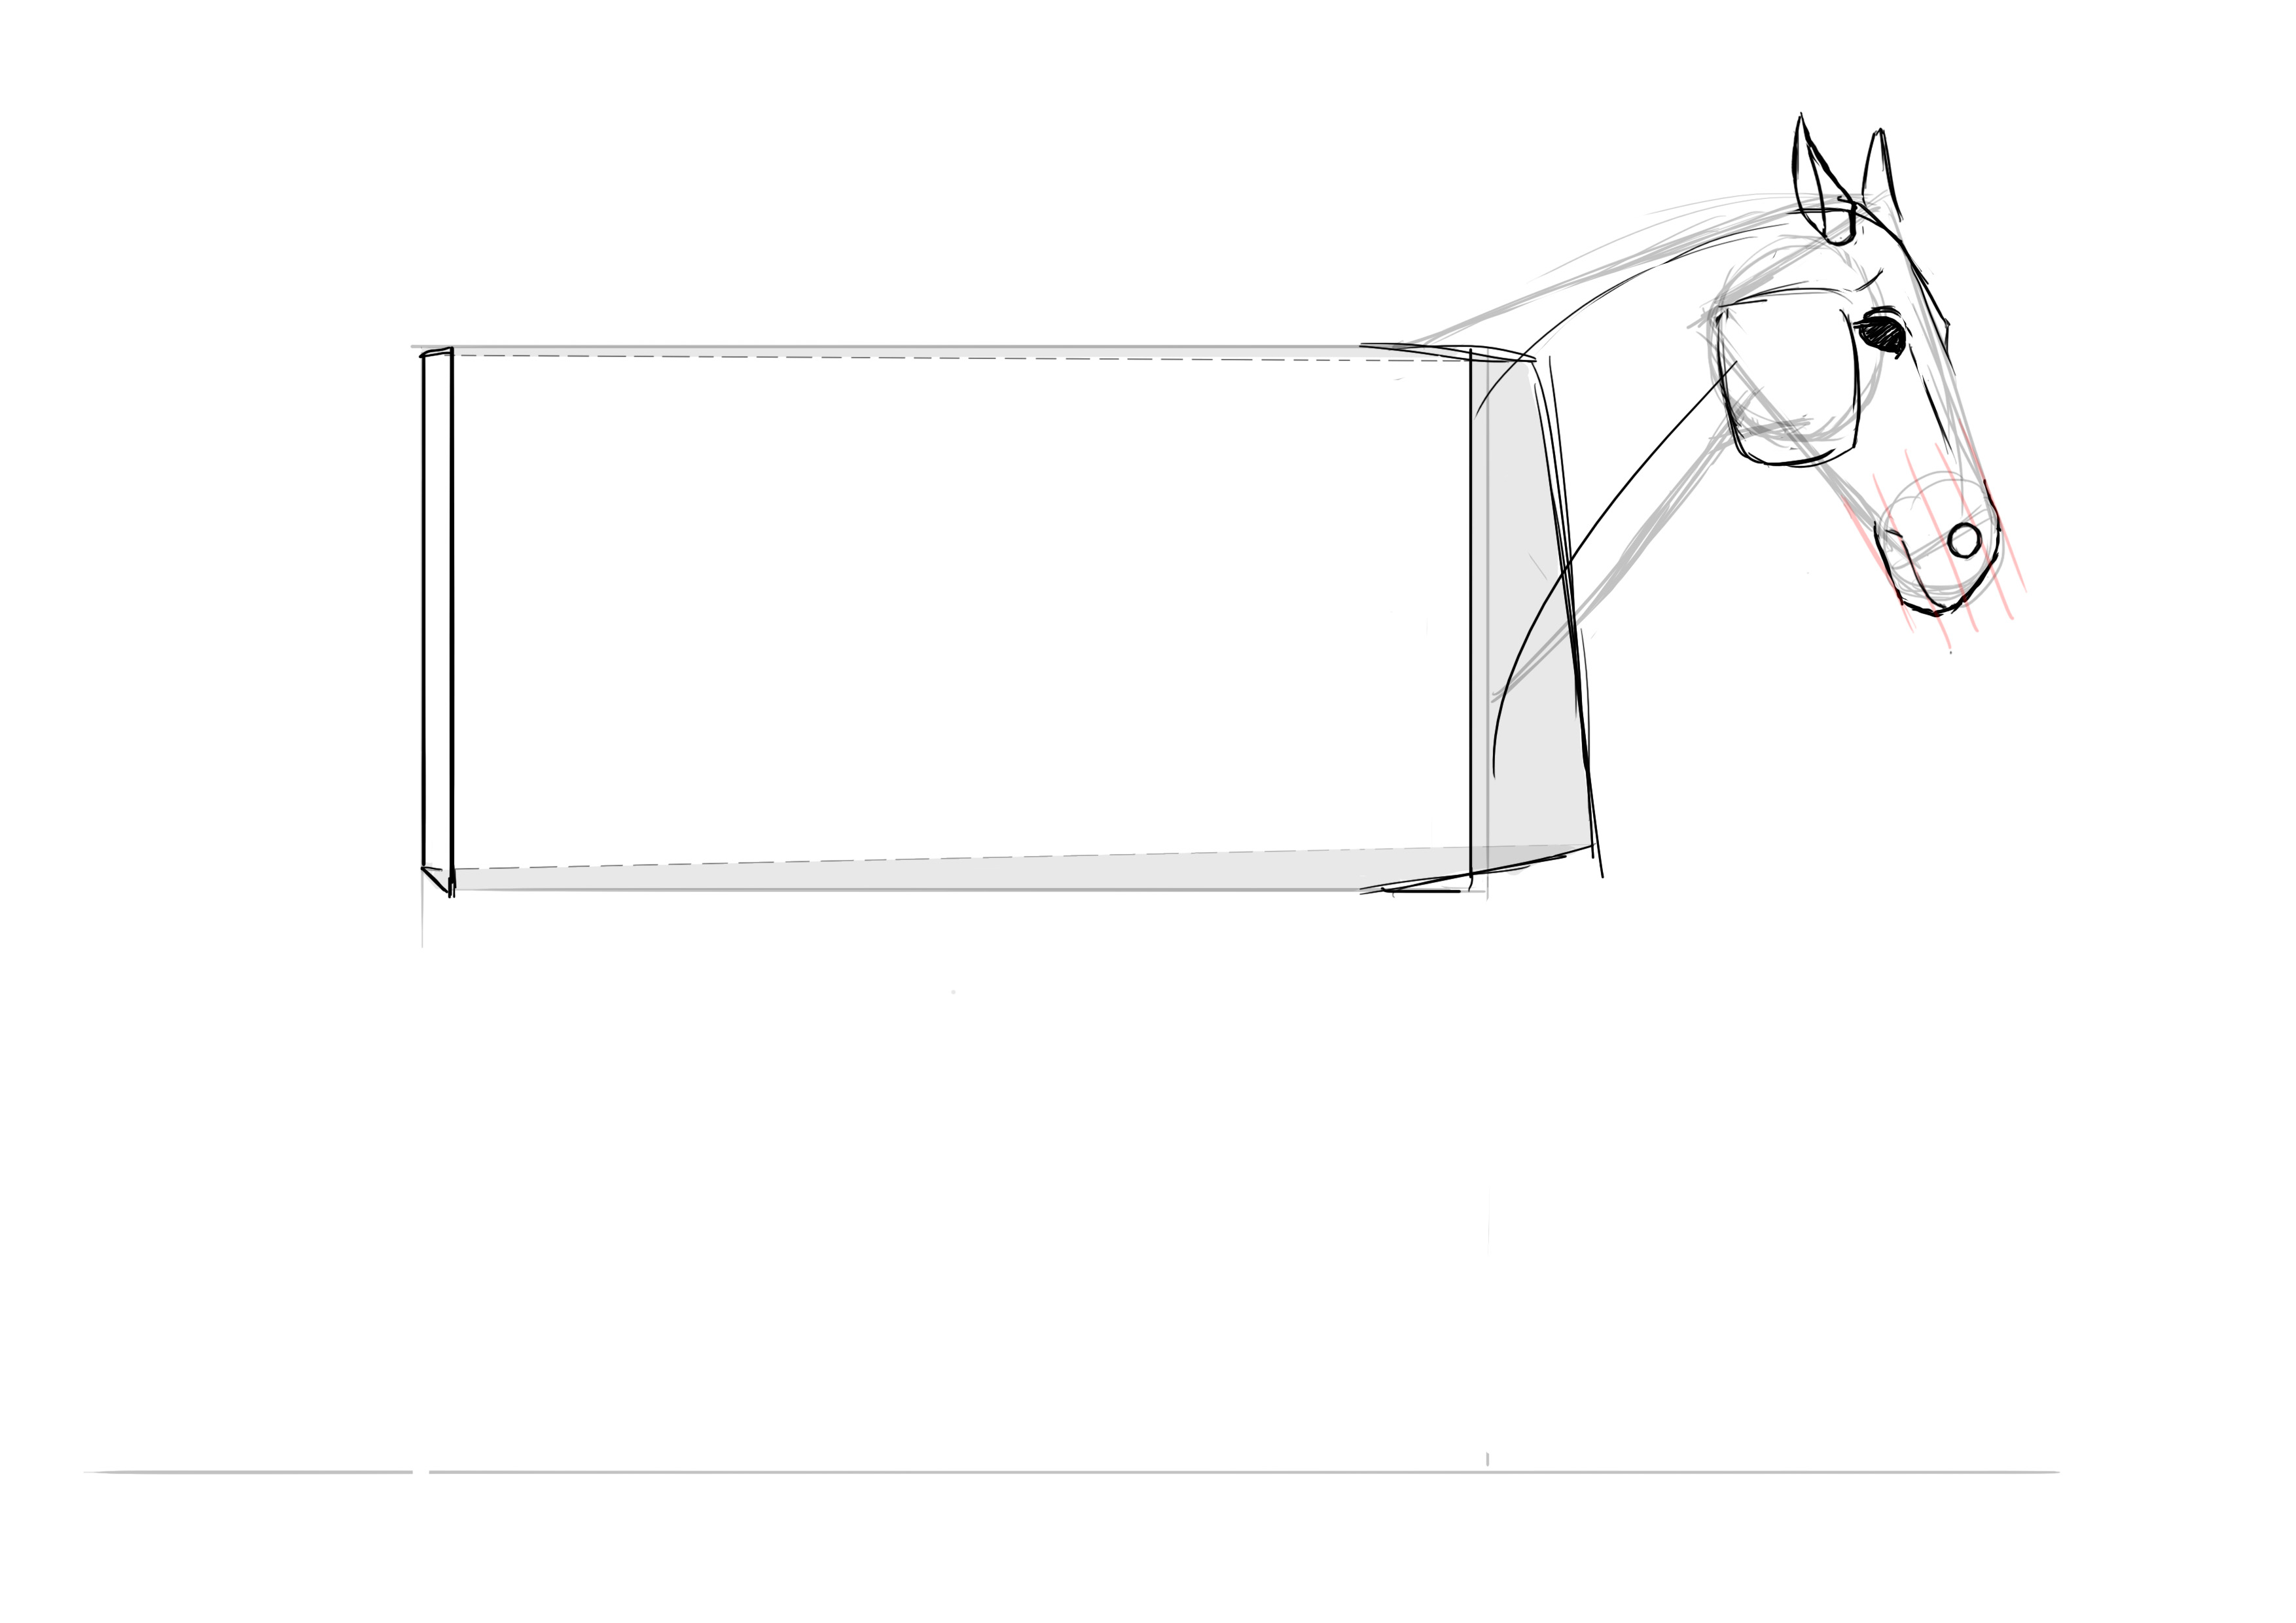
THE SKETCH OF THE HEAD
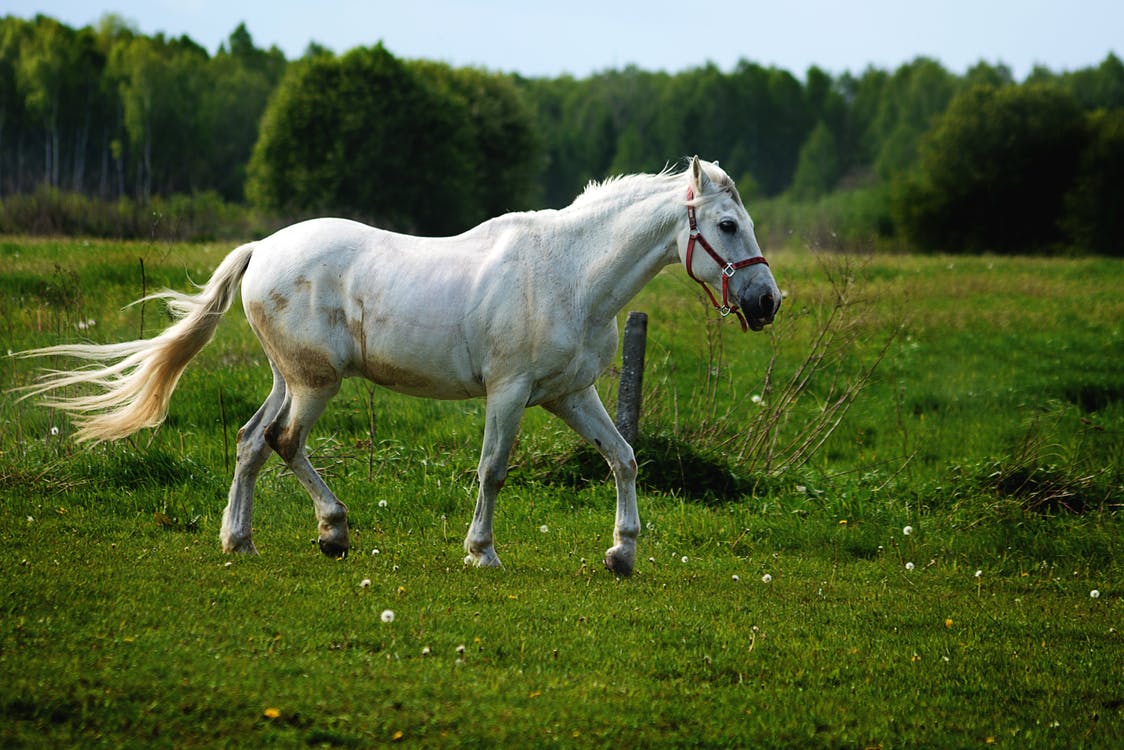
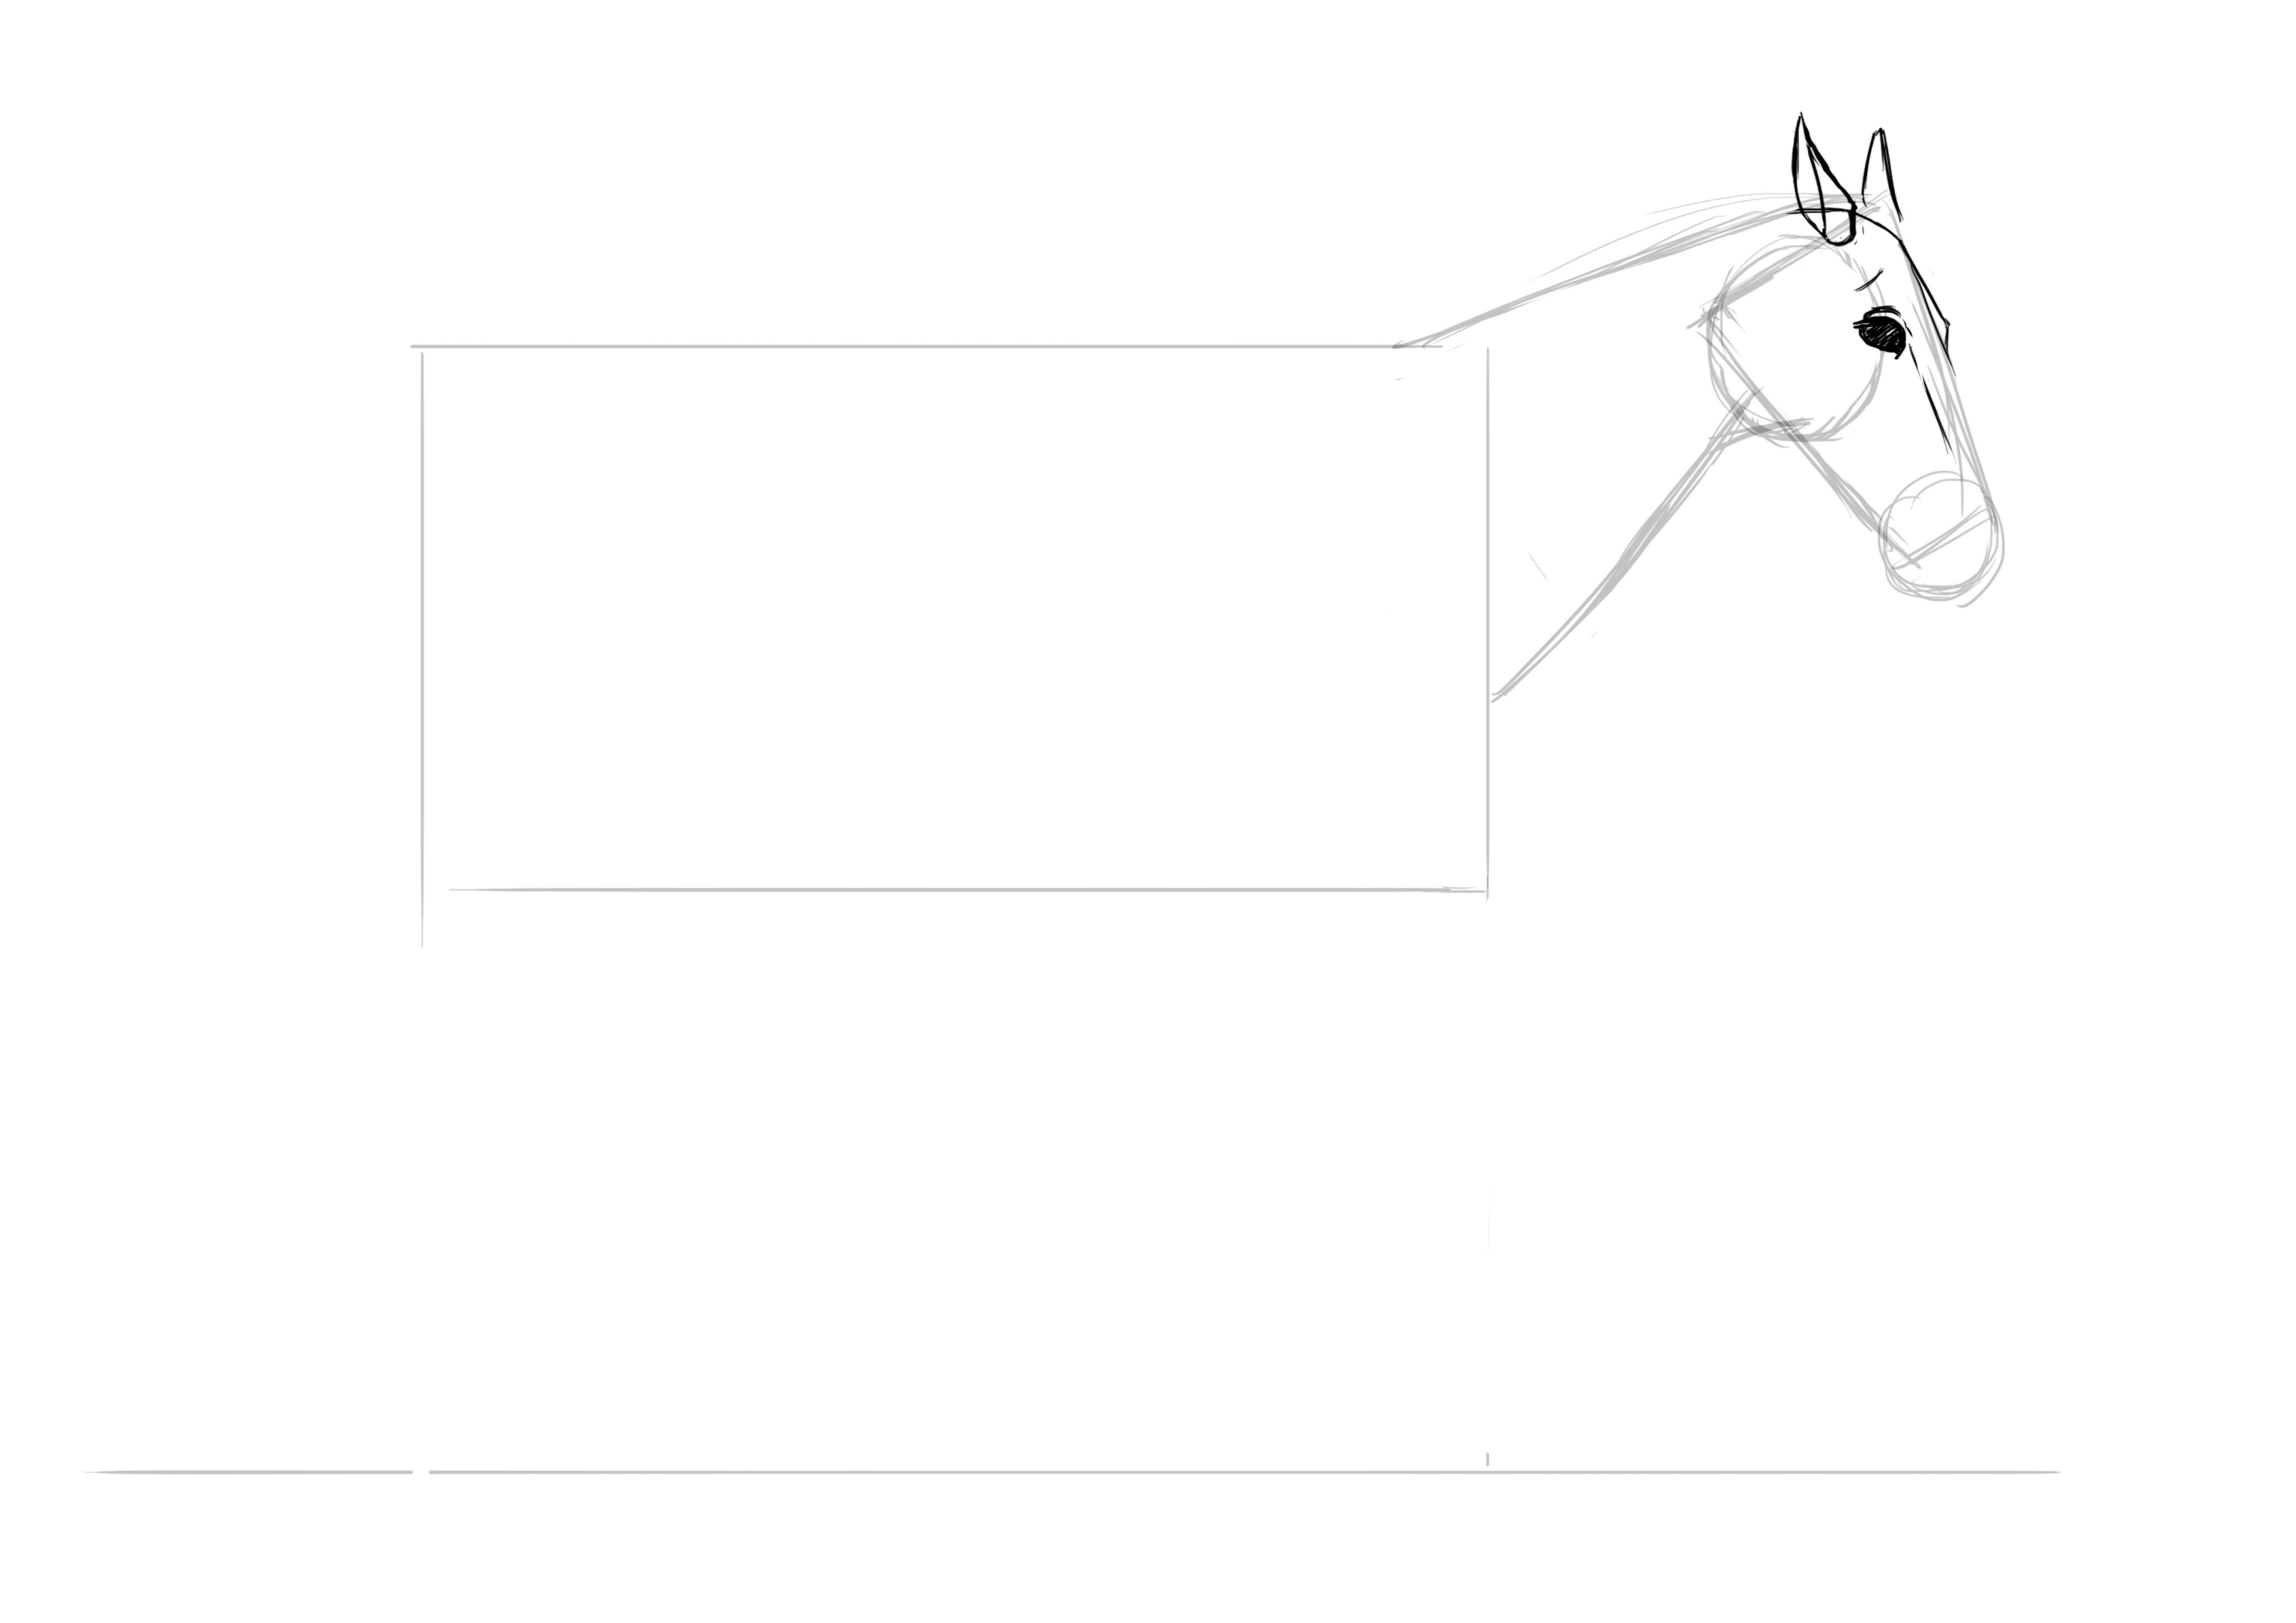
We will start with the head which I will break down into several steps. Let's start with the trapezoid then. Its base should be about twice as wide as the end towards the muzzle and two and a half times longer ^^
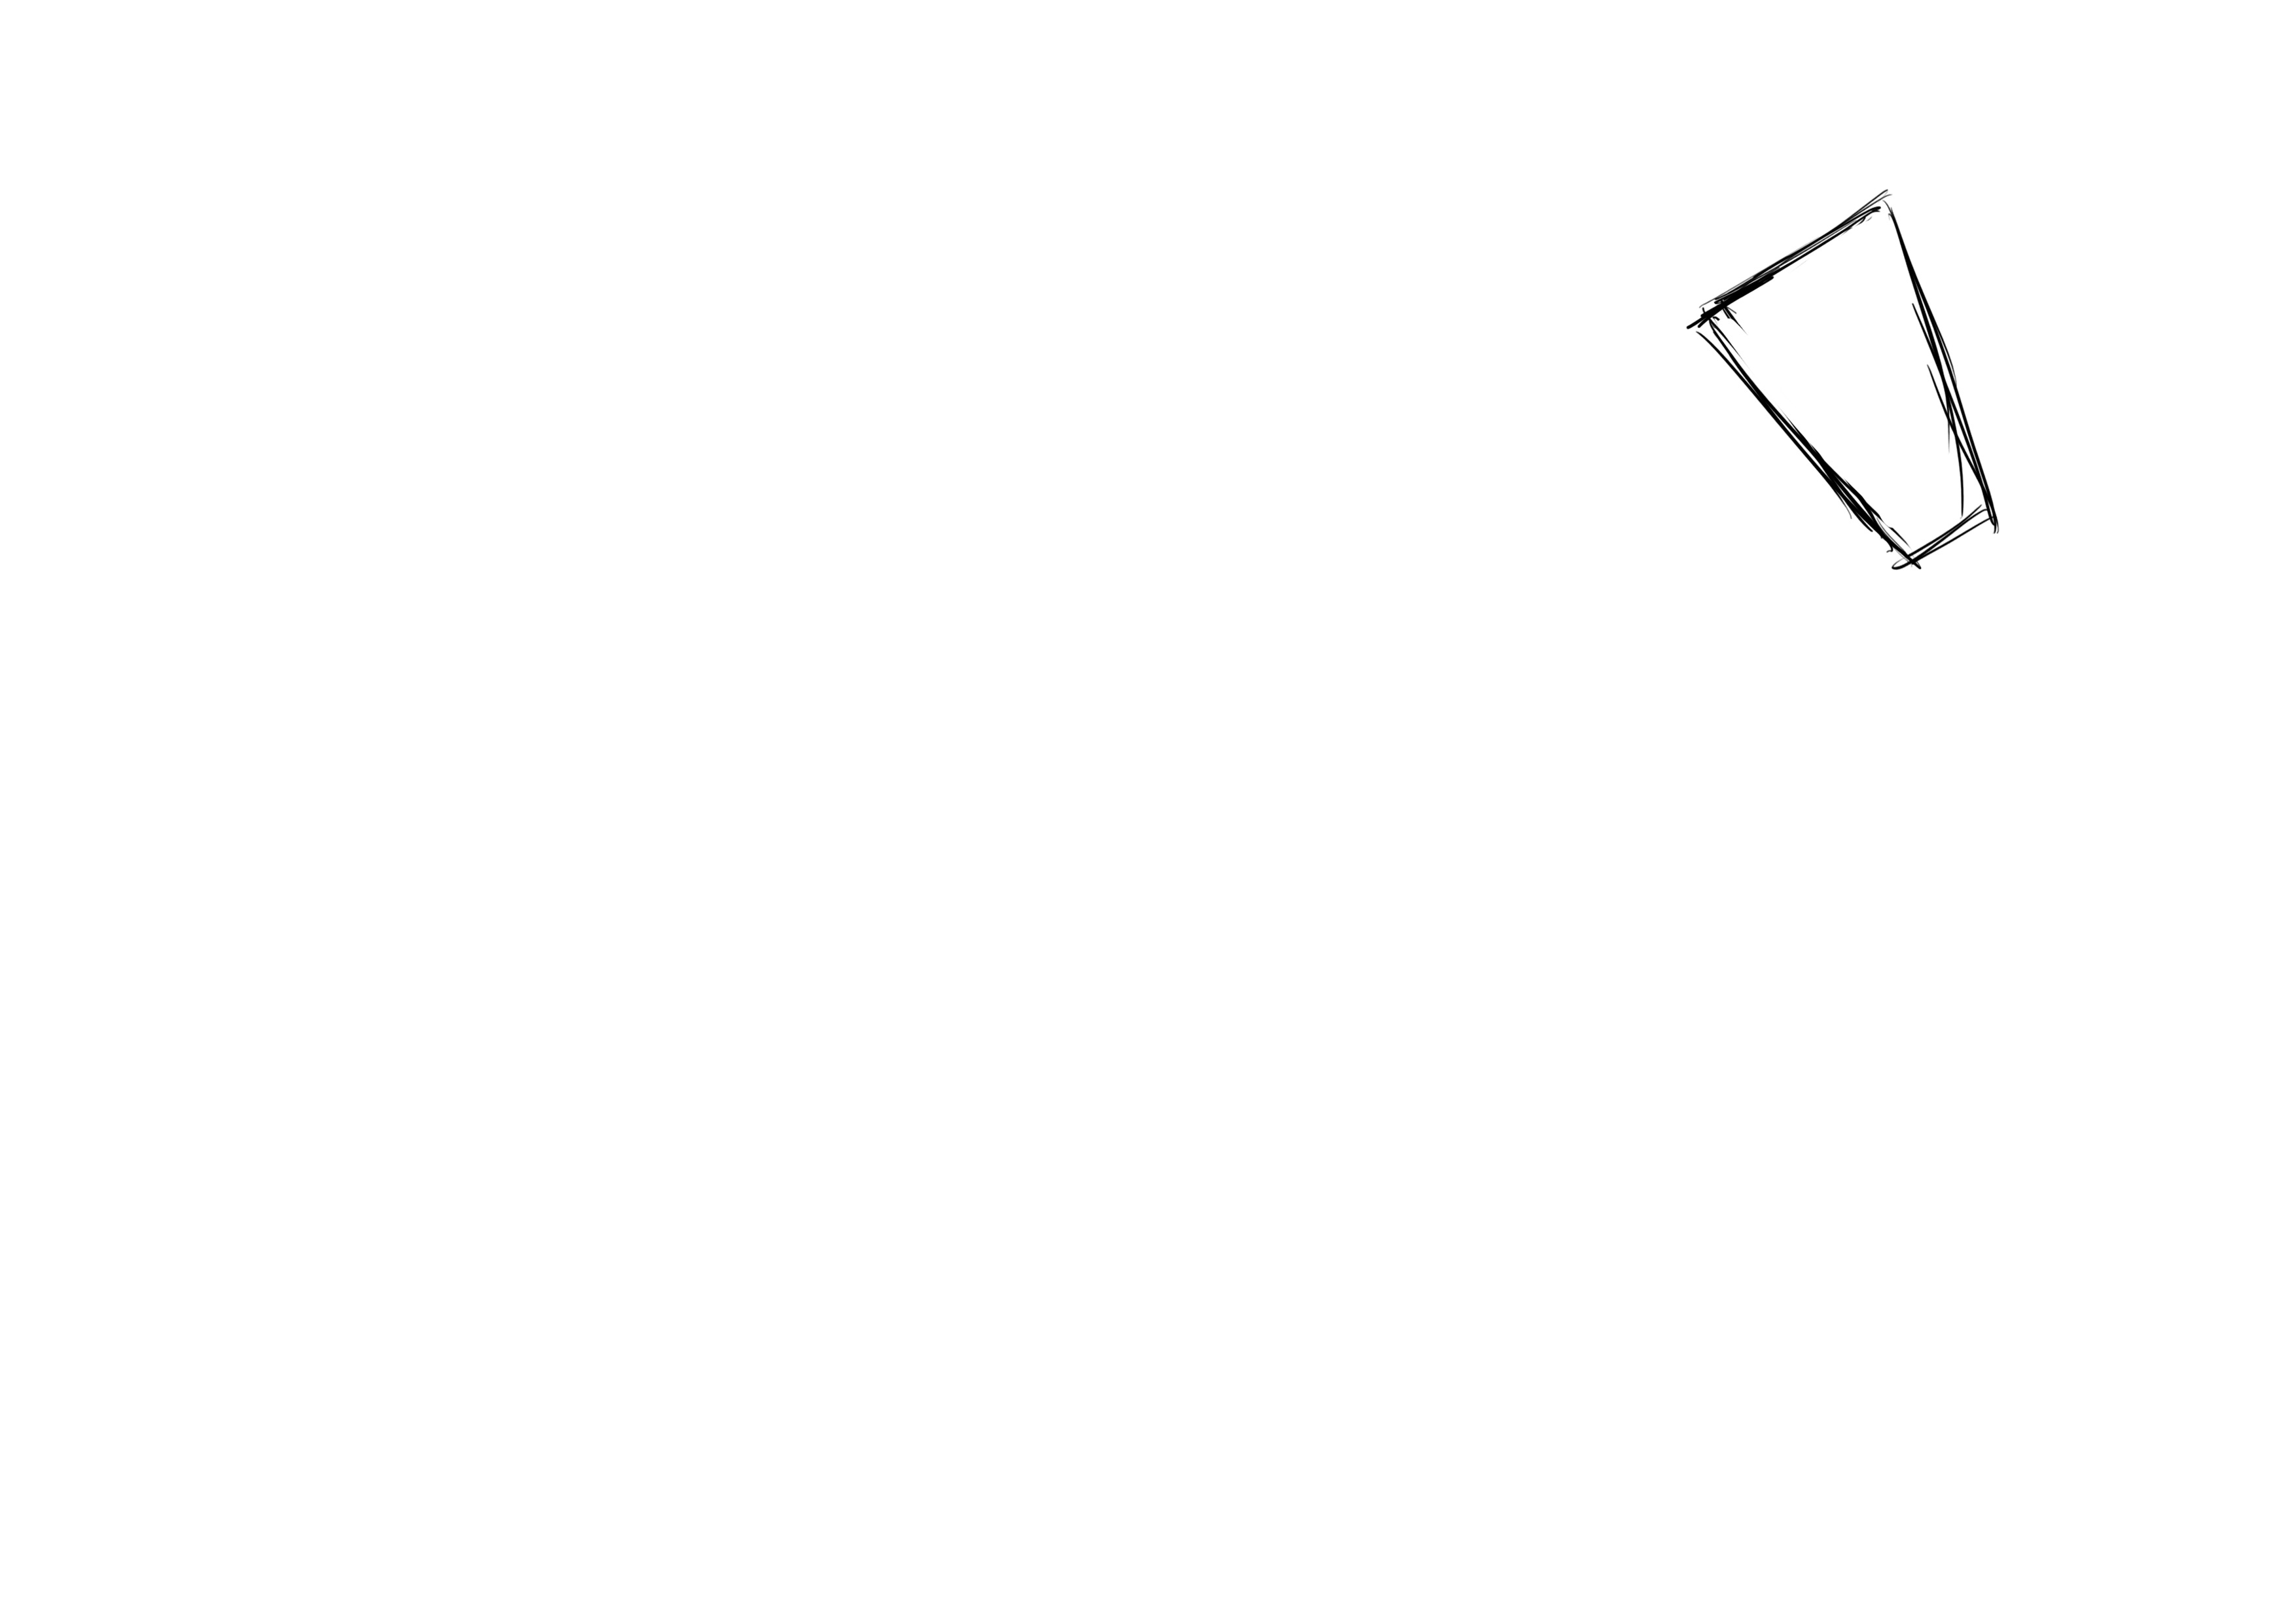
We then draw the circle of the muzzle and the one for the cheek.

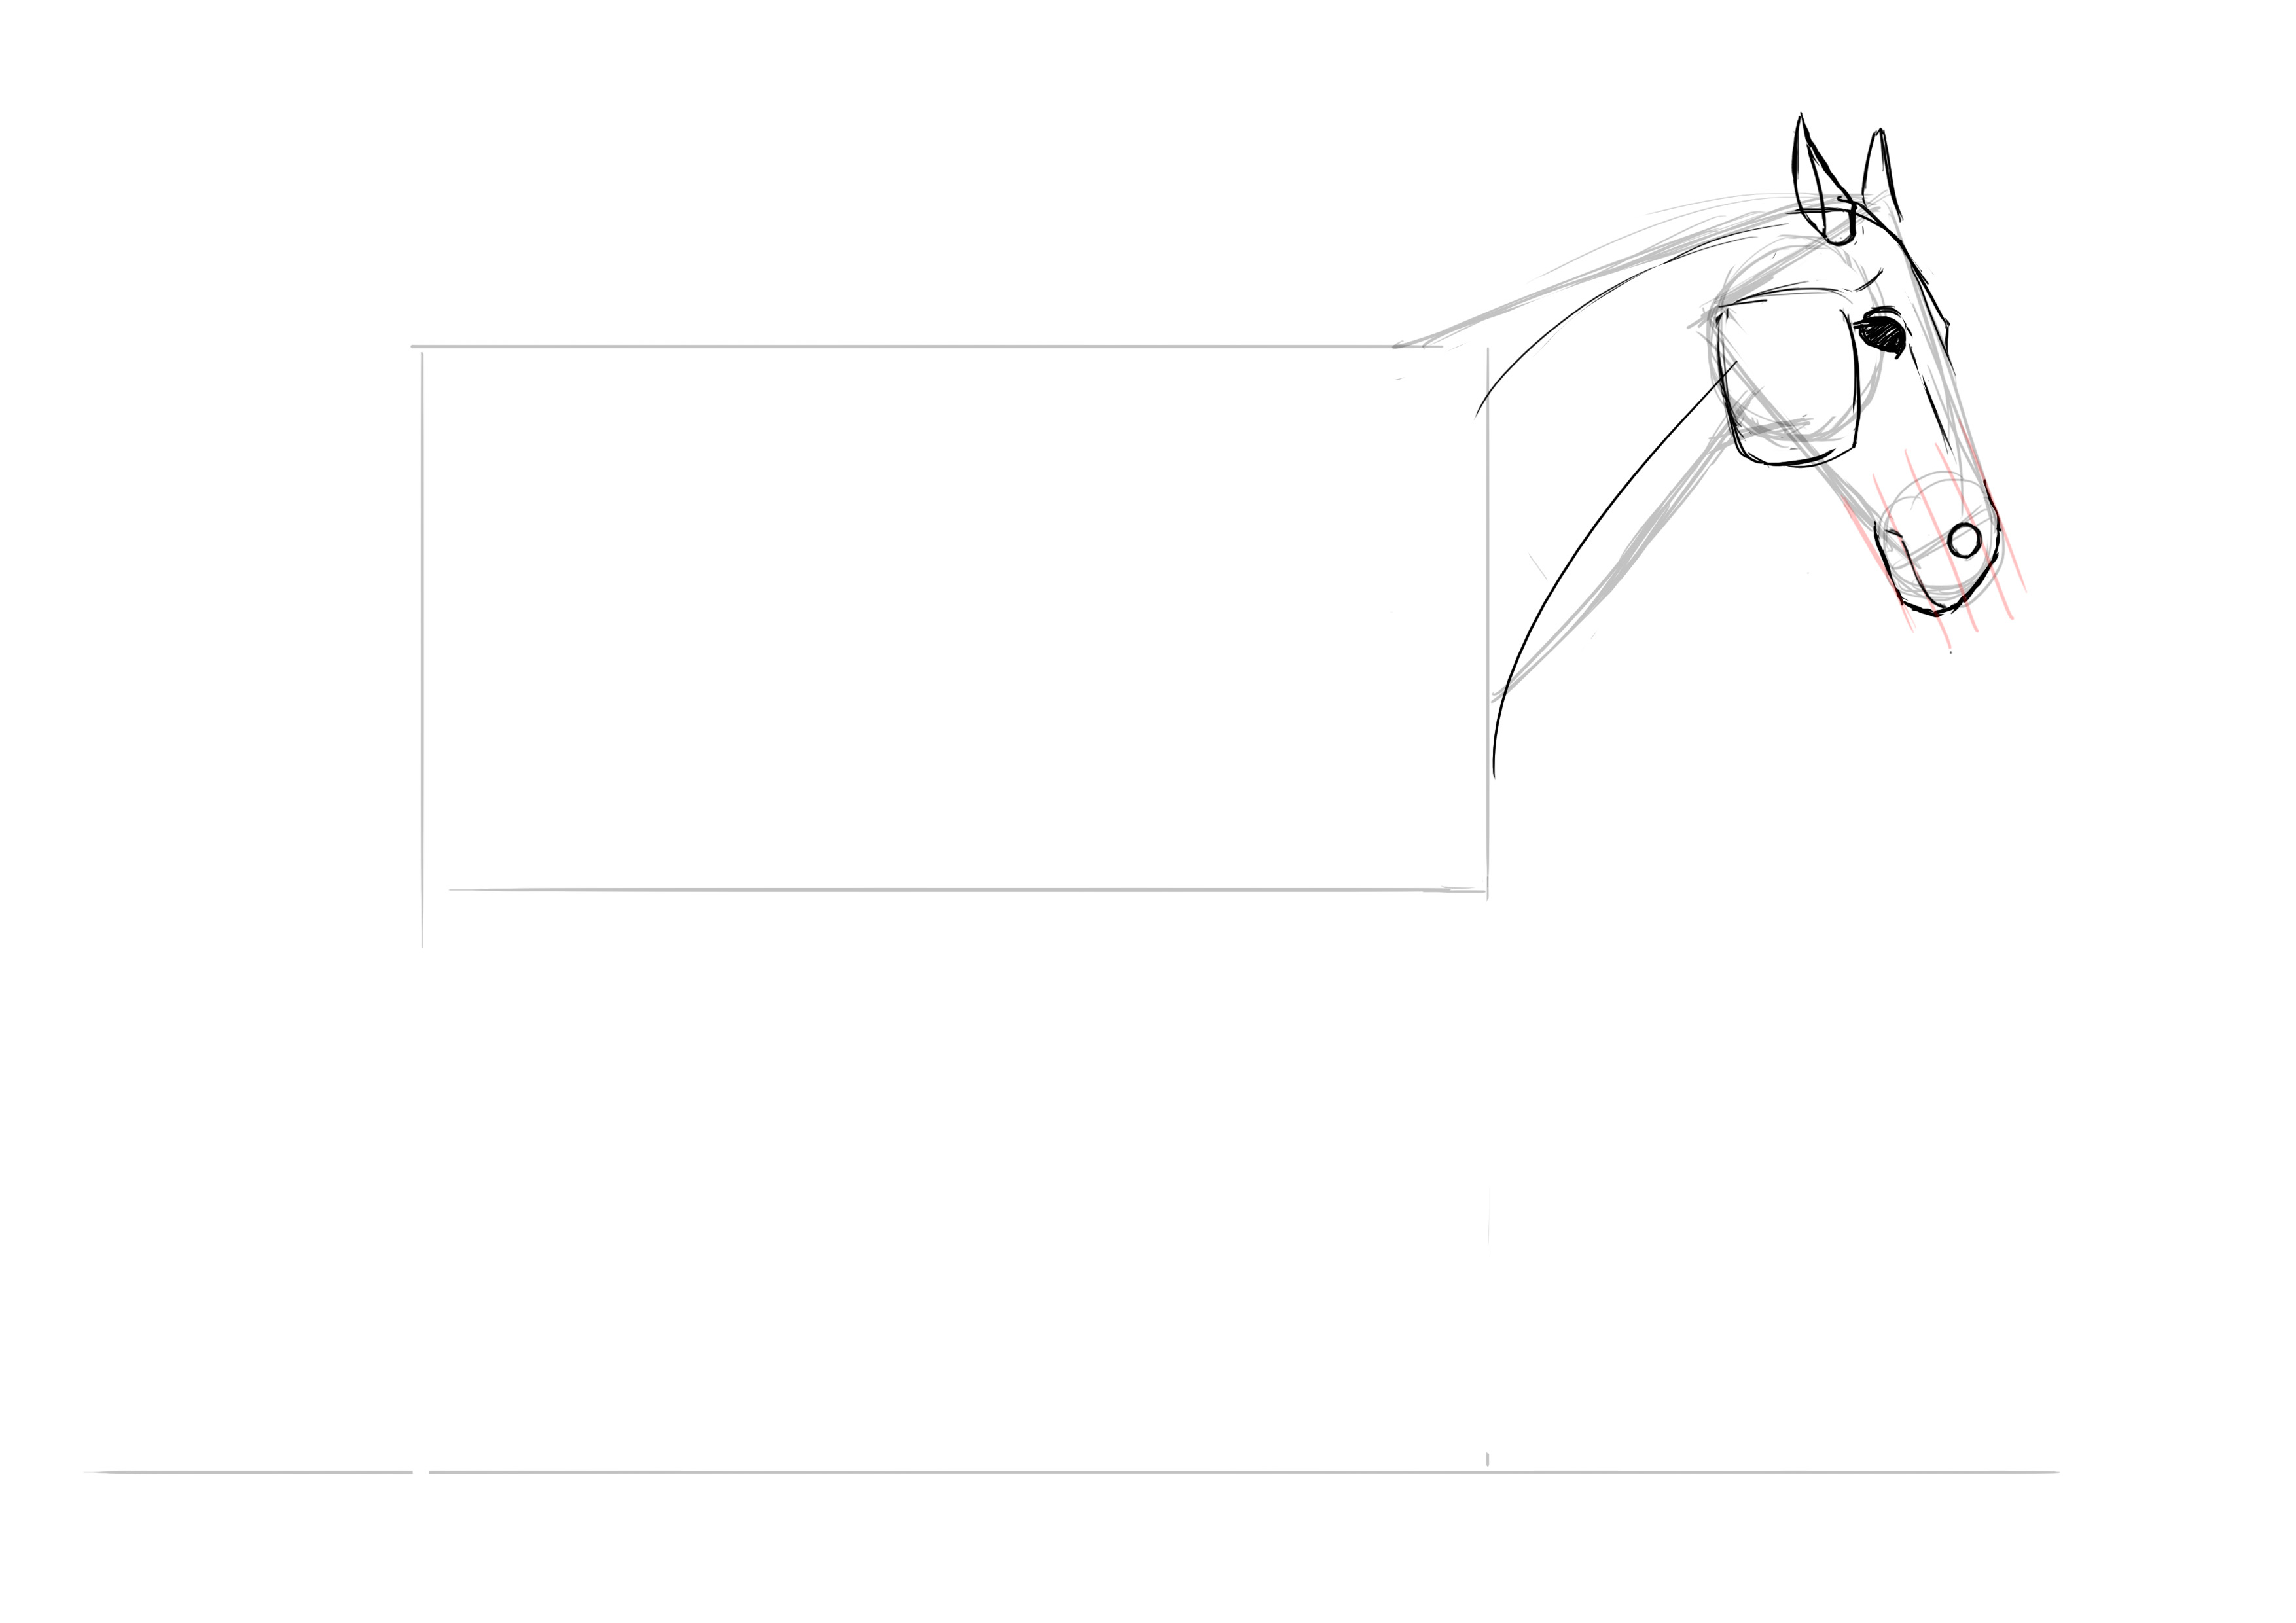
We then draw the neck, as long as the head, slightly wider at its base and a bit narrower at the base of the skull.
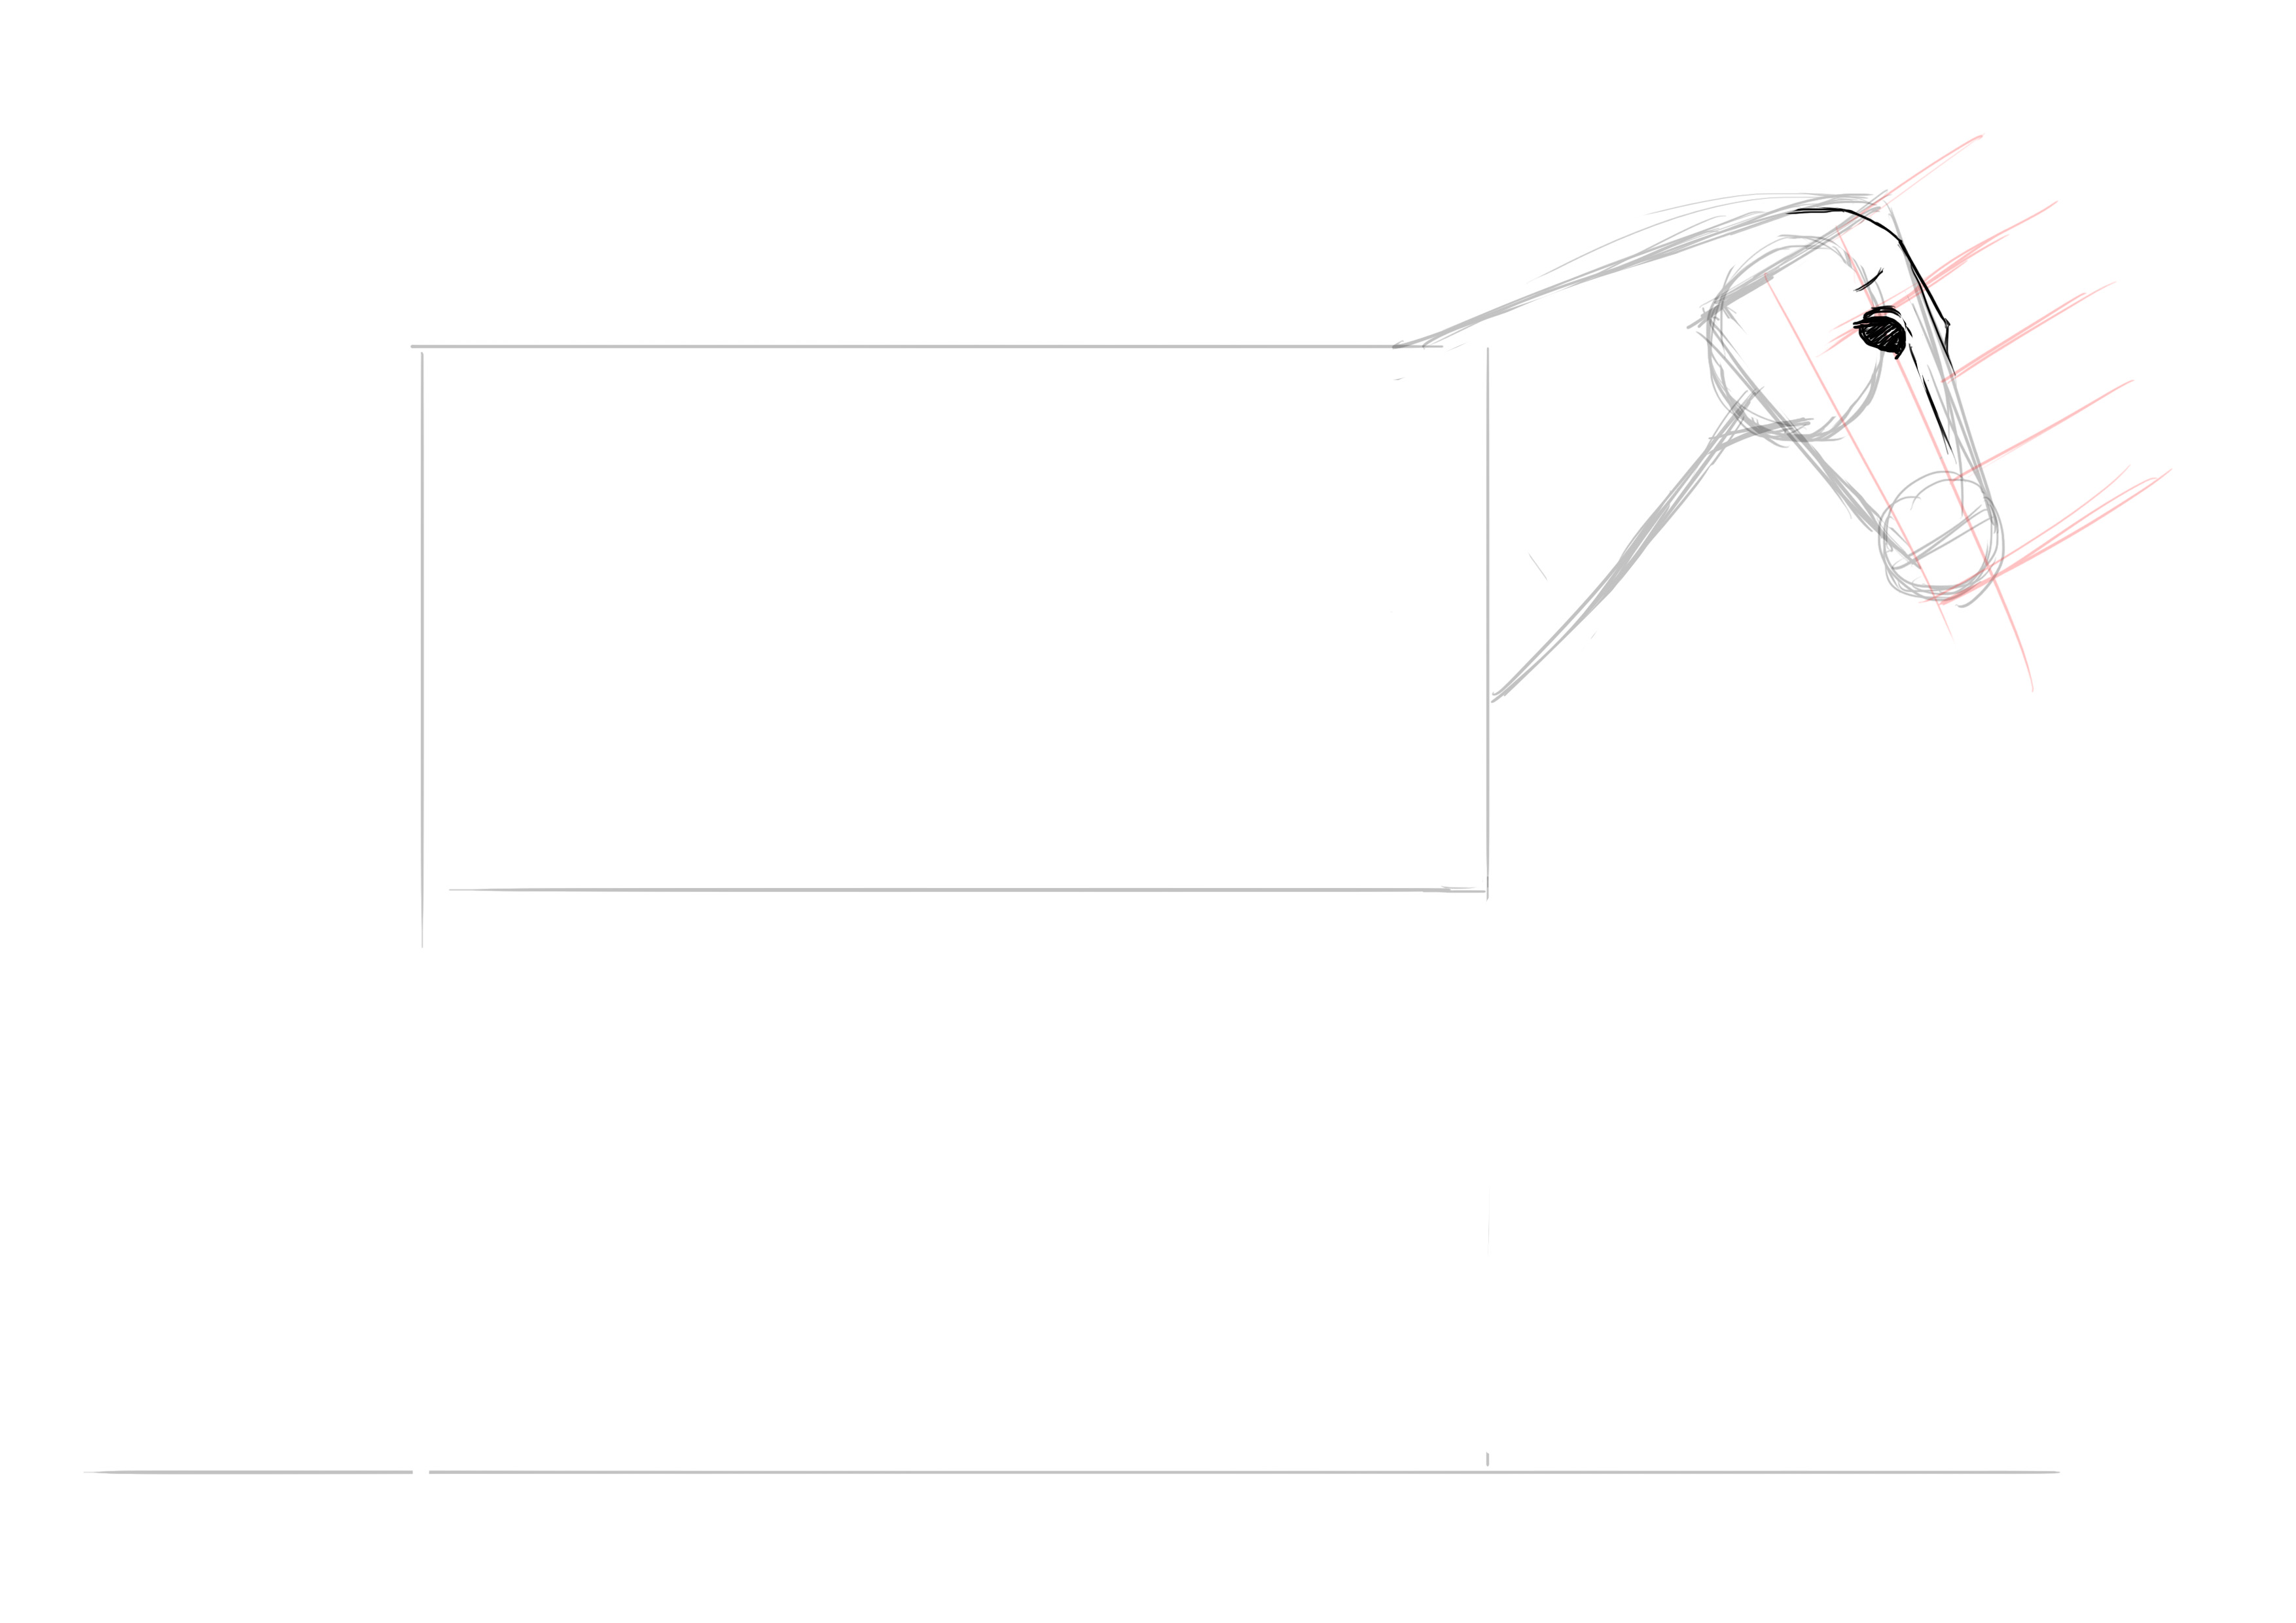
THE BODY SKETCH
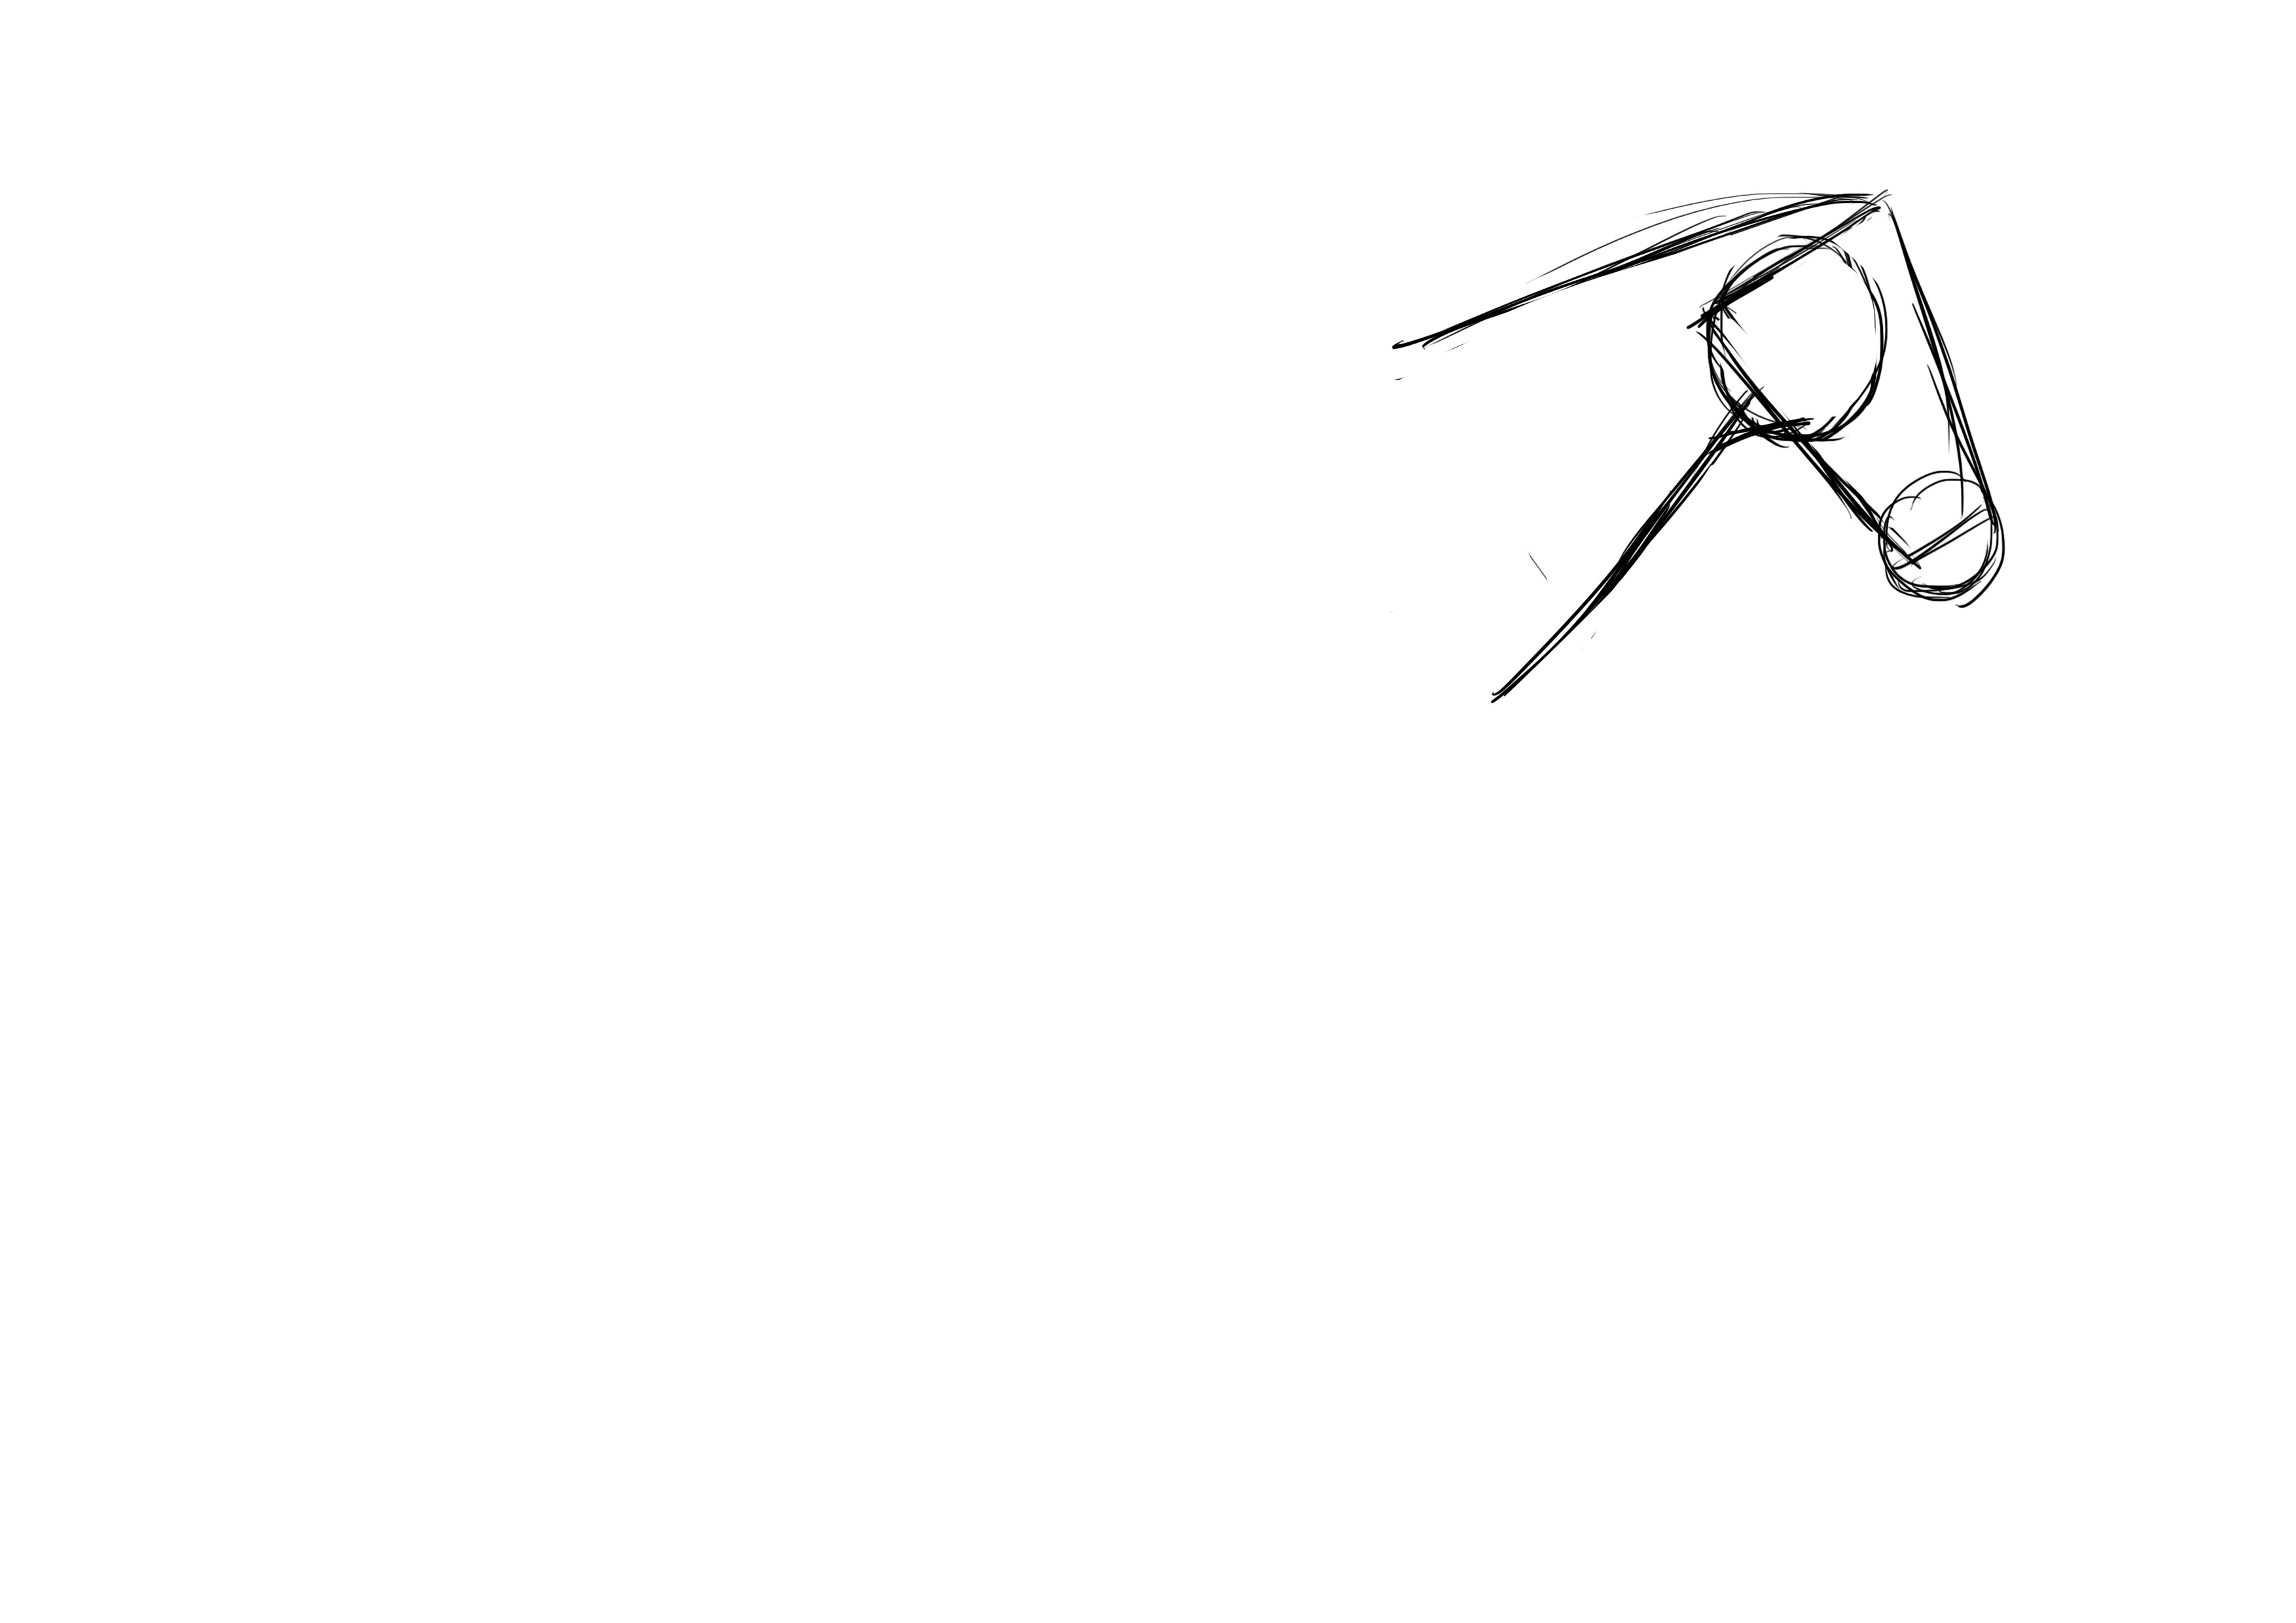
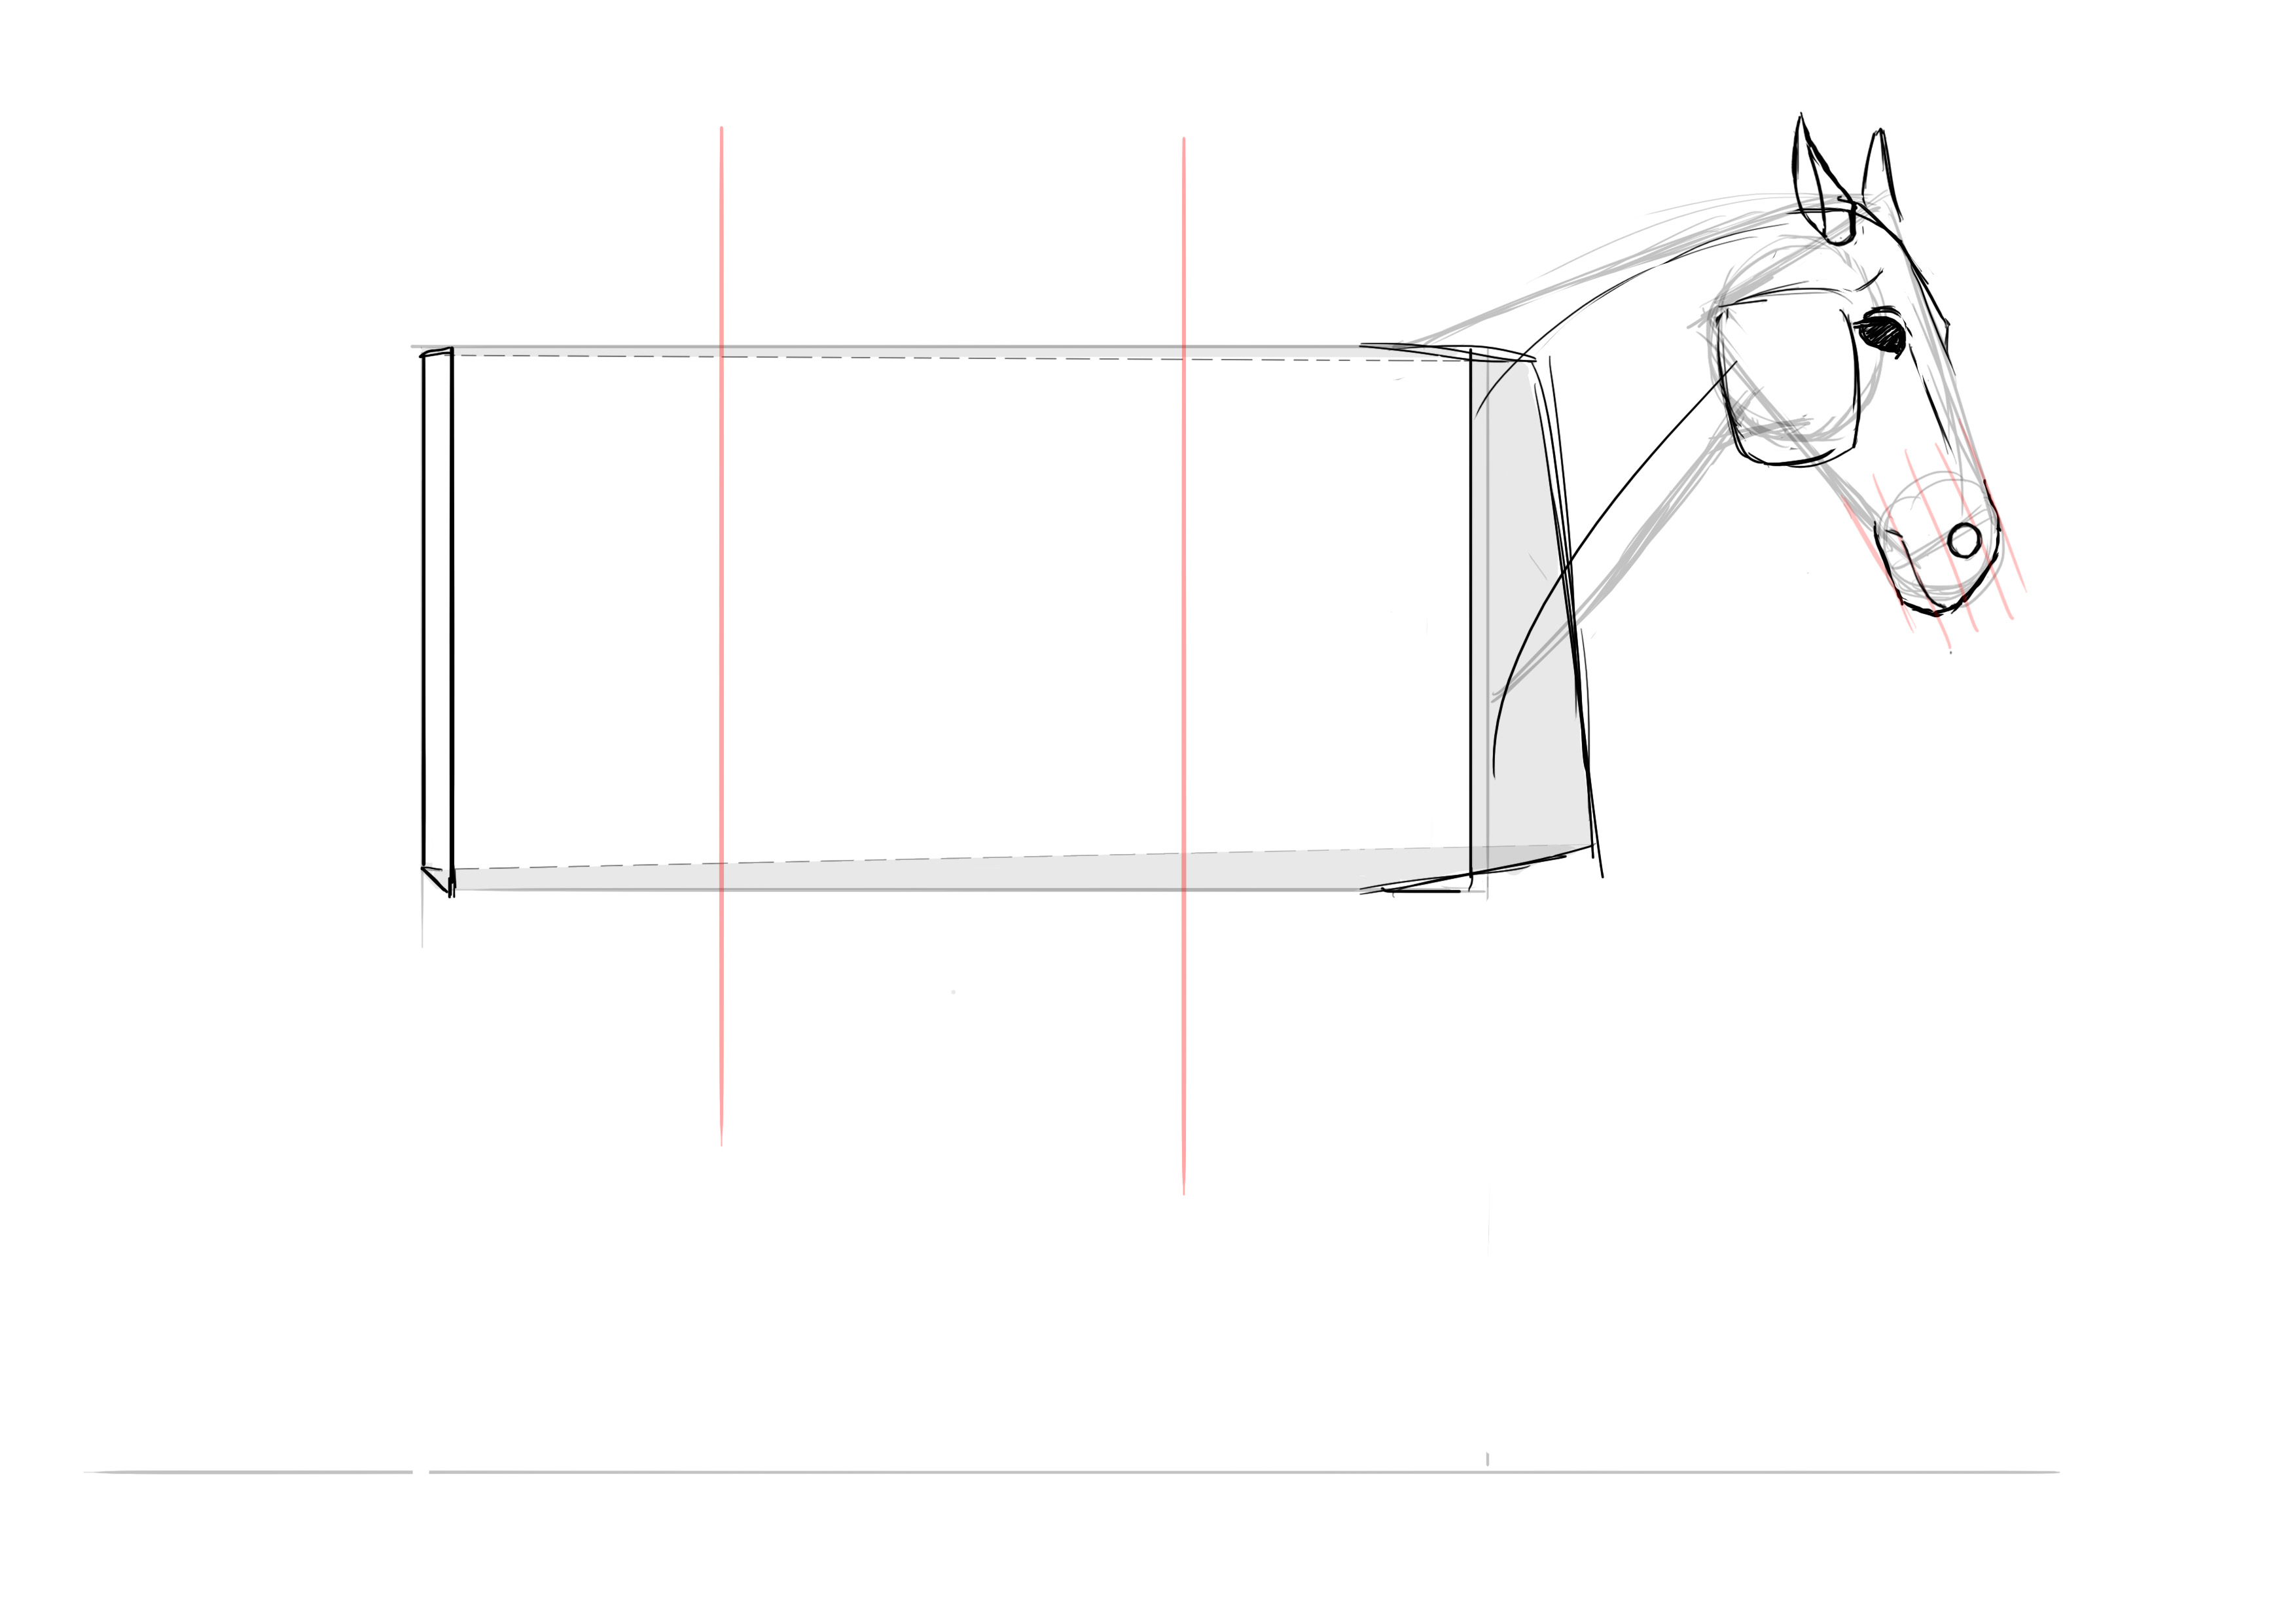
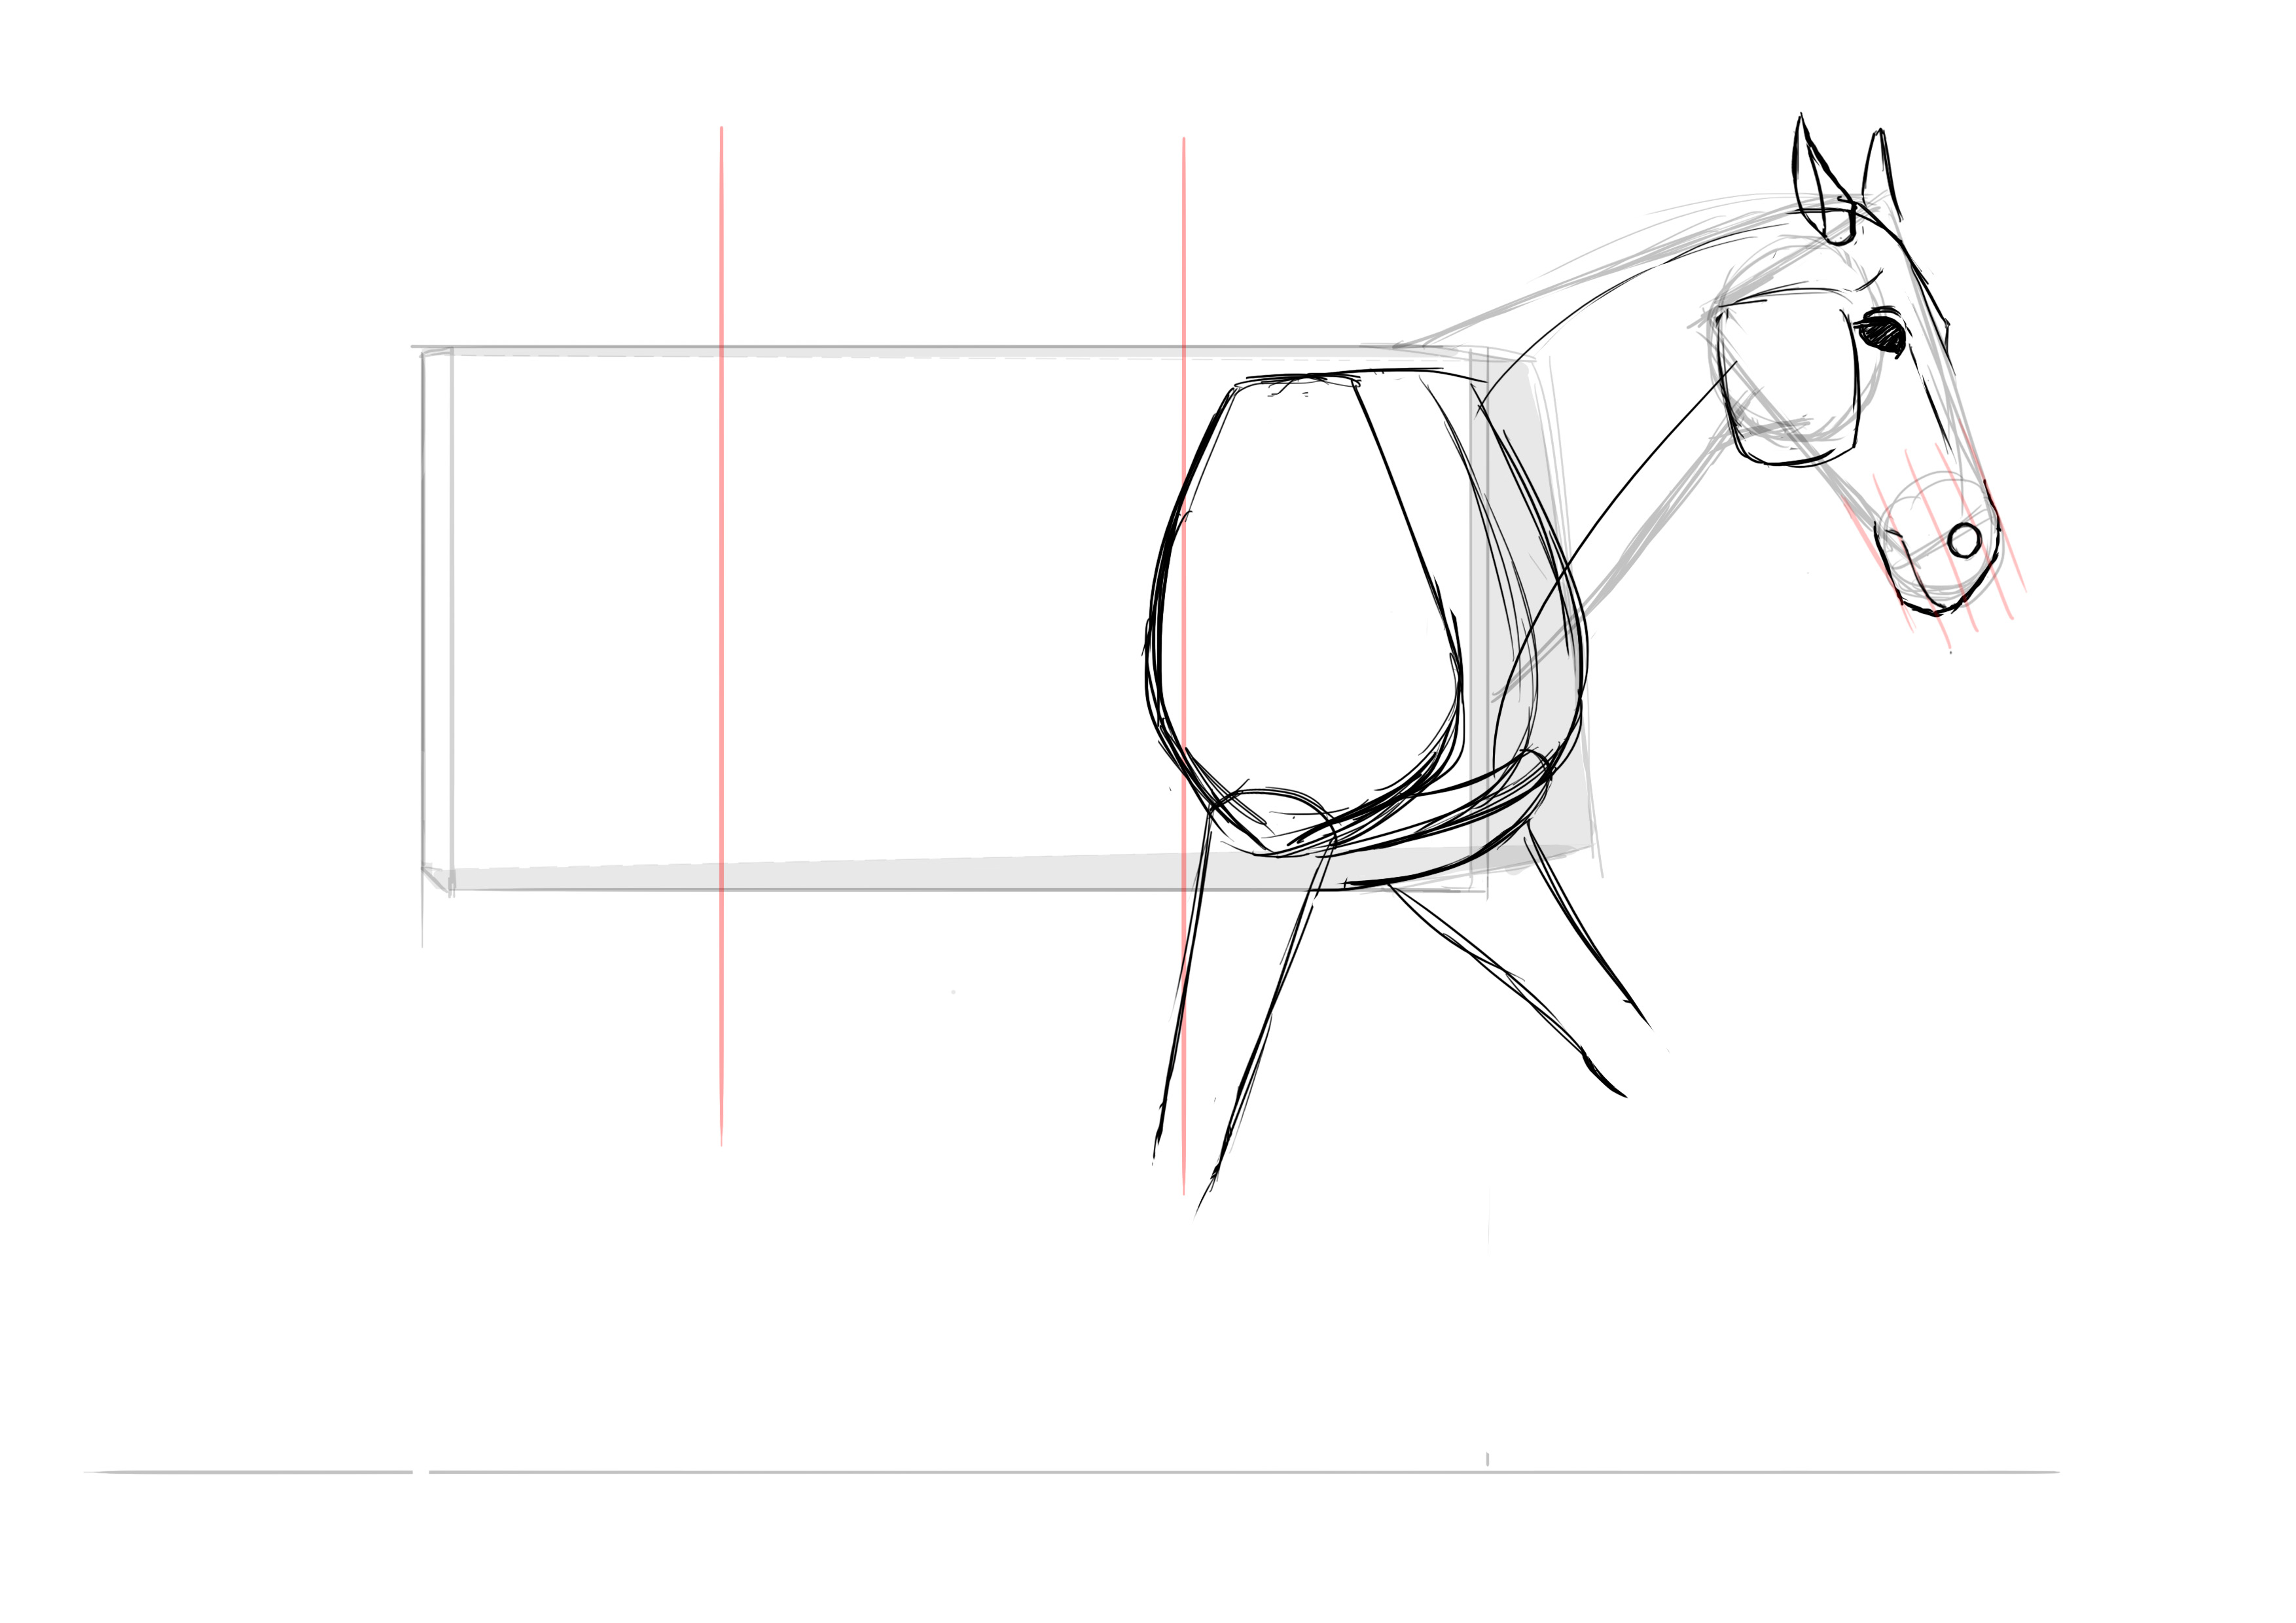
Let's draw a rectangle about the height of the horse's neck + head and twice the length of the head + neck. This rectangle will help us contain the entire body of our horse.
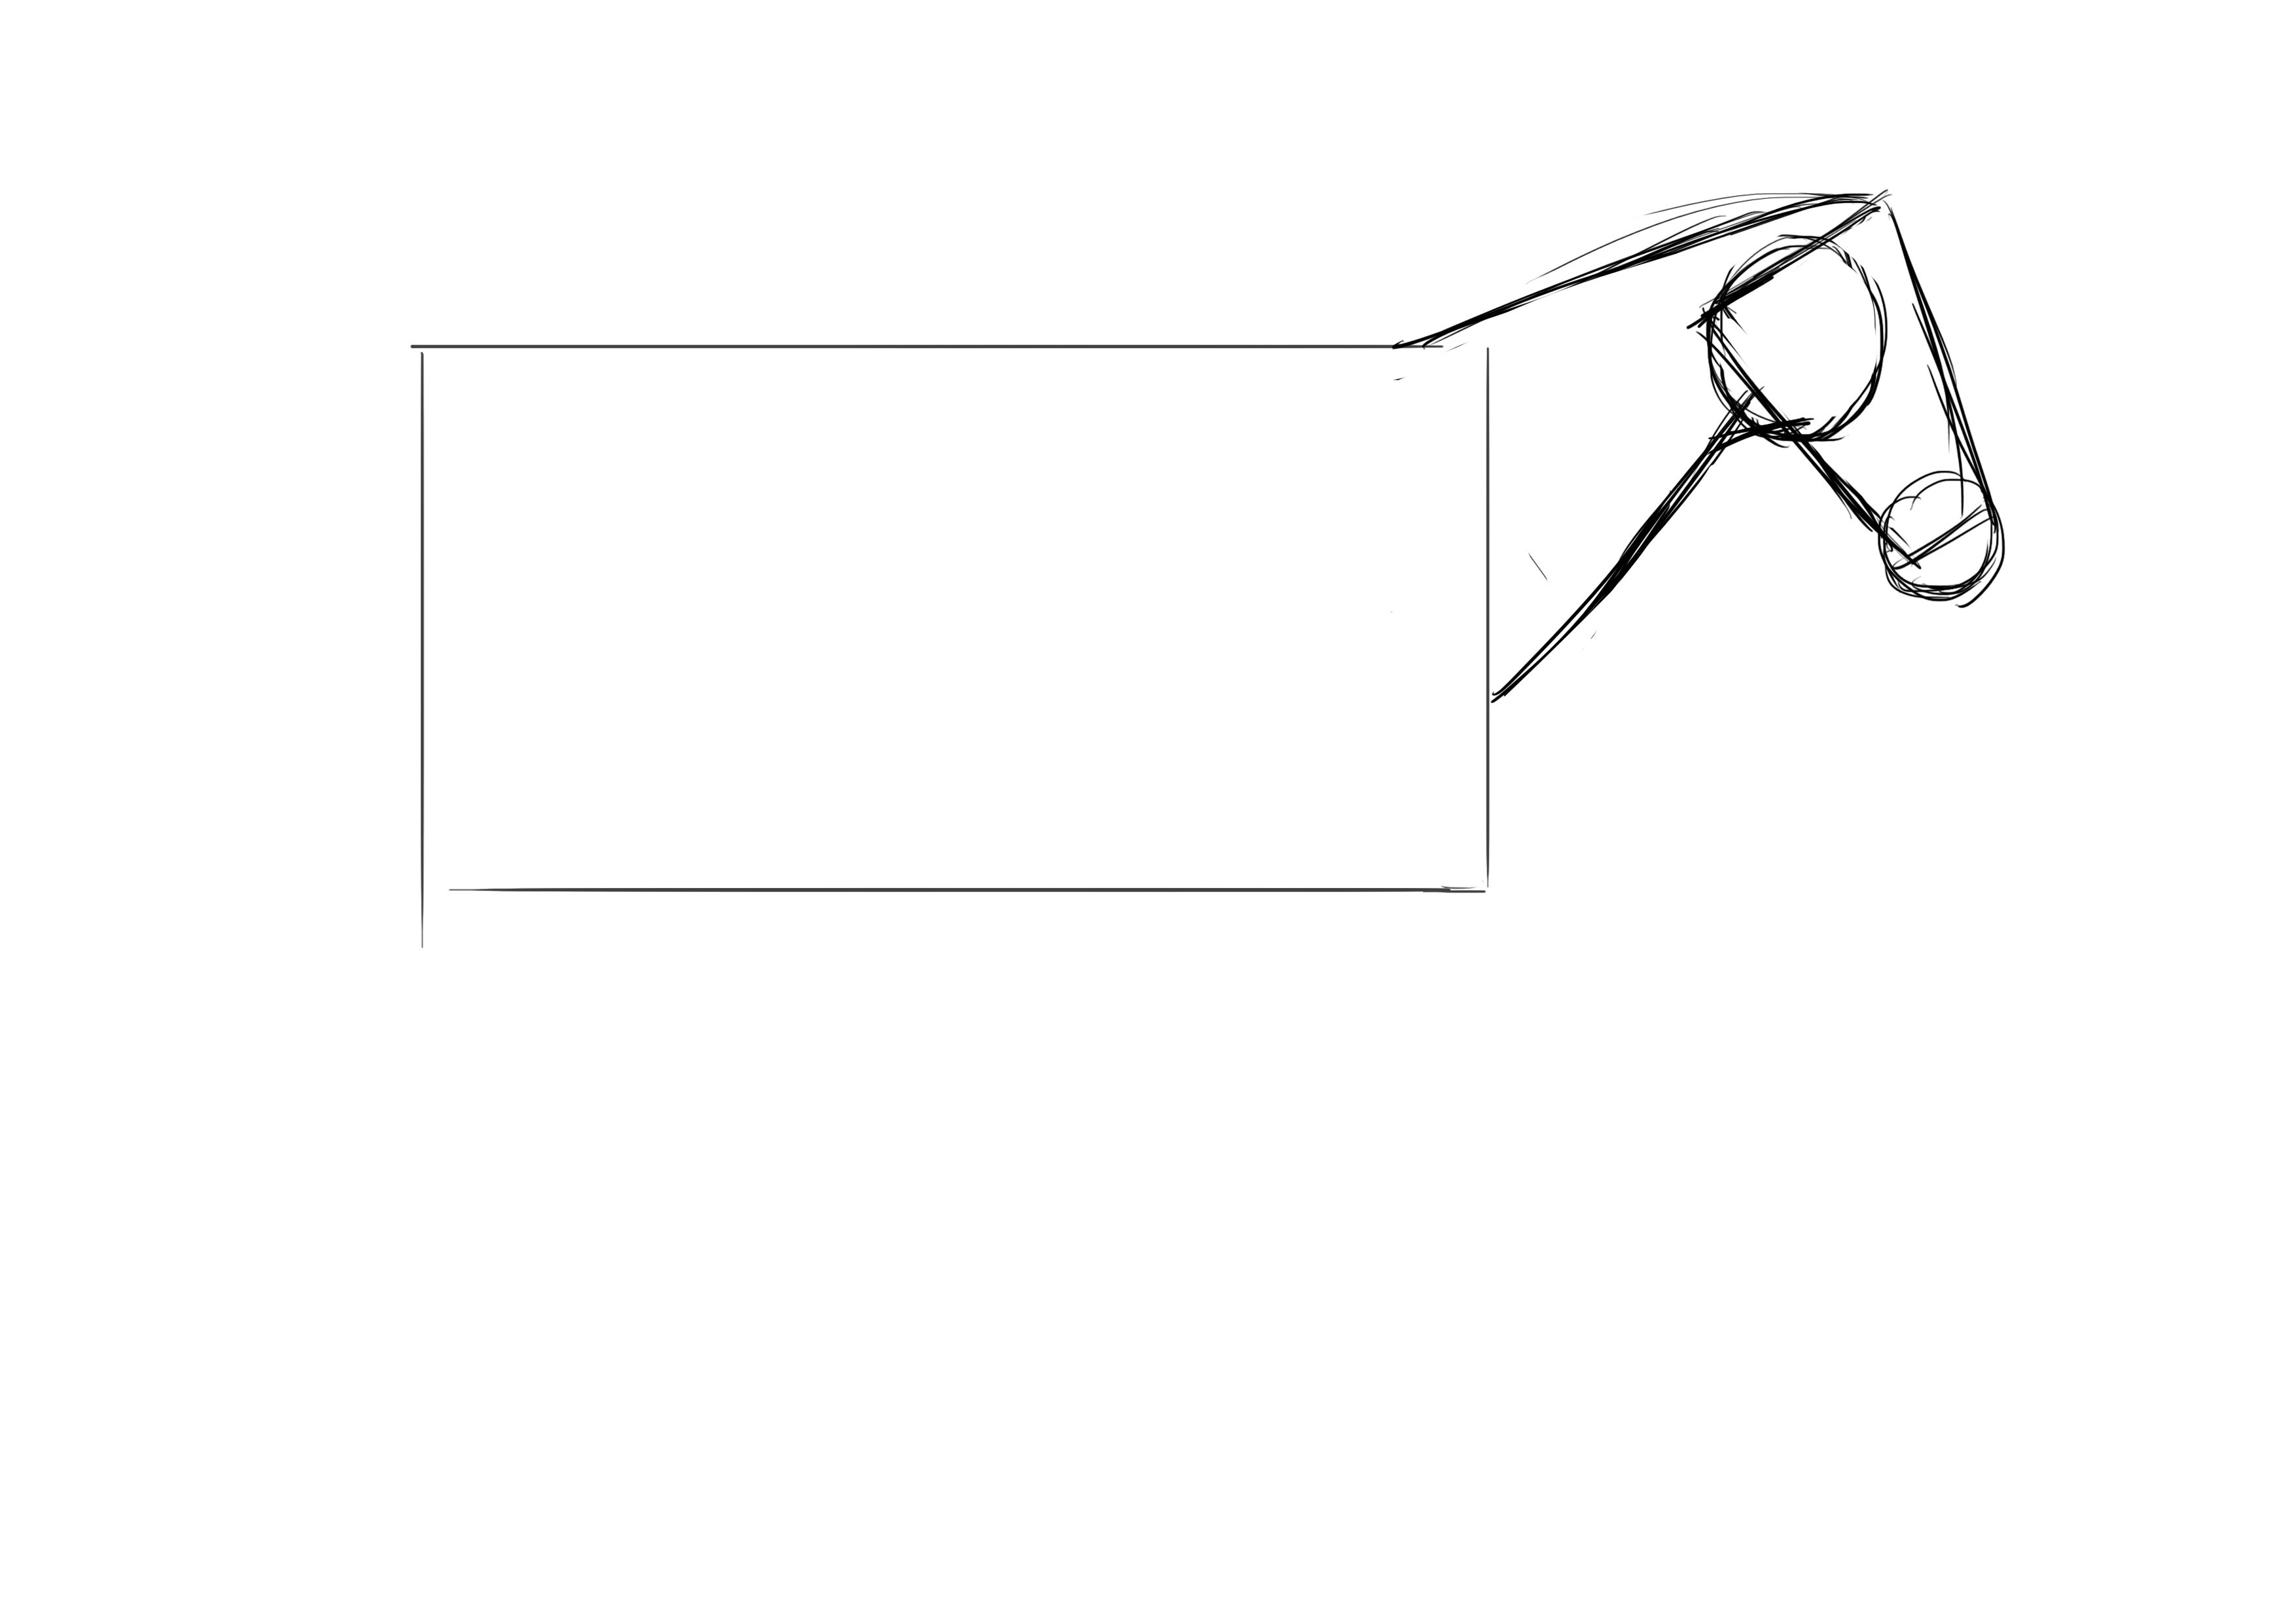
Like with the deer, I won't detail the legs right away as they require restructuring the body, but I will place the ground line. To find it, it’s simple: you should be able to fit a second rectangle under the one for the horse's body. The bottom edge is our ground :3
THE DRAWING OF THE HORSE
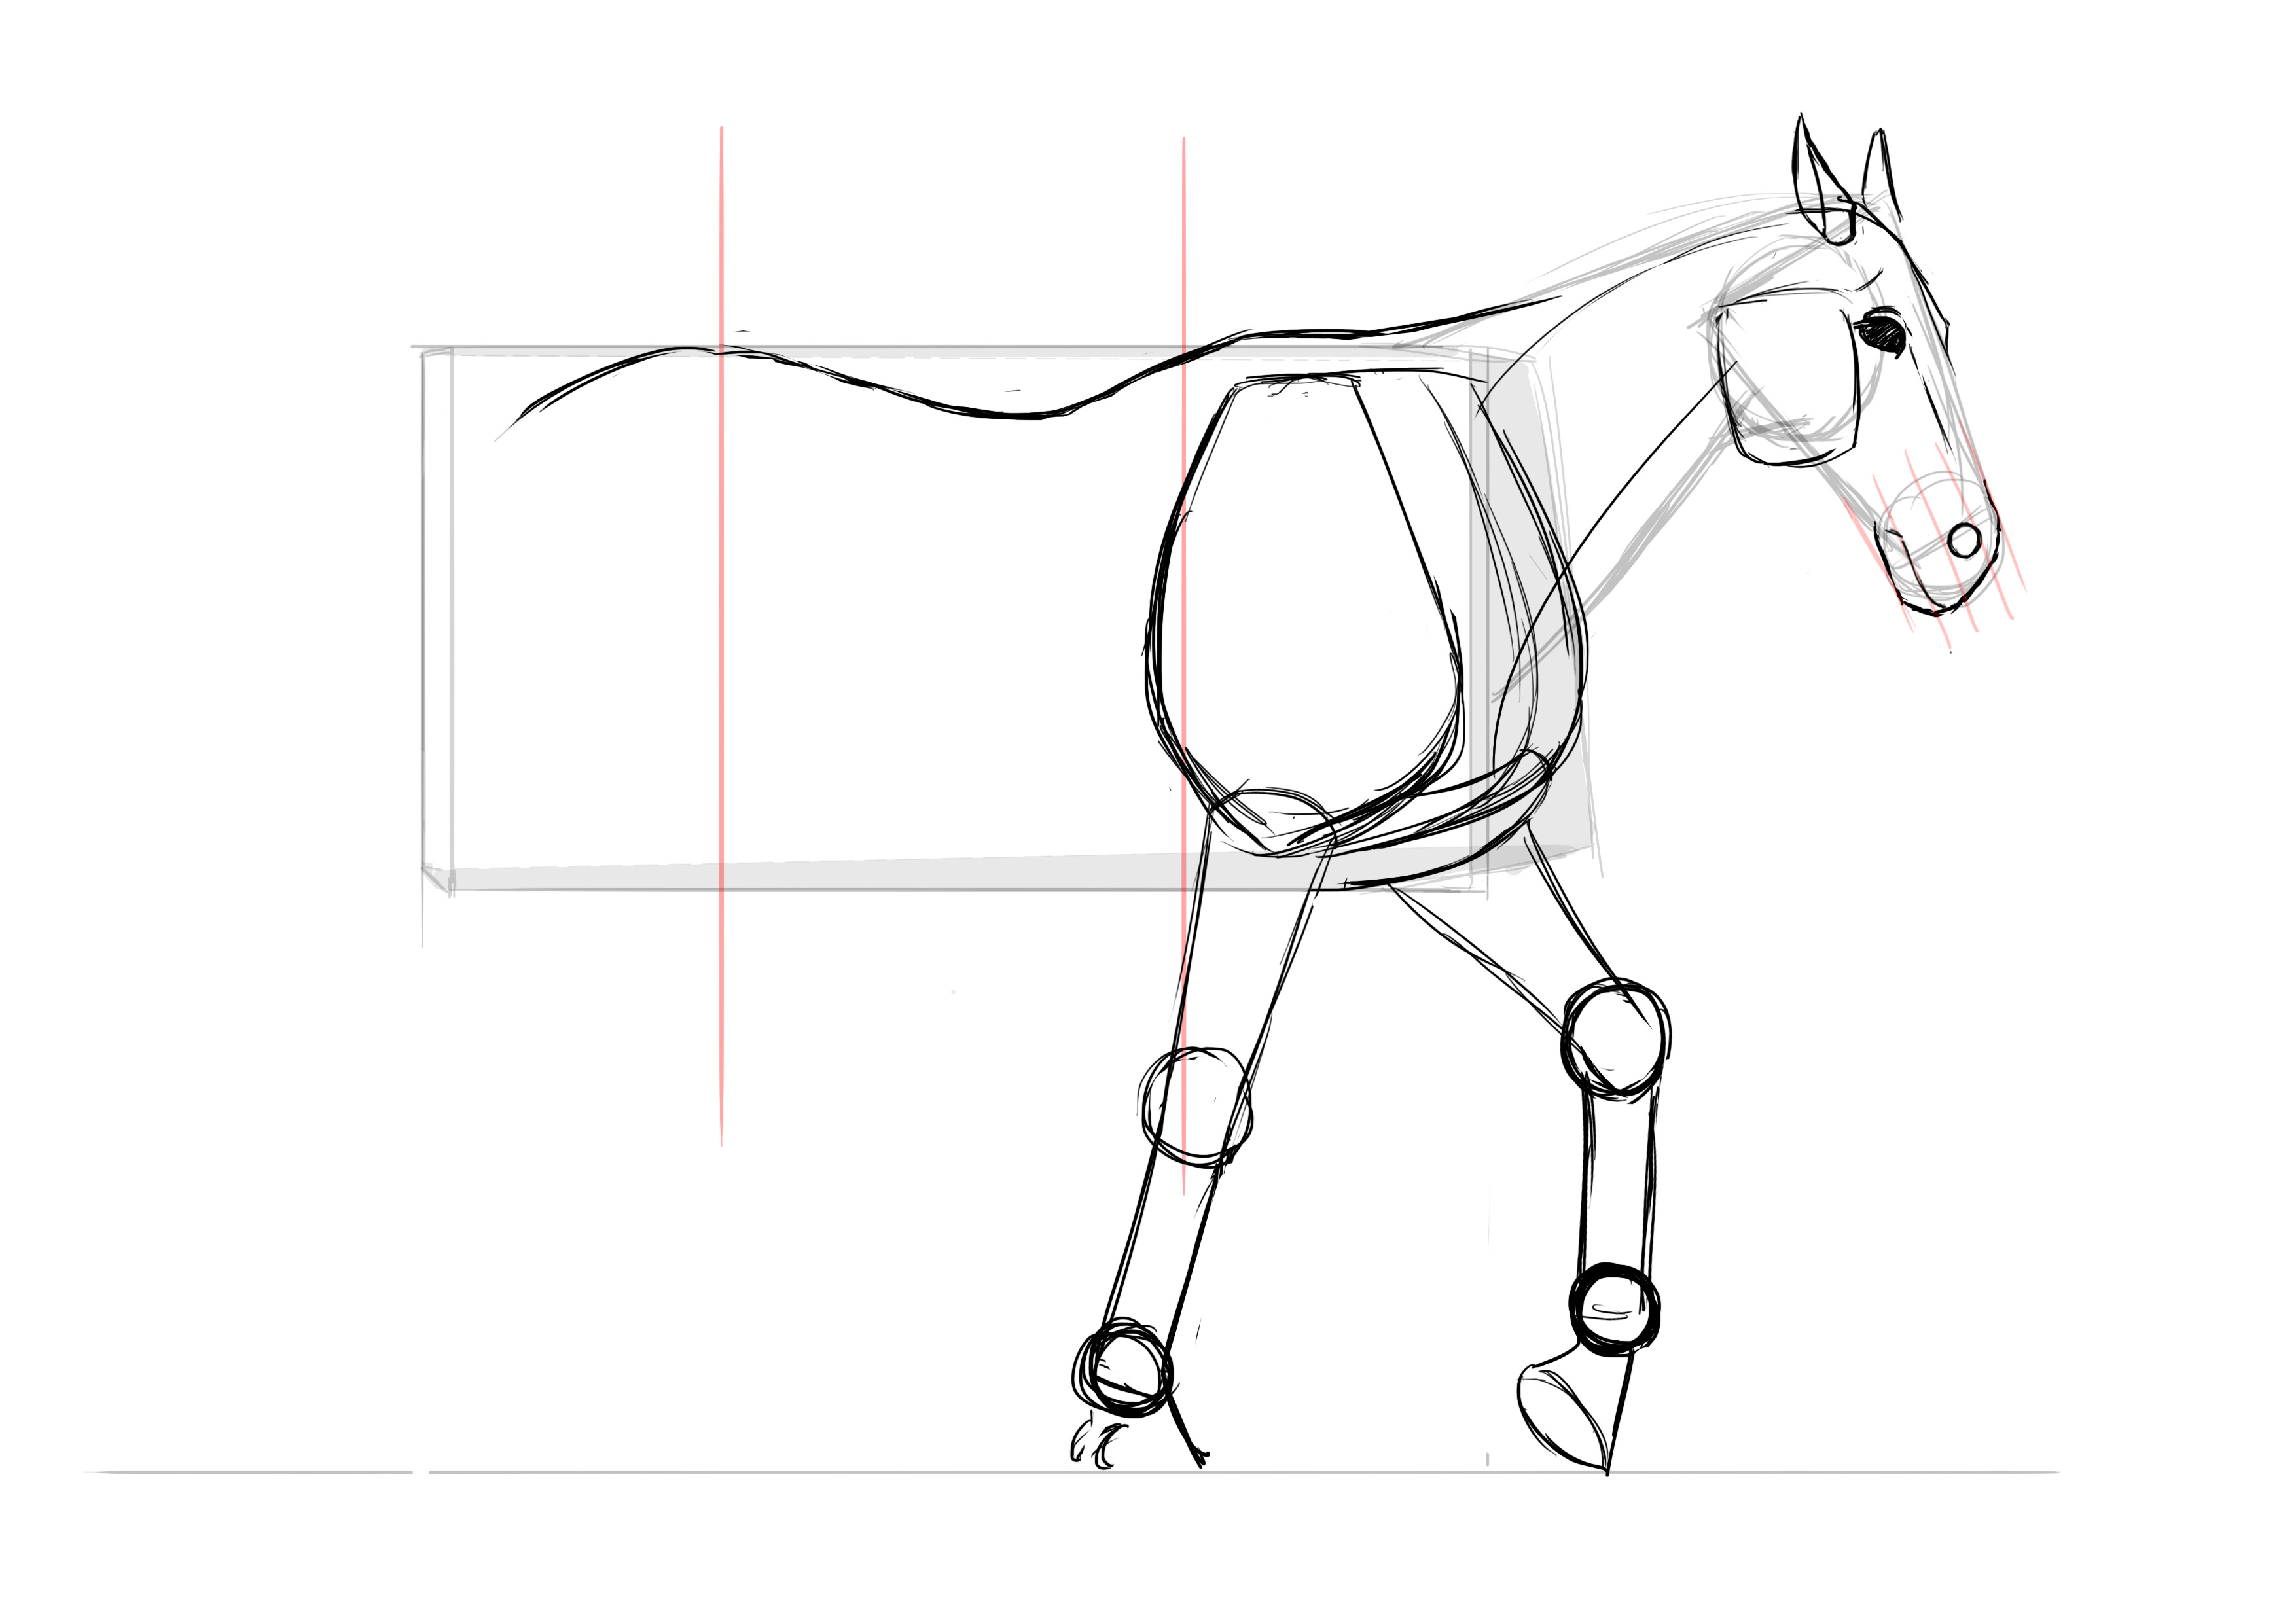
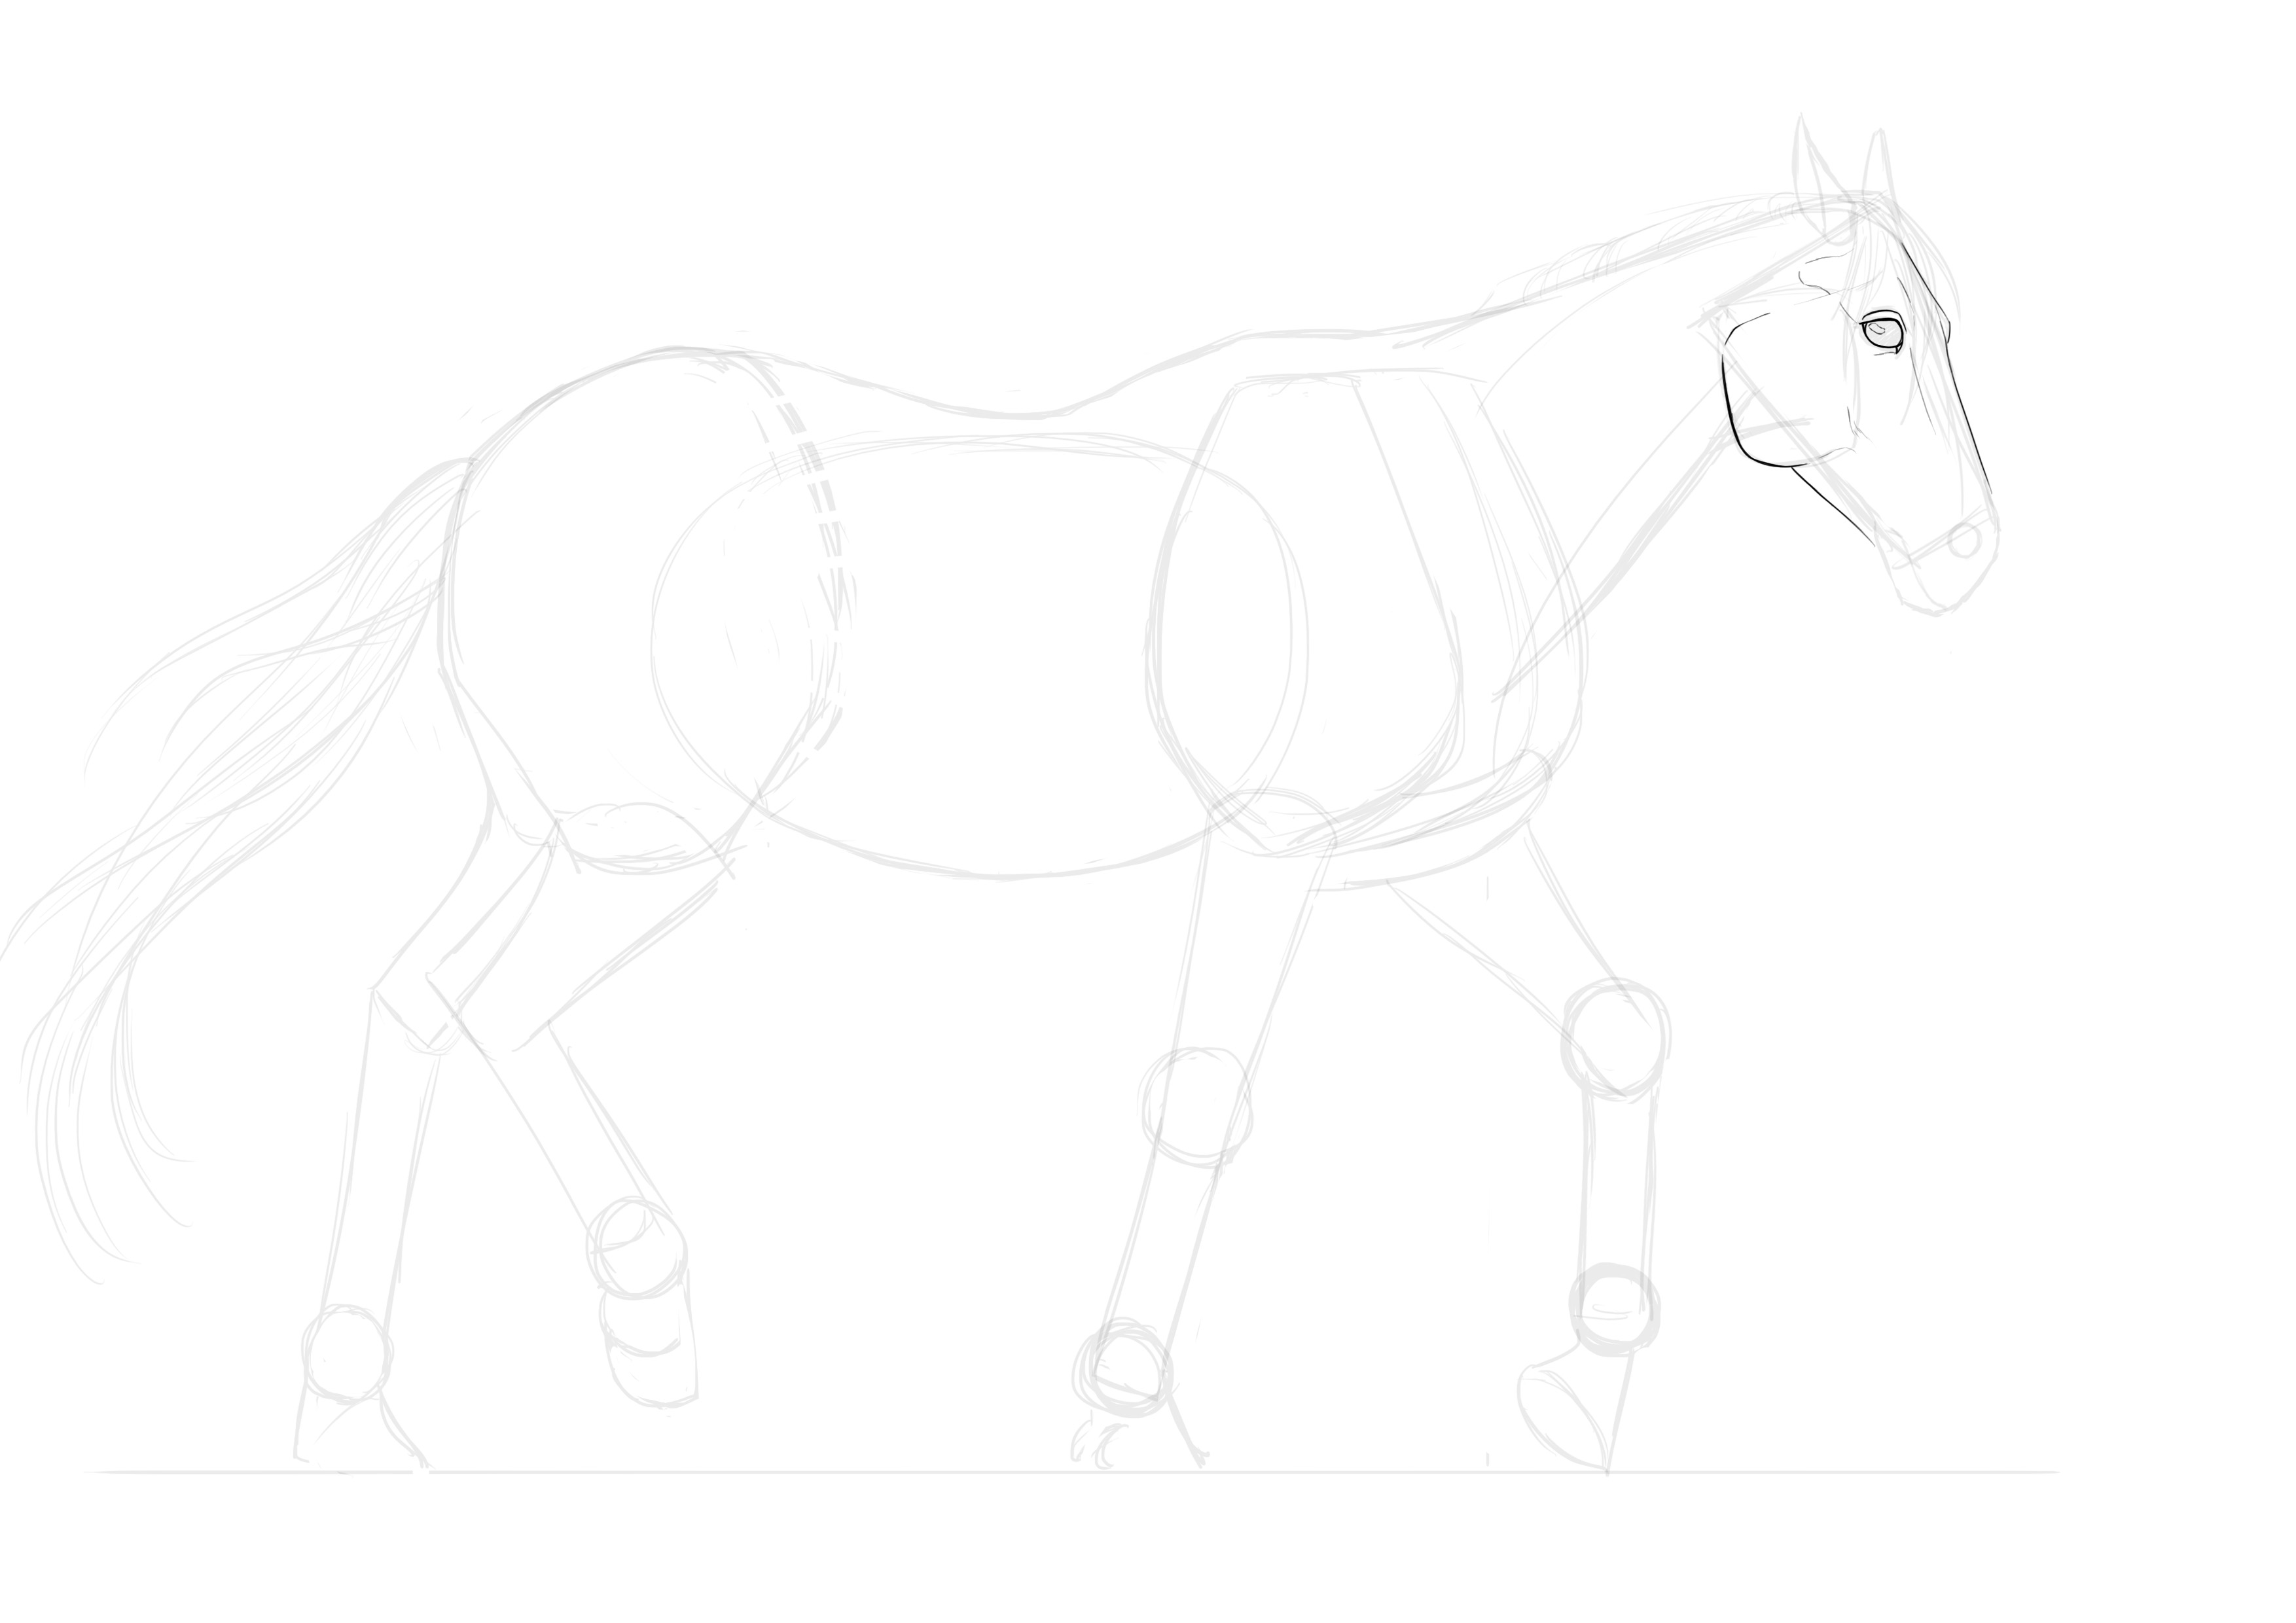
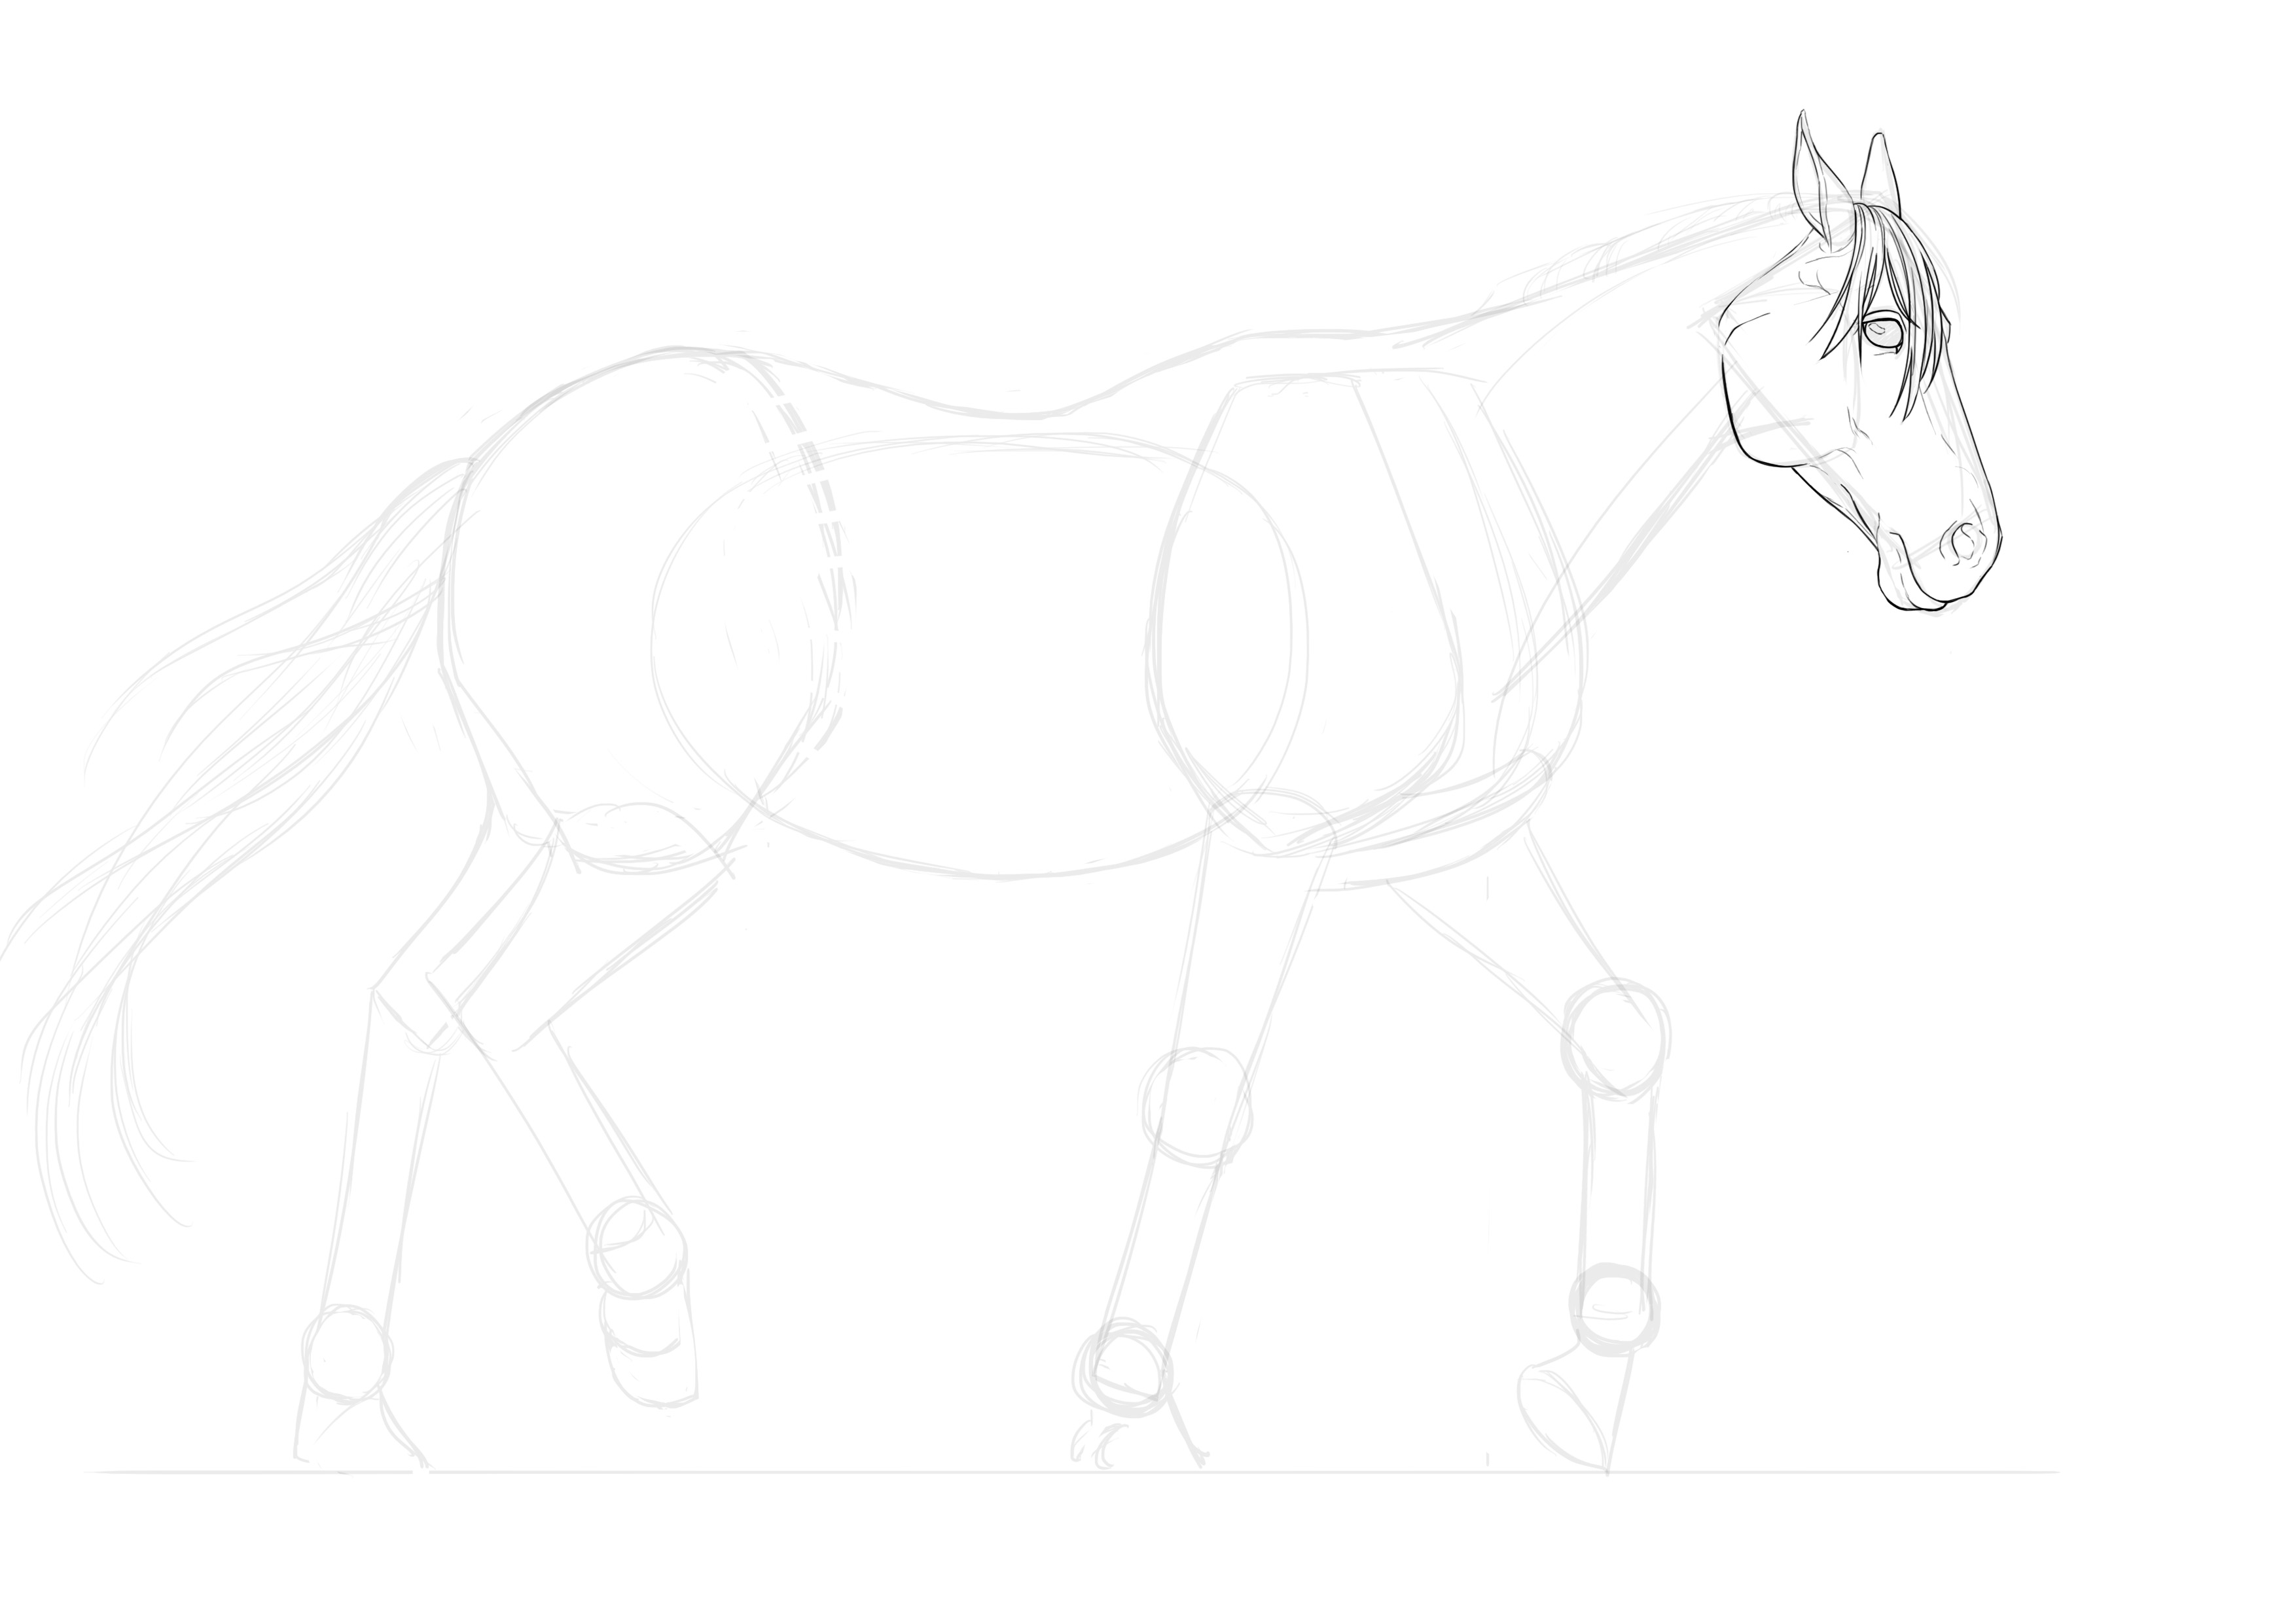
Let's start over by refining and detailing a little more! Let's start with the head.
DRAW THE HEAD
Our model is in profile, which greatly simplifies things for us. So, we have already traced a good part of the basic structure. As I mentioned earlier, the eyes are placed about in the first quarter of the head and about a third of the way up in height. As with all herbivores, horses' eyes are positioned on the sides of the head, in order to monitor their surroundings and take off if a predator appears.
From the front it's much clearer. We can clearly see that the eyes are located on the sides. We can break down the shape of the head like this:
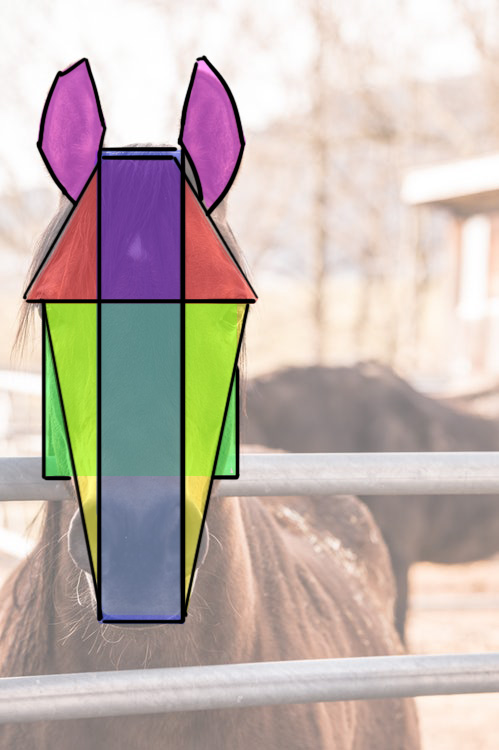
A big rectangle for the muzzle, a trapezoid for the forehead and the top part of the eyes, a triangle for the "cheekbones" and a rectangle for the cheeks. Not to forget the two diamonds for the ears, of course ;)
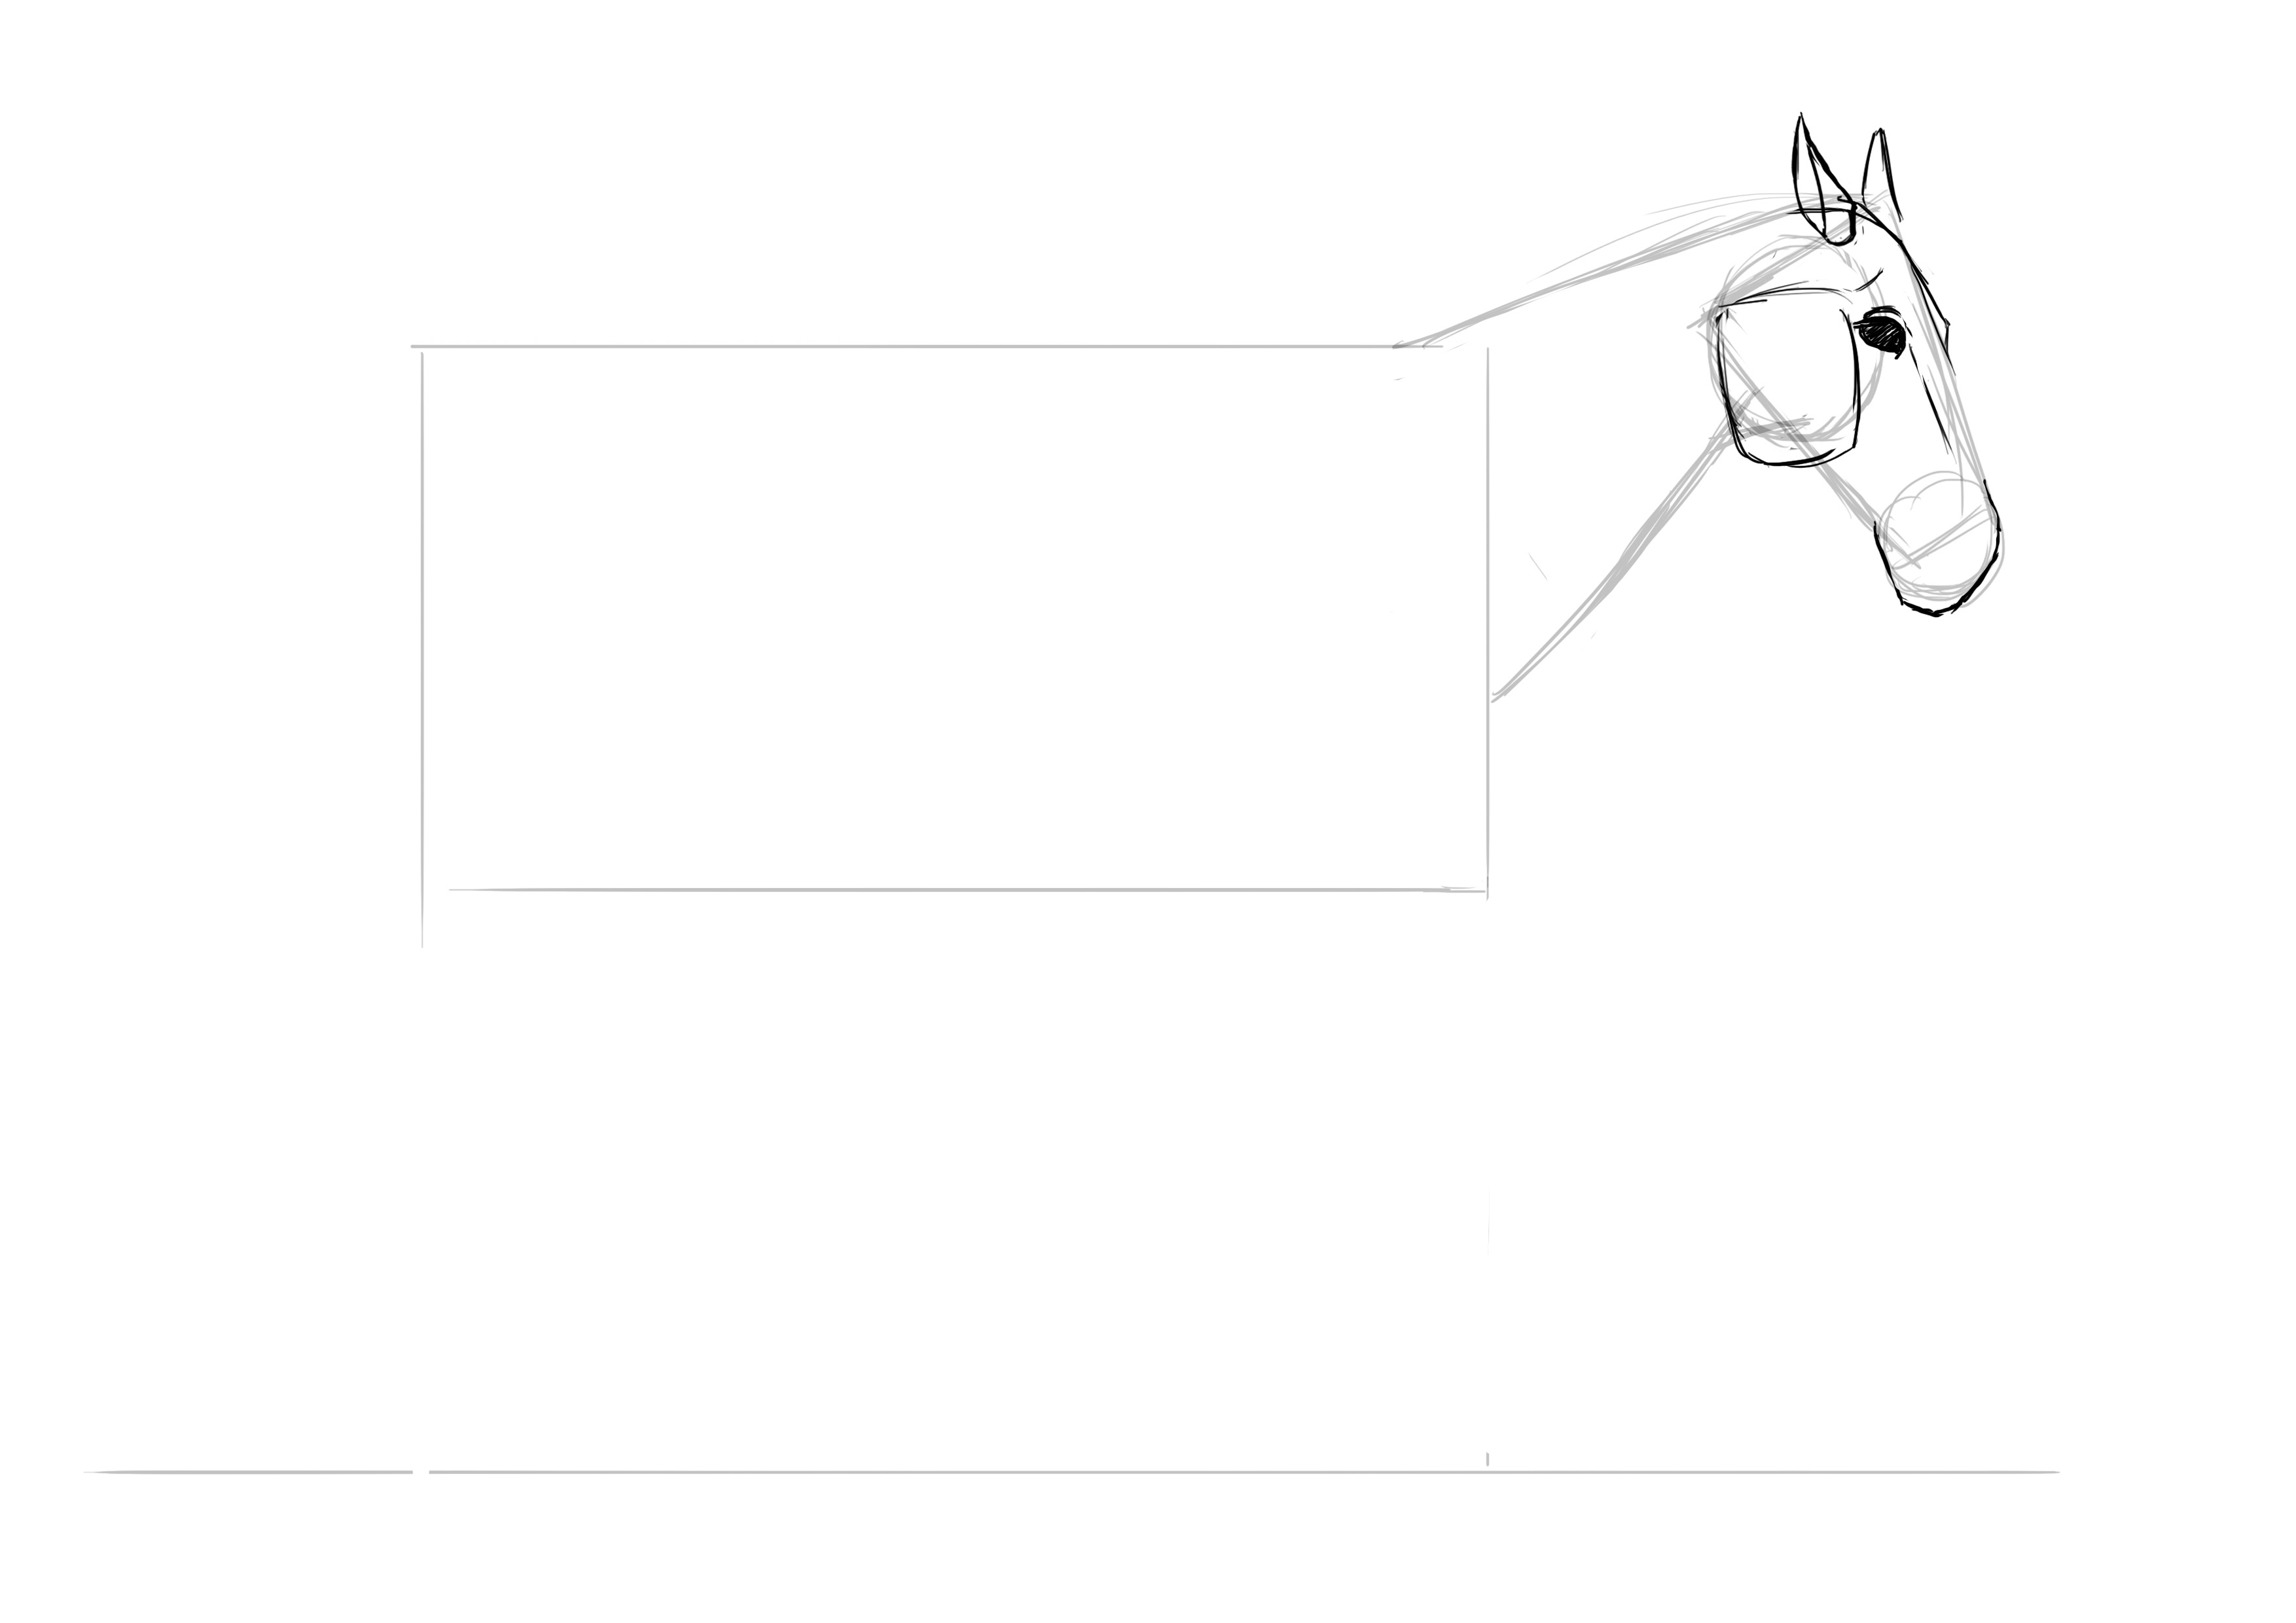
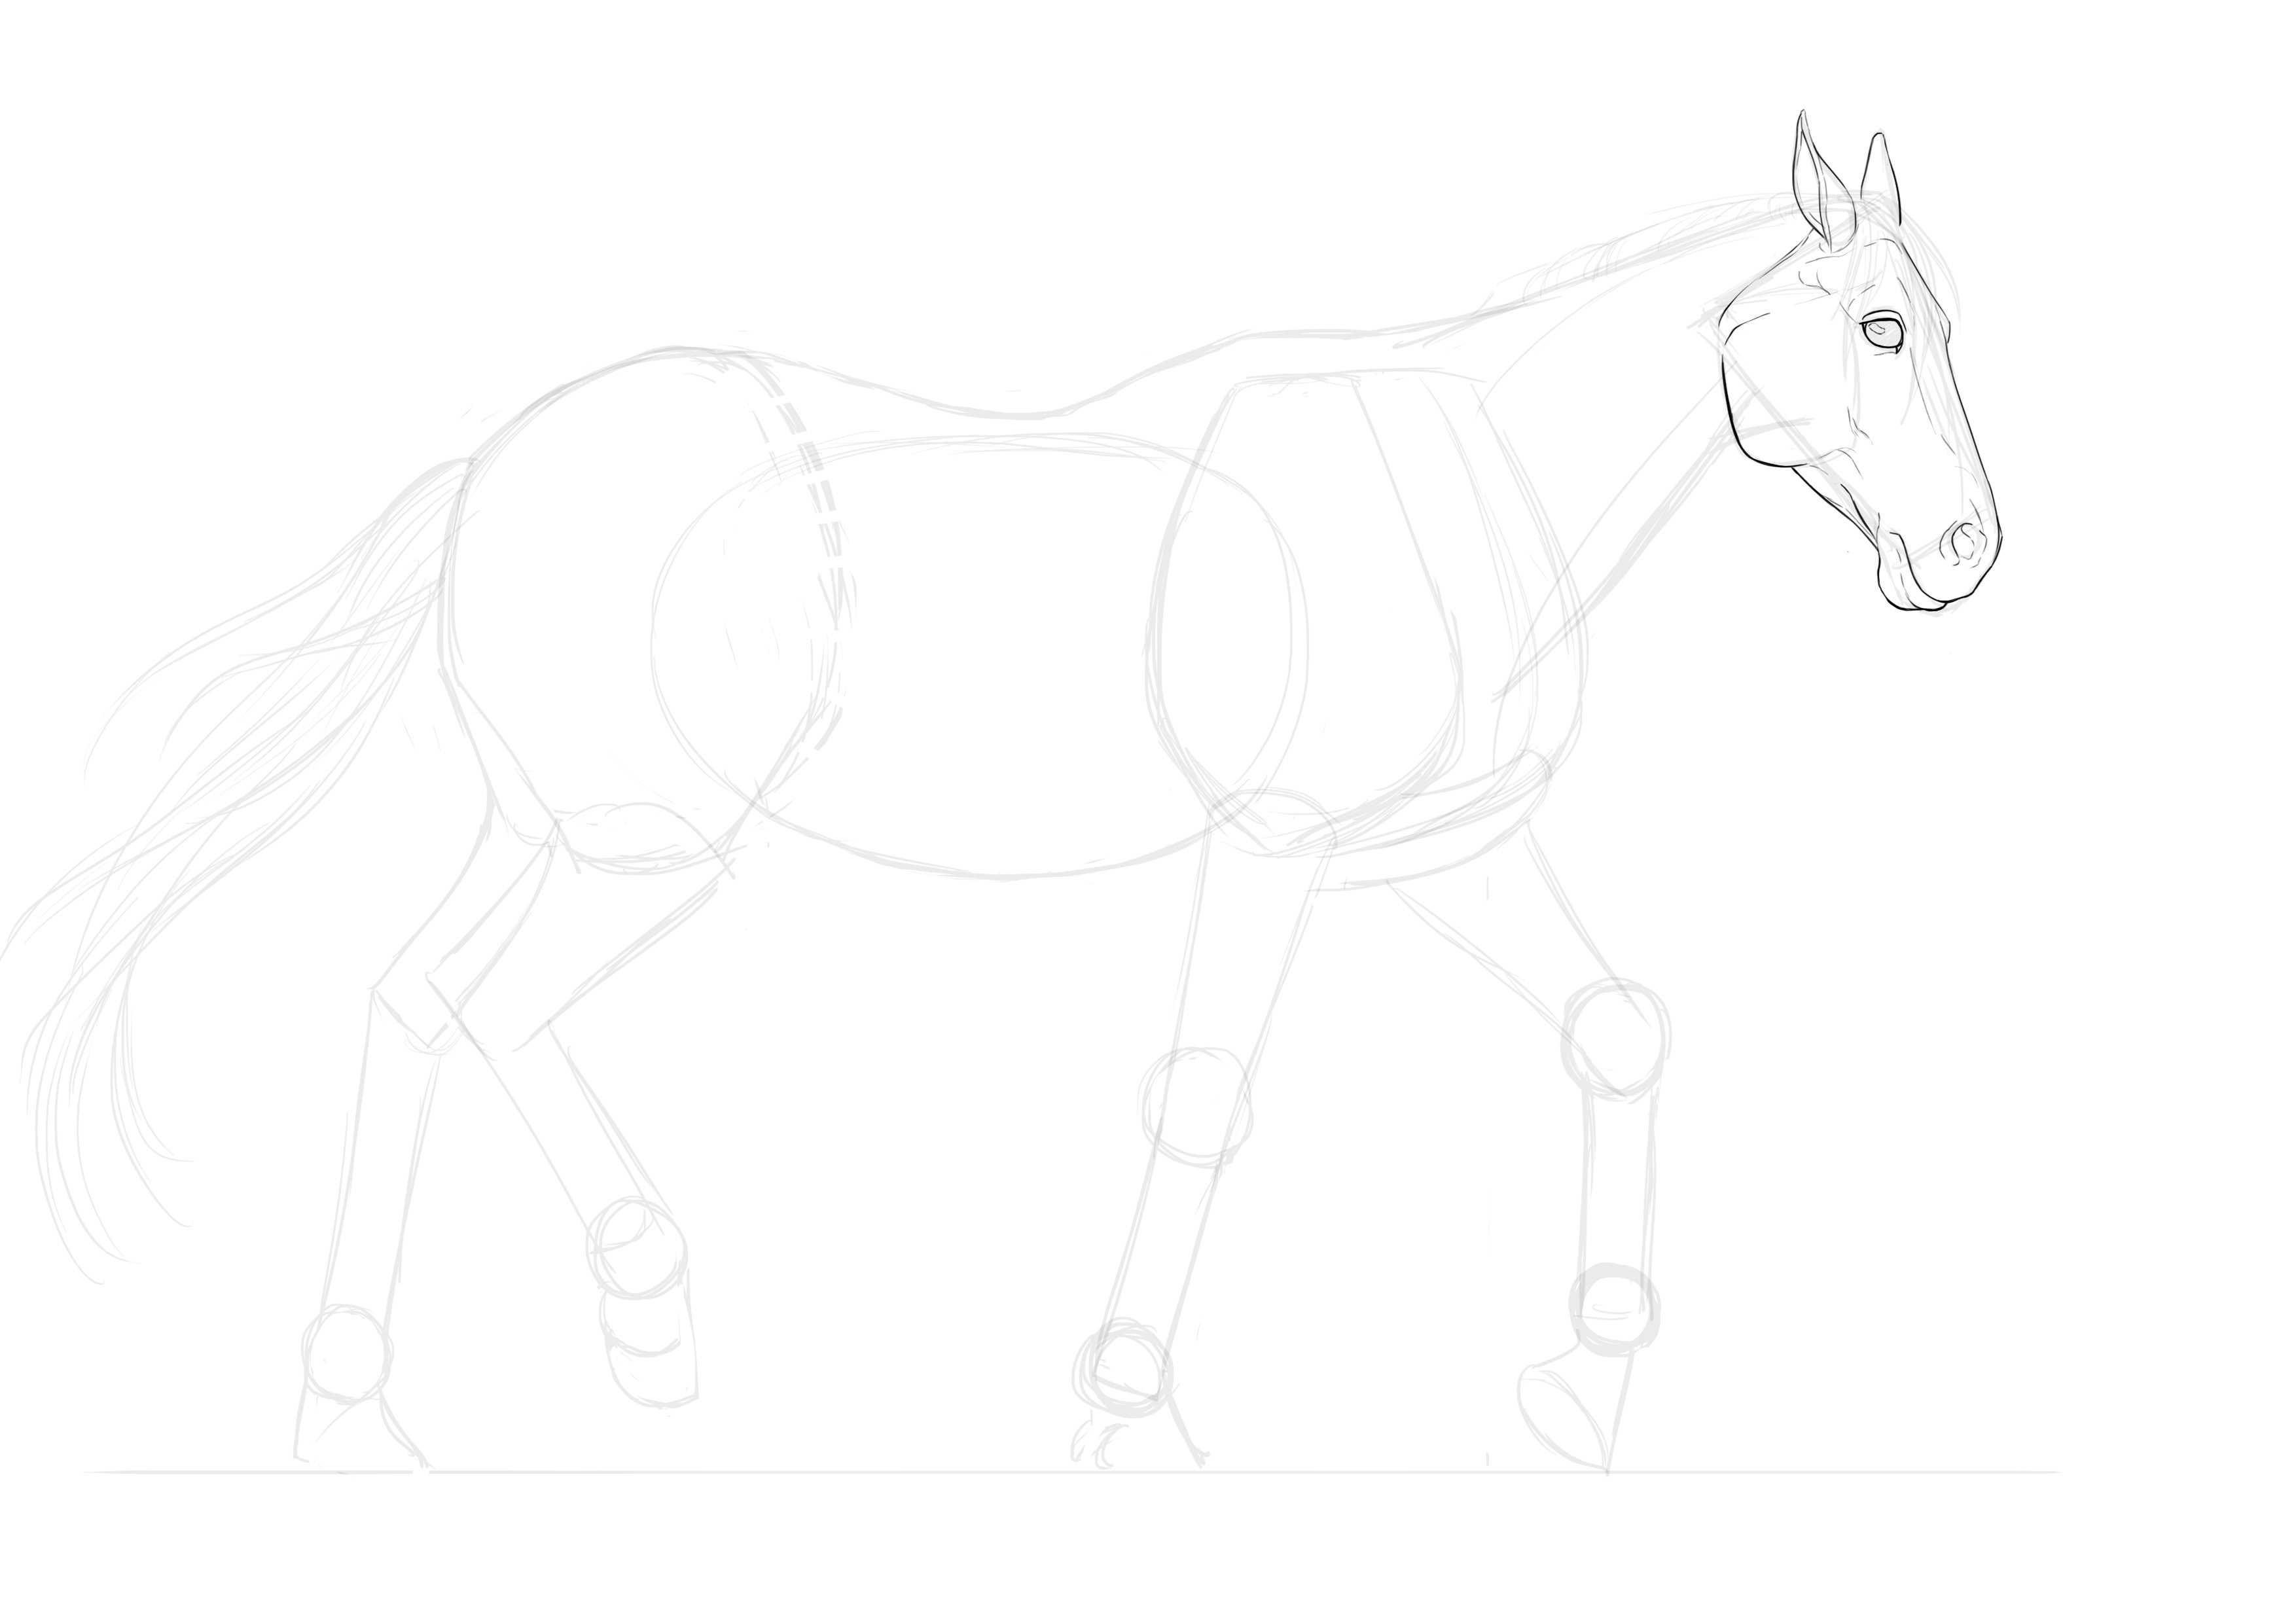
But let's return to our side view, not entirely in profile either. I will position the ears in a diamond shape. Regarding their length, it should be the same as between the eye and the base of the ear, so be careful to place them correctly. Observe carefully!
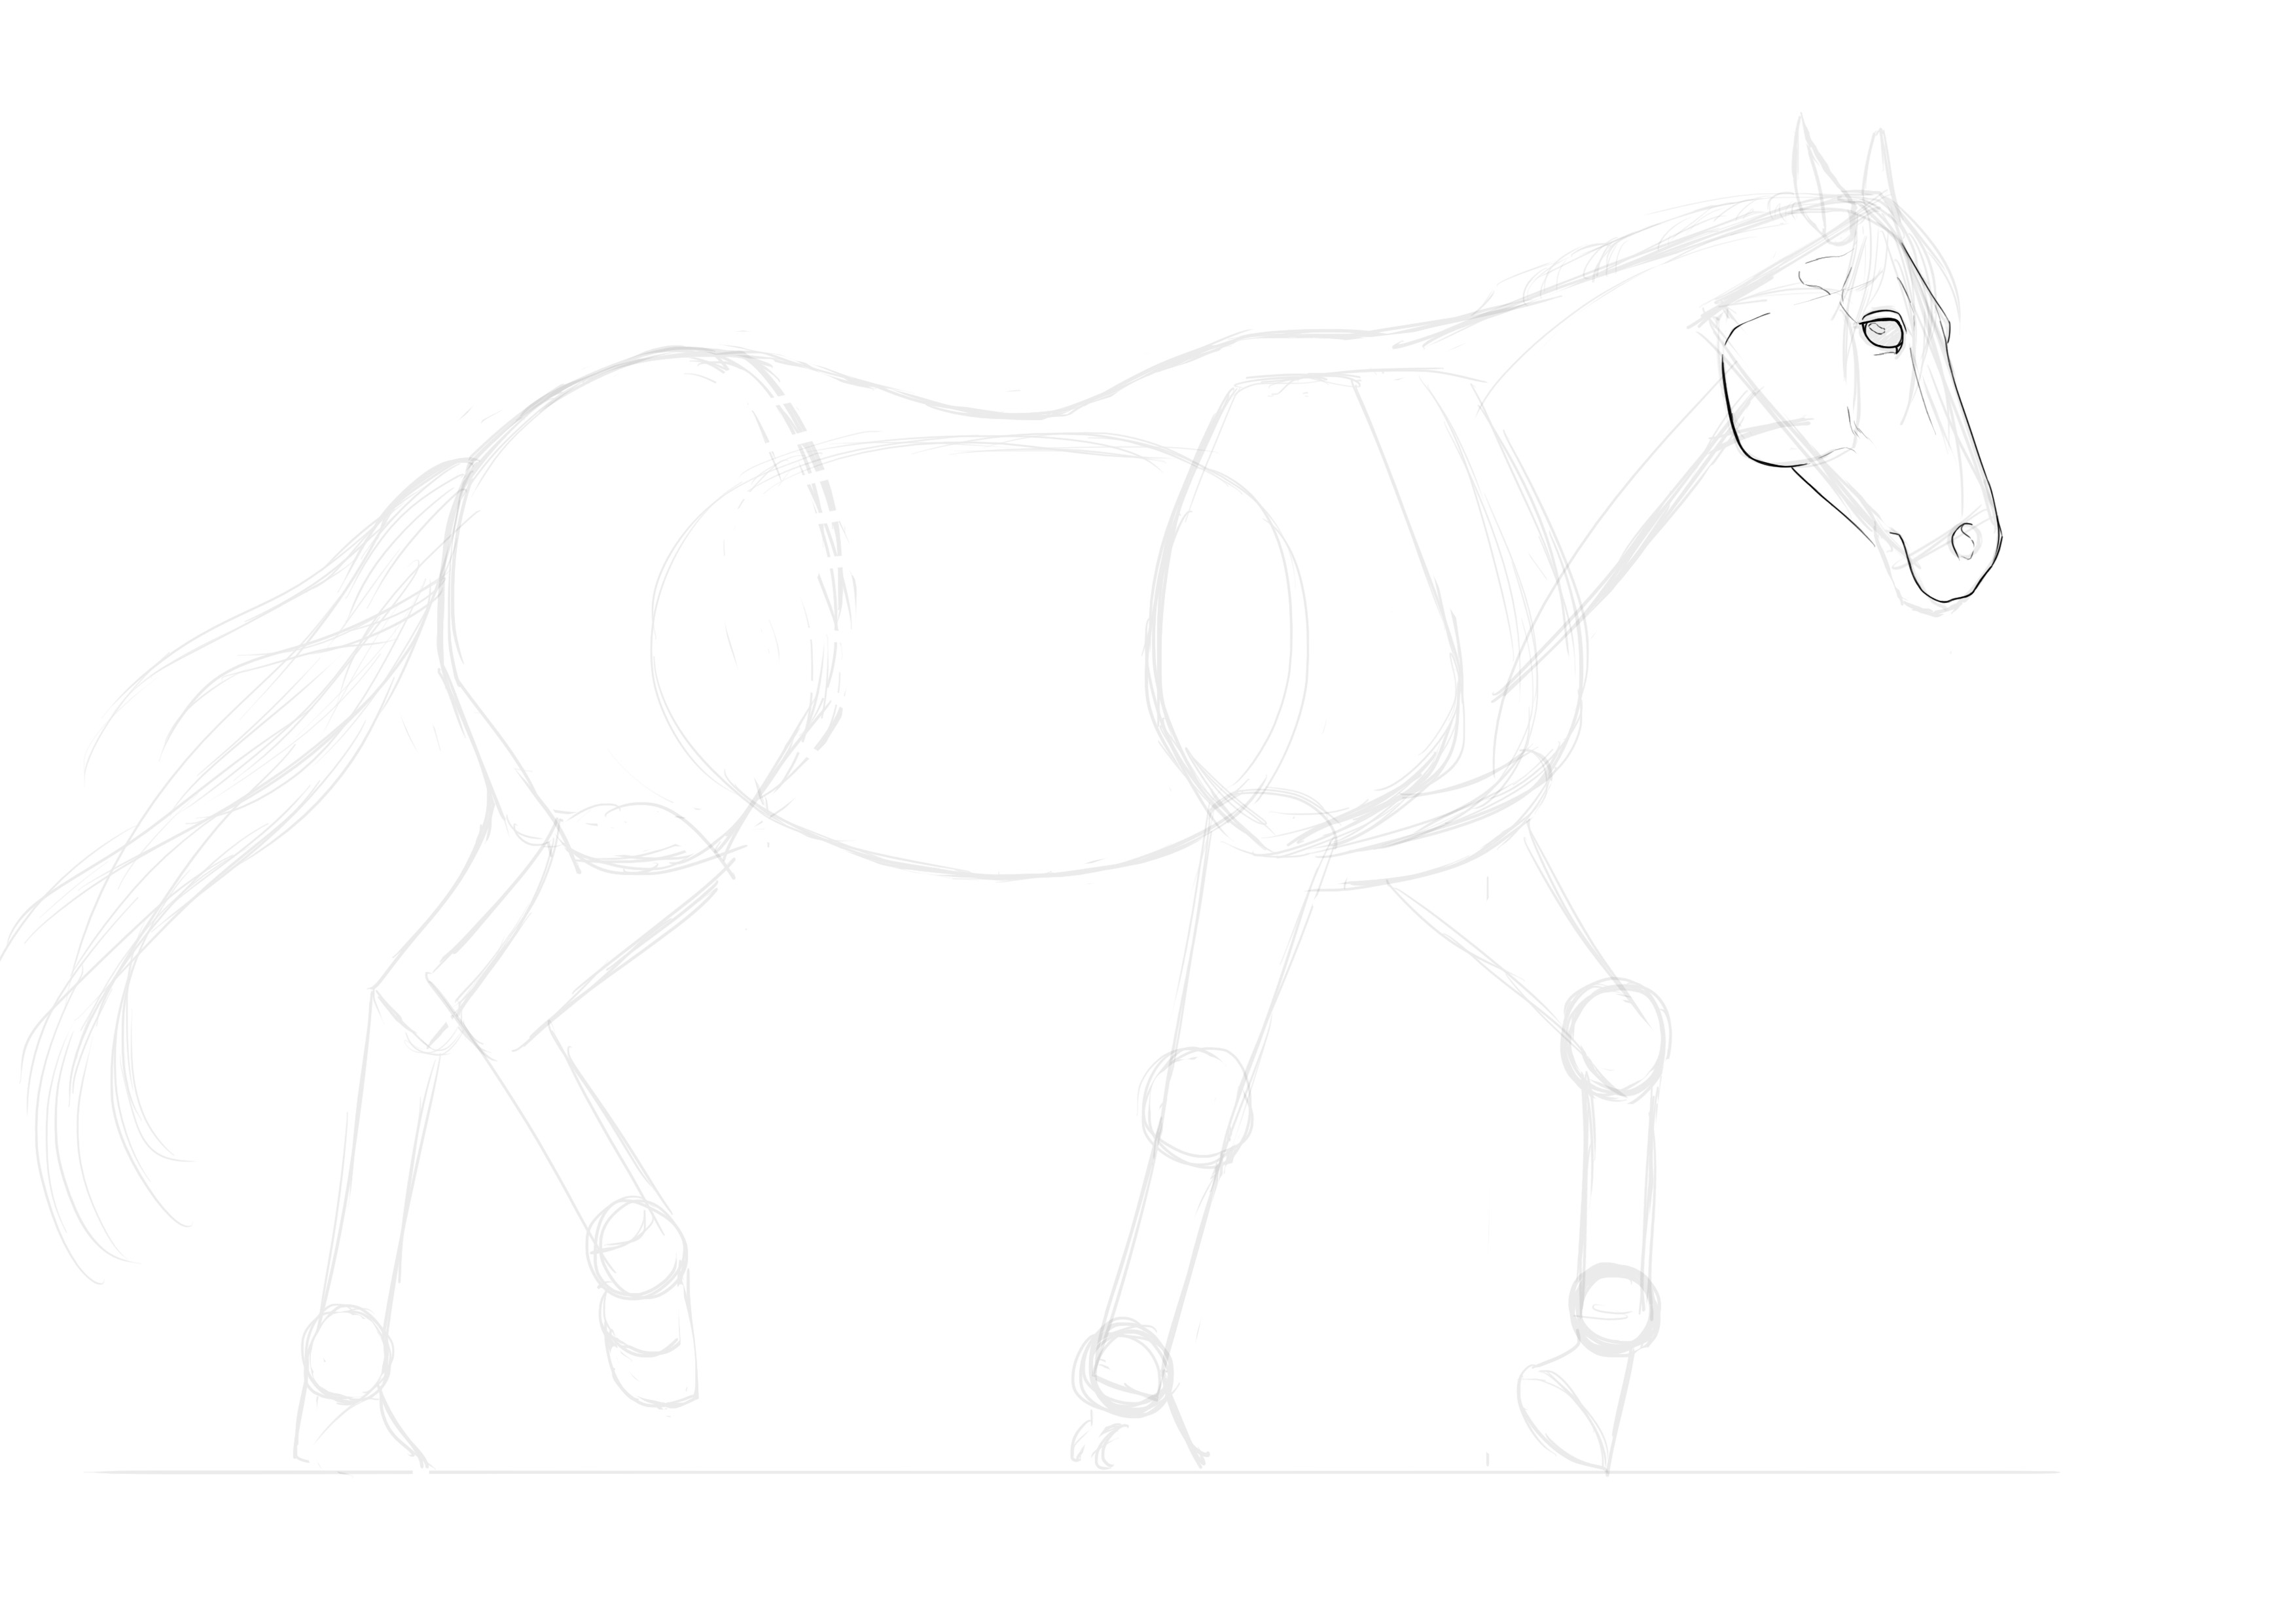
I'm adding the cheeks, squarer than our original circle, pay very close attention to their positioning and angle. I'm also refining the shape of the snout, tilted downwards.
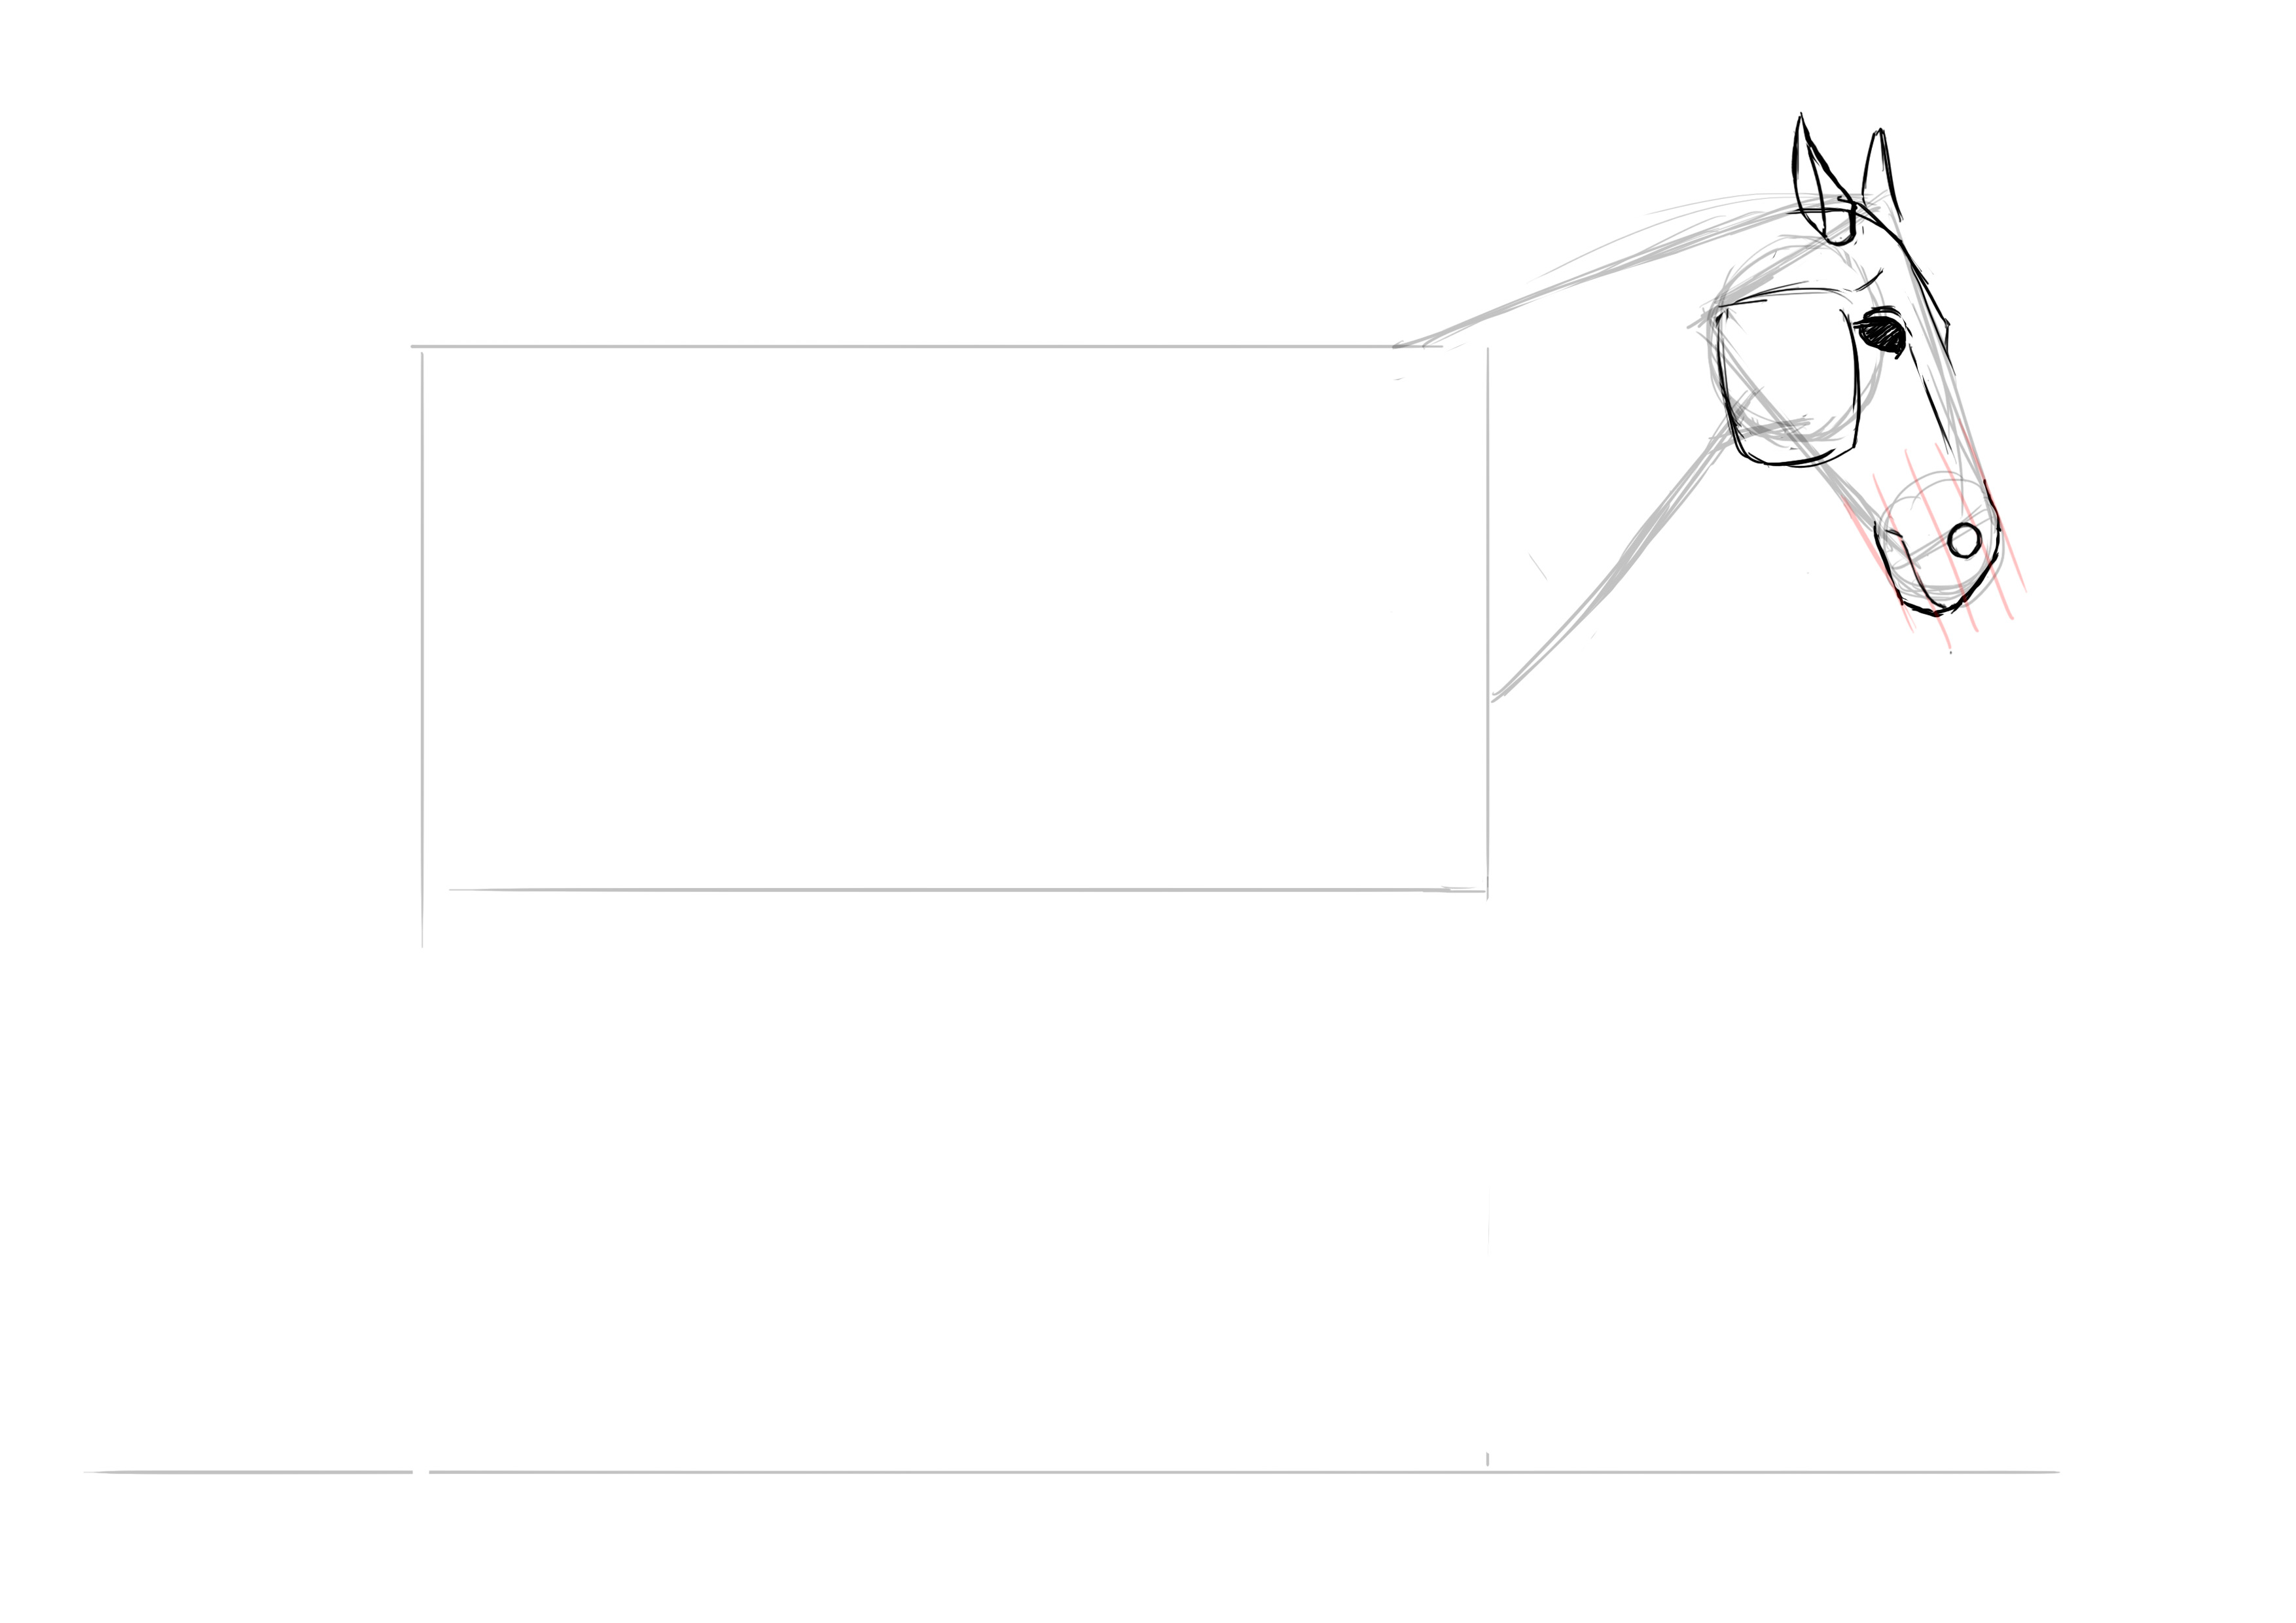
The nostrils that make up ¼ of the height of the snout. I consider them round for the base. We will detail them later ^^

You can fit slightly less than one nostril between the nostril and the mouth line. Take the opportunity to give it a nice curve in passing.
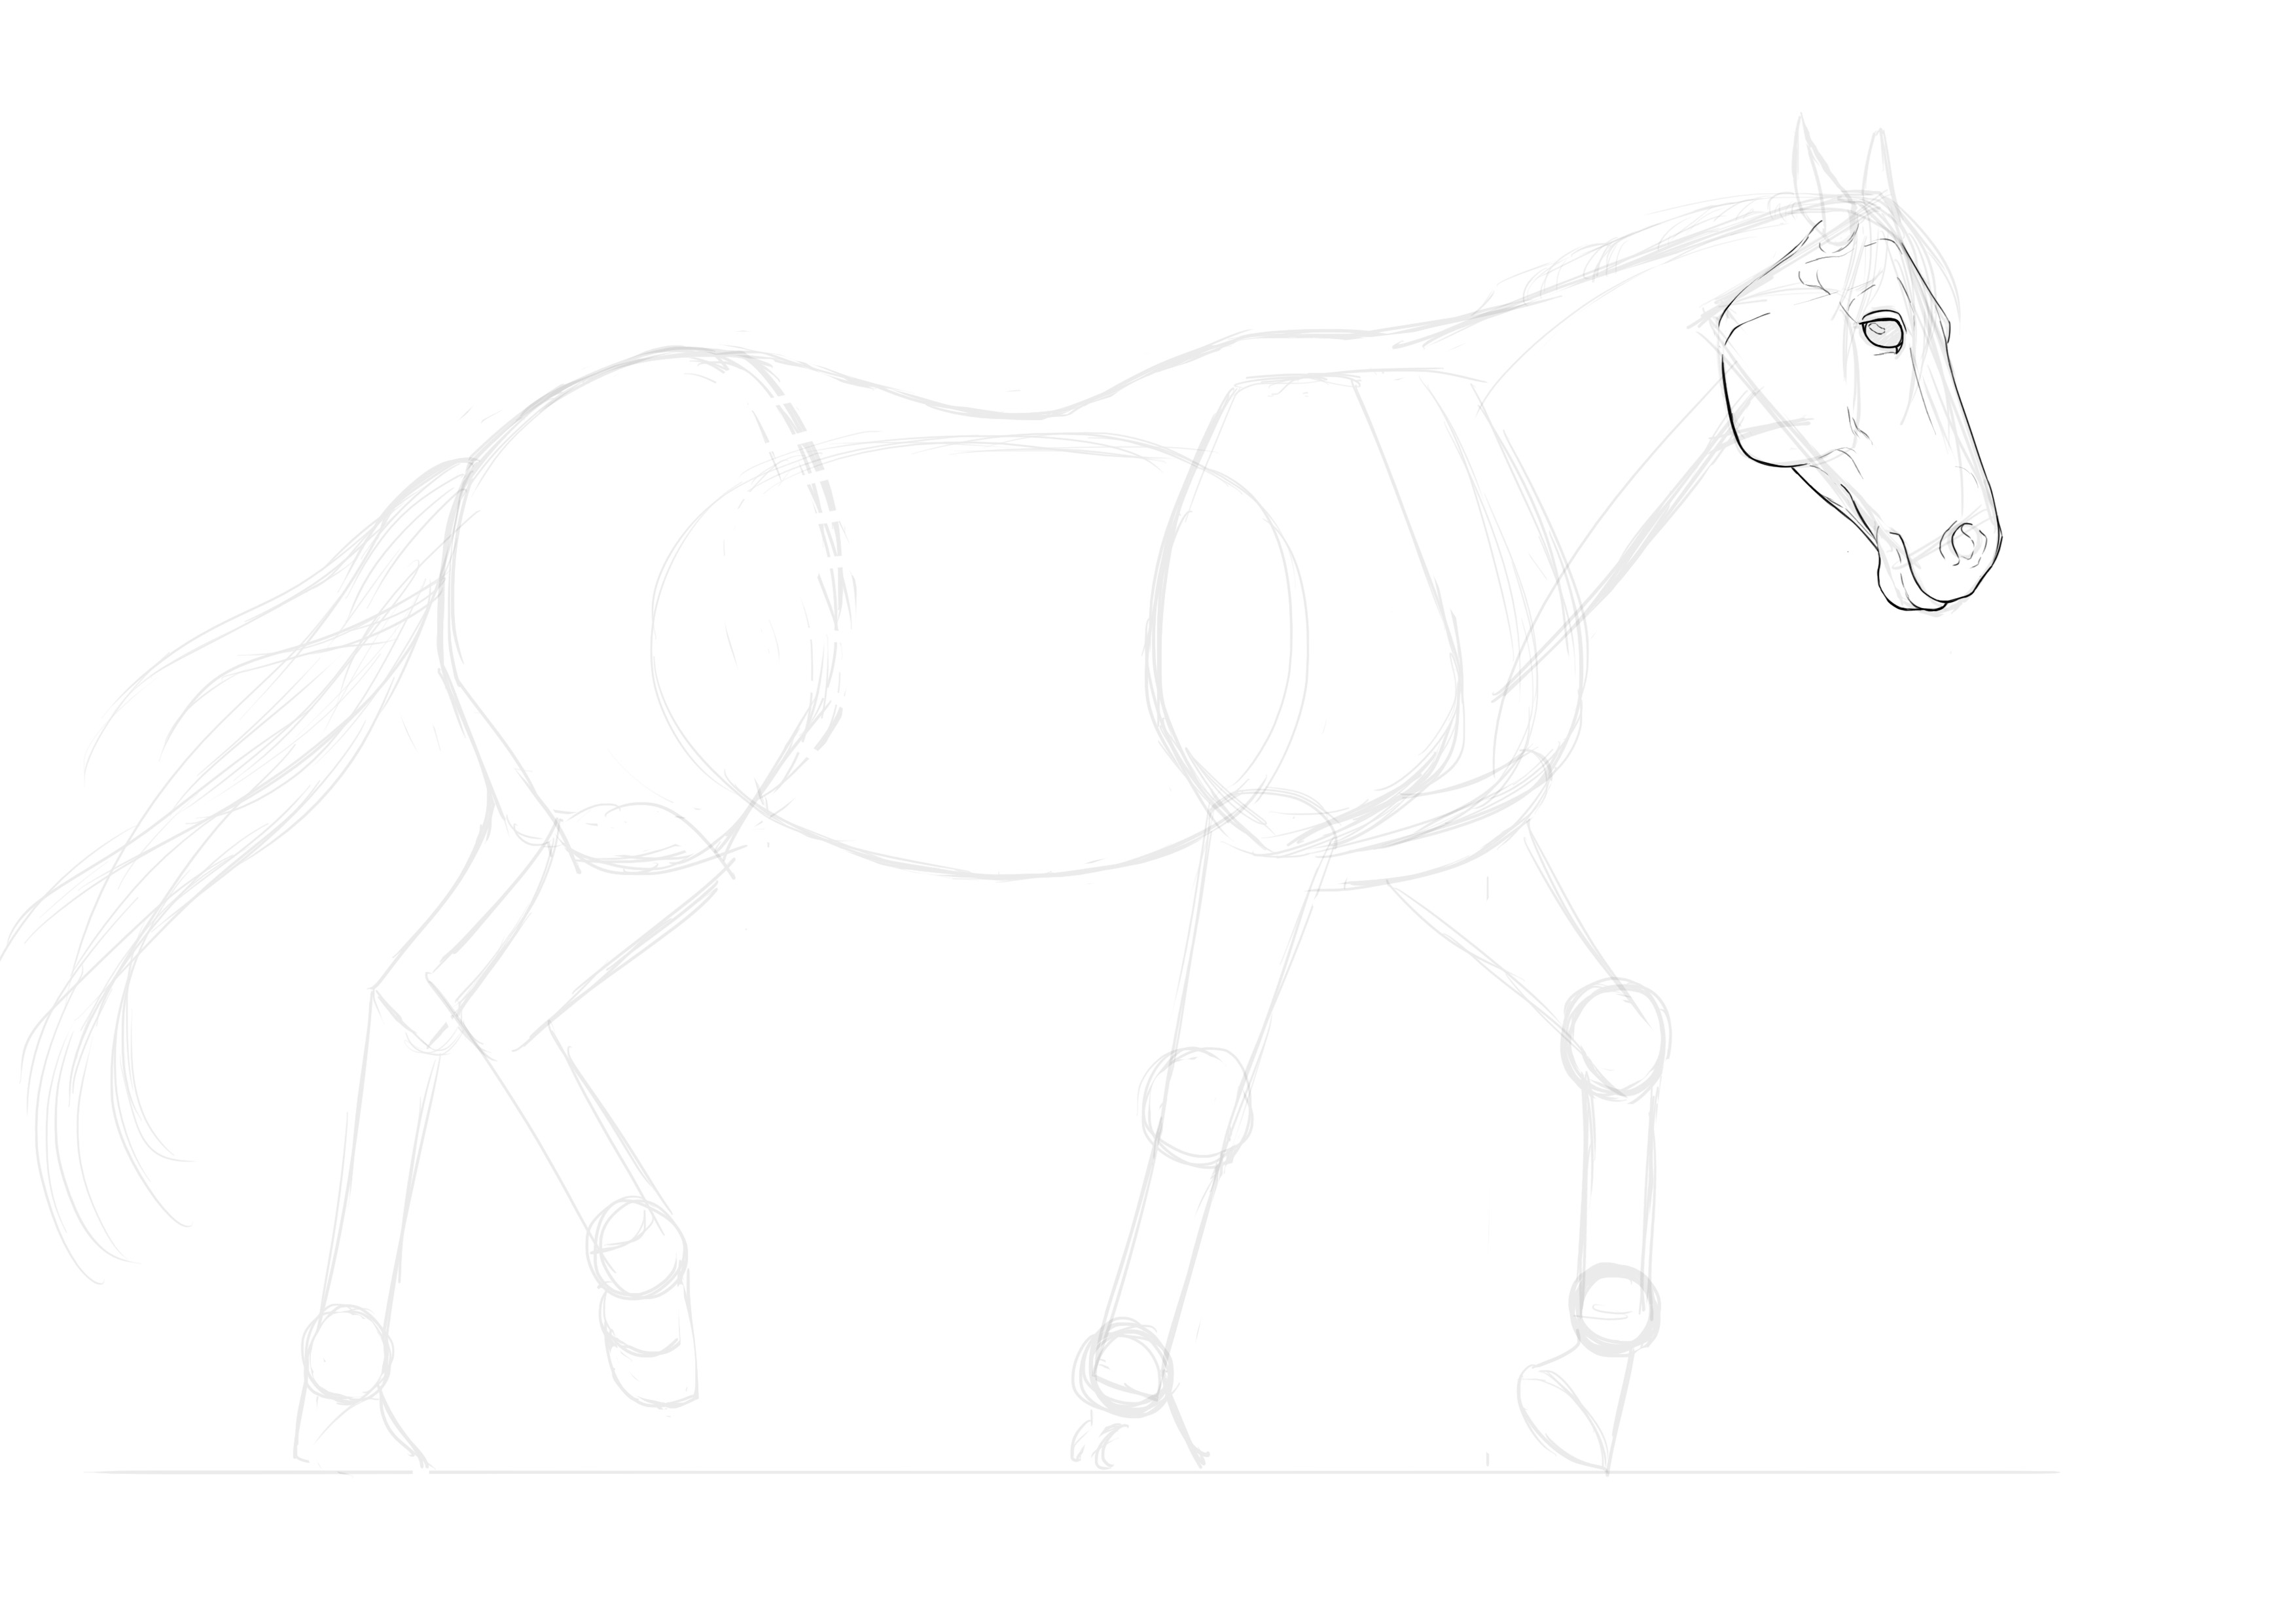
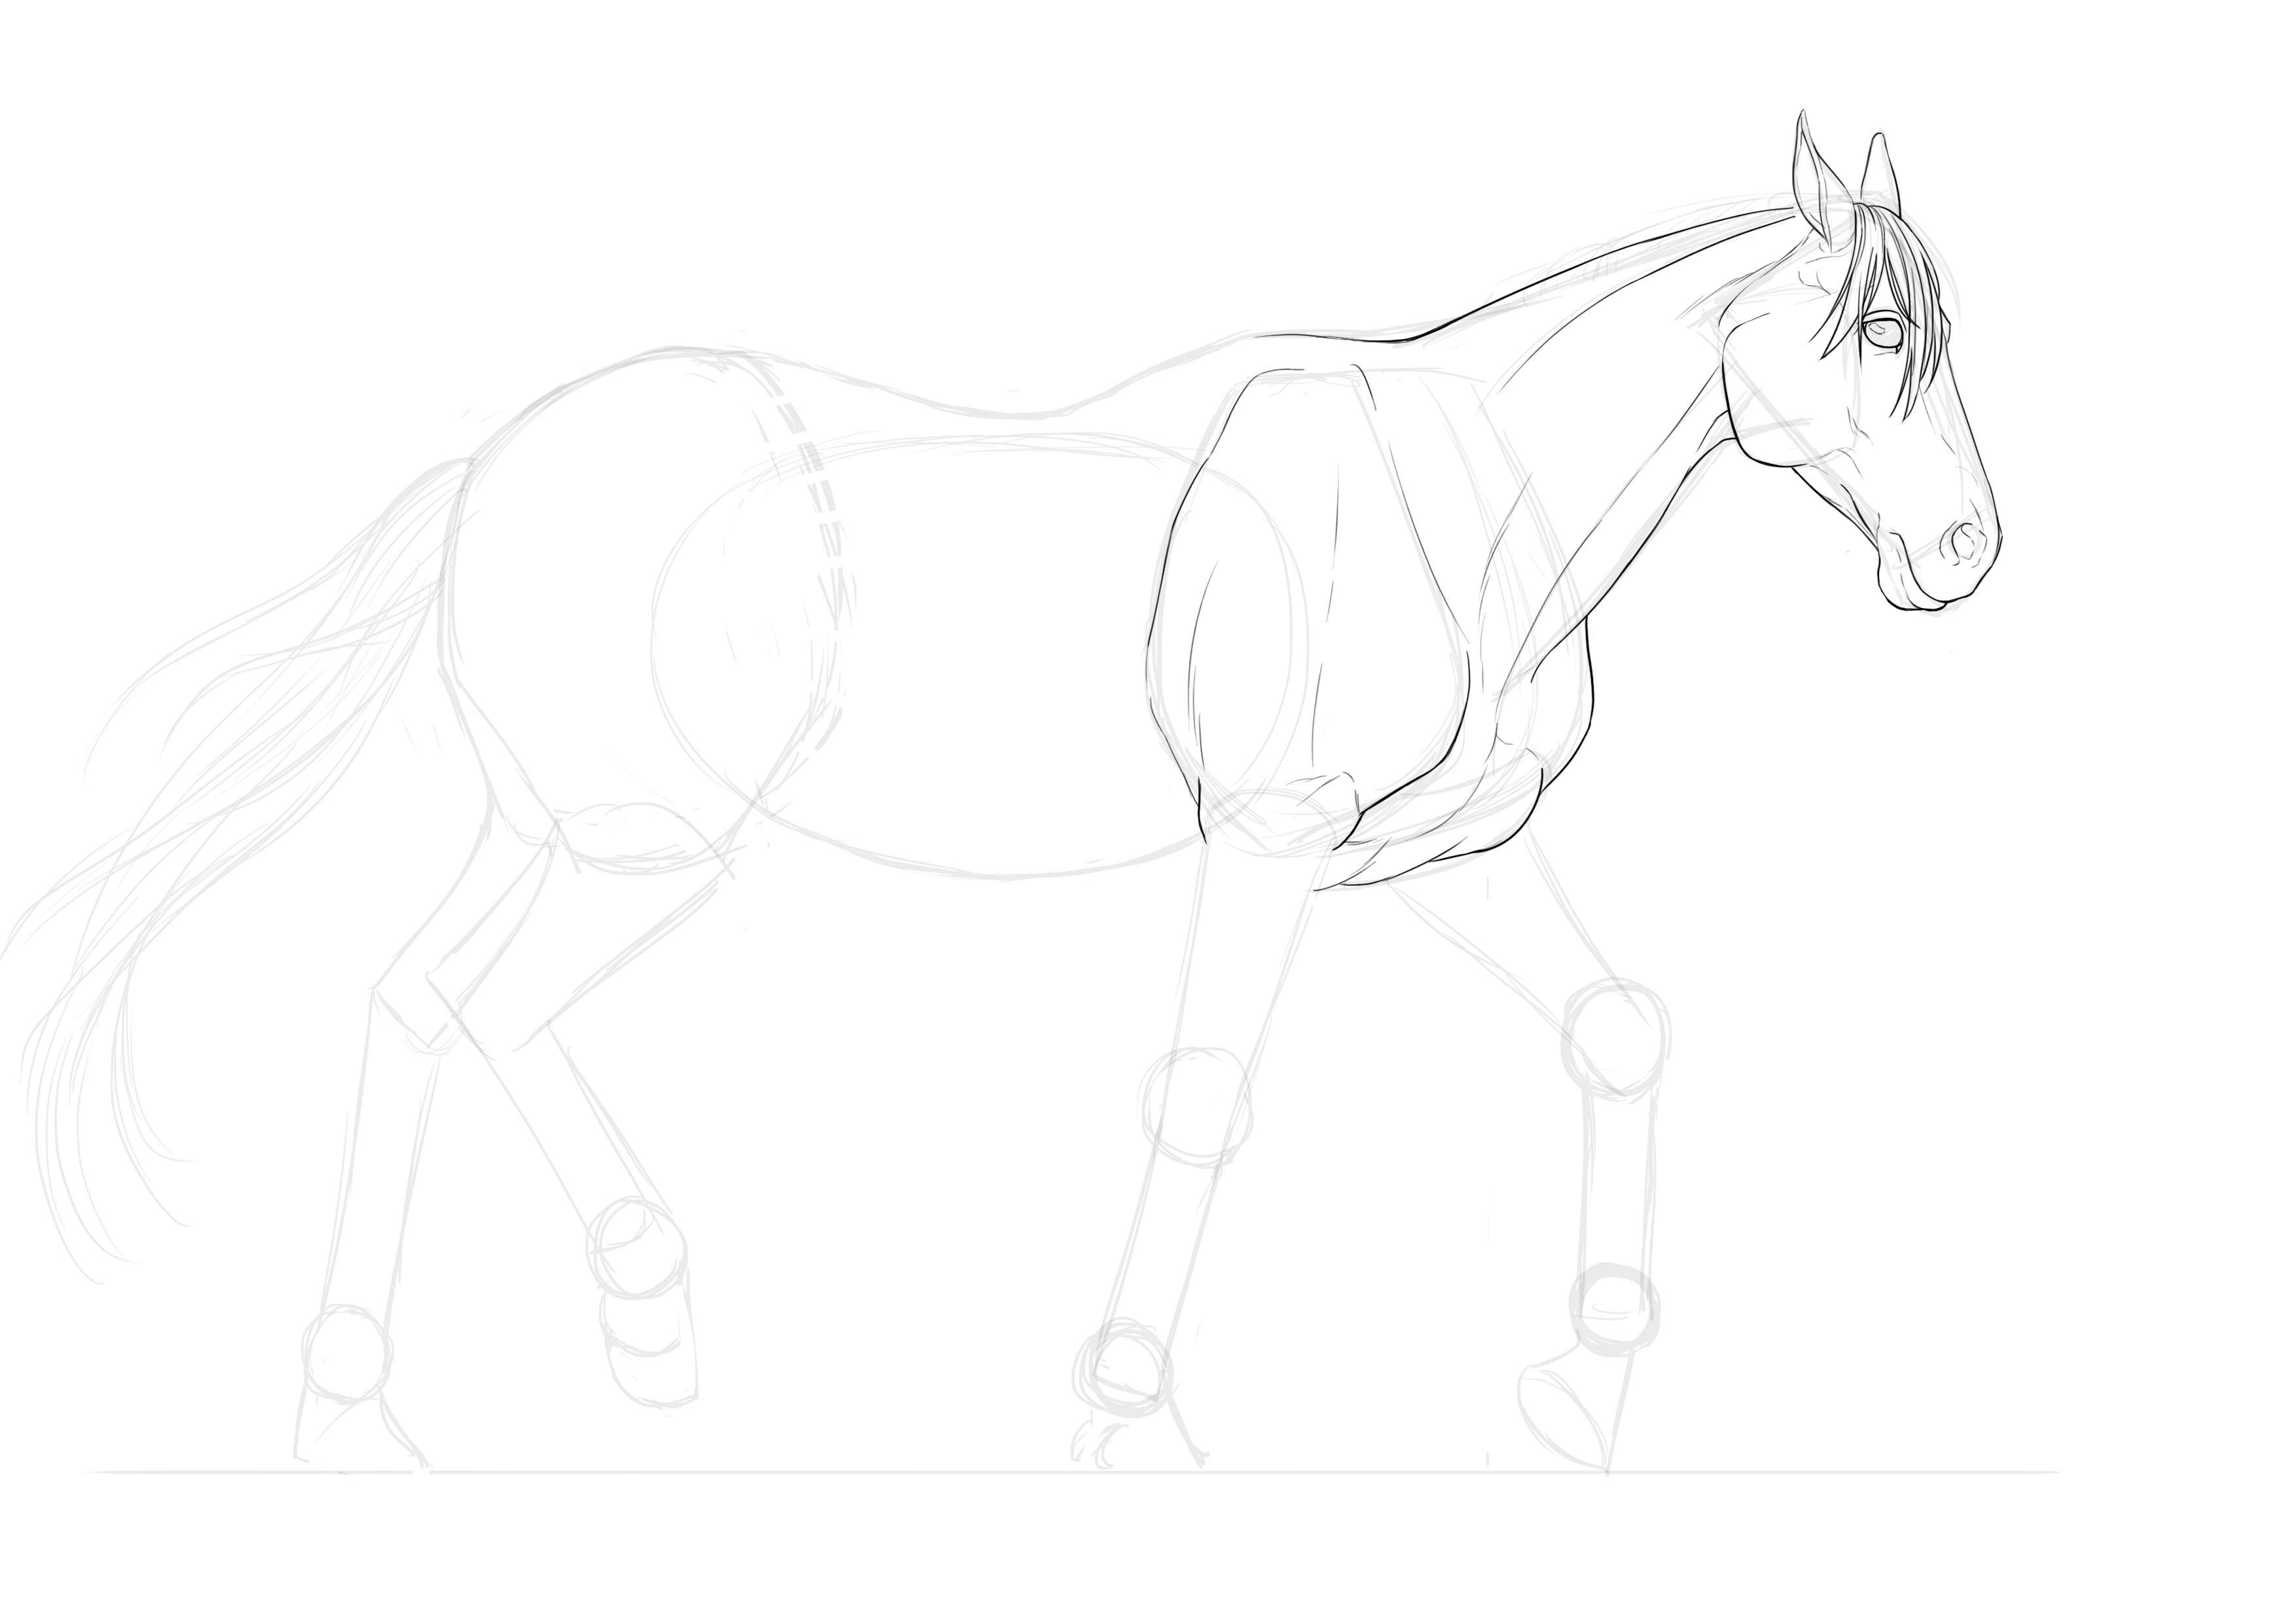
THE NECK DESIGN
Let's move on to the neck! Here, we want to highlight the musculature. There's the throat at the front, the same muscle as in our neck (the sternocleidomastoid for those who want to show off at parties) which starts from the ear and attaches at the base of the neck in the middle, and the muscle that begins the back starting from the nape and continues up to the withers (the top of the horse's shoulder).
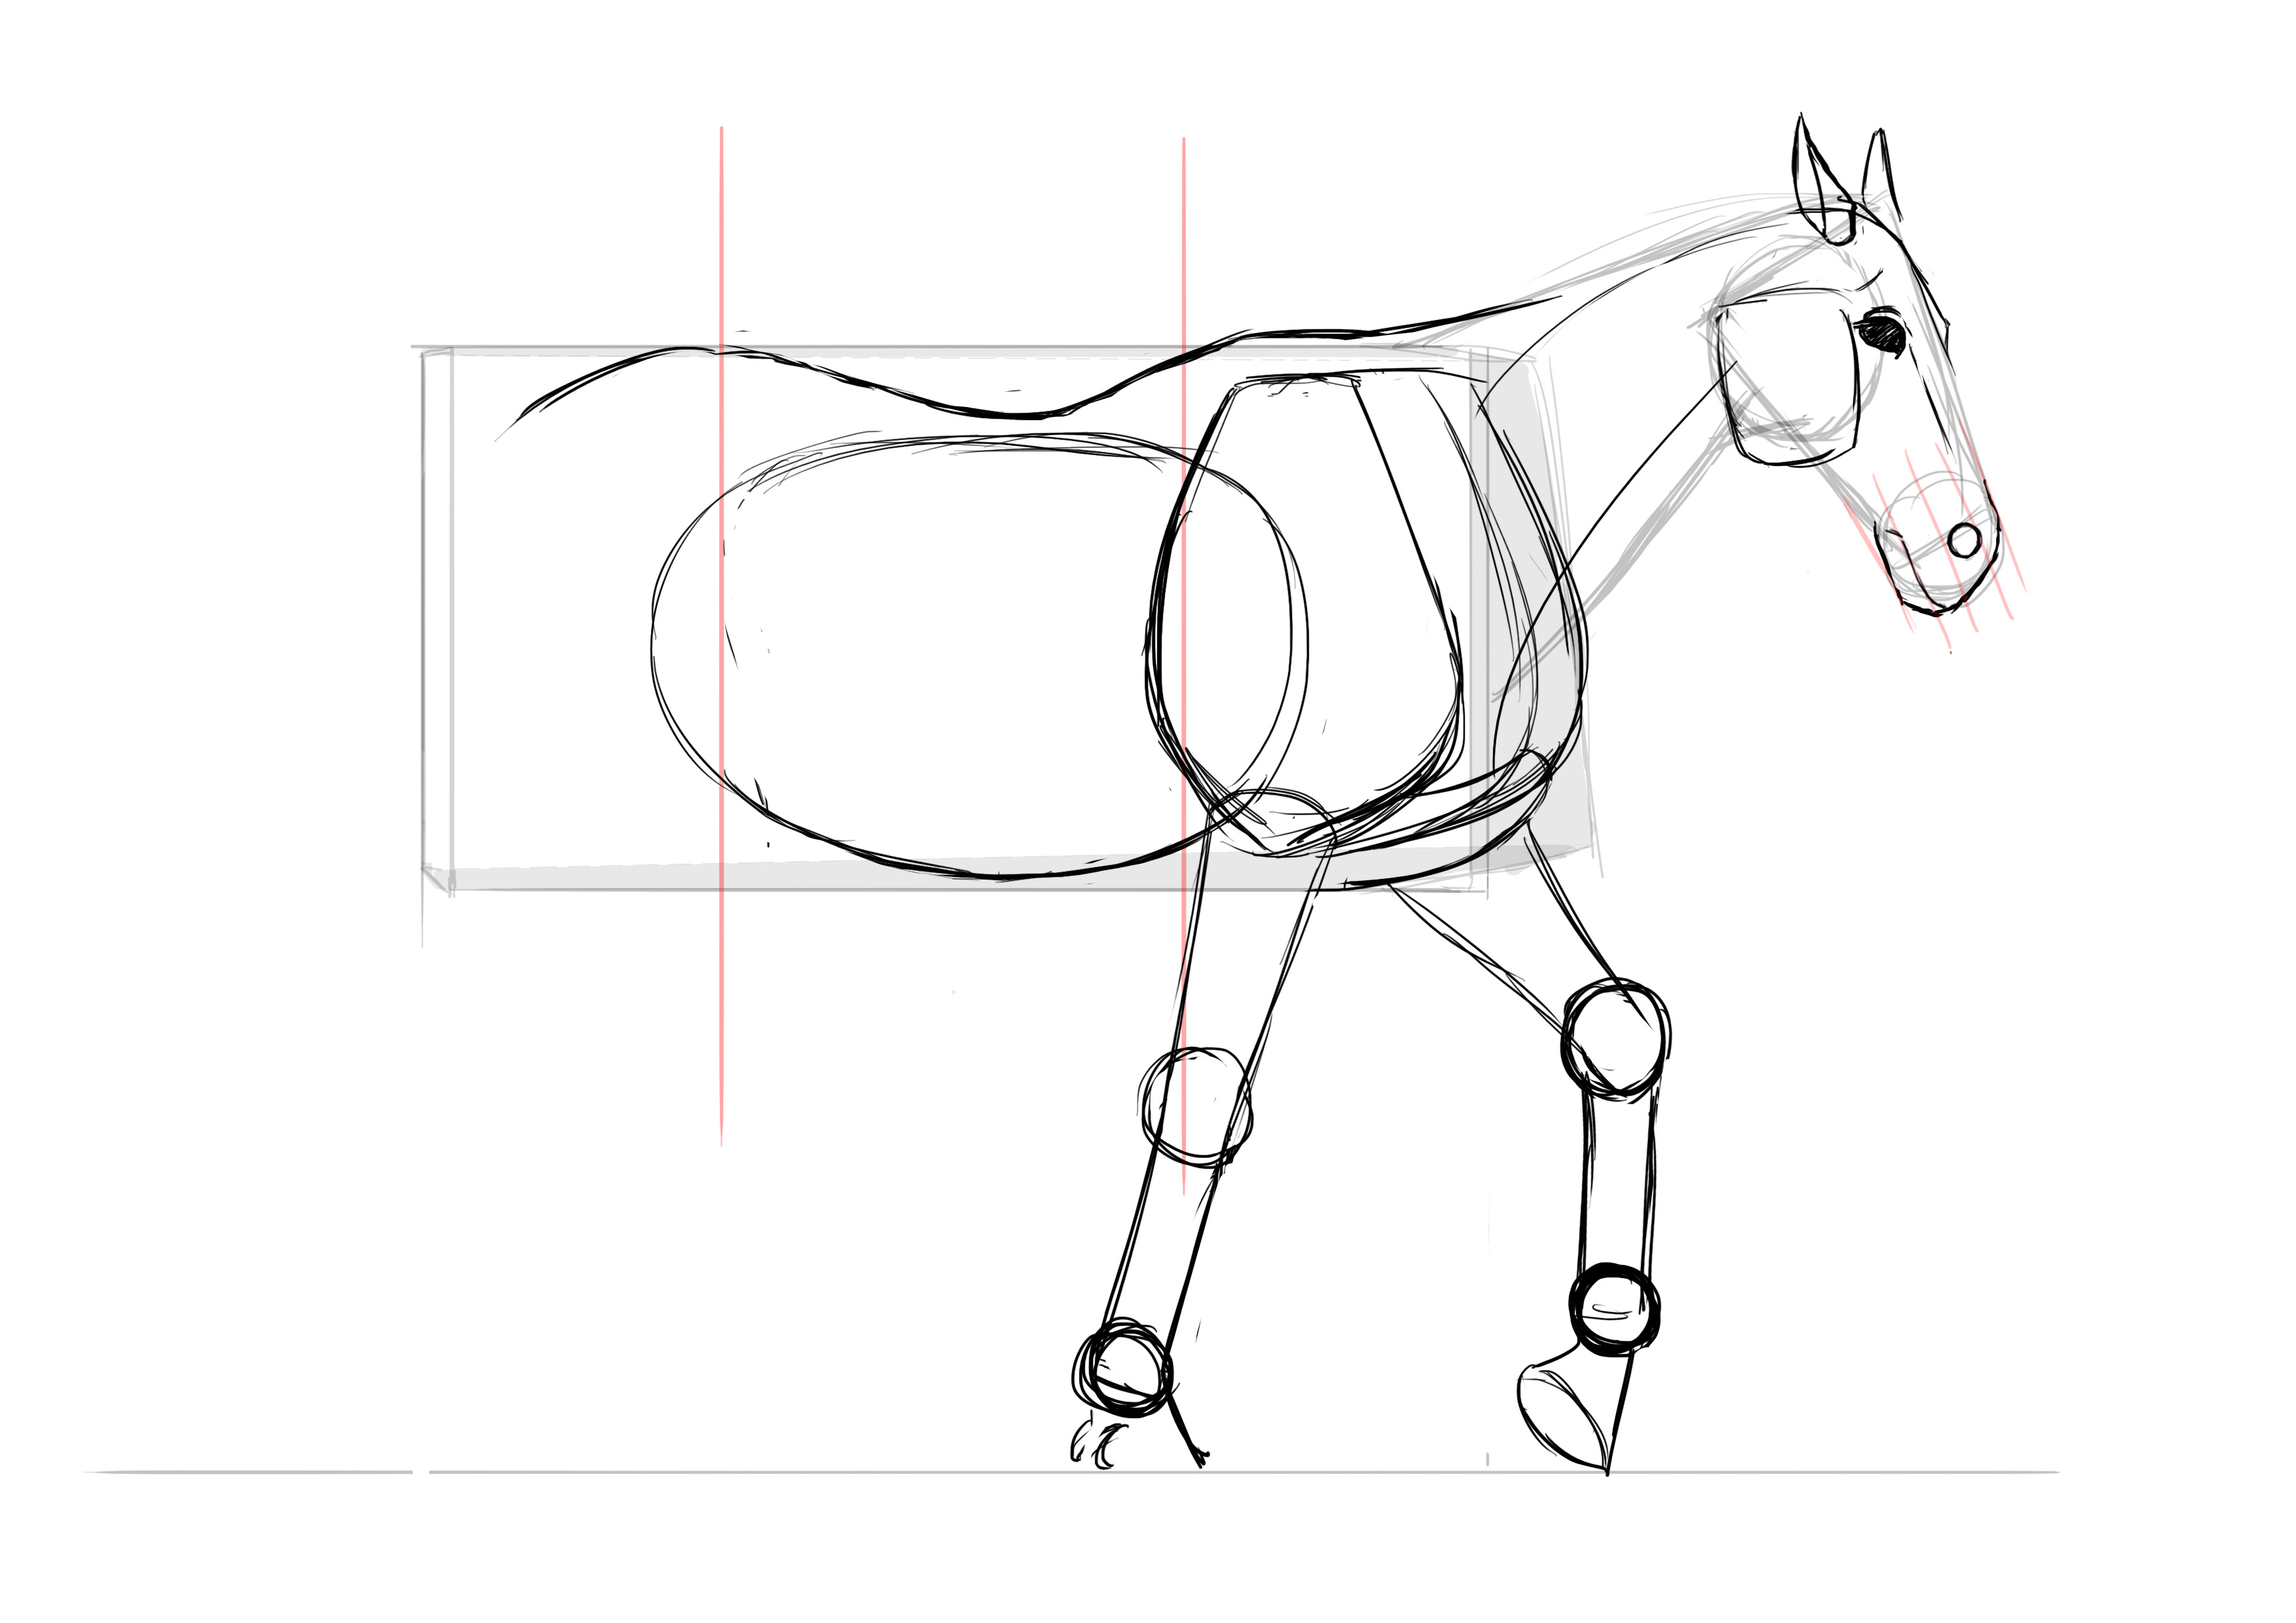
DRAW THE HORSE'S BODY
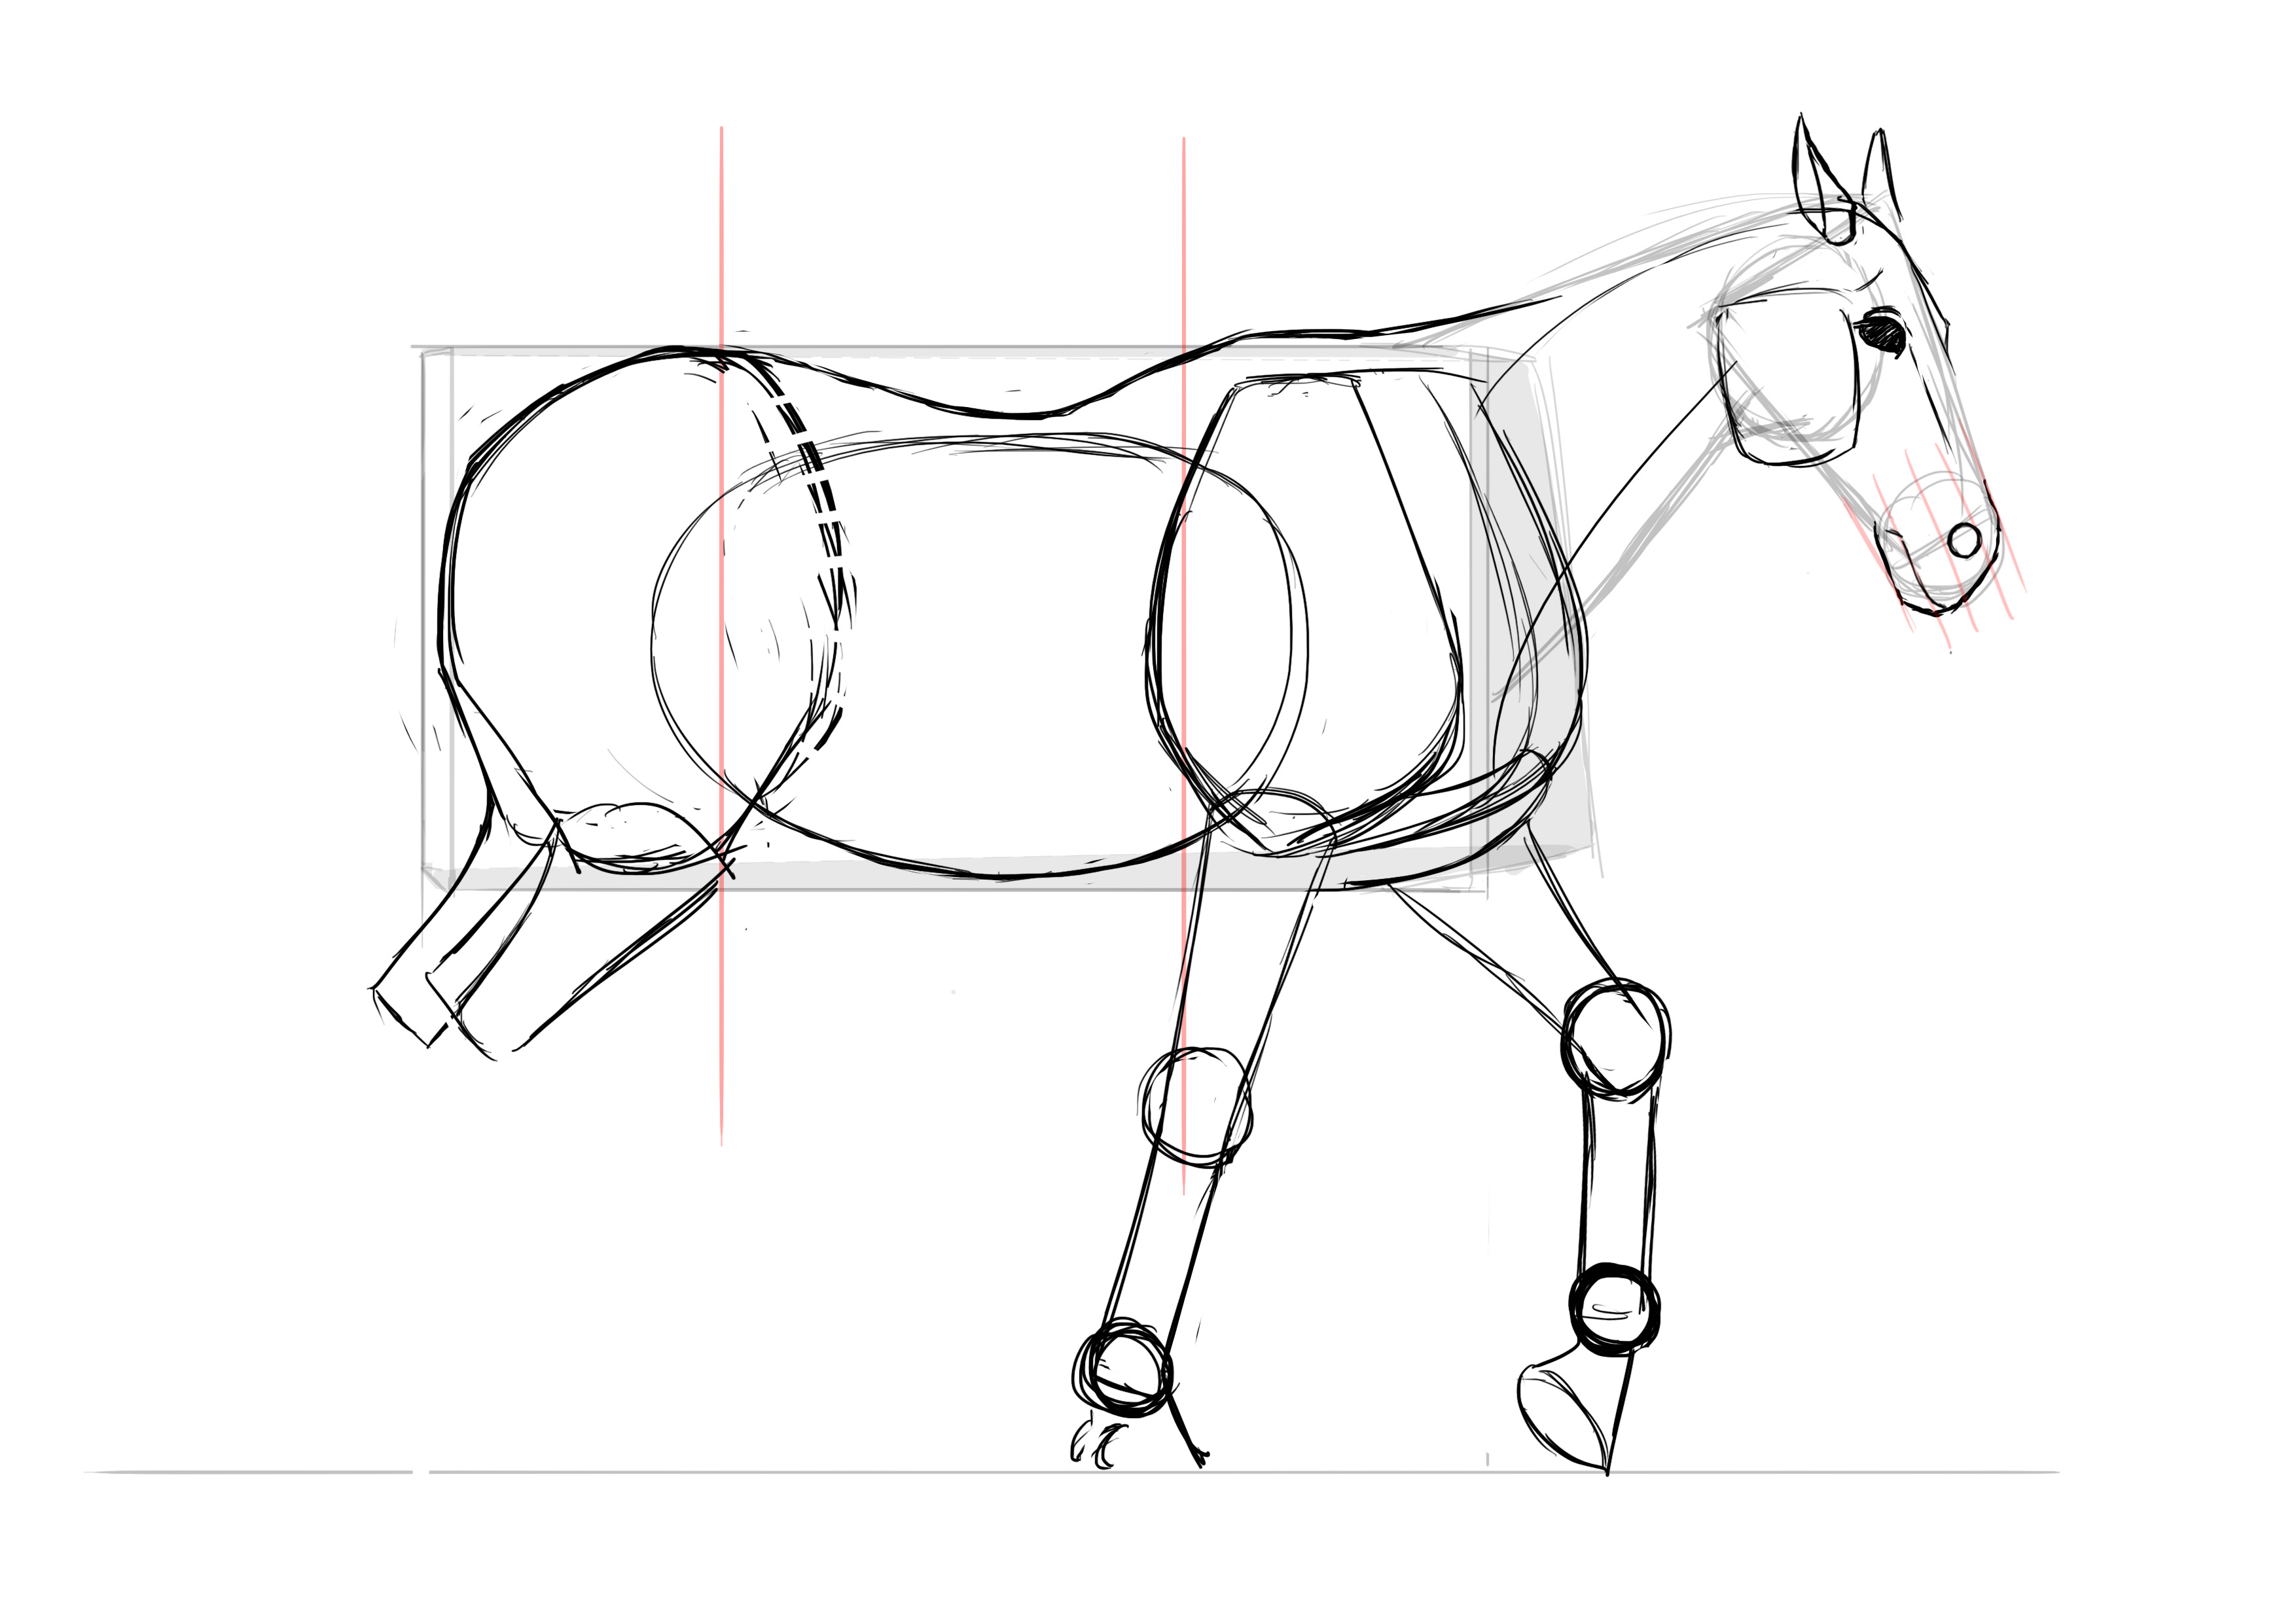
Now the body! Like the deer, our horse is not perfectly in profile. Or at least, since it is moving forward, it does not really form a rectangle. I'll show you what I mean by that:
From there, we divide the front face of our parallelepiped into three roughly equal parts. One will correspond to the chest and shoulder, the middle one to the abdomen, and the last one to the hindquarters. In reality, in the case of a horse, the abdomen is slightly wider. Therefore, we will slightly increase the middle portion.
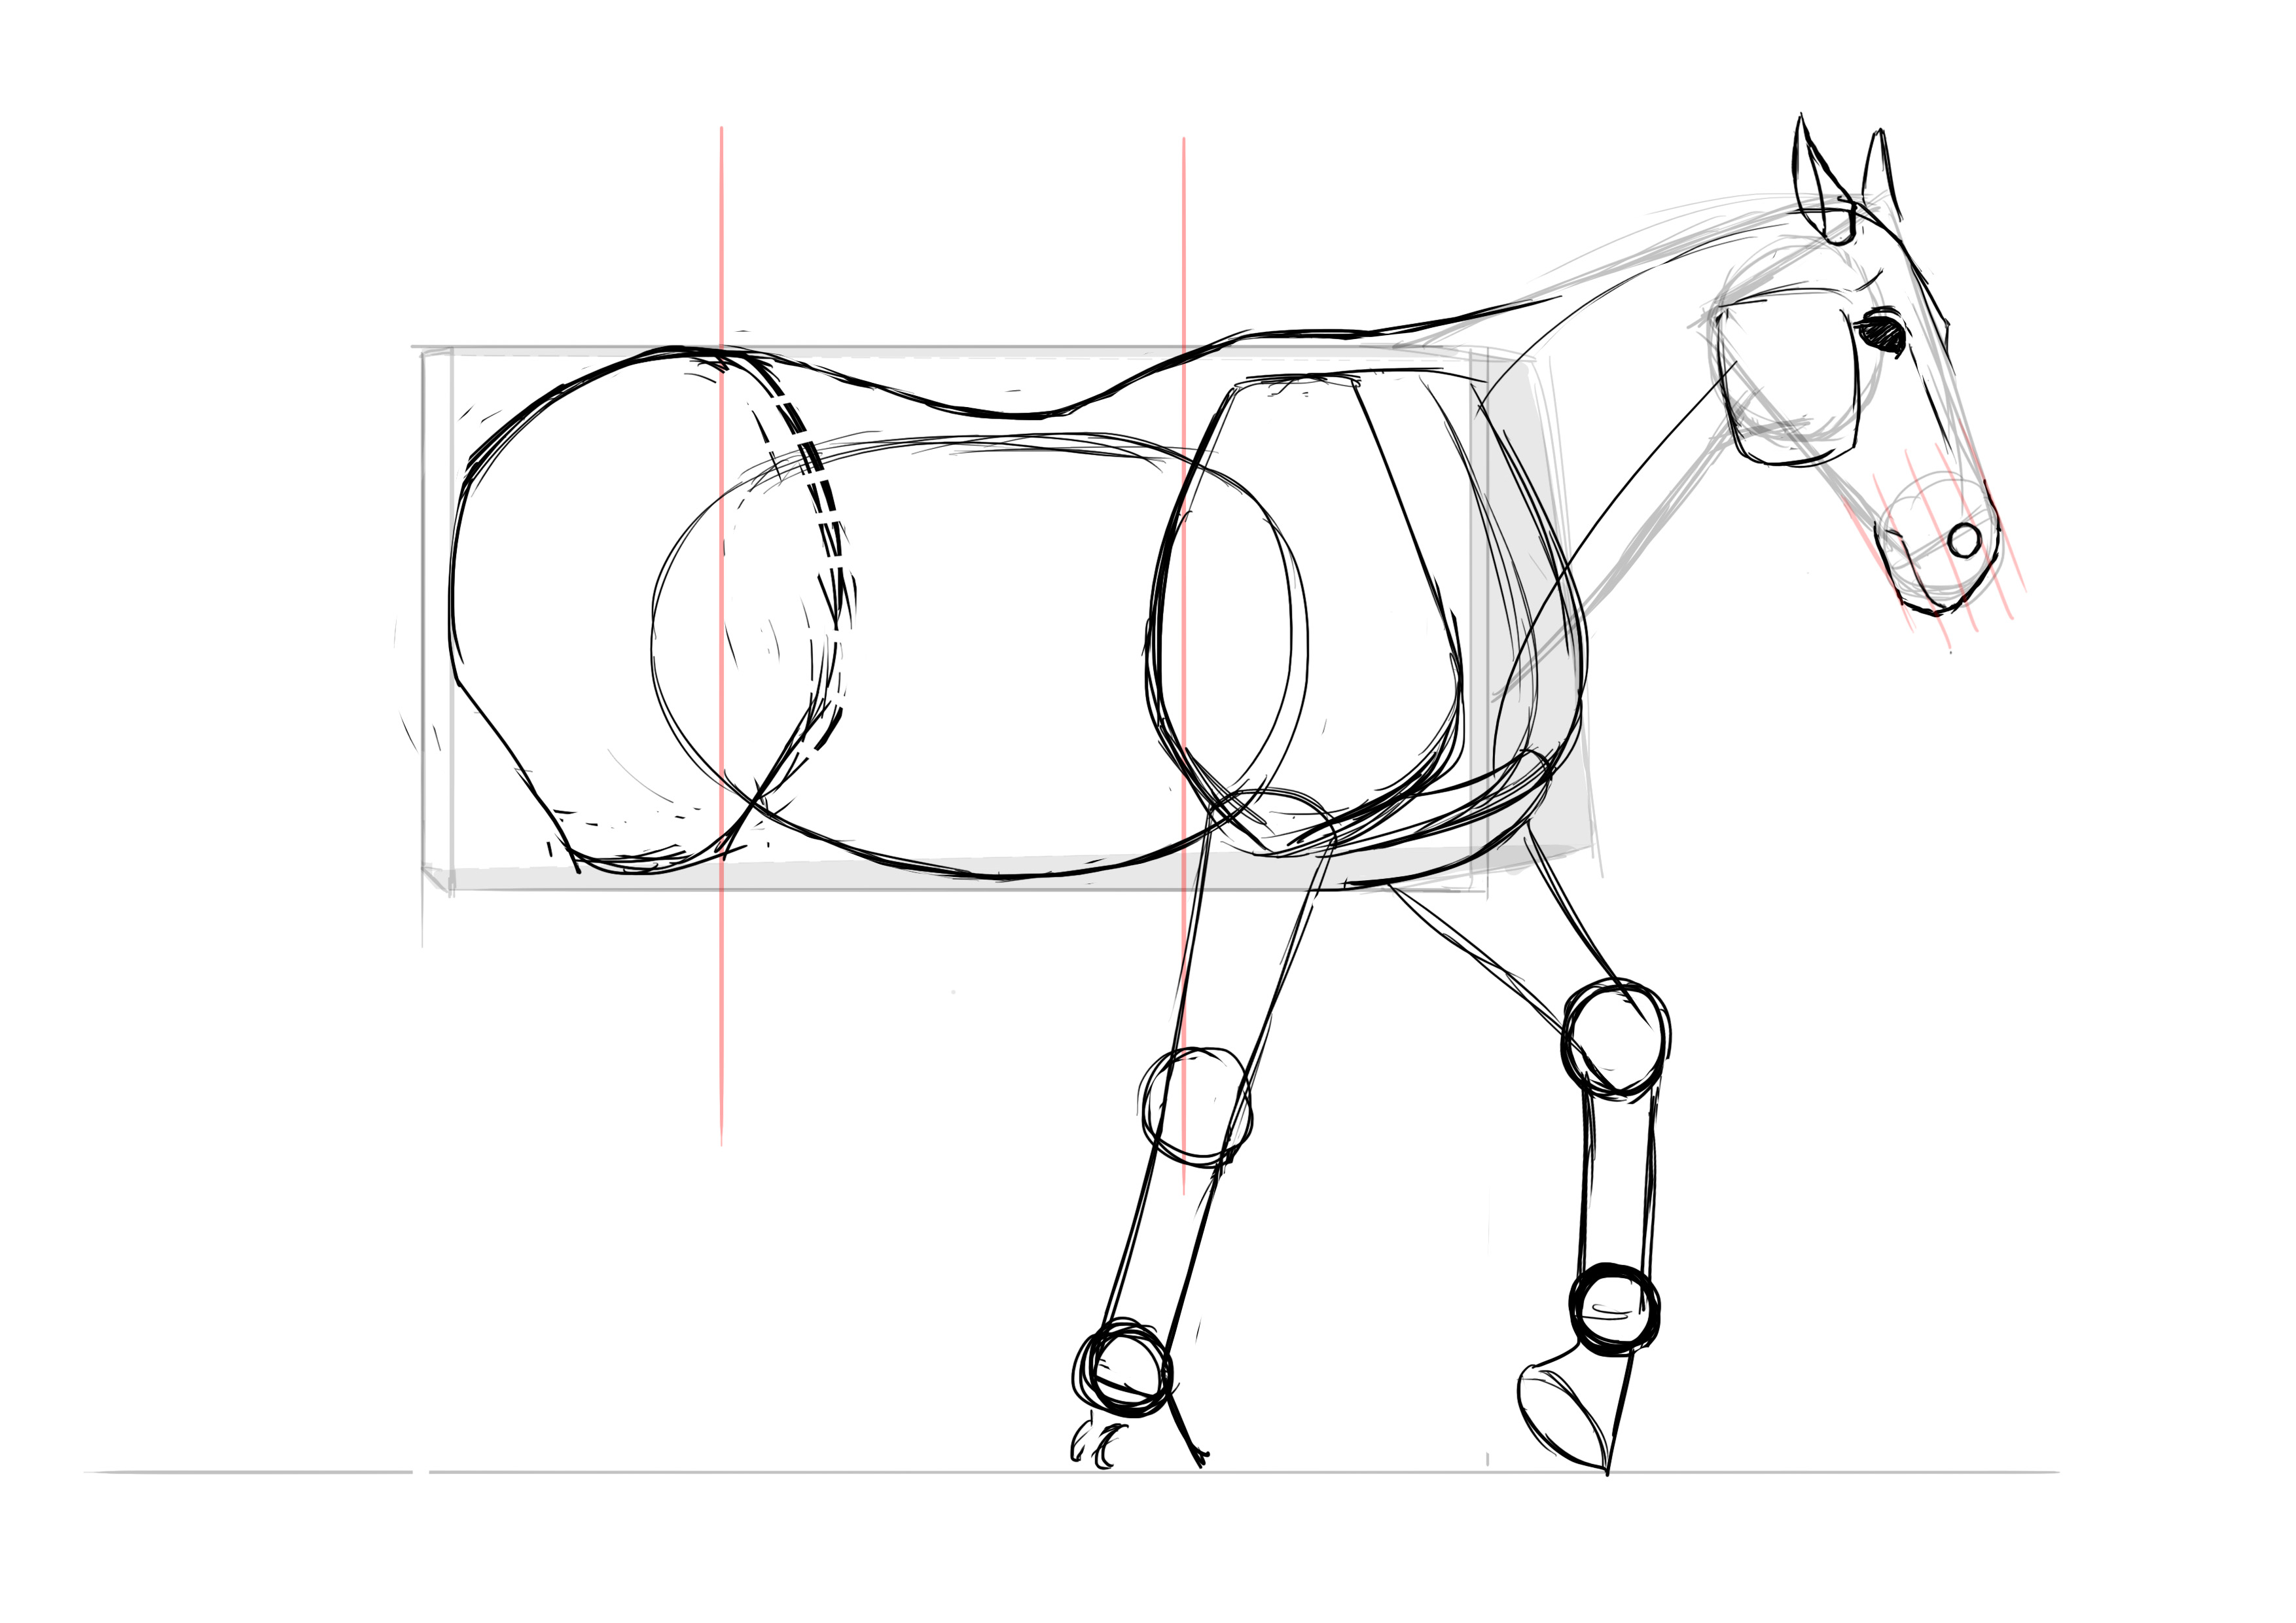
We're going to draw a kind of diamond shape. Hard to explain exactly, images are clearer.
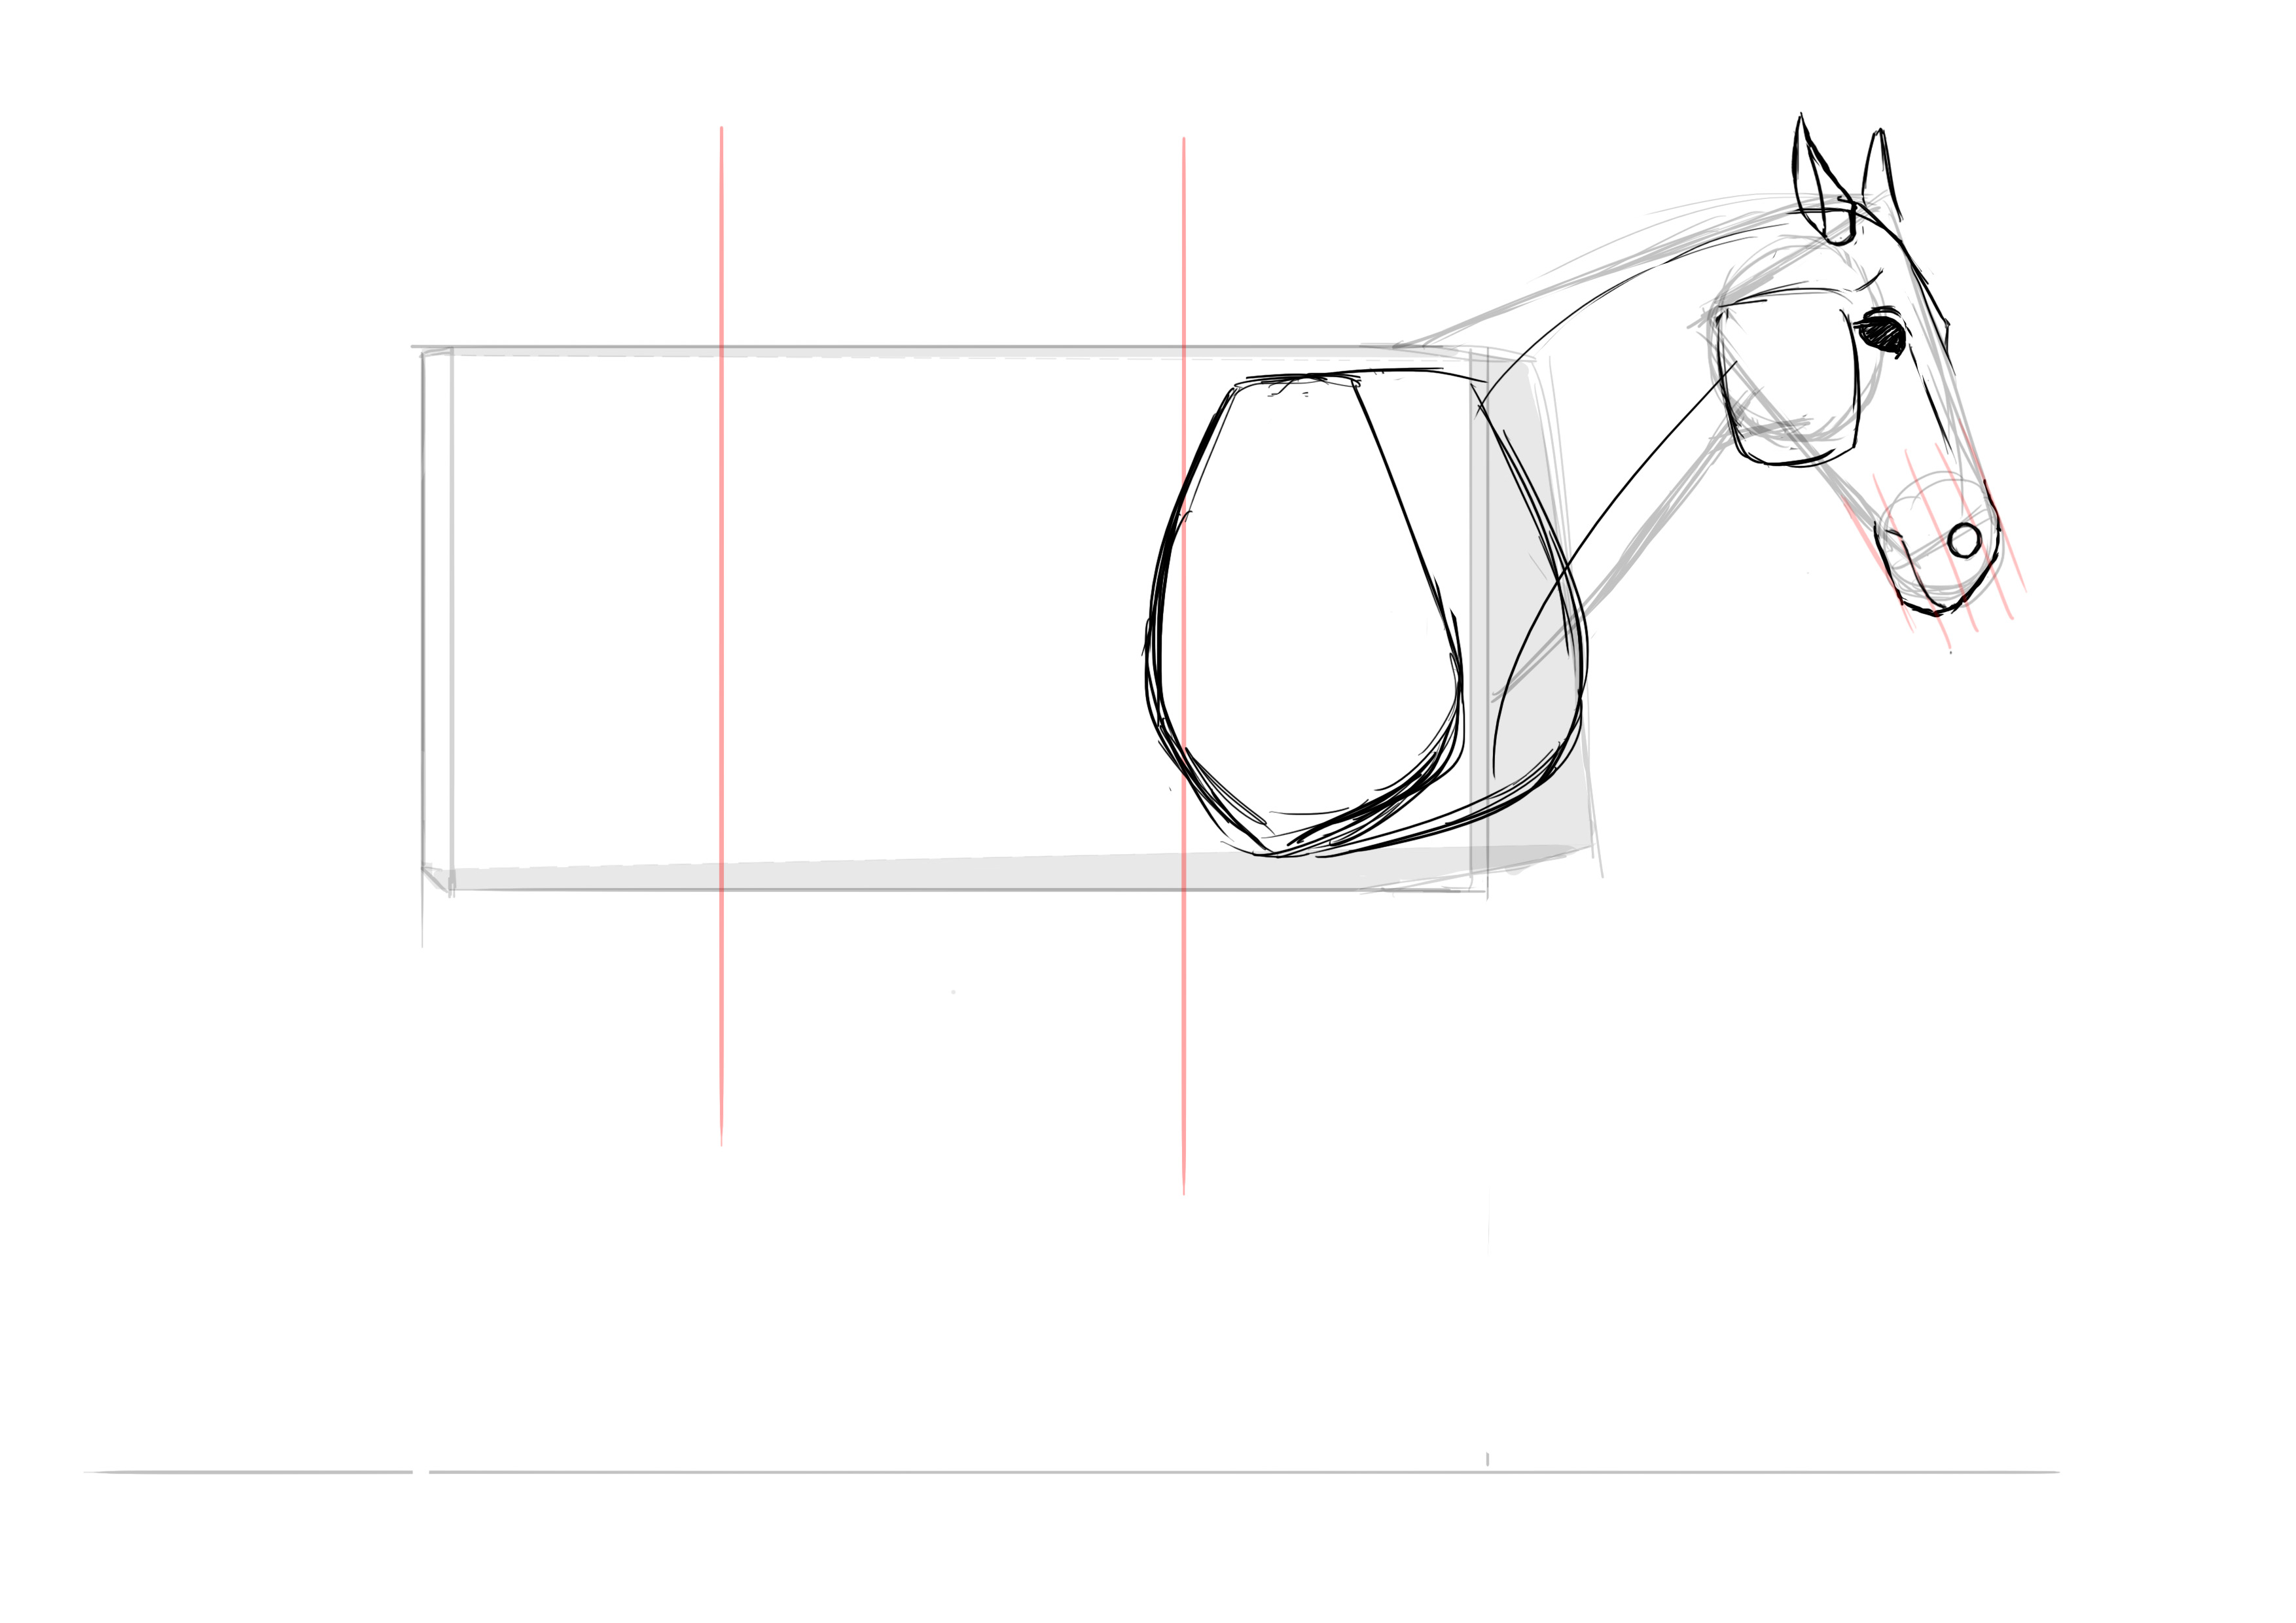
We divide that in two.

Then we trace the beginning of the abdomen.
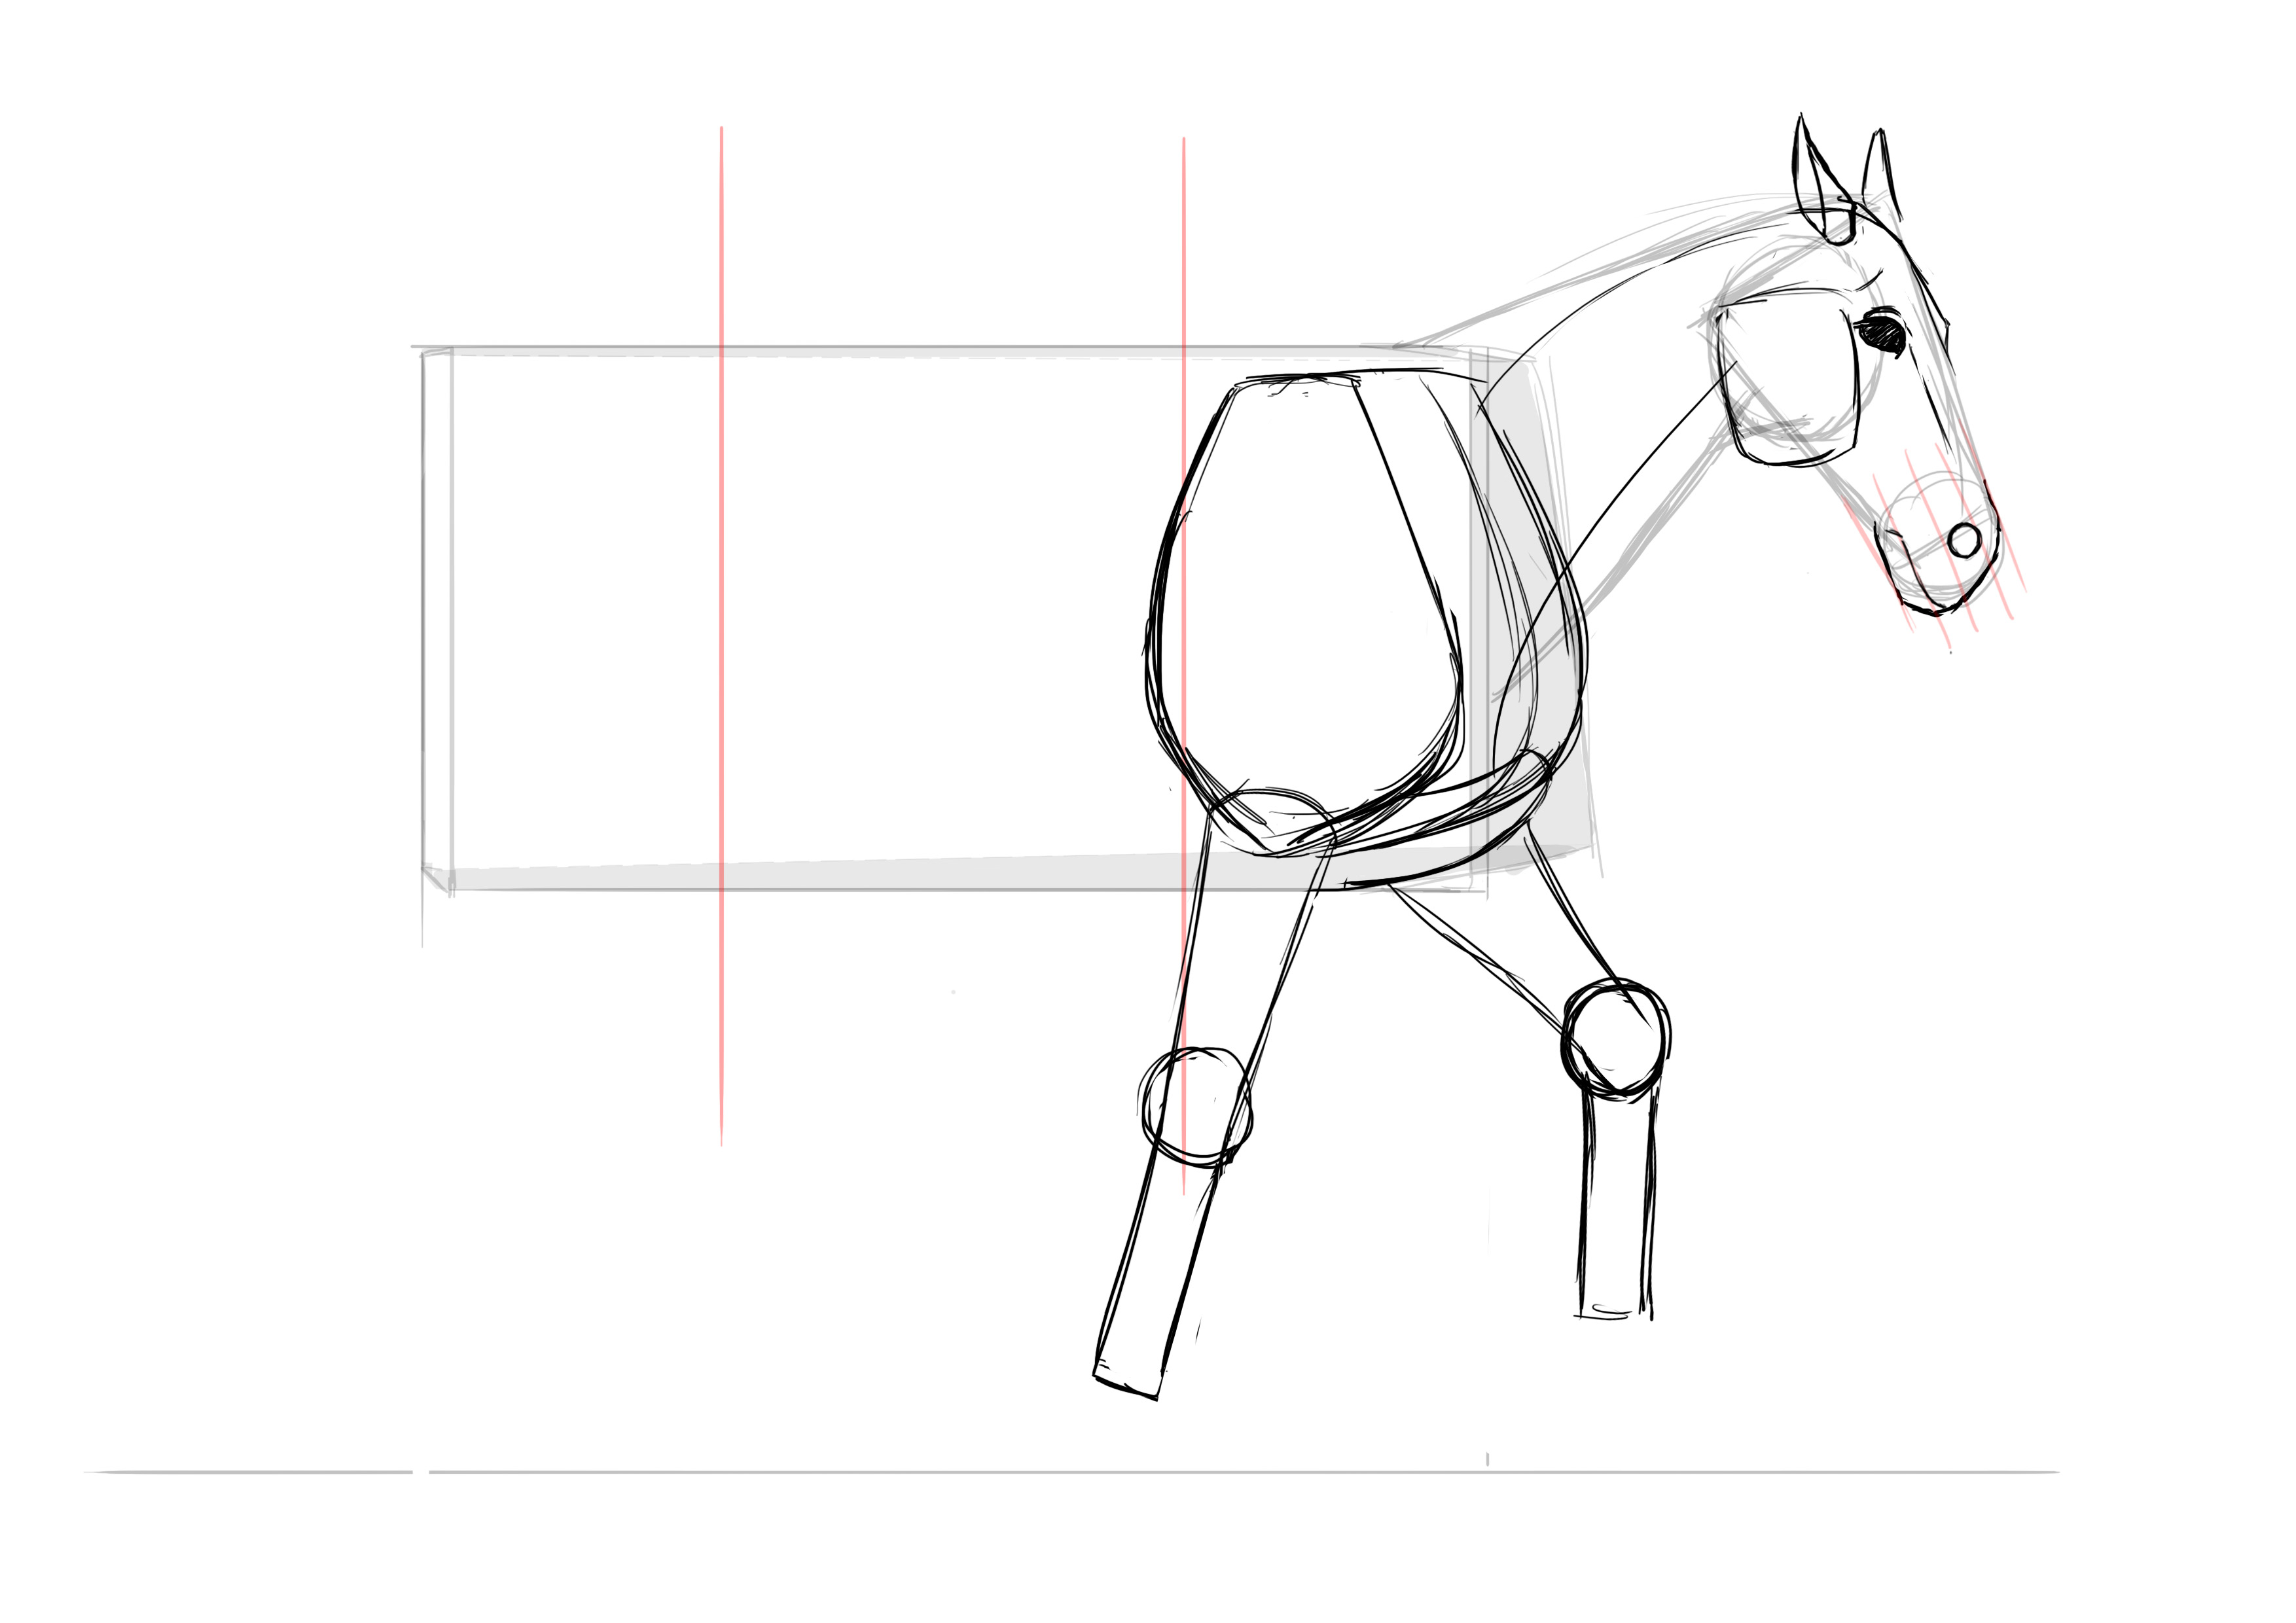
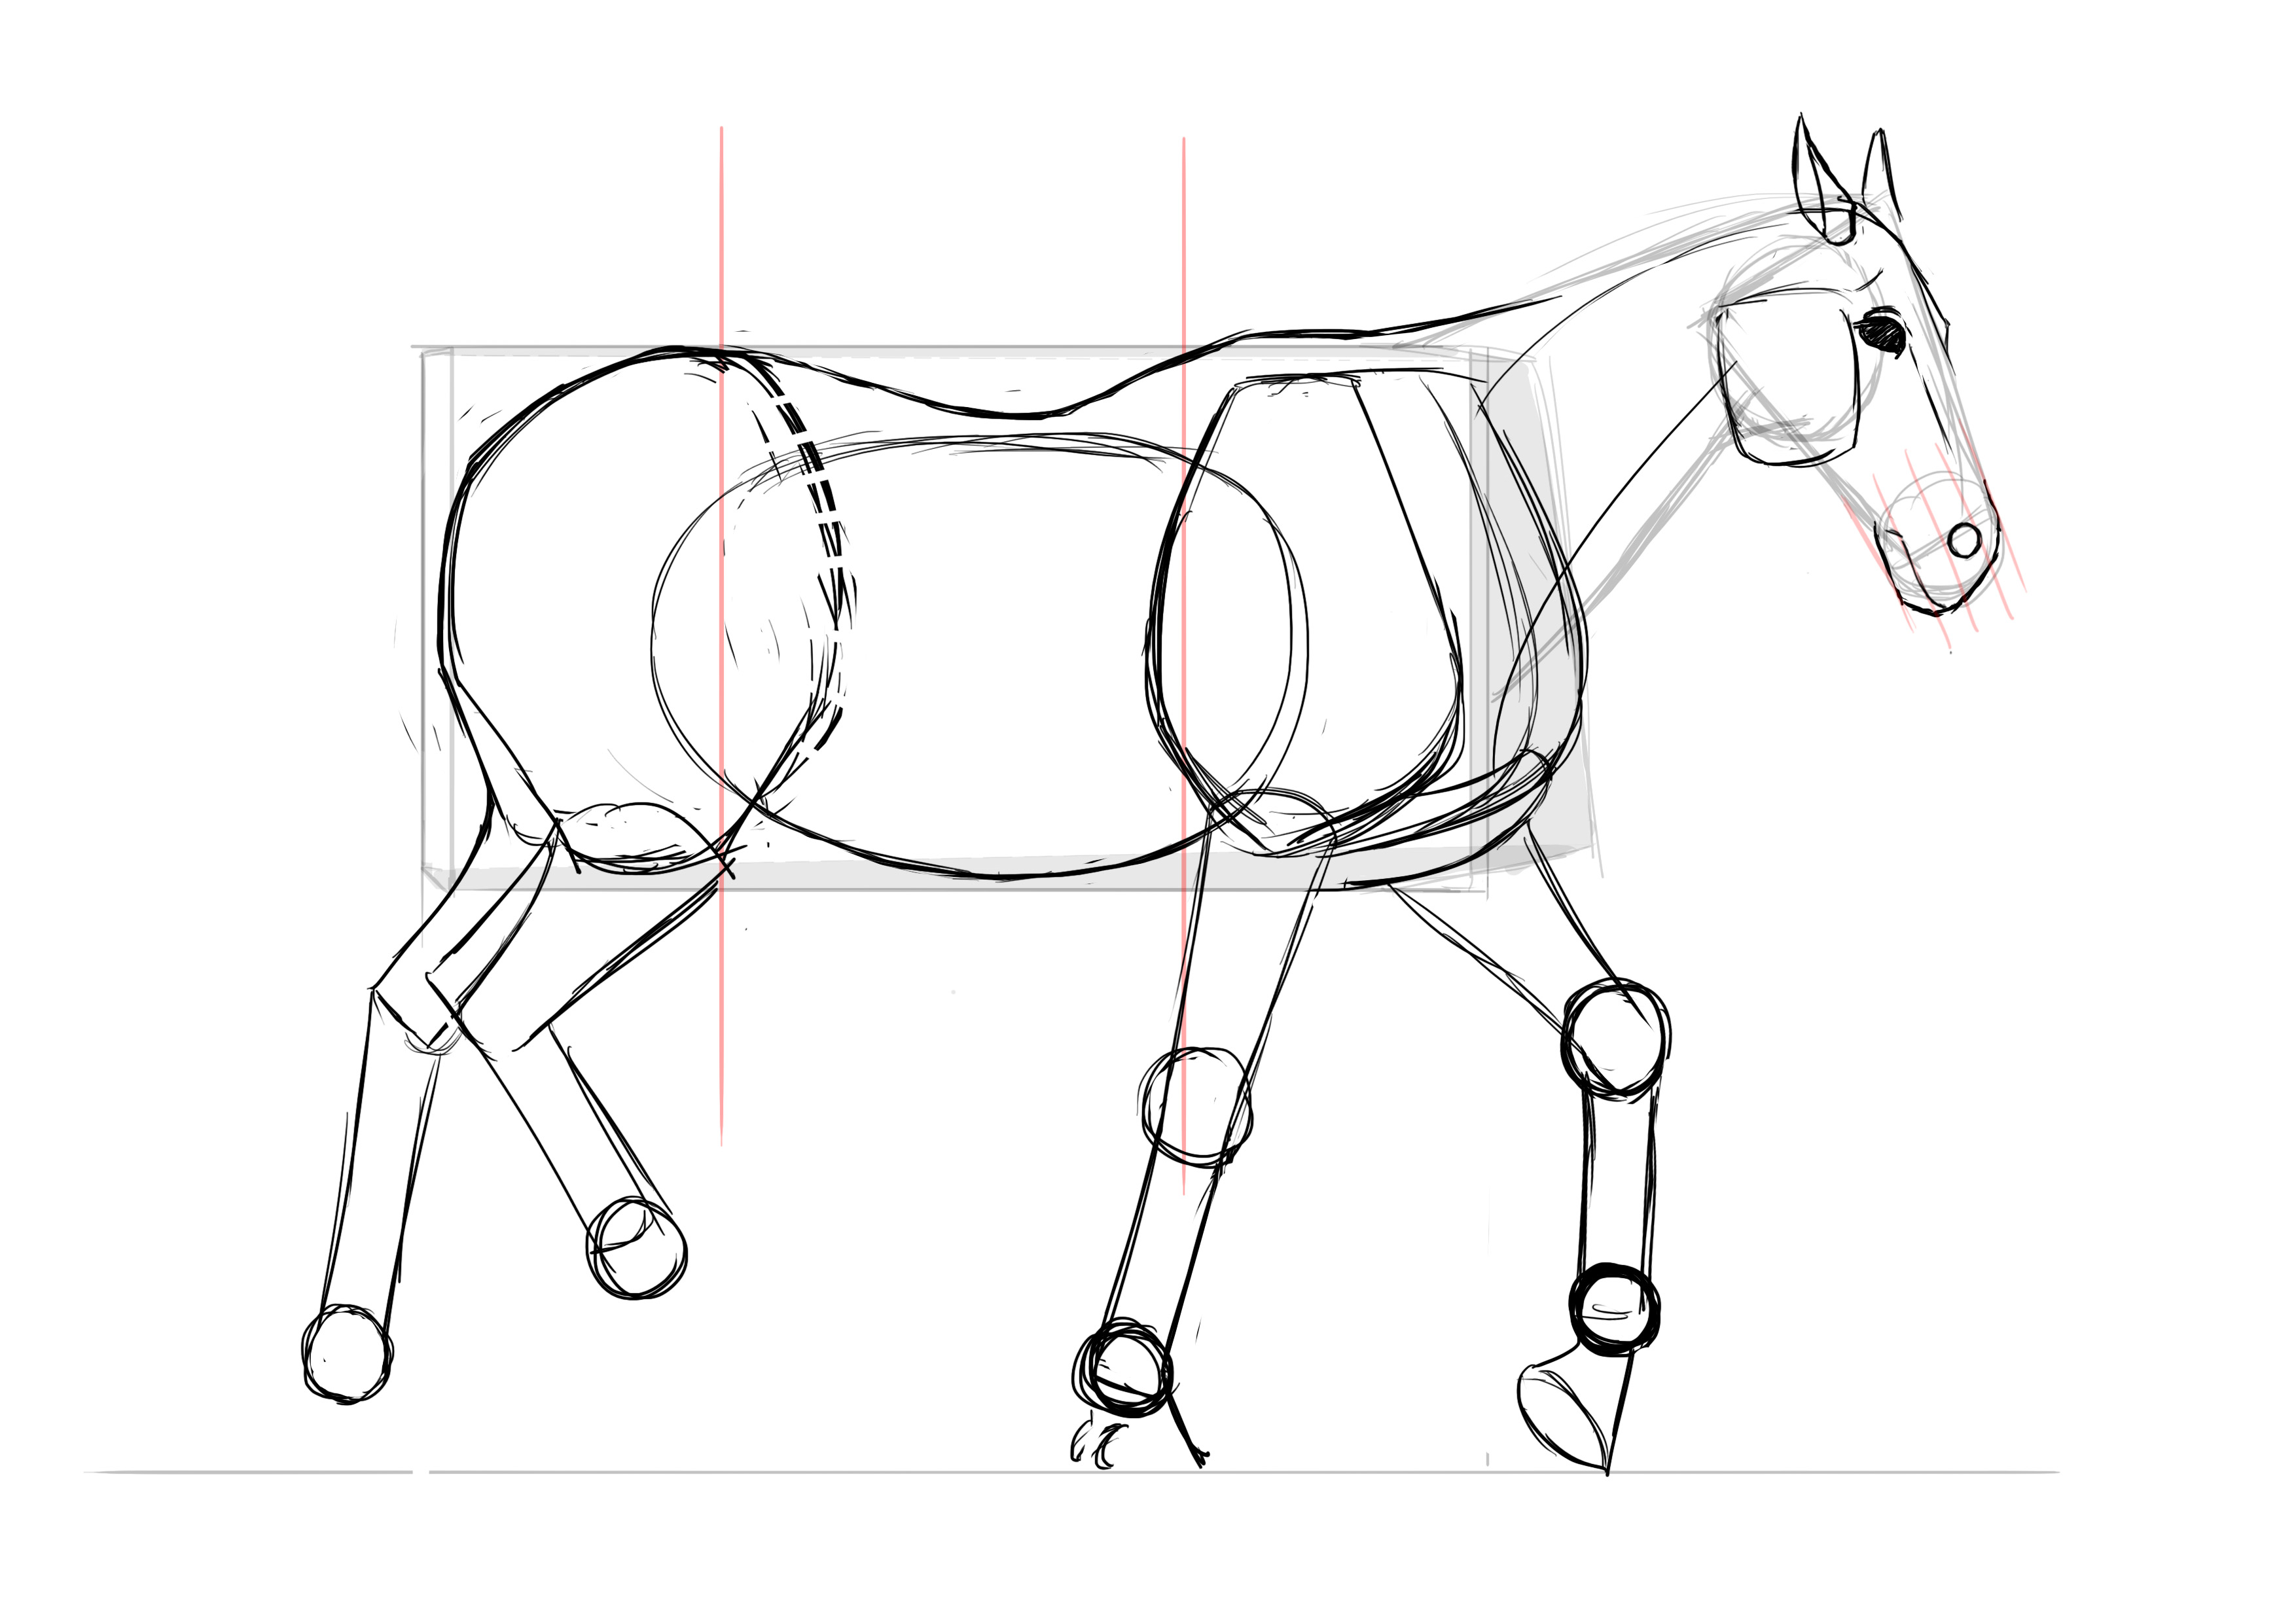
For the front legs, we start with a kind of flared cone.
A ball for the knee then a rectangle.
Another ball, a straight line for the front of the hoof.
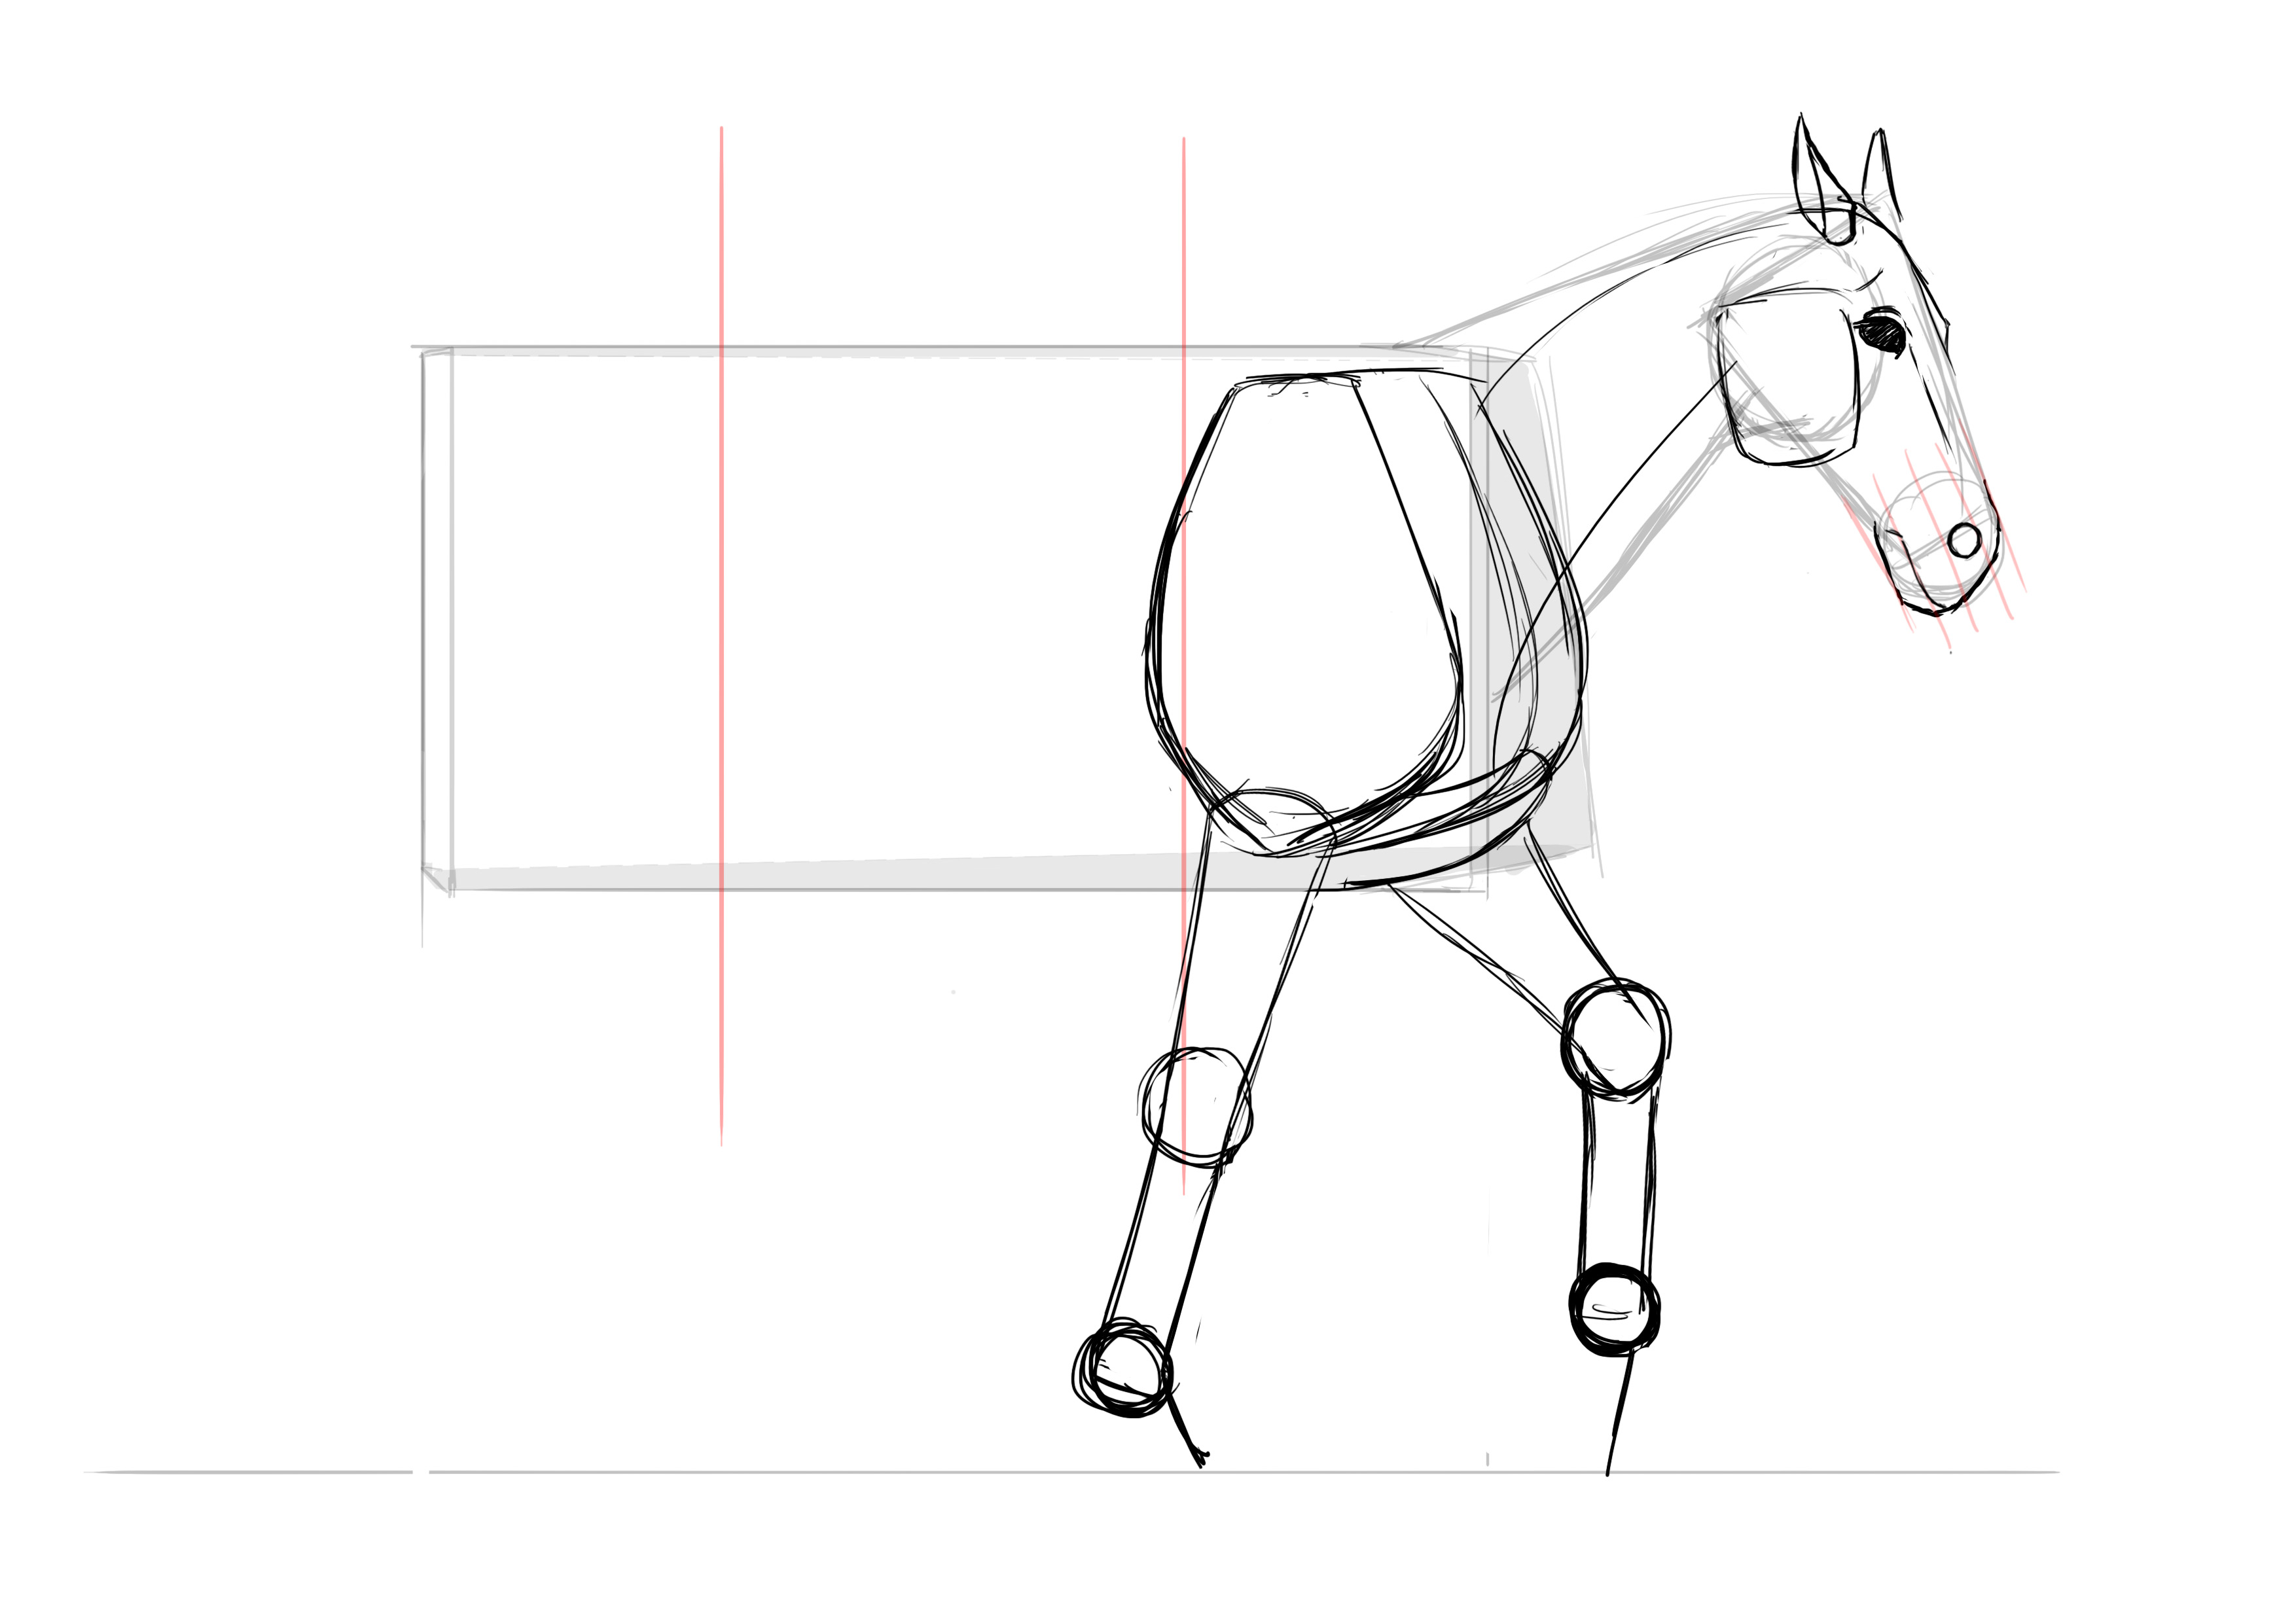
A curve and a mini straight line. Tada!
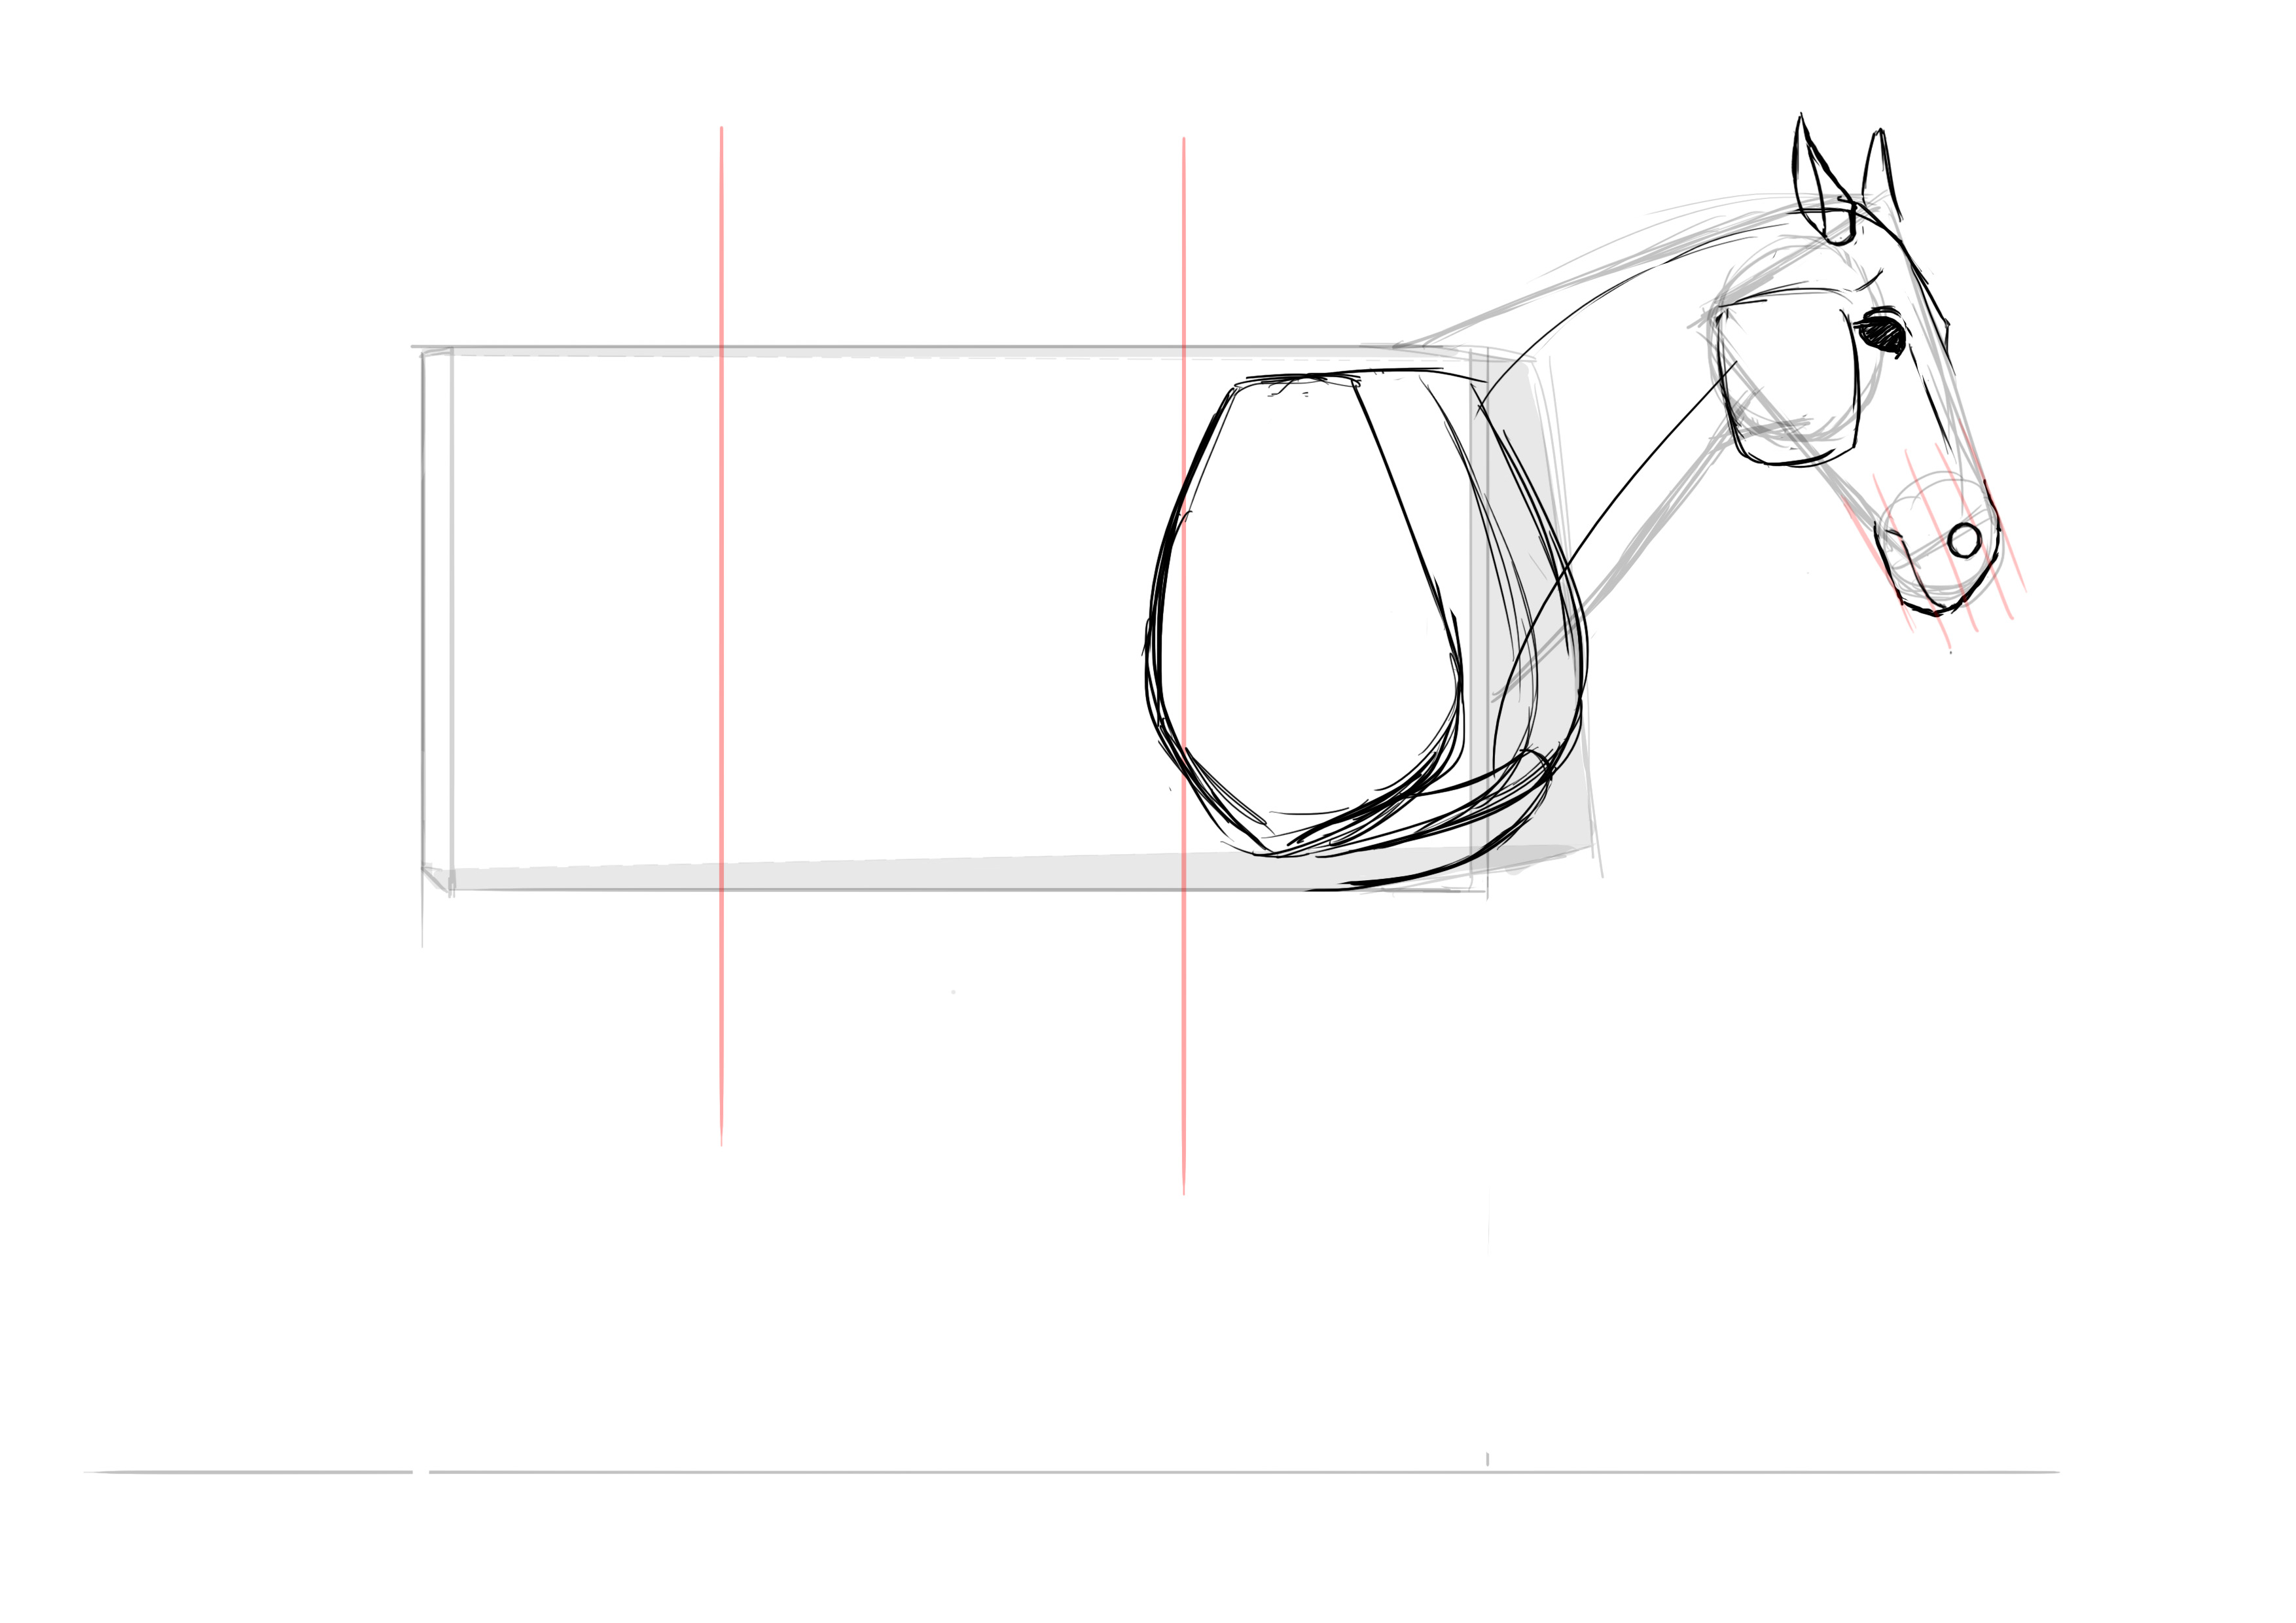
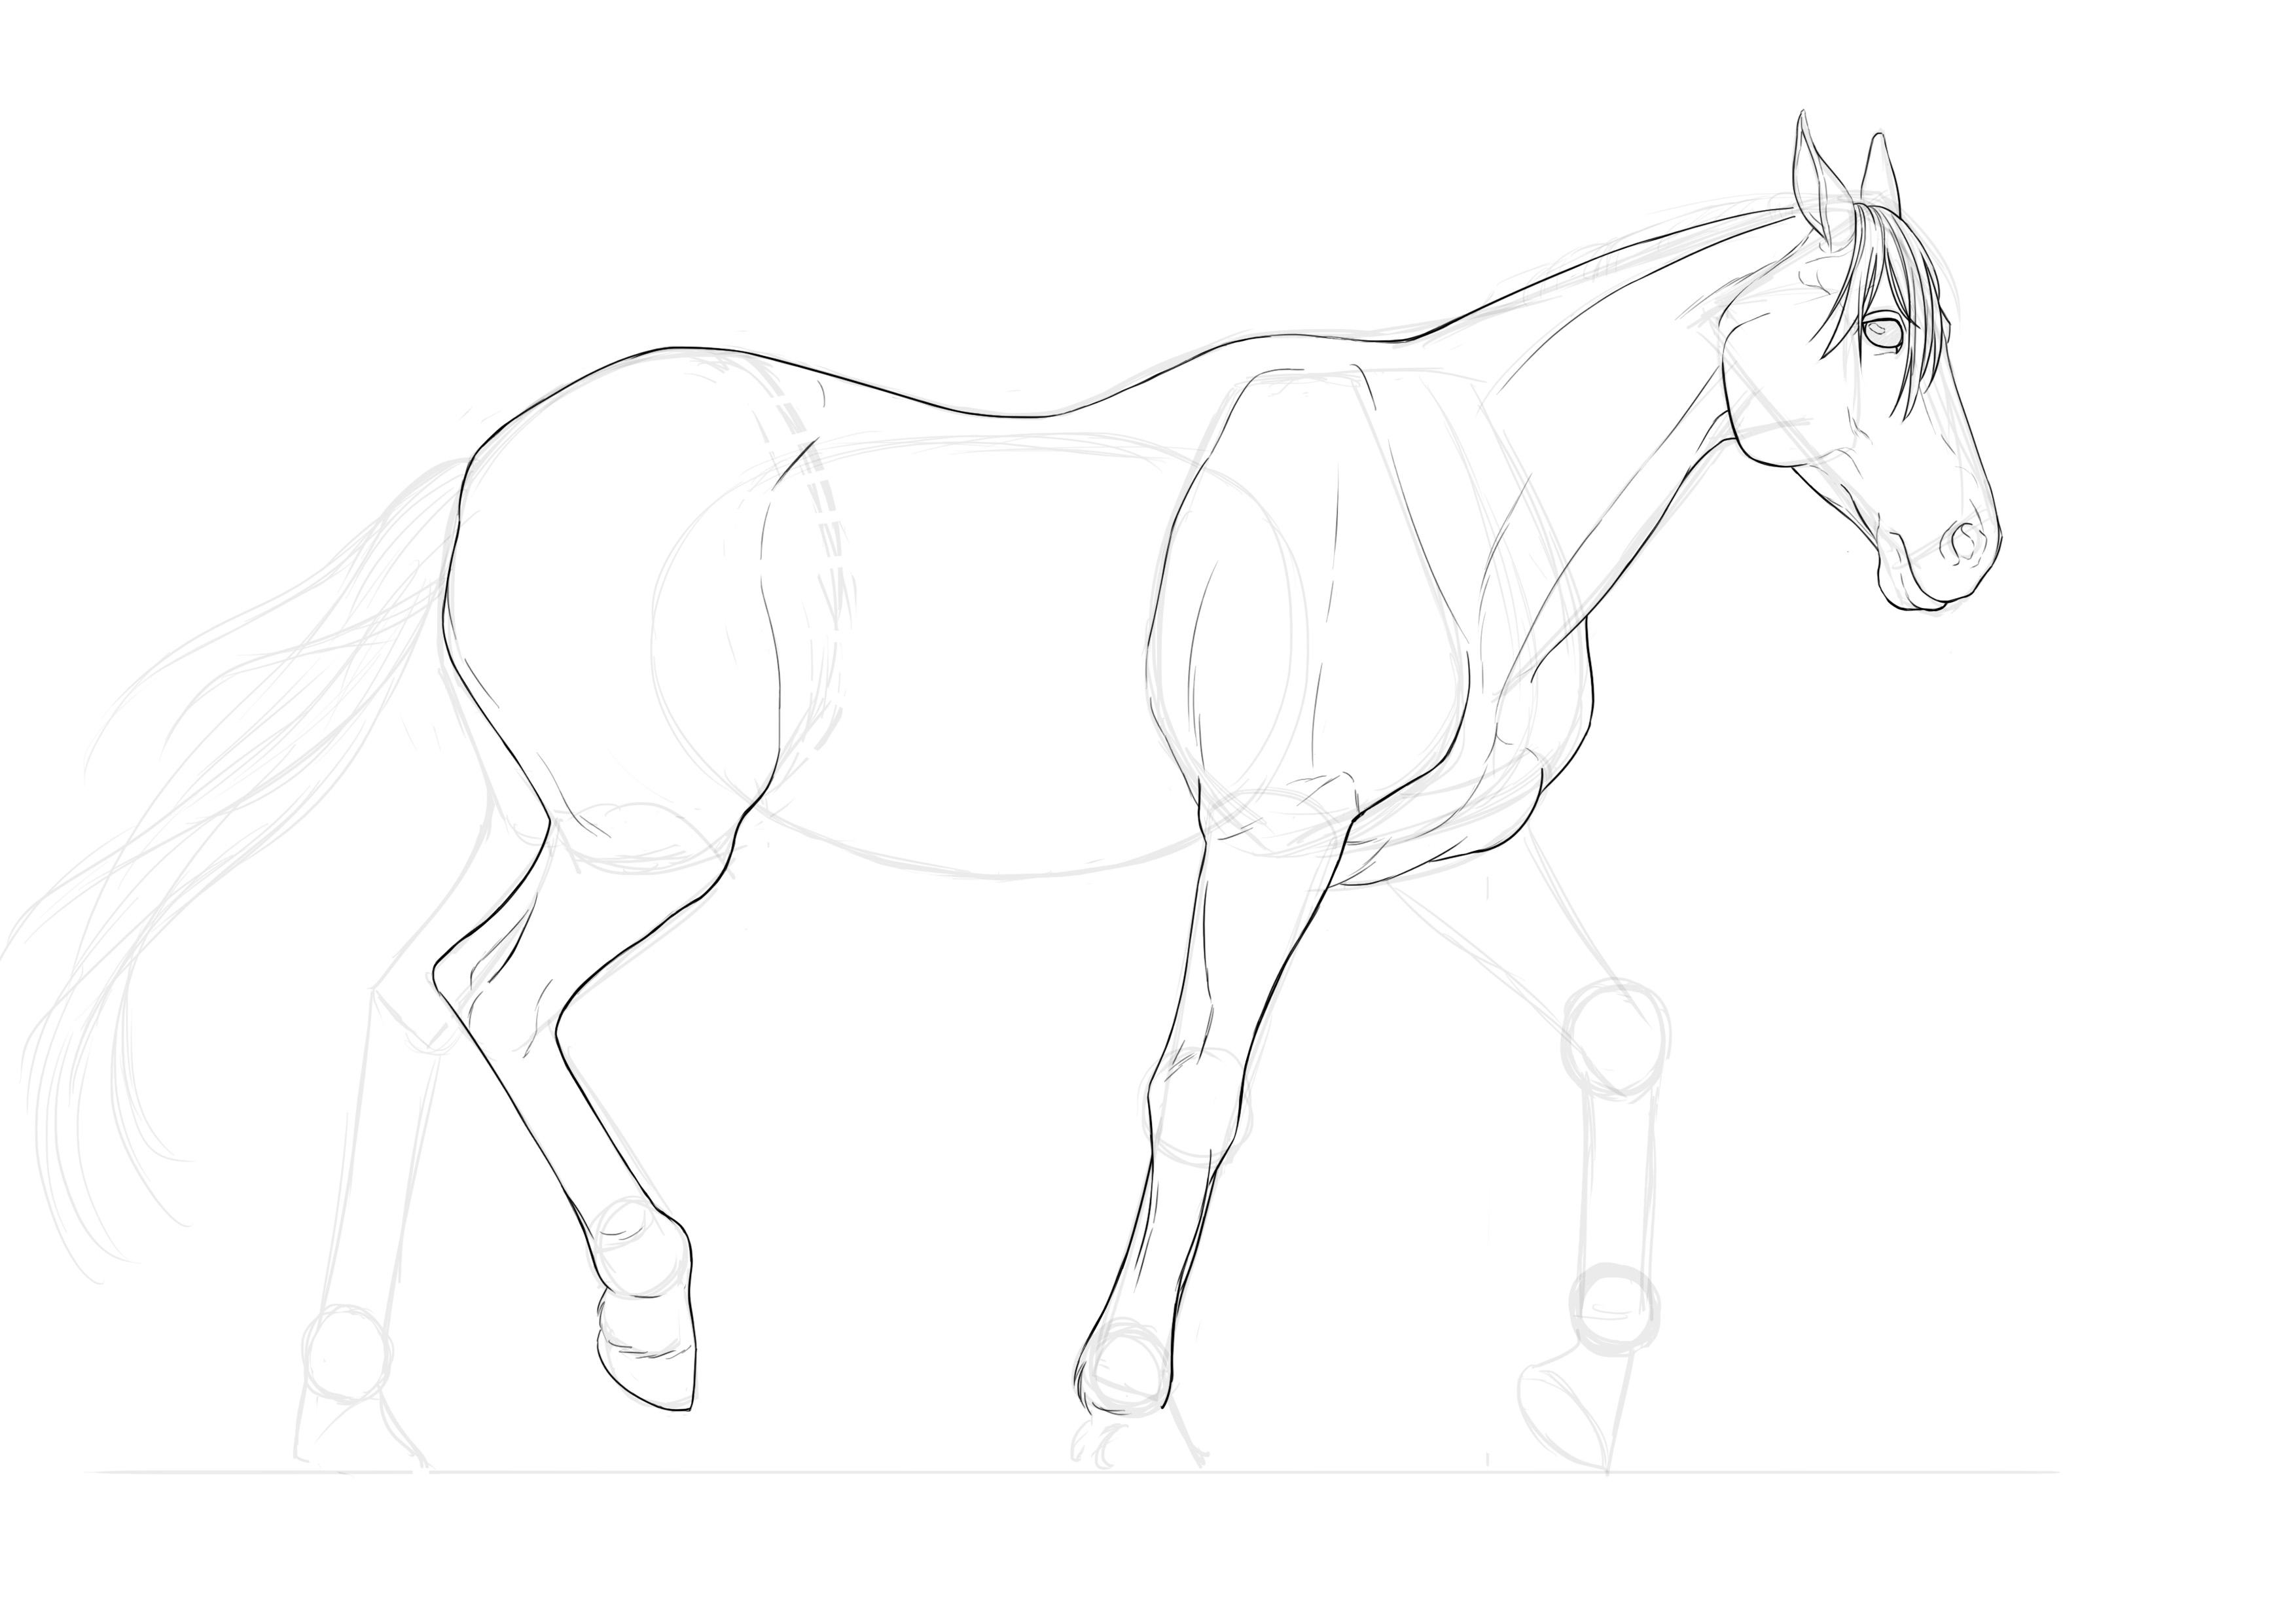
We also take the opportunity to slightly round out above the shoulder. And we draw the back line more hollowed and rounded at the croup.
The abdomen is quite simple, it's a big oval :D Be careful, it does not go up to the back, there is the spine above.
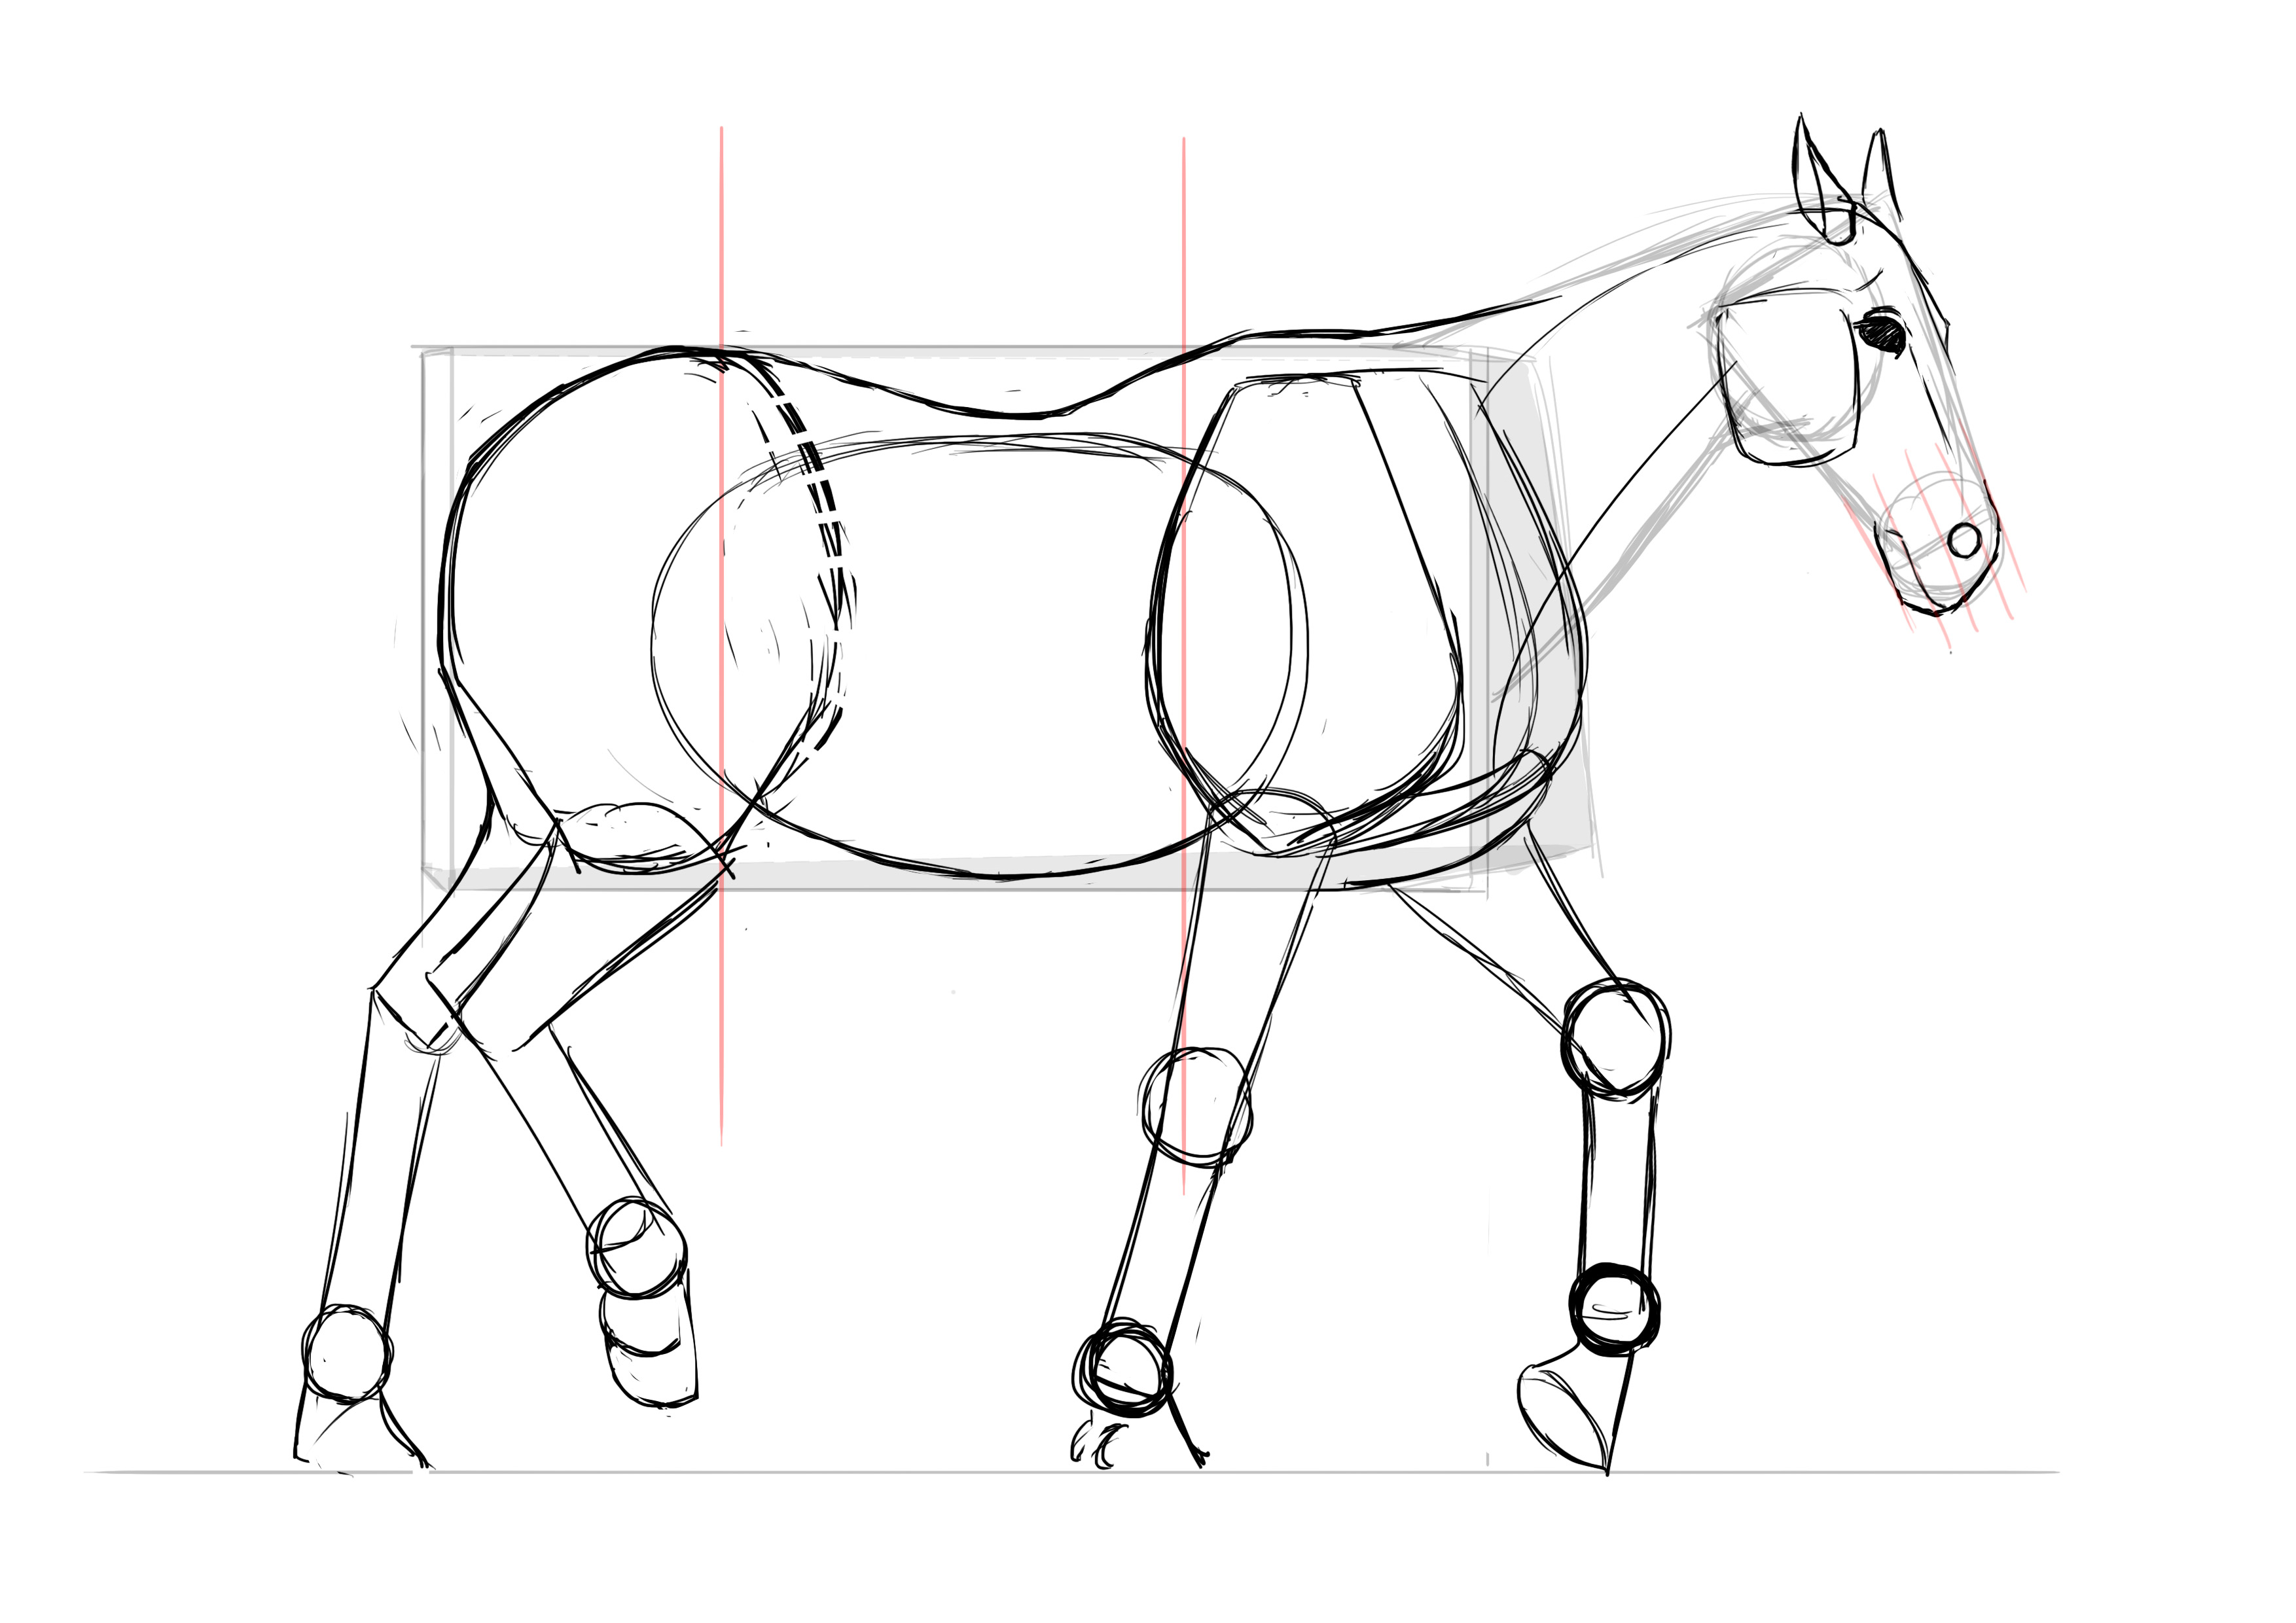
The hindquarters now! Draw a relatively round shape for the rump.
Similar principle to the front legs, we draw a cone for the start of the rear leg up to the knee. The only difference is that there is no ball for the joint, we simply draw a second line to widen the end of the cone.
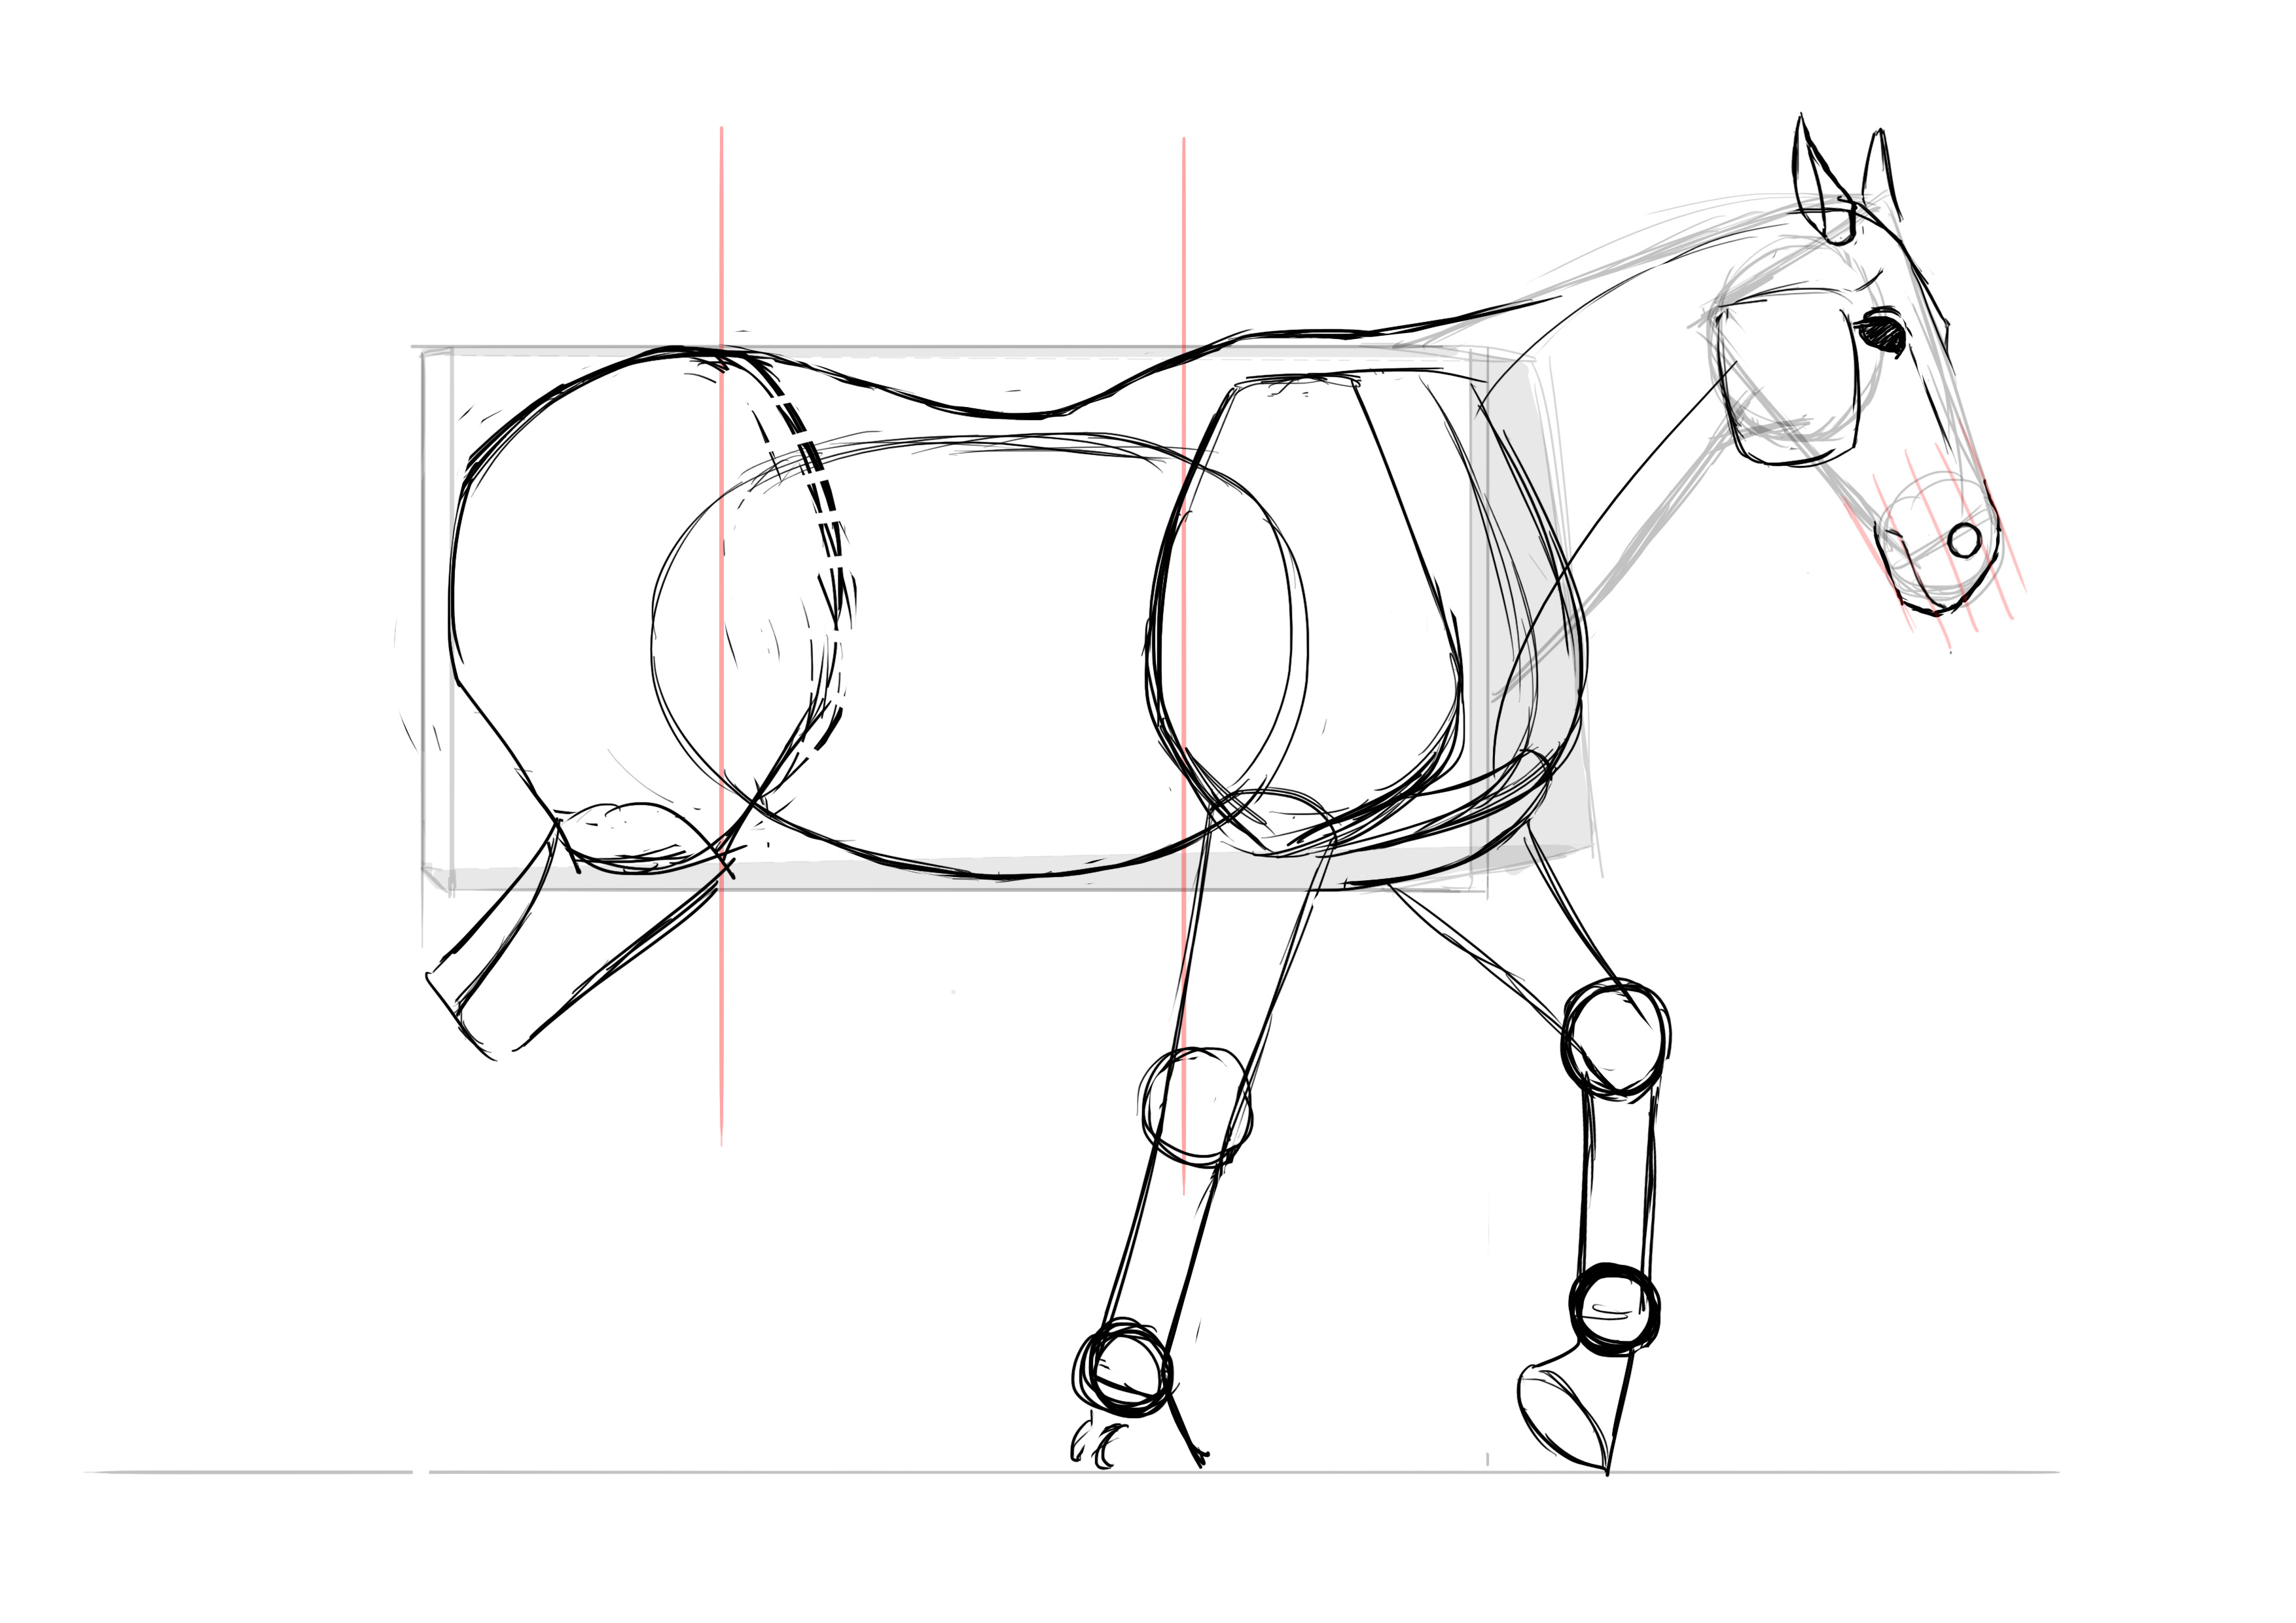
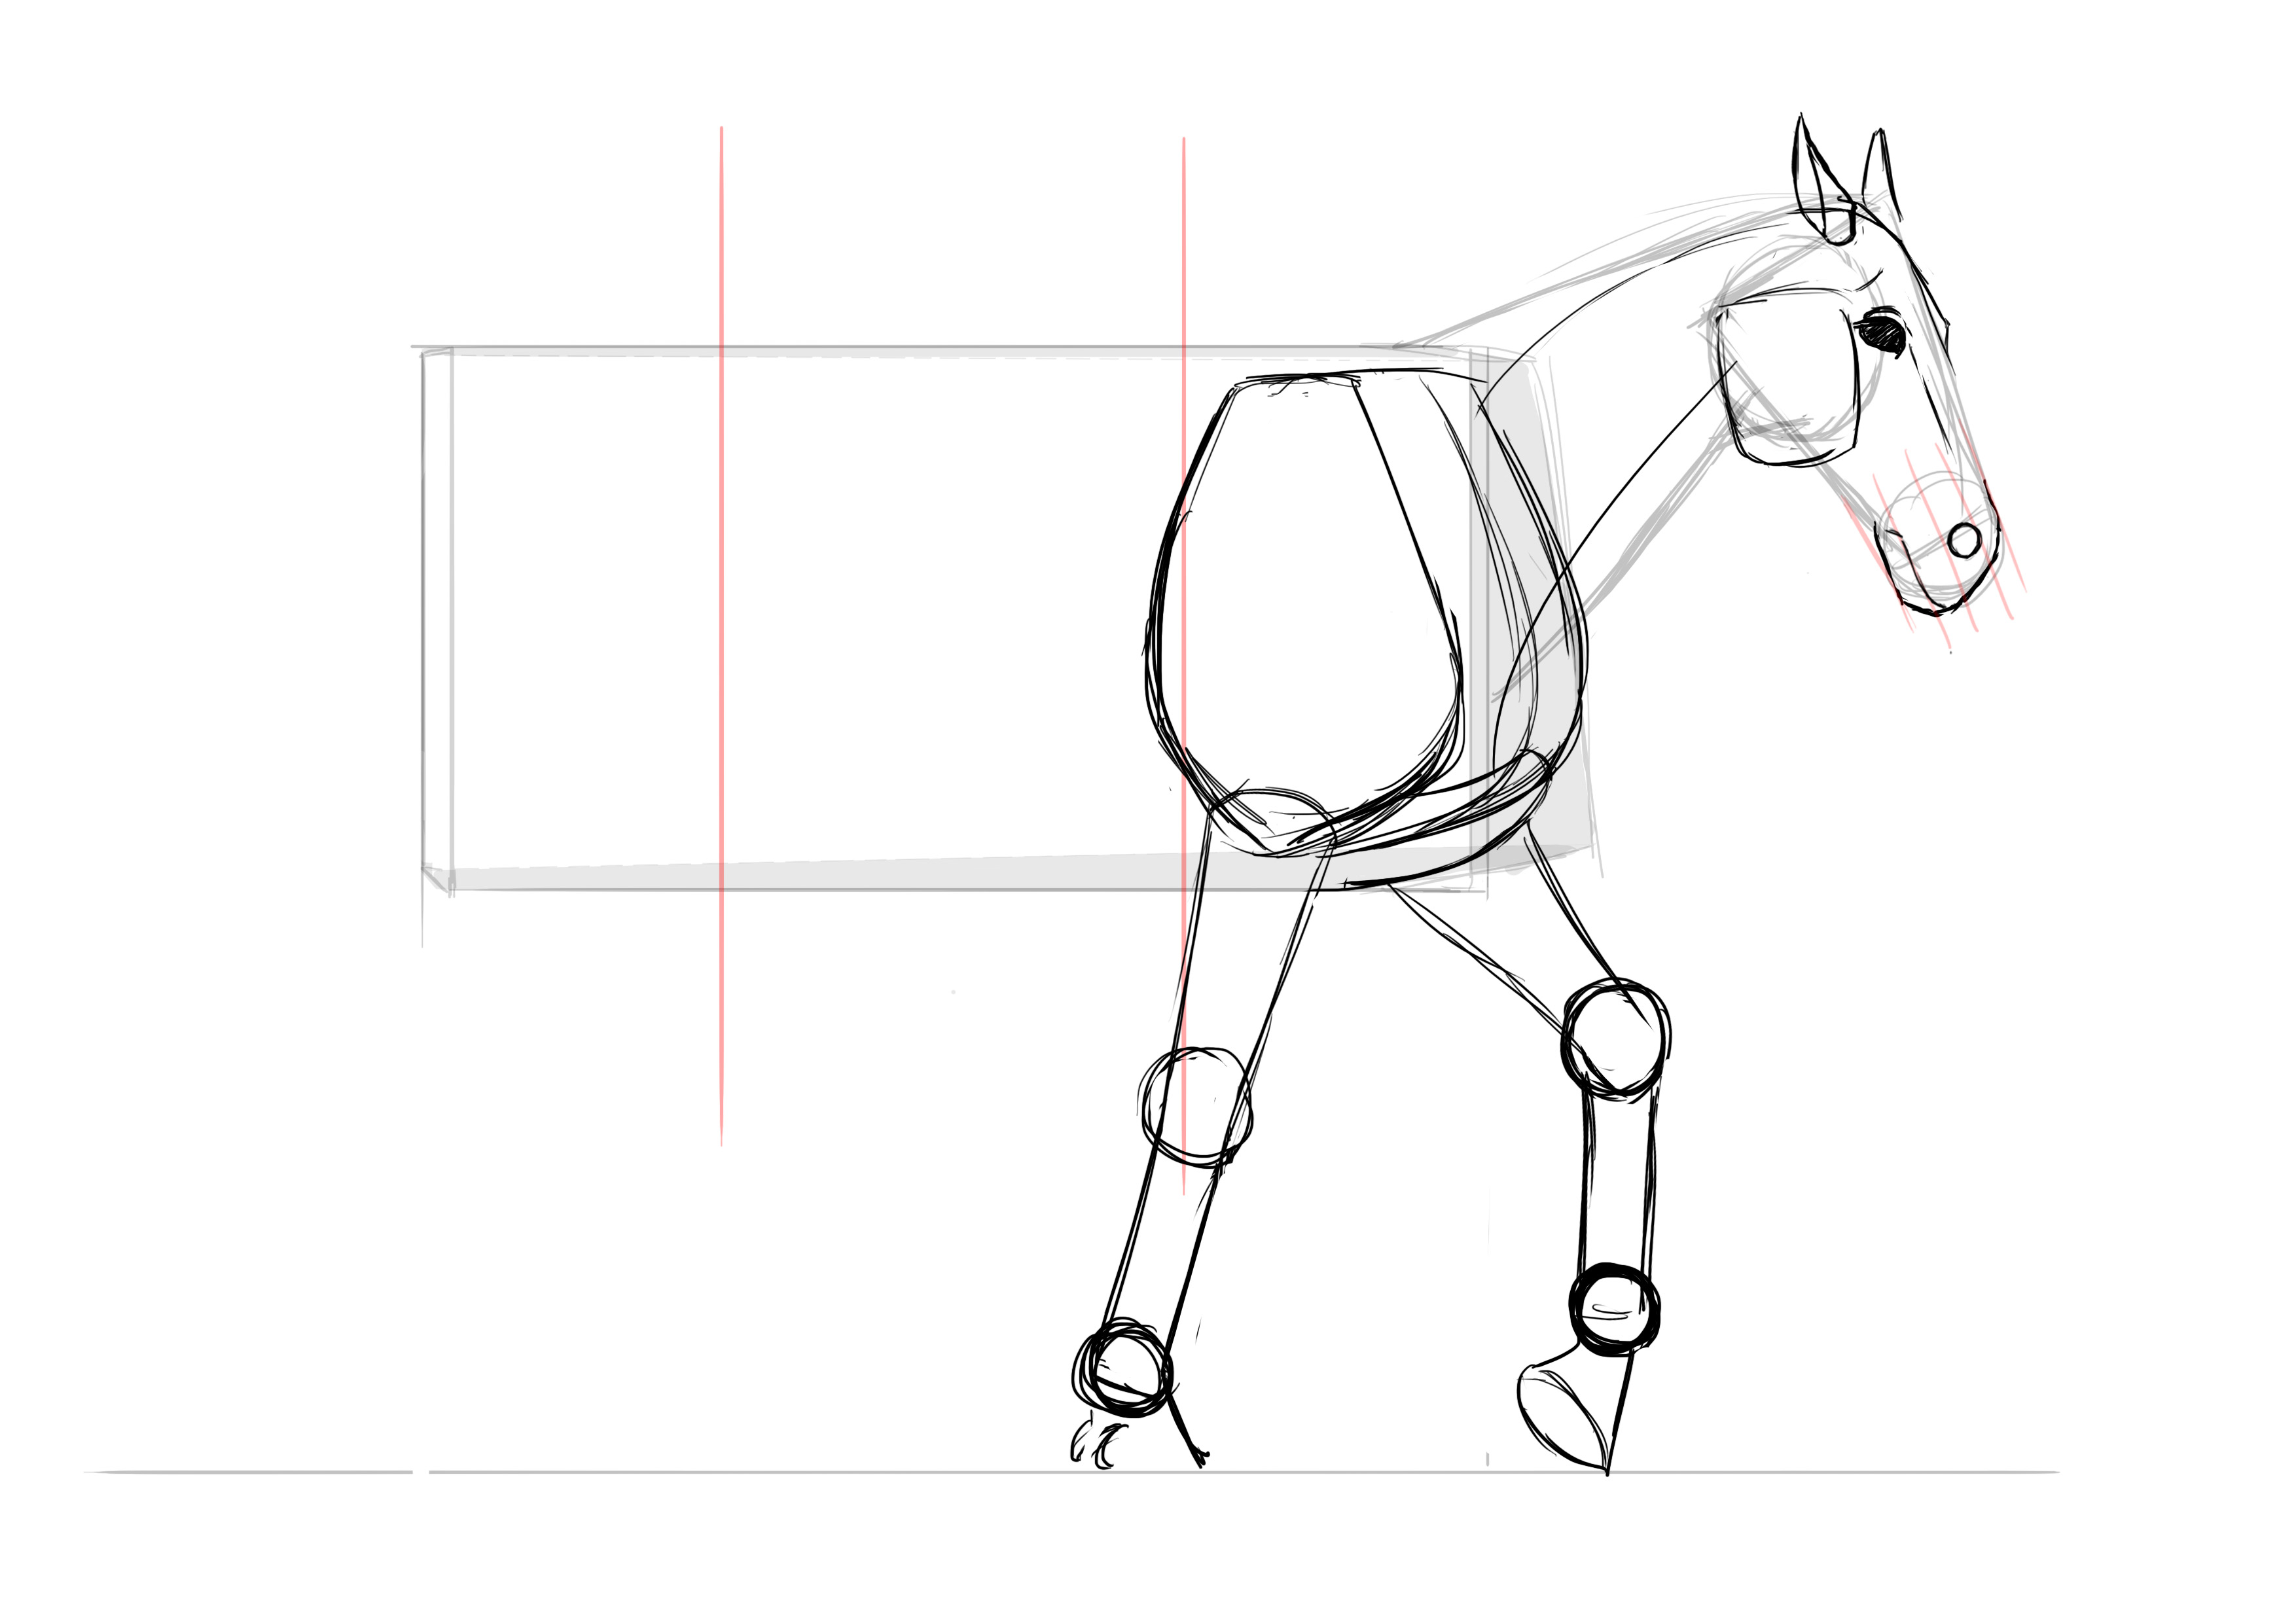
Then we put the other paw behind.
We add a cylinder ending this time with a ball and observe the same process for the clogs.
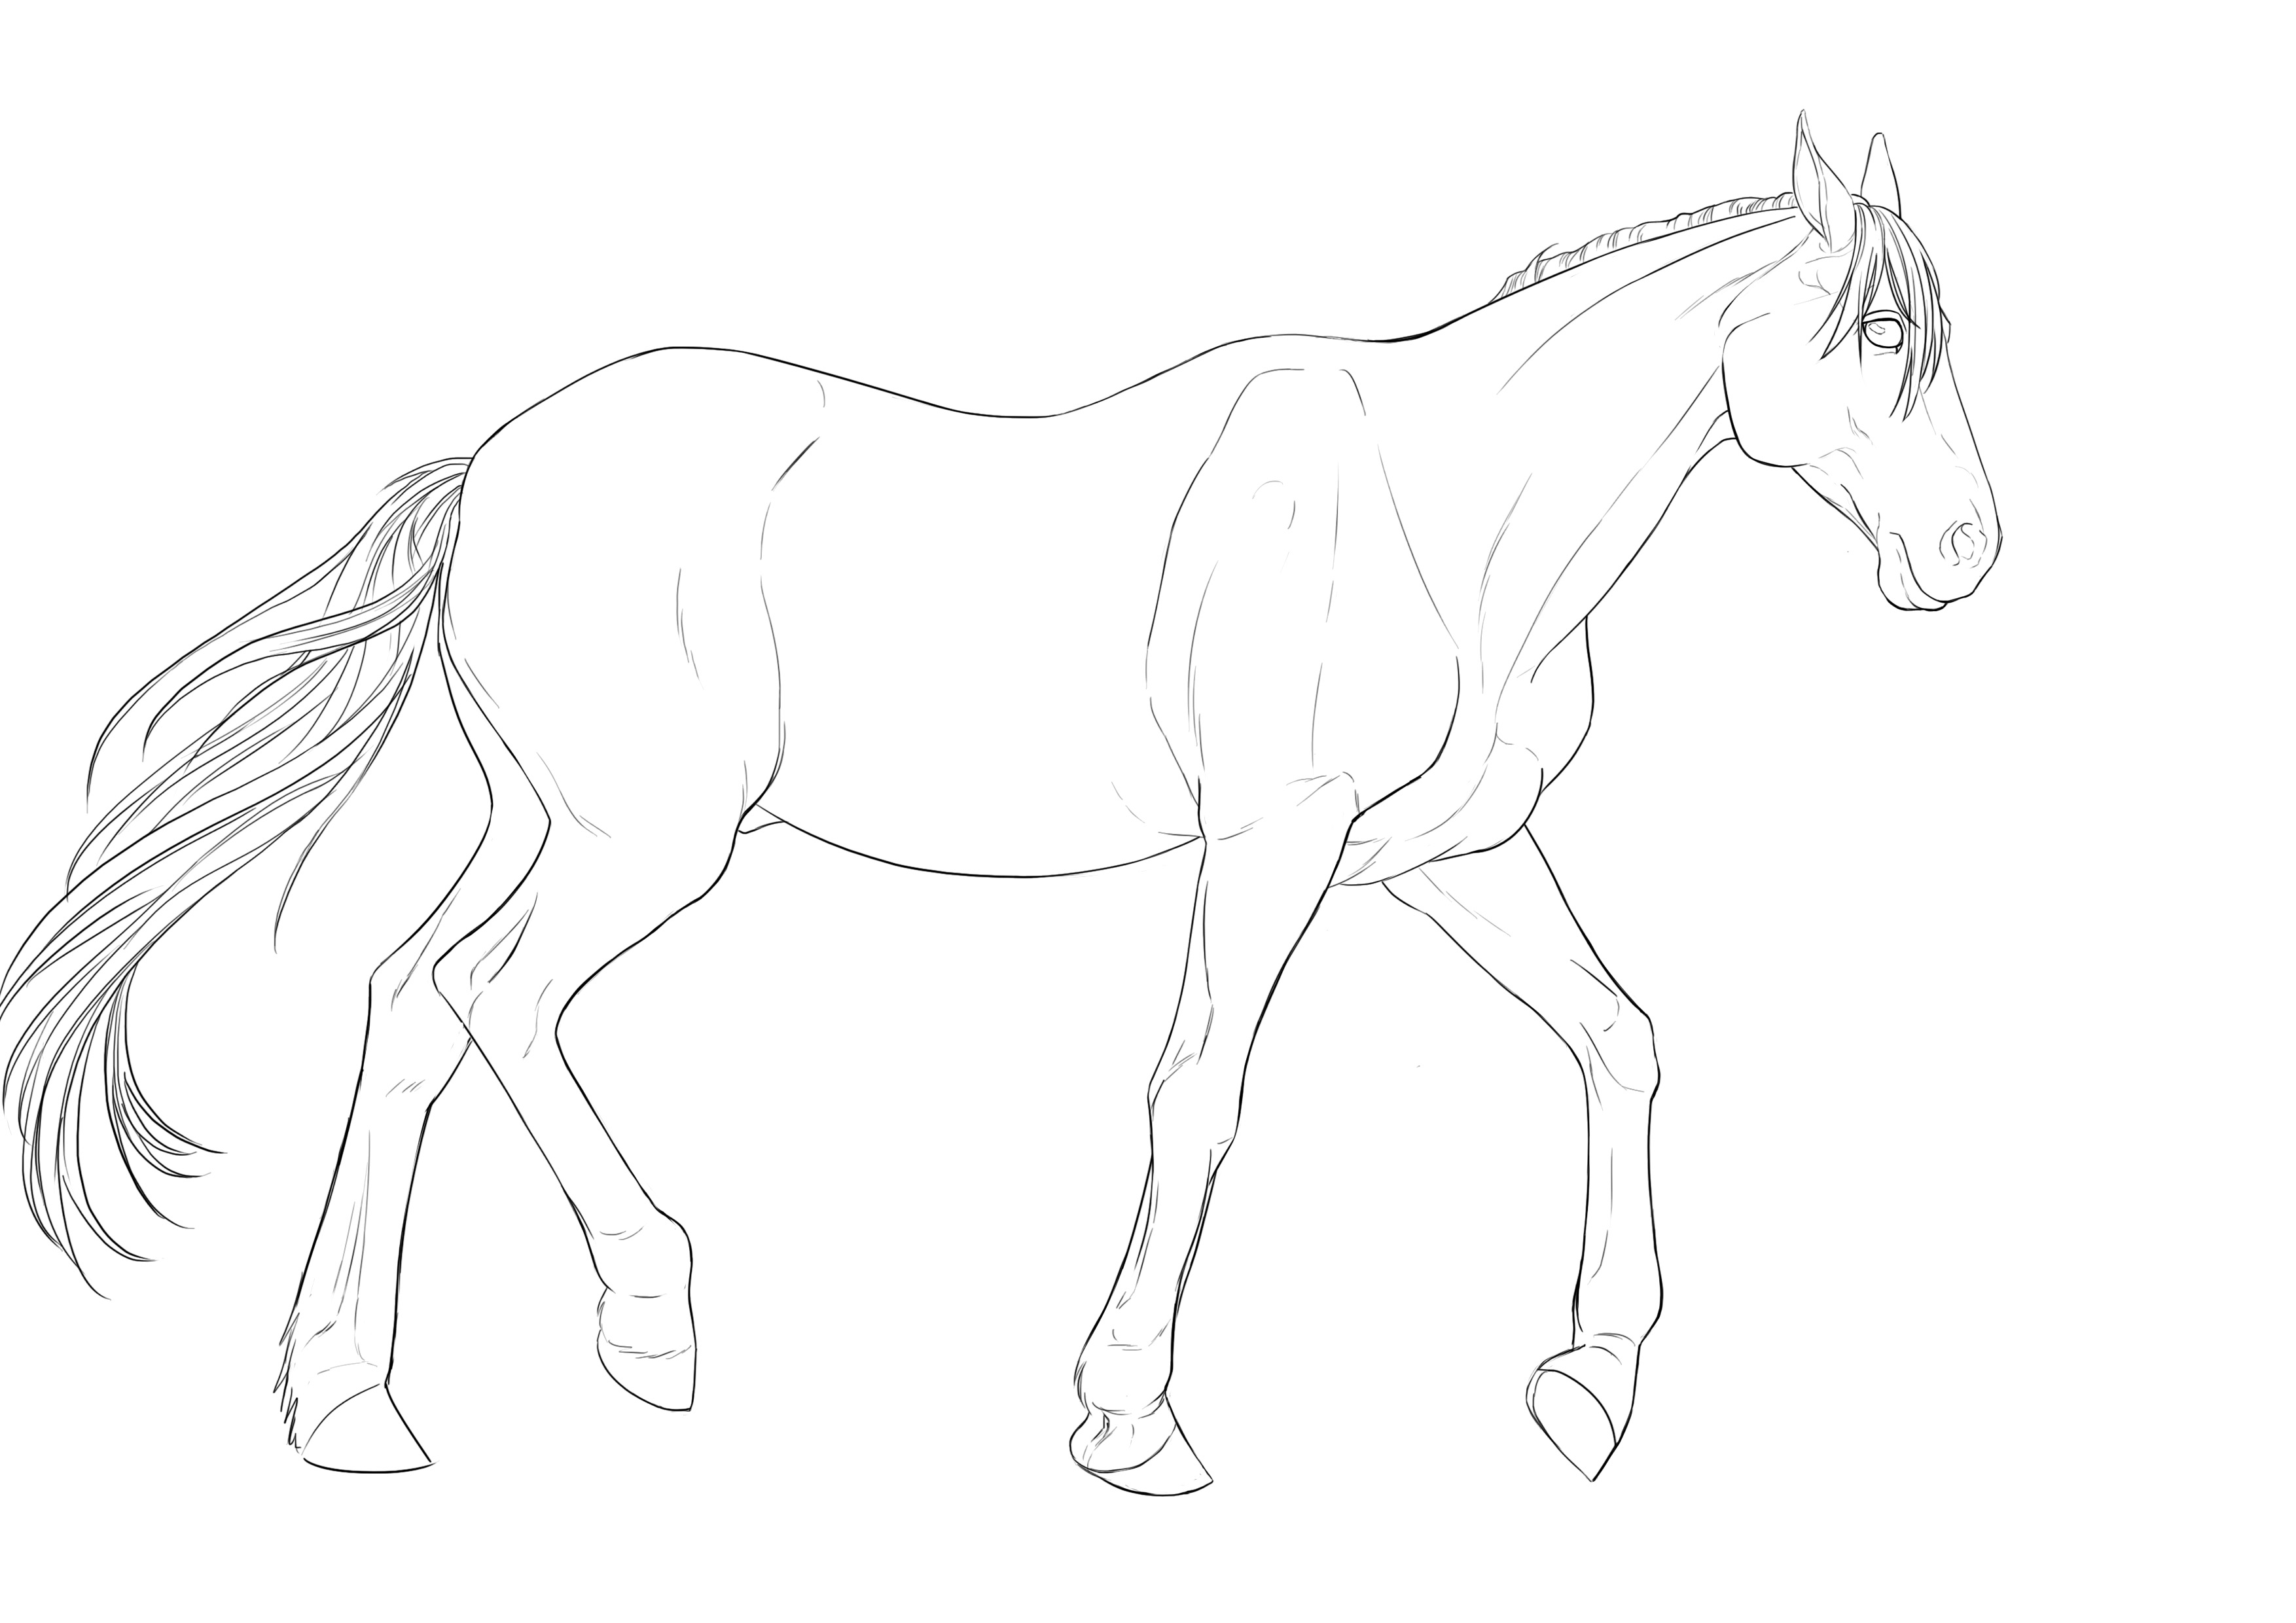
DRAW THE TAIL AND MANE
Finish the tail! It's placed in the first third of the rump, and as for the length, it's up to you :D
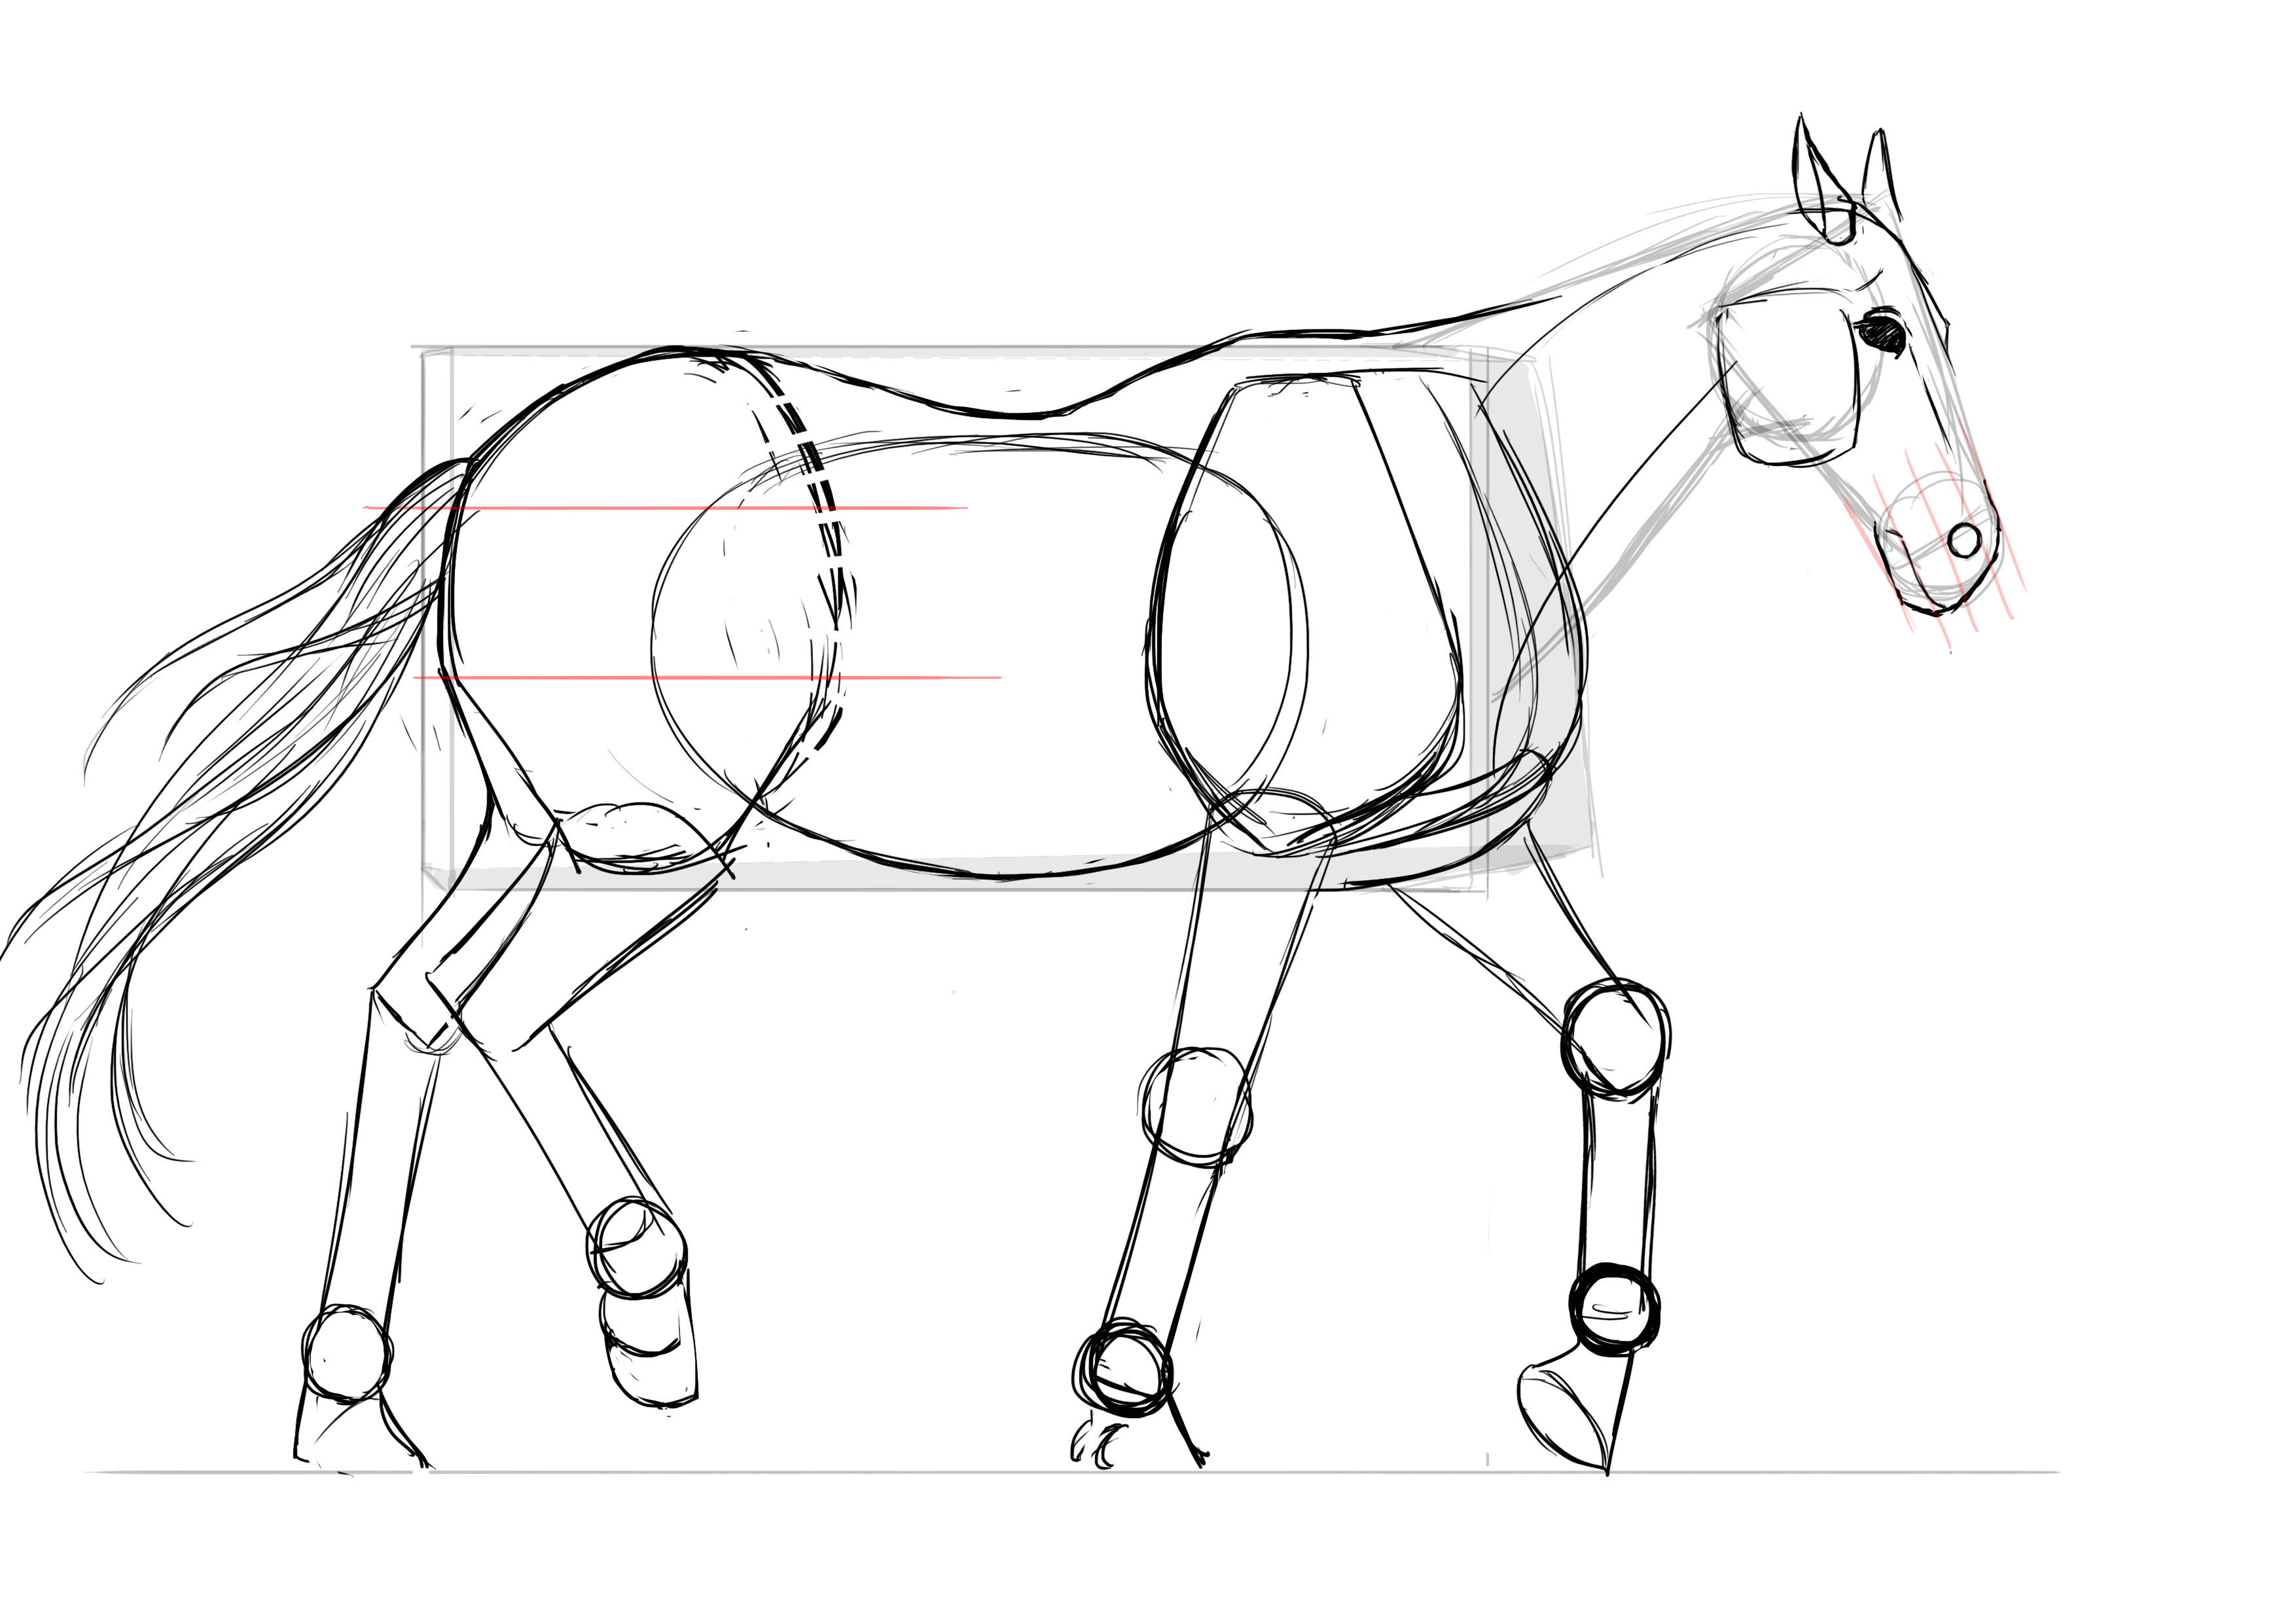
We don't forget the mane, of course!

DRAWING DETAILS
Did you think it was over? Not at all! We still have to tidy everything up and add the details. The hardest part is done, I assure you ^^
DRAW THE DETAILS OF THE HEAD
I'll show you step by step how I do it for the head, as I rarely do it usually. Most of our lines are drawn, we're going to redefine the silhouette of our horse, for this the photo reference is your best friend, I can't really explain every little curve or crevice. Keep this in mind: the eyes are the widest point of the skull, the tip of the nose generally slopes downward, the lips are thick.
The eyes have a pretty shape and are smaller than the nostrils.
The nostrils actually have a very specific shape, but are quite simple to make in the end ^^


We don't forget the ears of course and the fringe of the mane.
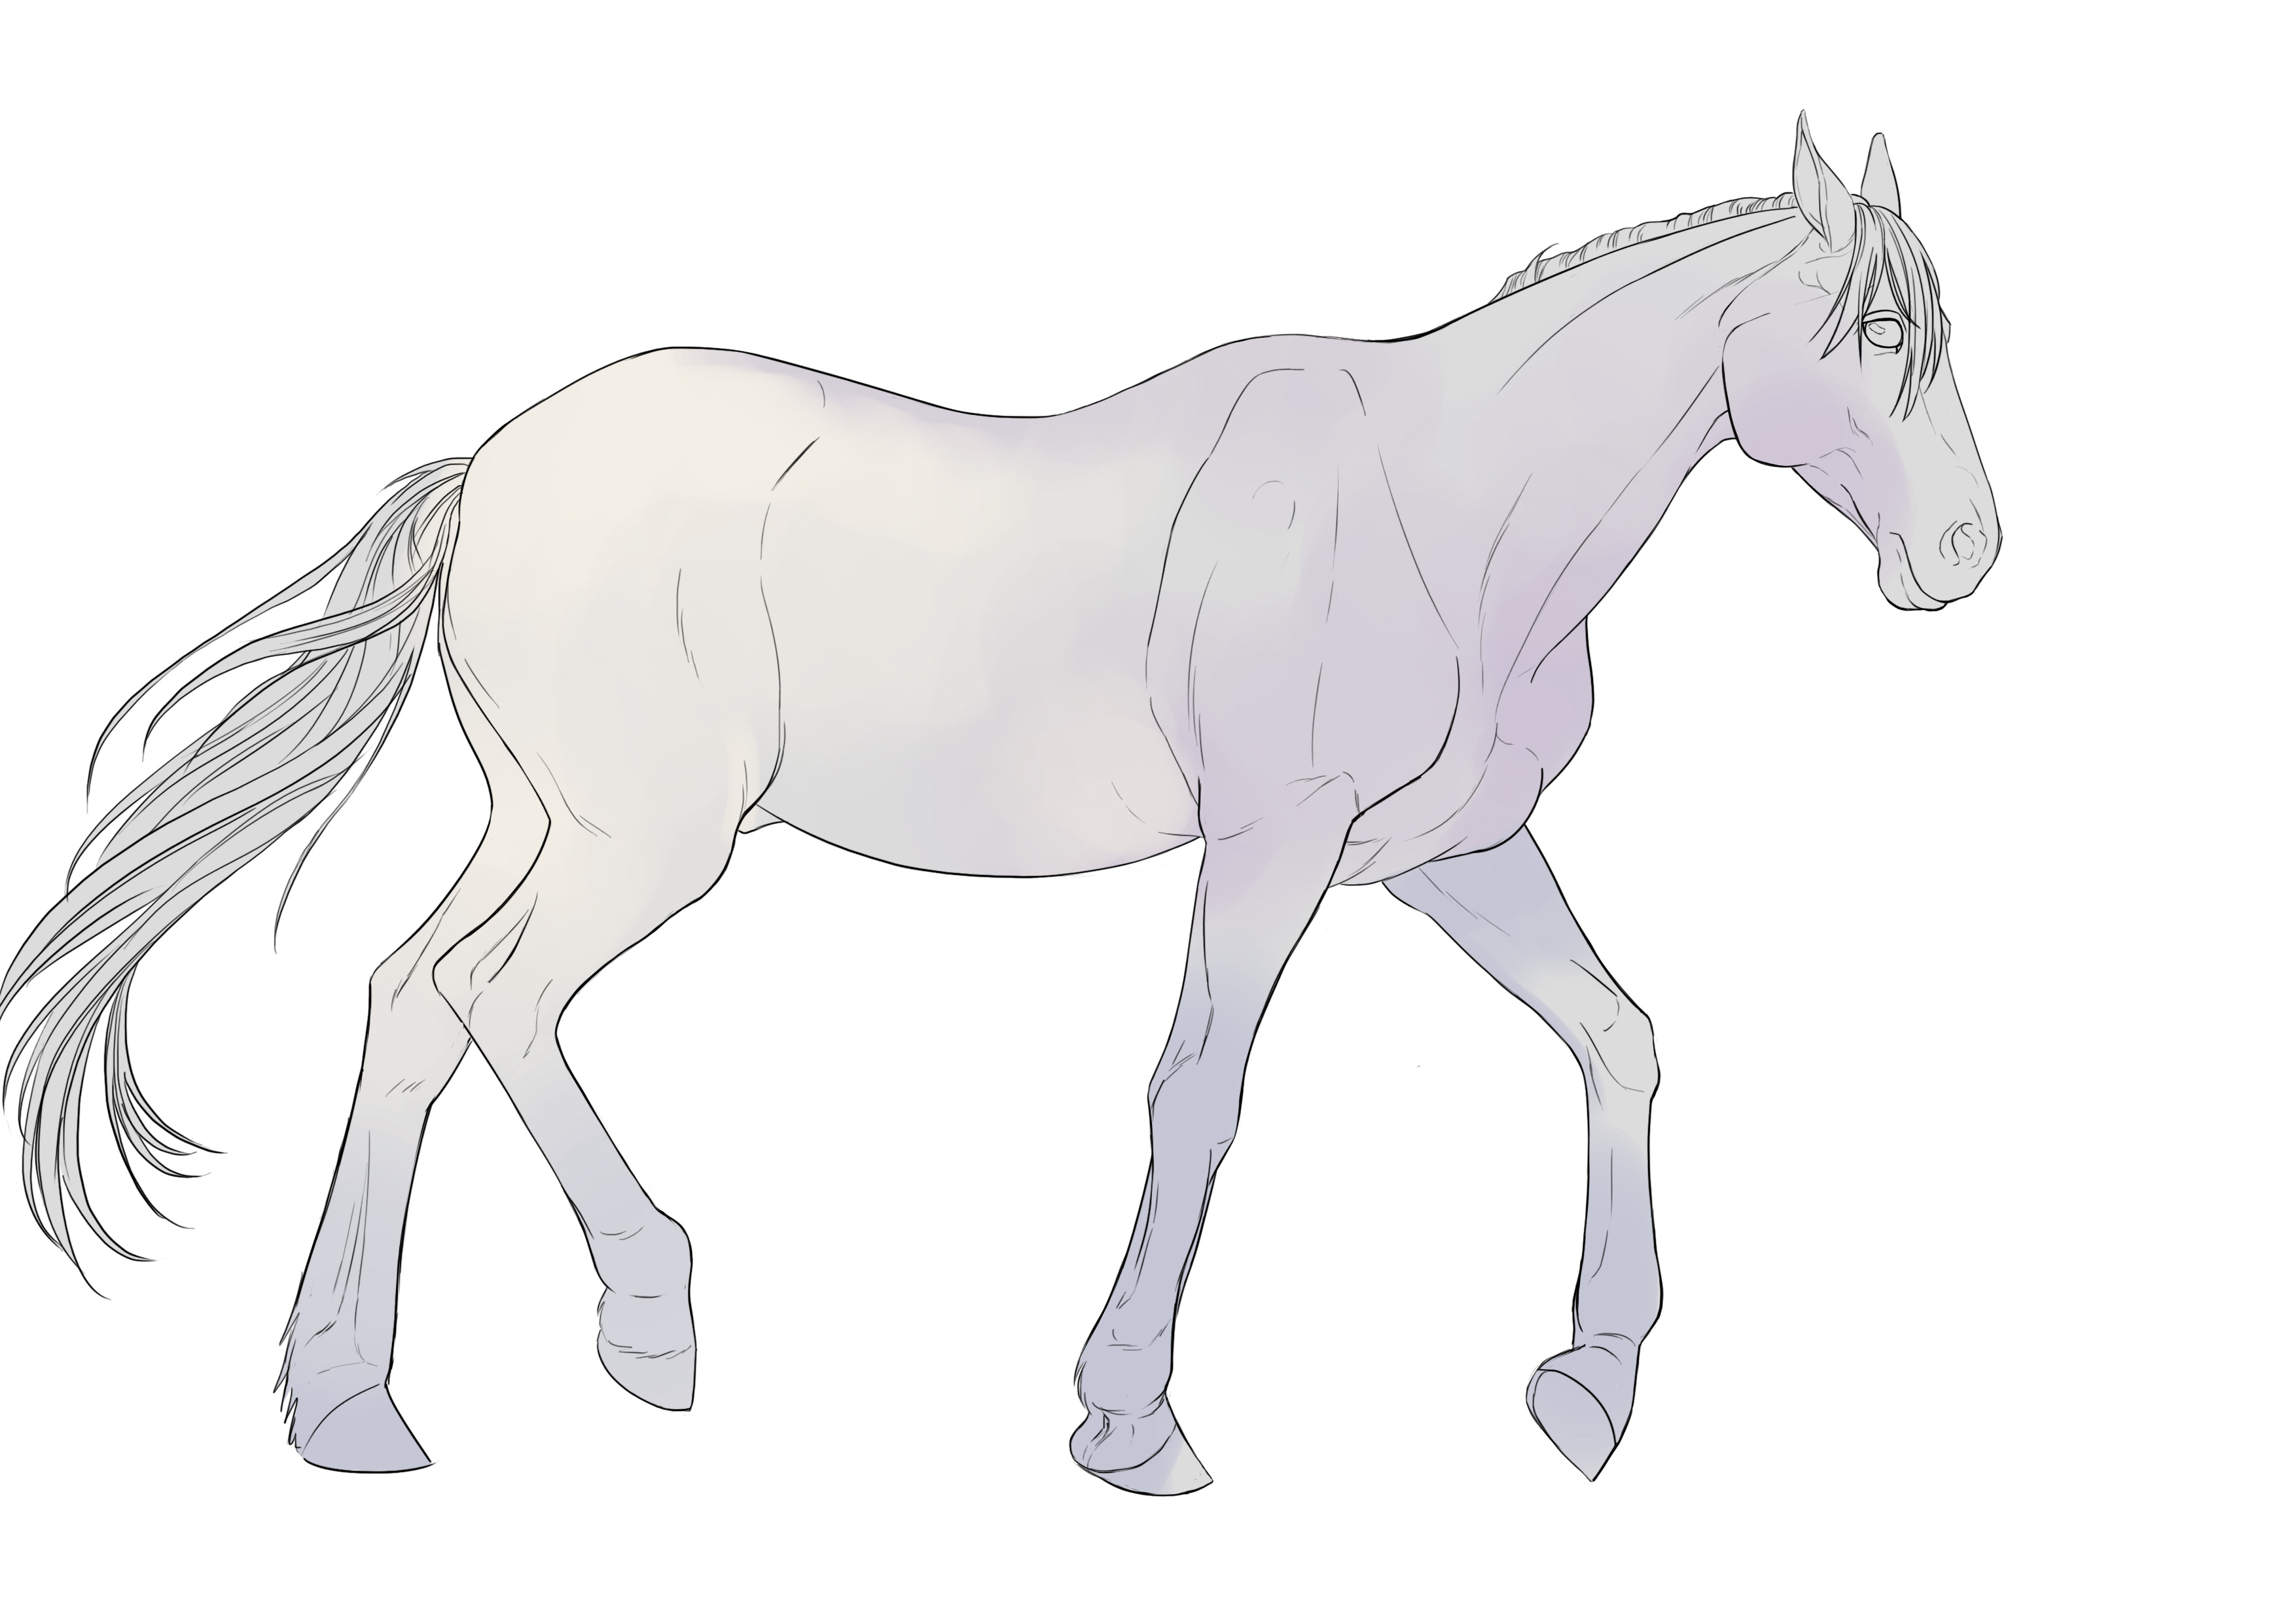
BODY DETAILS
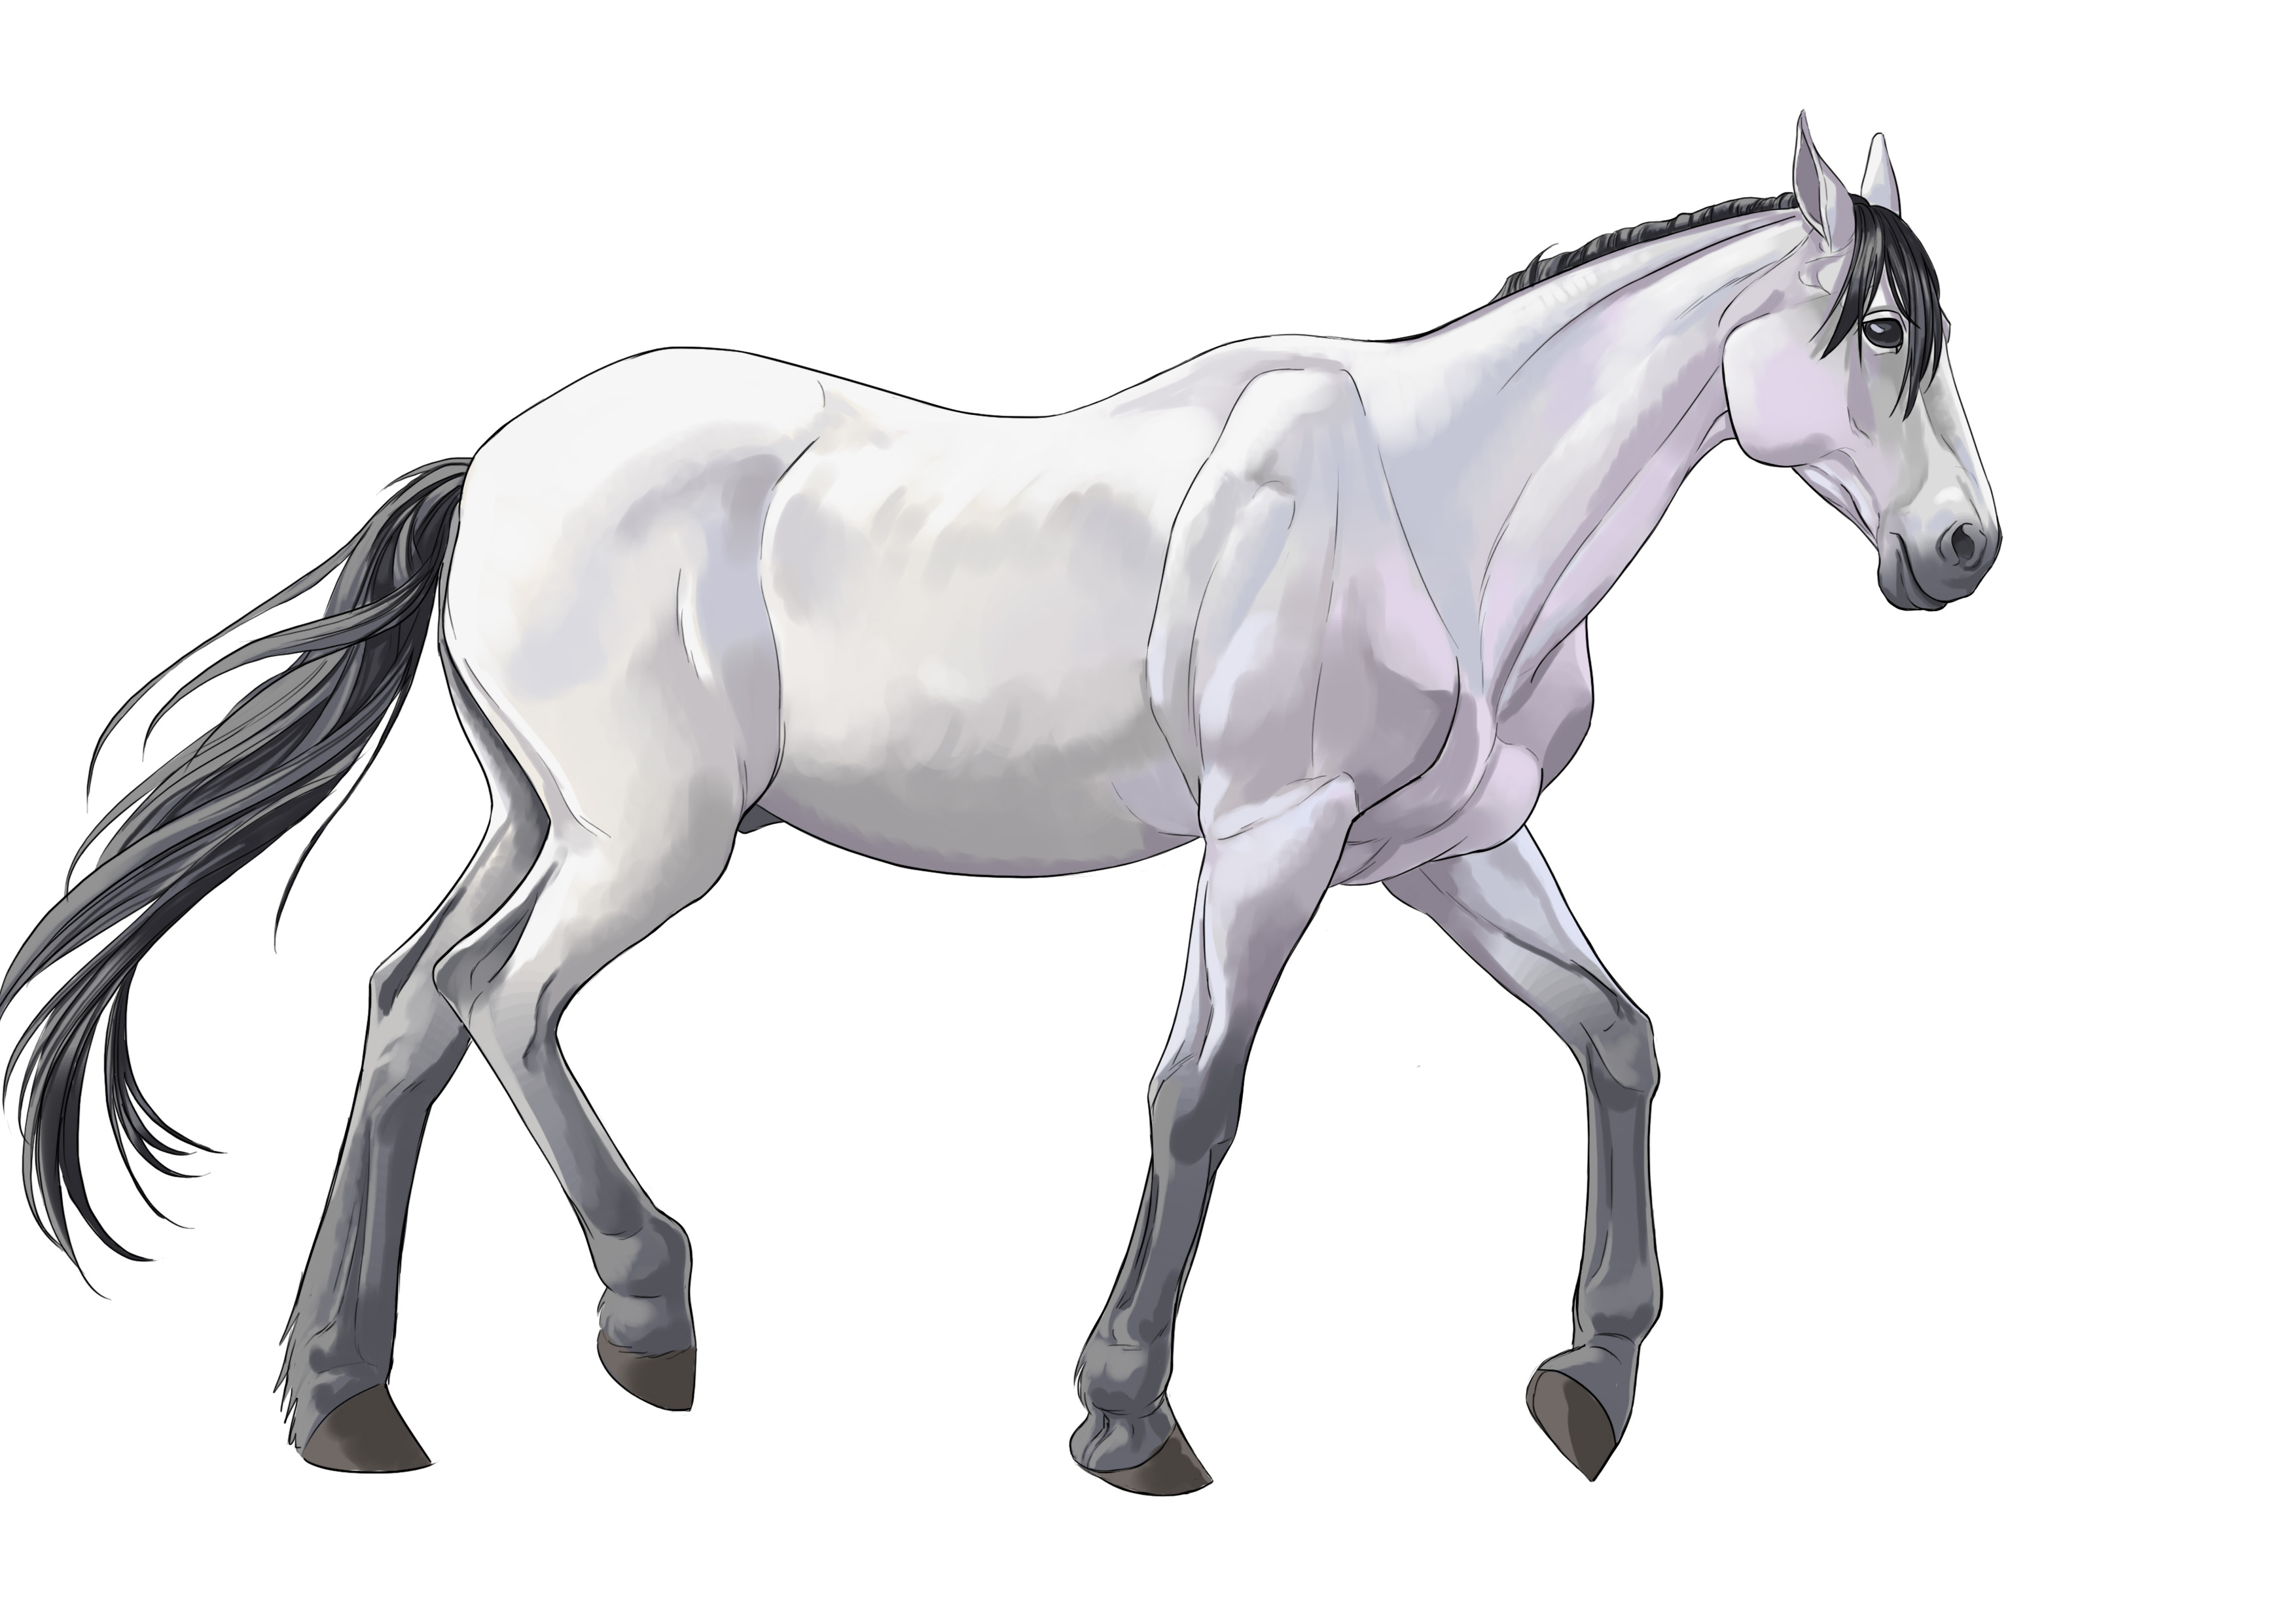
Ah, as soon as we put a bit of muscle into it, it becomes much more classy! And we have our completed horse drawing!
APPLY COLOR TO THE DRAWING
Yes, you read that right, we're going to do color too. I feel you're motivated :D
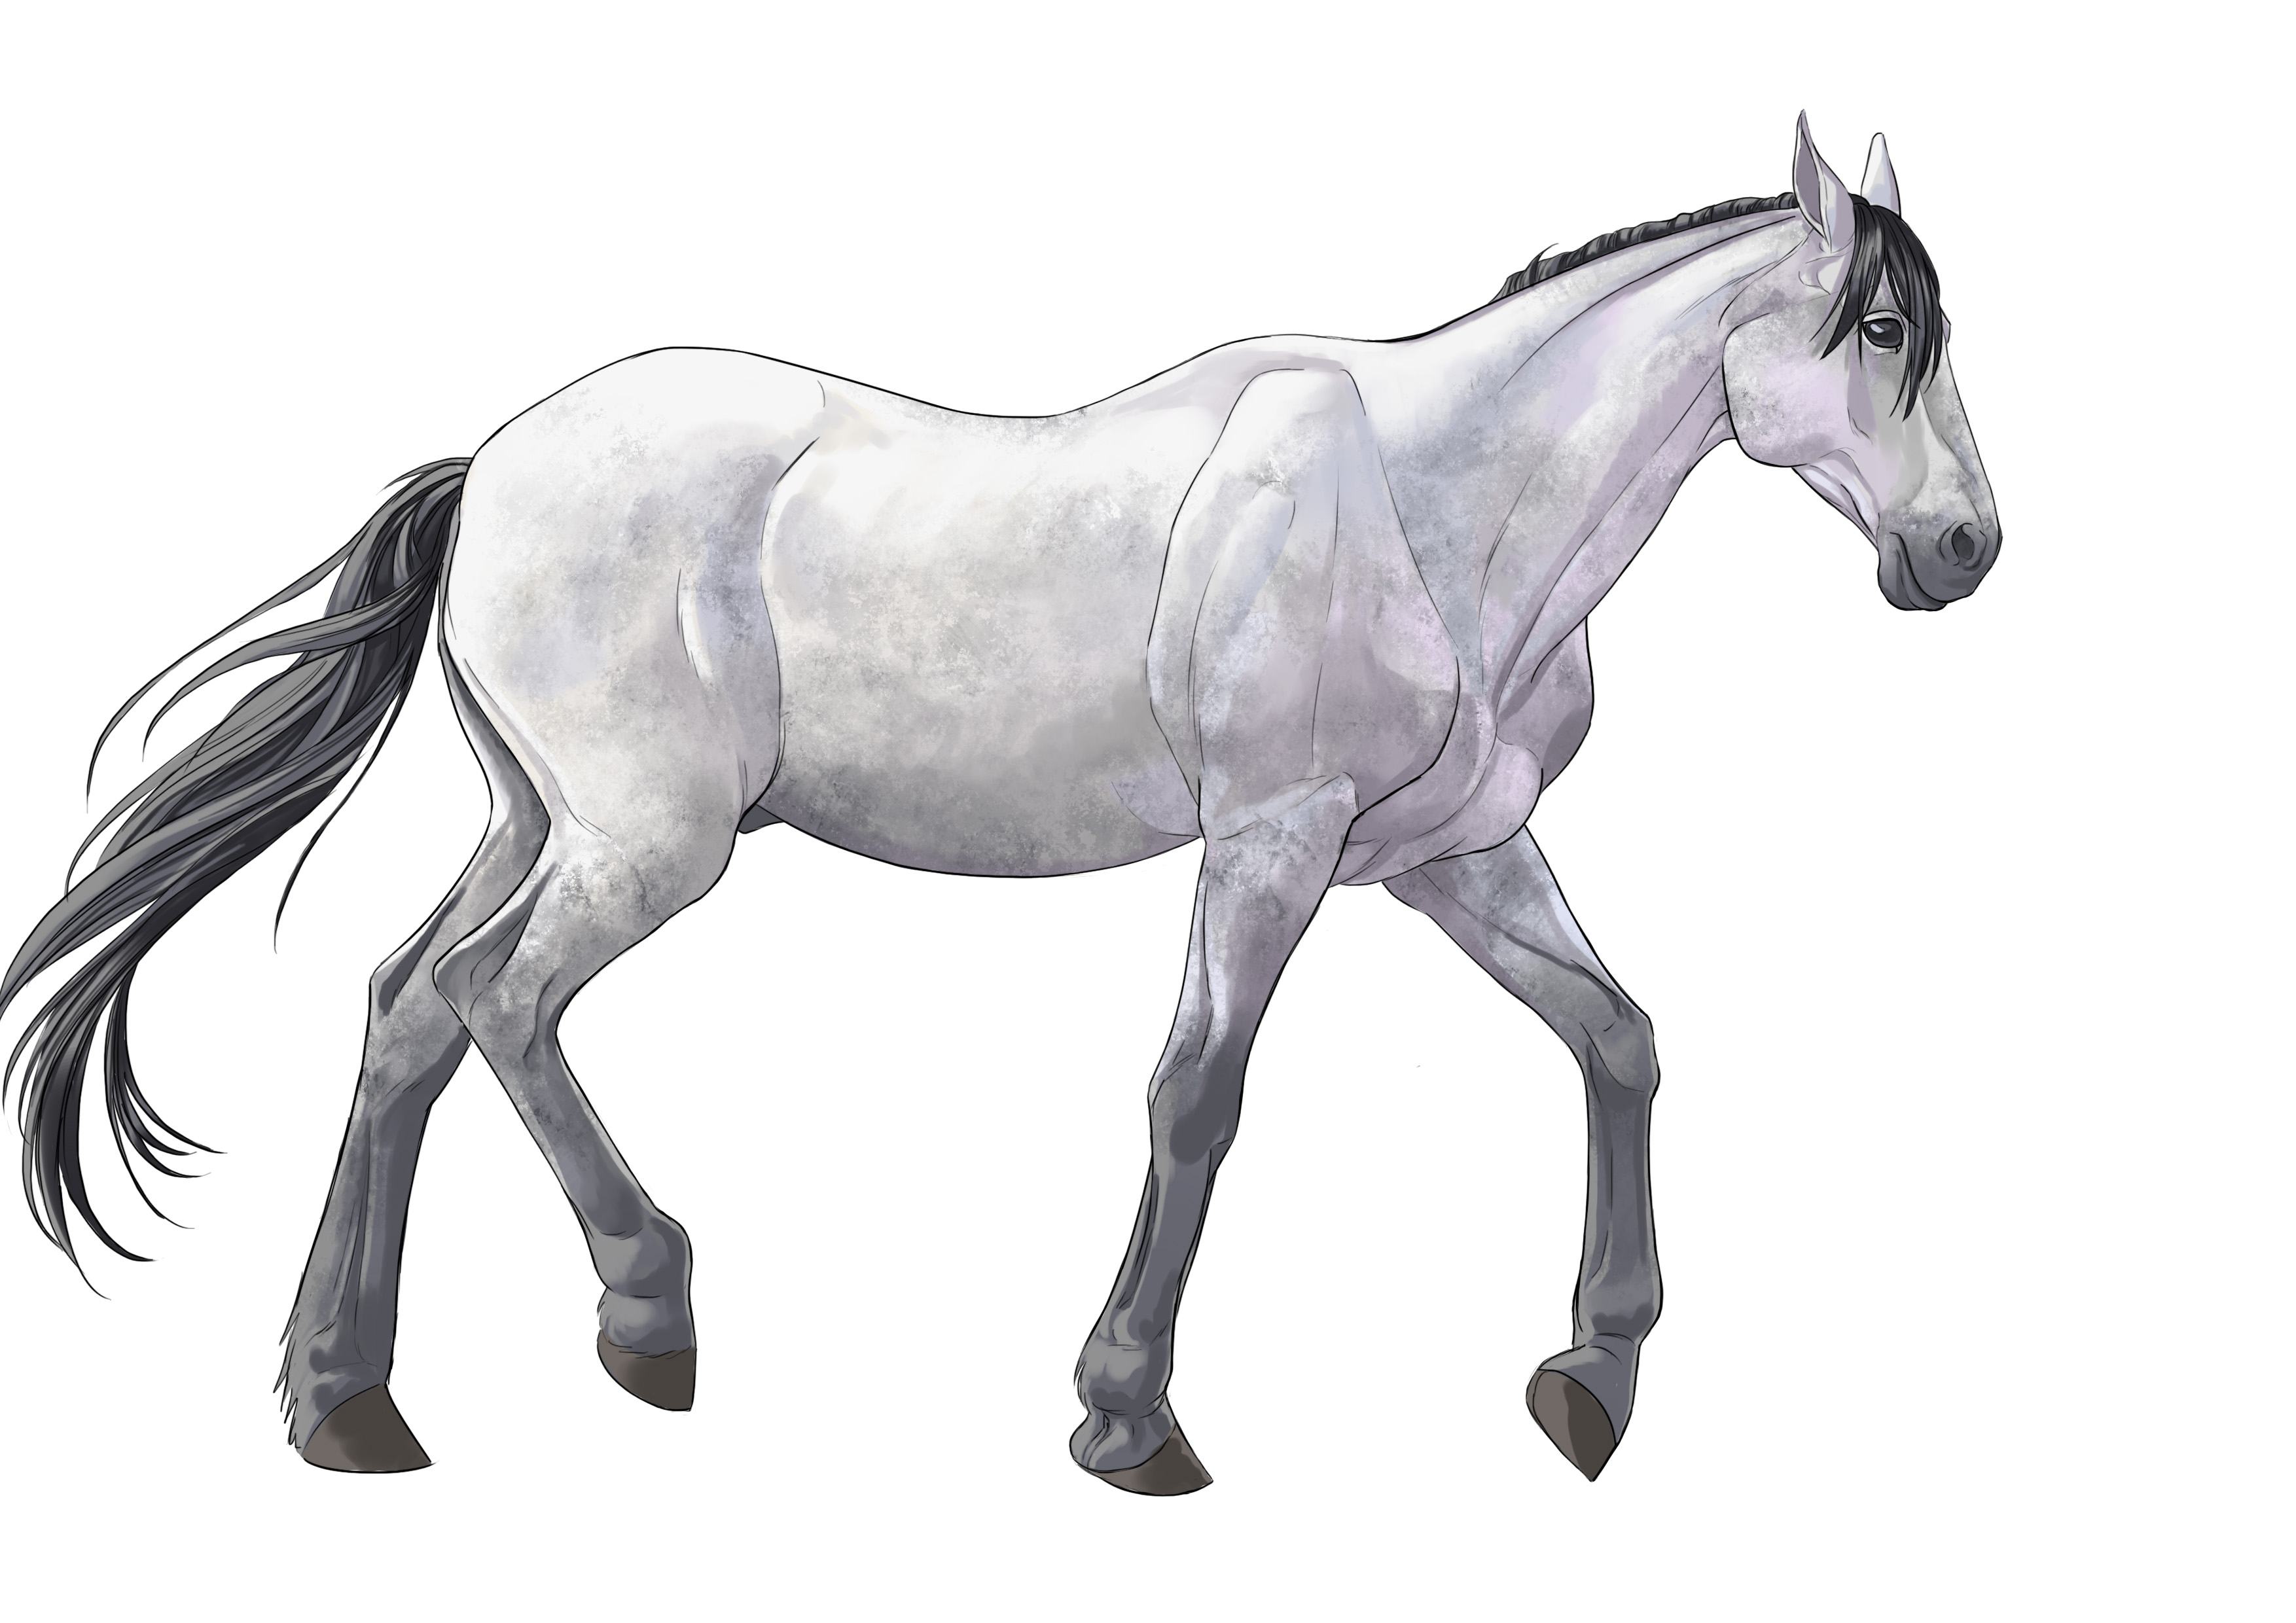
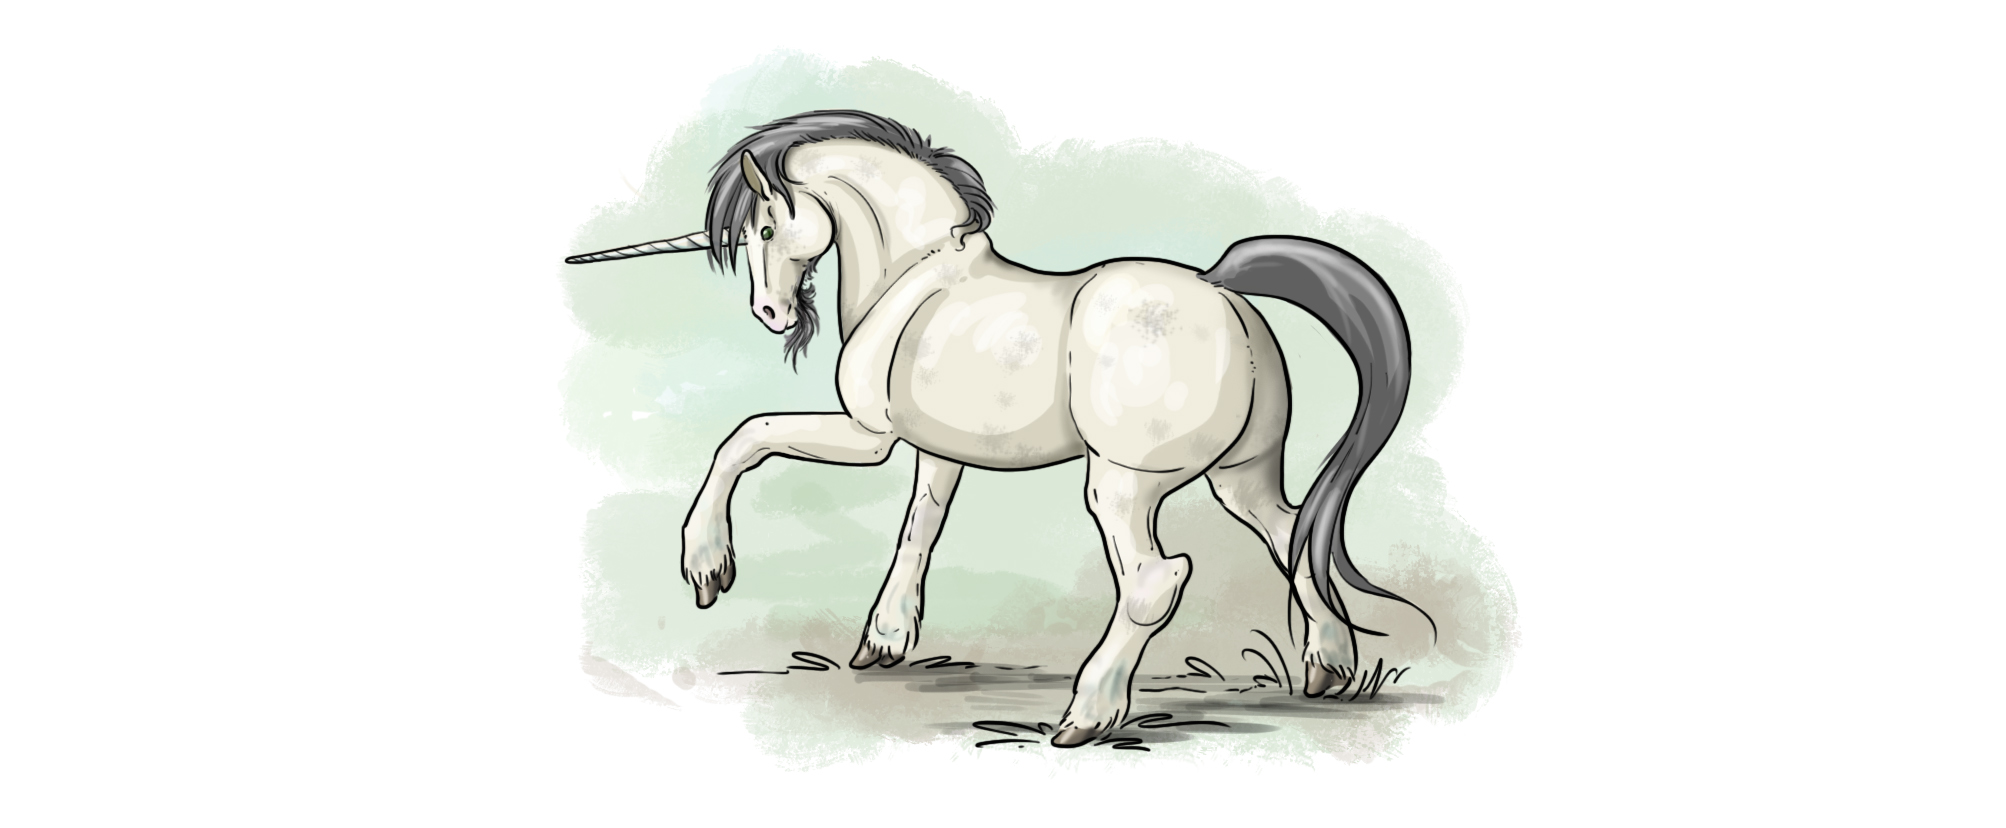
This time, I don't feel like following the colors of my model but instead making a horse with a mouse-gray coat (basically gray with a black mane). So, we'll use our basic reference for placing the lights and our color reference to use the right colors. Yes, I'm making things a bit complicated for you ^^
Again, it's hard to explain to you step by step the entire coloring process, closely observe your model and understand its volume.
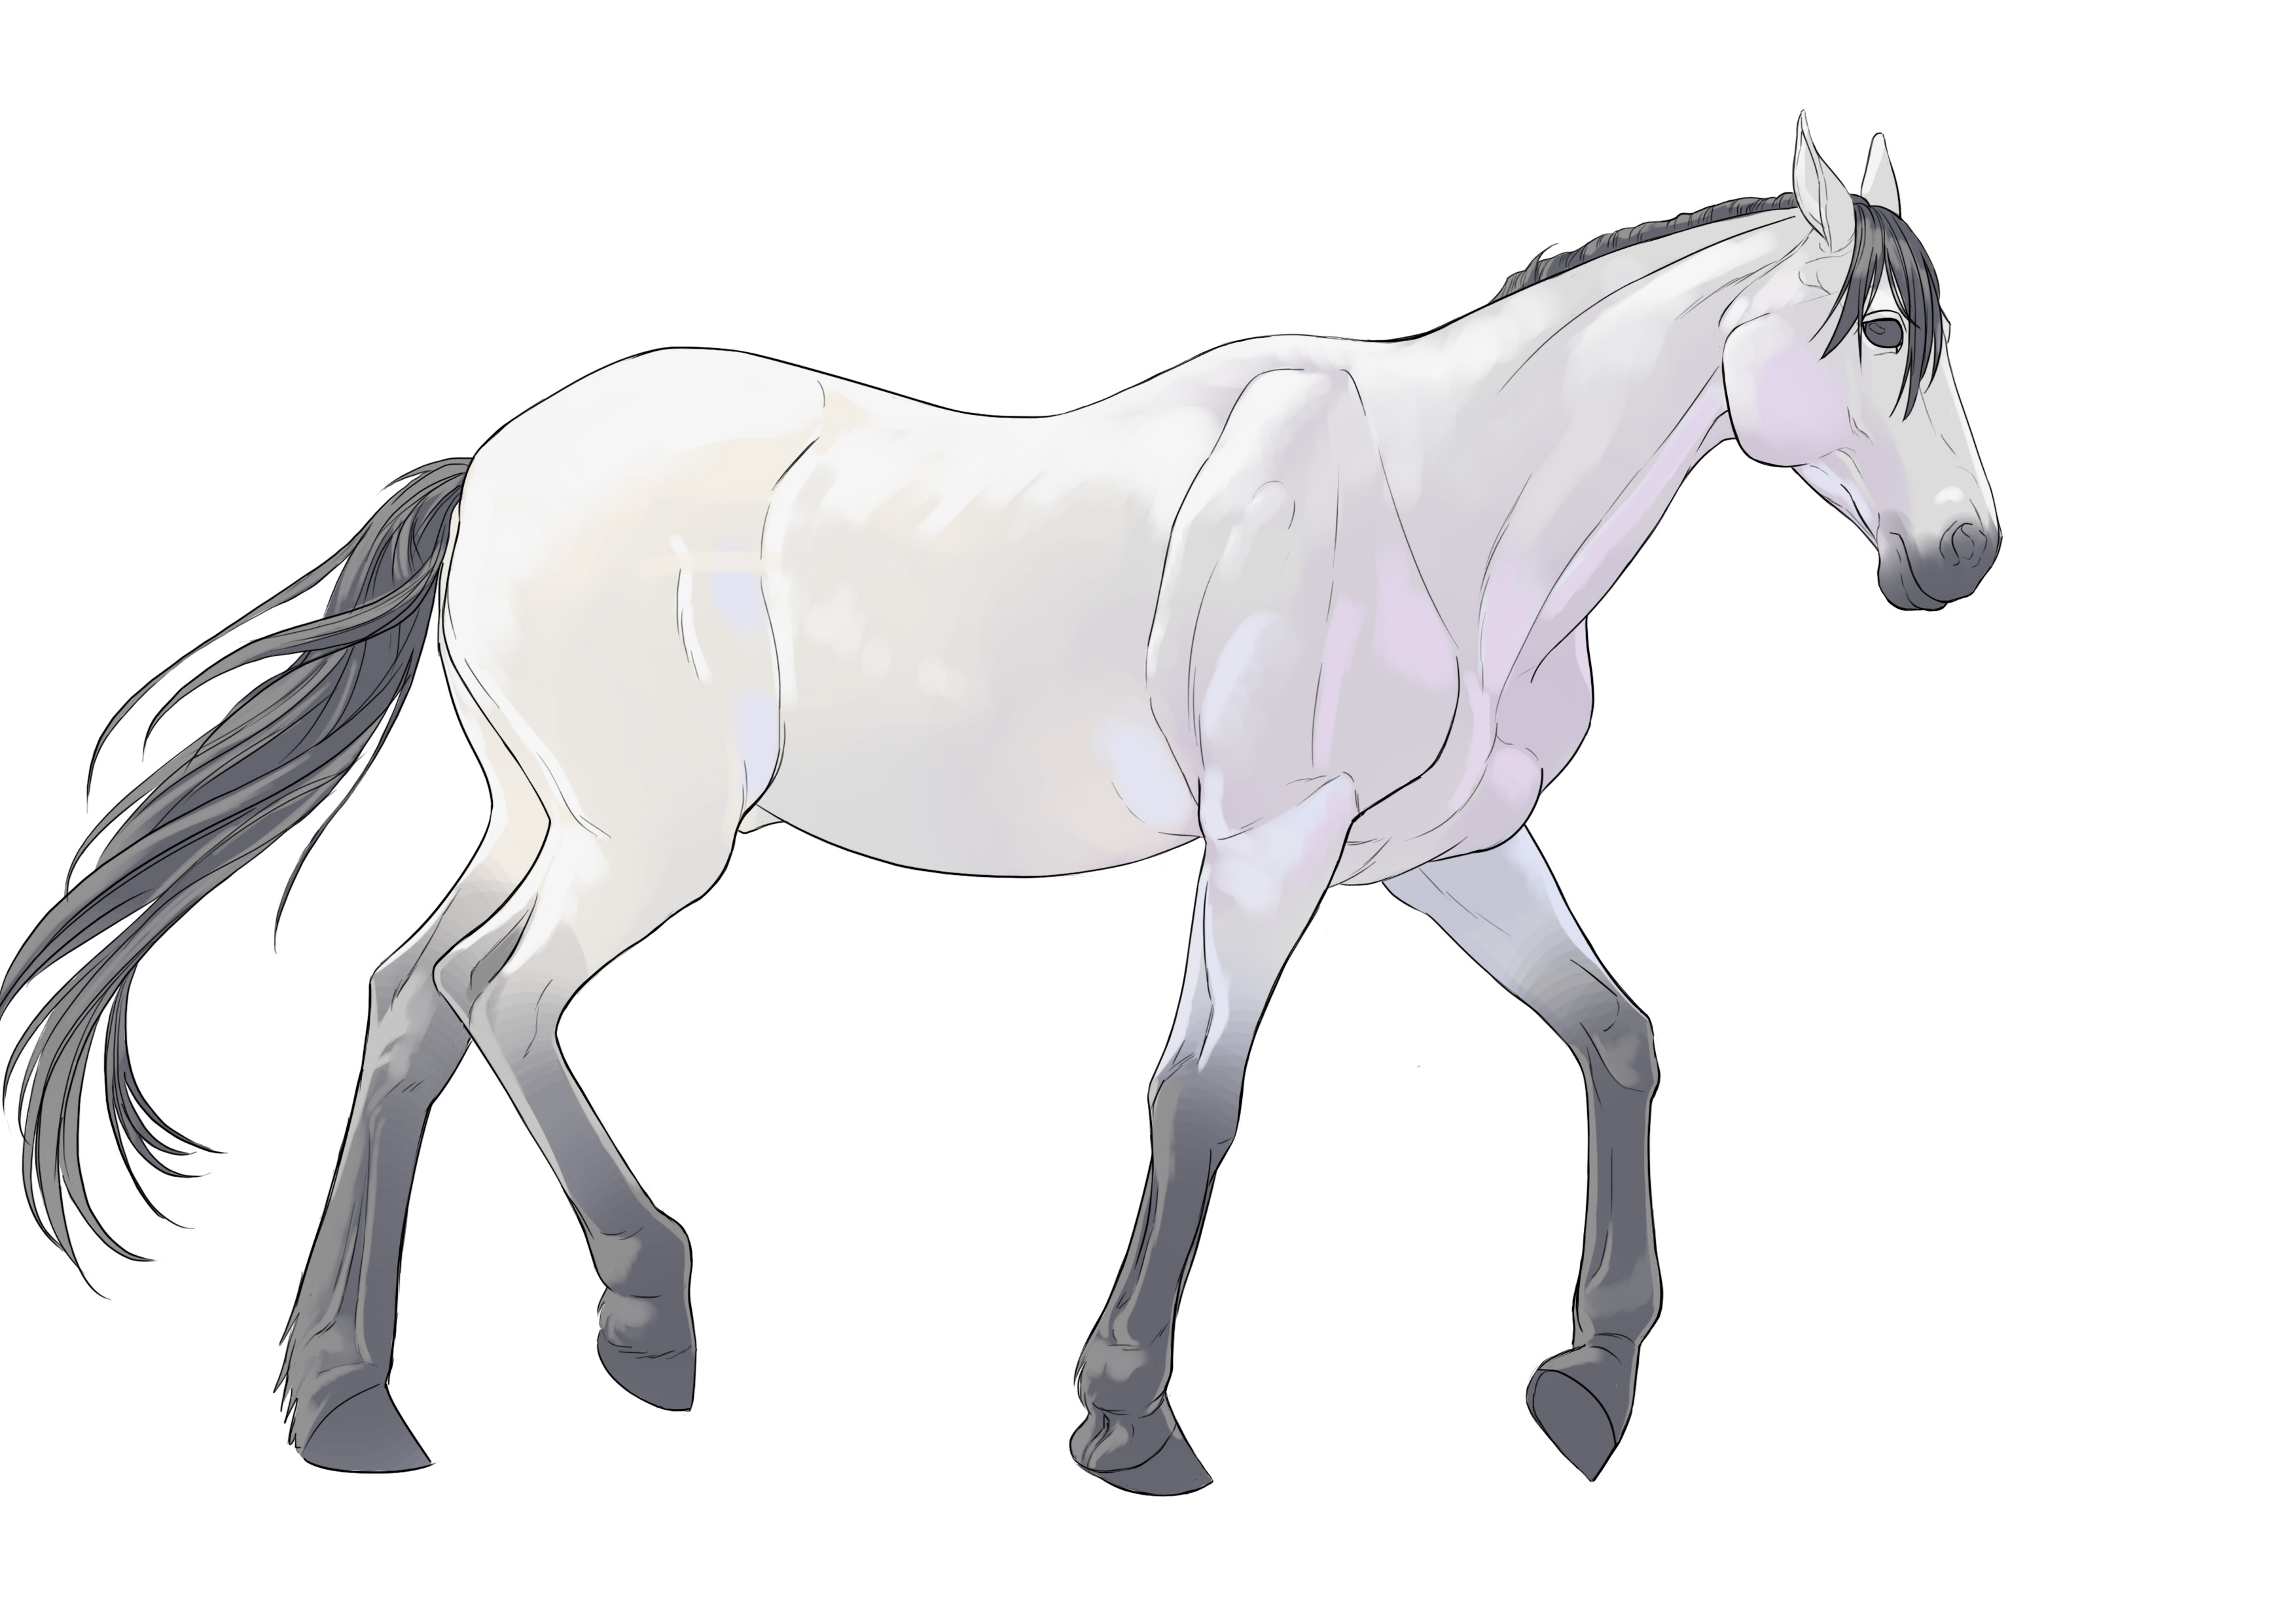
We always start with our base color, here, a slightly yellowed gray on the entire body except the chest, which leans more towards a bluish tint.
The dark color of the legs, tip of the nose, and mane are also set, which are the same color. Again, it's not a pure black but a bluish gray for the front legs and a yellowed gray for the hind legs.
File name: color-legs-mane-nose
Alt image: apply color to the mane, legs, and nose of the horse
We will add the speckled effect later so that those who are using traditional methods can also follow.
SHINE THE LIGHT ON THE DRAWING
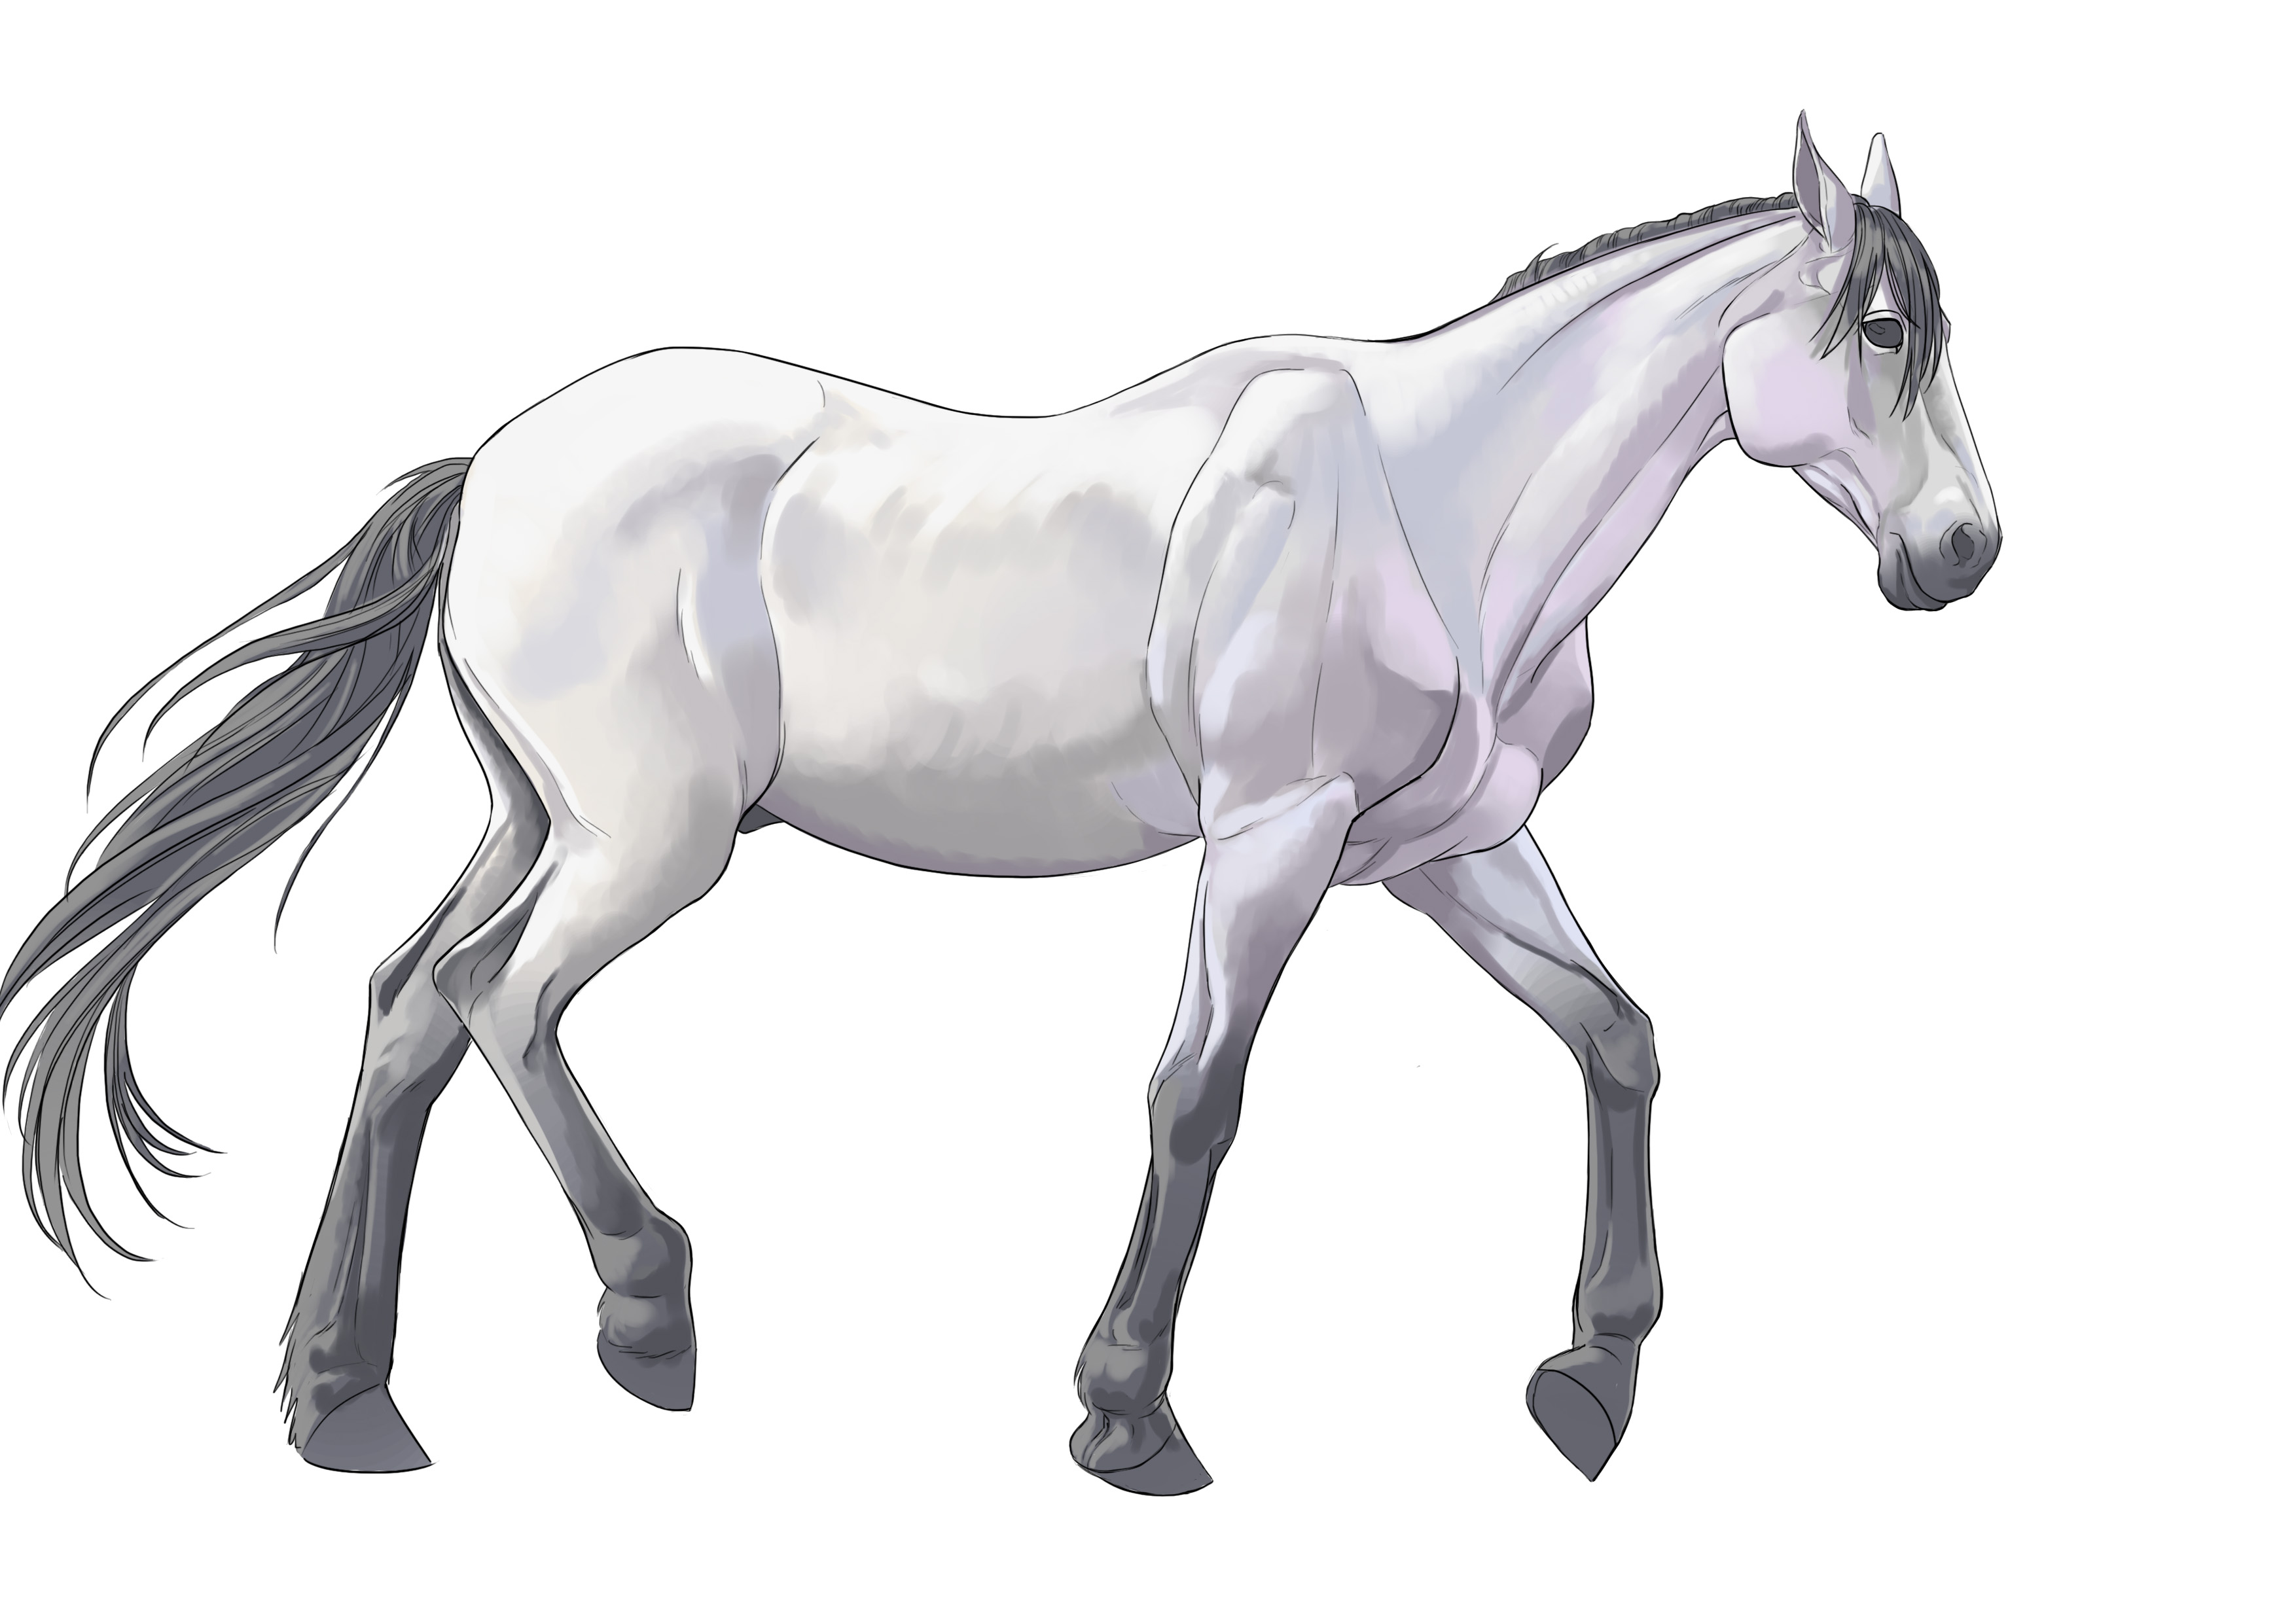
Our light is coming from the left and seems relatively low (it must be morning or evening, no doubt). So we are going to place our lights. For the body, we will use a slightly yellow white.
I also take the opportunity to vary the shades in some places with pinks or blues. Always remaining consistent.

For the chest and head, a rather rosy shade (of course I'm telling you this based on the colors I see, if you don't agree, feel free to choose another color ^^).
For the lower legs, a lighter gray as usual, yellowed for the hind legs and bluish for the front legs. Same principle for the mane. If you know how to do hair, it's about the same :)
We have therefore applied our base color. Now we will apply our highlights. The colors are very similar to those used for the legs, so feel free to reuse them. However, the treatment of the mane is different. In our model, the mane itself is hidden by the neck, so it will be quite simple to handle, but its tail on the other hand will be a good exercise in style.
Let's set up our lights. The light source hasn't changed, never forget where your light comes from. For hair, manes, fur in general, you must ALWAYS follow the direction of the hair growth. That means your brush strokes should always follow the direction of the fur. Don't go painting something horizontally or in small circles. It won't work. So, we start from the root and follow the mane and tail.
This rule applies to everything: both shadows and lights. It's ultra important. This means that we will end up with "streaks." That's good because that's what we want :D To start, do not use a fine brush to paint each hair independently of the others. Again, this is quite classic: we start with the general and move towards the particular. In short, we start with the large volumes and gradually refine down to the detail.
If you have done things right, you should have something like this.
APPLY SHADING TO THE HORSE
Same principle for the shadows. The first level of gray will be a gray, always tinged with yellow or bluish/purplish depending on the areas. And a darker gray for the legs. This is the time to bring out the musculature and bones of our horse. Generally, these are powerful animals and it shows.
As always, take the time to properly work on the shadows and volumes. However, be careful not to lose or forget the underlying structure. If you are particularly diligent and curious, you can even look up anatomical references of horses to see what their muscles look like, thus avoiding modeling a shape you do not understand and that will look odd in the end. As always: if you don't understand, it will show.
Same principle for the first shade of shadow on the mane. No, it's not black. Never ^^

On the mane as you see, we keep it pretty simple ^^
Only small details like the hooves and the head remain.
For the hooves, we will take a base shade close to that of the legs, but leaning more towards brown / ochre.
We add the shadows of the hooves.
And now you can add small spots all over. They will be the color of the shade one tone darker each time. That is, in the light areas they will be the color of the base shade, in the base shade area they will be the color of the first shadow shade, and in the shadow shade area you have two options: either you take a new shade even darker, or you take the middle shade and make lighter spots. It’s up to you ^^
In my particular case, I used a textured brush to save time ^^

And I think we're done! Since we're viewing from a distance, we won't see small details like the hairs on the muzzle, the veins, and the small wrinkles under the eyes. So there's no need to do them.
It was quite an article, I warned you! So let's summarize all this!
- We start by finding simple ratio reports and easy-to-draw geometric shapes to lay out the basic structure.
- We refine by reflecting on the horse's skeletal and muscular structure
- We refine and finally detail based on photo references for the small details that make it look good.
- For color, again, take references, there is a huge variety of coats for horses.
- As always, we identify the light source and stick to it! Preferably, if it's difficult, we take a photo reference to avoid mistakes.
- We do not hesitate to bring variations in shades for more realism. Again, everything has a certain logic.
- In case of doubt, refer to anatomical charts to fully understand the volumes you see
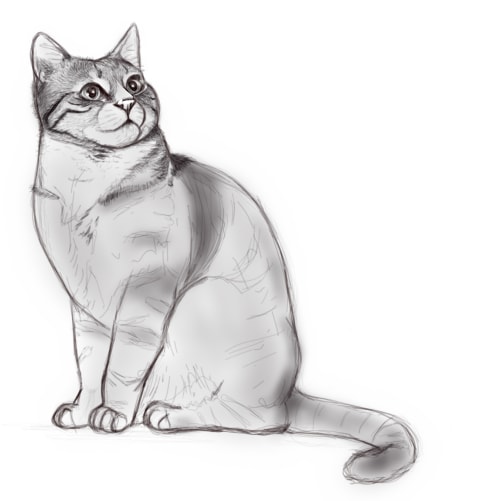
If you don't know what to do, you can check out the article to find out how to draw a cat. Enjoy yourselves!
Popular Articles
Discussion
Thank you for this article that allows one to progress step by step and by using simple forms.