How to Draw a Robot
In this article, we will show you how to draw a robot. But there are many types of robots: humanoids, Gundams, cartoons, realistic ones...
I've chosen to show you how to draw two types of robots: a cartoon robot, somewhat in the style of Futurama (so a very simple style without details) and a humanoid robot with a more realistic silhouette and more details. In the simple category, you can also find an article on 5 easy drawings to do from our blog, for those who are interested! I also encourage beginners to check out our article dedicated to learning how to draw!
DRAWING A CARTOON ROBOT

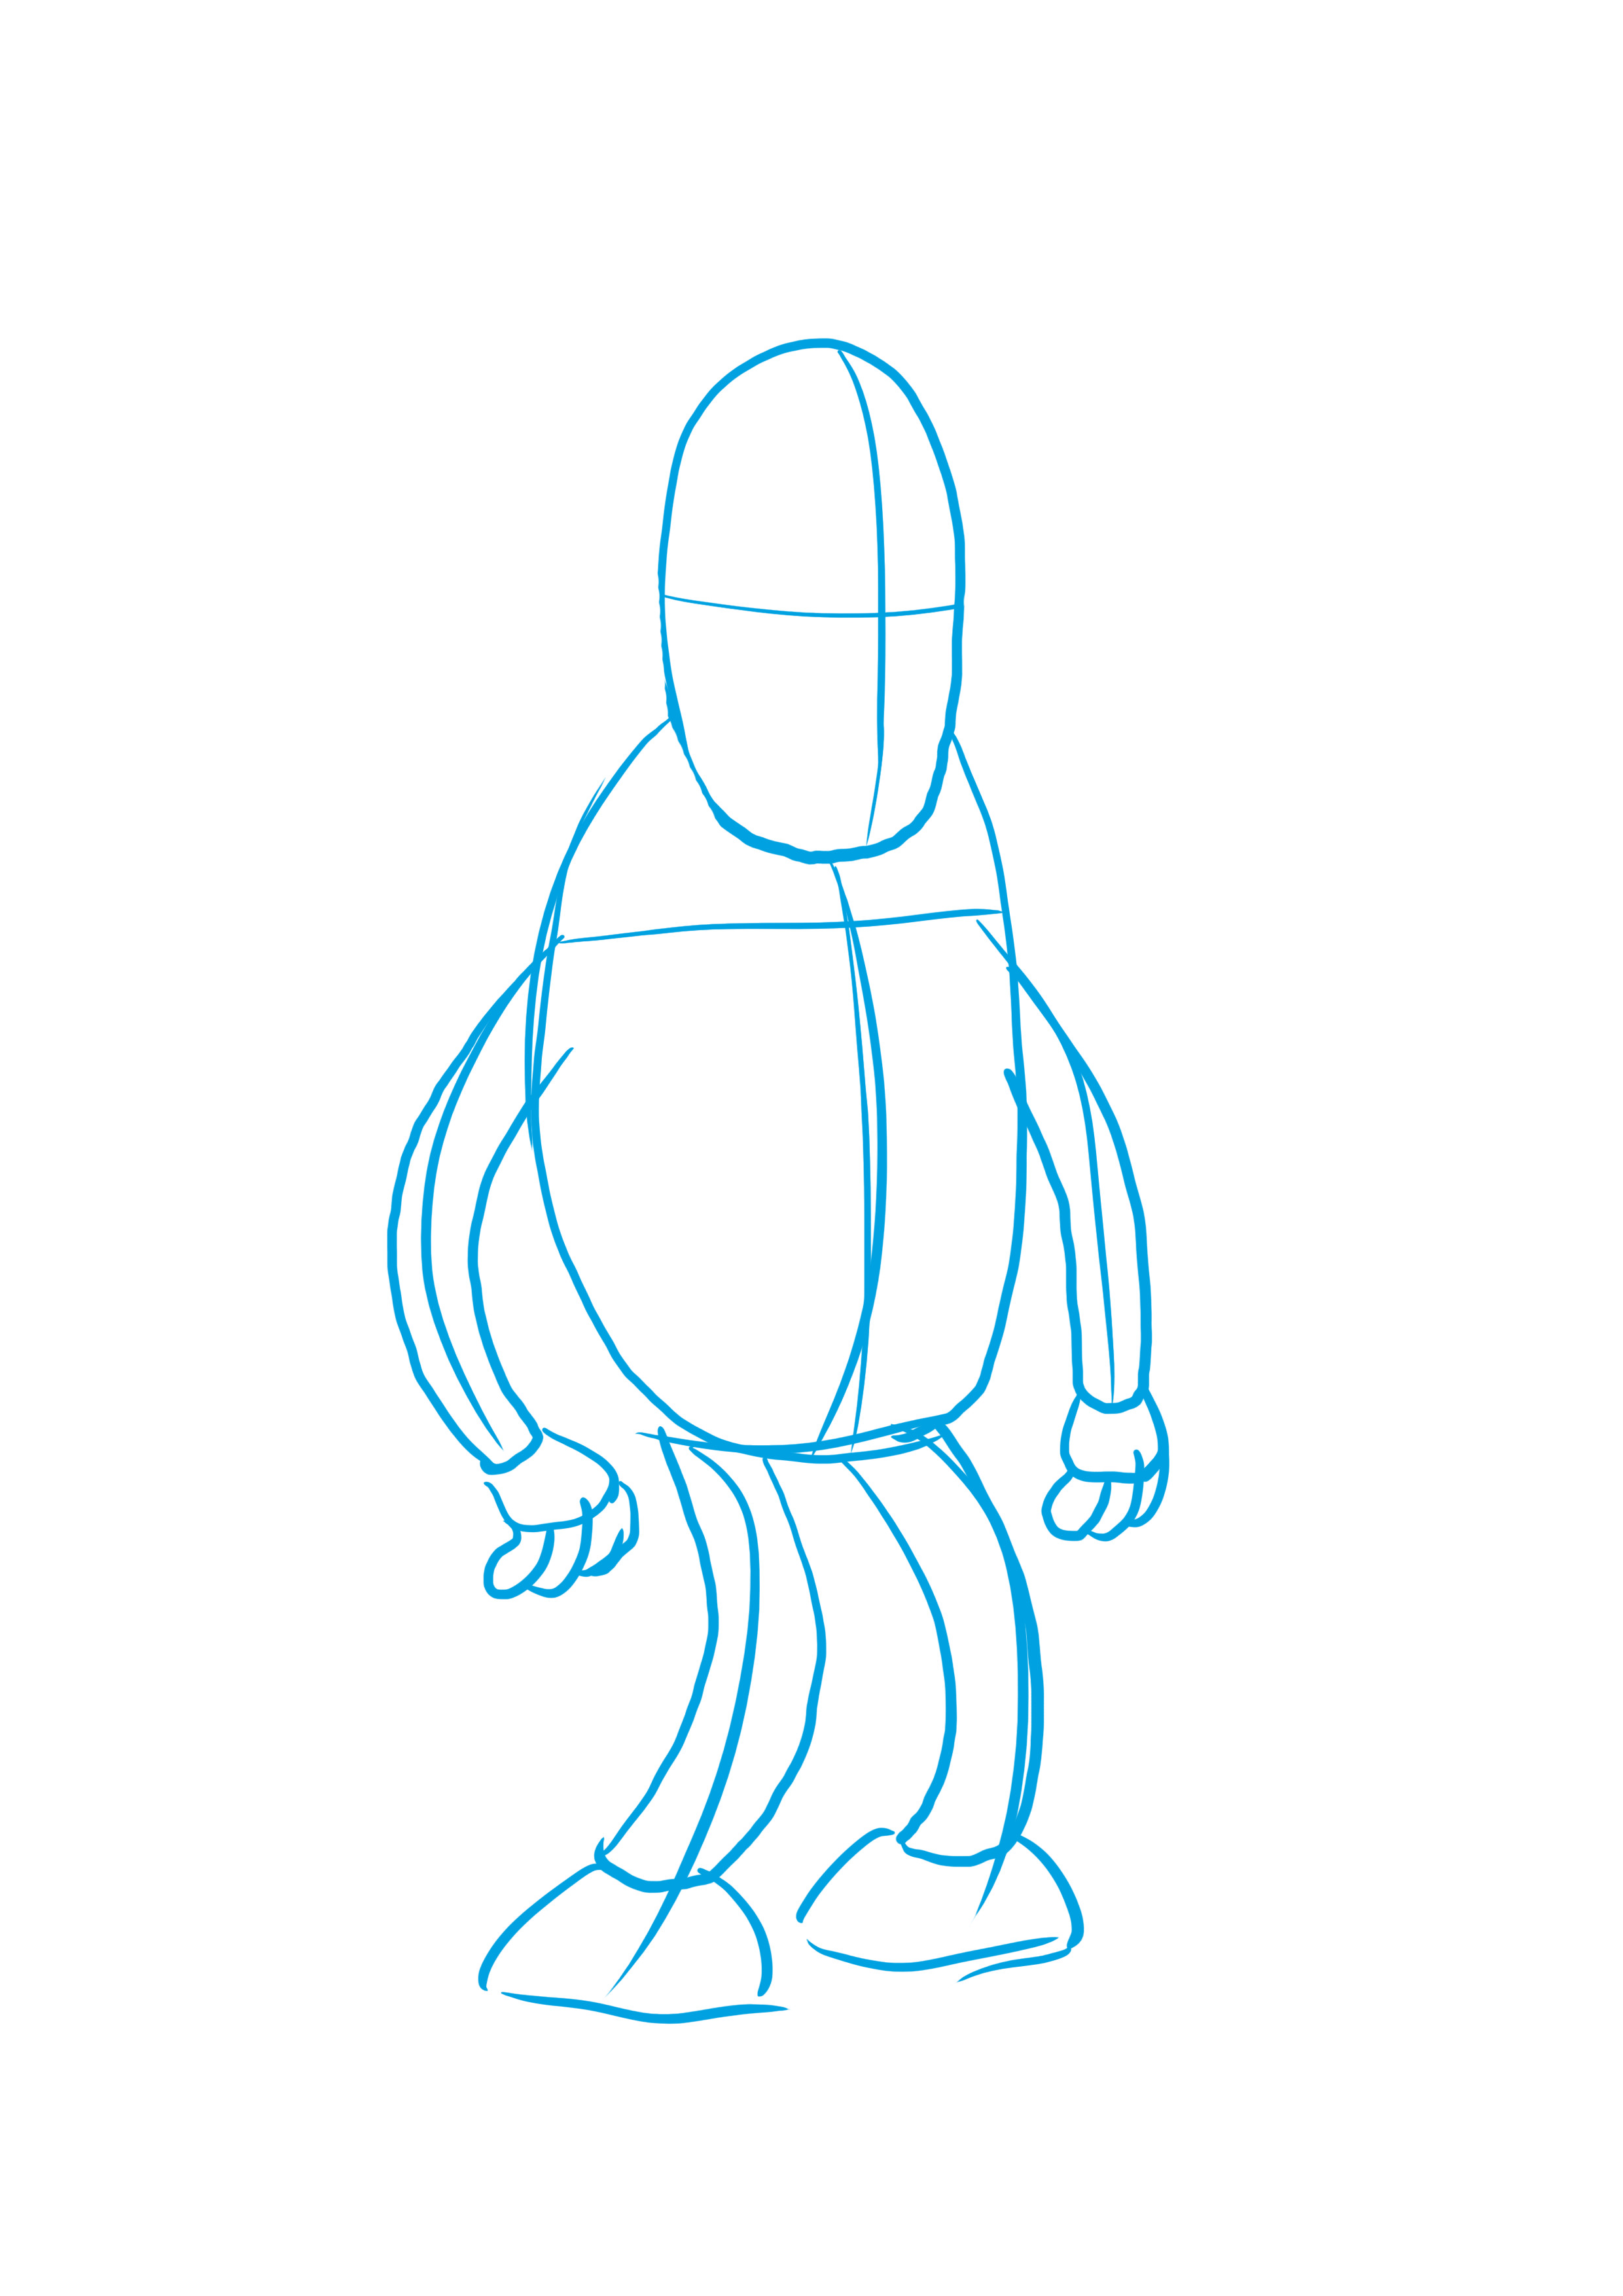
To begin, draw an oval to make the head.
I divide it into 4 by making a cross to define the orientation of the head. My central point represents the location of the nose, so my head will be turned to the right.
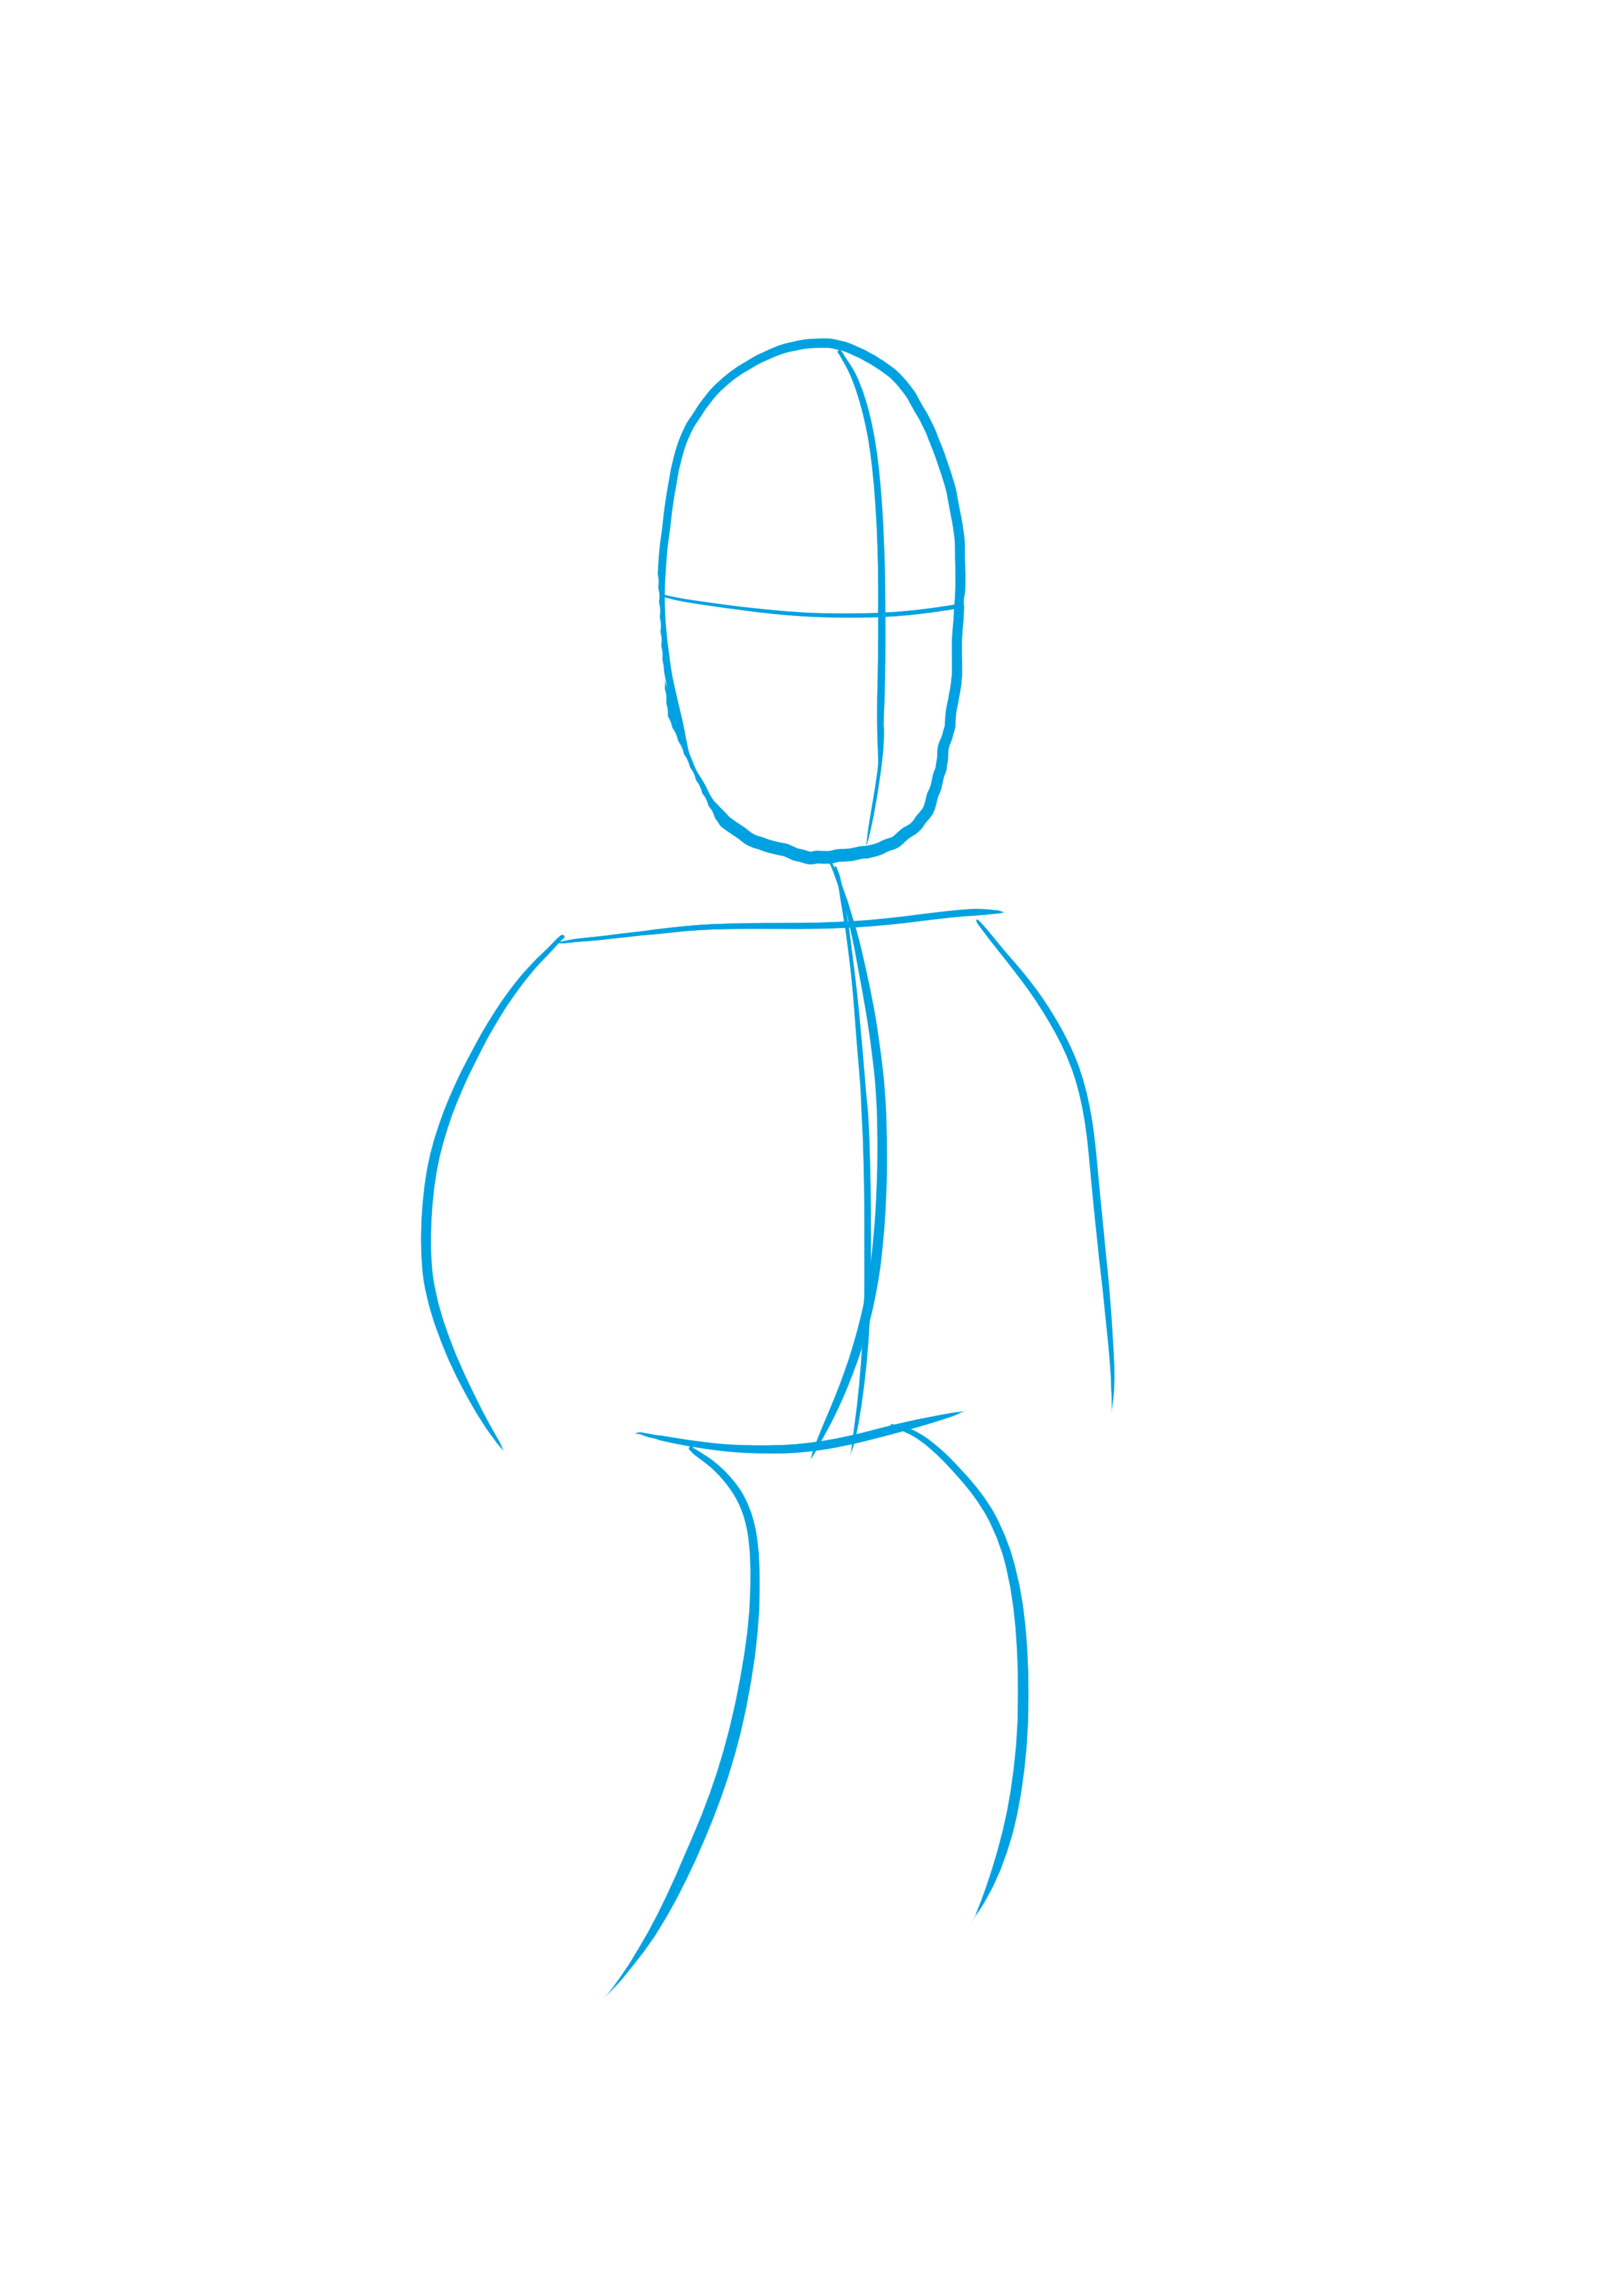
Next, I will draw the skeleton of my character in a very simplistic manner, just to give the impression of a pose and define its size.
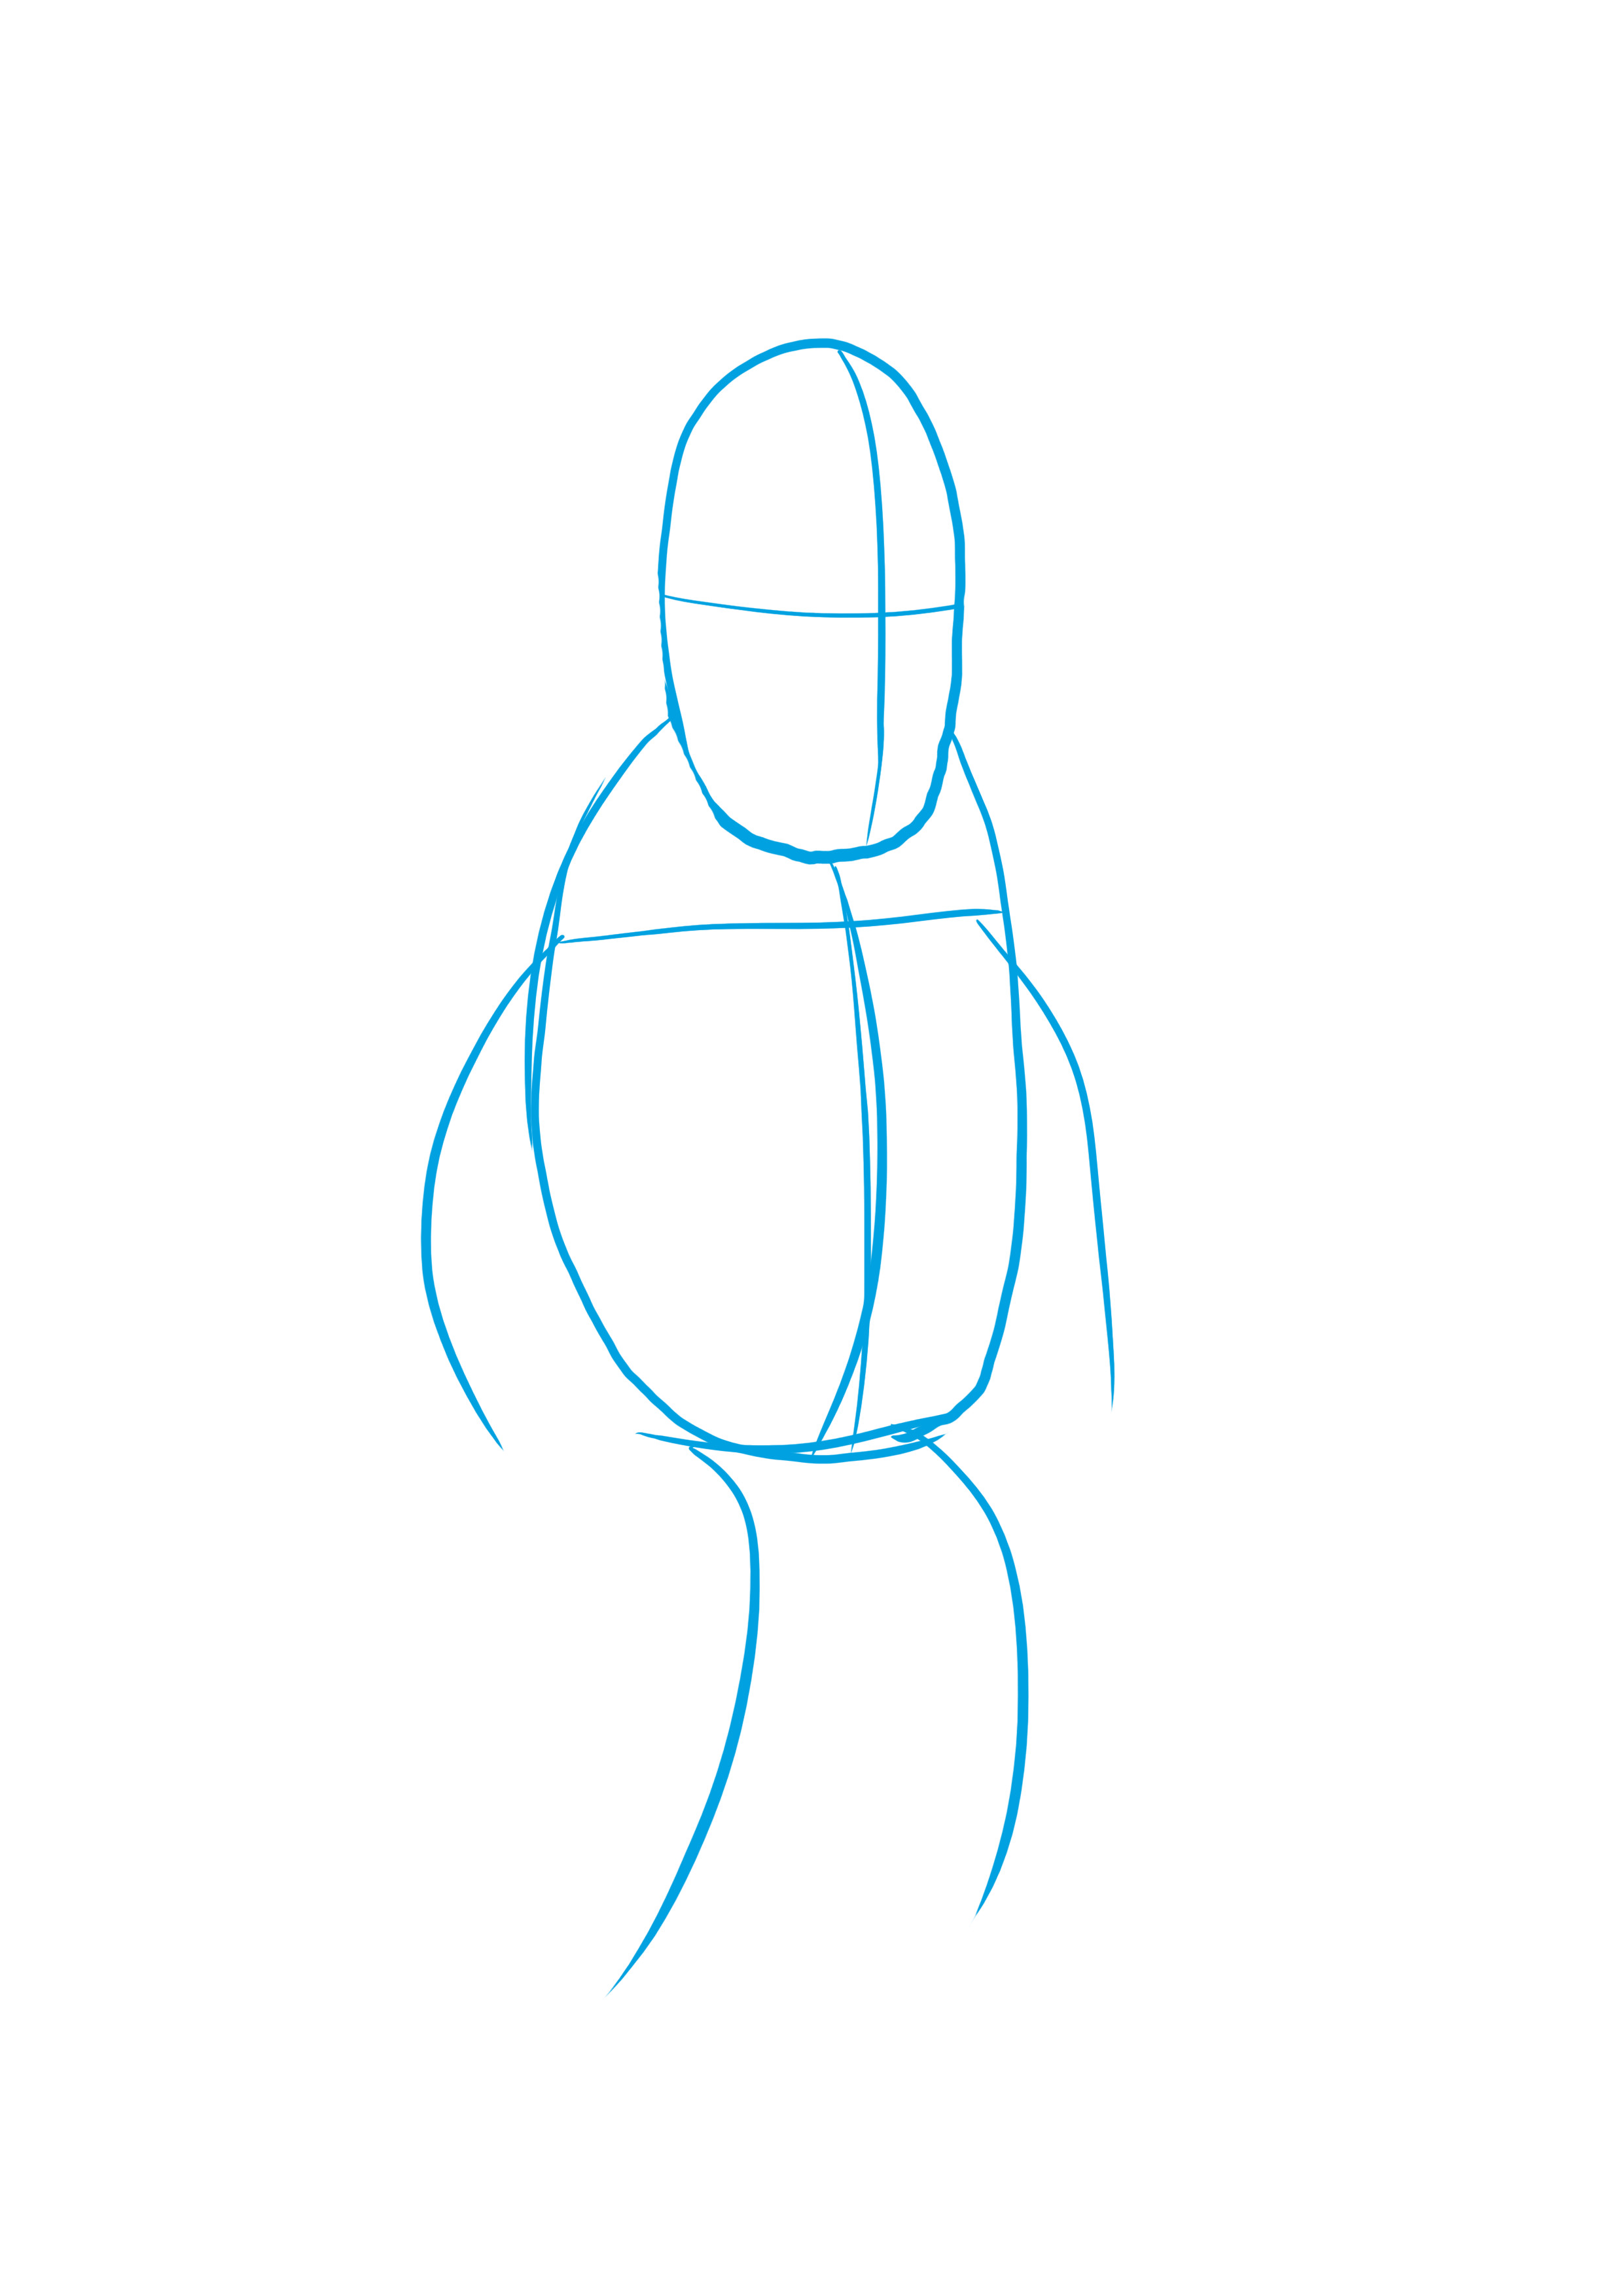
I'm drawing the body's torso. I want to make my robot look quite sturdy, so I won't draw a neck to make it seem like the head is tucked into the shoulders.
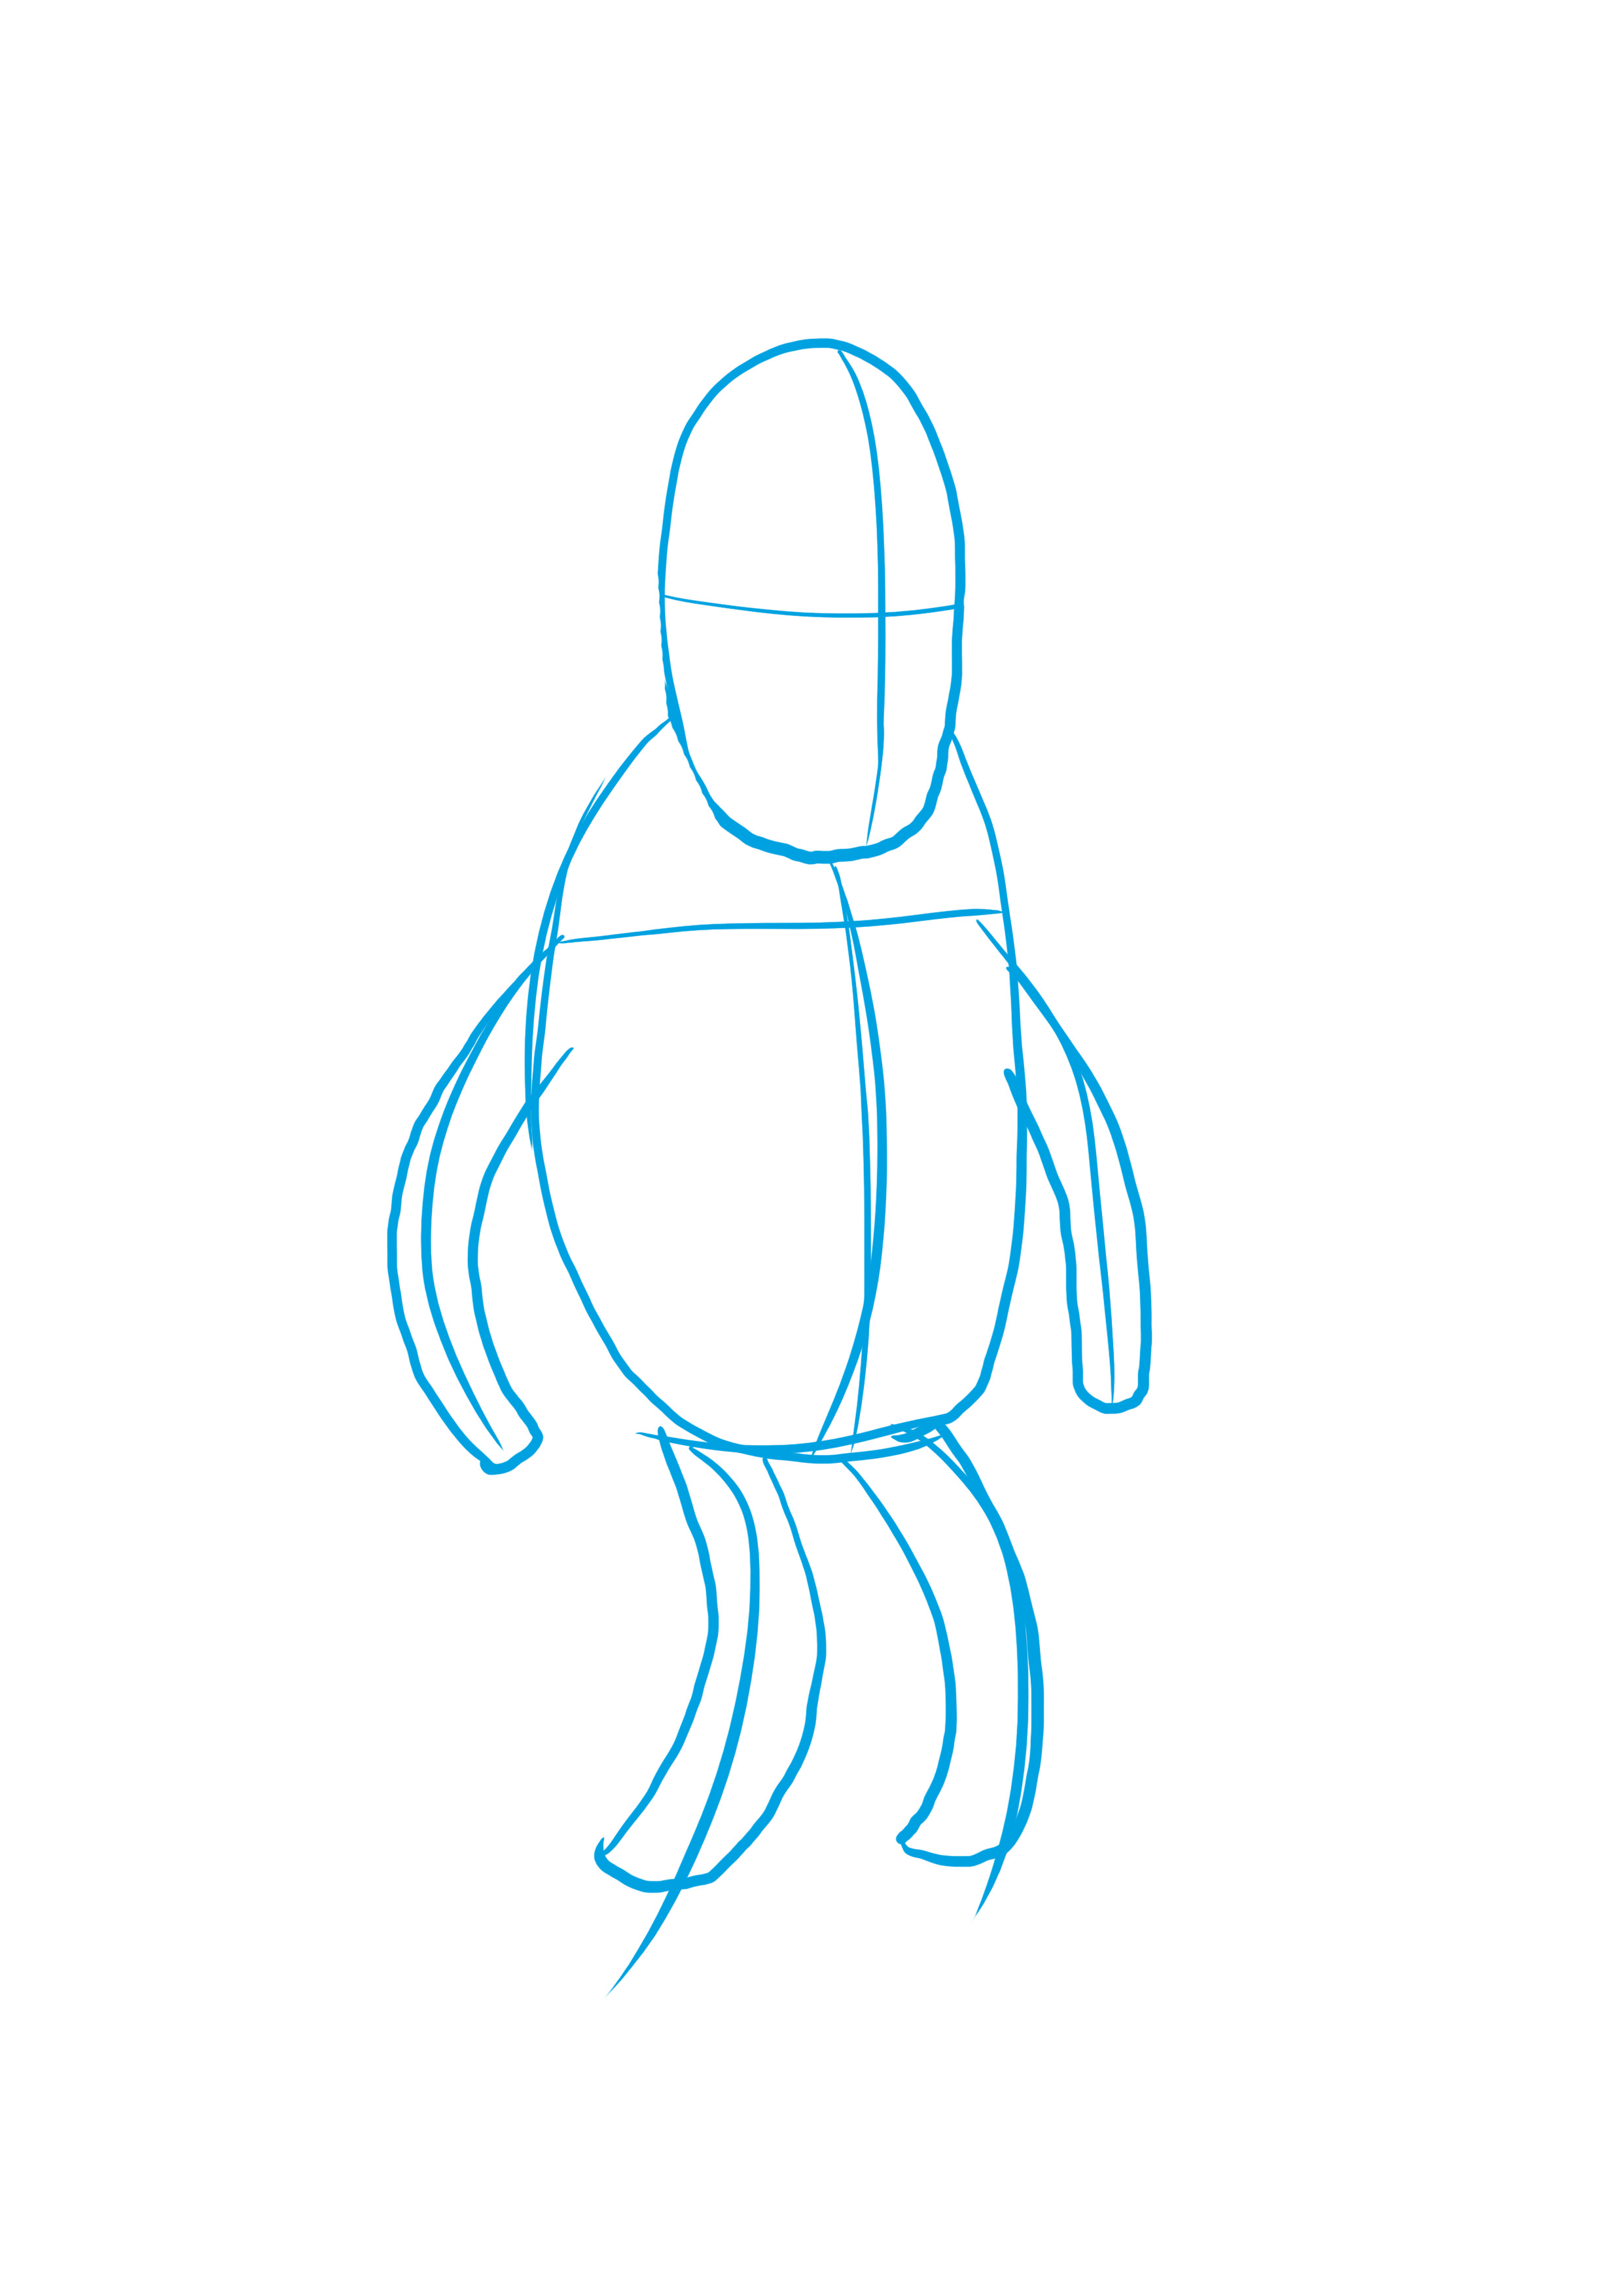
To make the arms and legs, I will simply draw "tubes" to keep with the cartoon spirit of the robot.
DRAWING THE DETAILS OF THE CARTOON ROBOT
To continue, I will draw the hands and feet in a very simplistic way, using a trapezoid to make the base of the hand and three rectangles for the fingers. For the feet, I will simply draw domes.
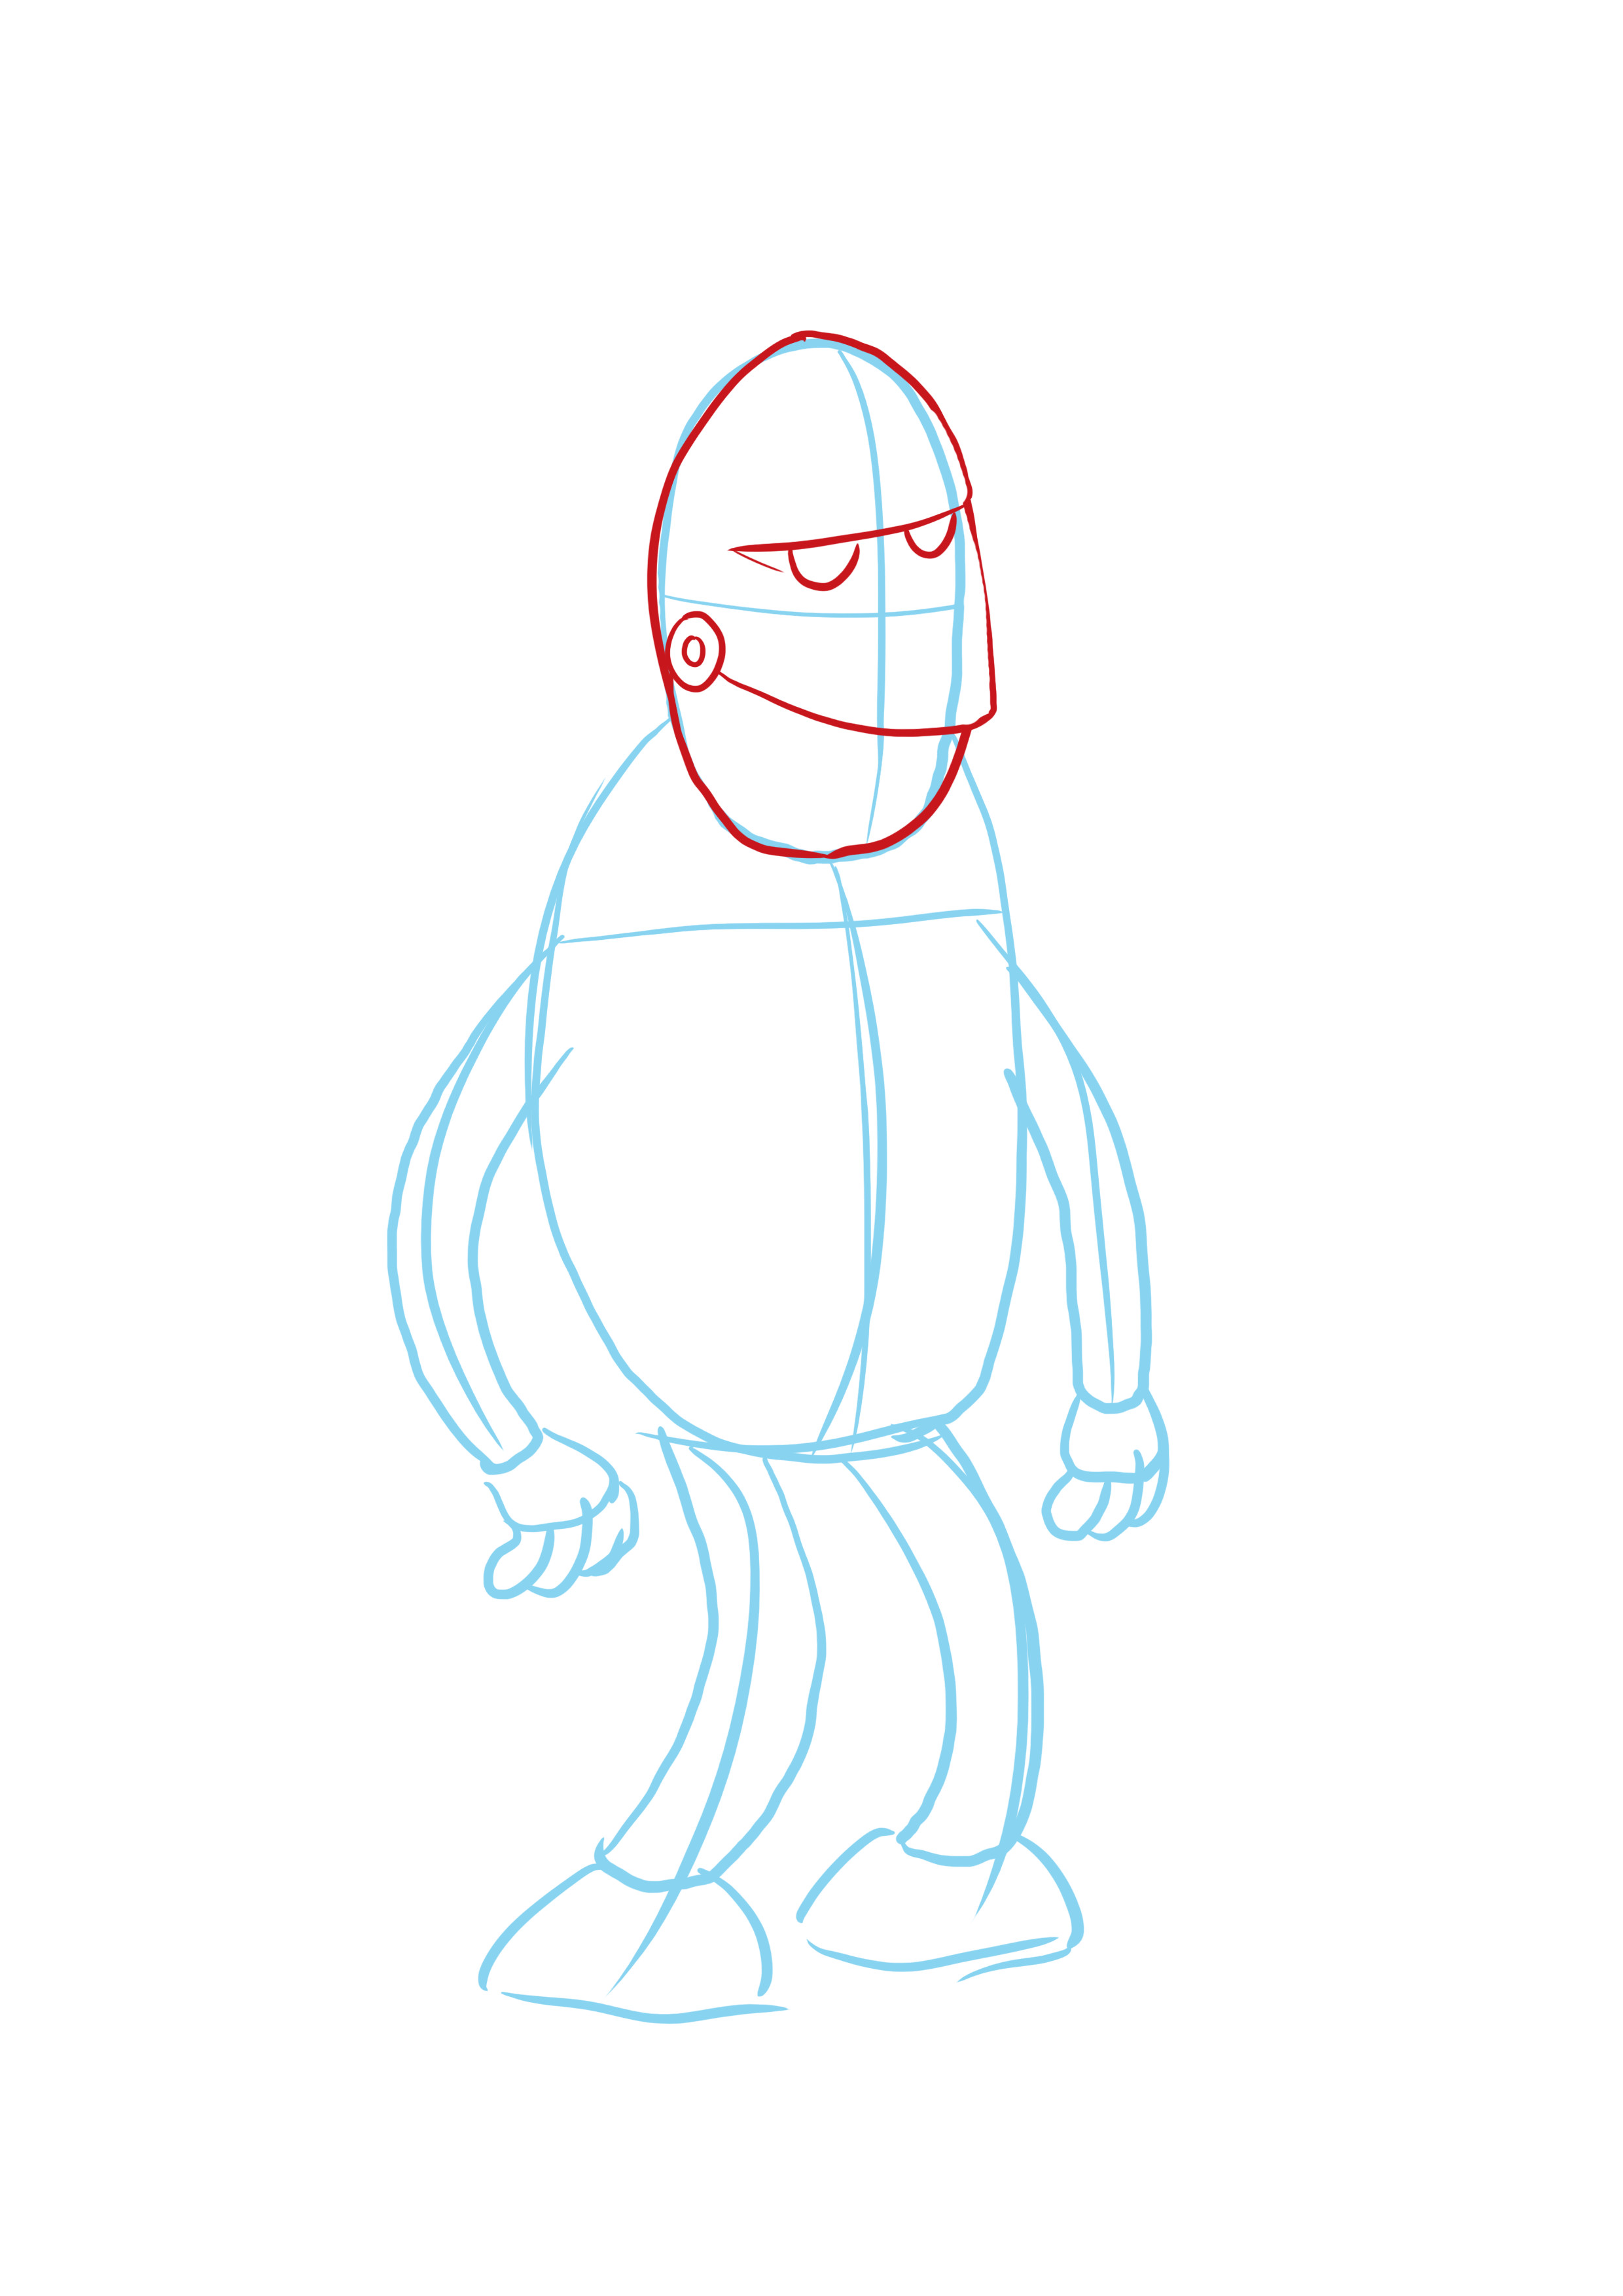
Now that my base is finished, I will start to draw neatly and add details to finalize my robot's appearance.
I will start with the head. I decided to give it a gruff look, with half-closed eyes, as if it's blasé, and quite a noticeable smile.
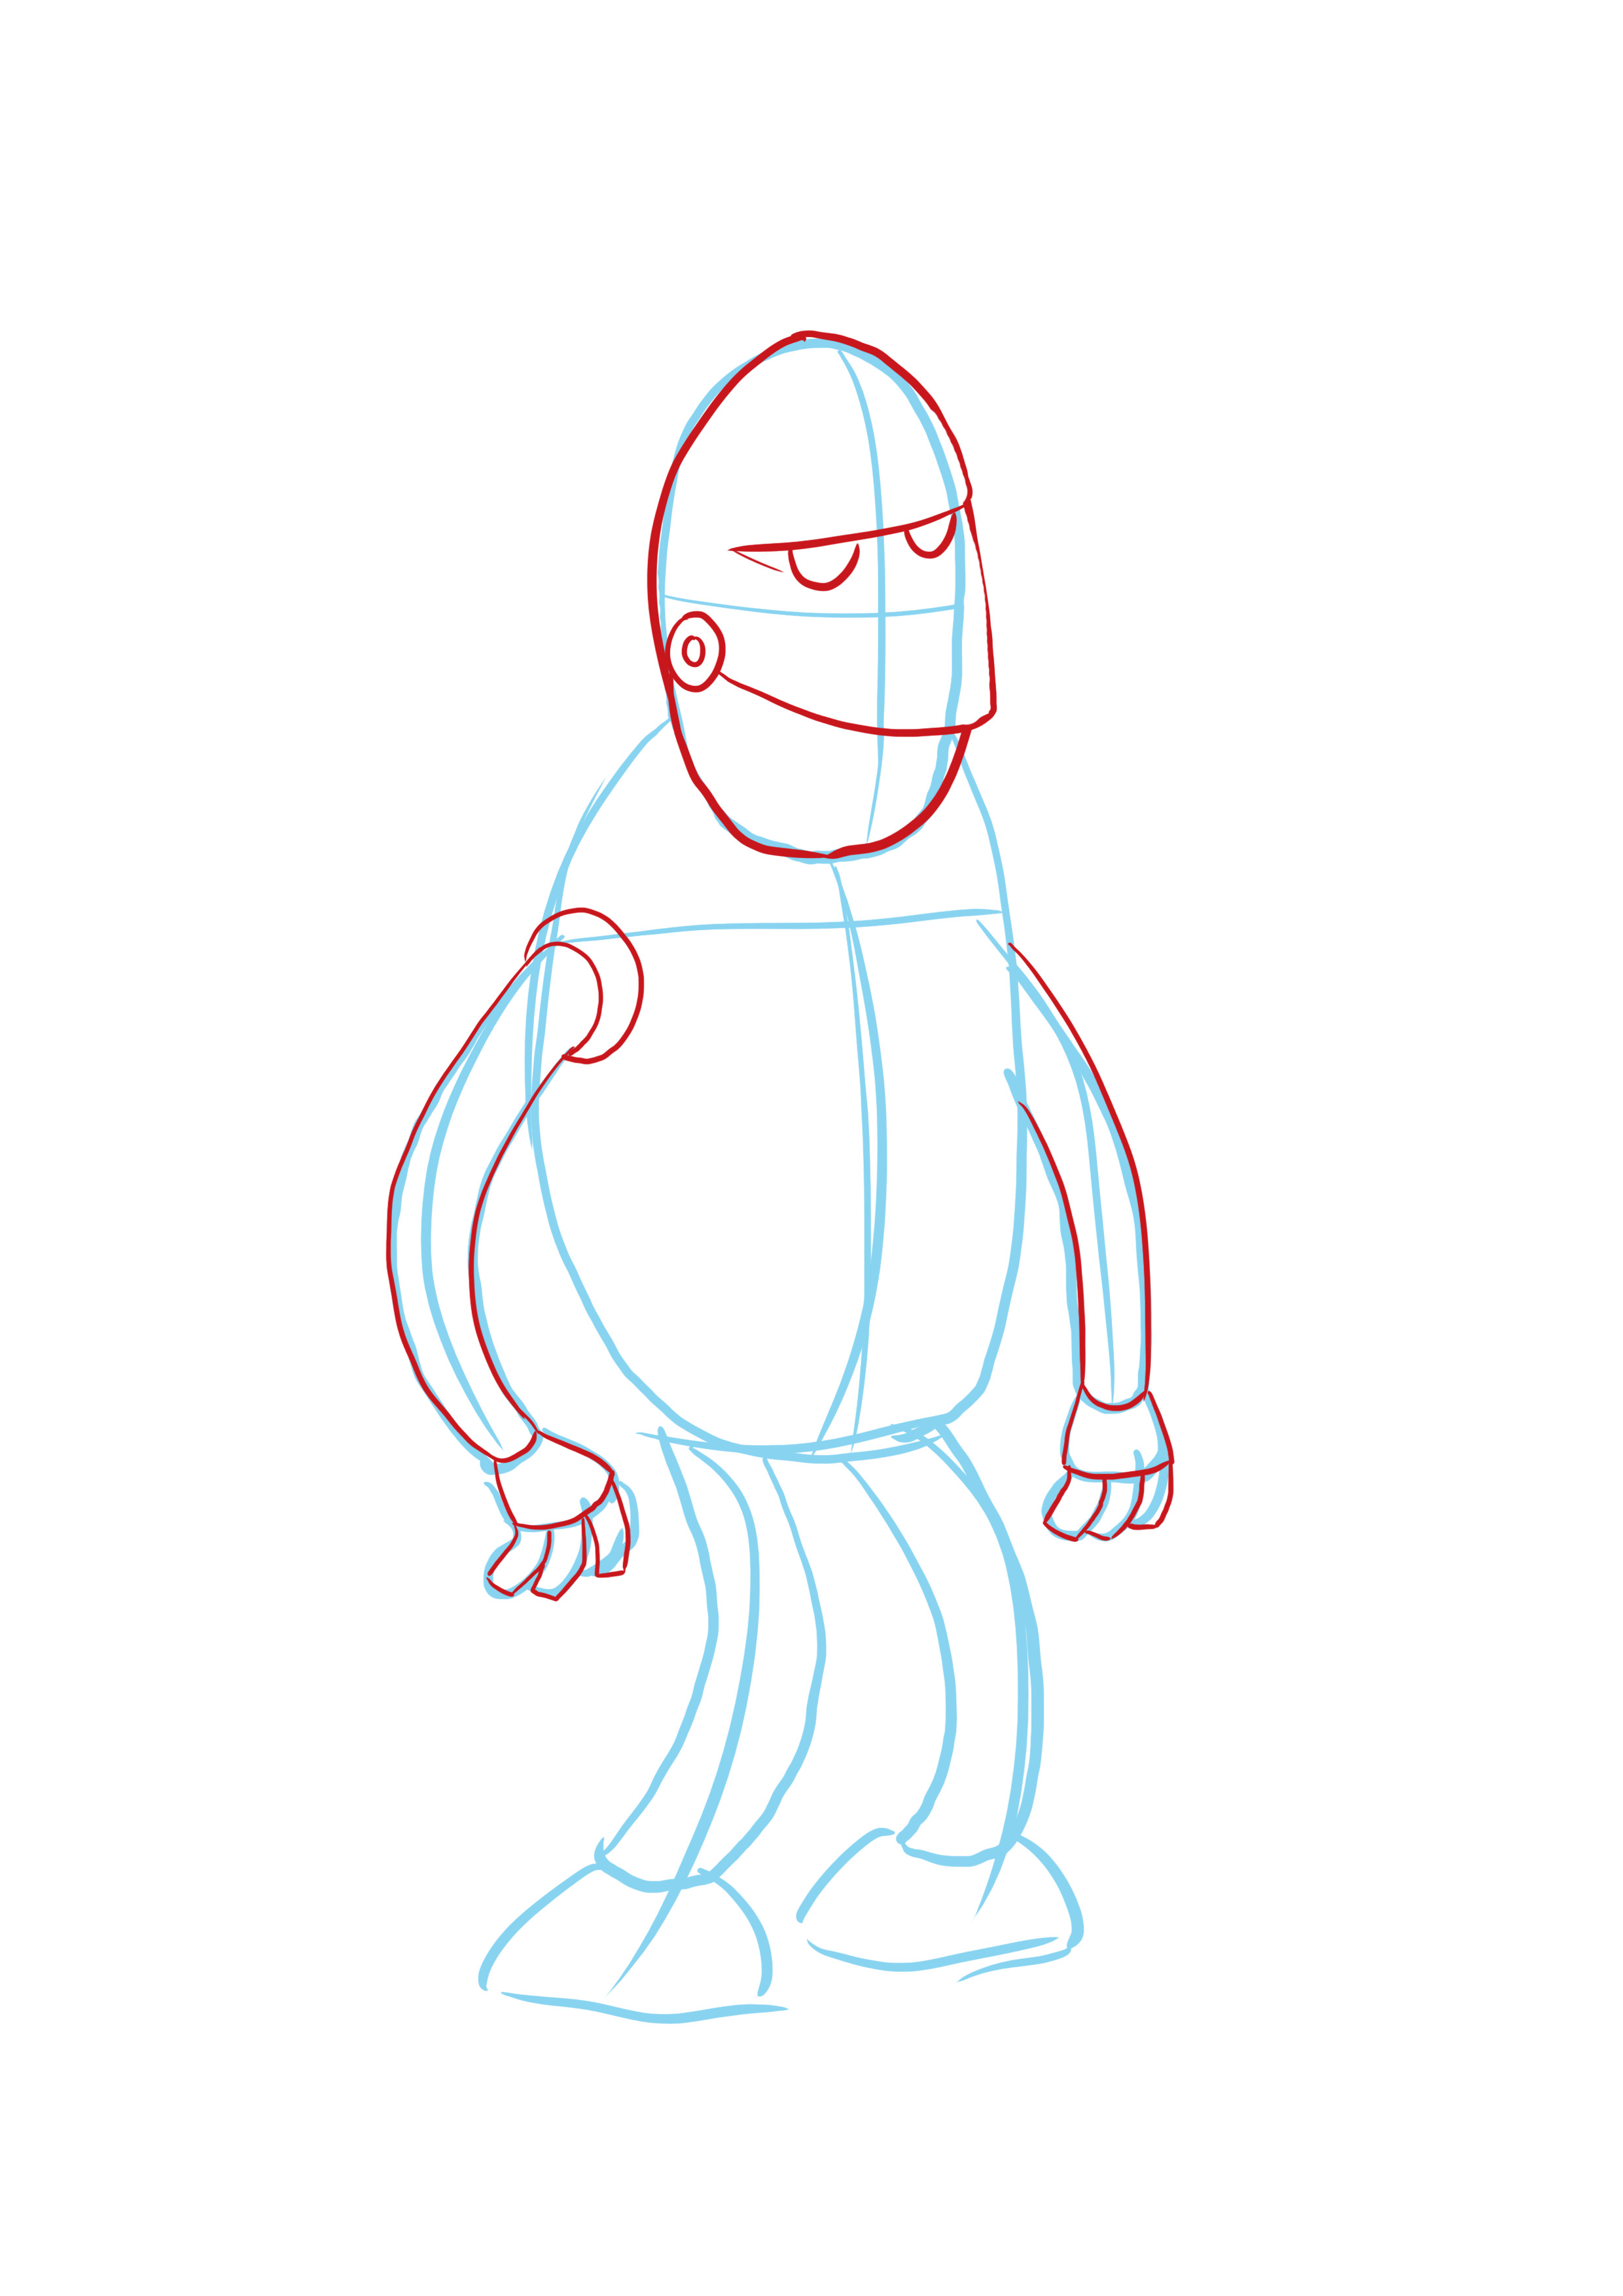

I will continue drawing my robot's body by going over my previously drawn base, taking this opportunity to correct any possible errors in proportions or positioning.
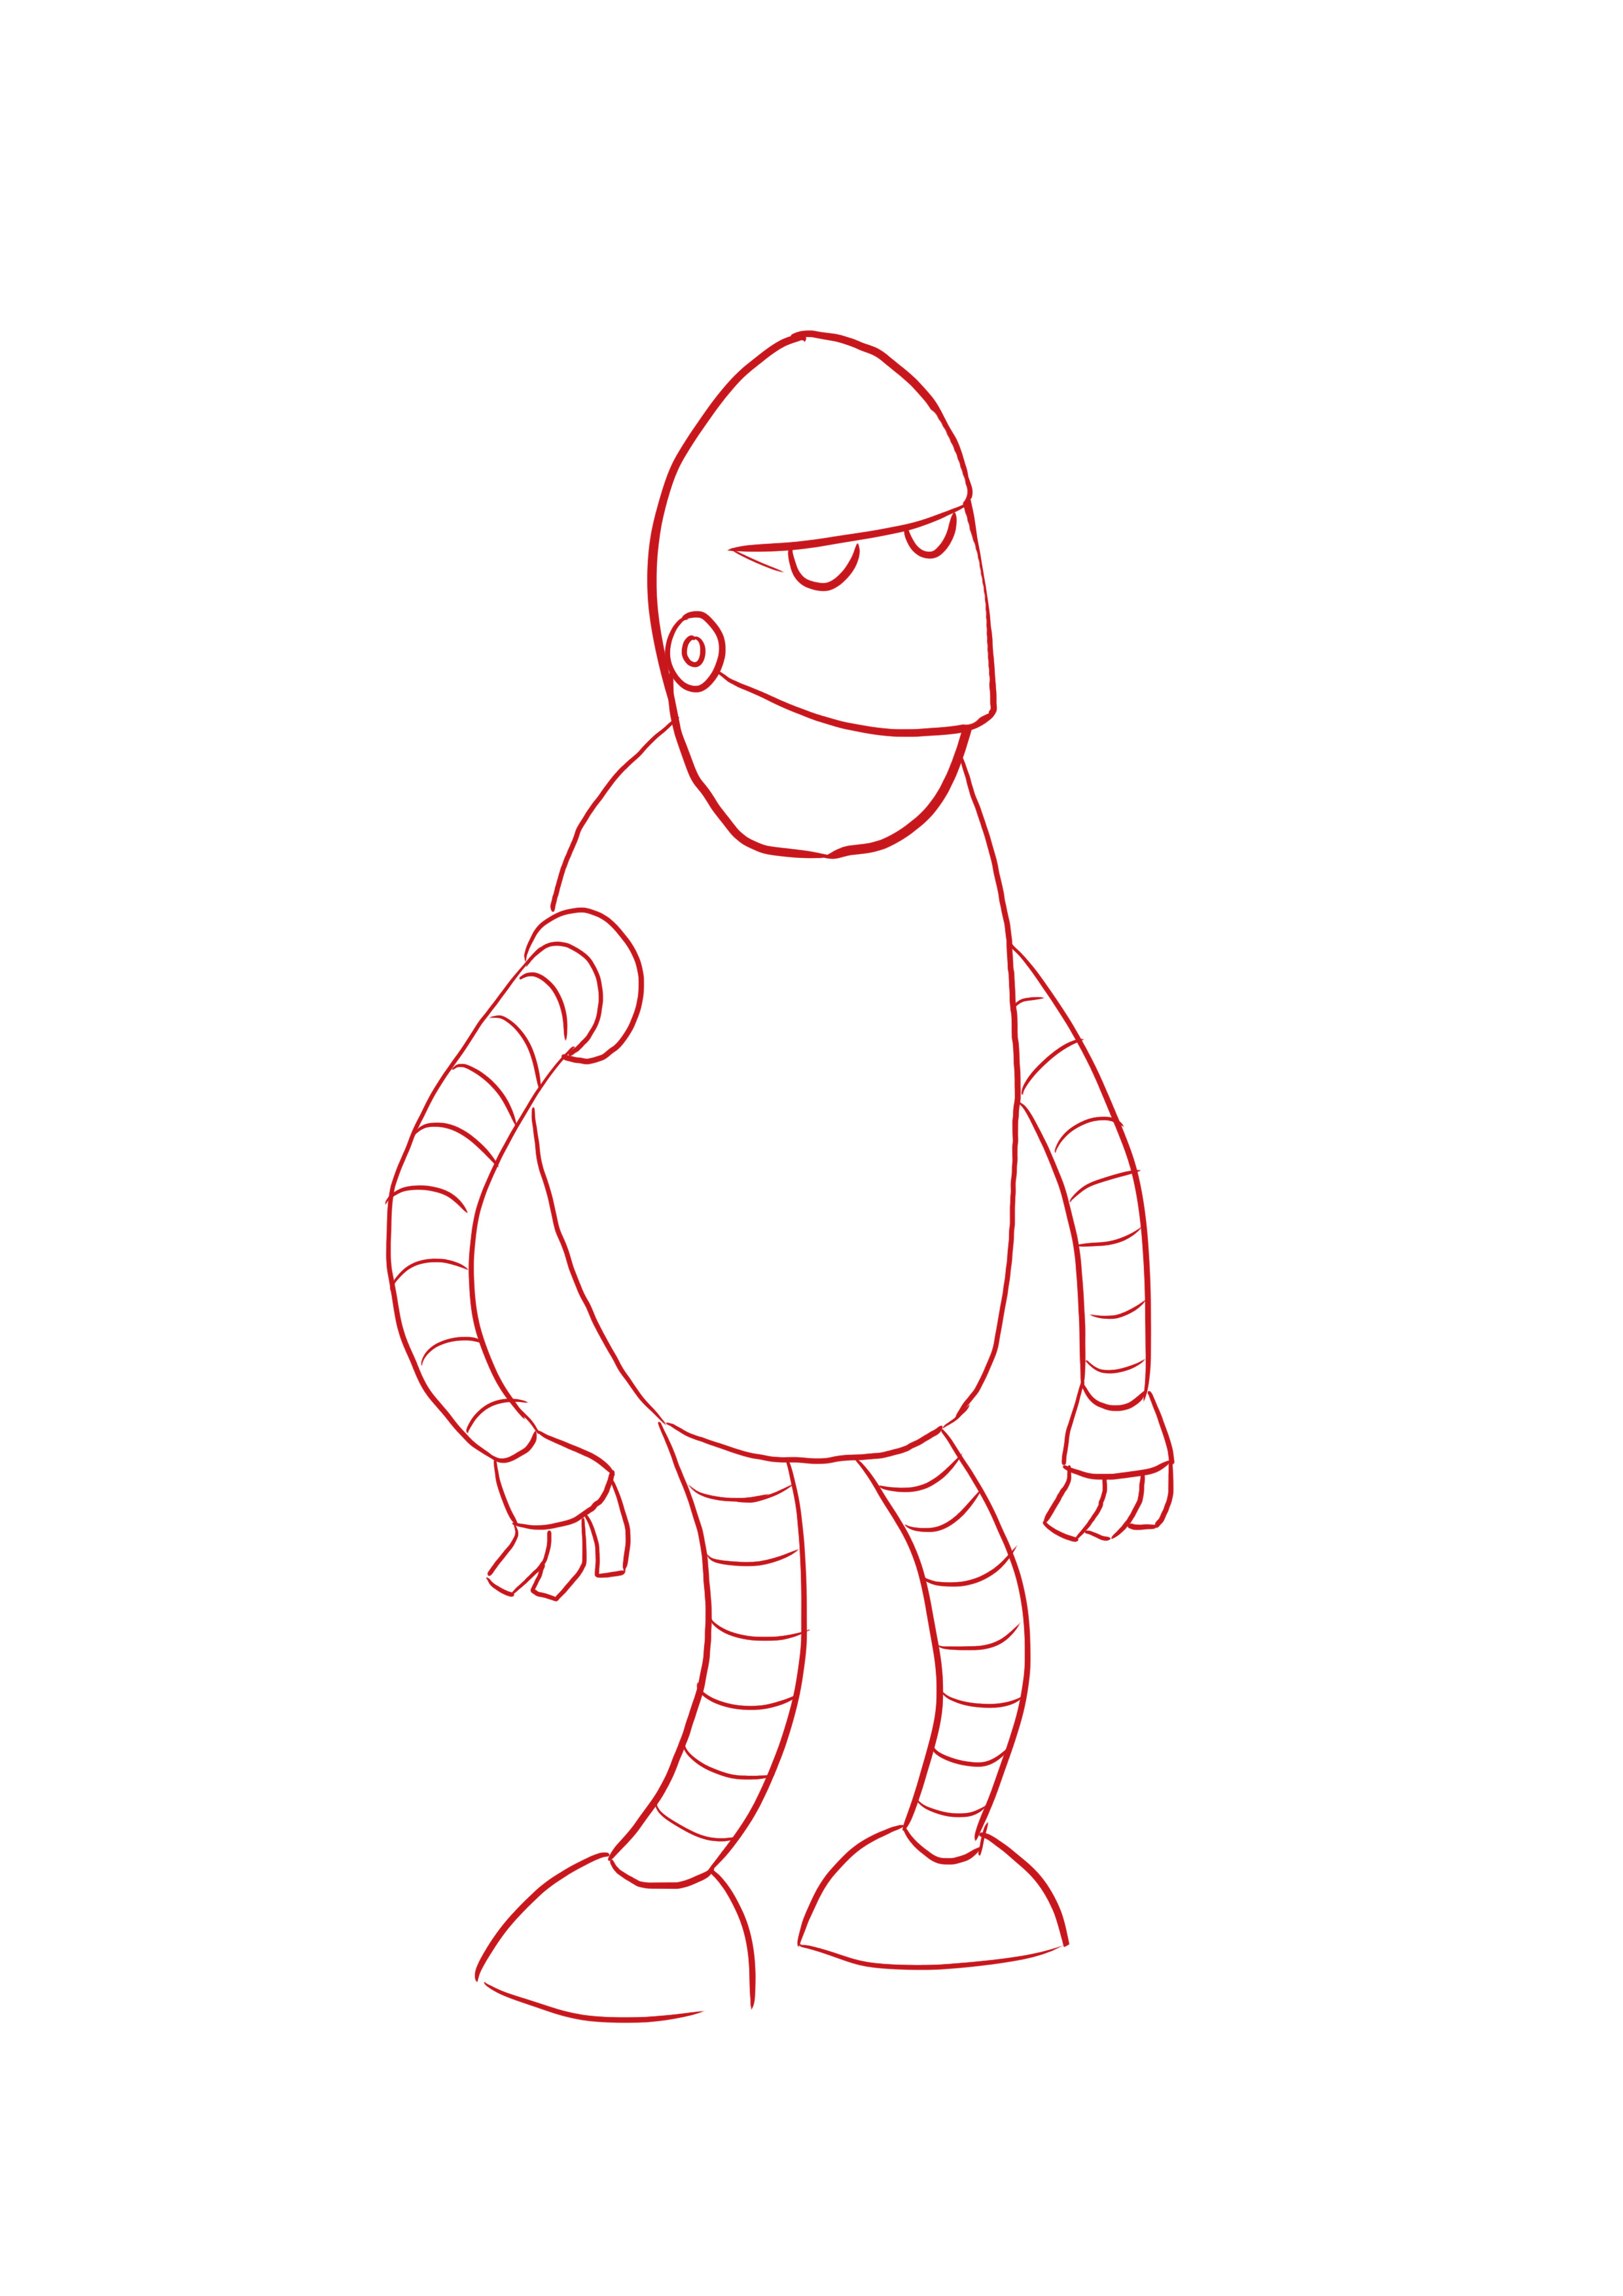
Once my robot is completely drawn, I will erase the construction lines and start adding detail to make it look more realistic.
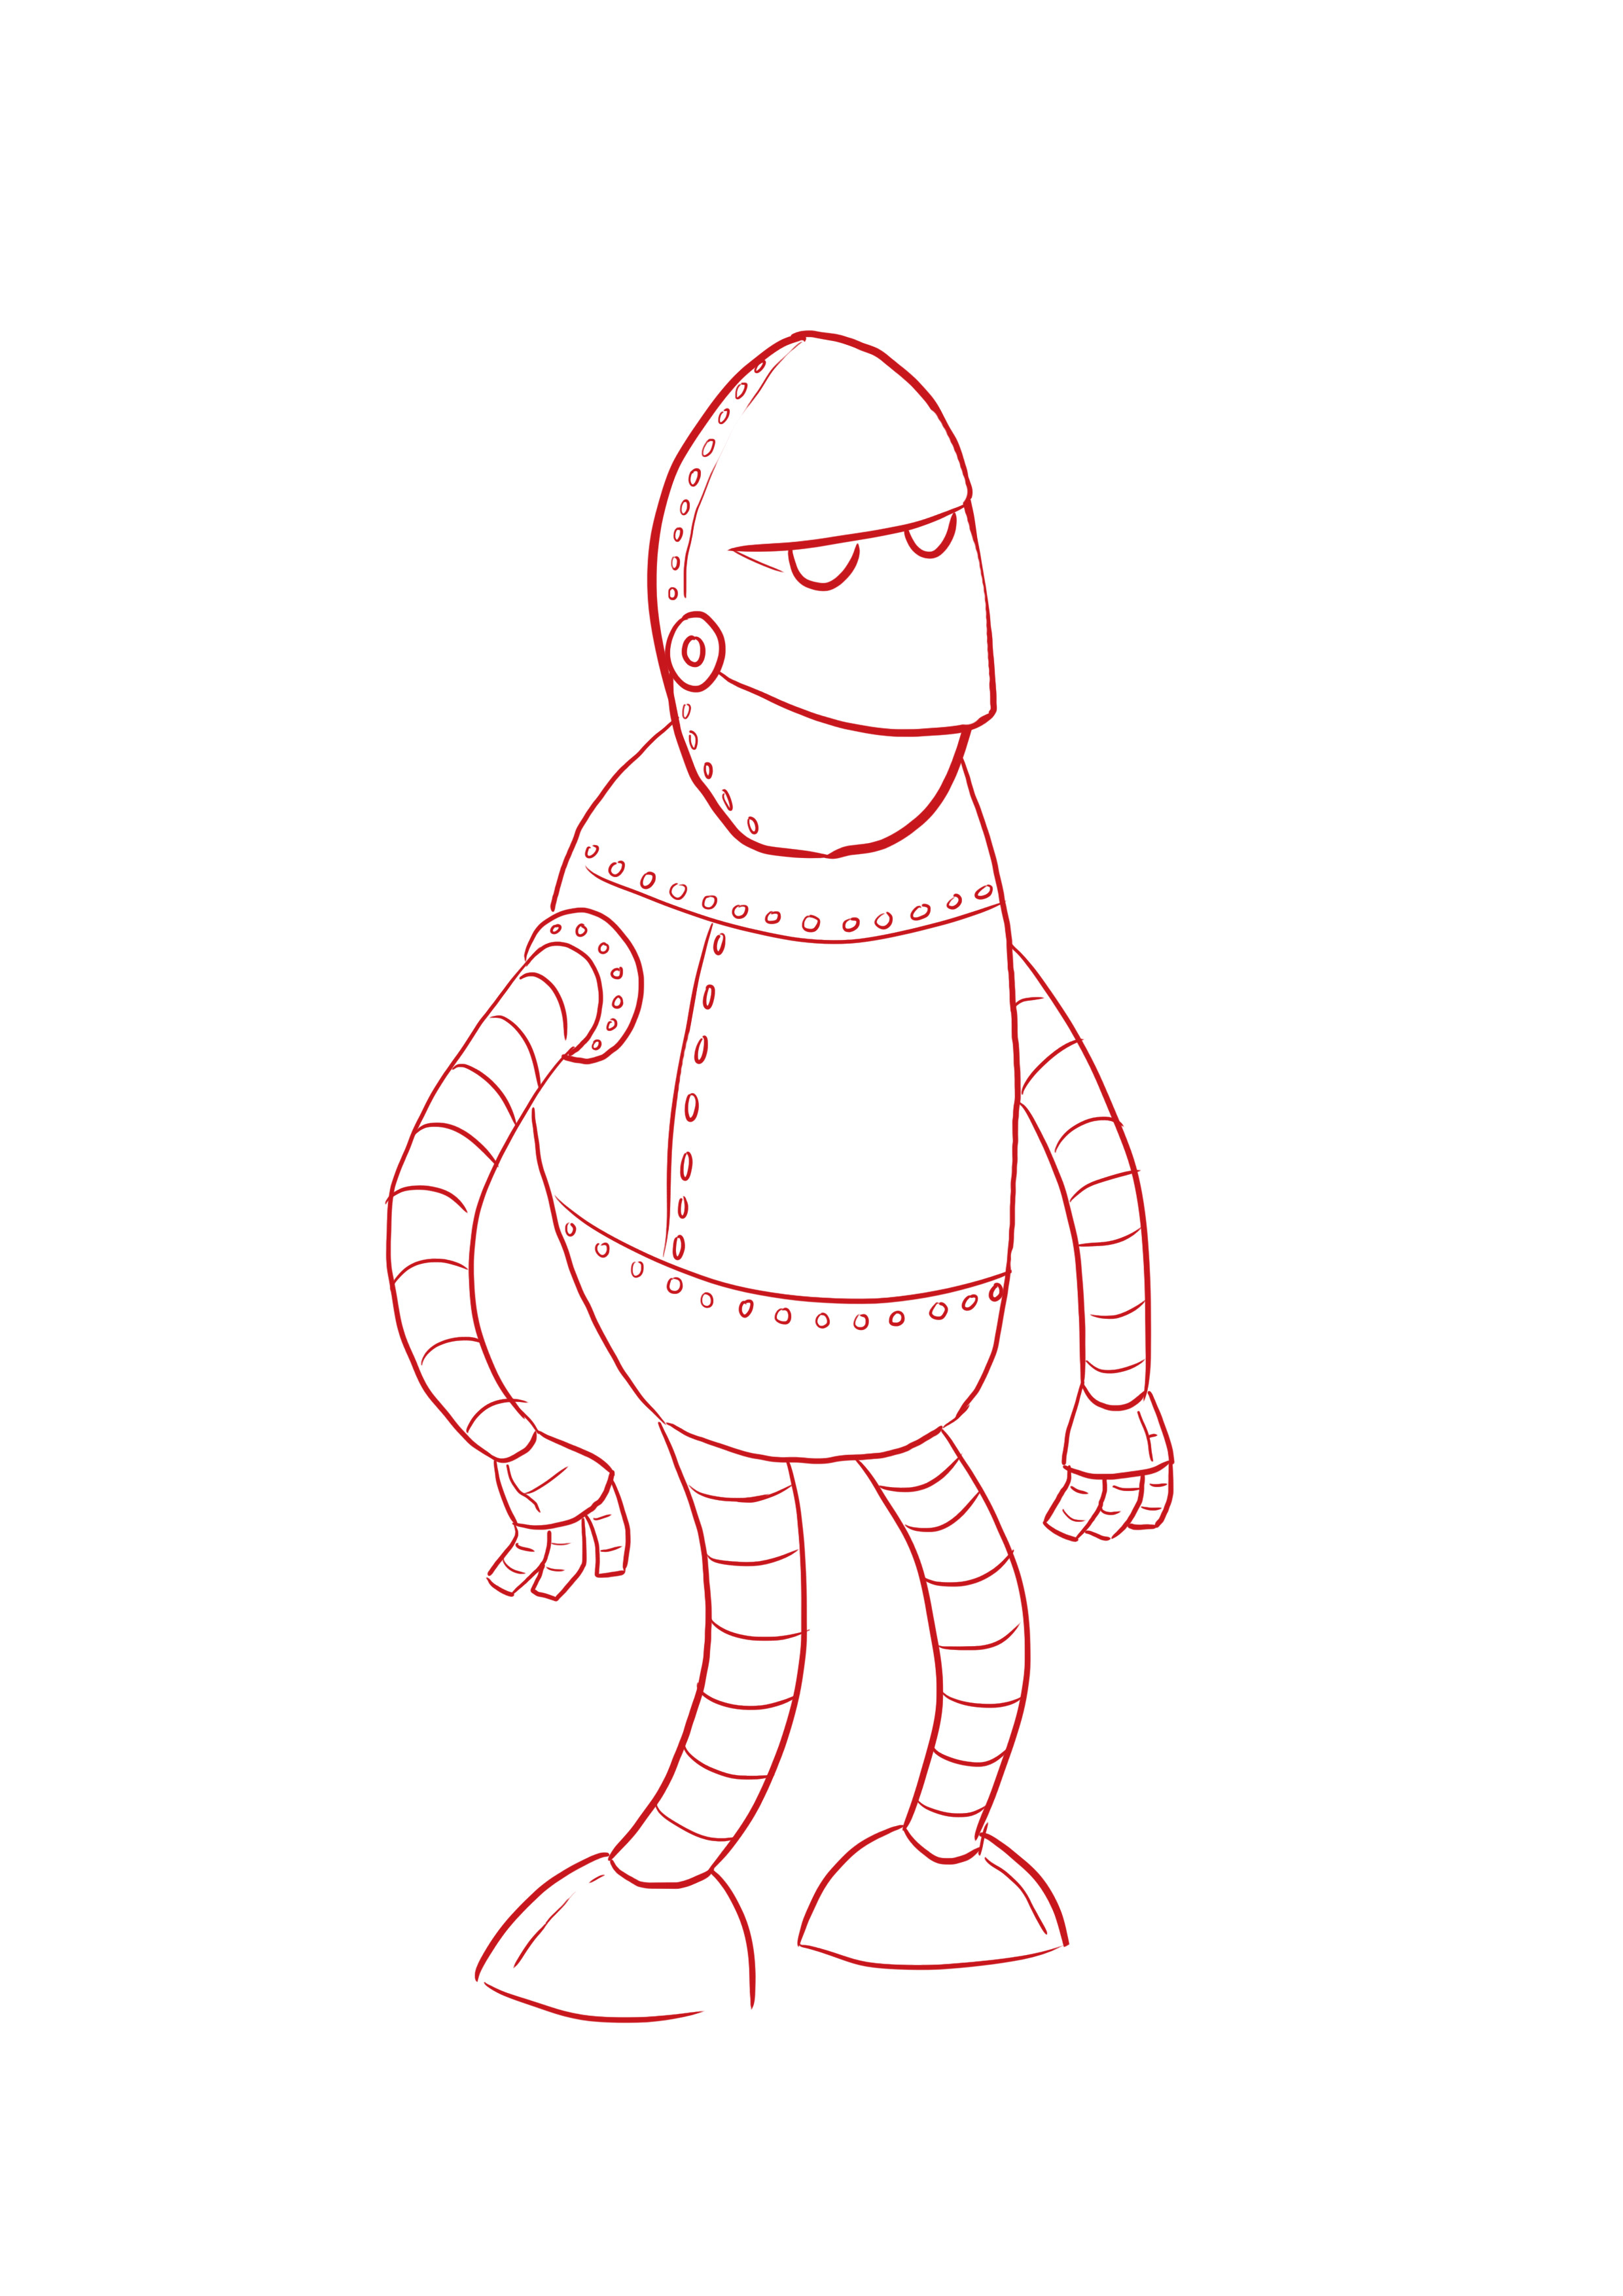
My cartoon robot is now complete.
Now you can color it, having fun combining colors to give it more character. :)
DRAWING A HUMANOID ROBOT
Now let's move on to the humanoid robot. The steps will be the same, just the drawing style will change. Essentially, the beginning will be the same as drawing a character. We will first define a pose, then draw the body, and finally, we will add details that will make our character robotic.
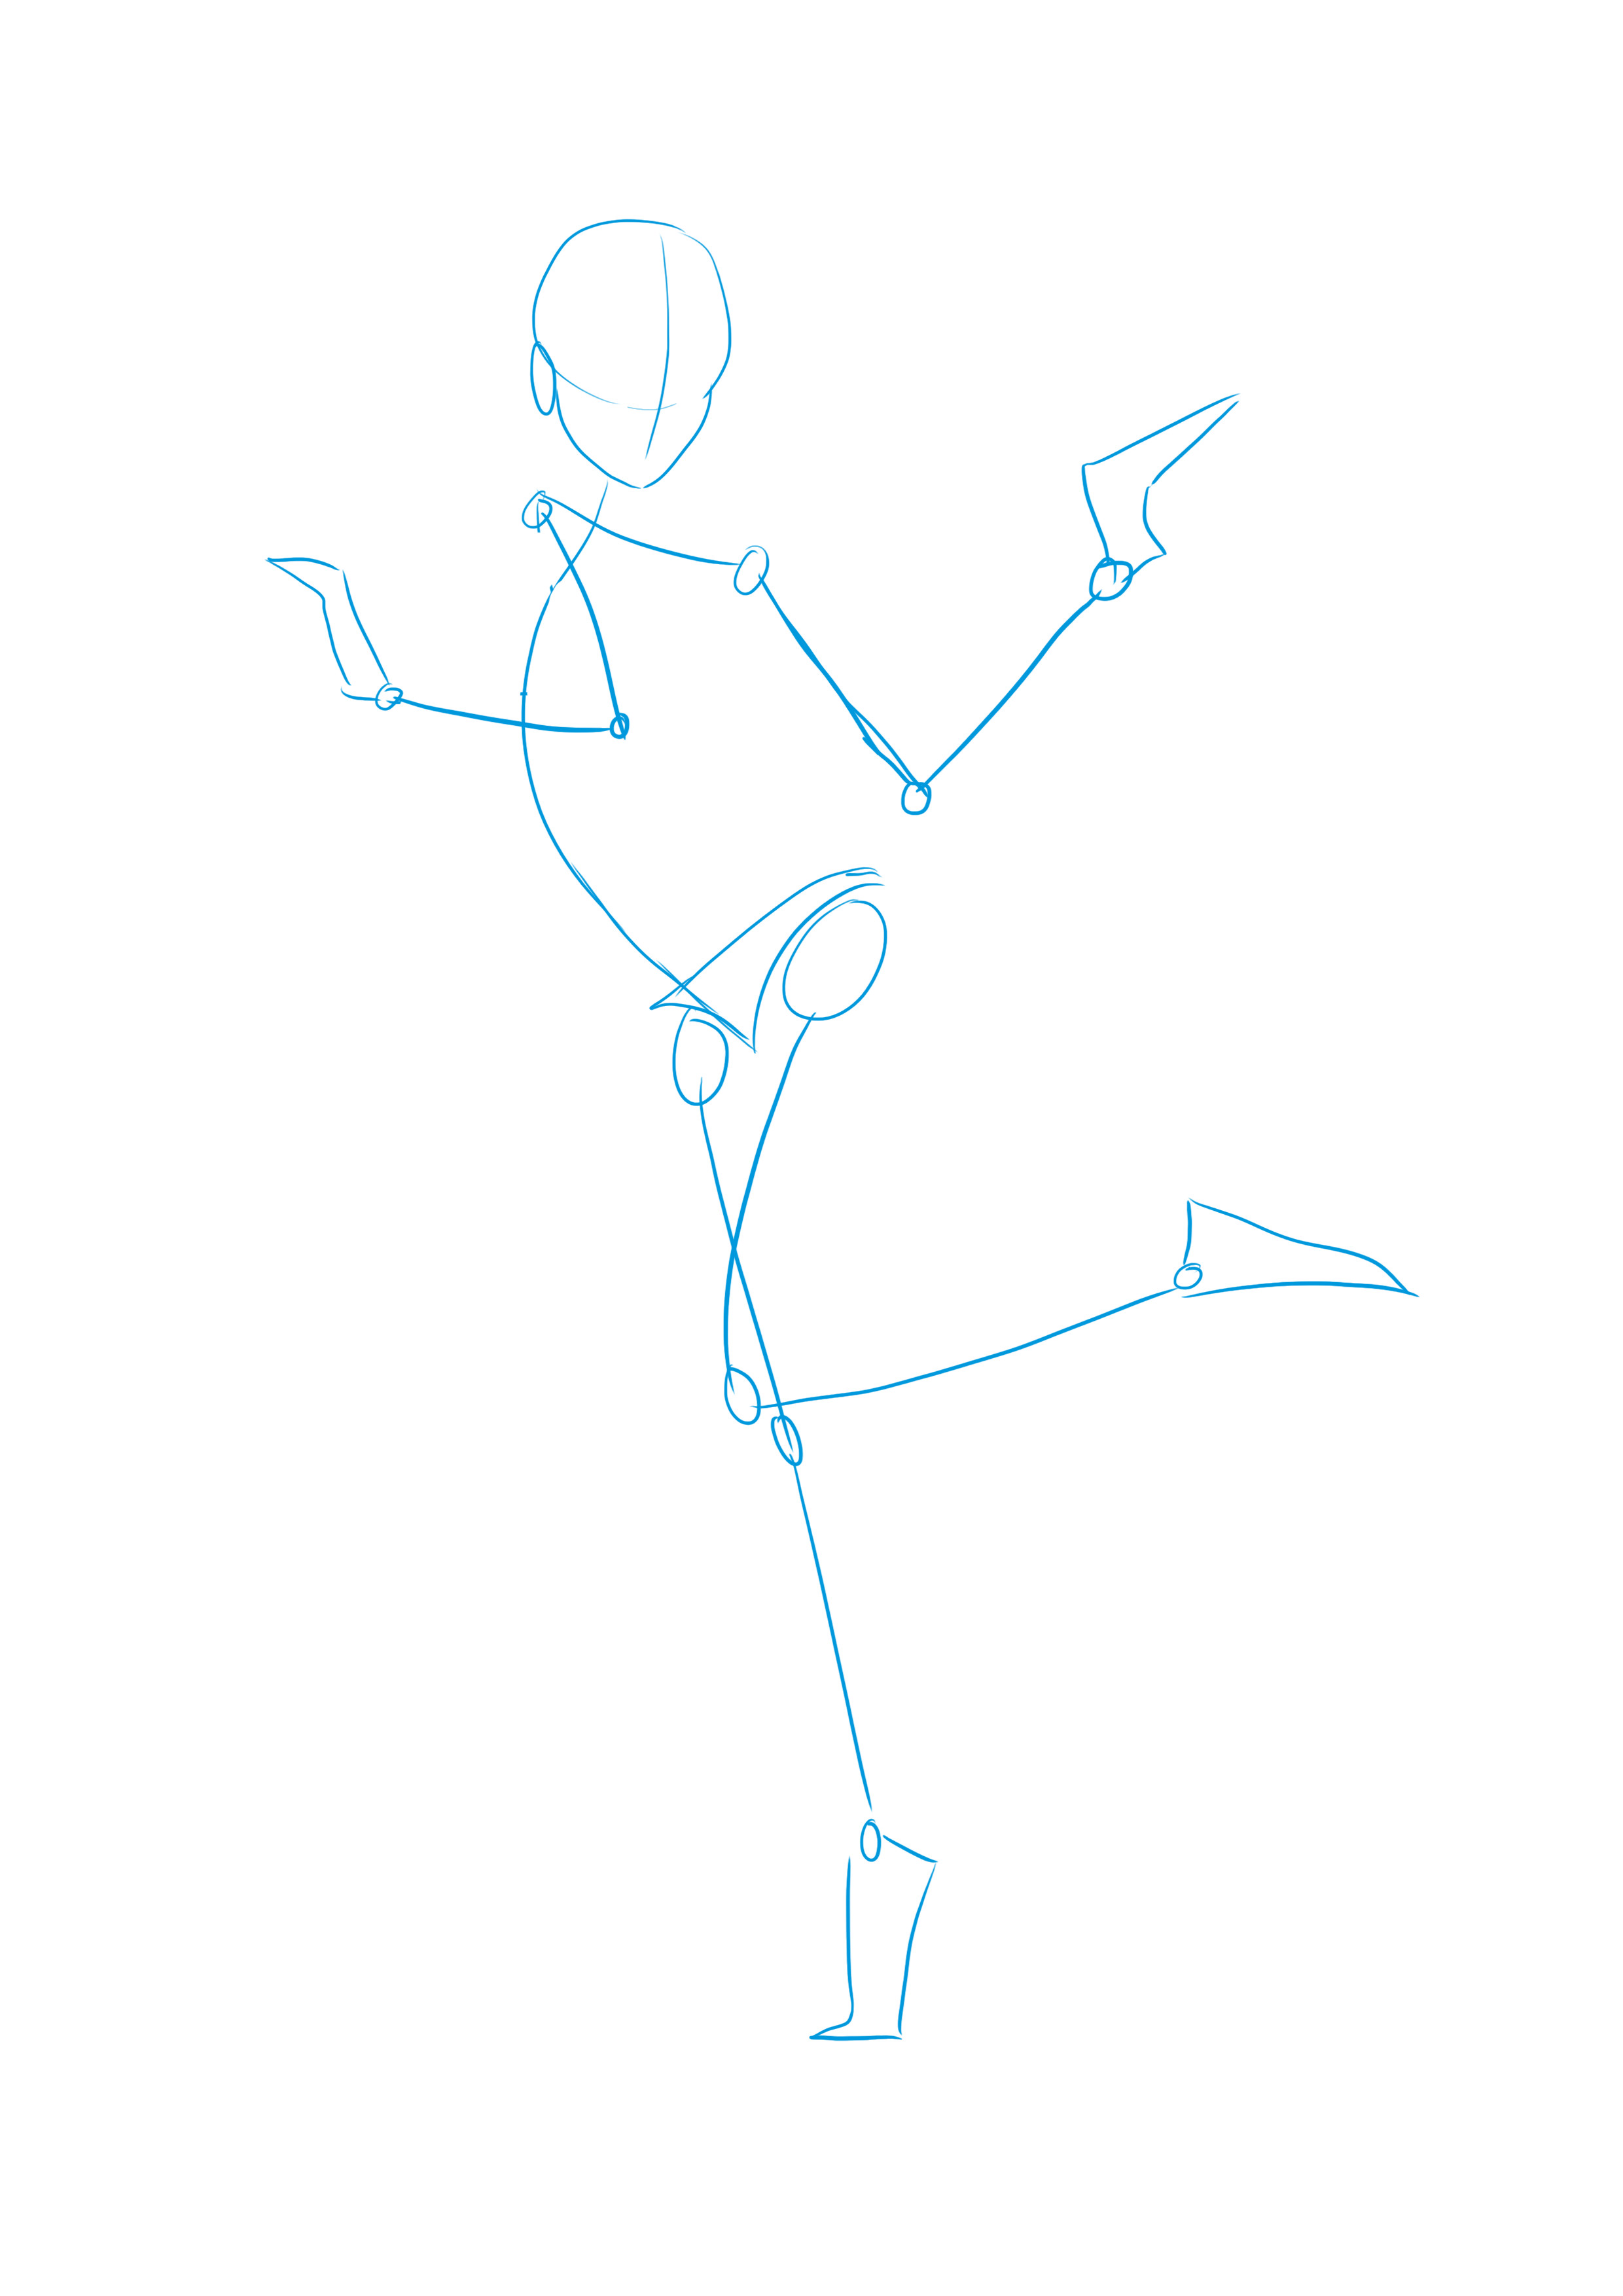
To start, draw the head and then the skeleton of your body in your chosen position.
DRAWING THE DETAILS OF THE HUMANOID ROBOT
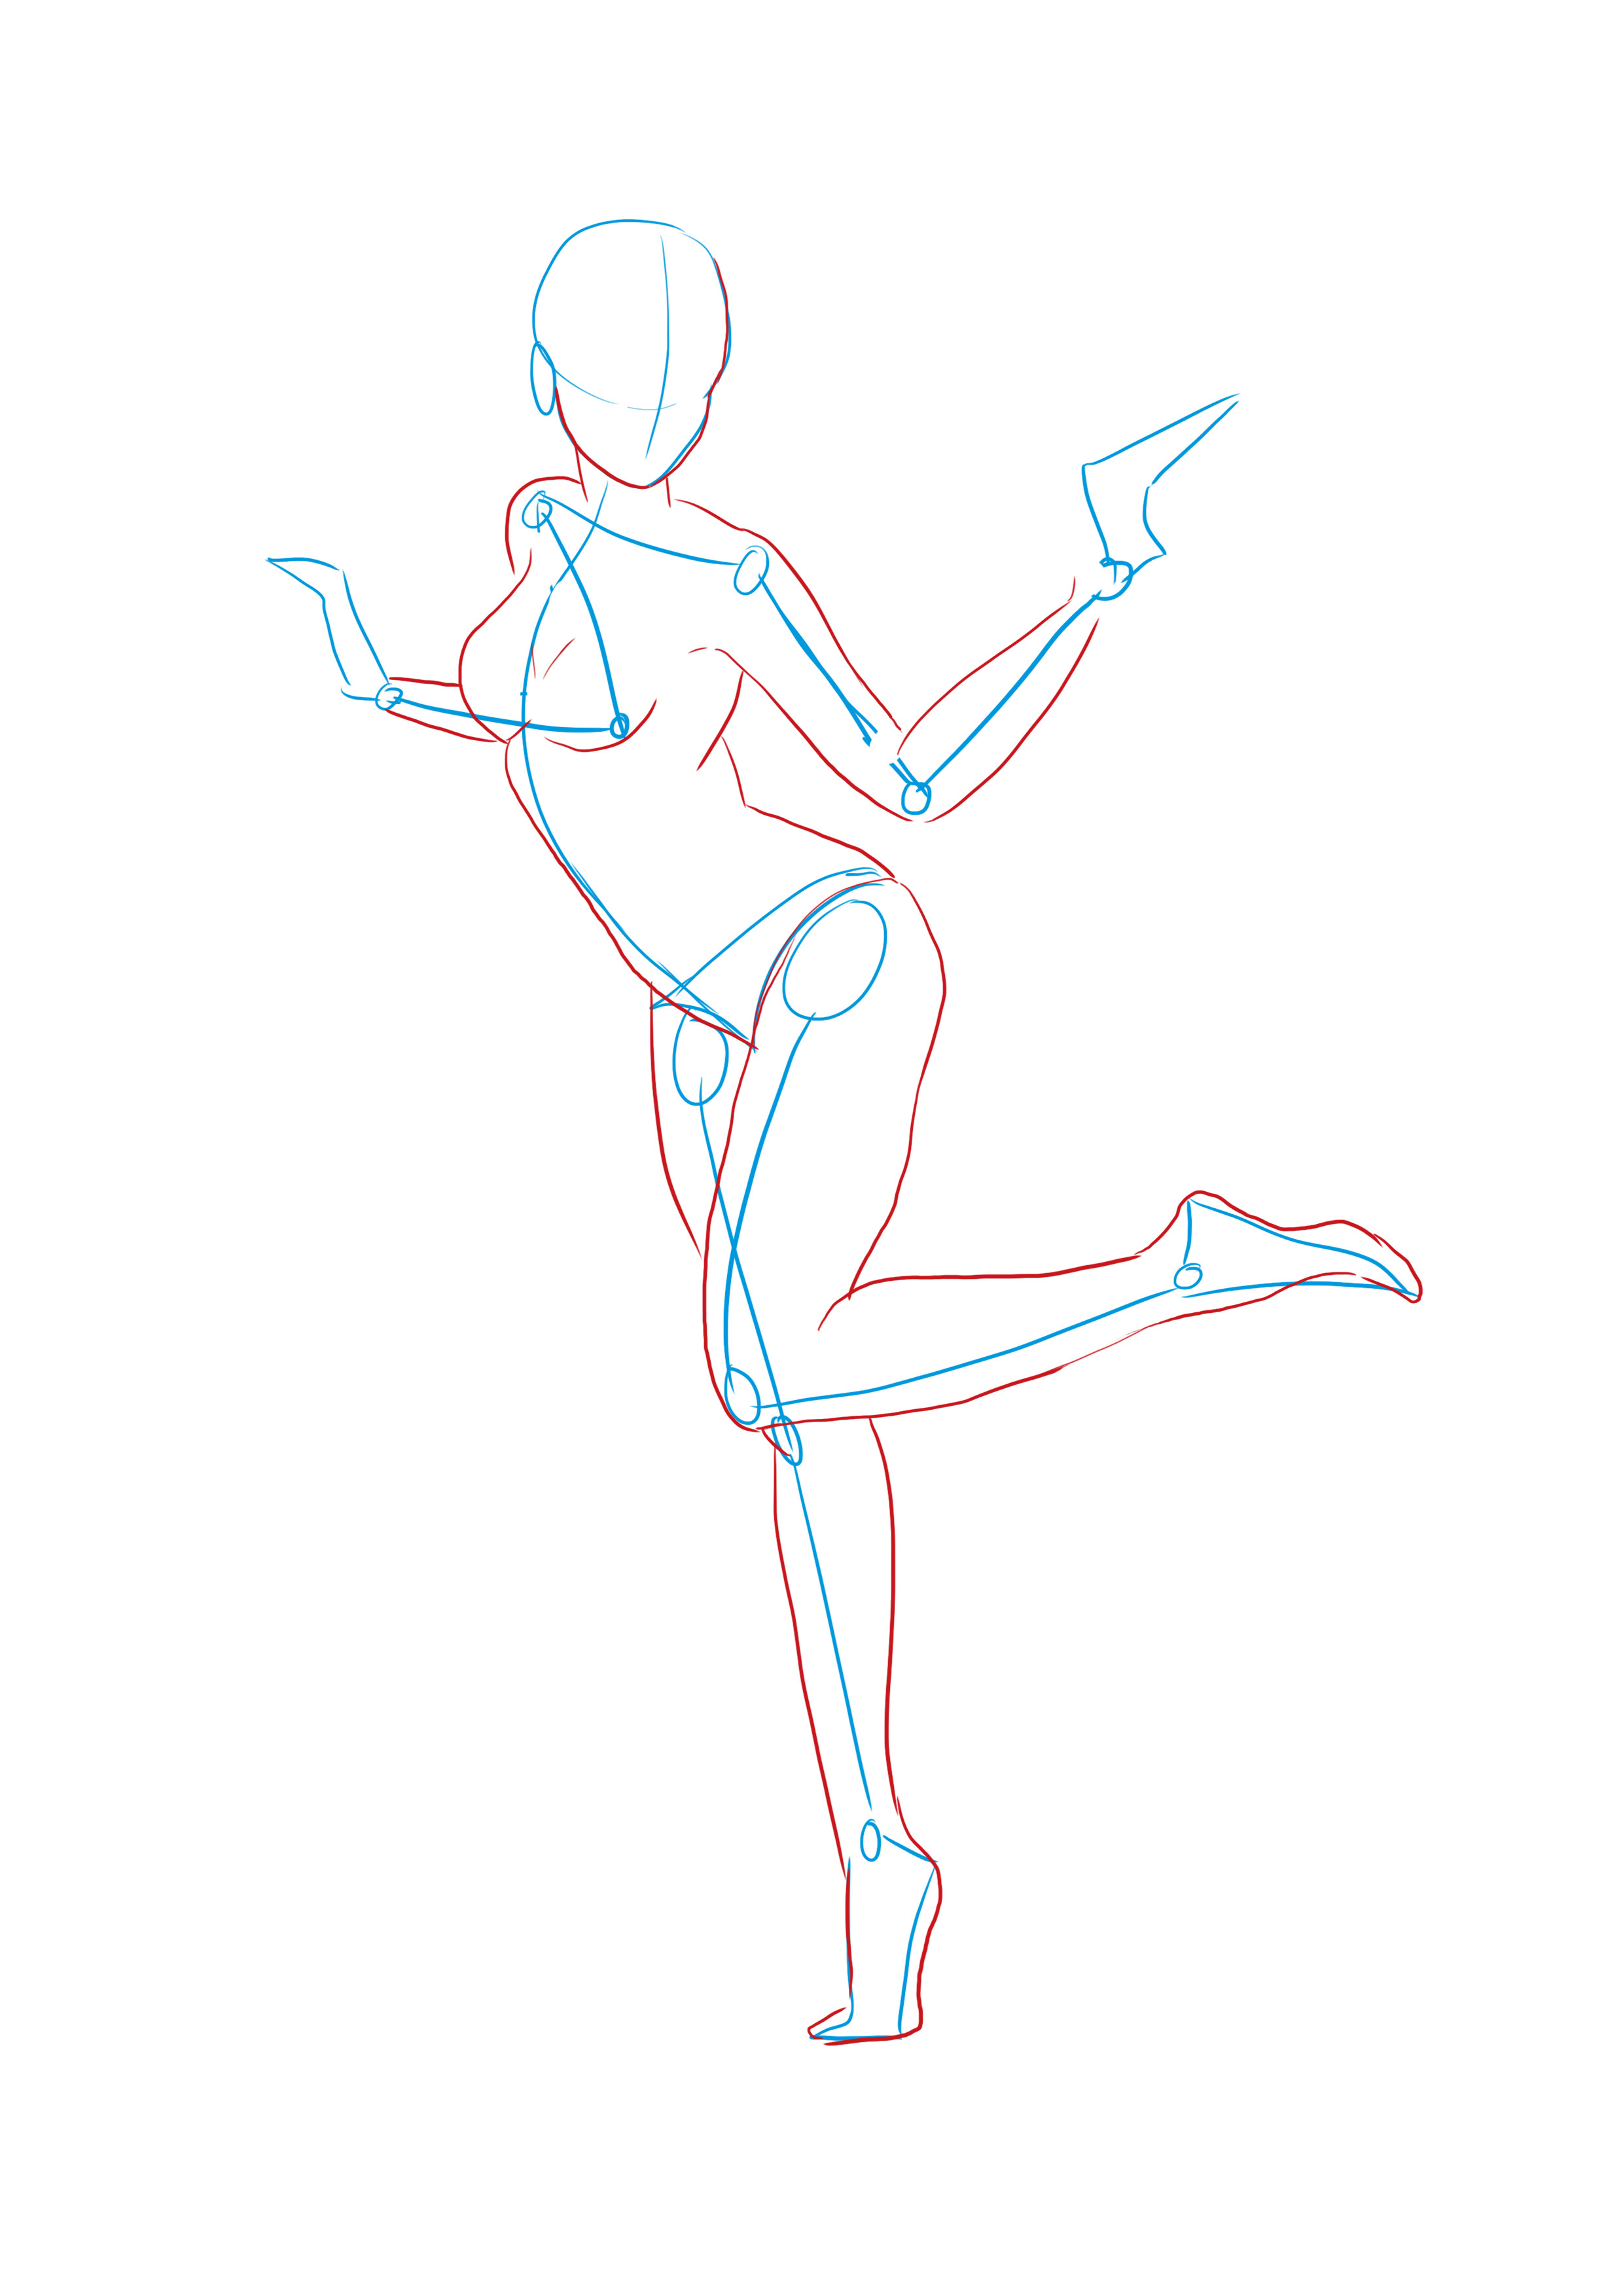
Once you're sure of your pose, draw your body following your skeleton.

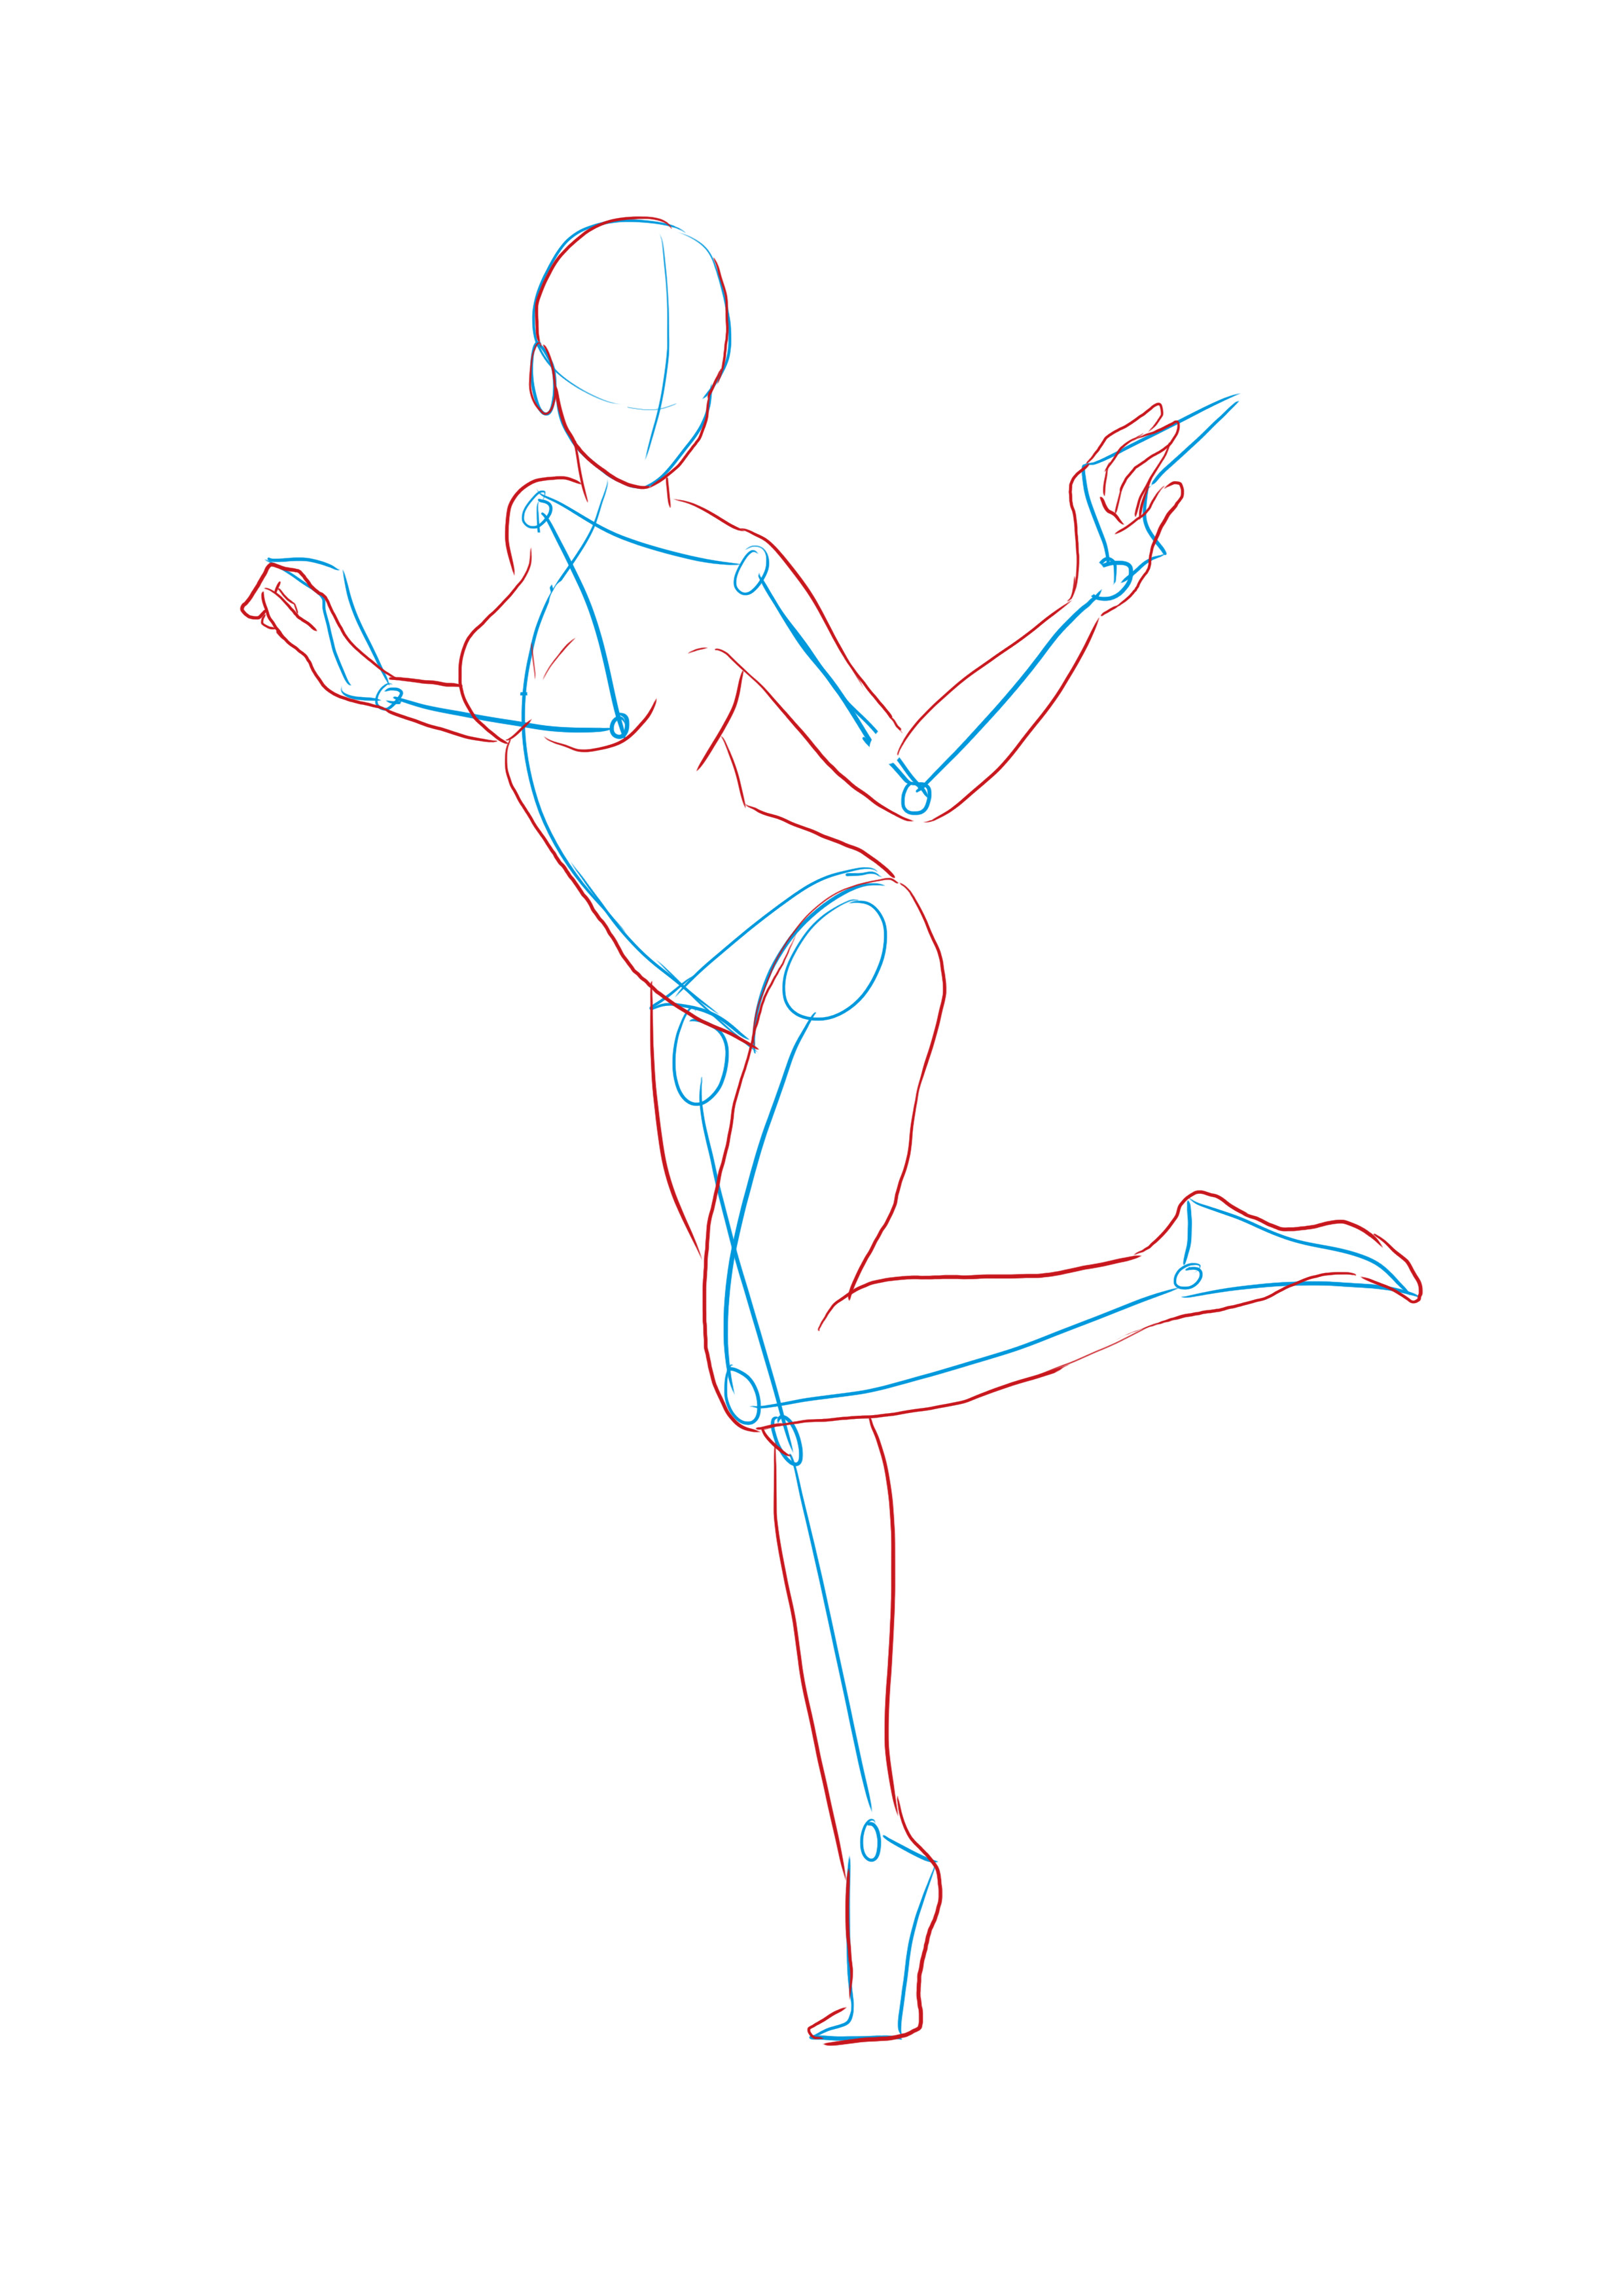
Erase the construction lines, and start thinking about your humanoid's appearance.
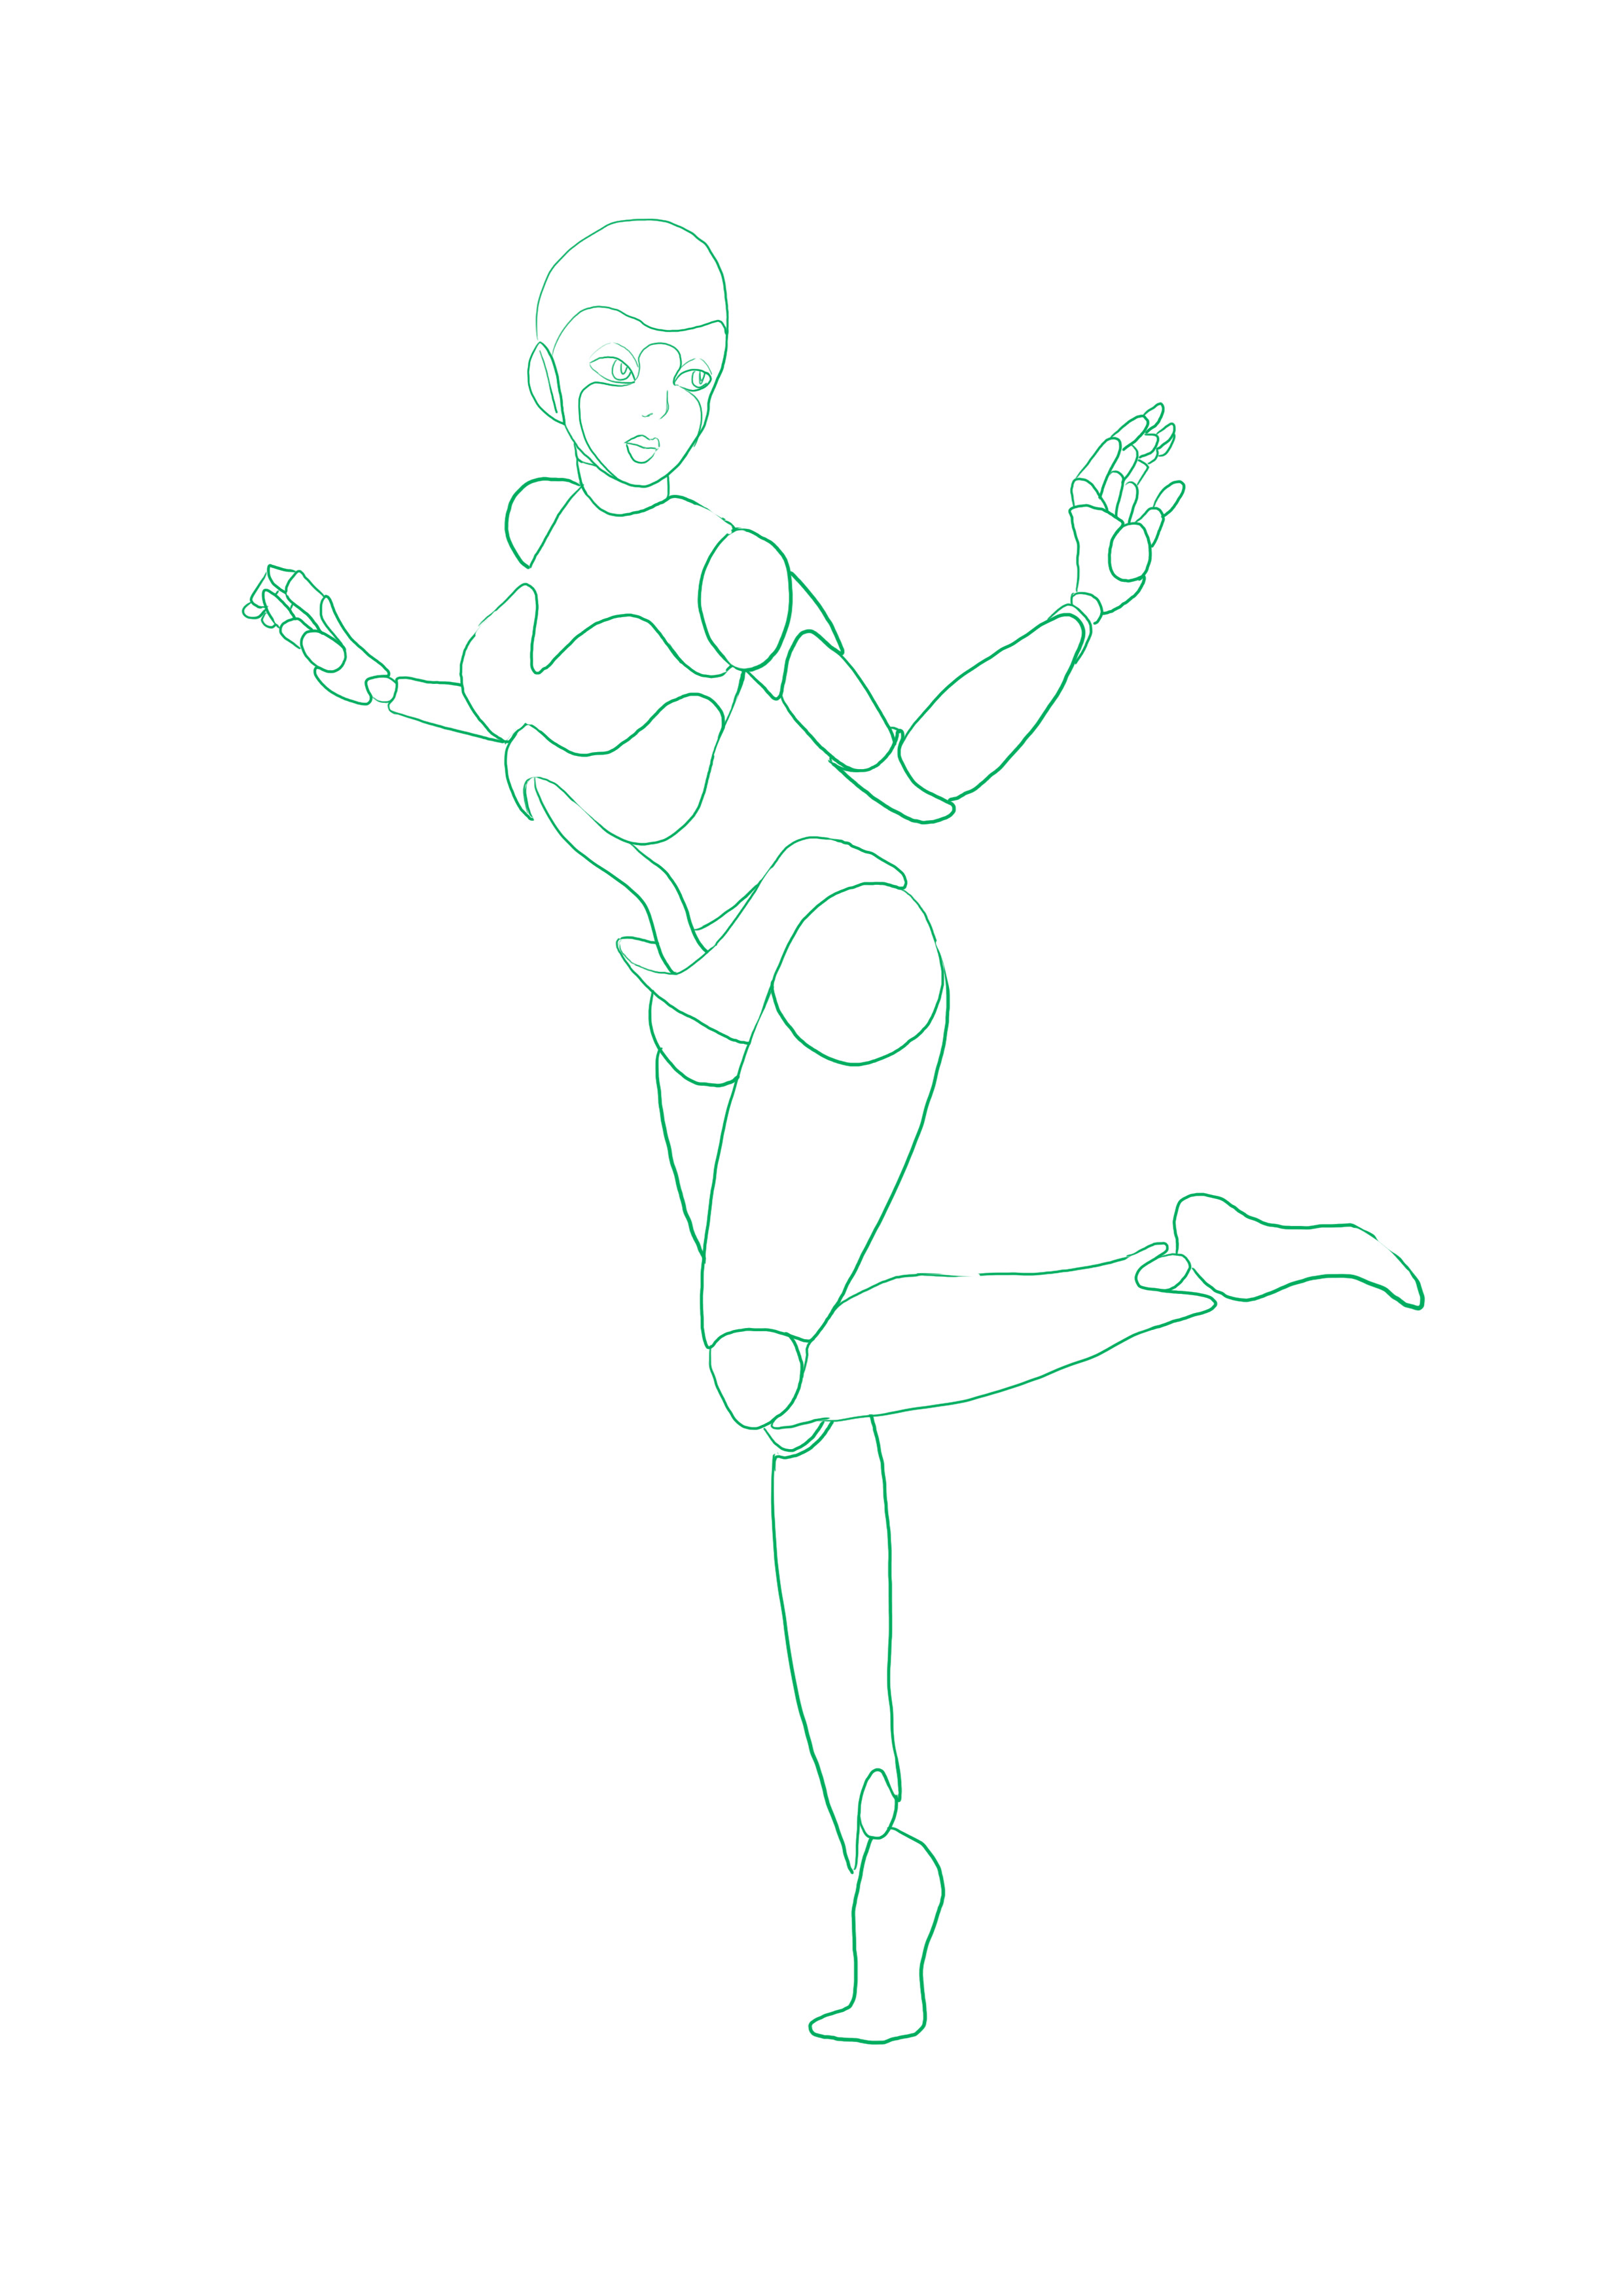
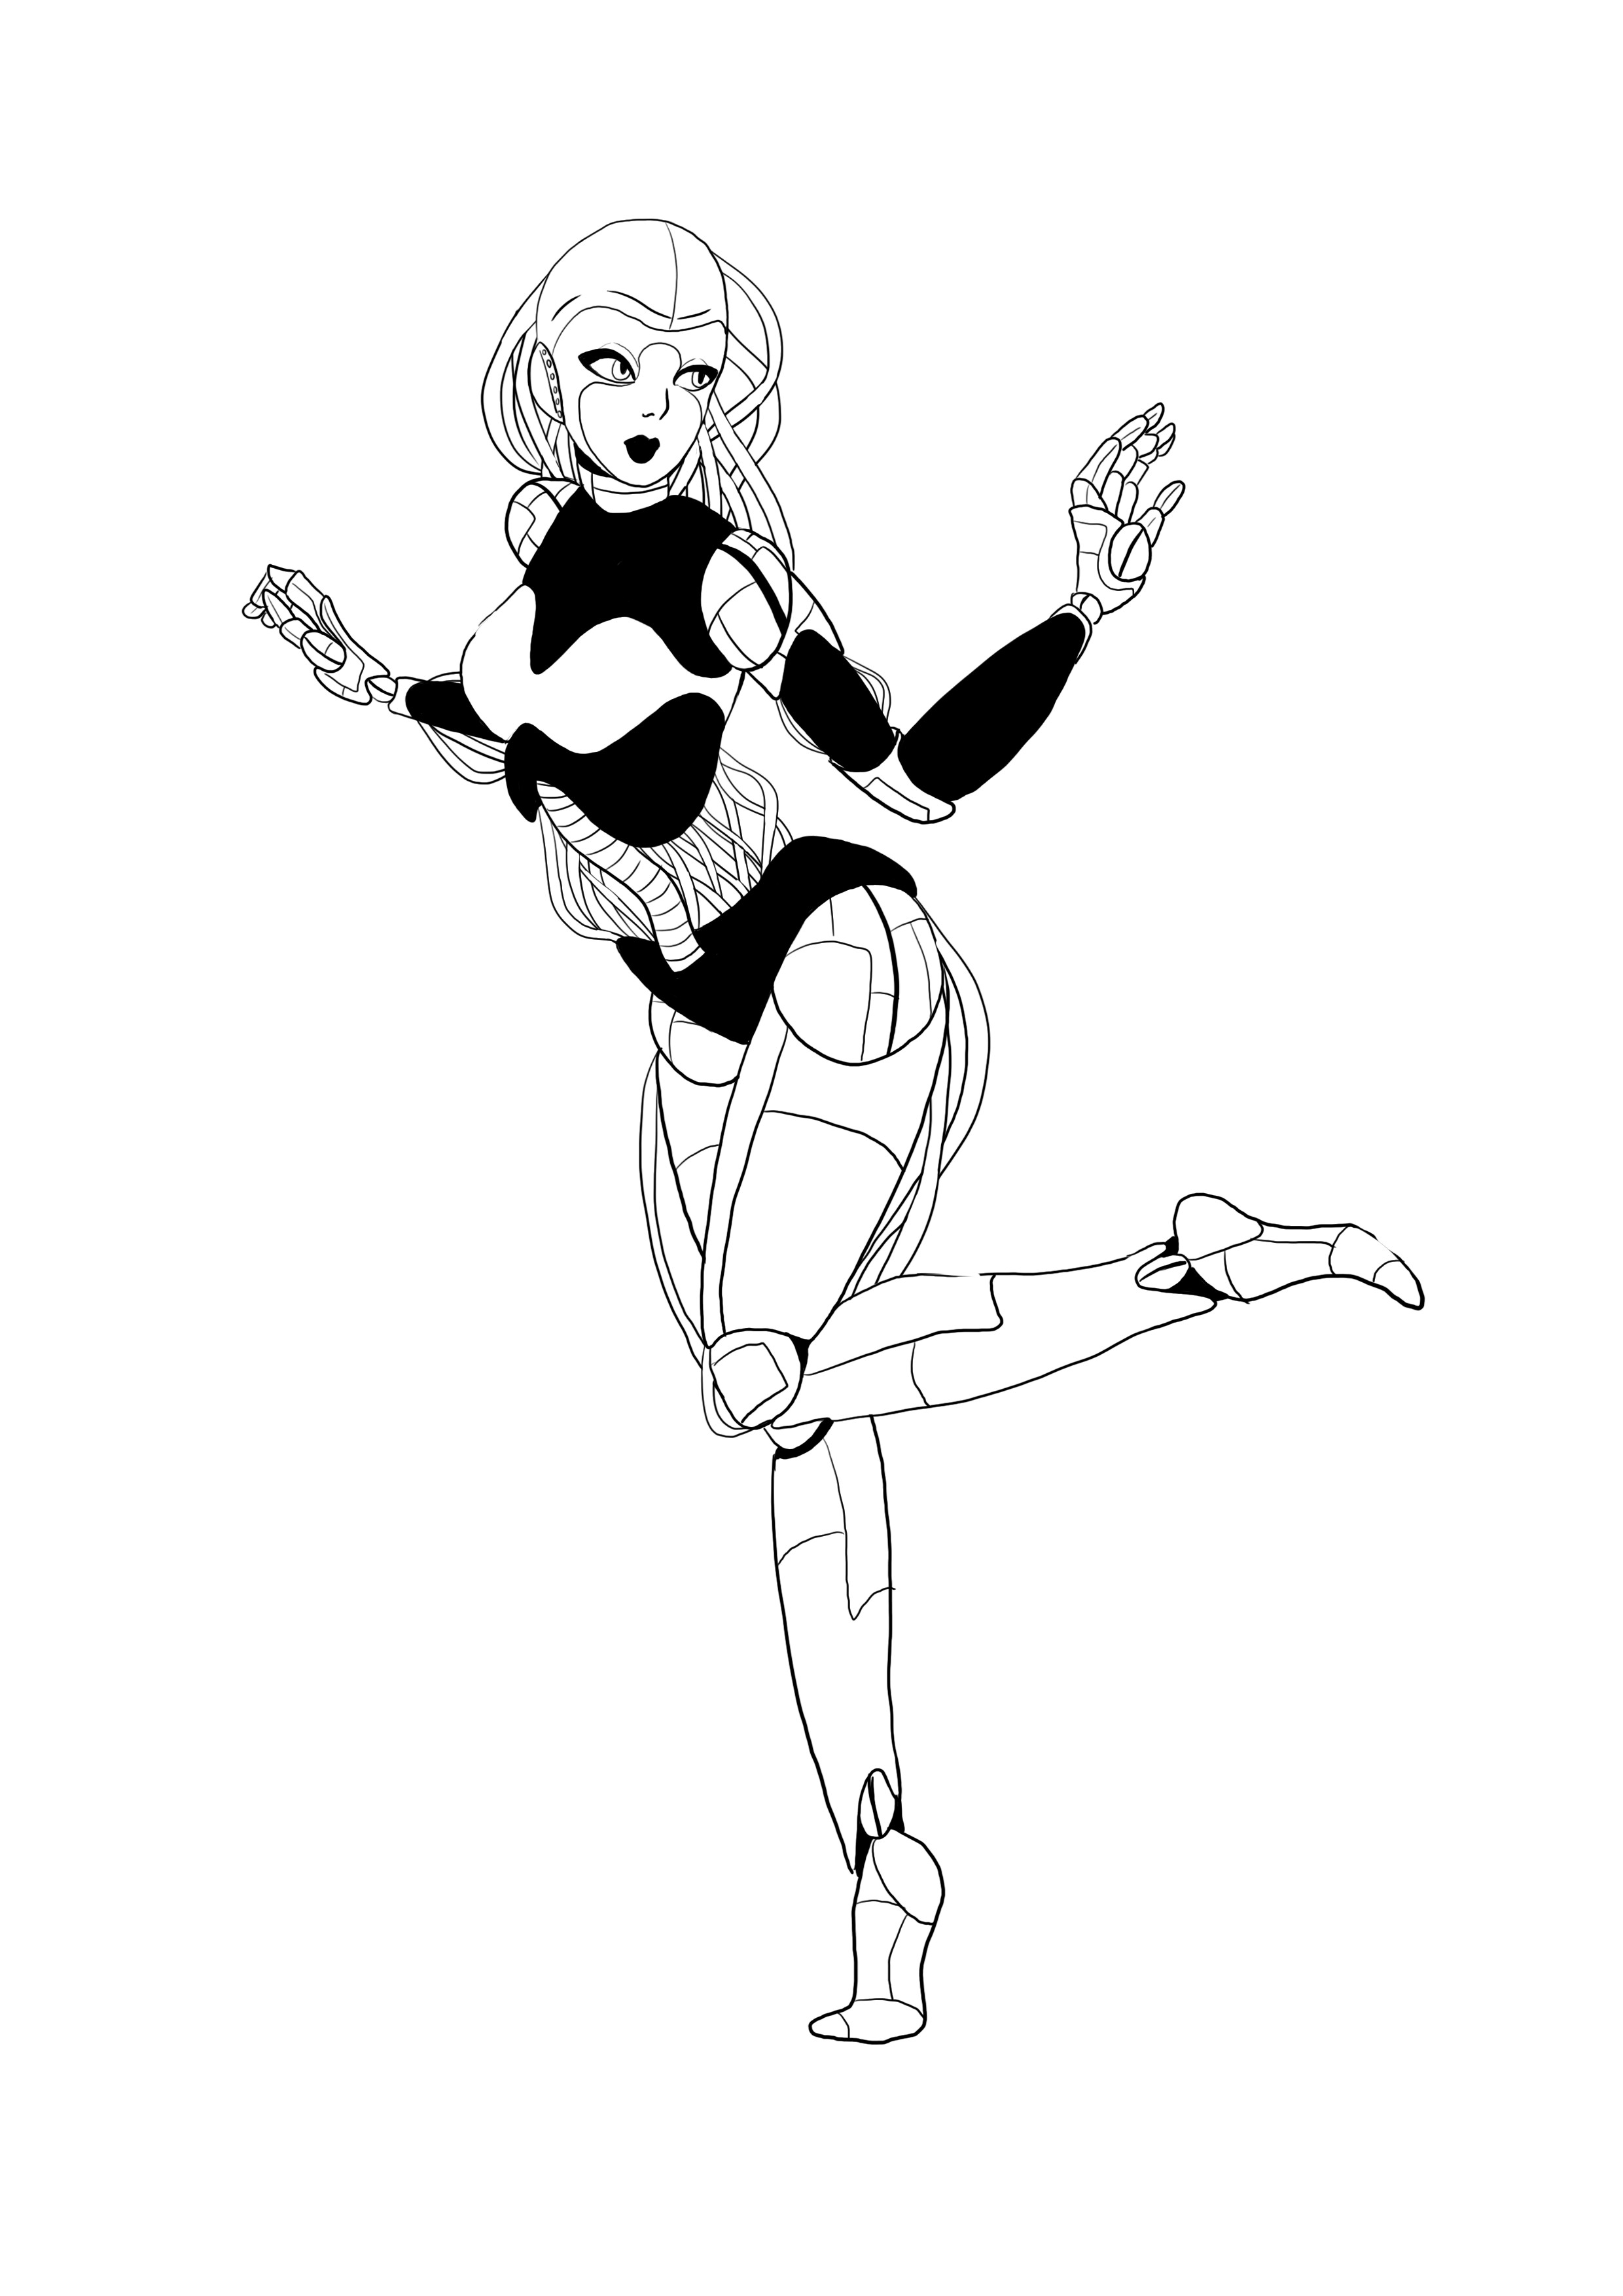
Following the lines of the body, draw your robot and add technological details.
I decided to mark each joint and draw the muscles as if they were prosthetics. I also removed part of their abs to show their spine.
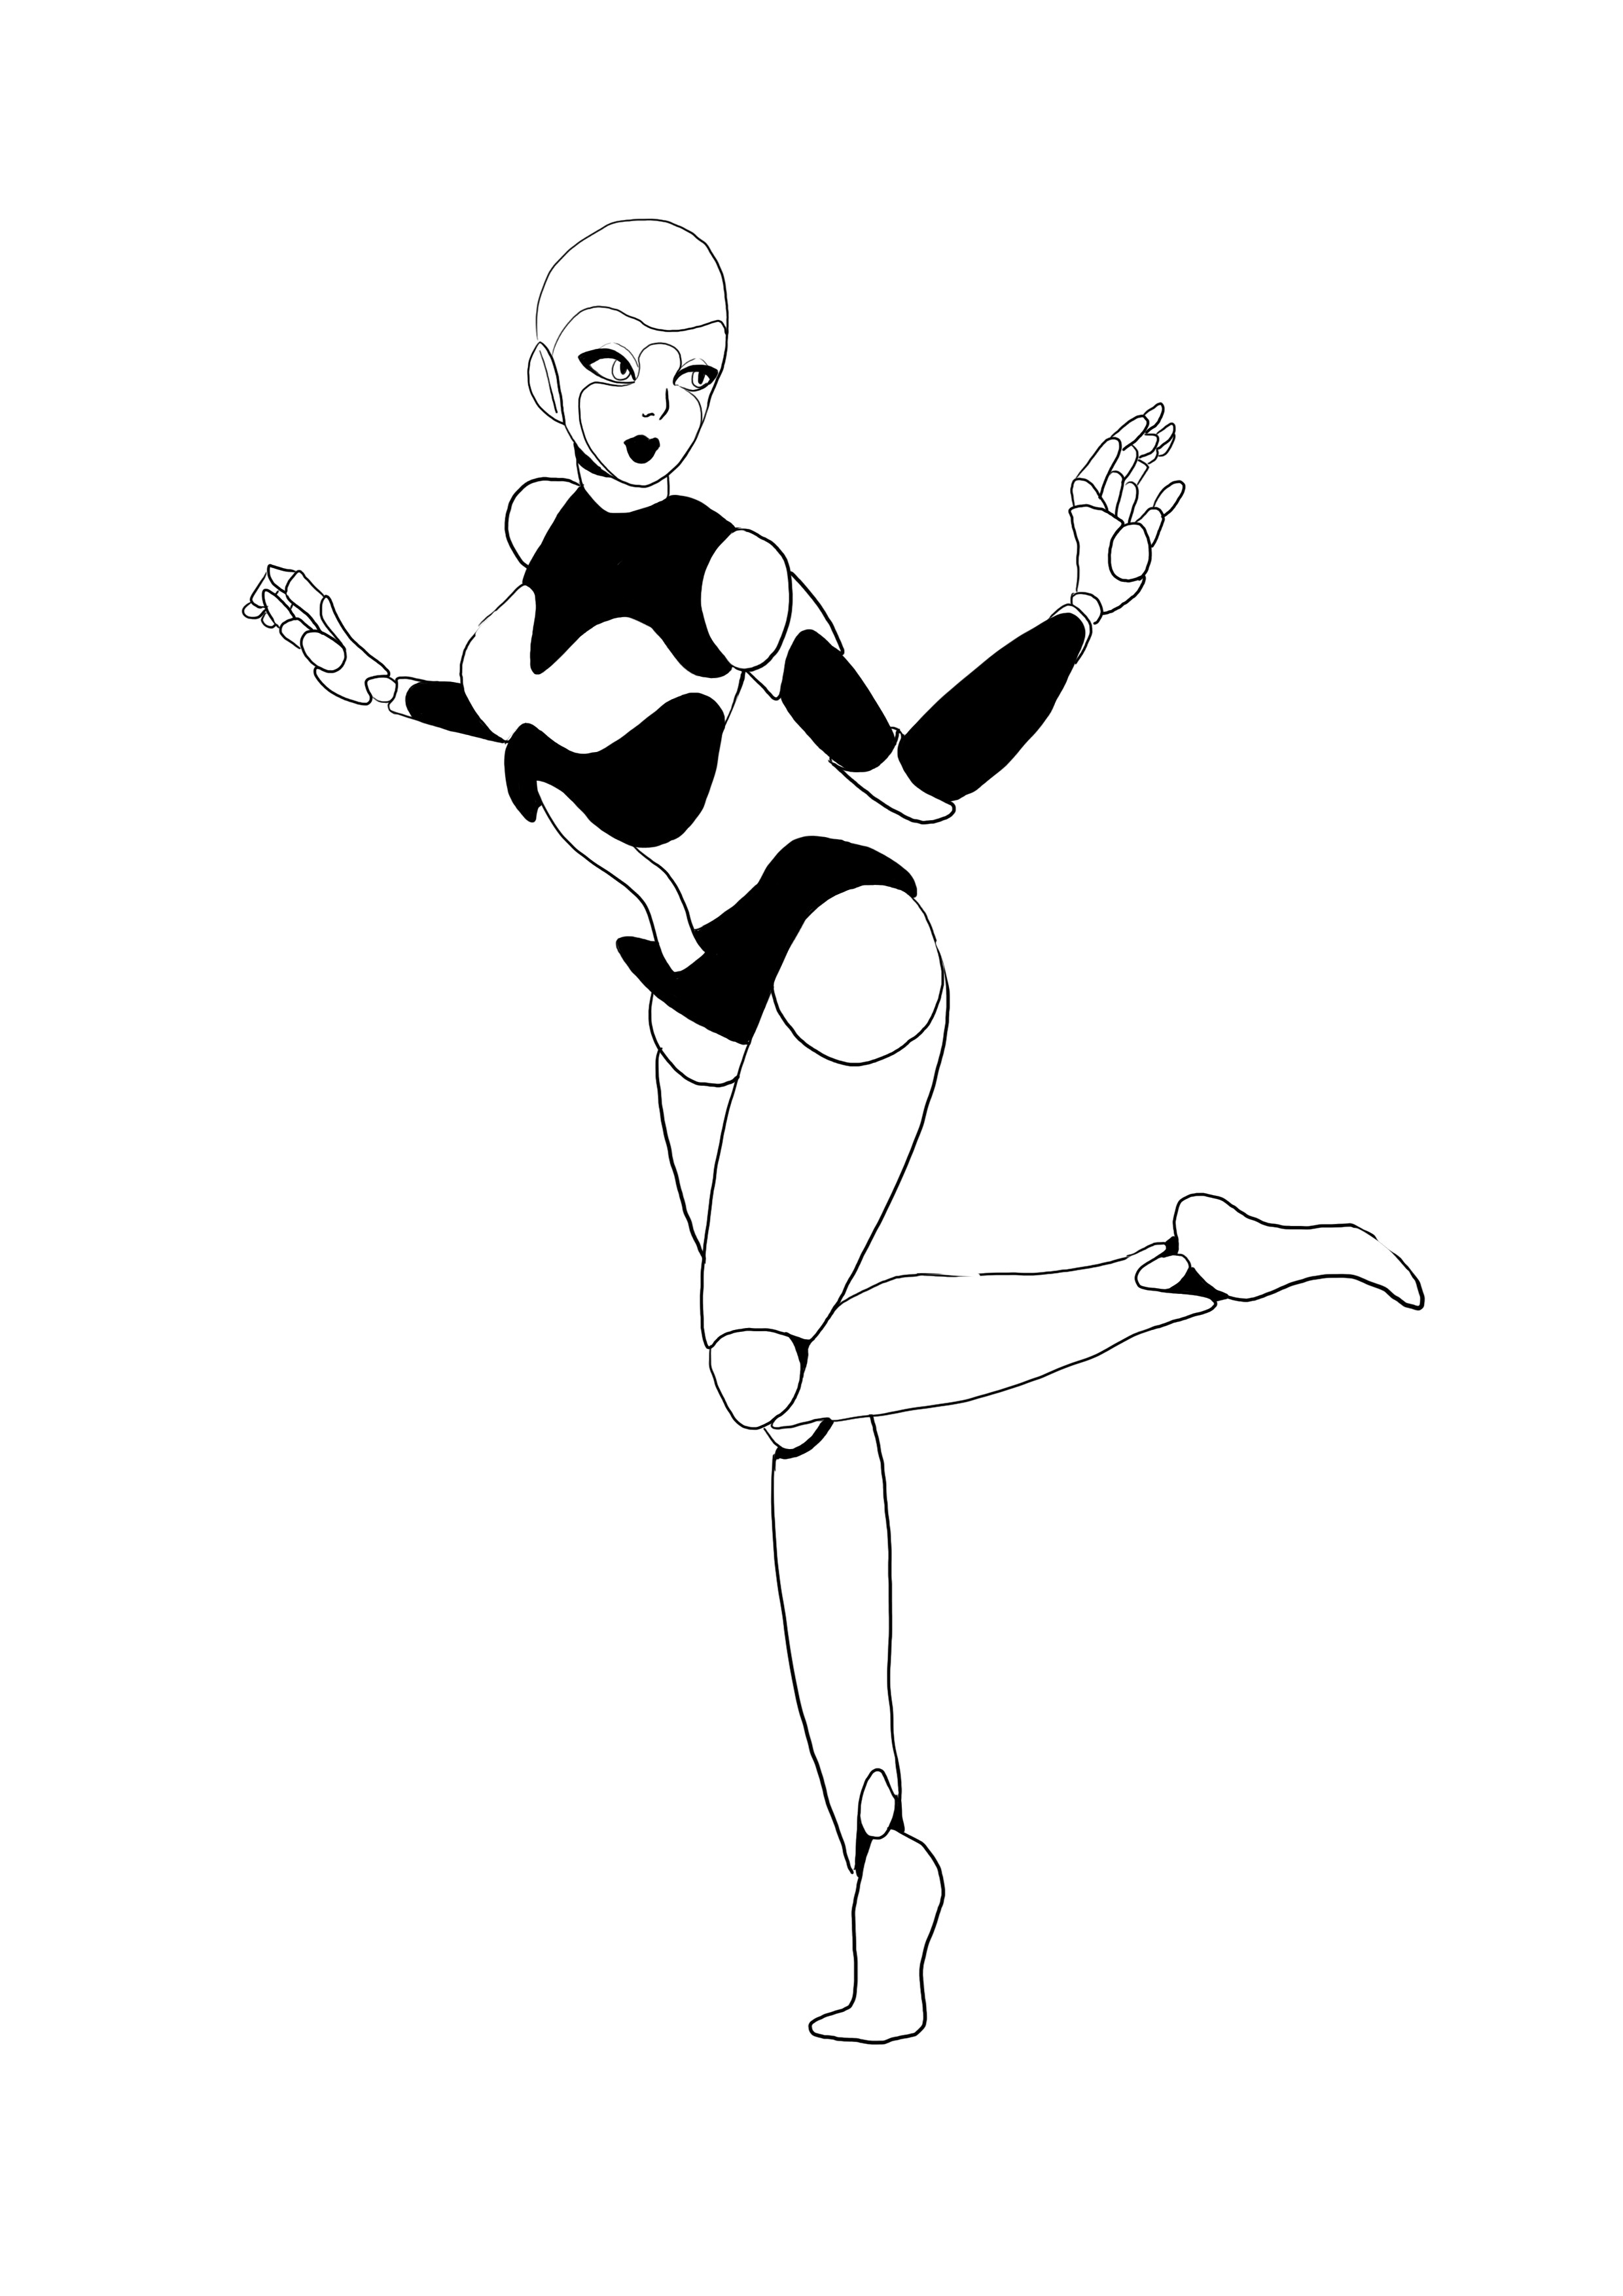
I will clean up my robot and add some black areas to decorate it.

I will move on to the details by adding small bolts and drawing grooves on certain parts of the body to simulate metal plates.

I will add cables all over, but particularly in the empty part of the body (the belly) to show the inside of the robot.
My humanoid robot is finished :)
Generally, a robot is similar to a human. So you can draw it as if you were drawing a character. Start by sketching a skeleton in a pose, then draw the body and gradually add the details.
Don't forget to properly work the material and add elements to show that it's a cluster of metal and screws, whether you do it in a cartoon style or more realistically. There will always be screws and metal plates, as well as cables, whether they are visible or not.


Discussion
1 comment