Draw a Turtle
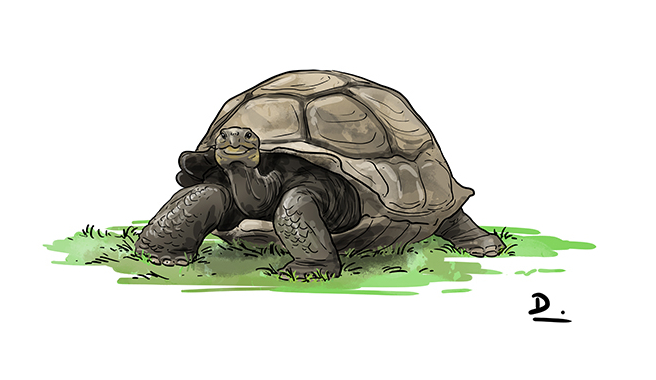
Hello, in today's article we are going to study a very friendly reptile, the turtle! The different species present quite varied shapes, so it is not going to be easy to deal with all of them...
ABOUT THE TURTLE
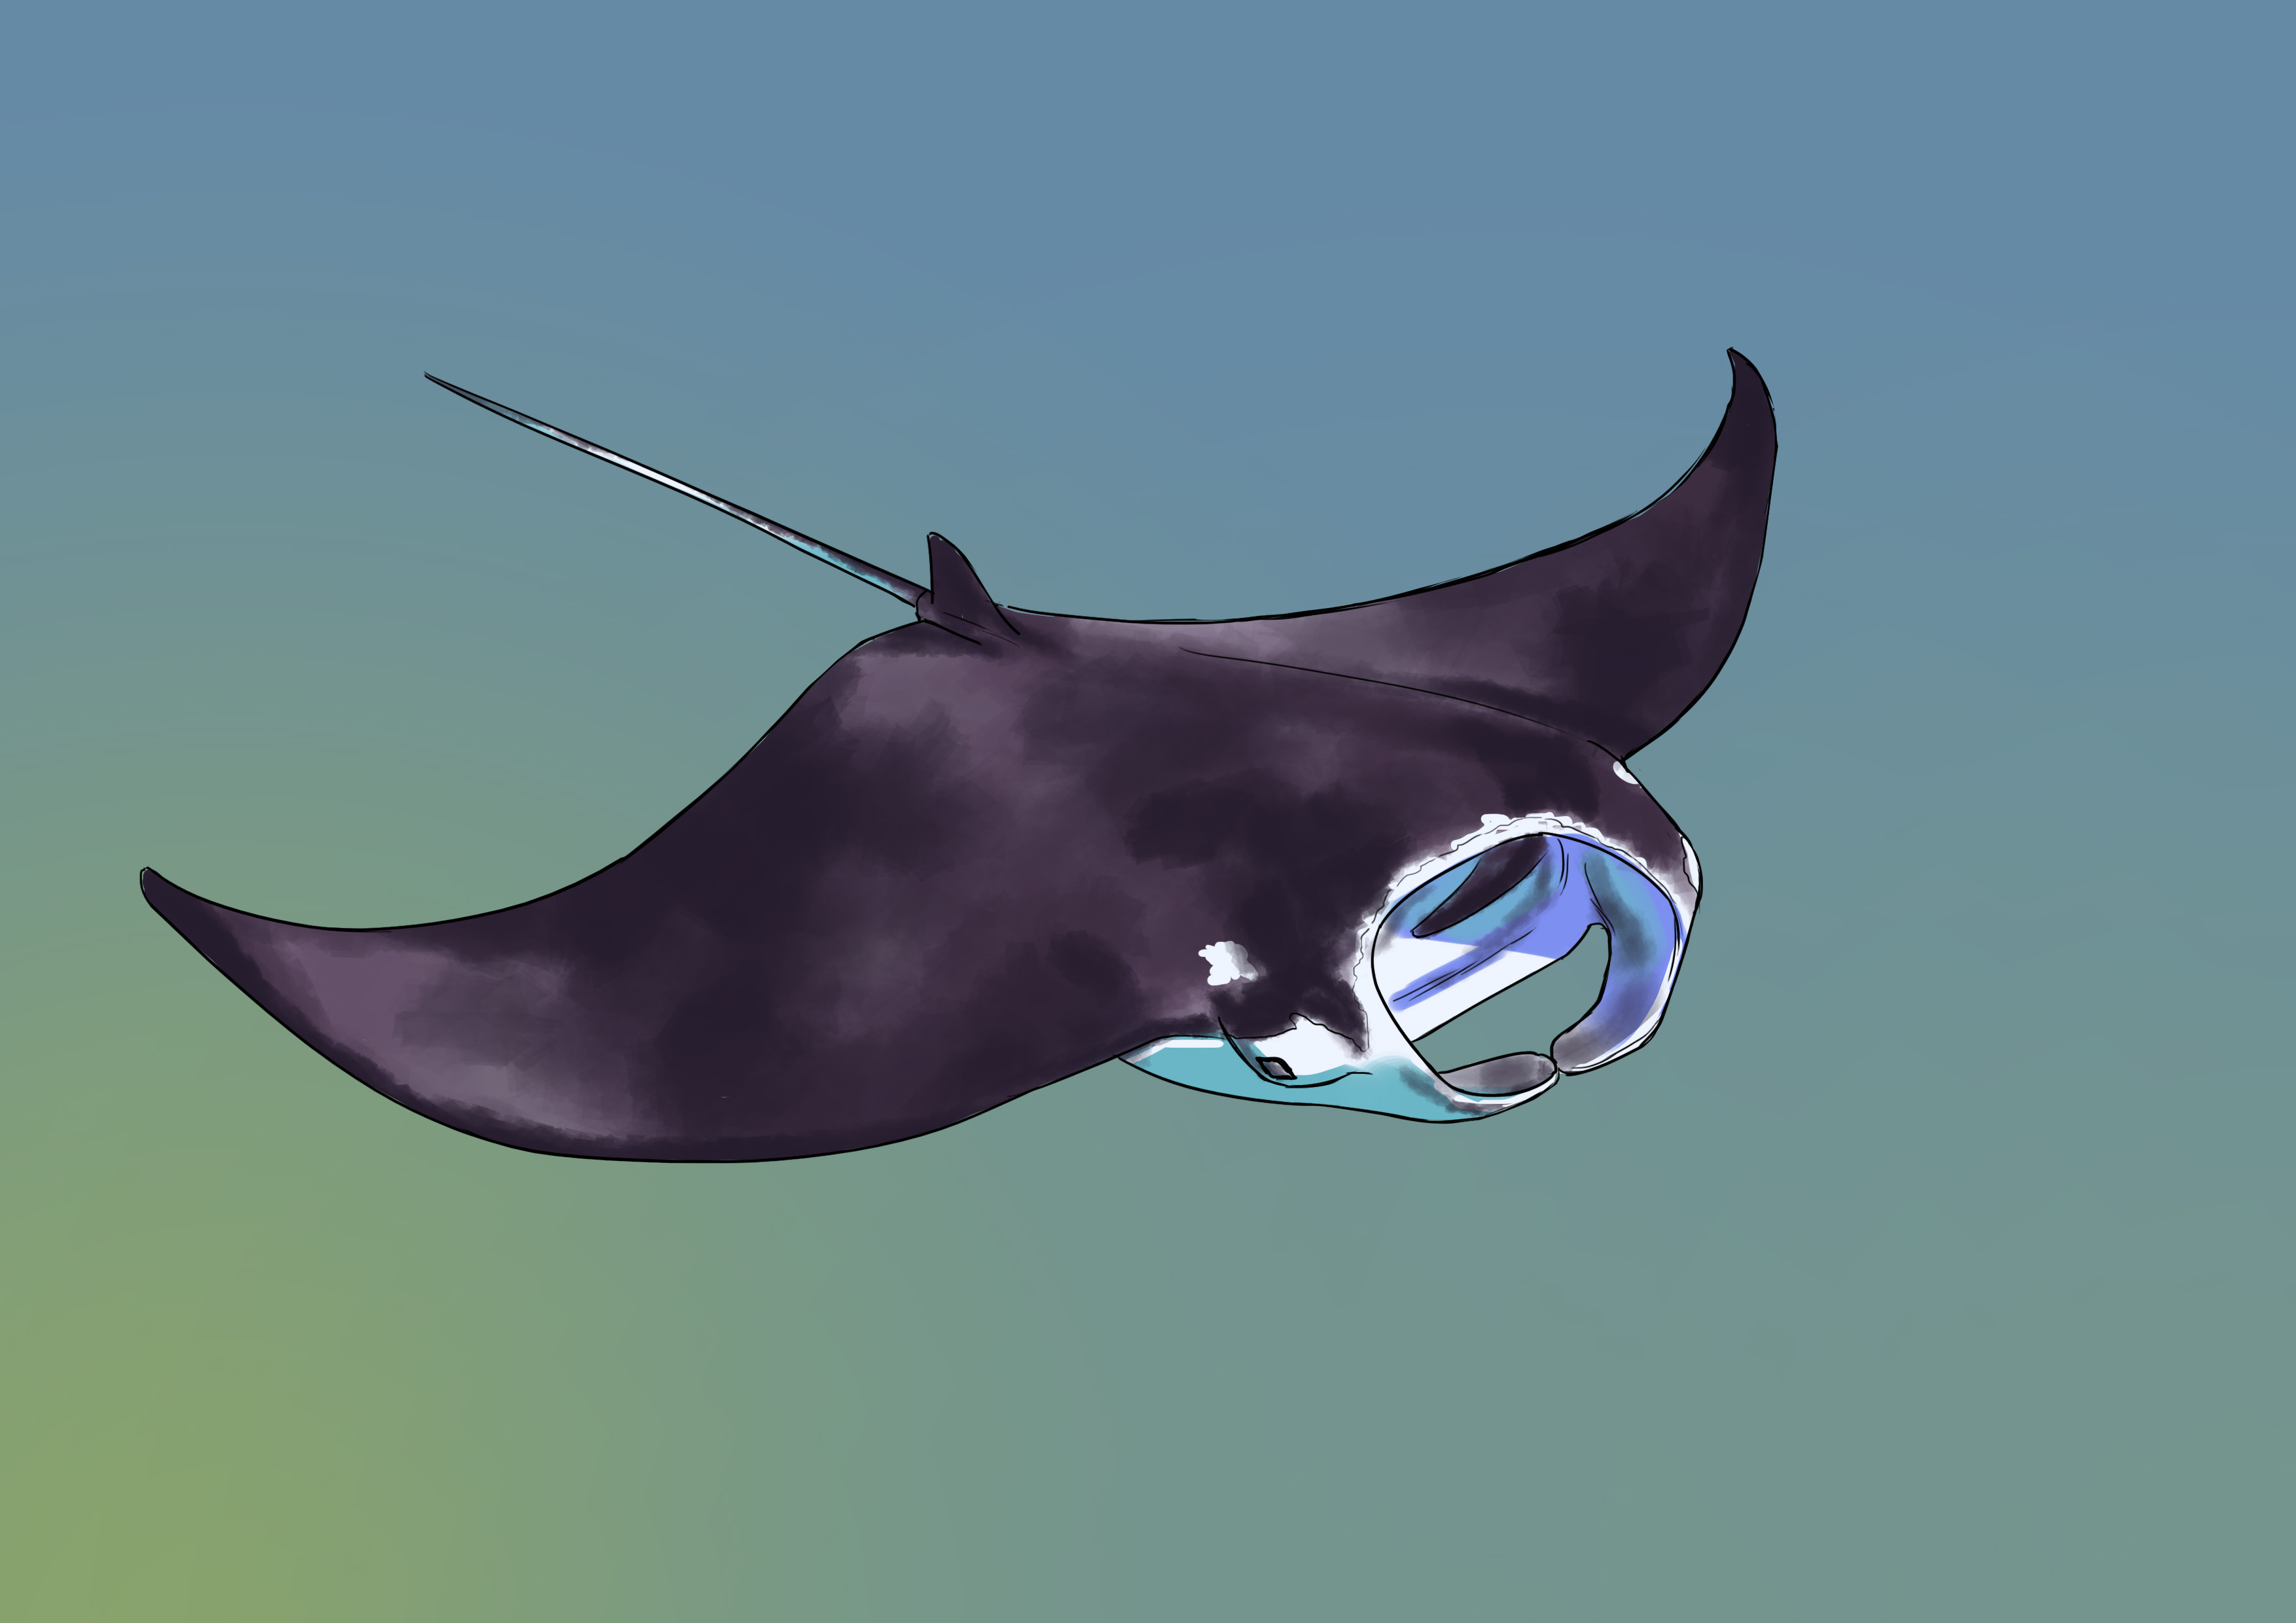
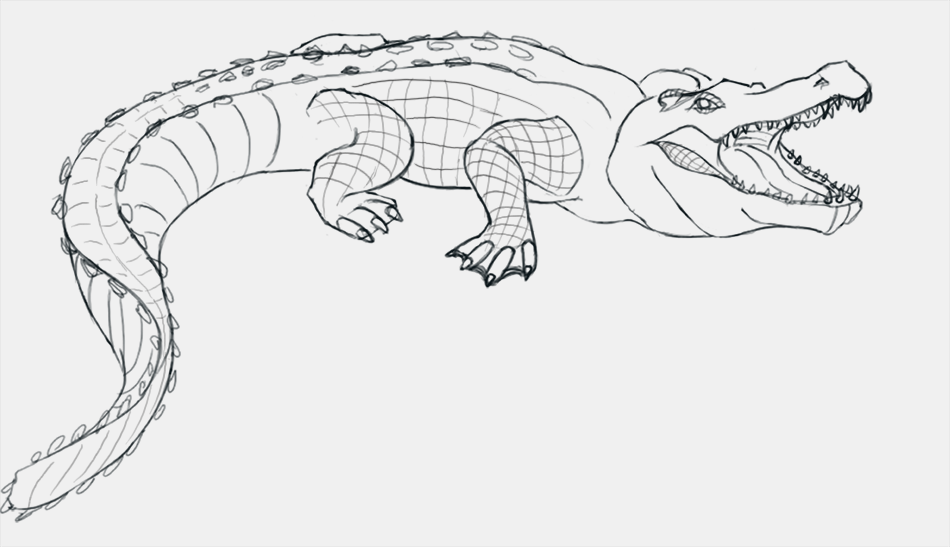
The turtle is indeed a reptile, like the lizard or the crocodile, but it is the only one to have a very solid feature: the shell! To learn how to draw a lizard or a crocodile, you can find the relevant articles on our blog if you are interested ;) There are many species, some are carnivorous and some are omnivorous, but they all lay eggs and have the typical style of shell. Traditionally, without taking into account the 334 species that are spread across 14 families (source Wikipedia), turtles are divided into 3 groups: terrestrial, freshwater (aquatic), and marine (saltwater).
Traditionally, studying an animal's skeleton is very useful to fully understand its shape. In the case of a turtle, this will not be as relevant... The reason for this is that the animal's shape is essentially structured by its shell... and shells come in various shapes and sizes.
Nevertheless, it should be noted that shells are always structured in the same way: a flat bottom (the plastron) and a convex back (the shell), with the two parts being connected on the sides by two bony bridges.
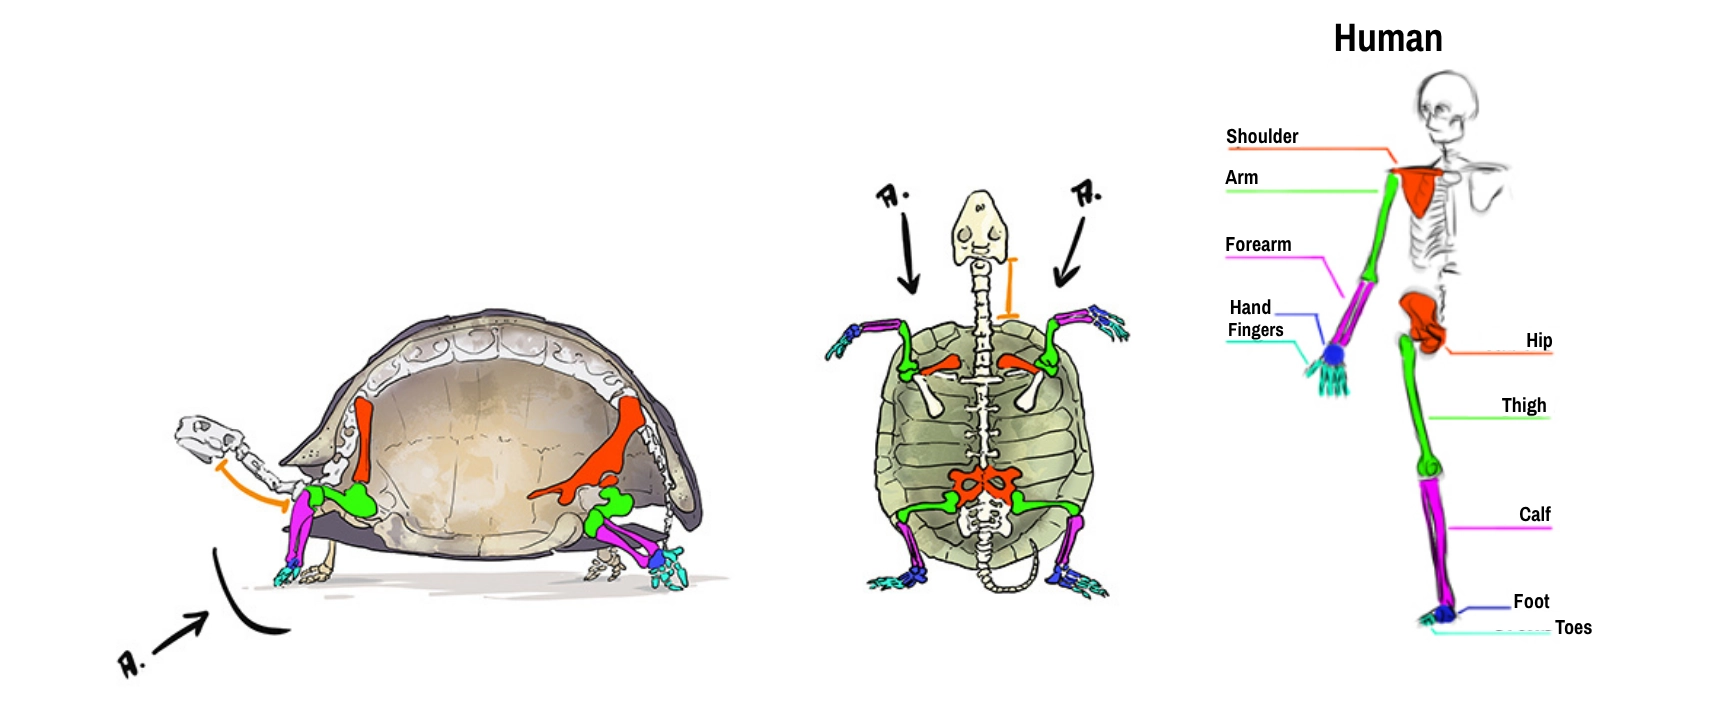
There is one opening at the front of the shell and one at the back. Note that the space at the front reveals the head and the front legs. The front legs do not "stick out" through a hole on the sides of the animal, but rather through the opening at the front, which allows the neck to pass through (arrows A).
The neck is also very mobile and rather long (orange segment). Note also that the turtle's limbs have the same bone structure as our limbs. Additionally, the tail is quite short.
In terrestrial turtles, the shells are quite imposing and domed (as is the case in our example).
You may also observe that the neck attaches to the back of the skull, so avoid bending the animal's head too much or you will risk breaking its cervical vertebrae.
THE TURTLE'S SKULL
Again, remember that studying the skull will not allow us to generalize a structure for all turtles. Here, on the left, we can see the skull of a sea turtle, and on the right, another river species; the two skulls show a clear difference in shape.

Nevertheless, we can observe some common features:
The nostrils, in red, are indeed at the tip of the front of the skull. No turtle has teeth; they all have a beak (with sharp edges). The eyes (eye sockets in blue) are generally quite large and at the front of the head. The axis of rotation of the lower jaw is located towards the back of the skull (green circle).
For the turtle on the left, we have a rather rounded rectangle, and for the animal on the right, the rectangle is more elongated with harsher angles.
In both cases, no elevation was observed that could form a "front." The top line of the head is quite straight.
So you will need to carefully look at your chosen species in order to properly define the shape of the animal, whether it be the shell or the head.
THE STRUCTURE OF THE SHELL
We've already said it: shells come in a variety of shapes. Some are taller, some are shorter, some have scales that are more or less marked and/or pointed... Despite all this, they are actually built on the same base.

Here, [A] is a small land turtle, Hermann type, [B] is an aquatic turtle (known as "from Florida"), and [C] is a sea turtle (green turtle).
So, at first glance, it is clear that the shell of the sea turtle has a very different shape from the other two. It is more rounded and pointed at the back. The two turtles [A] and [B] have more rectangular shells (the shell of the Florida turtle tends to widen a bit at the back).
But if we look closely, the three shells have the same structure:
- A "collar" of scales that goes around the shell (in pink).
- A central line of scales (in green).
- Scales arranged symmetrically on either side of the scales along the central line (in blue).
A quick reminder: the front legs (in red) extend in front (in orange), right next to the neck, and not on the flanks. Similarly, the hind legs are indeed on the edges of the back of the animal.
DRAWING THE TURTLE'S HEAD
As we briefly saw with the skulls, it will be difficult to perfectly generalize the shapes. But that doesn’t stop us from defining a common base.
The first drawing represents a land turtle head and the second offers the observation of a sea turtle.
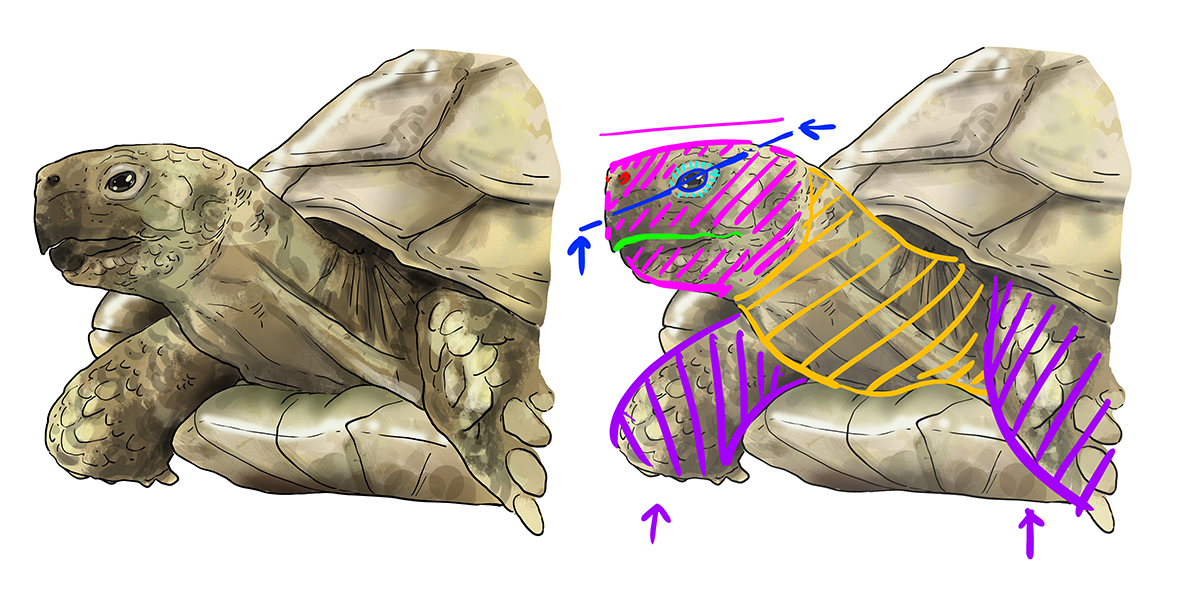
On the 2 diagrams:
- The eyes are blue. If you draw a line that passes through the two tips of the eye, you get a blue line enhanced by two blue arrows. You can see that this line is not parallel to the top line of the head.
- The eye is almond-shaped with well-defined eyelids (in light blue).
- The junction of the two jaws is elongated (green line).
- The nostrils (in red) are placed on the tip of the head.
- The neck is clearly visible.
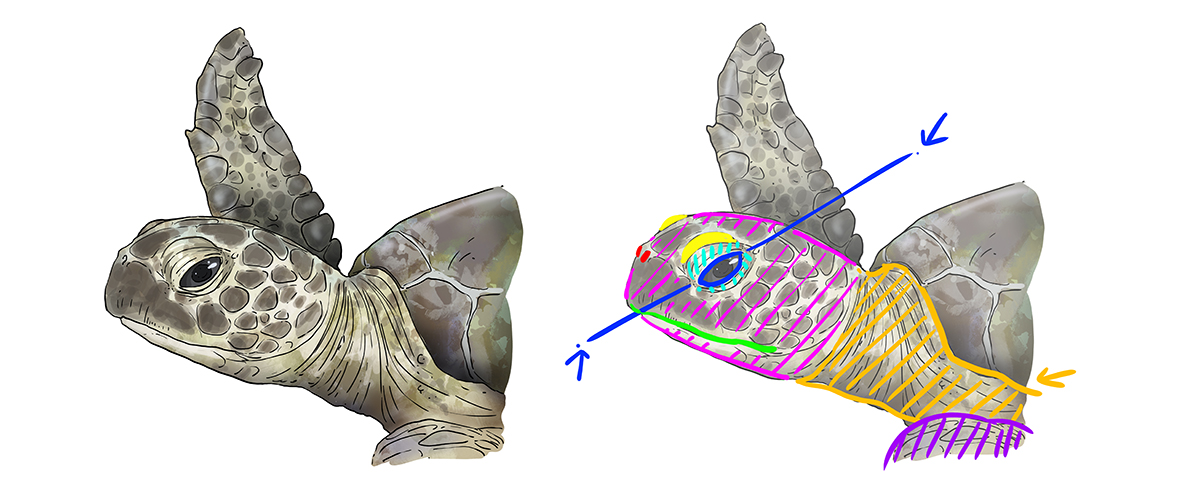
In addition, on the sea turtle, you can see a small plate above the eyelid (in yellow). This element is also present in certain terrestrial and aquatic species.
We can also clearly see here that the skin of the neck joins the shell without leaving any space. Often in terrestrial turtles, with the shell descending slightly, the junction of the neck with the shell is not distinguishable.
In both cases, the front legs (in purple) are right next to the neck (in orange).
DRAWING THE LEGS
Know that turtles have 5 claws on the front and 4 on the back.

Here [A] is the foot of a large Galapagos tortoise, [B] is the foot of a small land tortoise, and [C] is the foot of an aquatic turtle.
You can clearly see the 5 claws (in blue). The red dot indicates the inside of the animal.
Note that the front legs are generally turned inward, while the hind legs are slightly turned outward. It is generally observed that the claws on the hind legs are a little less developed.
Small detail for marine turtles whose legs are flippers.
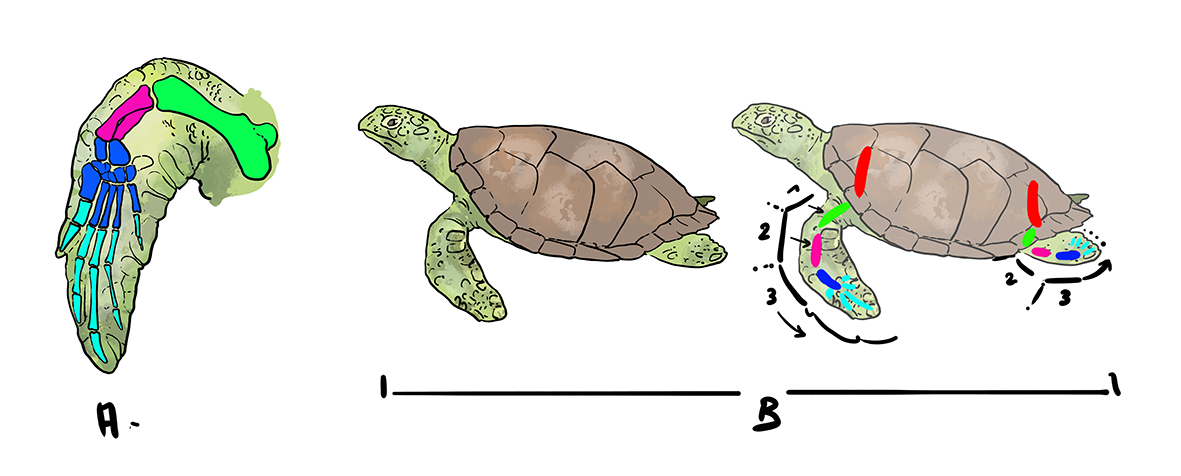
[A] shows where the bones are placed in the flippers. Sometimes the "finger" on the outside can be seen as it forms a small protrusion. The rest of the fingers can not be distinguished, and ultimately, only the arm and forearm bones will structure the flipper.
In [B], I have portrayed the bones in a simplified way.
The front flipper will be "segmented" into 3 parts, one with the green bone, one with the pink bone, and the last with the "hand" bones (in blue). For the rear flipper, the first part won't really be discernible, so there will only be 2 segments (the 2nd & the 3rd).
OTHER TYPES OF TURTLES TO DRAW
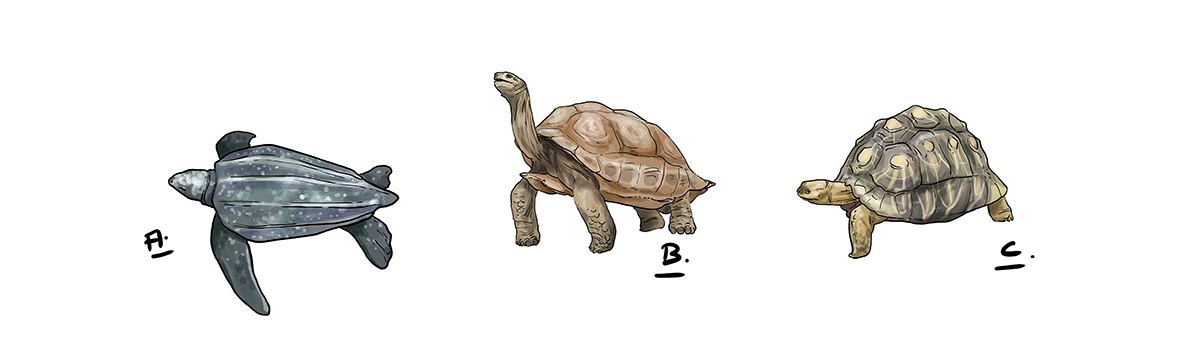
[A] is a sea turtle. The Leatherback turtle has a particularity in that it does not have scales on its shell but a "skin." It is the only current representative of its family.
[B] and [C] show two land turtles with different shells.
There are even species with almost flat shells...
SUMMARY OF THE DIFFERENT STAGES OF DRAWING
We're just going to quickly look over a Hermann's tortoise.
- The head is a rectangular base.
- The eye axis is slightly tilted compared to the top line of the head (blue line).
- The nostrils are high up at the top of the head (red dot)
- The neck is long (here you can even see a "collar" just after the head (orange arrow). If the animal hides its head, it will slide into the "collar" of the neck.
- The front legs come out right next to the neck, at the front of the animal and are turned inward (light green arrow). The hind legs are turned outward (dark green arrow).
- The shell has a collar of scales that goes all around it (light blue/ zones 1), a line of central scales (in purple/ zones 2), and scales that run along the sides (in yellow/ zones 3)
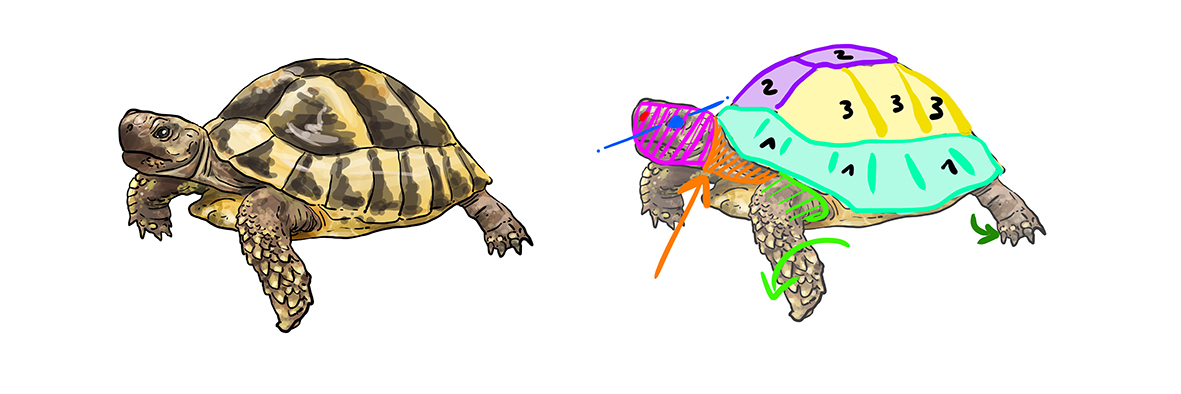
You will notice that the scales are clearly visible and developed at the bottom of the front legs. This is a common feature.
DRAWING A TURTLE STEP BY STEP
Since species can be quite different from each other, we will work from a photo.
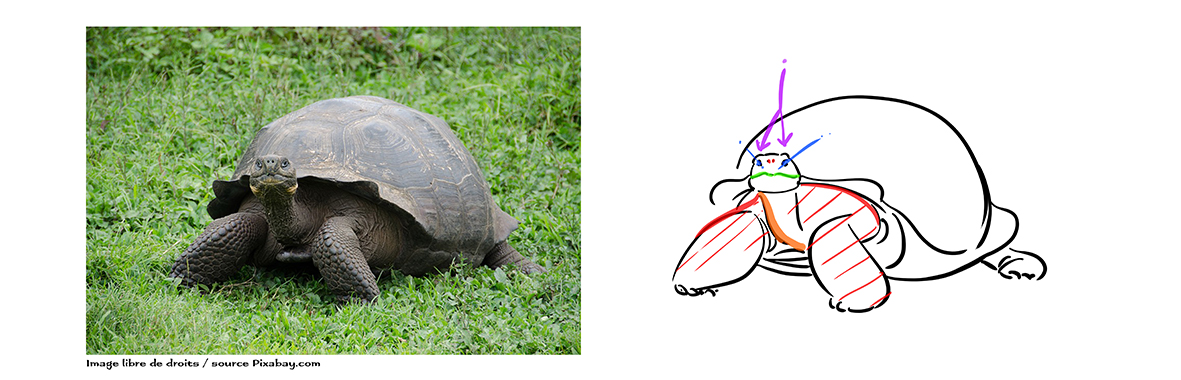
We will choose a terrestrial turtle, one that is rather large in size.
Before starting, I will simplify the drawing. The front legs (in red) are prominently in front of the animal, turned inward. The neck (in orange) is quite long. In this front view, you clearly see the nostrils (in red) placed high up, the slanted eyes (in blue), and the wide mouth (in green). The two purple arrows simply show you the relief just above the eyes. The shell is substantial and fairly rounded.
Let's begin.
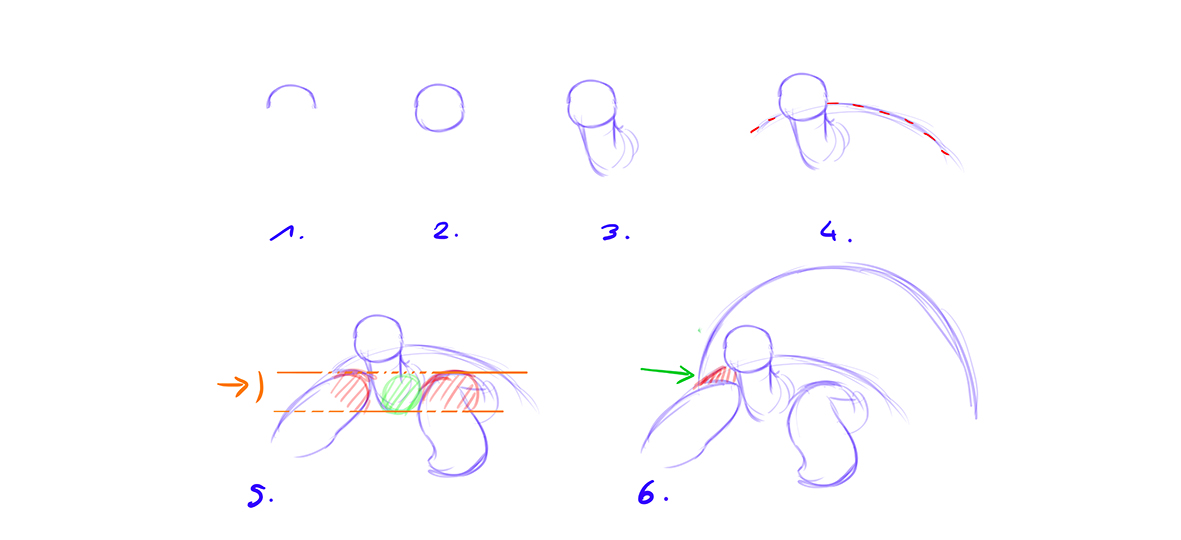
Step 1: Trace the top of the head.
Step 2: Trace the rest of the head, widening the circle slightly at the lower jaw.
Step 3: Sketch the very long neck.
Step 4: Place the limit of the shell with the skin.
Step 5: Define the neck attachment in green. At the same height (area bounded by orange lines), place the front leg attachments (in red) and extend the legs from there.
Step 6: Trace the top of the shell, which is quite round. Make sure that the shell completely encloses the front leg (red area/green arrow).

Step 7: Close the shell. The junction between the plastron and the shell is located at the leg exit area (orange area, step 5), and draw the hind leg.
Step 8: Draw the ripple of the edges of the shell (in red).
Step 9: Structure the shell according to the model we saw previously.
Step 10: For the head, position the top of the "muzzle."
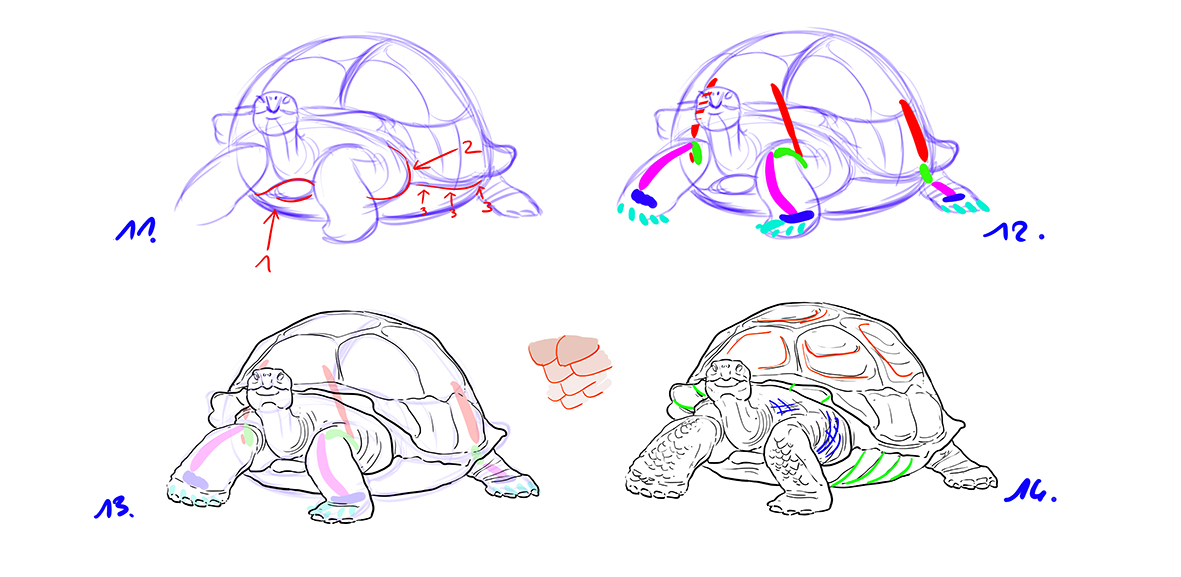
Step 11: Place the nostrils high up and the eyes slanted. Draw the edge of the plastron (in red arrow 1). Close the shell (arrow 2) and trace the junction of the two parts (in 3).
Step 12: Quickly place the bones to help position the claws. Don't forget that the front feet are turned inward and the back foot slightly outward.
Step 13: Draw your sketch.
Step 14: Add many folds (in blue). Don't forget to add scale limits (in green). Give a bit of substance to the scales on the shell (in red). Take the time to draw some scales on the legs.
Note, we don't want to create a hyper-realistic drawing, so do not draw the scales one by one. Instead, you should simply suggest them. Between steps 13 and 14, you can add a "model" of scales.
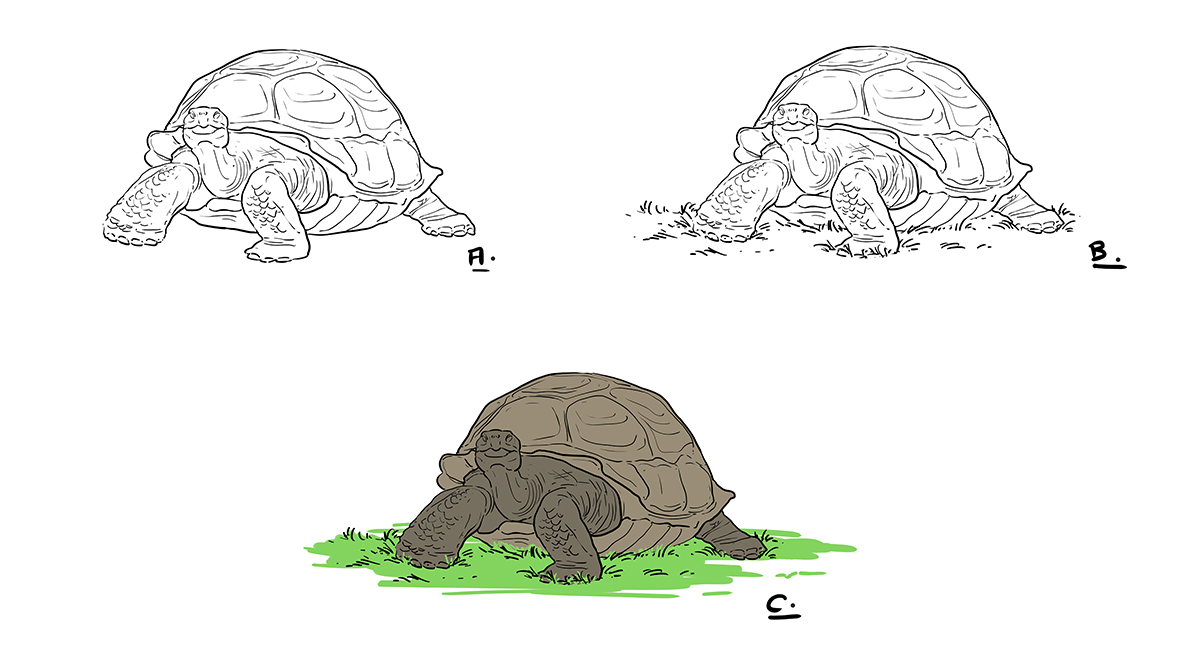

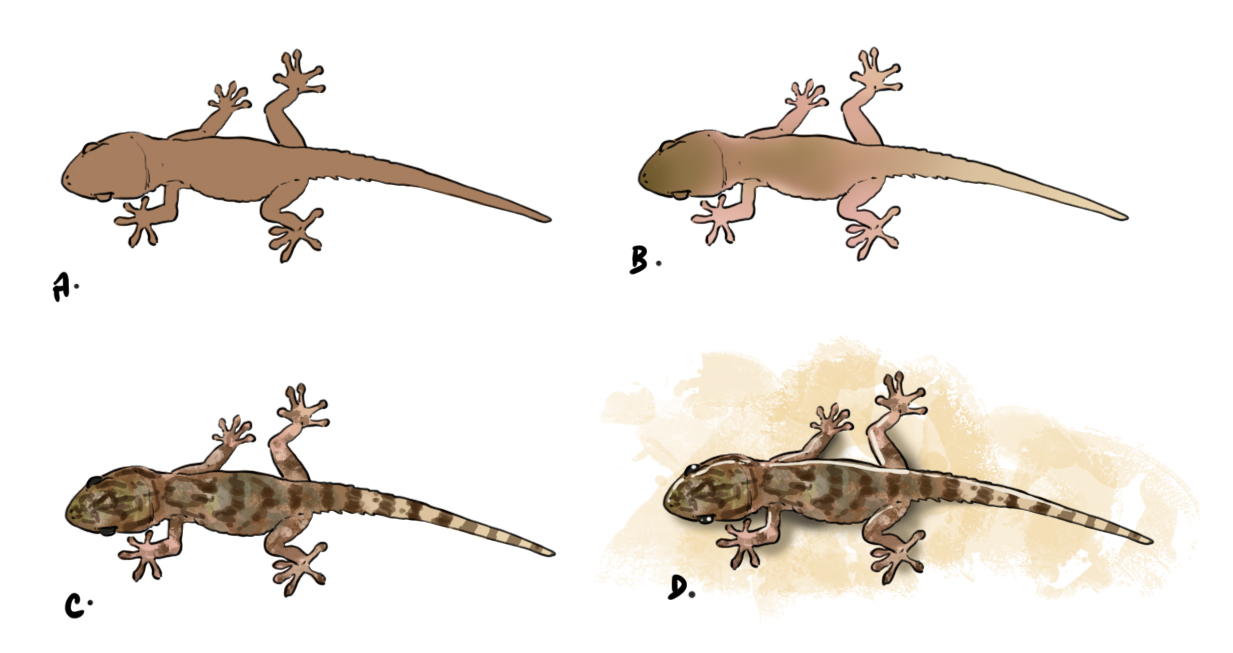
Now that the outline is done [A], quickly position the animal [B] on some grass, color it in [C], and refine[D].
For shading, do not hesitate to darken the area under the shell around the neck and the base of the front legs.
It is very difficult to generalize anything about the turtle, but I hope this article will be helpful for your drawings.
Illustrator and Copywriter: Elo Illus
Discussion
5 comments