How to Draw the Eiffel Tower
In this article, we will focus on a world-famous monument, the Eiffel Tower. An essential stop on a visit to Paris, this tower is one of the symbols of the beautiful country that is France.
Between you and me, I'm not a fan of straight lines and technical drawings, so this will also be a challenge for me! Being more accustomed to paws and furs, this will also be an opportunity for me to discover new subjects and skills.
Before anything else, I will quickly introduce you to what remains, when you think about it, a rather atypical construction... It's still a large metal tower somewhat stuck right there in the middle of the city!
So, as you probably know, the Eiffel Tower was not meant to last! In fact, it was built for the 1889 World's Fair. It was primarily intended to showcase the technical expertise of the country's engineers. It also marked the centenary of the French Revolution.
It took two years, two months and five days to build. For about forty years, it remained the tallest structure in the world.
Note that the Eiffel Tower is listed as a UNESCO World Heritage site.
STUDY OF PROPORTIONS FOR DRAWING
To help us out a bit, first, let's look at the dimensions and structure of our subject.

The Basics:
- The tower has 4 "feet" that form a square on the ground.
- There are 3 "floors", A, B, and C.
- The tower ends with a platform decked out with antennae and a "spire".
We will start with the base dimension on the ground that goes from one foot to another, the red length, which is therefore 125 meters.
The second floor [B] is located around 116 meters high. So with the ground, this distance forms a flattened square (yes, a rectangle in short^^). Note that the floor [A] is located halfway.
The total height of 320 meters can roughly be broken down into 3 short ground lengths (thus 3 red lengths, but slightly trimmed).
Also note that the Eiffel Tower is built symmetrically.
Remember, the arch that forms between the feet is a perfect semicircle.
THE SHAPE OF THE EIFFEL TOWER
One of the major challenges will be finding the right shape, and this will mainly come from the curvature between the feet and the tip.
It is vital not to build a tower that is too sharp and thin immediately, nor on the contrary a tower that does not rise up enough. It will also be important not to curve the legs too sharply and too quickly.
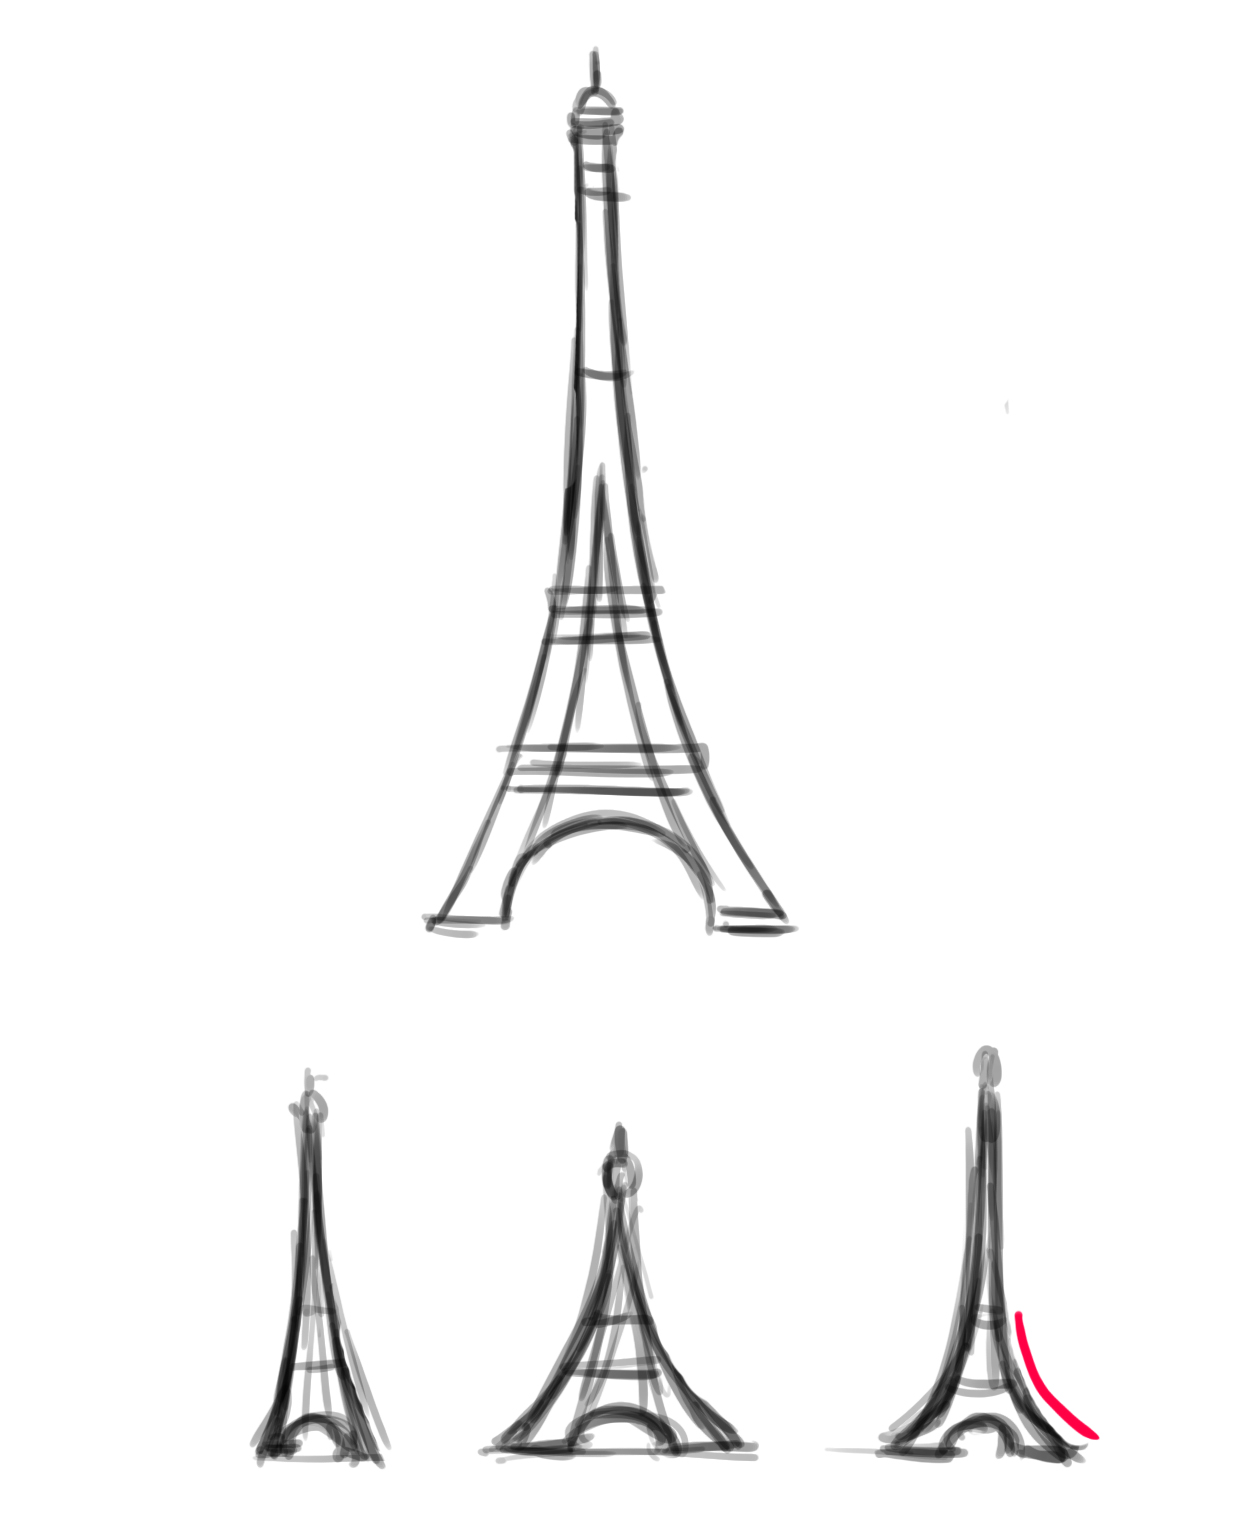
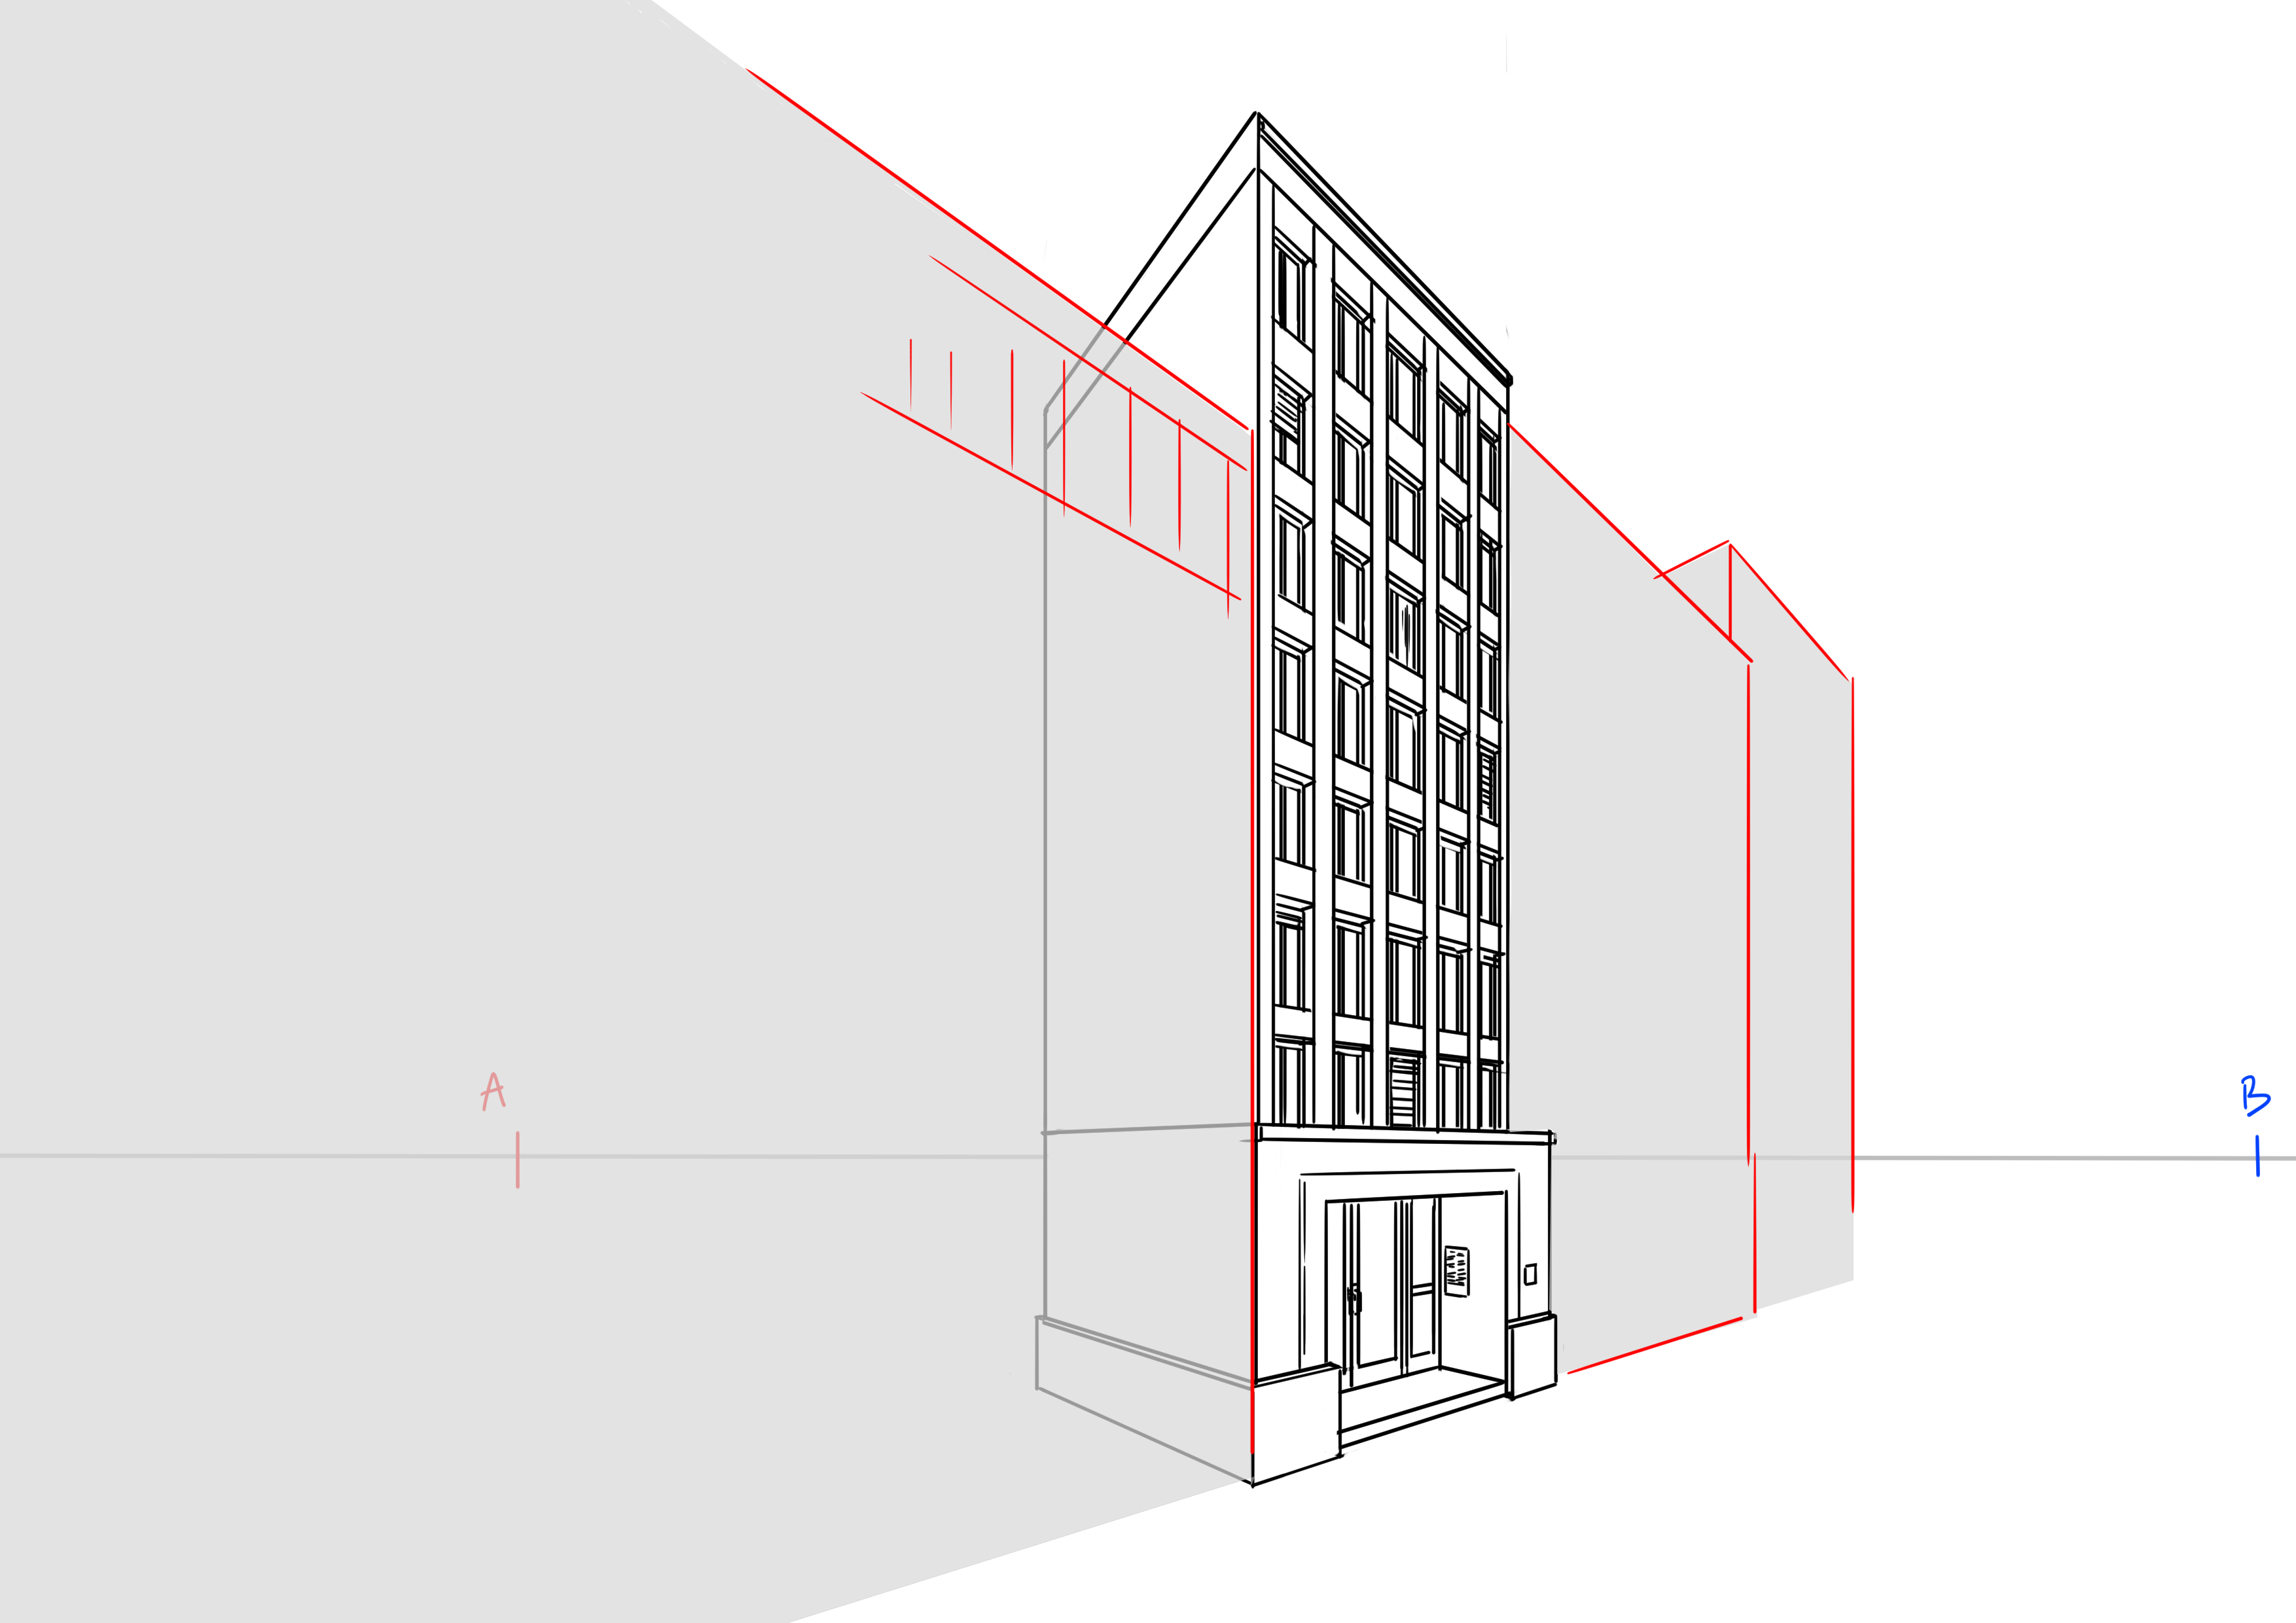
If you need to choose a perspective other than frontal, you must remember that the base of the monument is square.
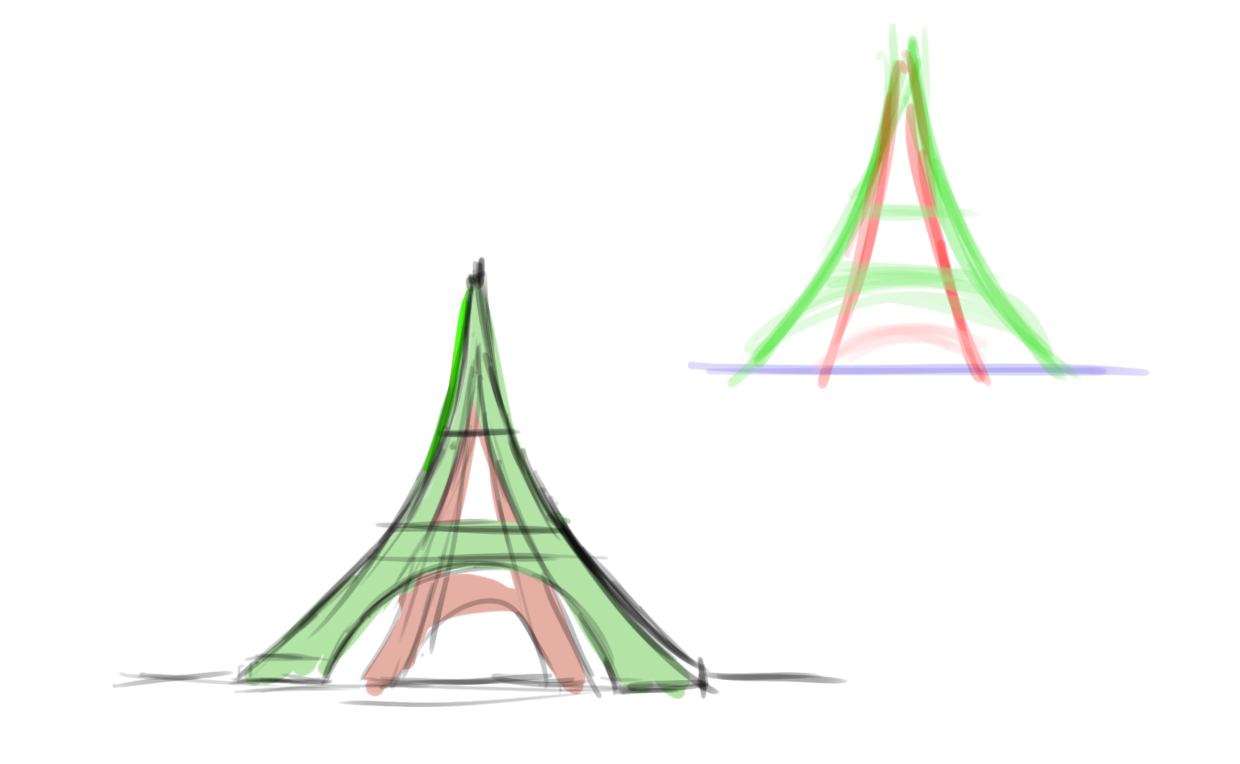
For example, we will quickly analyze the monument from a top view.
In the following drawing, you have a simplification of the tower with bold lines and these same lines arranged in a front view, so that you can make the connection, and below is the colored drawing.
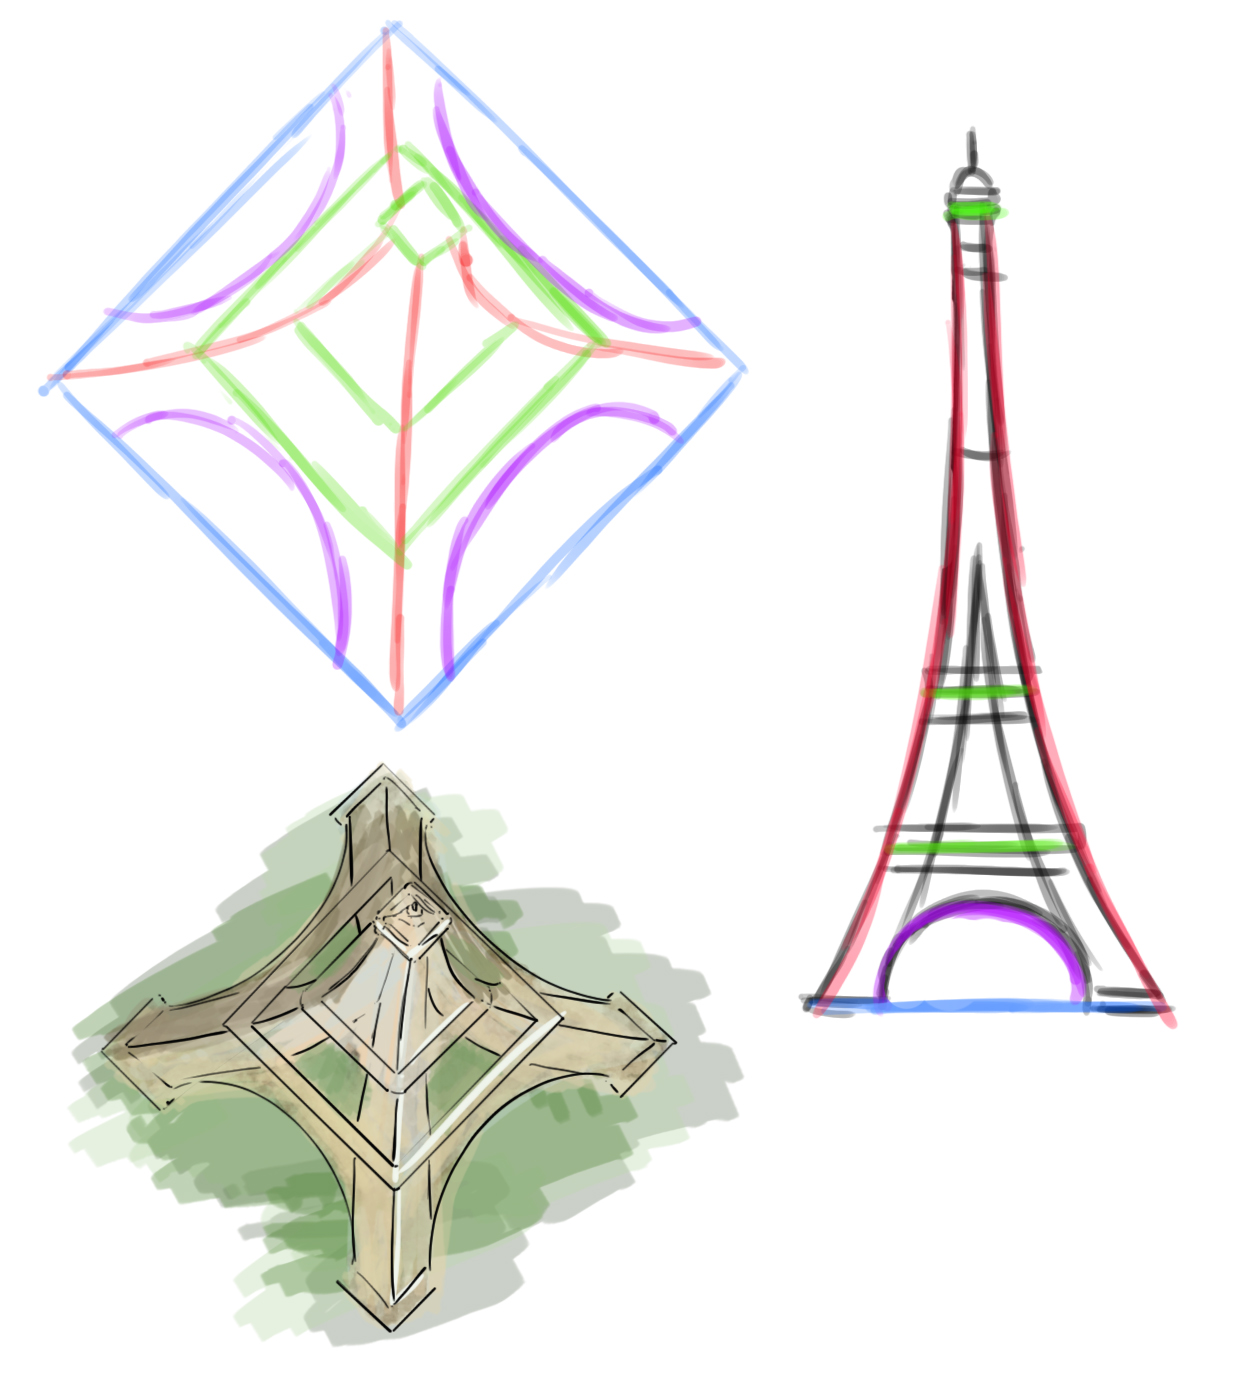
So we start with the square base, we extend the "legs", red lines, by gently curving them. In green we have the floors, which form squares (echoing the blue square on the ground).
The structure is not so complicated after all.
THE DETAILS OF THE EIFFEL TOWER DRAWING
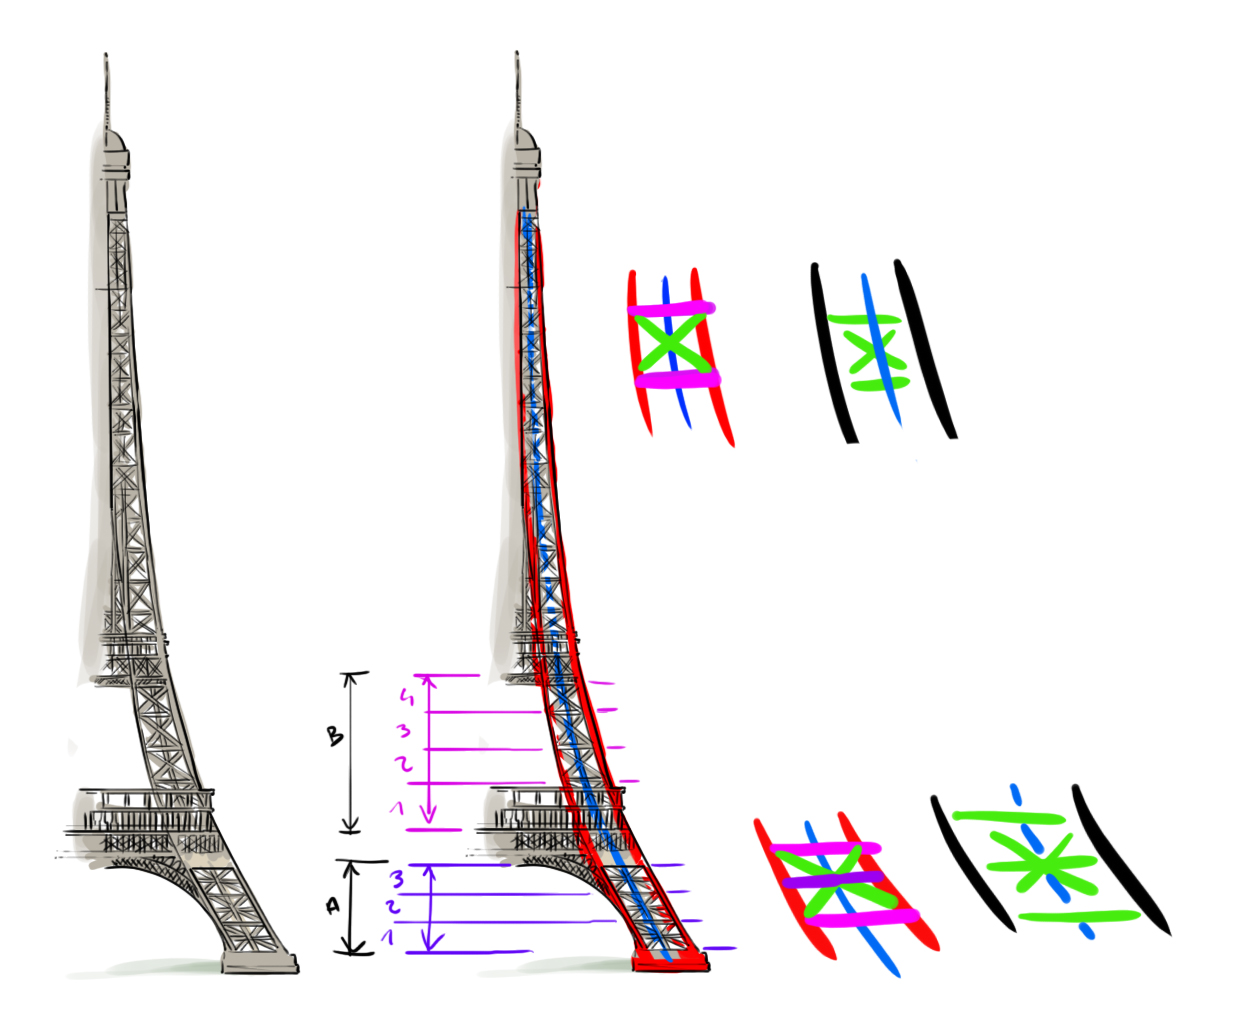
First, a quick look at the "network" of the tower's feet.
On the lower part of the feet [A], between the floor and the first floor, the structure will be divided into 3 parts and, between the first and second floor [B], into 4 parts. These small "sections" have a star structure with 8 branches.
For the segments above the second floor, the boxes have a 6-pointed star structure.
It can be observed that the "lines" of the feet (in red) go up to the top floor level.
Next, if you ever need to better define the top floor, a small point on the top of the tower. If you are going for a detailed drawing, I recommend you find more precise references.
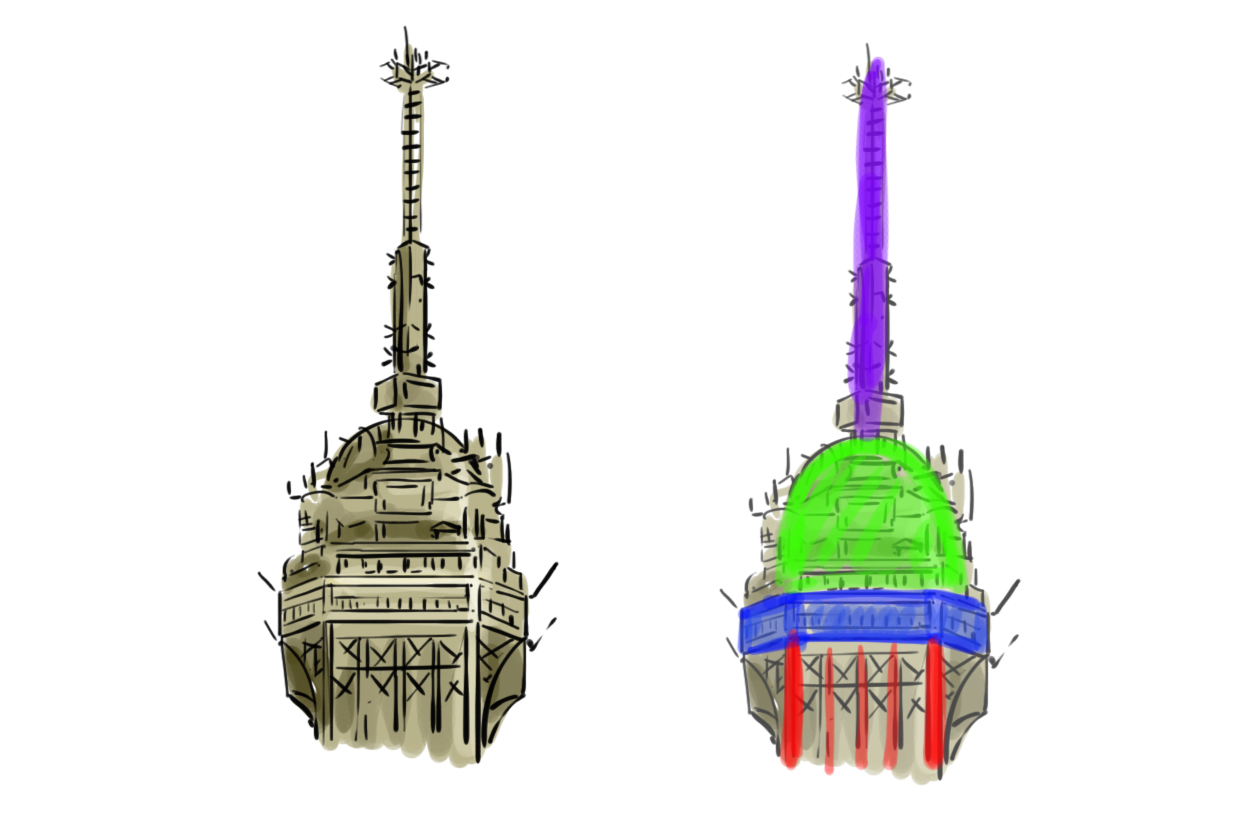
Indeed, even though the structure is simple: the platform (in blue) rests on the tops of the "legs"; the various elements form a "dome" that will support the final "needle", there are numerous antennae. The installation at the top of the tower is quite complex.
THE DRAWING STEP BY STEP
We are going to challenge ourselves a bit and opt for a low-angle perspective, a bit like if we were looking at the monument from the ground. Therefore, we will have to deal with distortion. The top of the tower will be flattened by the perspective. We will not add difficulty and we will draw the tower from the front.
First, a quick diagram to give you an idea of our goal.
We will keep a photo handy that will help us a bit with the details of the structure.
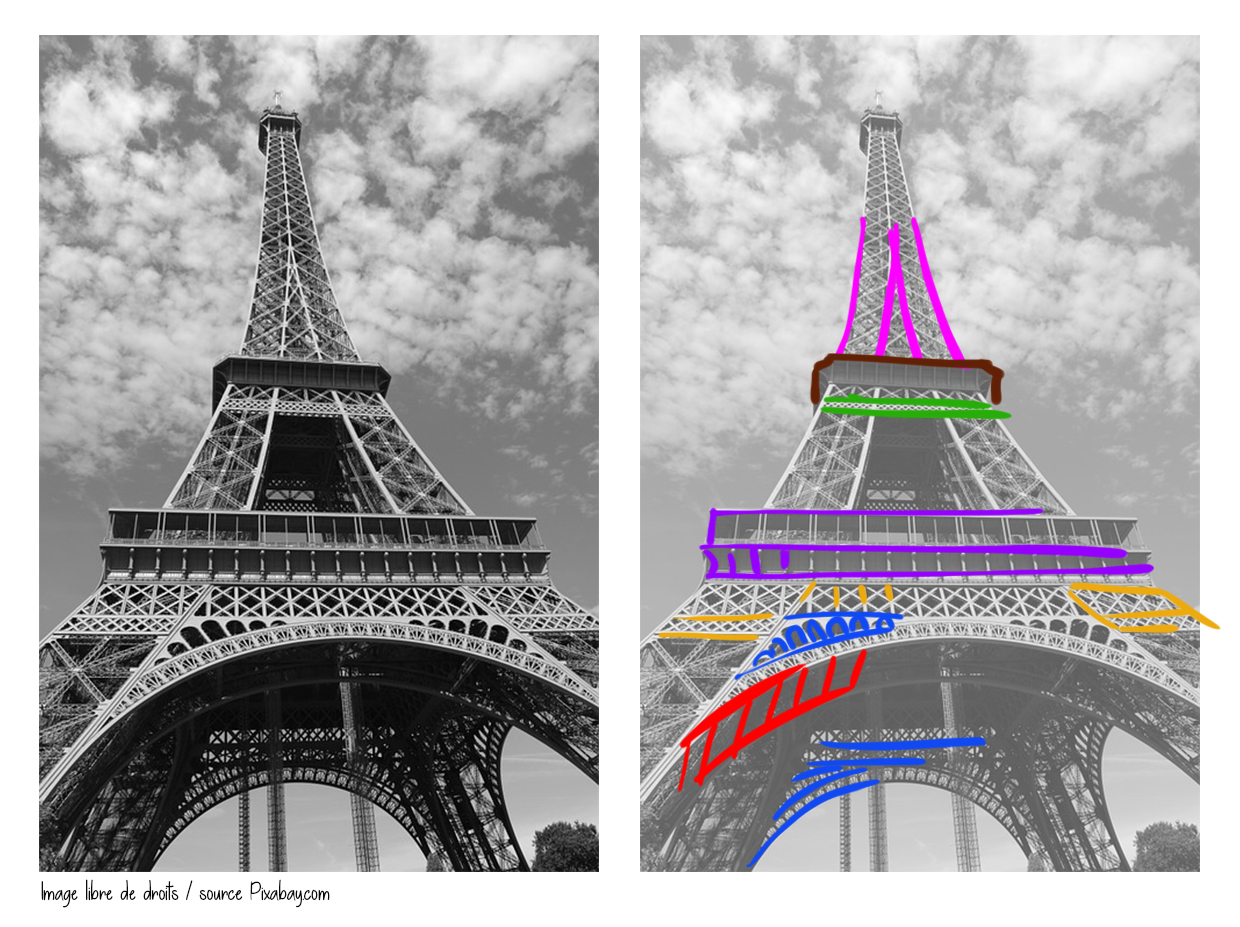
I just highlighted the details that will be relevant for our drawing. Note that from our perspective we will also see the underside and the thickness of the legs and the arch (in red).
Let's begin...
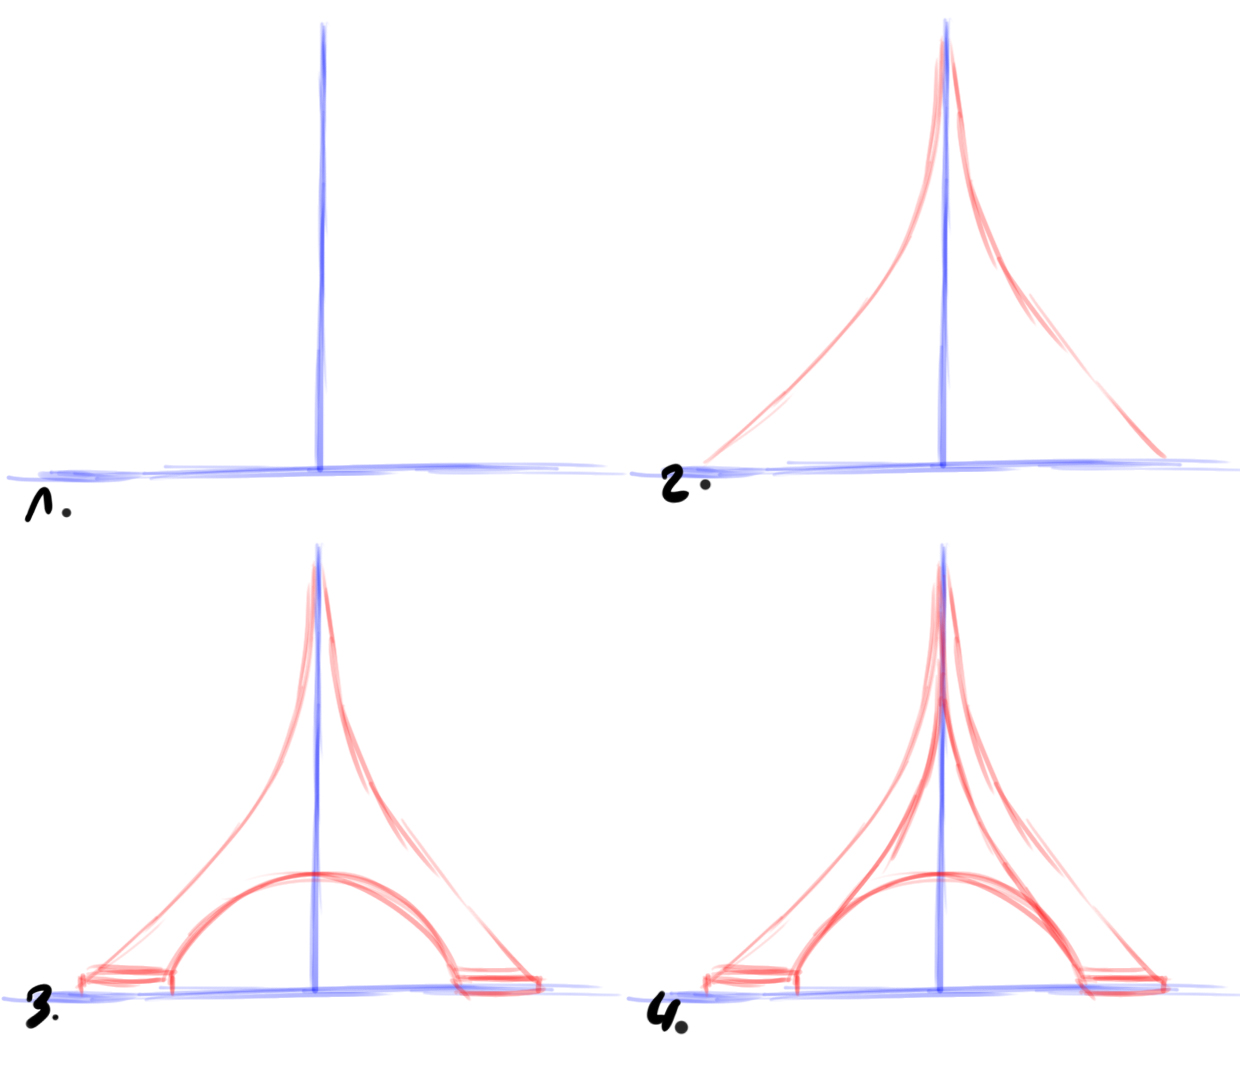
Step 1: I draw the ground line and a vertical line for the central axis to guide me relating to the symmetry of the structure.
Step 2: I shape the curve of the feet. Due to the deformation caused by the point of view, the tower will appear a bit squashed and the distance to the ground will seem greater than it actually is. Therefore, we exaggerate the curvature a bit and make the distance to the feet larger.
Step 3: I form the arch and quickly make the bases of the feet.
Step 4: I stretch my feet to the top.
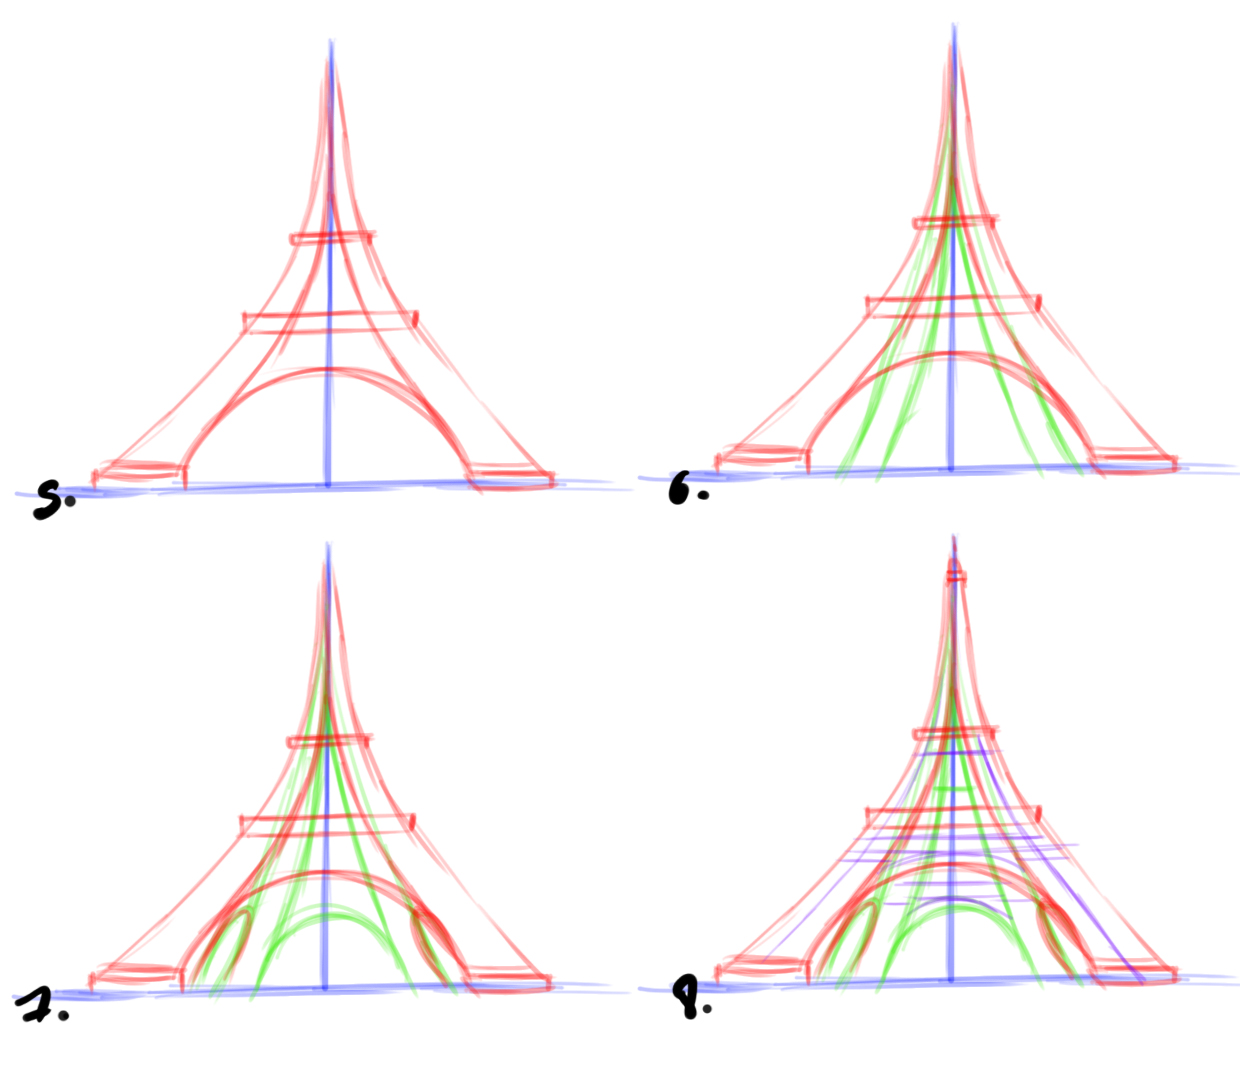
Step 5: I add the first and second floors. Again, due to deformation, they are positioned a bit higher on the overall structure. The distance between the ground and the first floor is larger, and the distance between the second floor and the tip is shorter. However, do not position the second floor too high; we need to maintain the impression that the final third of the tower is longer.
Step 6: I draw the feet on the other side.
Step 7: I shape the arches on the sides and at the bottom.
Step 8: I draw lines down the middle of the feet and glance at our reference photo for the look of the structure just below the first floor. Indeed, the curve of the arch is not right beneath the floor platform. I sketch the top floor.
Step 9: I am dividing the feet under the first floor to reveal the 3 "star sections". Be careful, the highest section is not directly beneath the first floor platform.
Step 10: I draw the 4 "segments" between the 2 floors and I form the thickness of the arch and the front legs (area hatched in red).
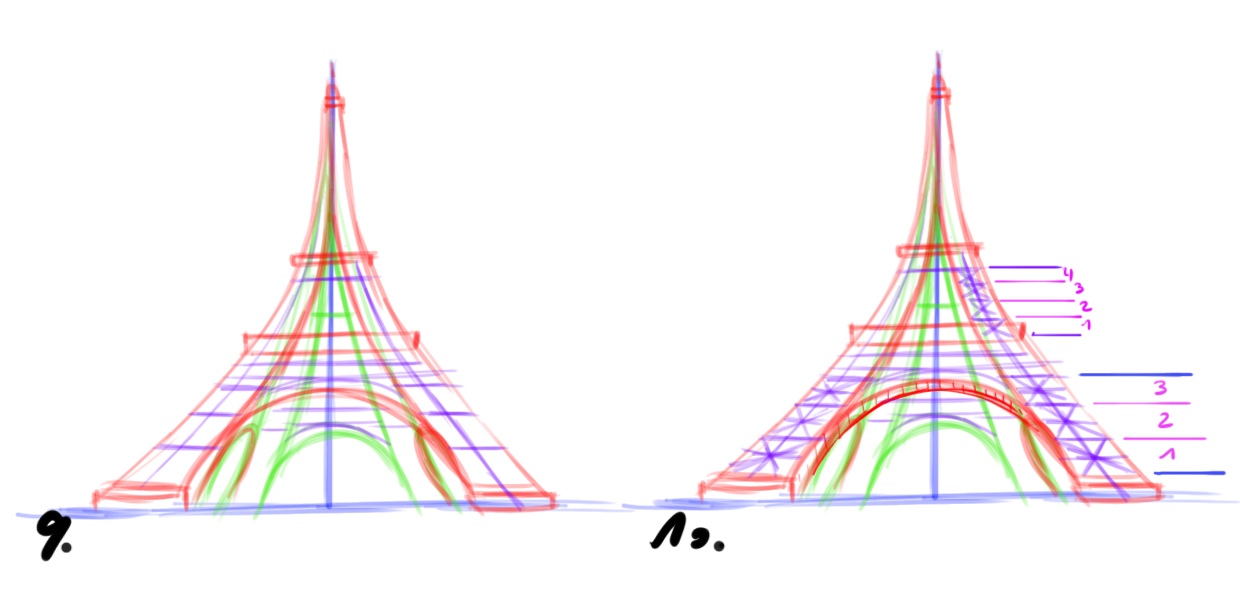
Step 11: I start to outline neatly. I first form the main lines, the feet, the arches, the floor platforms.
Stage 12: I draw the feet and the lines under the platforms of the floors (refer to reference photo / orange and green lines).
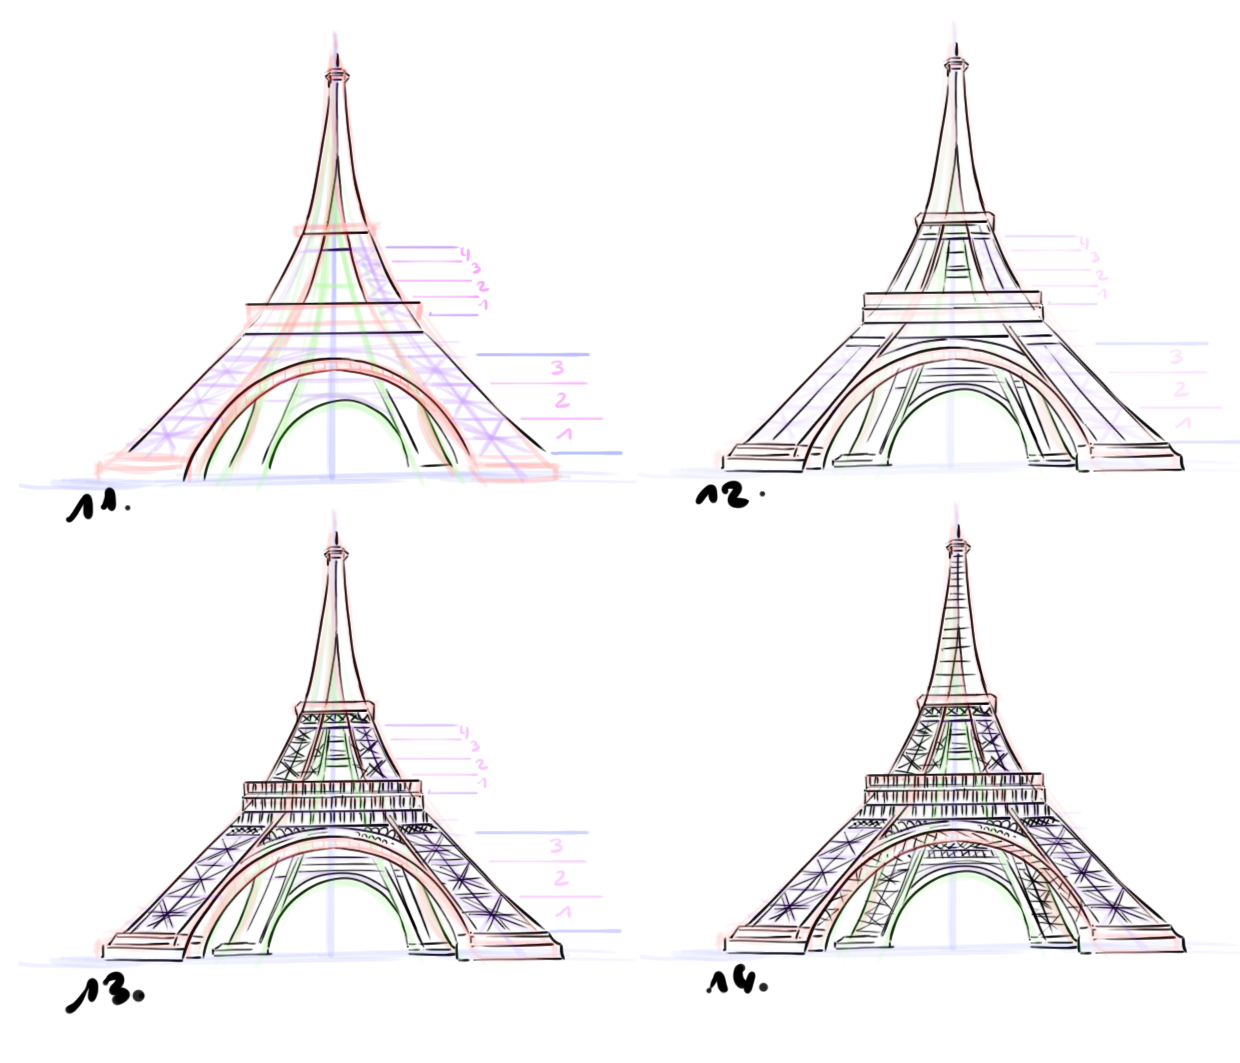
Step 13: I draw the "stars" of the structure in the segments and add a bit more detail to the edges of the floor platforms and arches.
Step 14: I am starting to "divide up" the last third of the tower and add the mesh onto the thickness of the legs and onto the rear legs.
Step 15: I add the star structure in the upper segments of the tower.
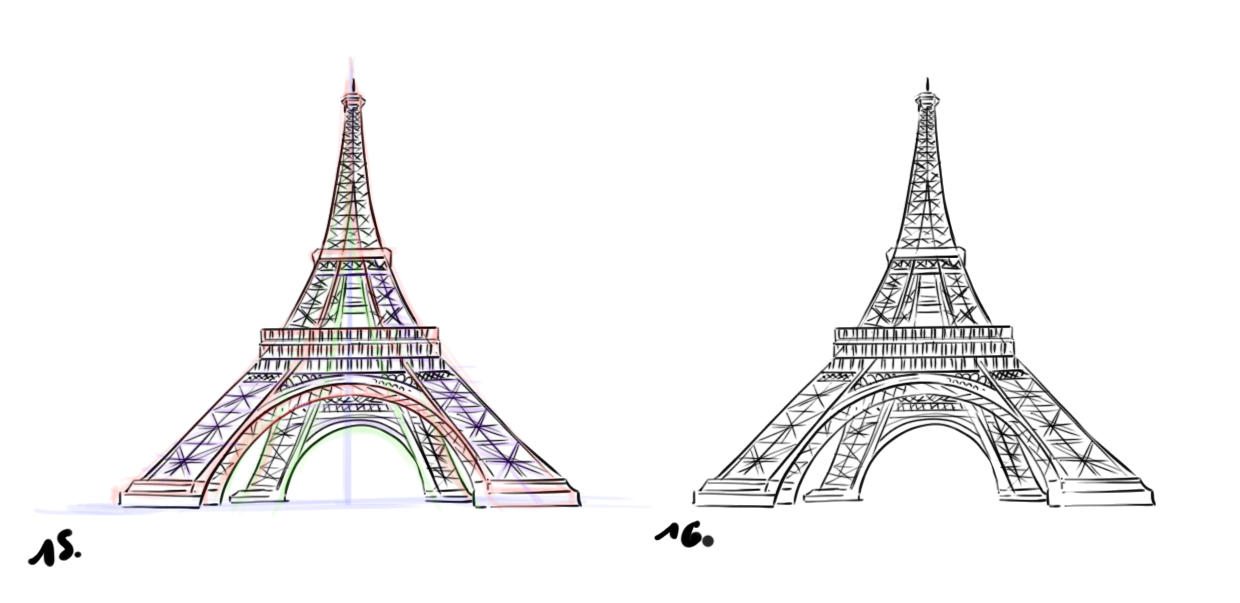
Step 16: I clean up my drawing.
COLORING THE DRAWING
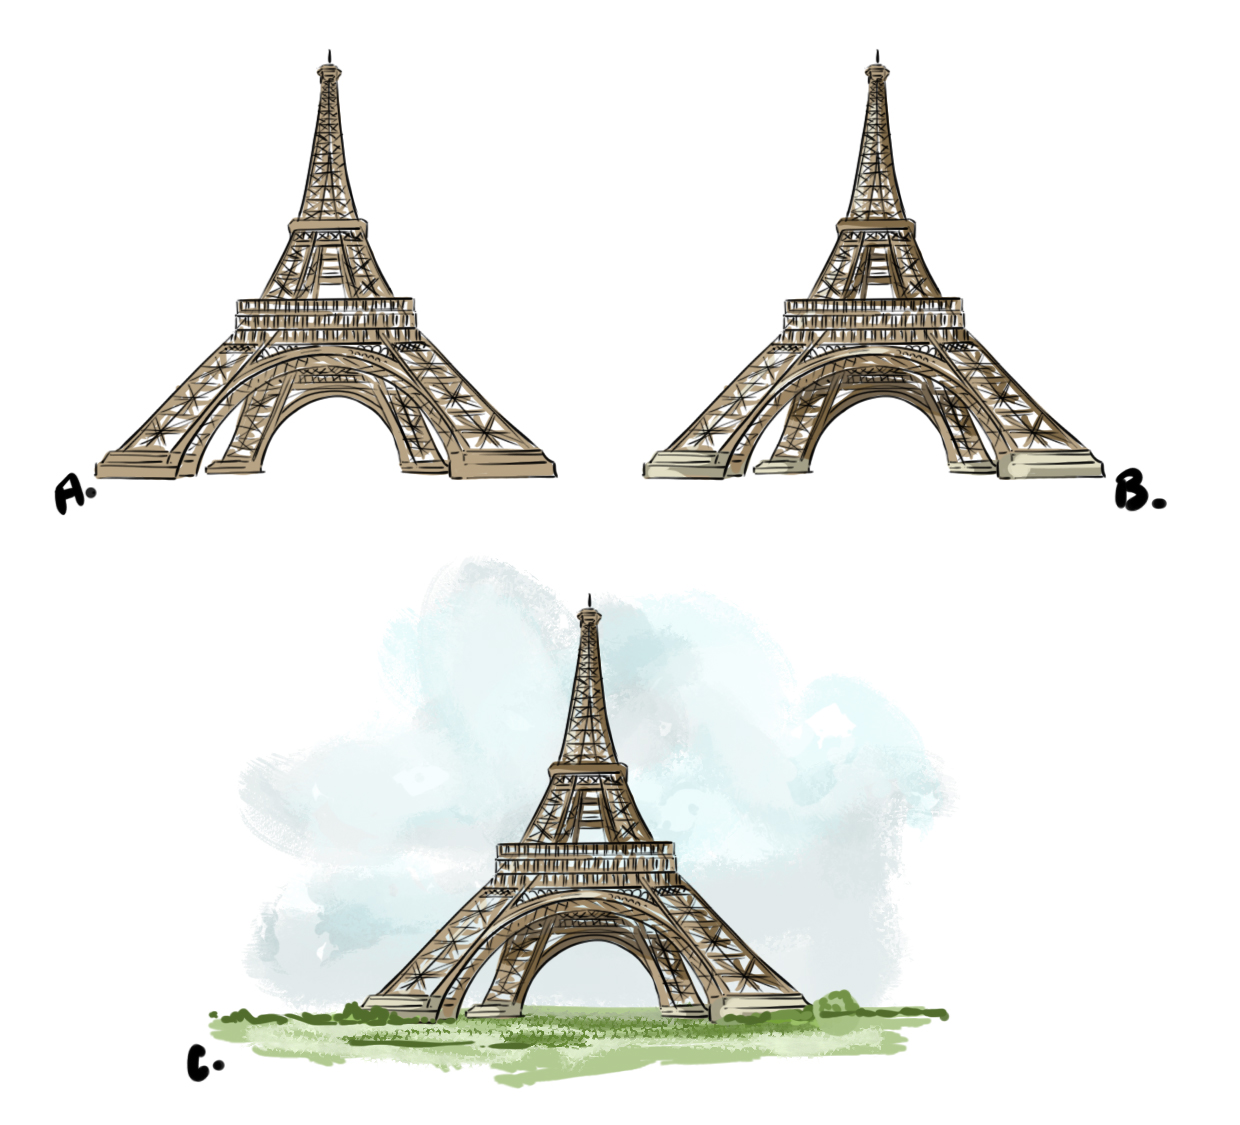
I choose [A] a soft and light brown for the main flat color, and quickly shade the interior and one side of the structure [B]. I apply a touch of light and a background to position our tower and it's done!

Obviously, if you want to create a hyper-realistic drawing, there will be much more to do, like rendering the thickness of each beam, drawing the rivets... In summary, this short article has given you the basics to draw the Eiffel Tower quite quickly and especially to incorporate it into a setting or a wide shot.
See you soon for a new tutorial on Dessindigo.com
Discussion
4 comments