How to Draw a Building
Do you like backgrounds? No, right. Me neither. Let's stick together and I'll teach you how to draw a building today :D You'll see that at several stages there are recurring mistakes to avoid. The goal, of course, is to depict a building, but one that looks realistic and not just four smooth, soulless walls.
Here I will show you a relatively "standard" building, but if you feel like it, you can definitely push the details of your houses, buildings and other decorative elements much further.
THE DIFFERENT STYLES OF BUILDINGS TO DRAW
Well, there are many different styles of buildings, depending on the era, the function of the building, etc. A modern New York office building does not look like a Haussmannian building found in Paris, or a suburban public housing project, or an ultra-modern building with improbable shapes.
But to put it simply: it's a big parallelepiped. Nothing too complicated.
The difficulty lies in the perspective, of course. But also all the details that will make the building realistic: the moldings, windows, balconies if applicable. And of course, the very large number of windows involved which requires a lot of time and patience.
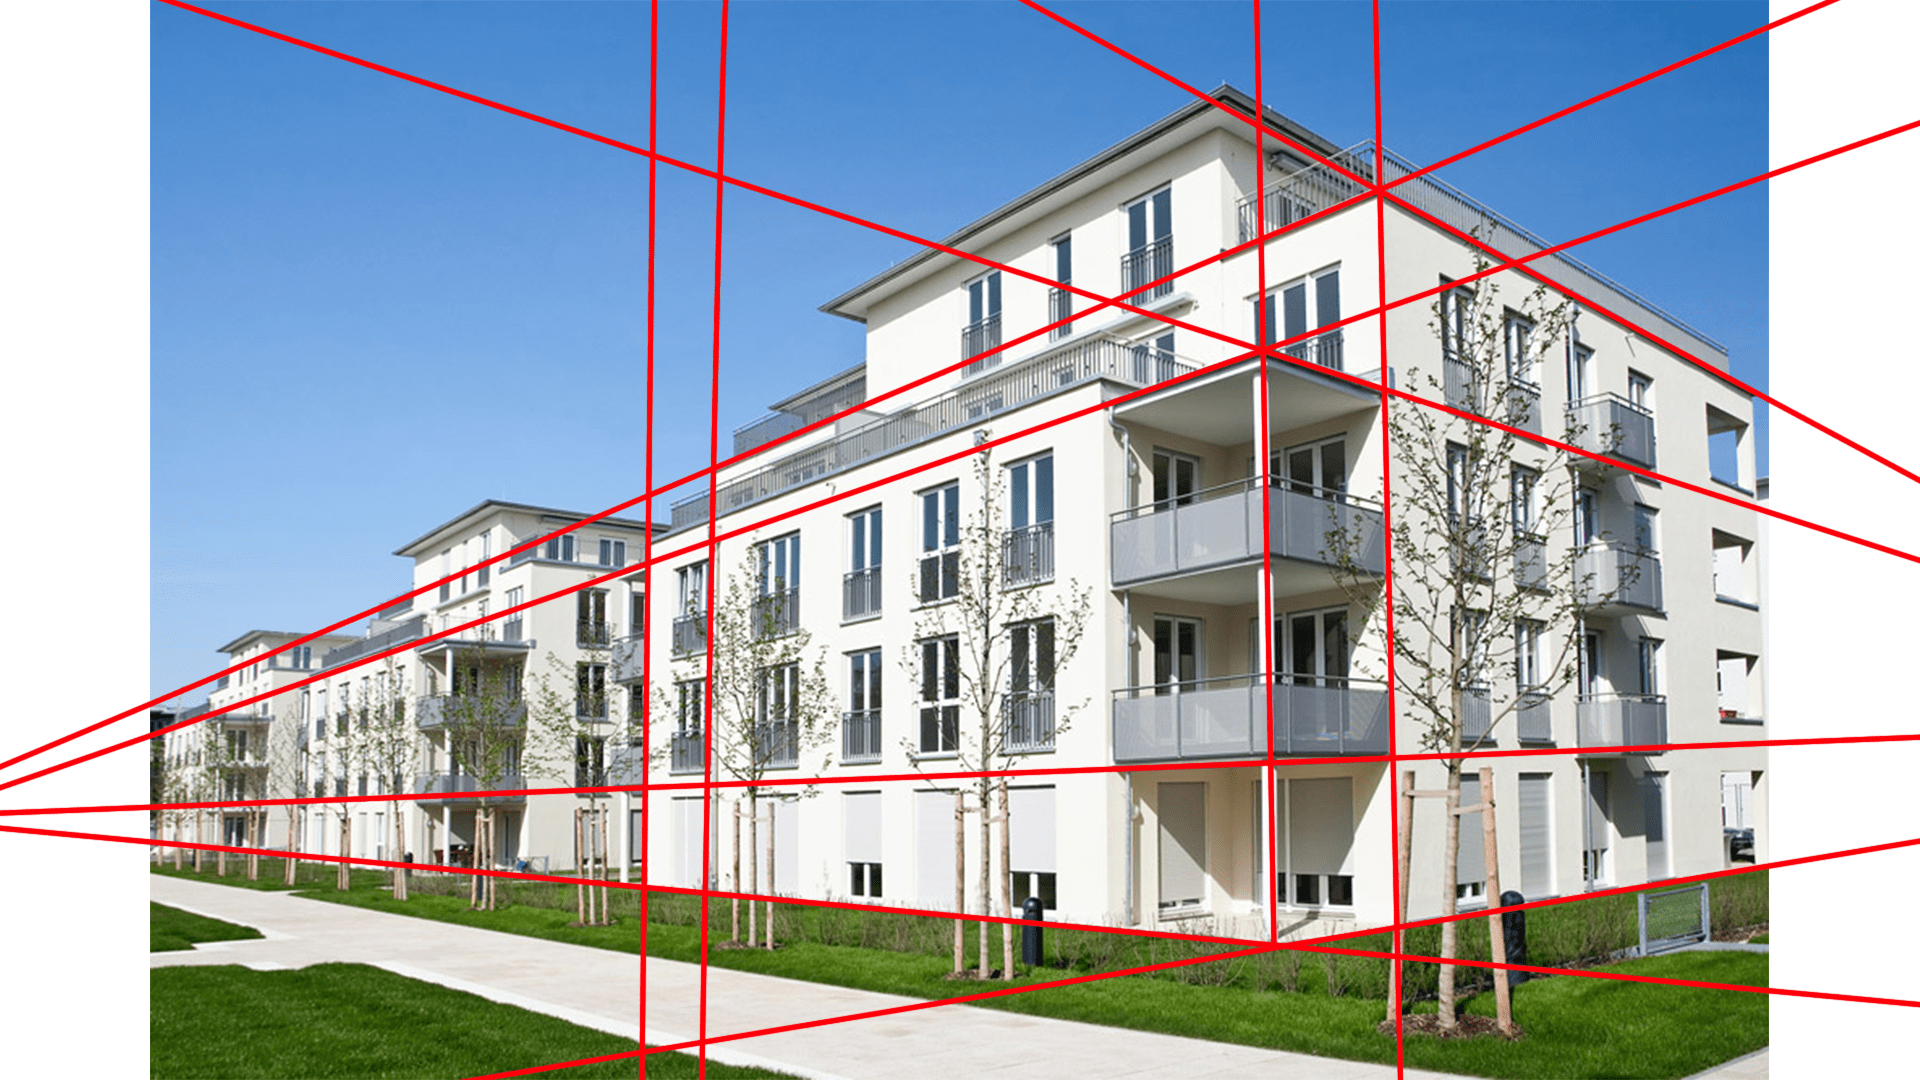
Therefore, rely on photo references to make a realistic building.
We're trying to do something like this:
Not like that:

STEP-BY-STEP DRAWING GUIDE
I used the forbidden word: perspective!
Today we're going to do a two-point perspective. Don't worry, nothing too complicated, I'll explain everything step by step 😊
For today, I won't focus on a specific type of building, but rather go with the flow and do something very simple so that you understand the mechanics well. If you would like a tutorial on a more elaborate building (like a Haussmann-style building, for example), feel free to mention it in the comments ^^).
PERSPECTIVE IN DRAWING
We start by laying the foundations of our perspective. If you need more information on this, you can consult the article on our blog about perspective and vanishing points.
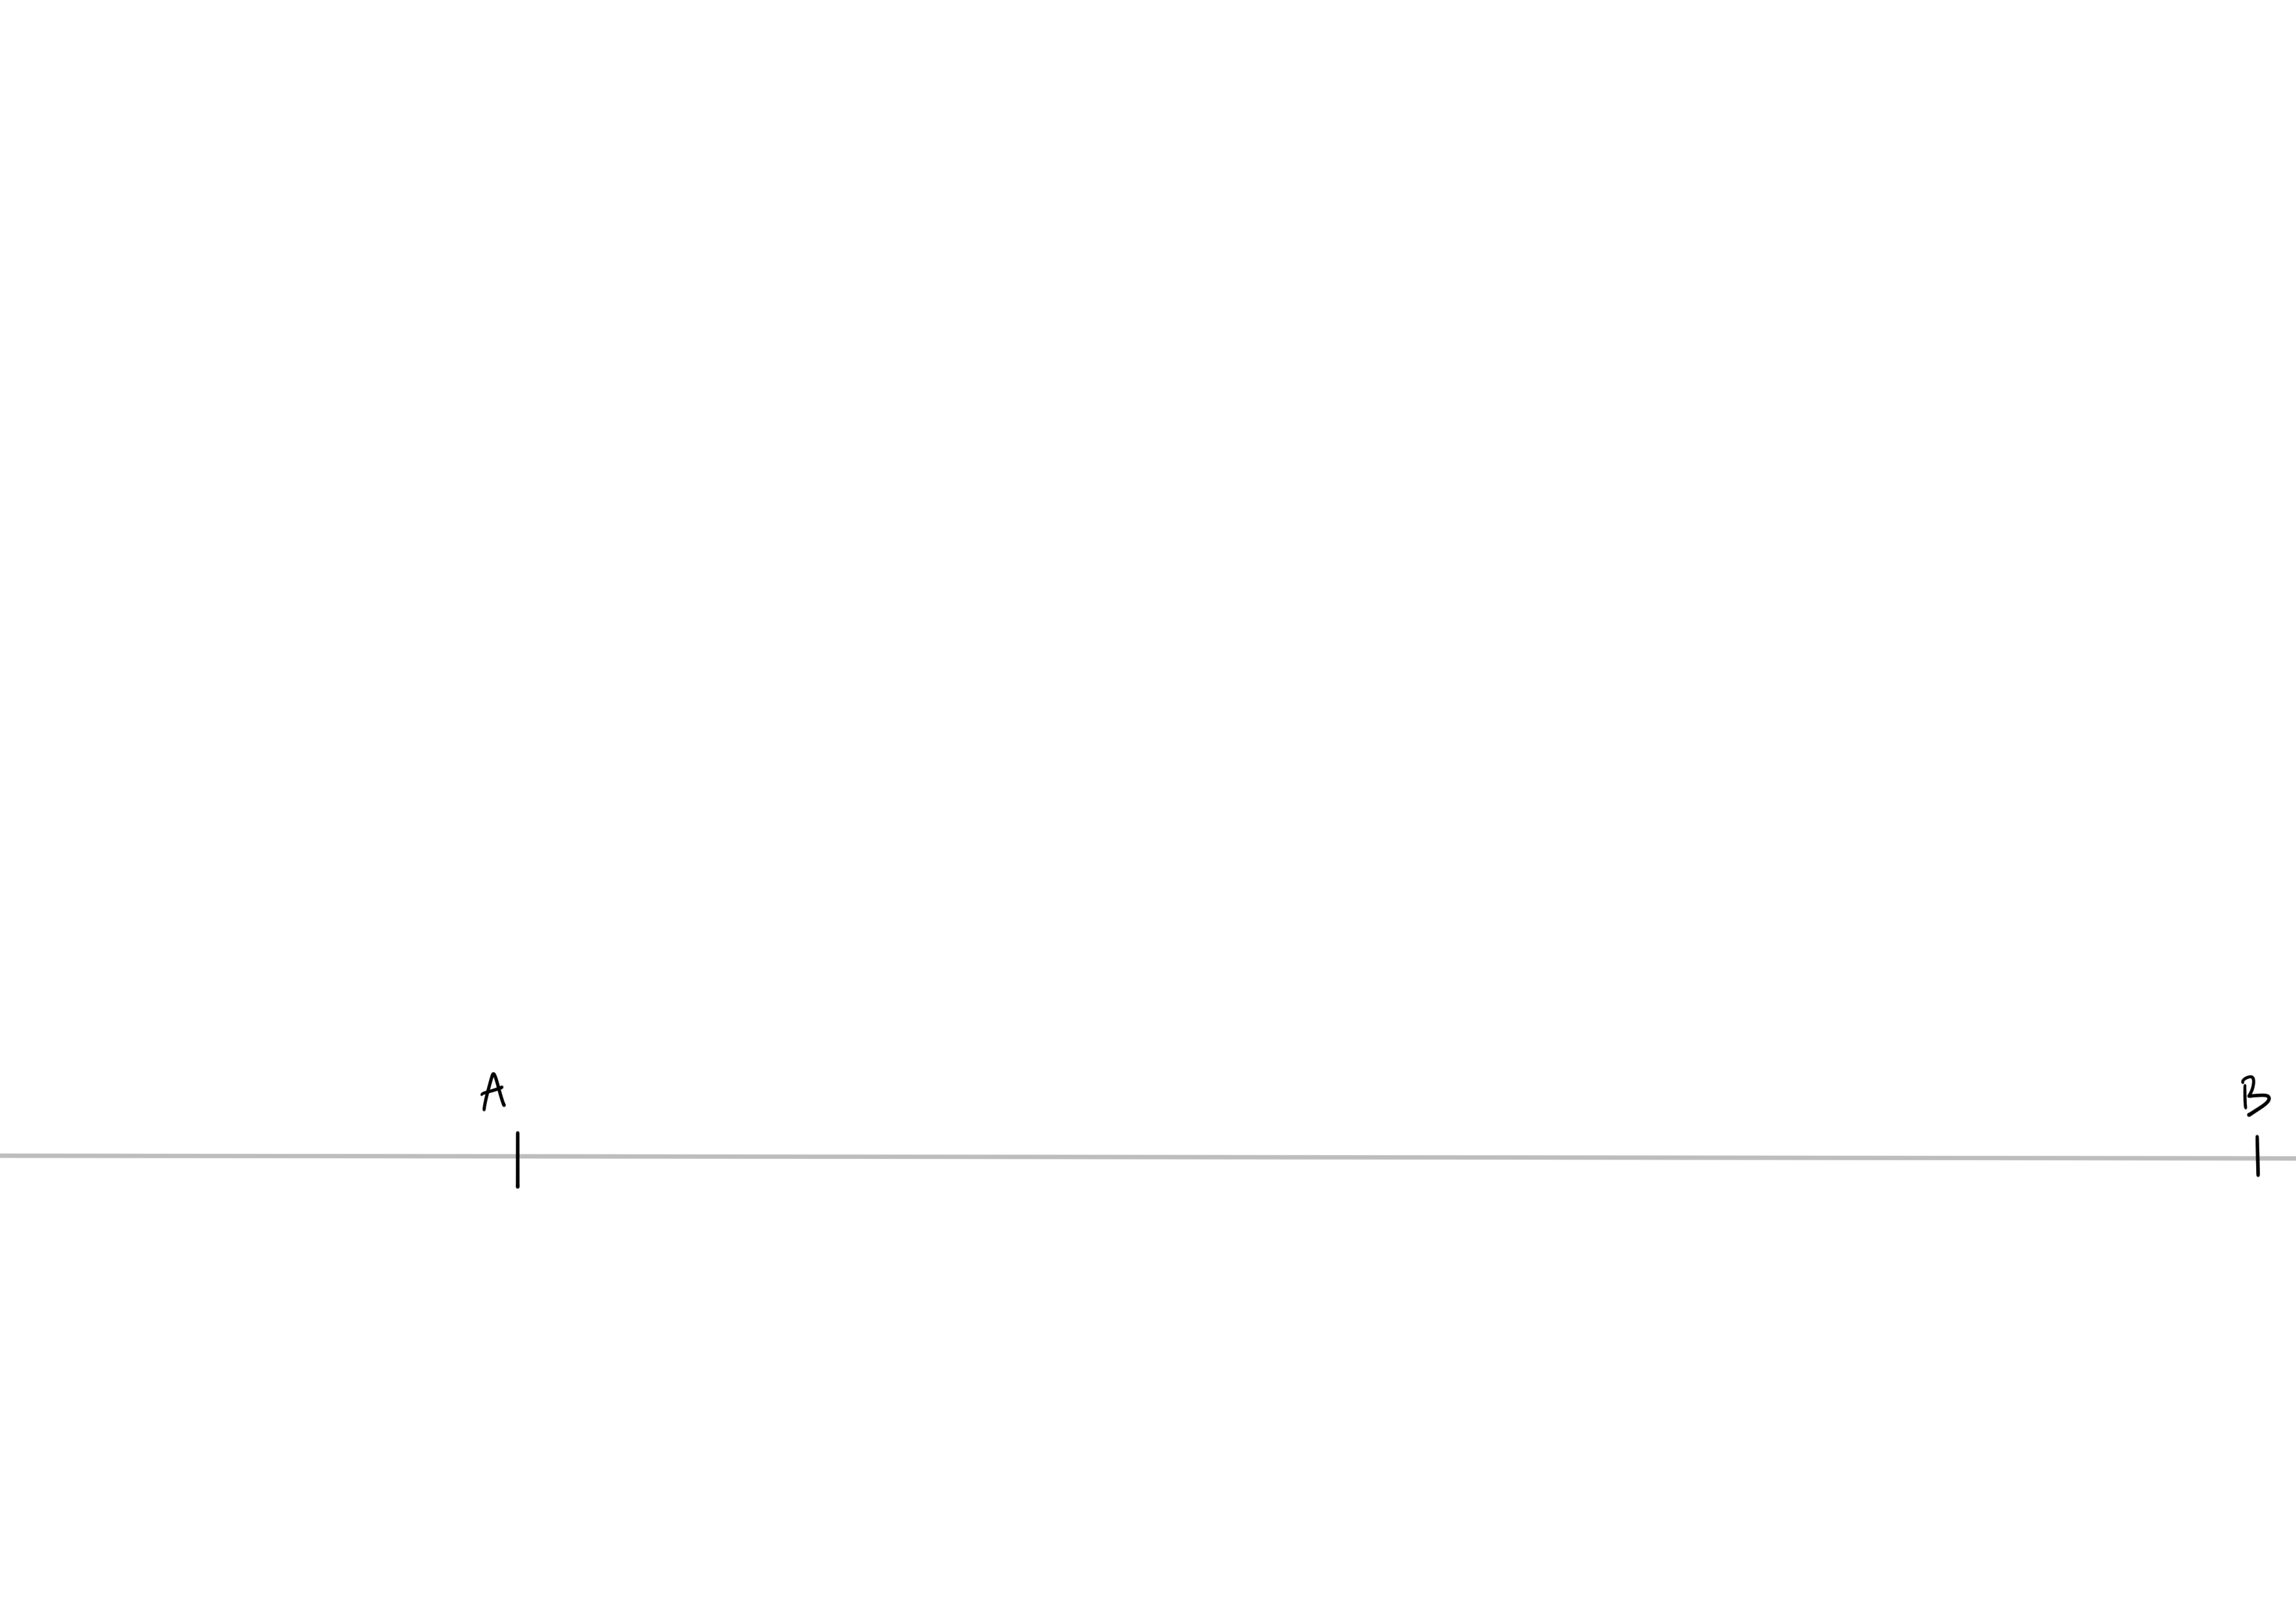
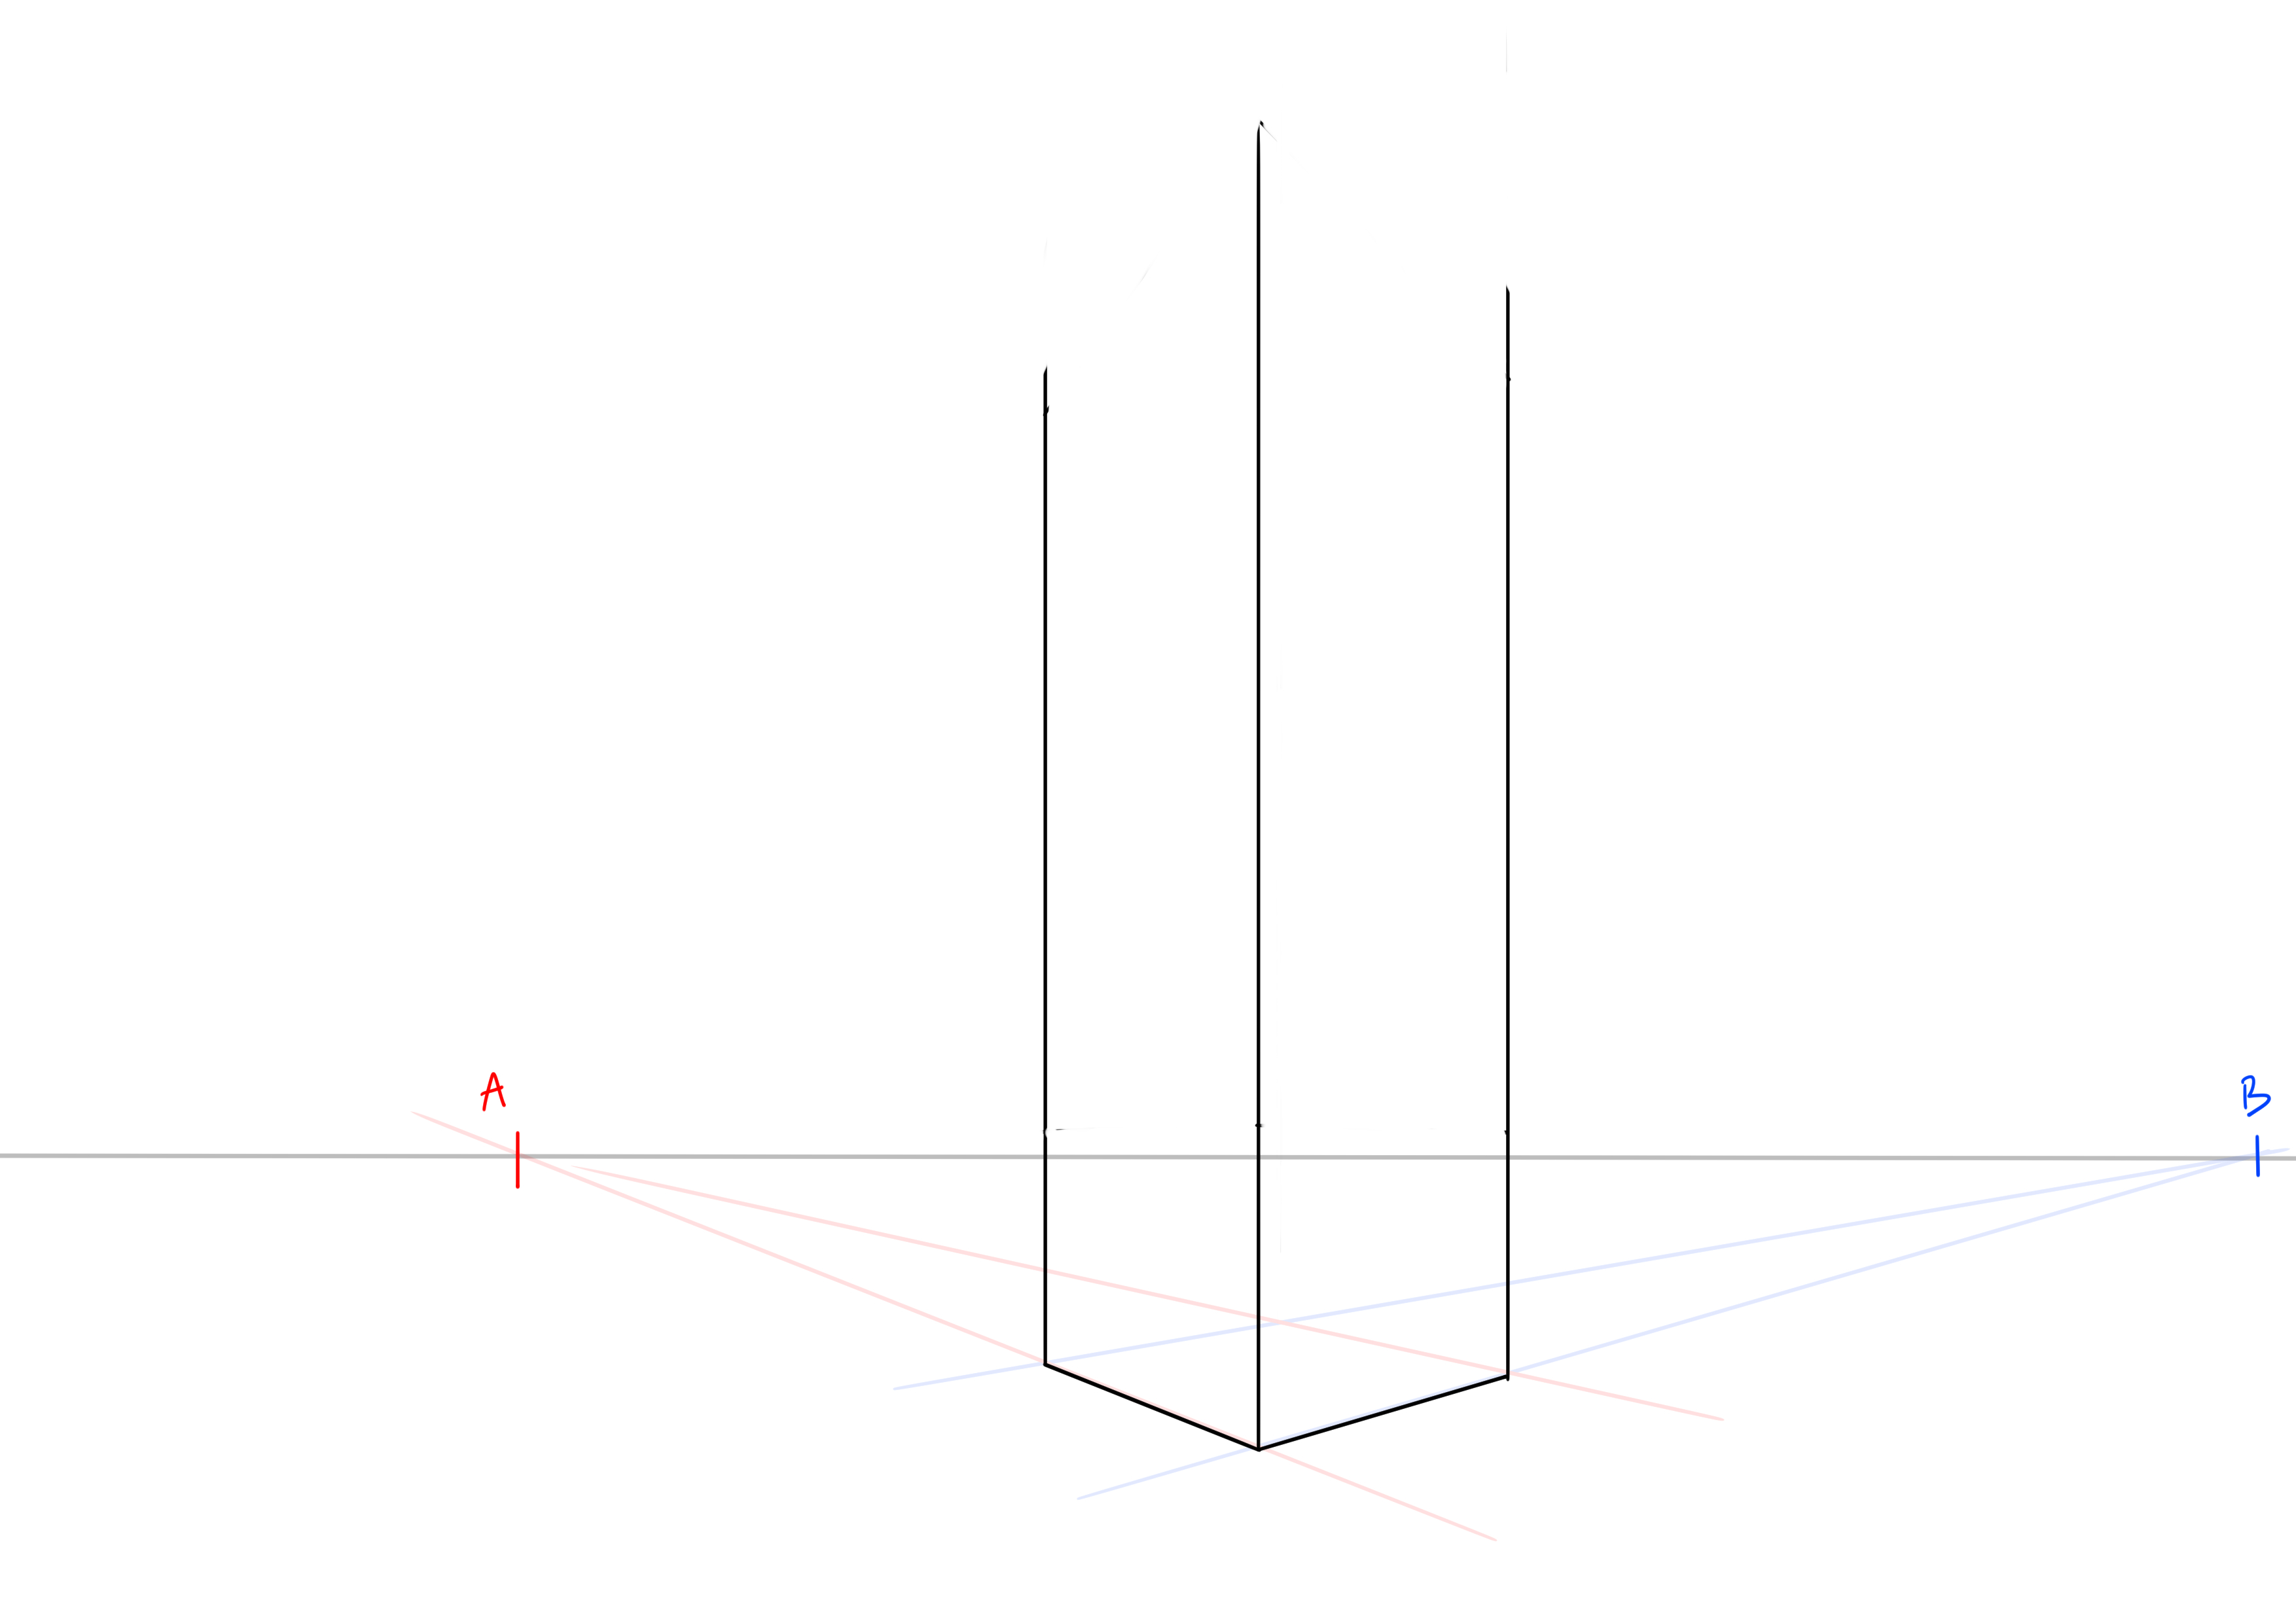
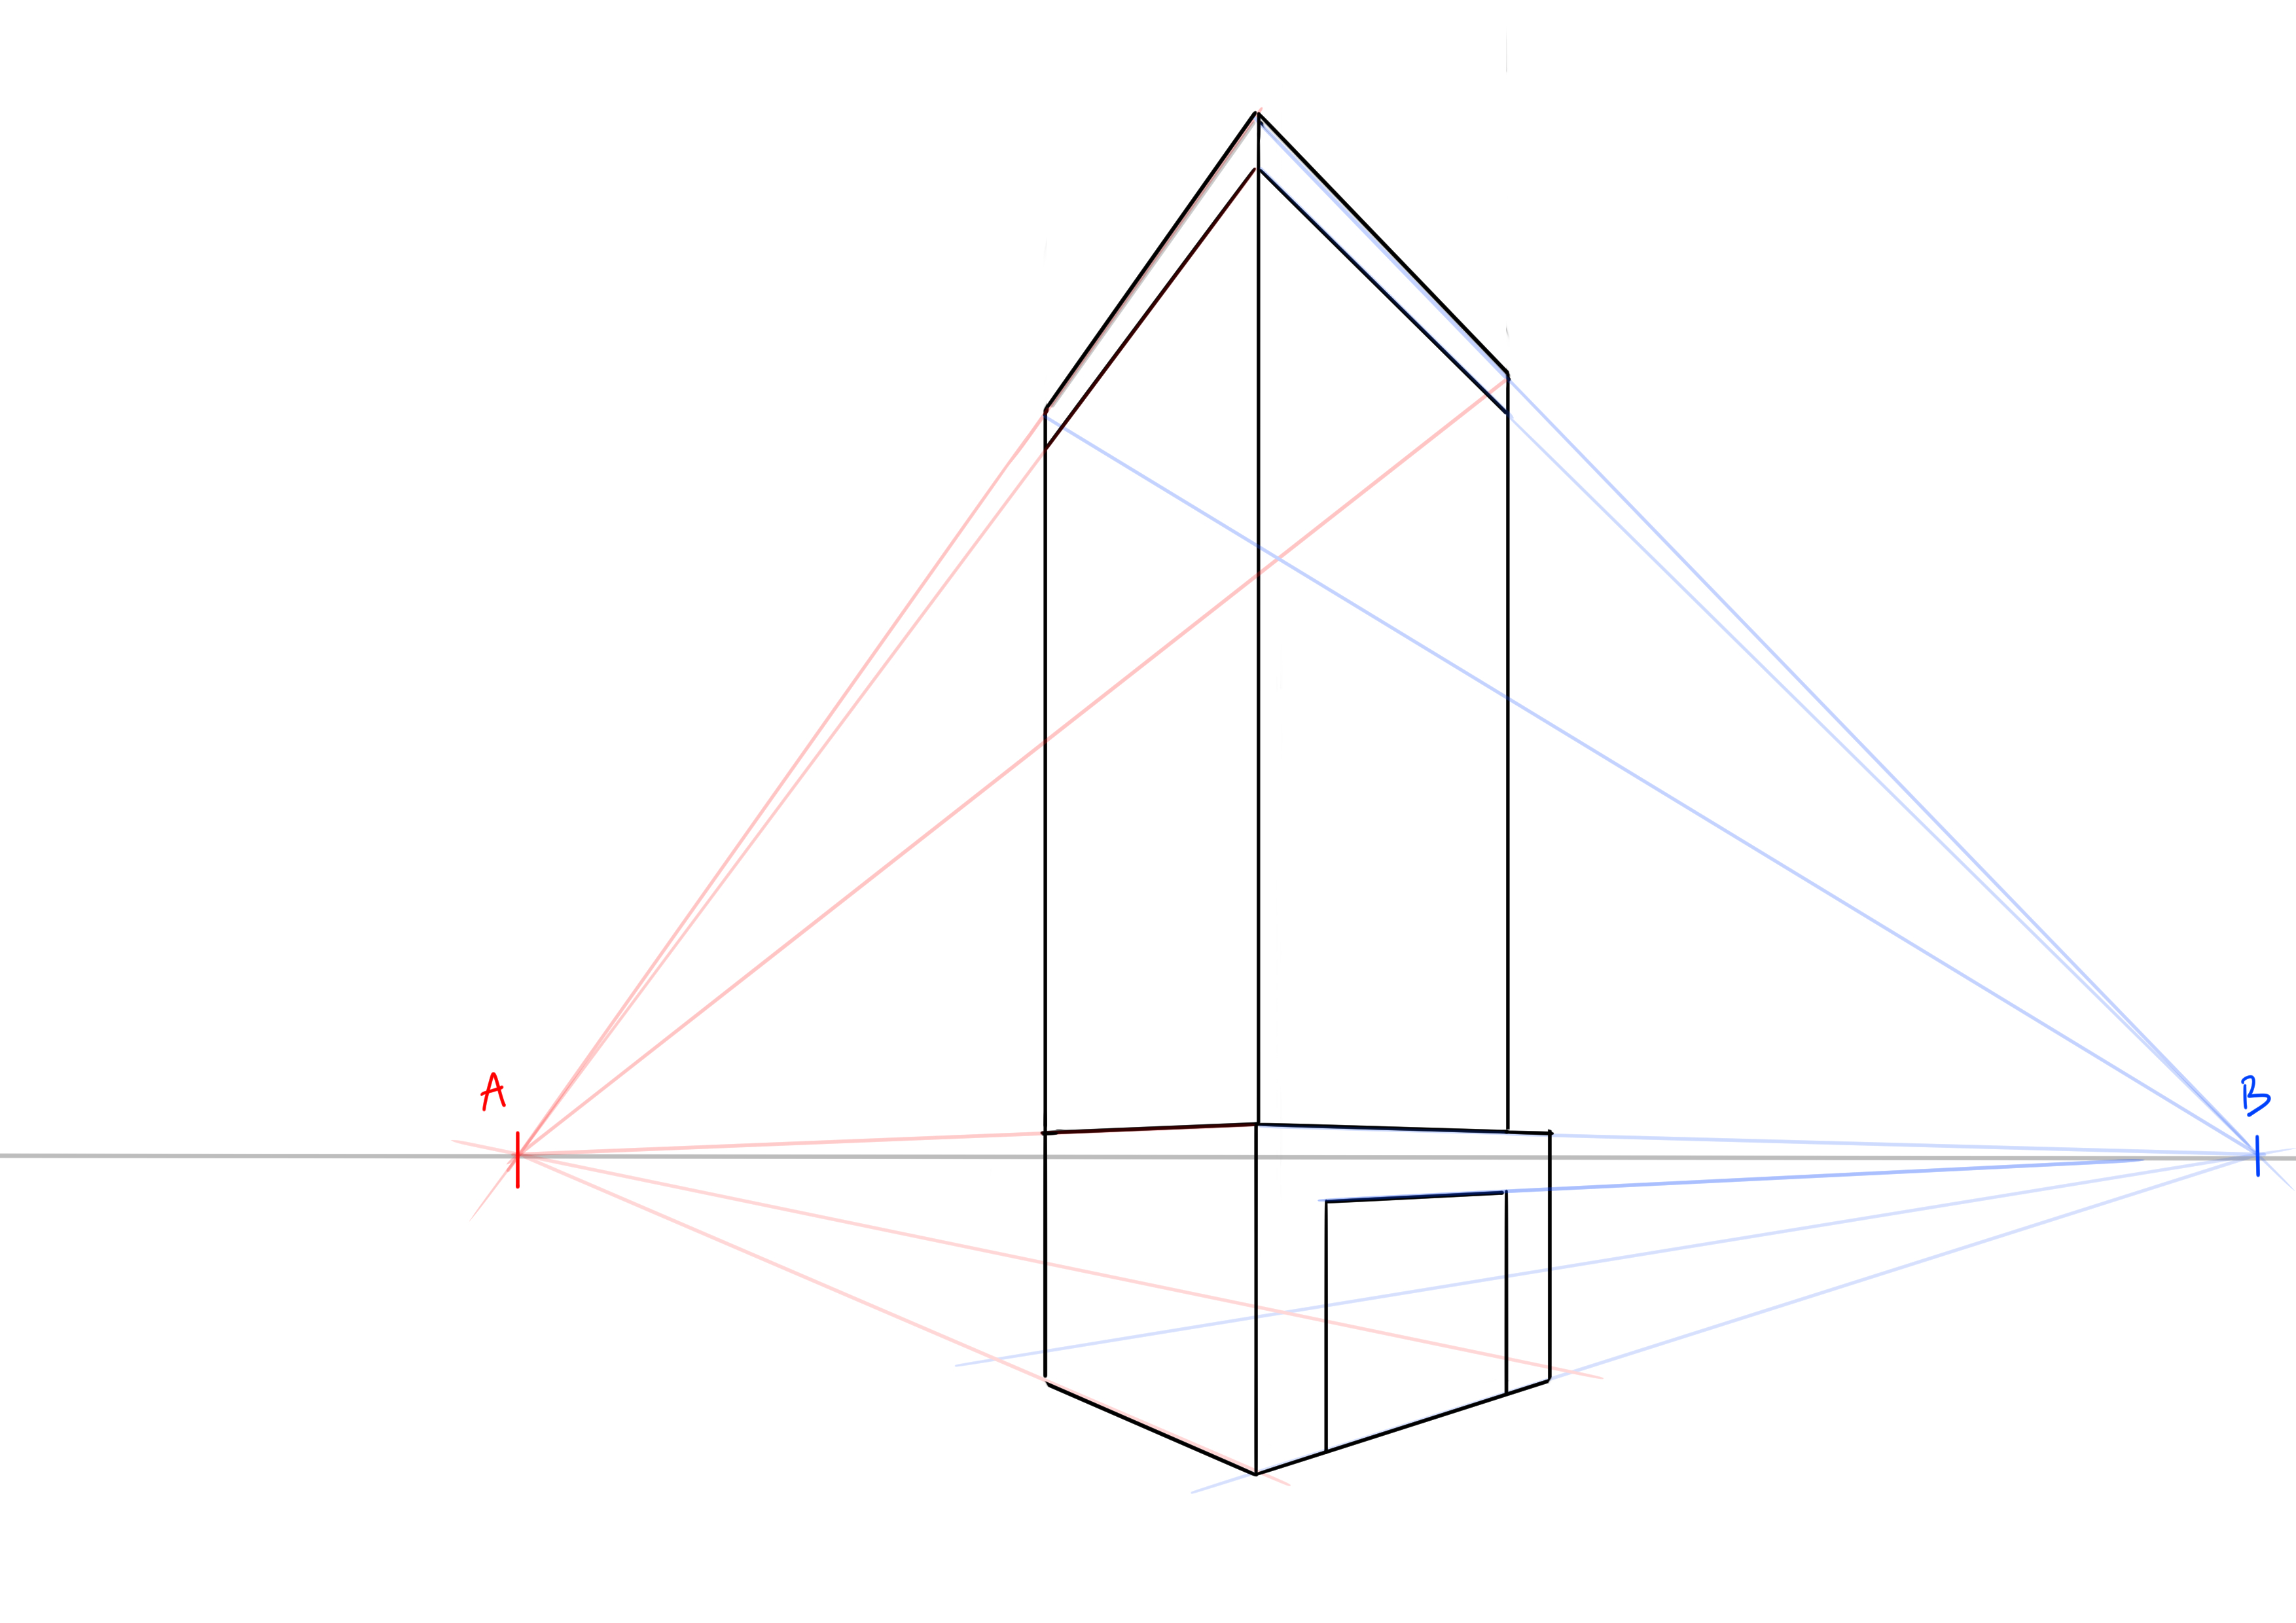
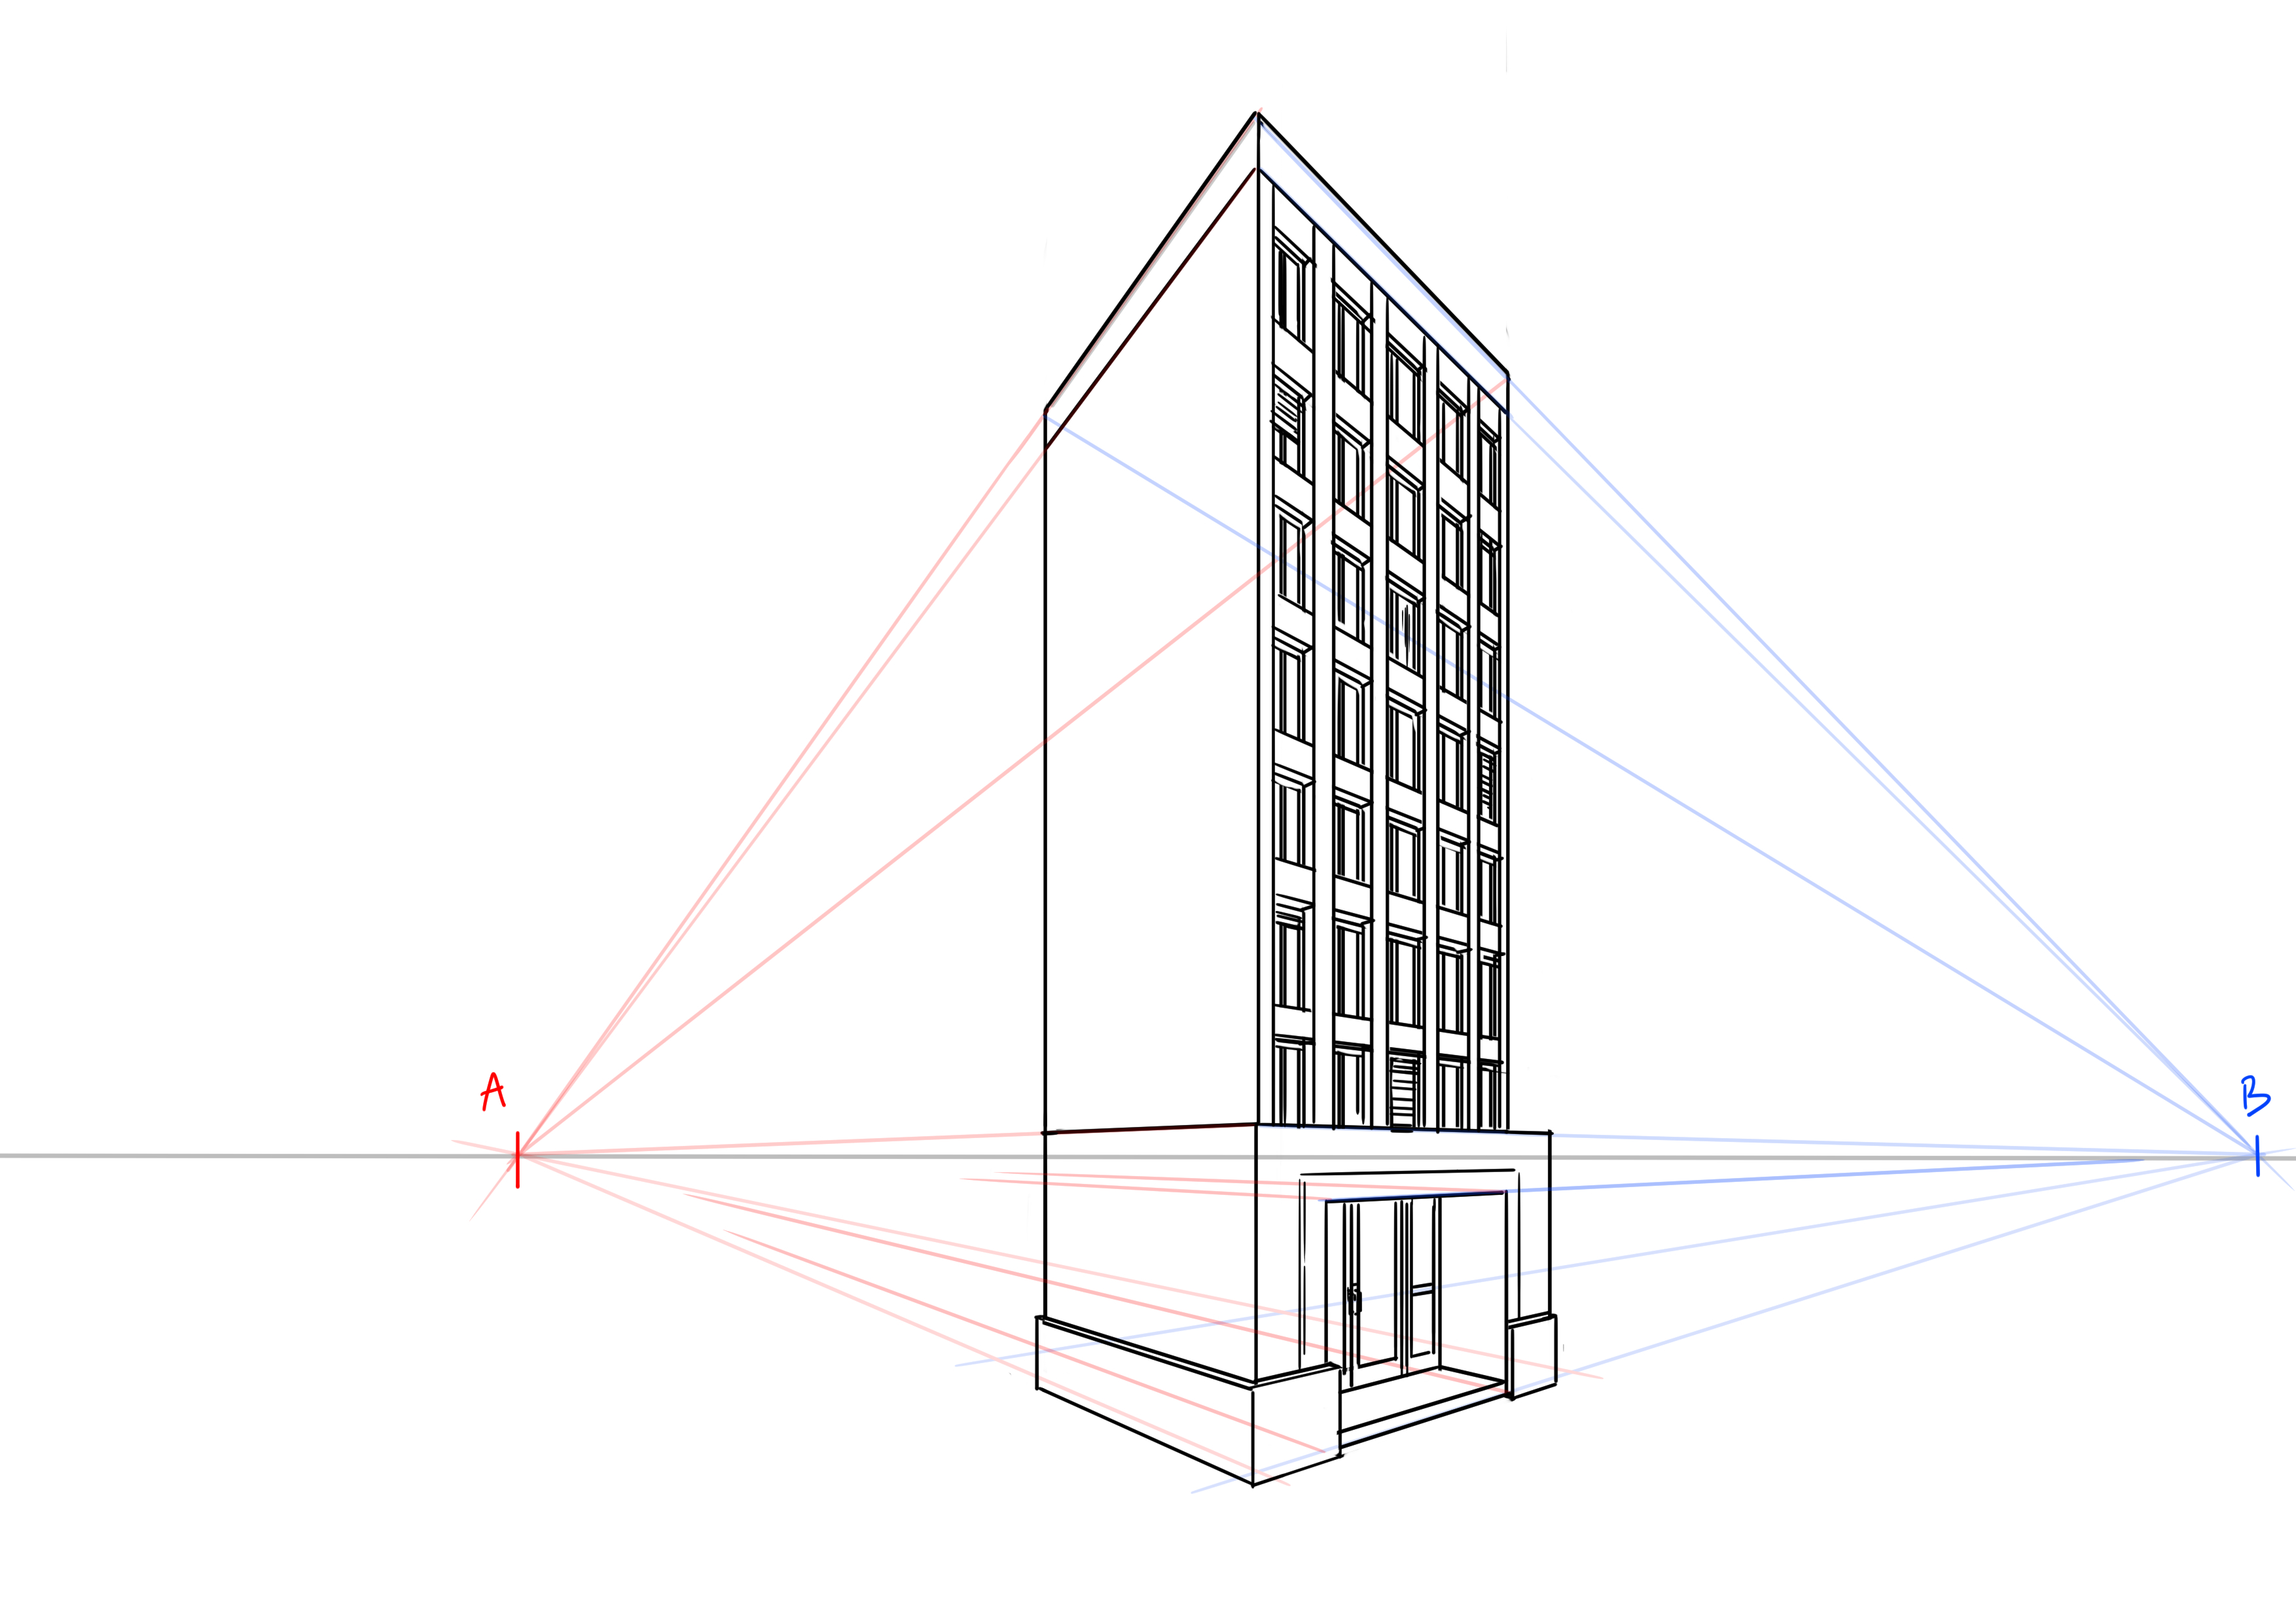
To put it simply, we need a horizon line (a line that symbolizes the horizon, whether we see this line in the end or not does not matter, but it is very important for placing the vanishing points correctly).

Then place two points on this line, relatively far apart. All the building lines which are not vertical will converge towards one or the other of these vanishing points. For clarity, I will simply call these points A and B.
DRAWING THE BASE OF THE BUILDING
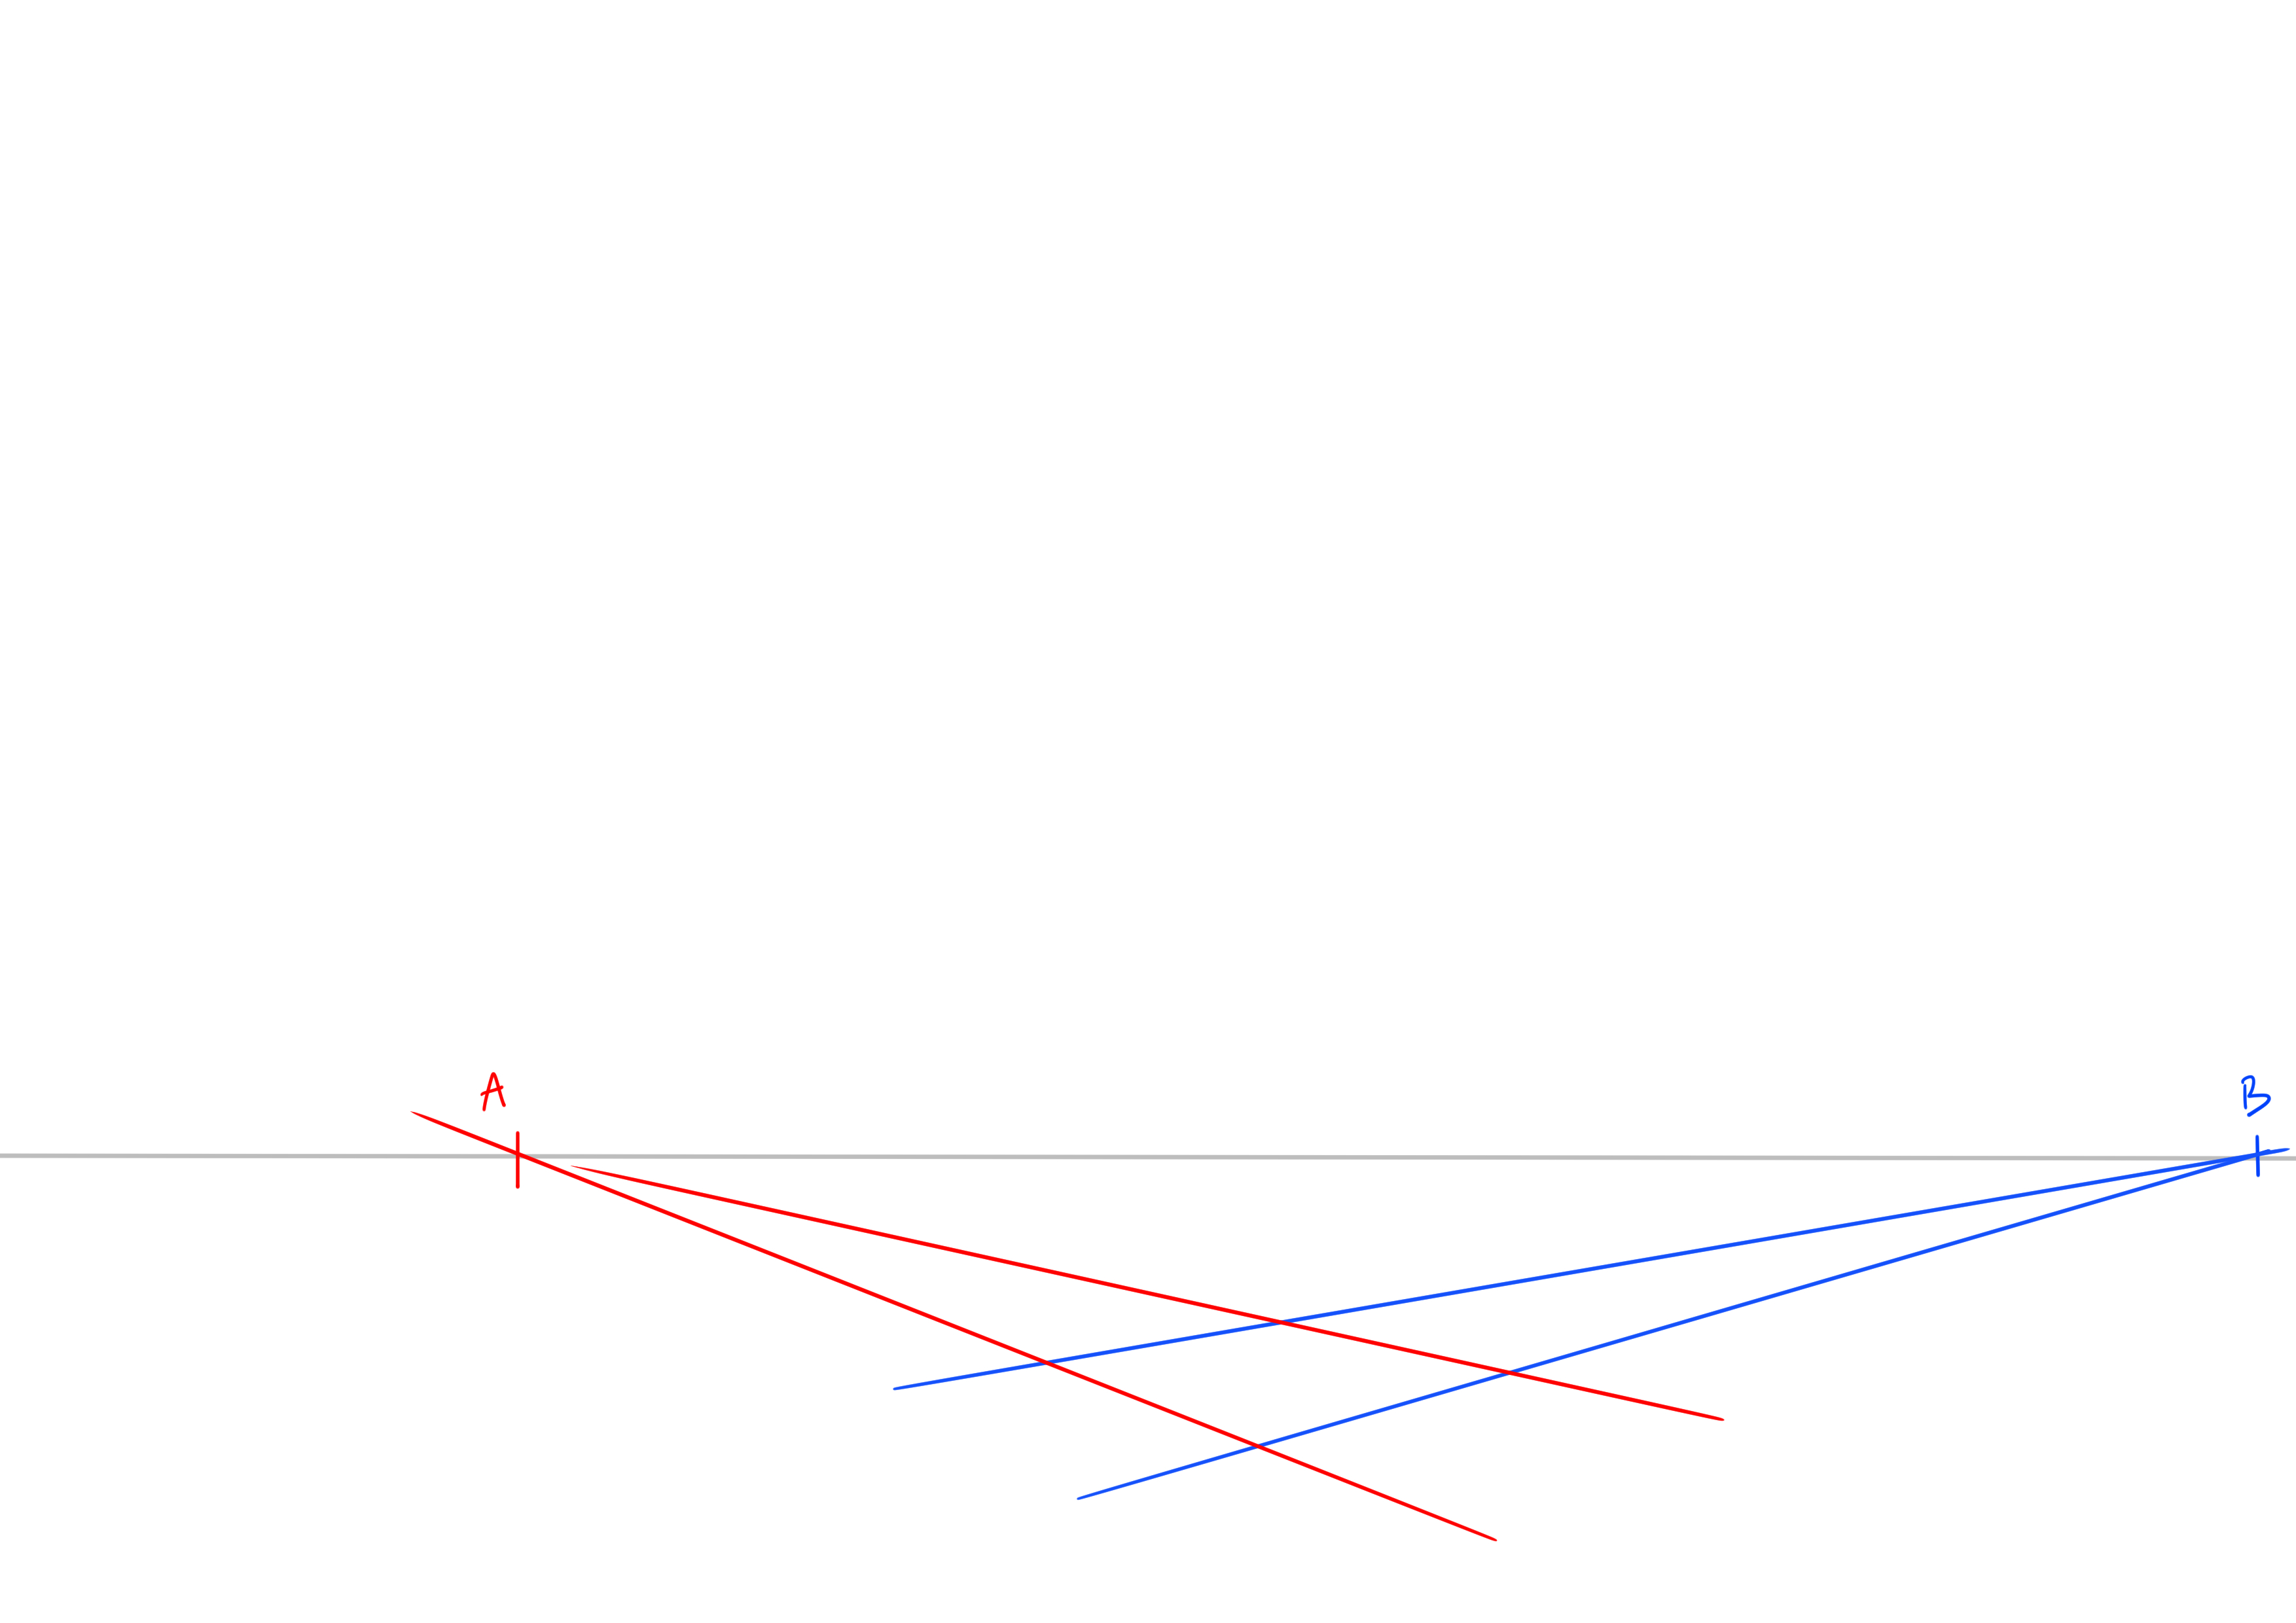
We can now start the actual drawing! First, we'll sketch the base of the building. A square or rectangle, whichever you prefer. For this, draw two lines from each vanishing point (so 2 from point A and 2 from point B). To make it clearer, I will draw the lines corresponding to vanishing point A in red and those for vanishing point B in blue. I'll keep this color code at the beginning so you can clearly understand the logic.
The foundation of our building is made; we can now draw vertical lines from each corner of our base to give it height. Choose the height you want.
To finish our base, we again draw two lines from each of our vanishing points.
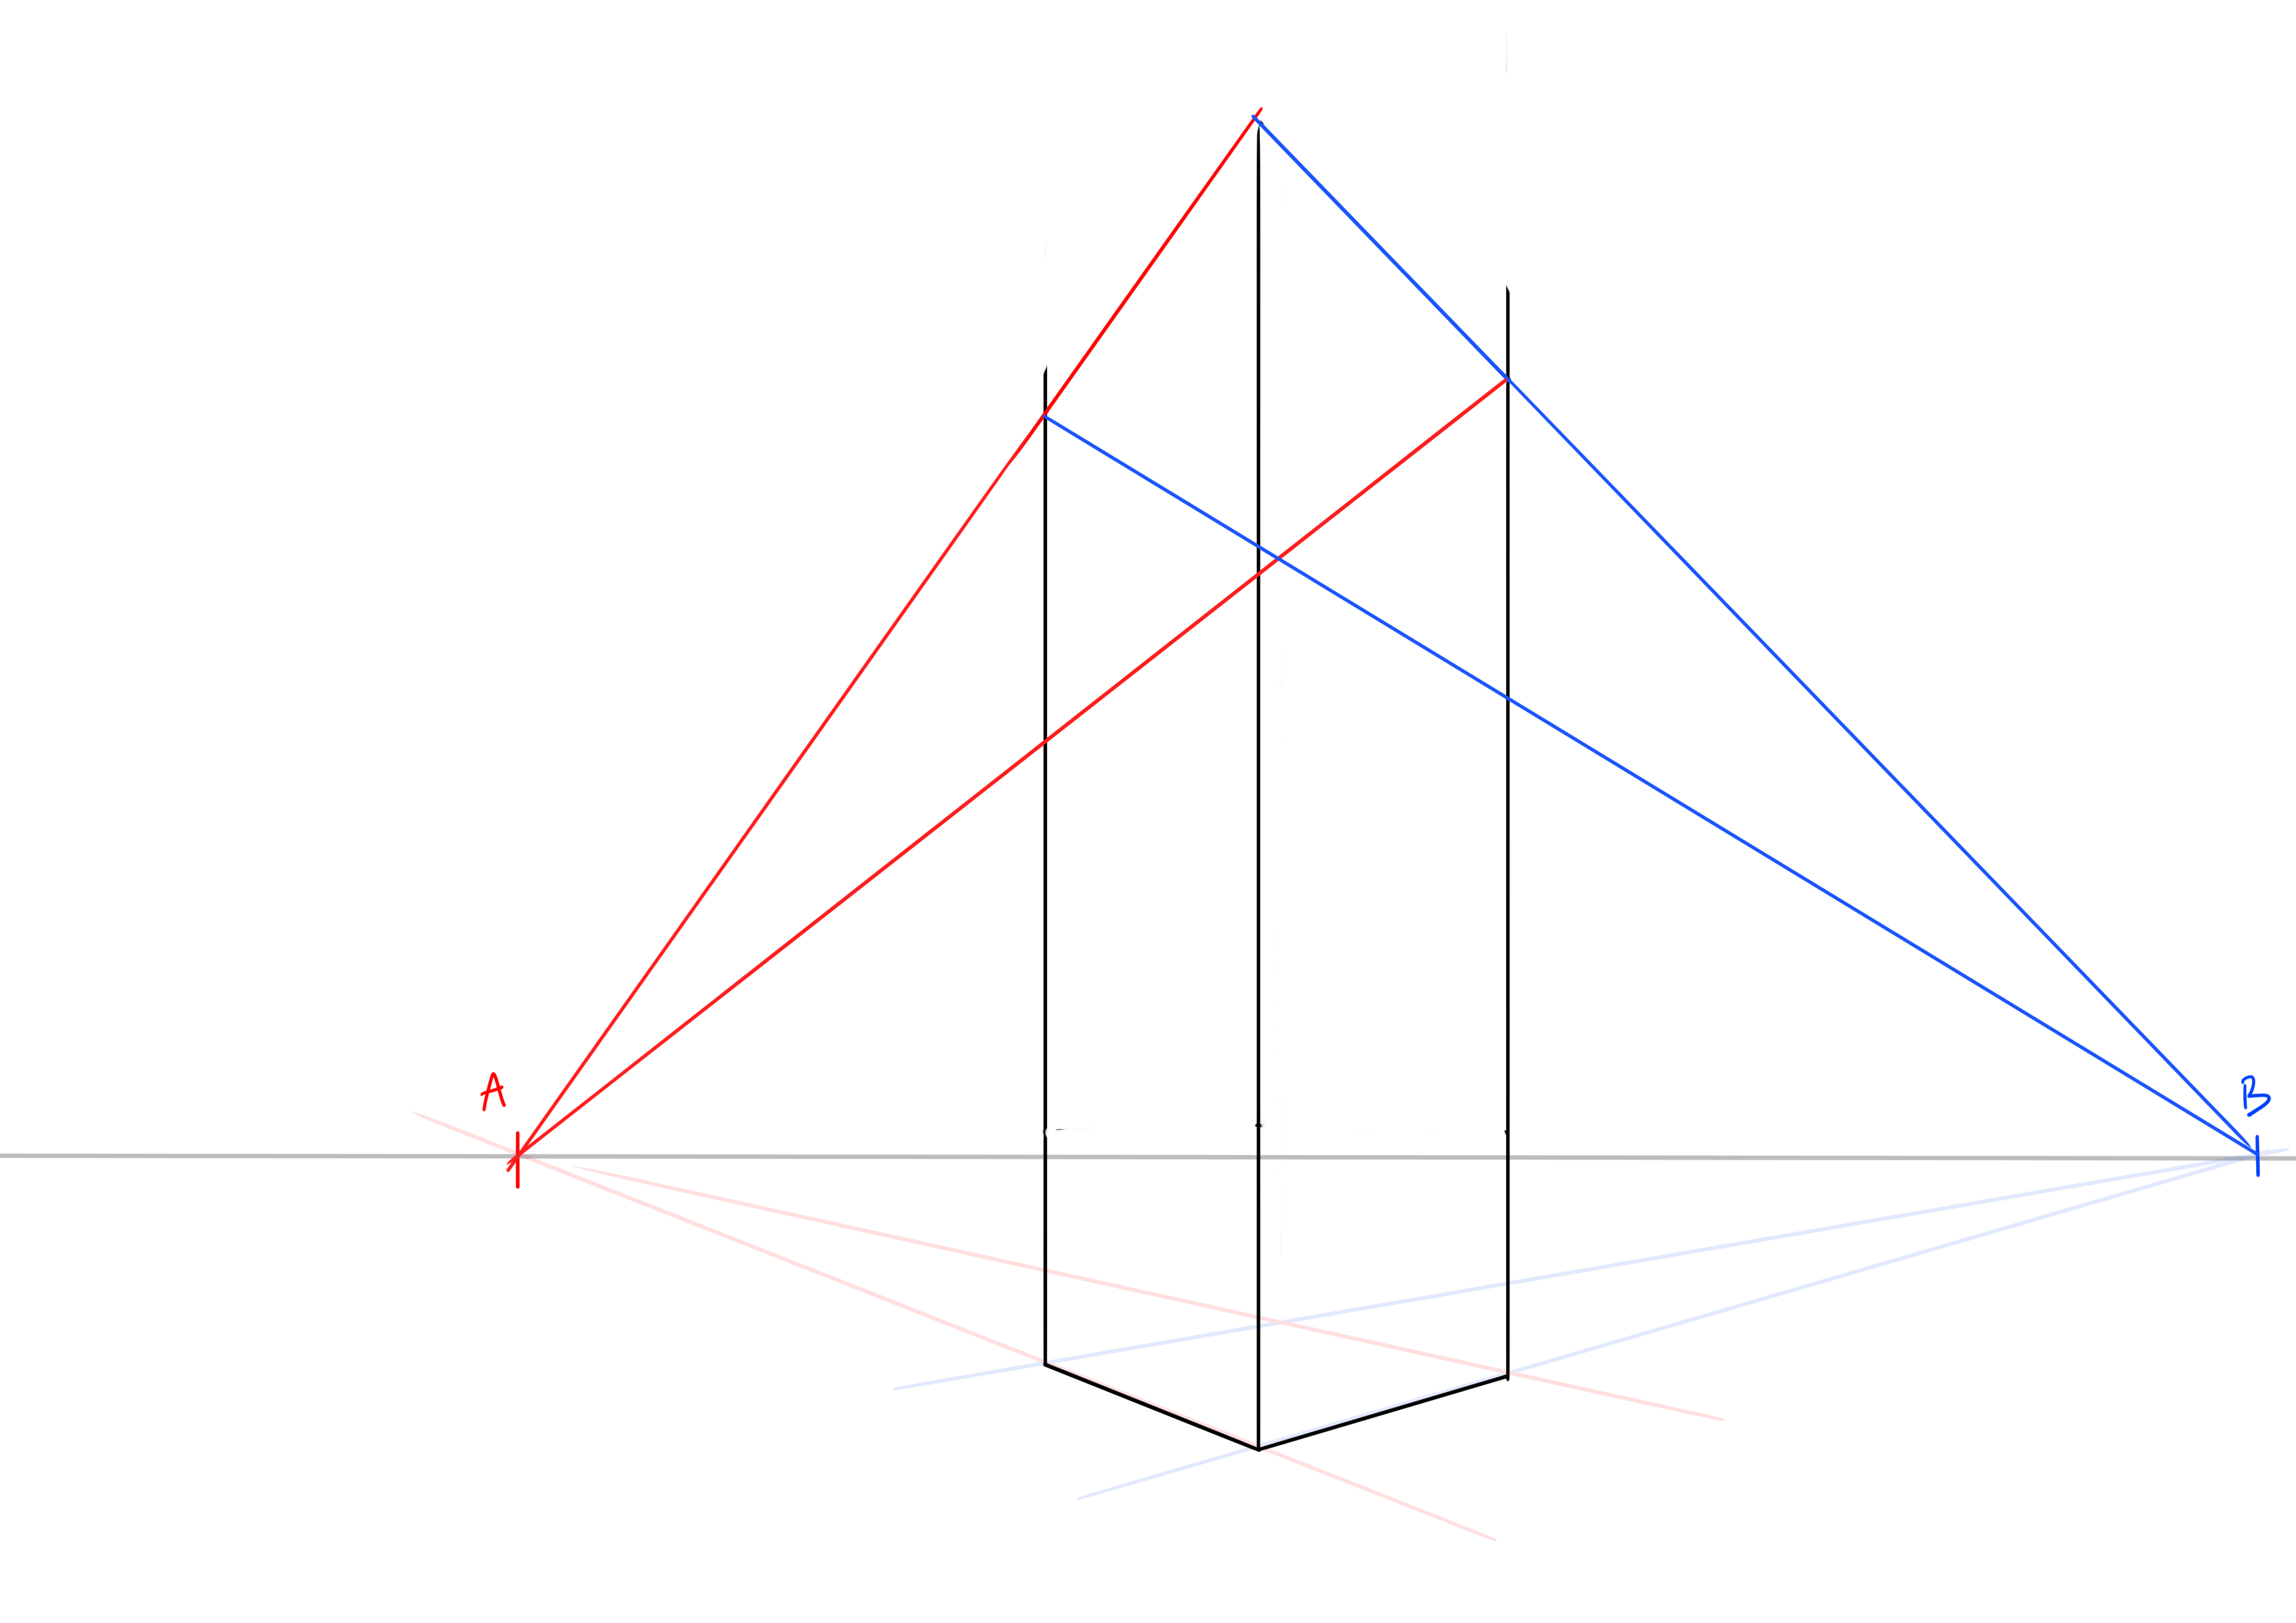
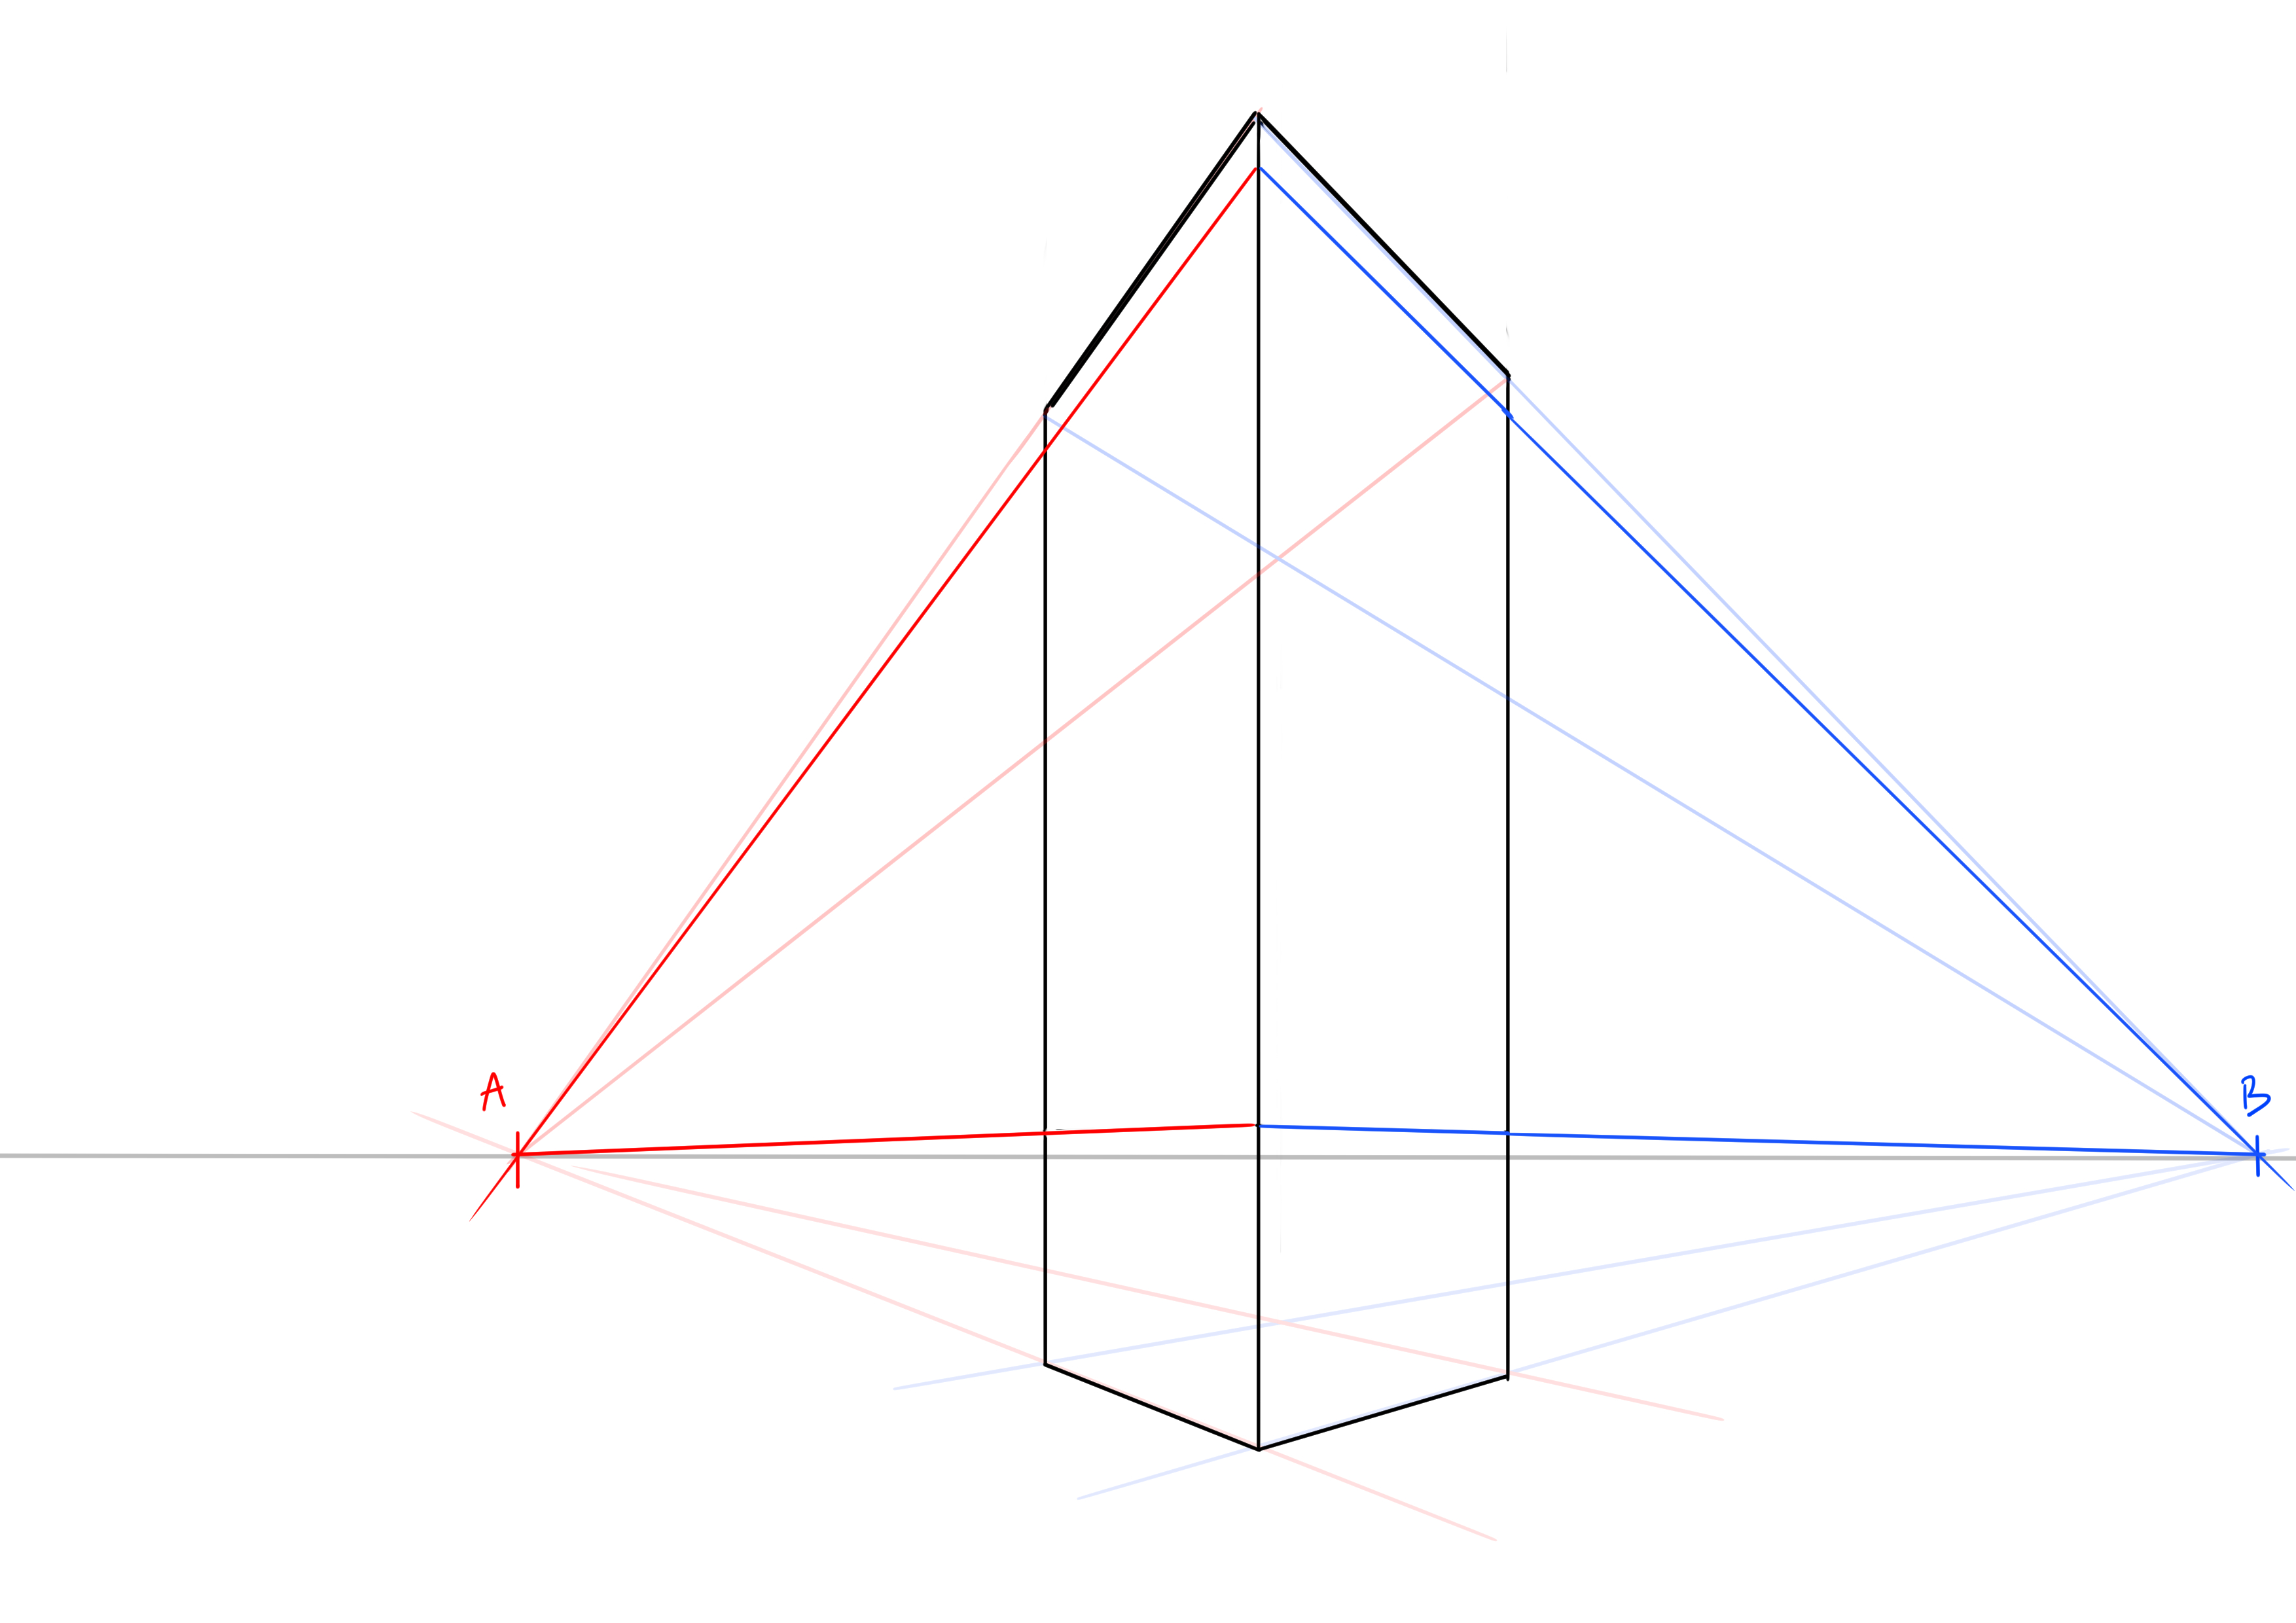
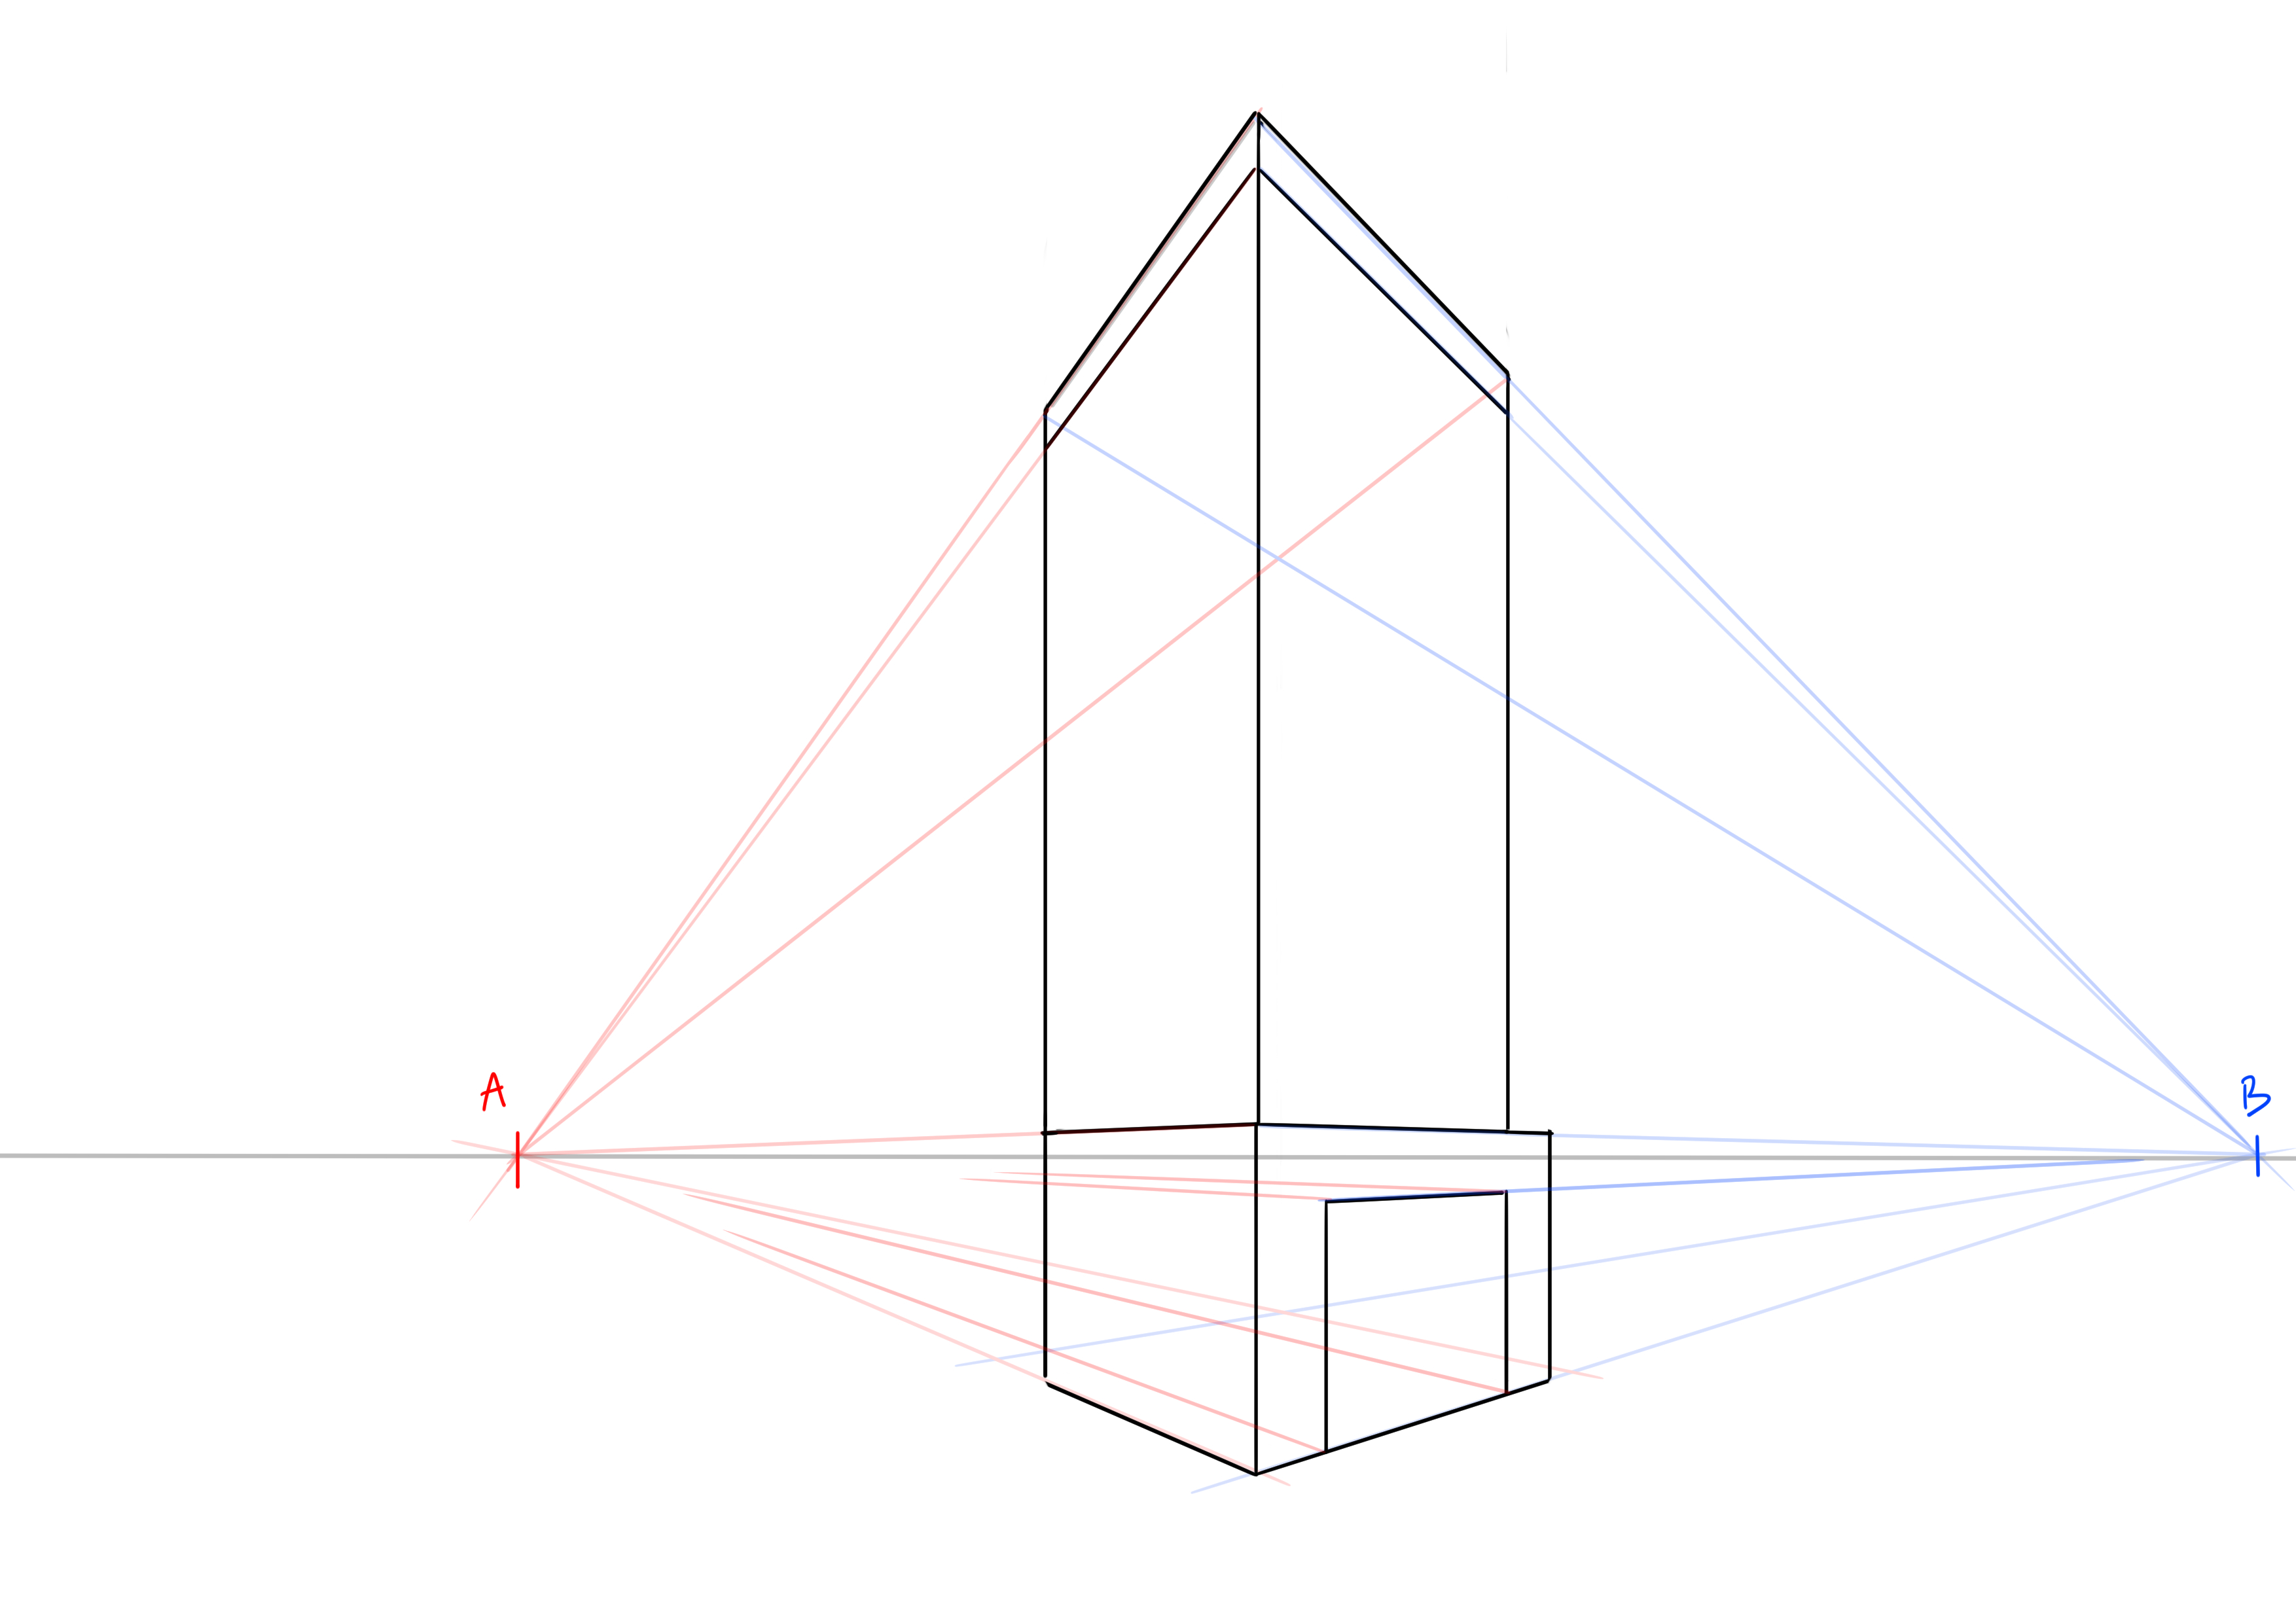
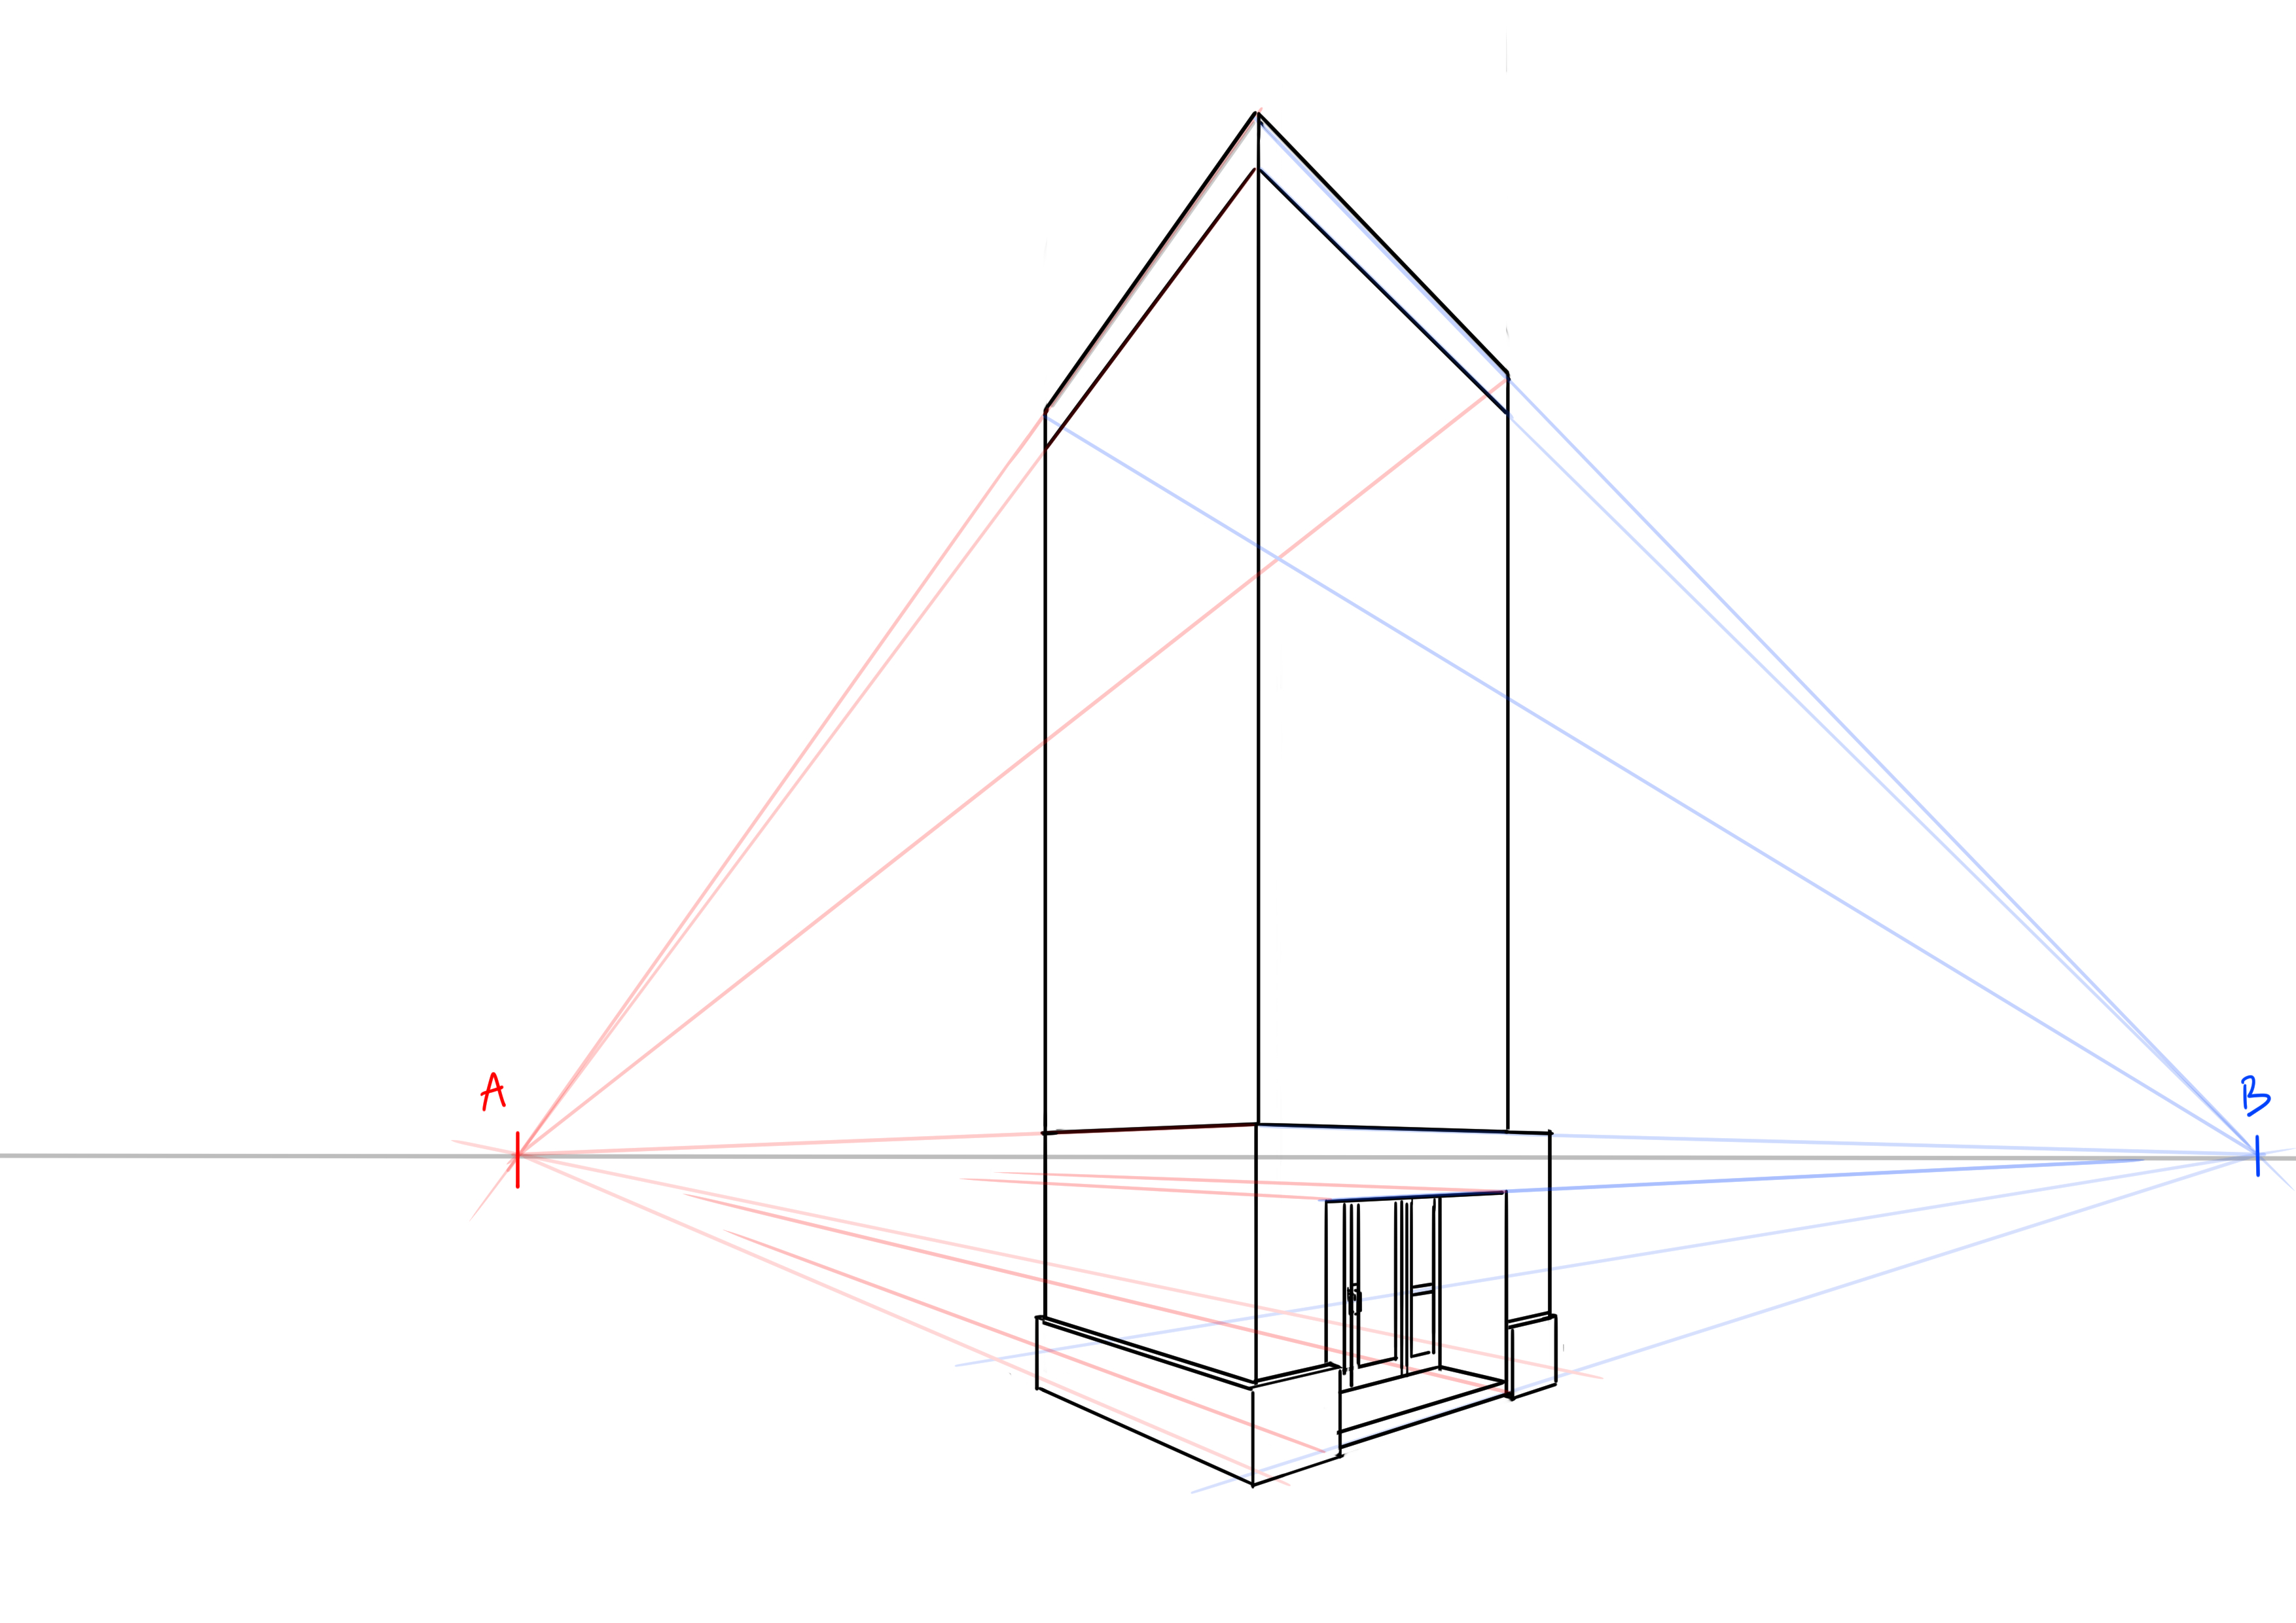
So we have a parallelepiped. Now, we're going to add the details, which is the most difficult part. I will first draw a line at the top of my building and another much lower on the visible faces.
The top one will be used for decoration (sorry, I might not know the technical terms, just follow along, you should get what I mean! :D) sort of a frieze actually, and the bottom one to mark the entrance of the building.
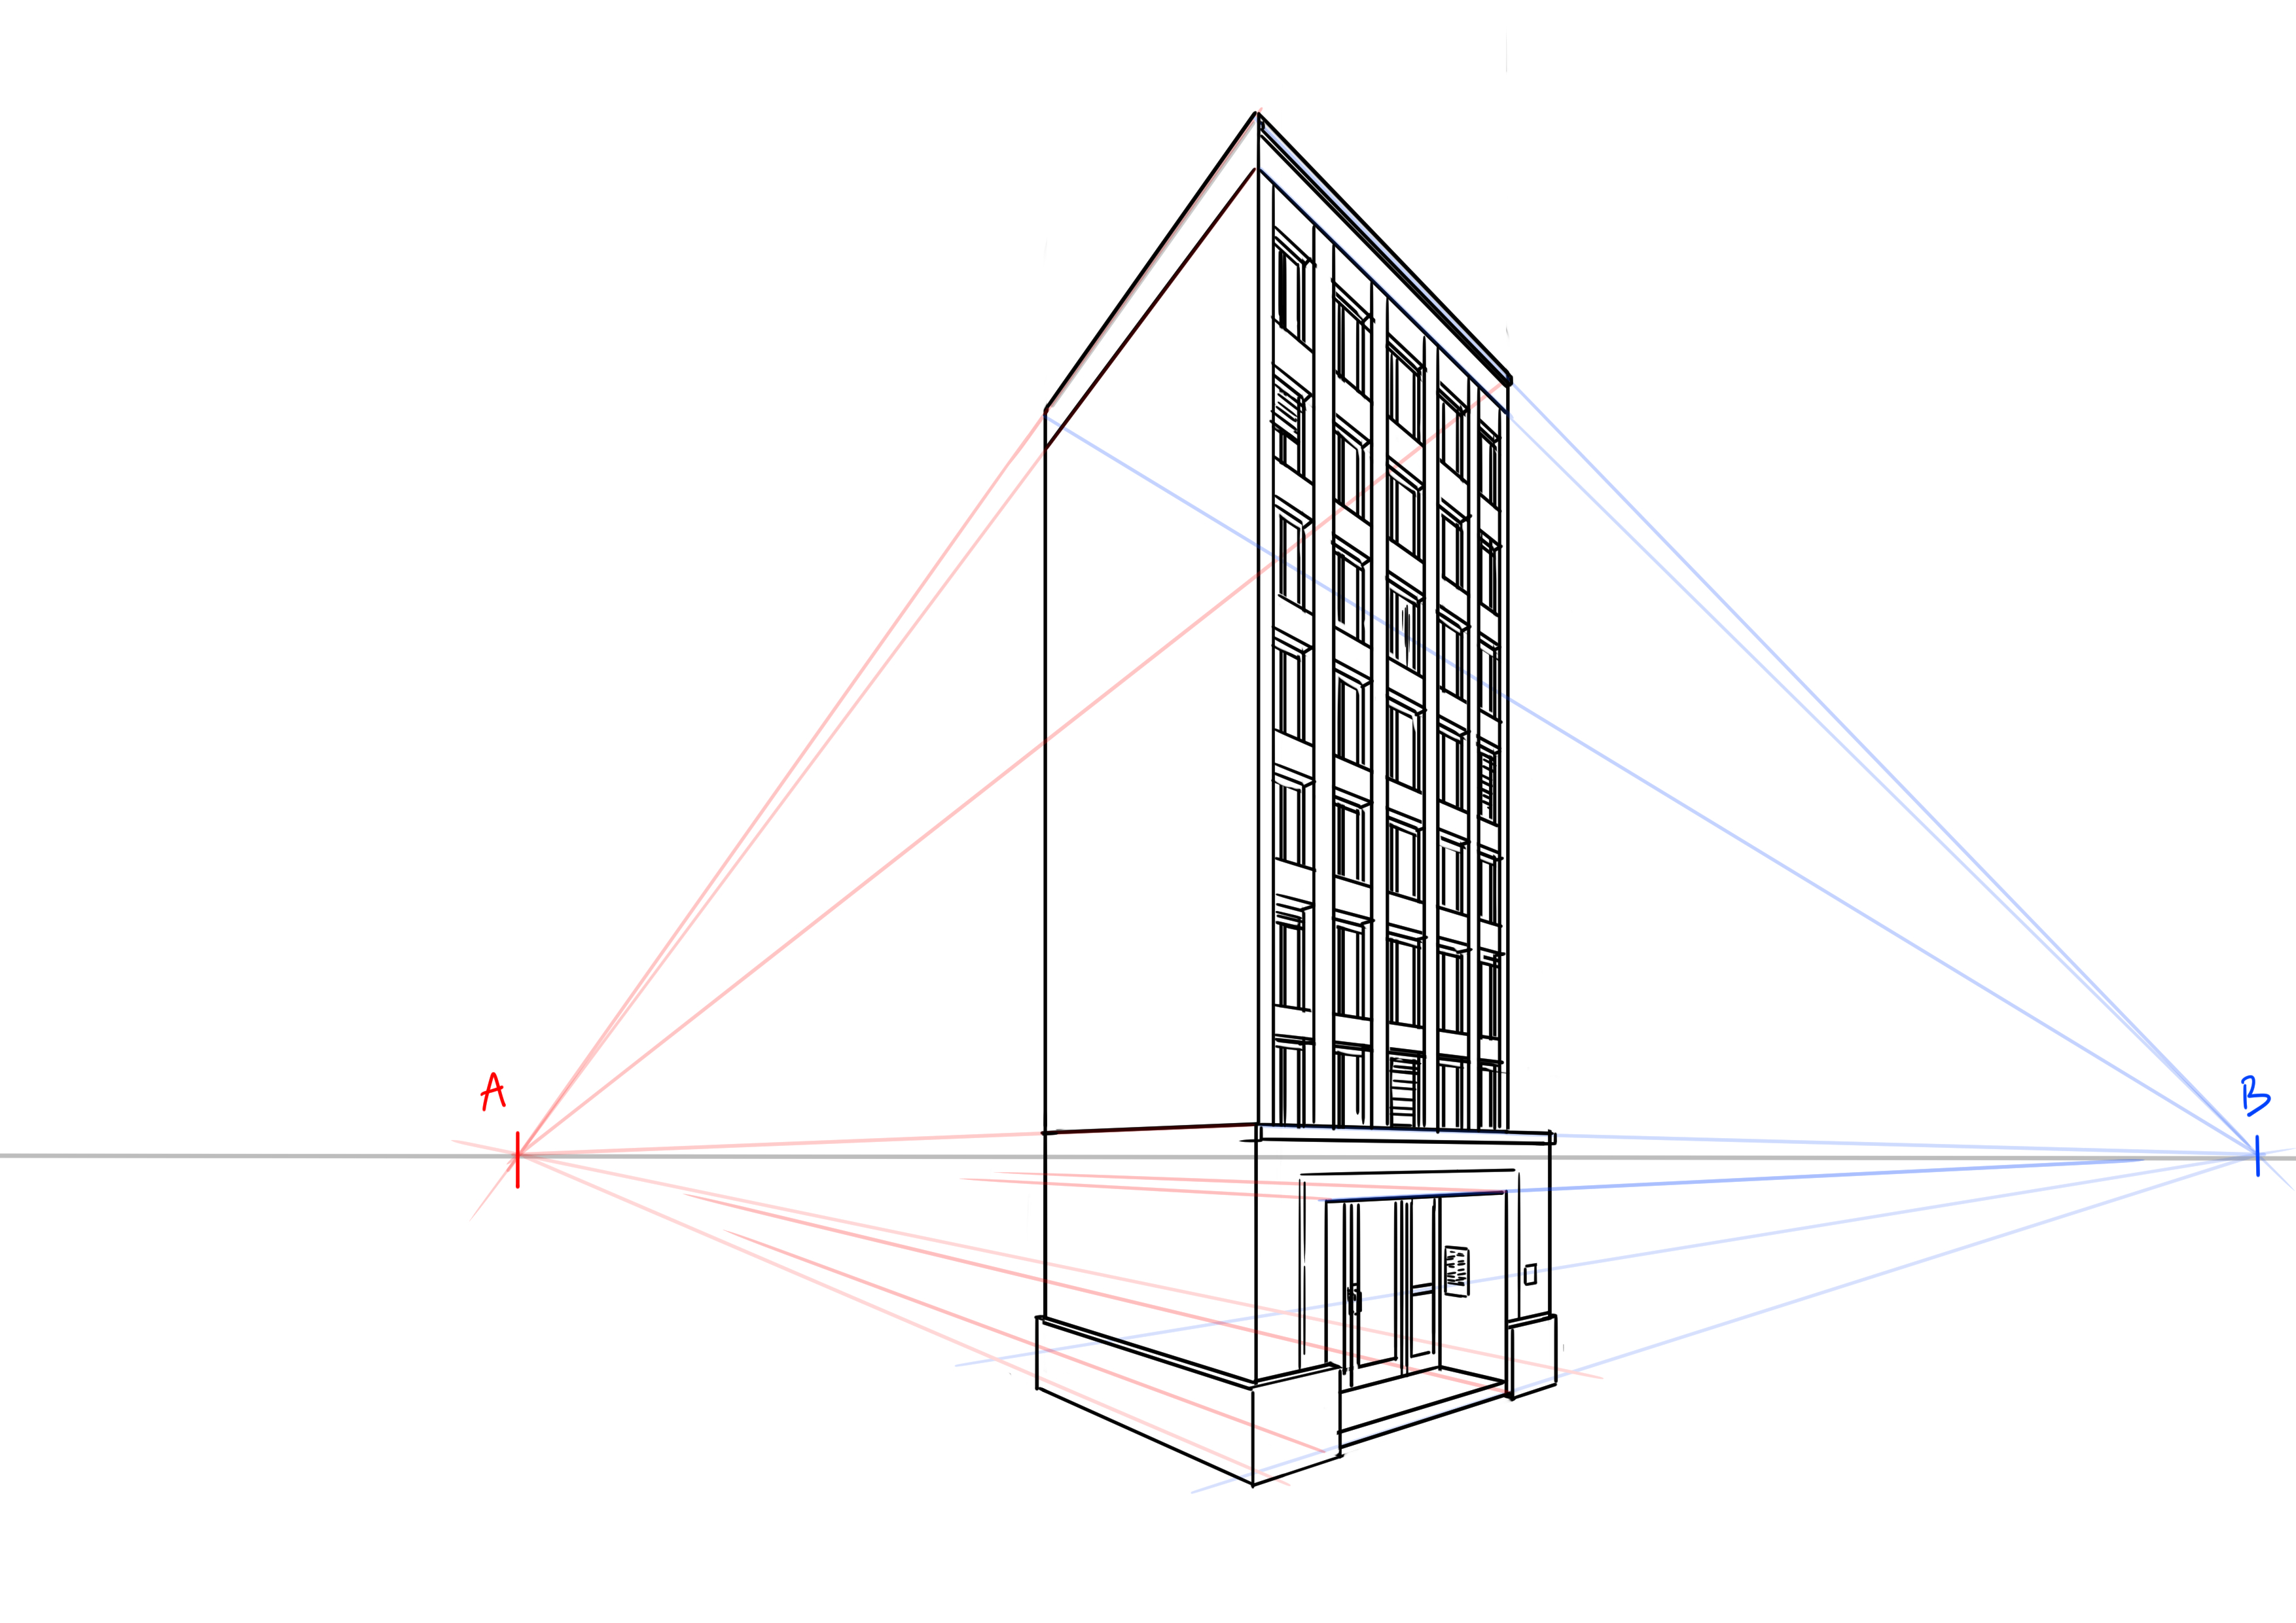
Let's talk about the base of our building. We'll add some details. Let's start by thickening this base. Draw new lines from the vanishing points to add thickness to our base rectangle. I'm not bothering to do it on each side since some will not be visible.
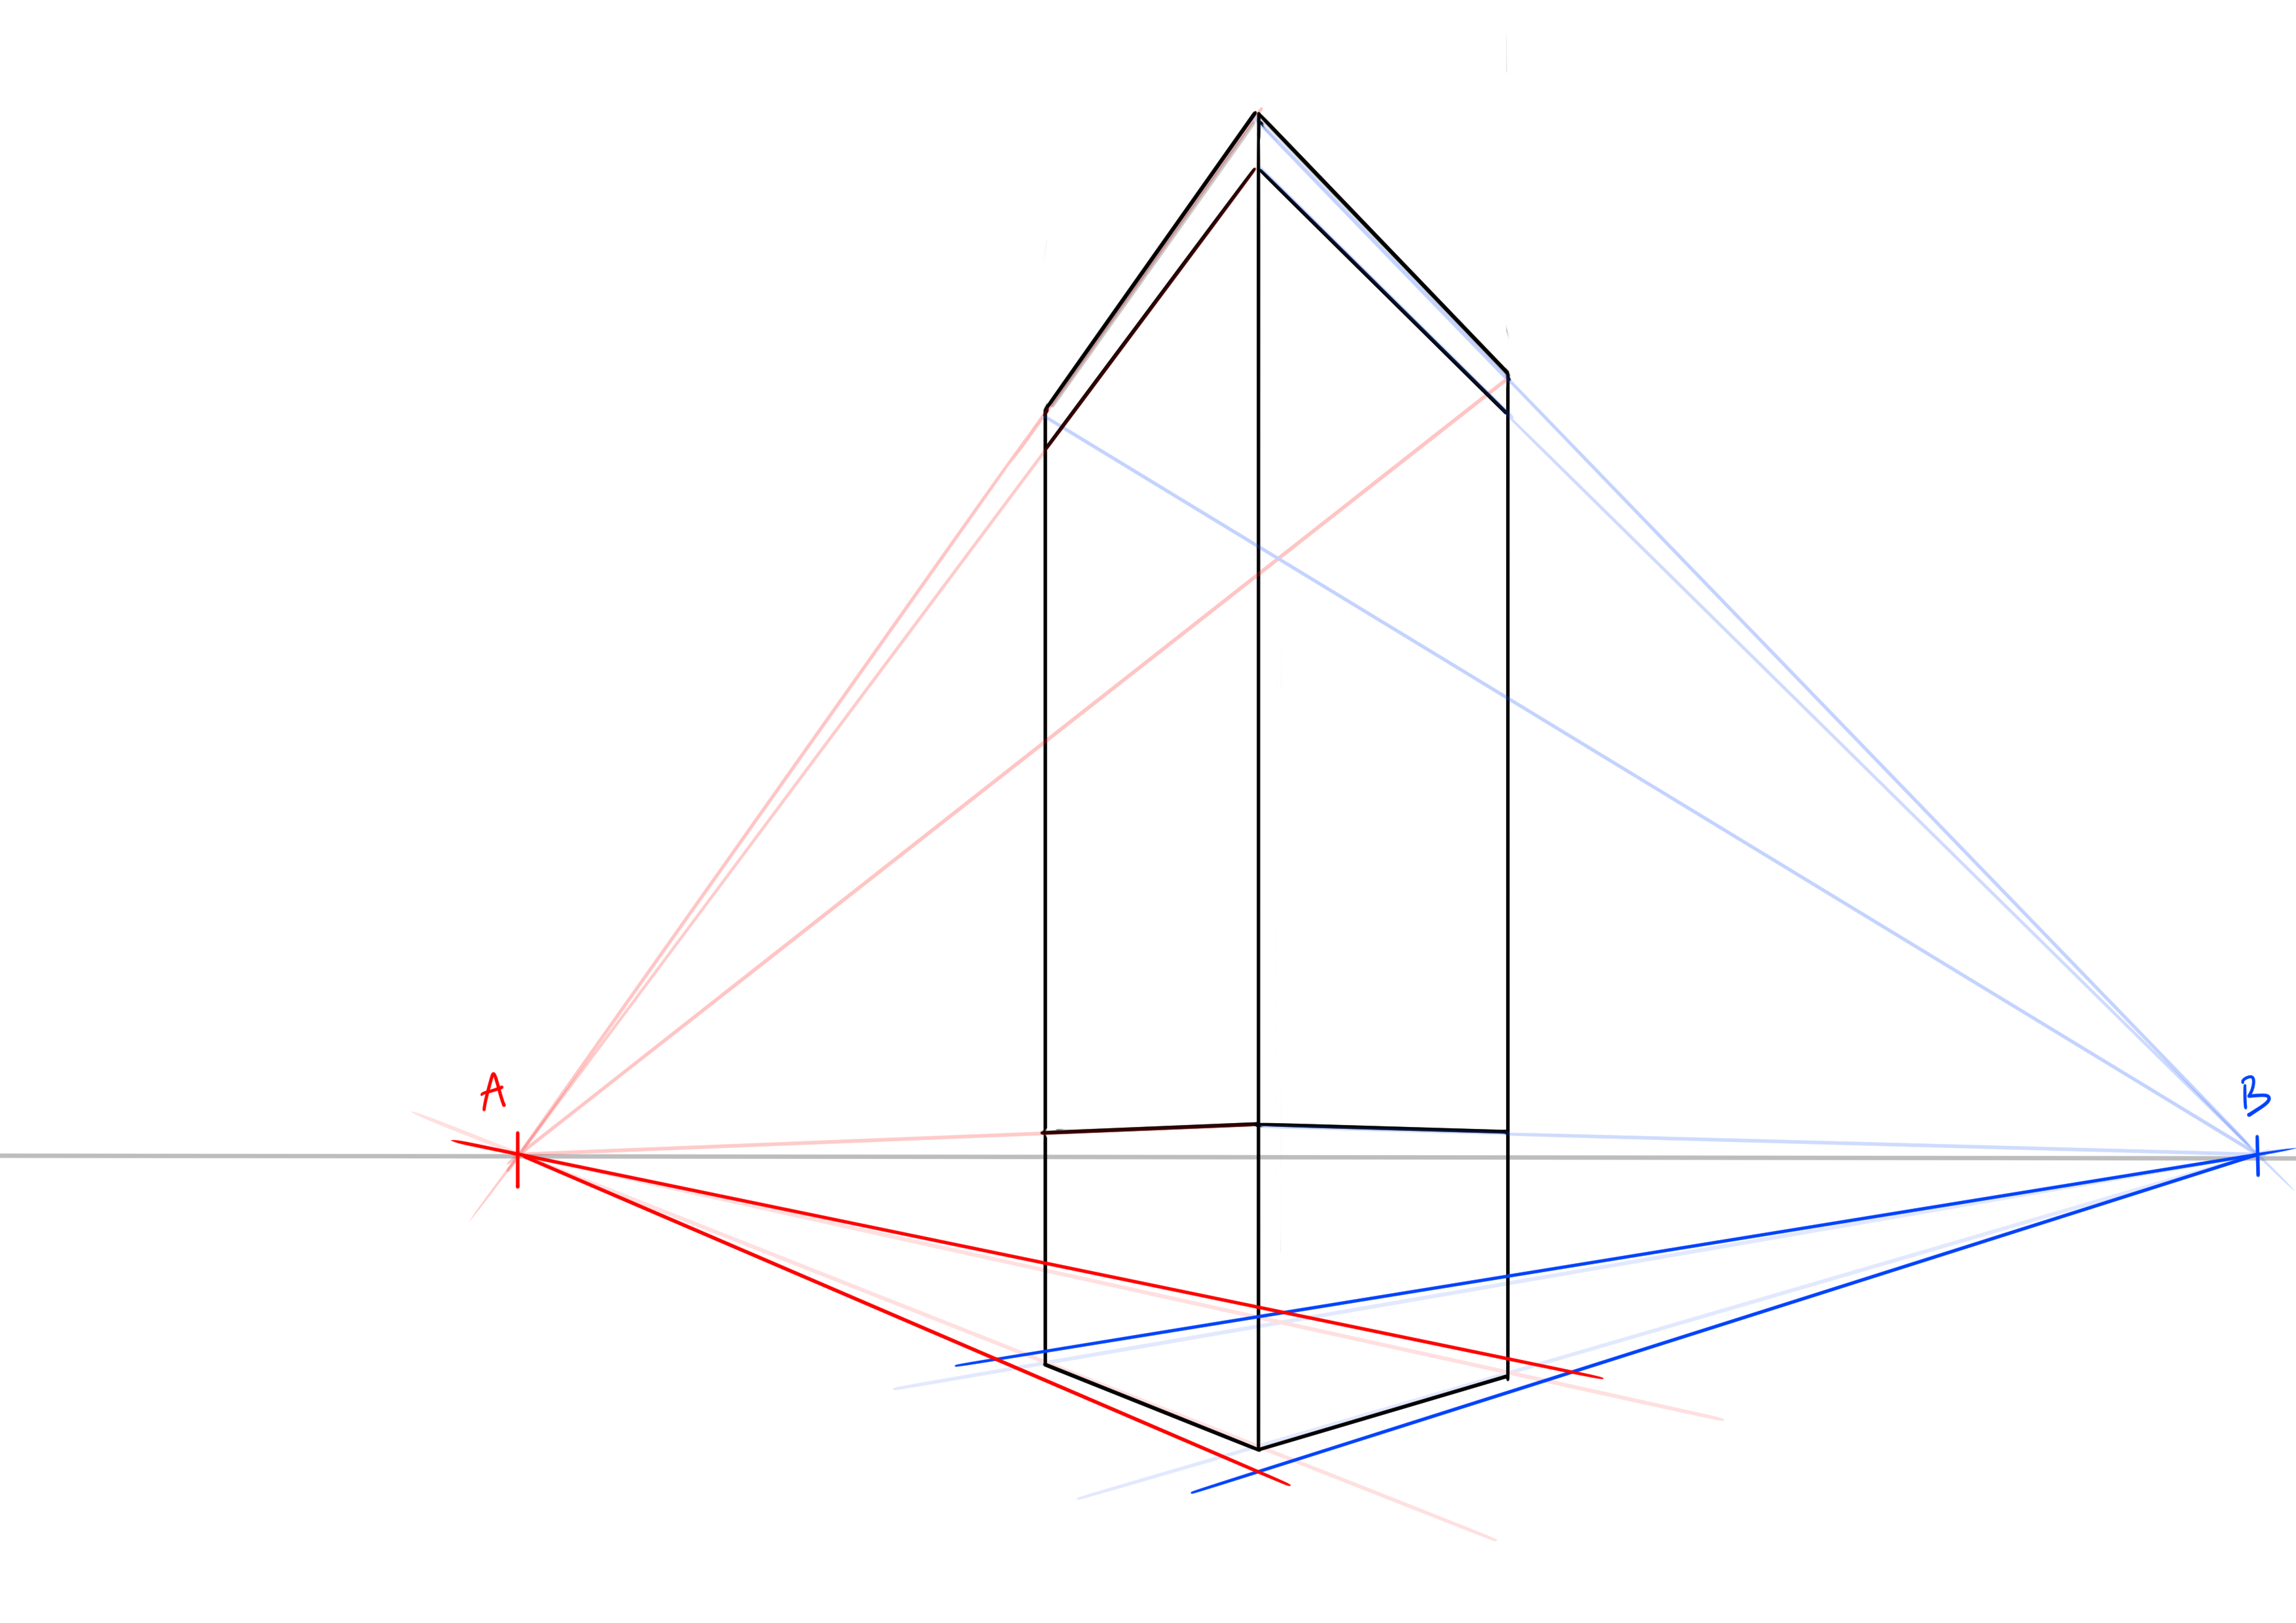
We also draw the vertical lines up to the line we had drawn on the width of the façade just before. I want to move the wall forward only on the front face of my building. In my mind, it is attached to other buildings, so only the front face interests me.

THE BUILDING ENTRANCE
I want to make an entrance to this building, so let's draw the door! It will be a double glass door.
We are going to "indent" this door into the building. To do this, let's draw lines towards the interior of the building and then trace the rectangle of the door again.
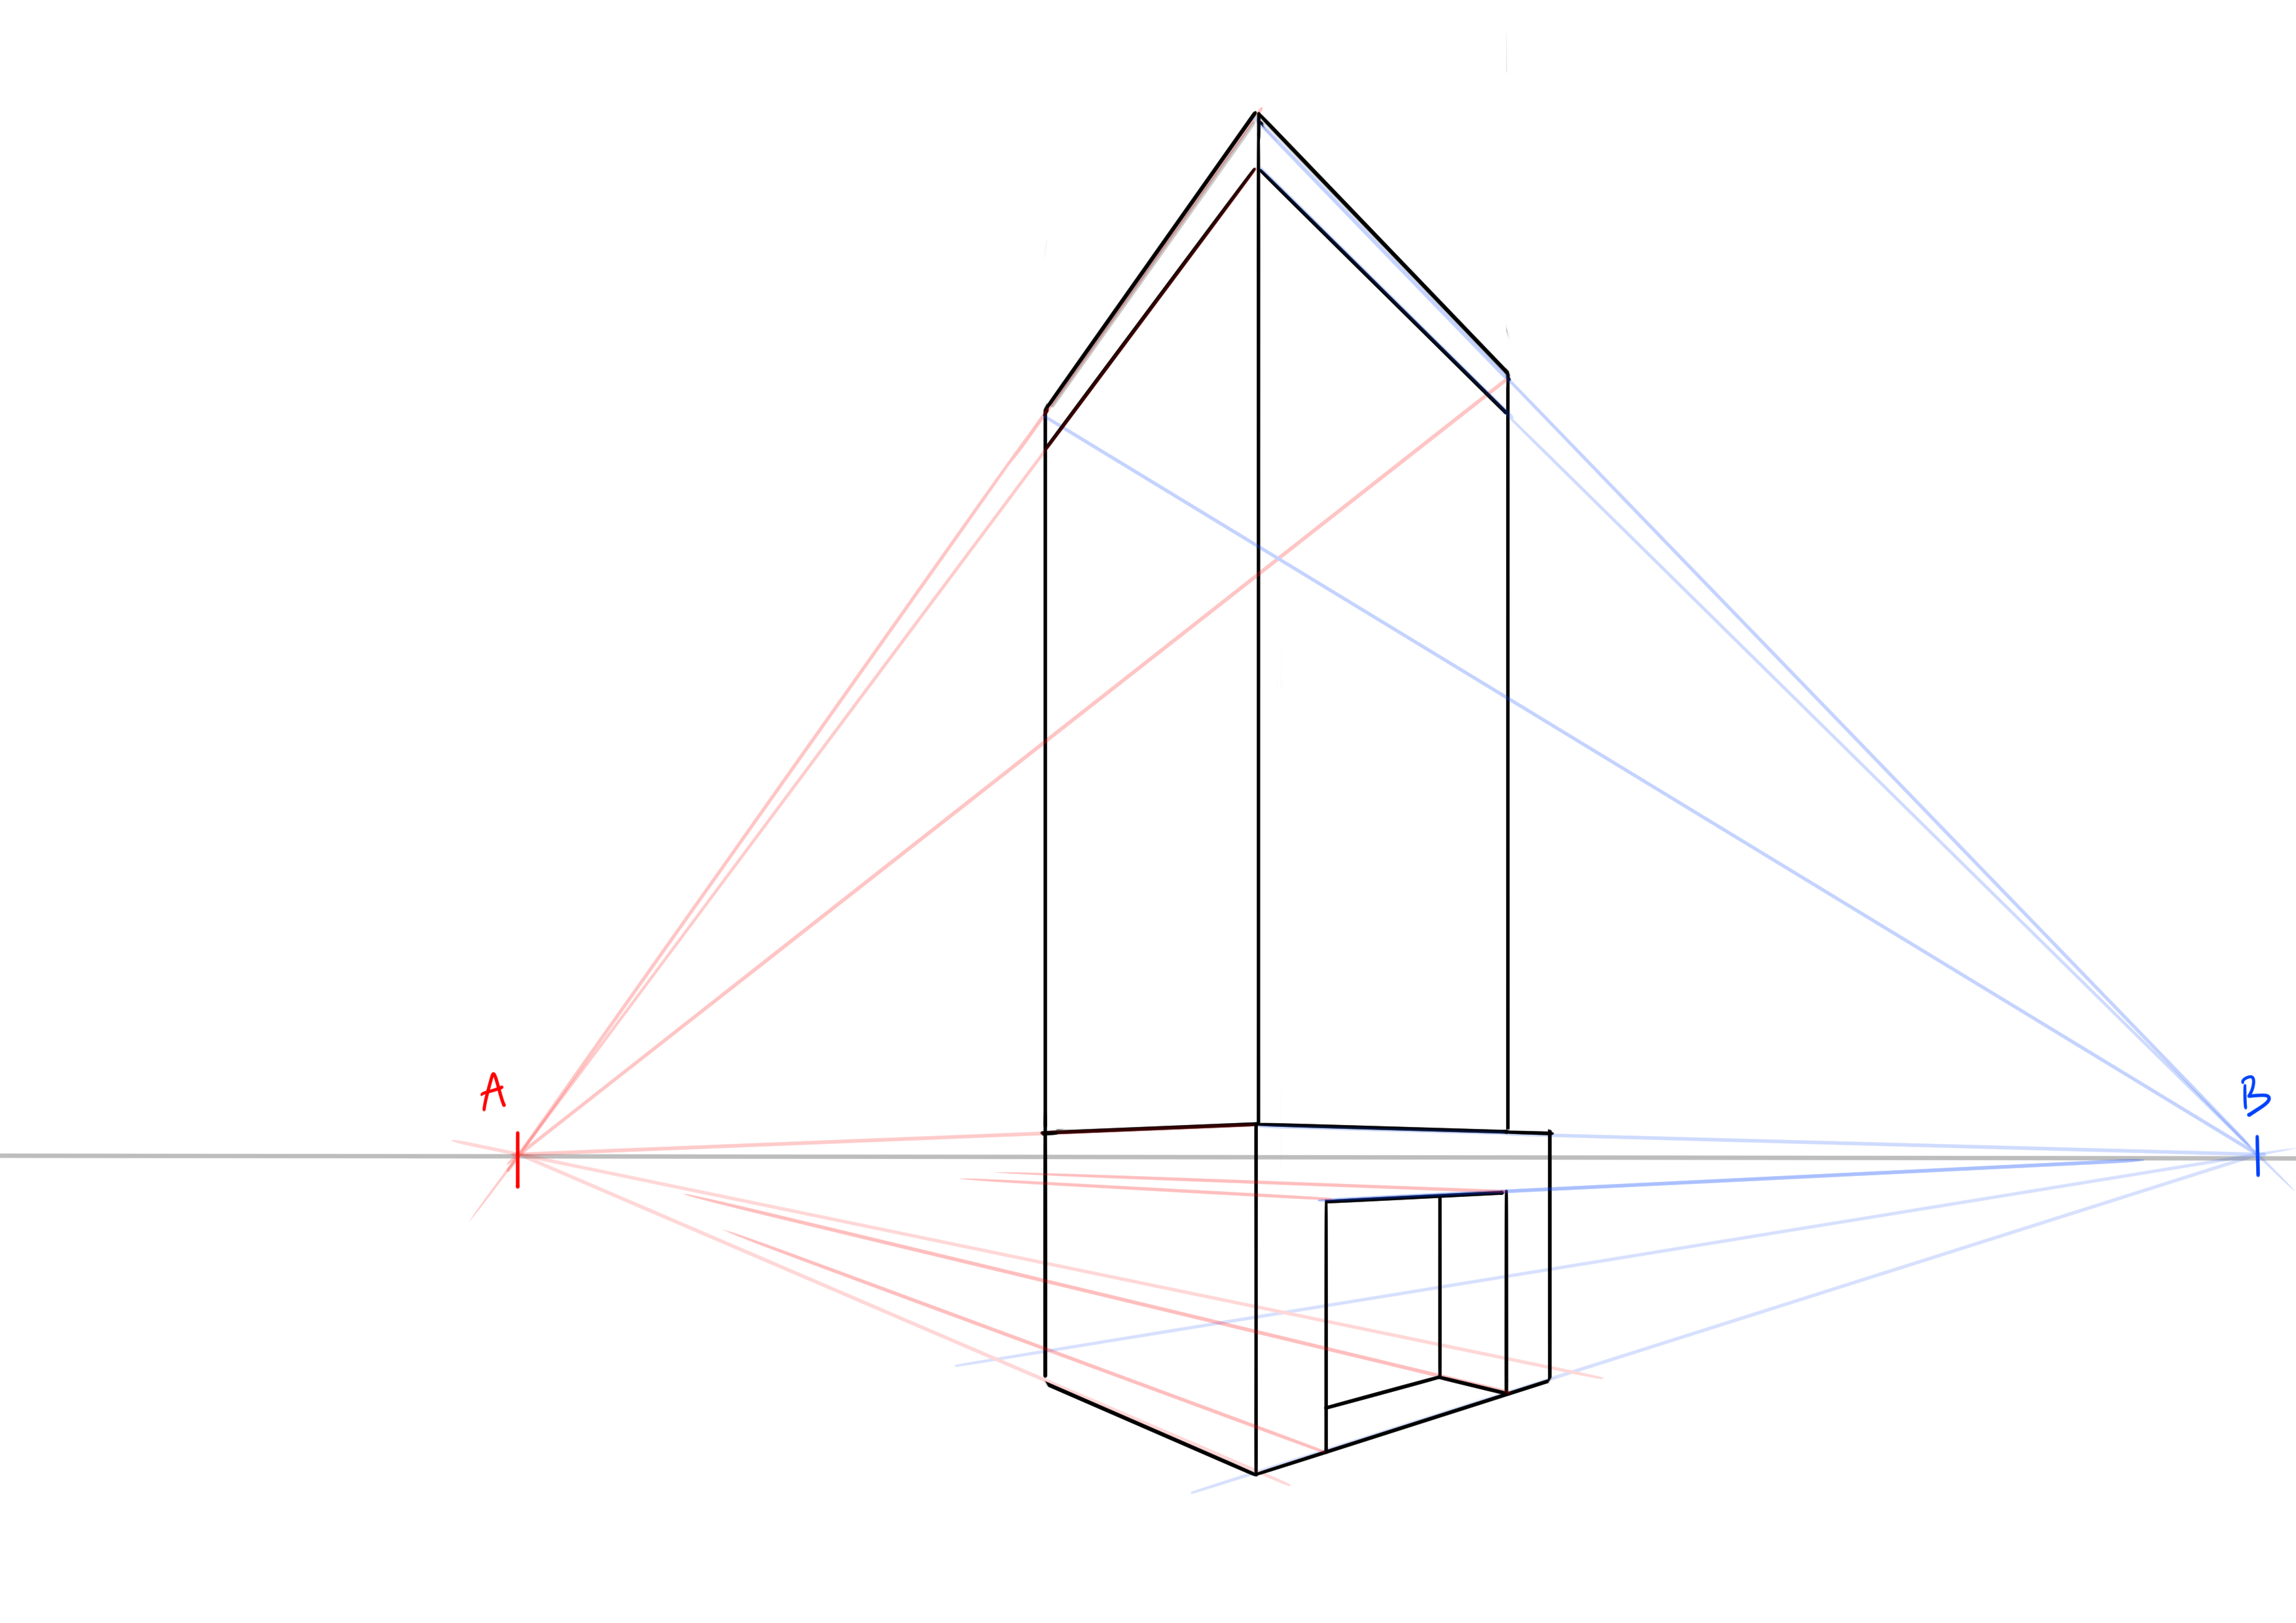
I'll take the opportunity to put a frieze on the facade and add a small step. From this point on, I believe you have understood the approach and will be able to draw the correct lines each time.
I'm detailing the door, for that, refer to adequate documentation. Look at how it's done. I kept it quite simple ^^
I'm adding another small detail: a pediment at the entrance.
DRAWING THE WINDOWS
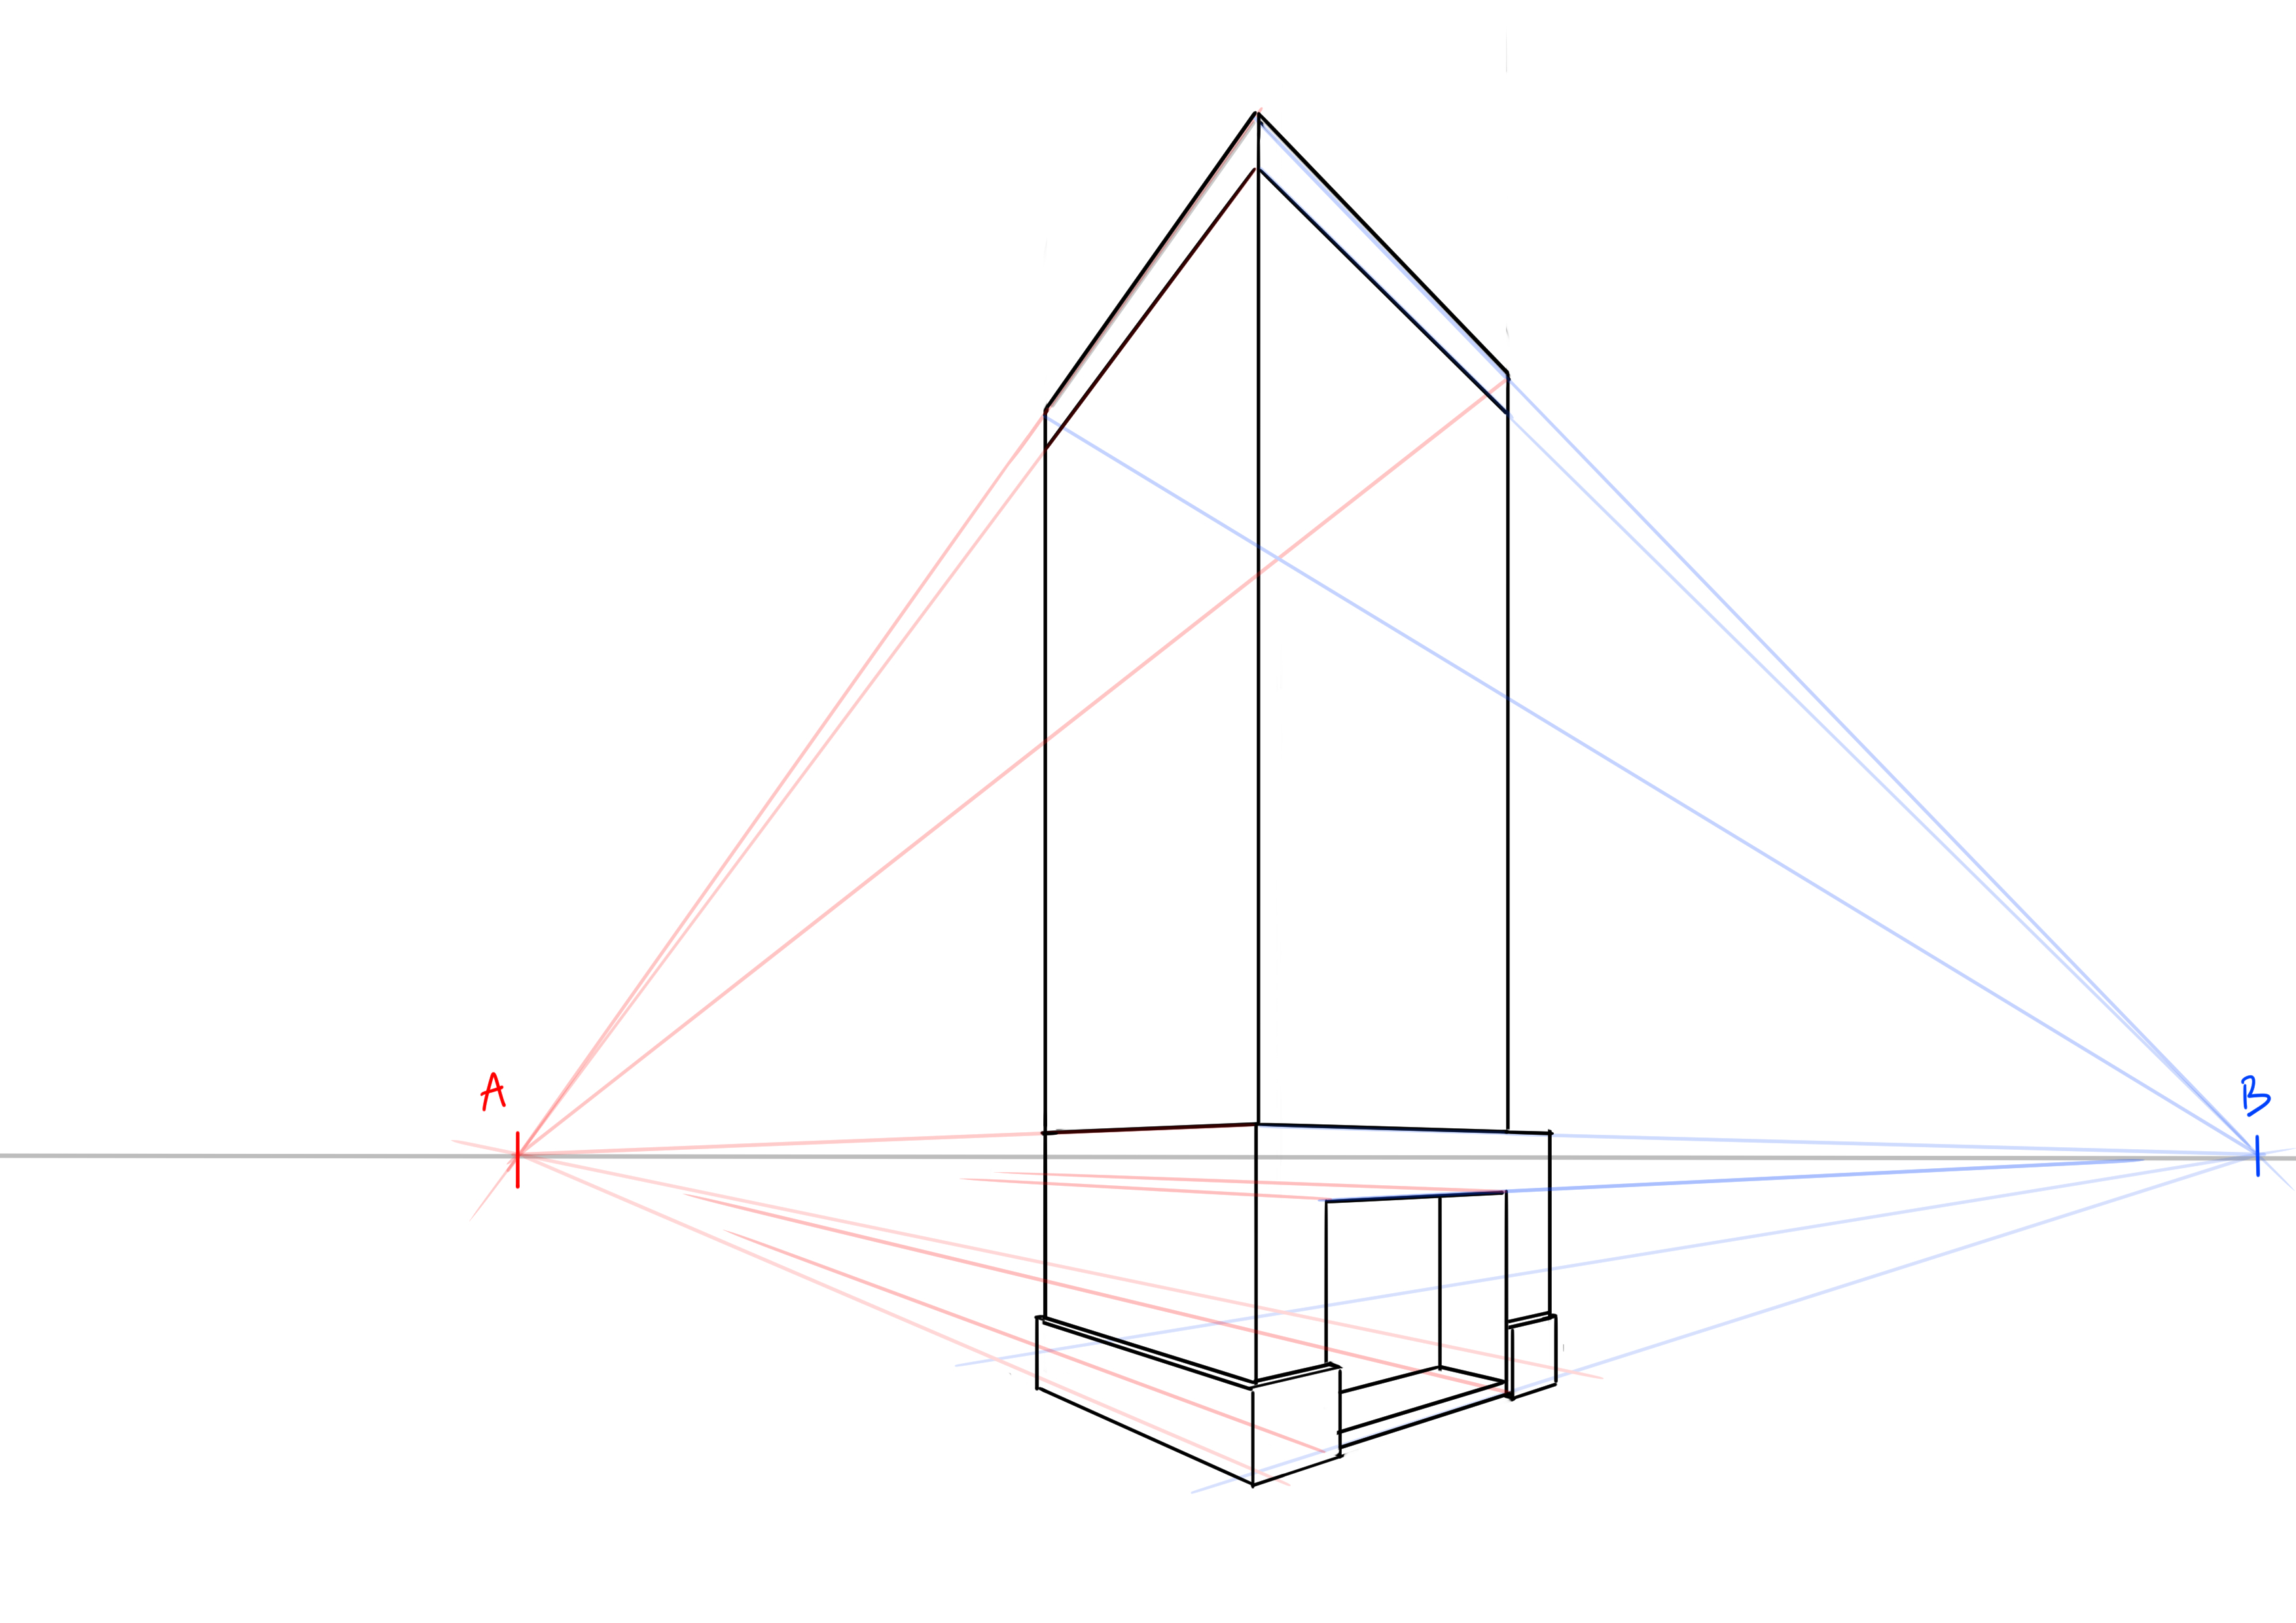
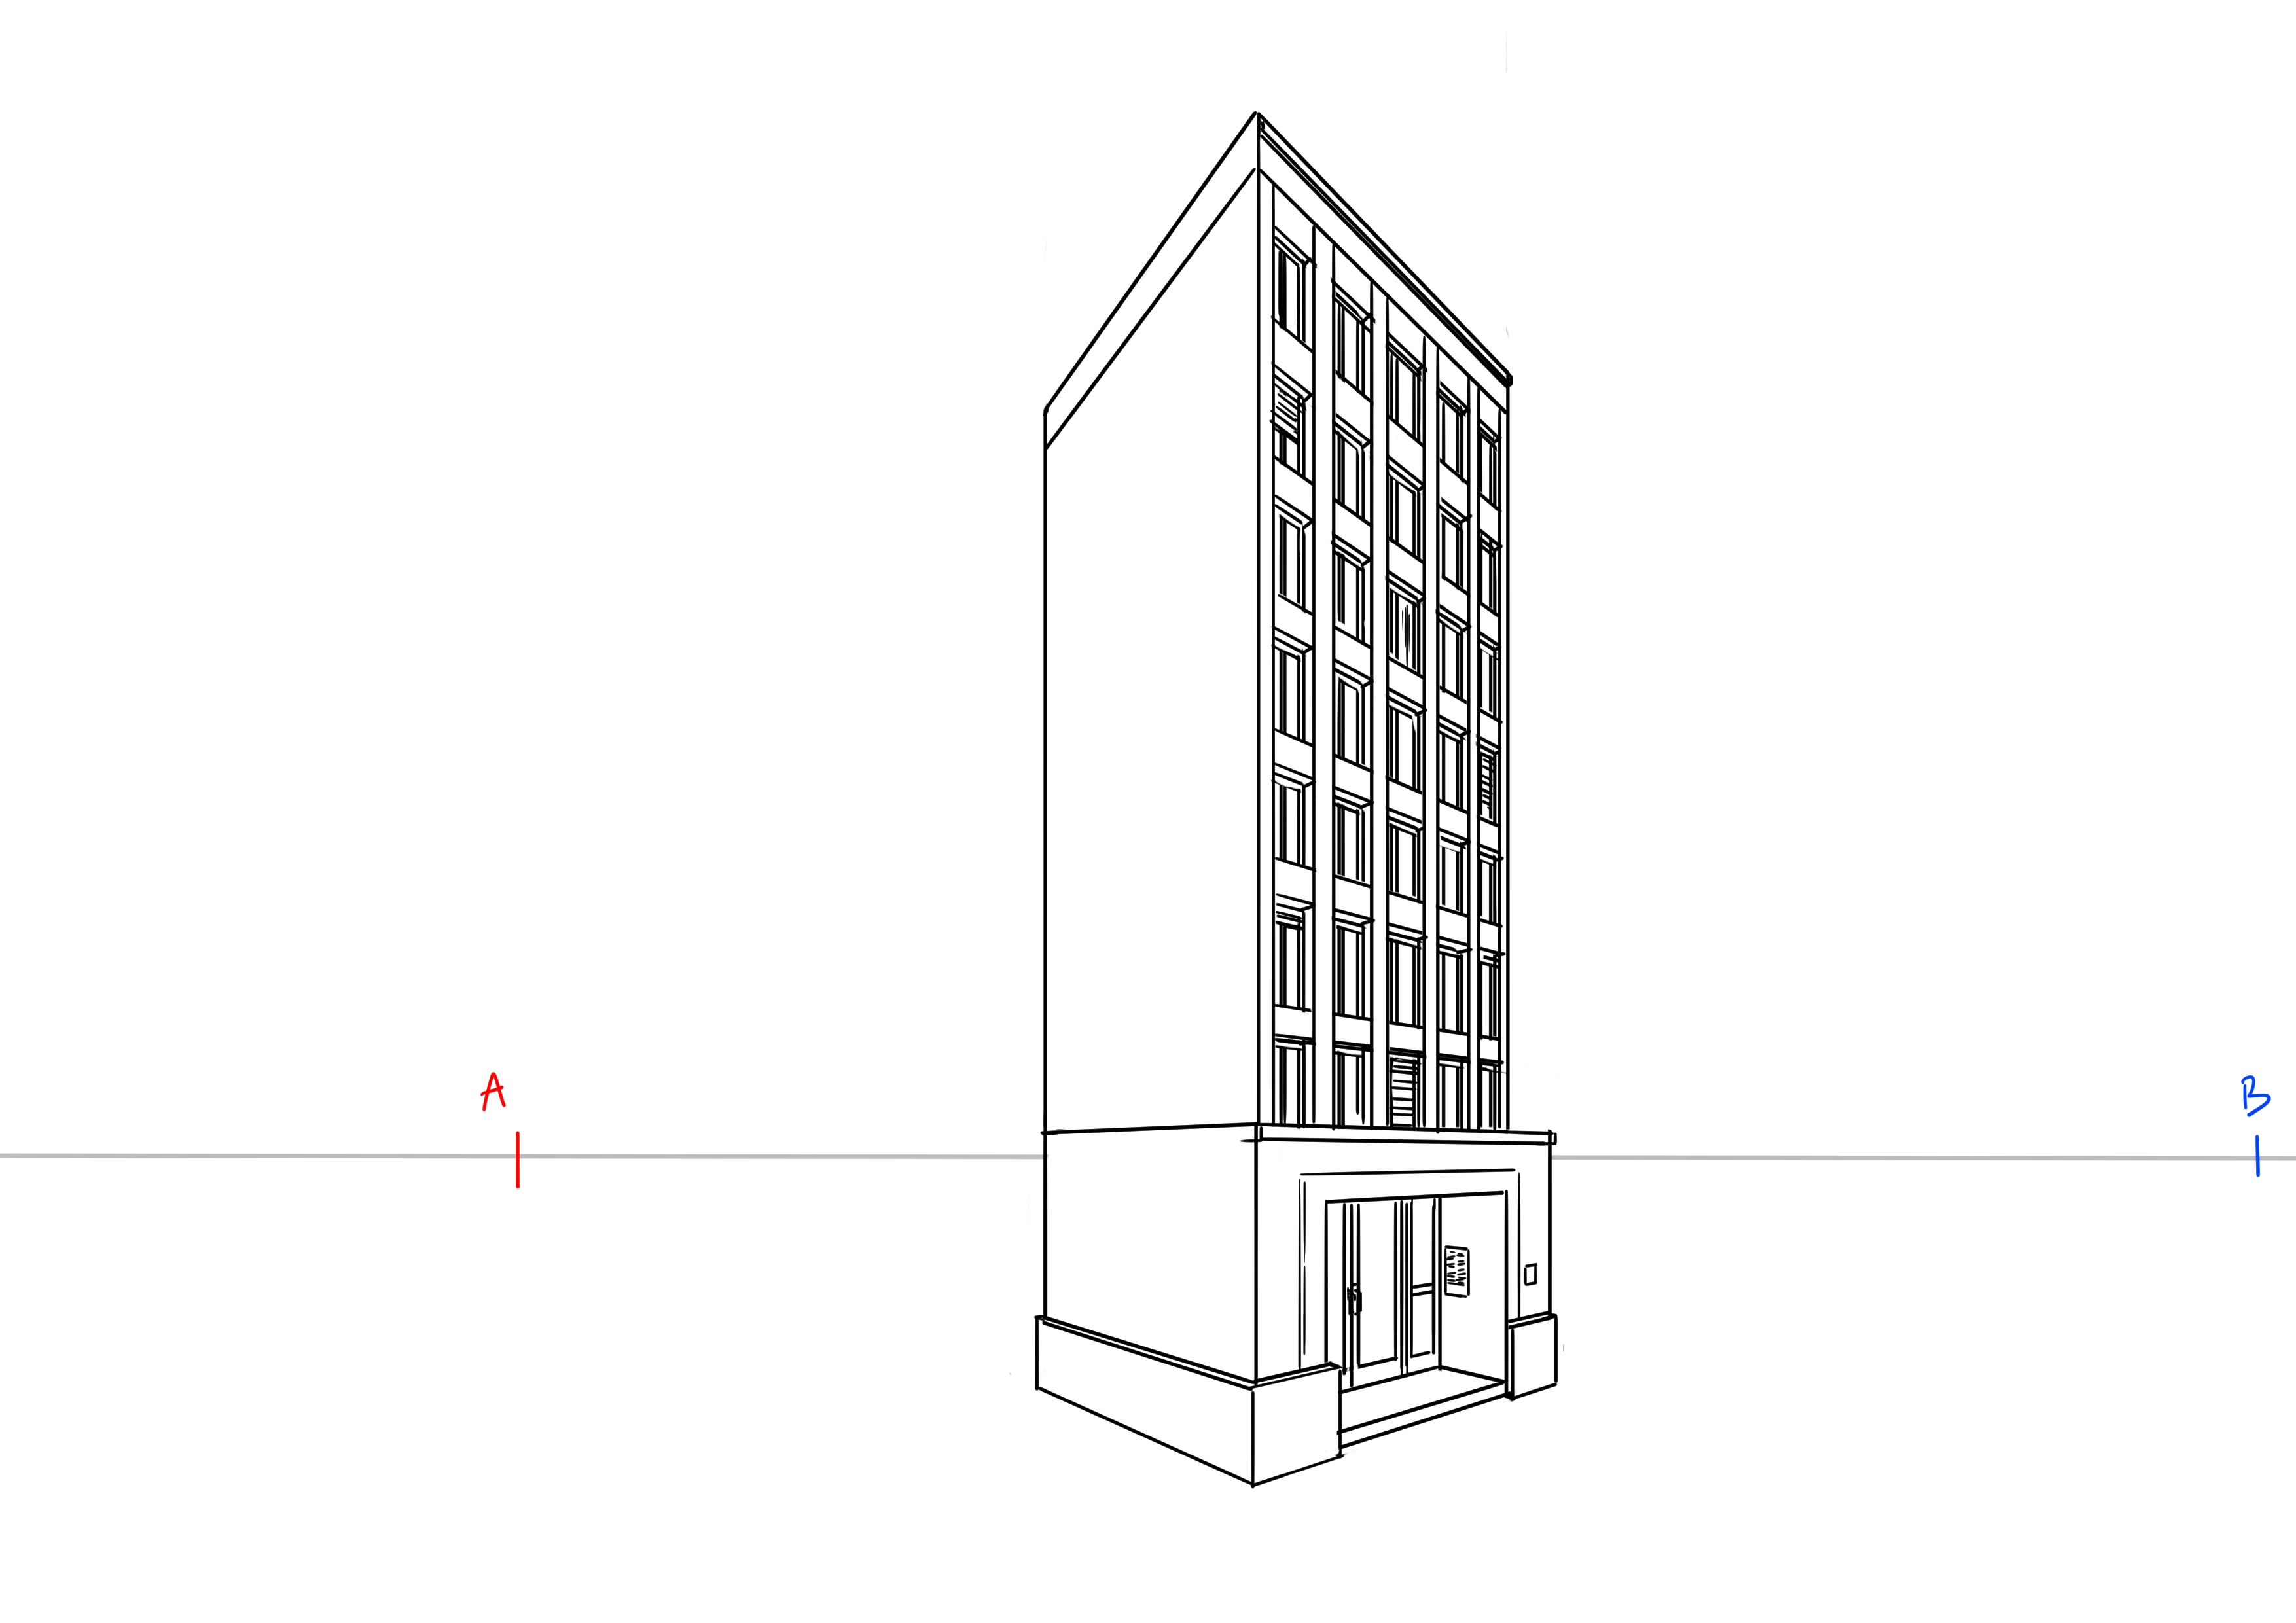
Let's move on to the big part: the building's windows. I'm going to keep it quite simple. We'll draw columns on our façades. I don’t measure things, I just eyeball it. As long as you follow the "closer is bigger" approach, it will always work ^^
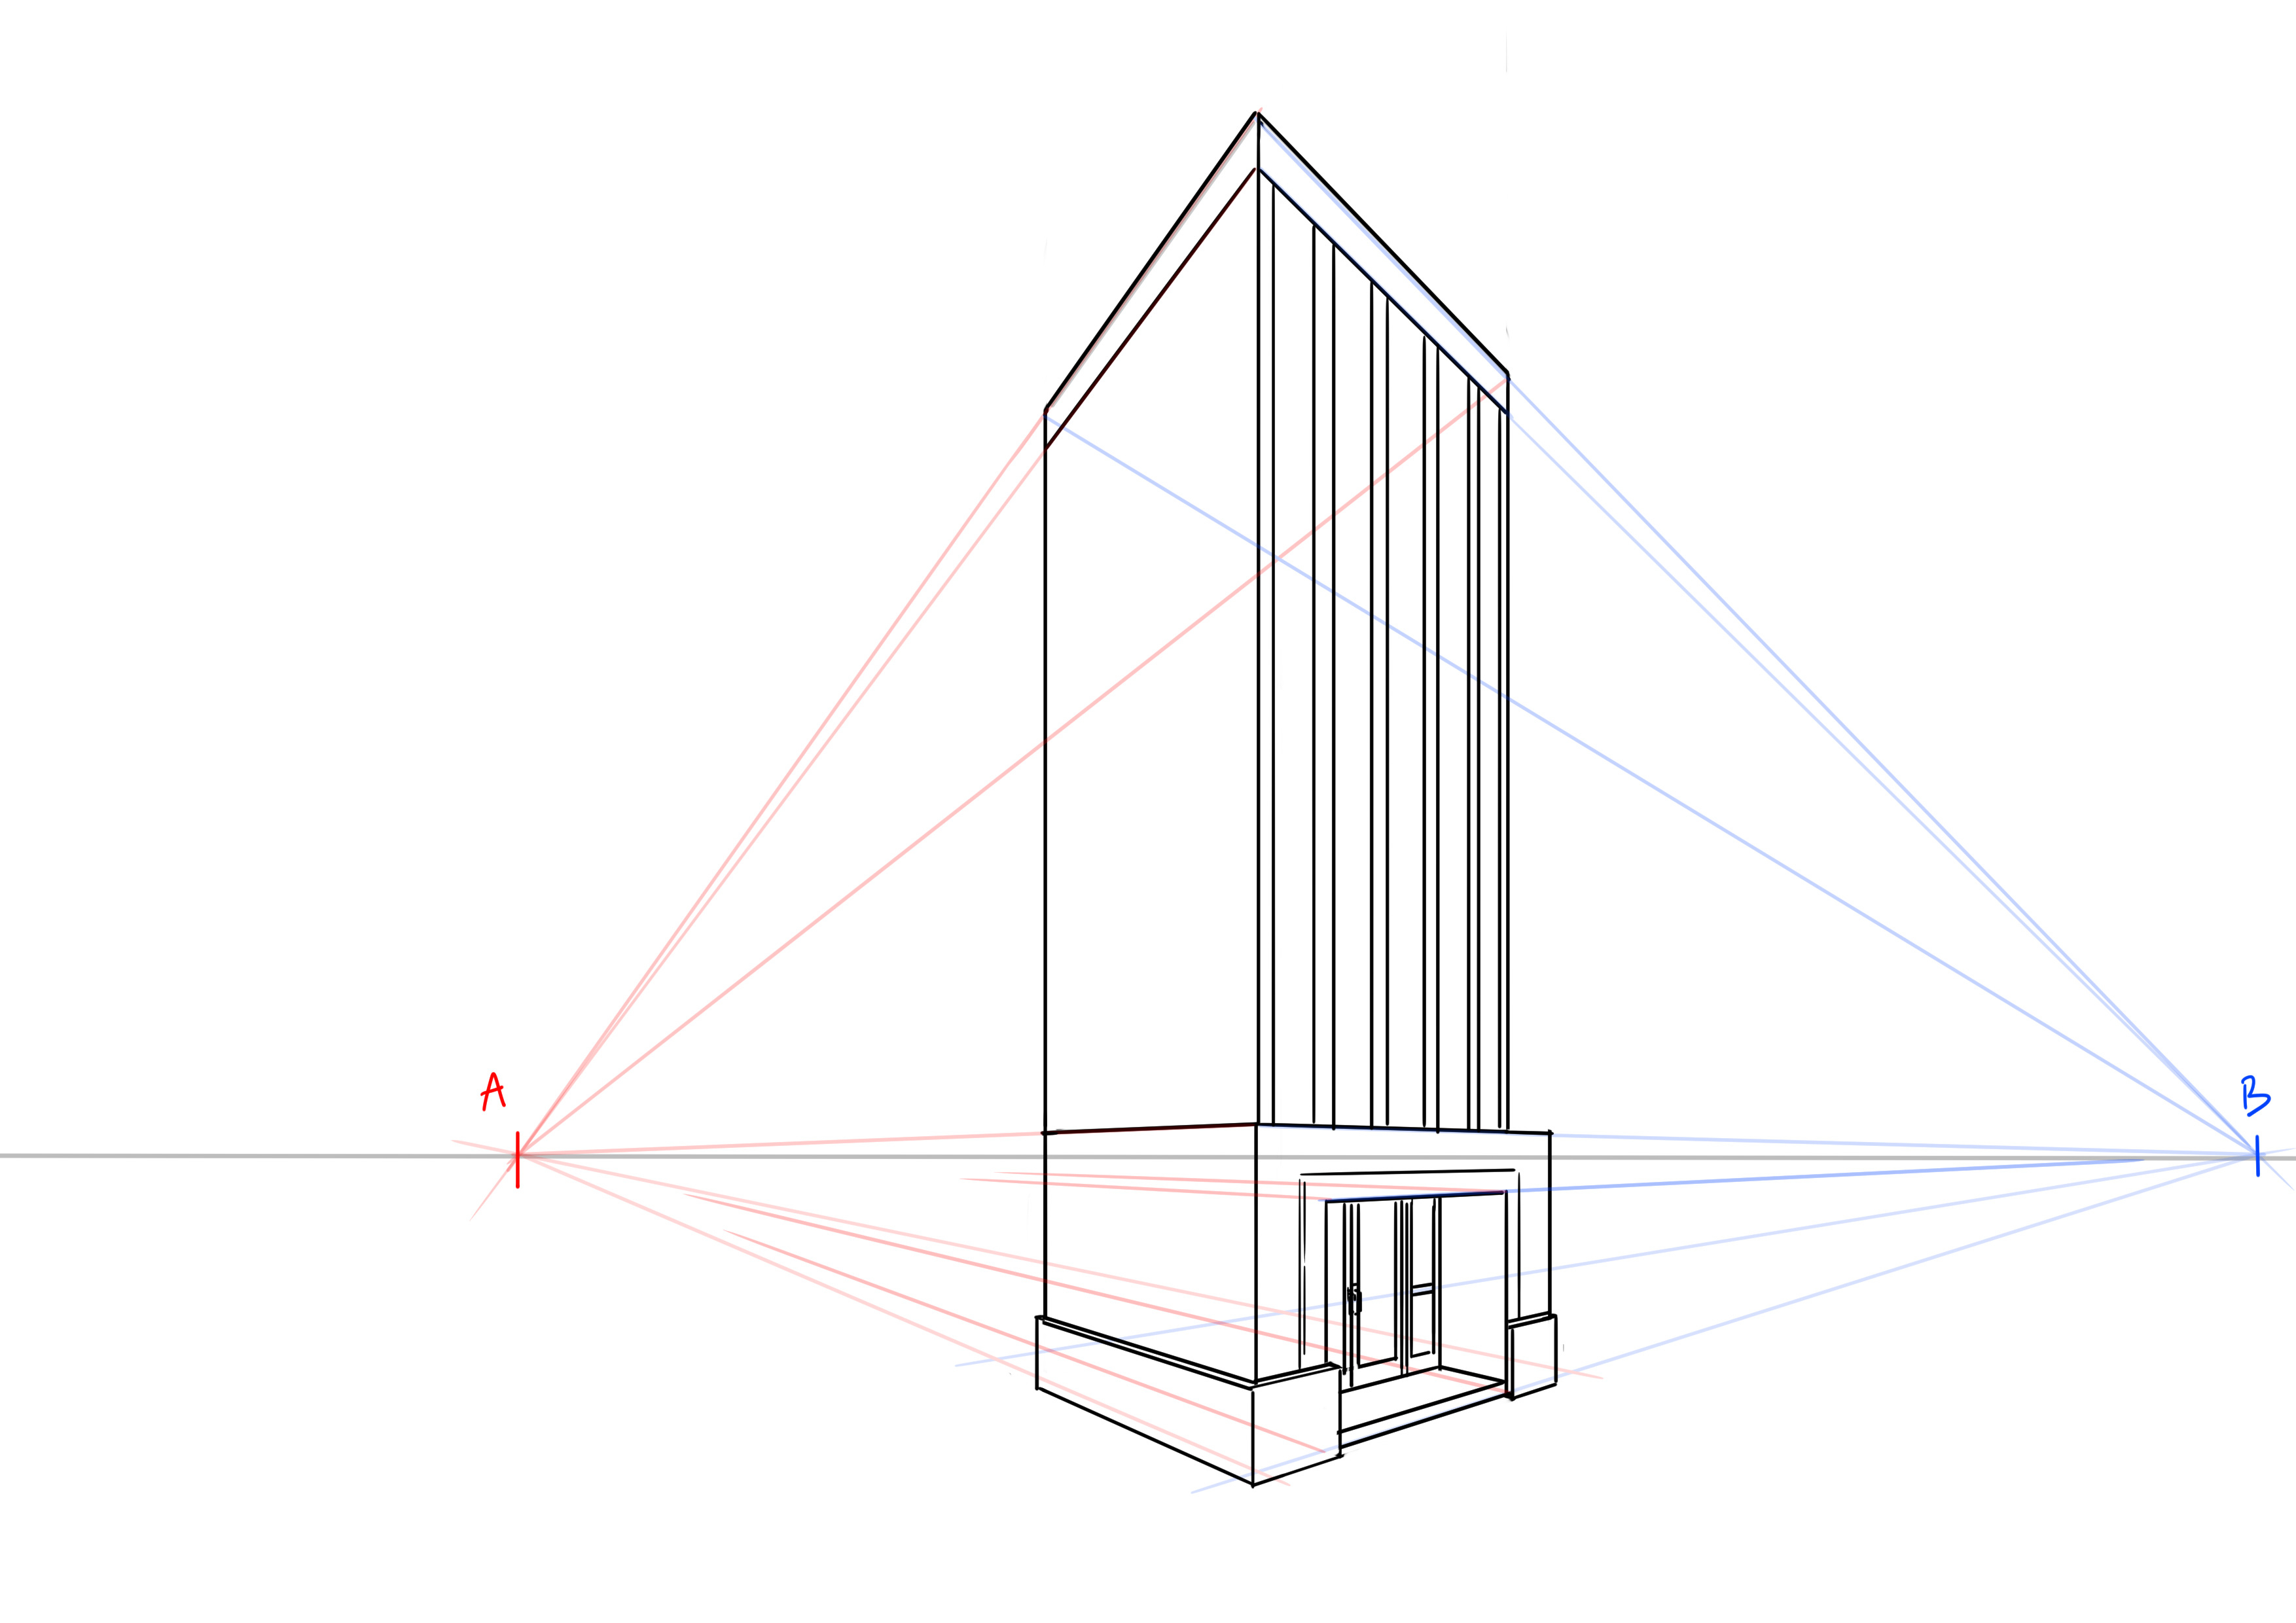
These columns will alternate between windows and no windows (because they are not attached to each other, there are rooms behind with a floor and a ceiling, stories, in short, a building).
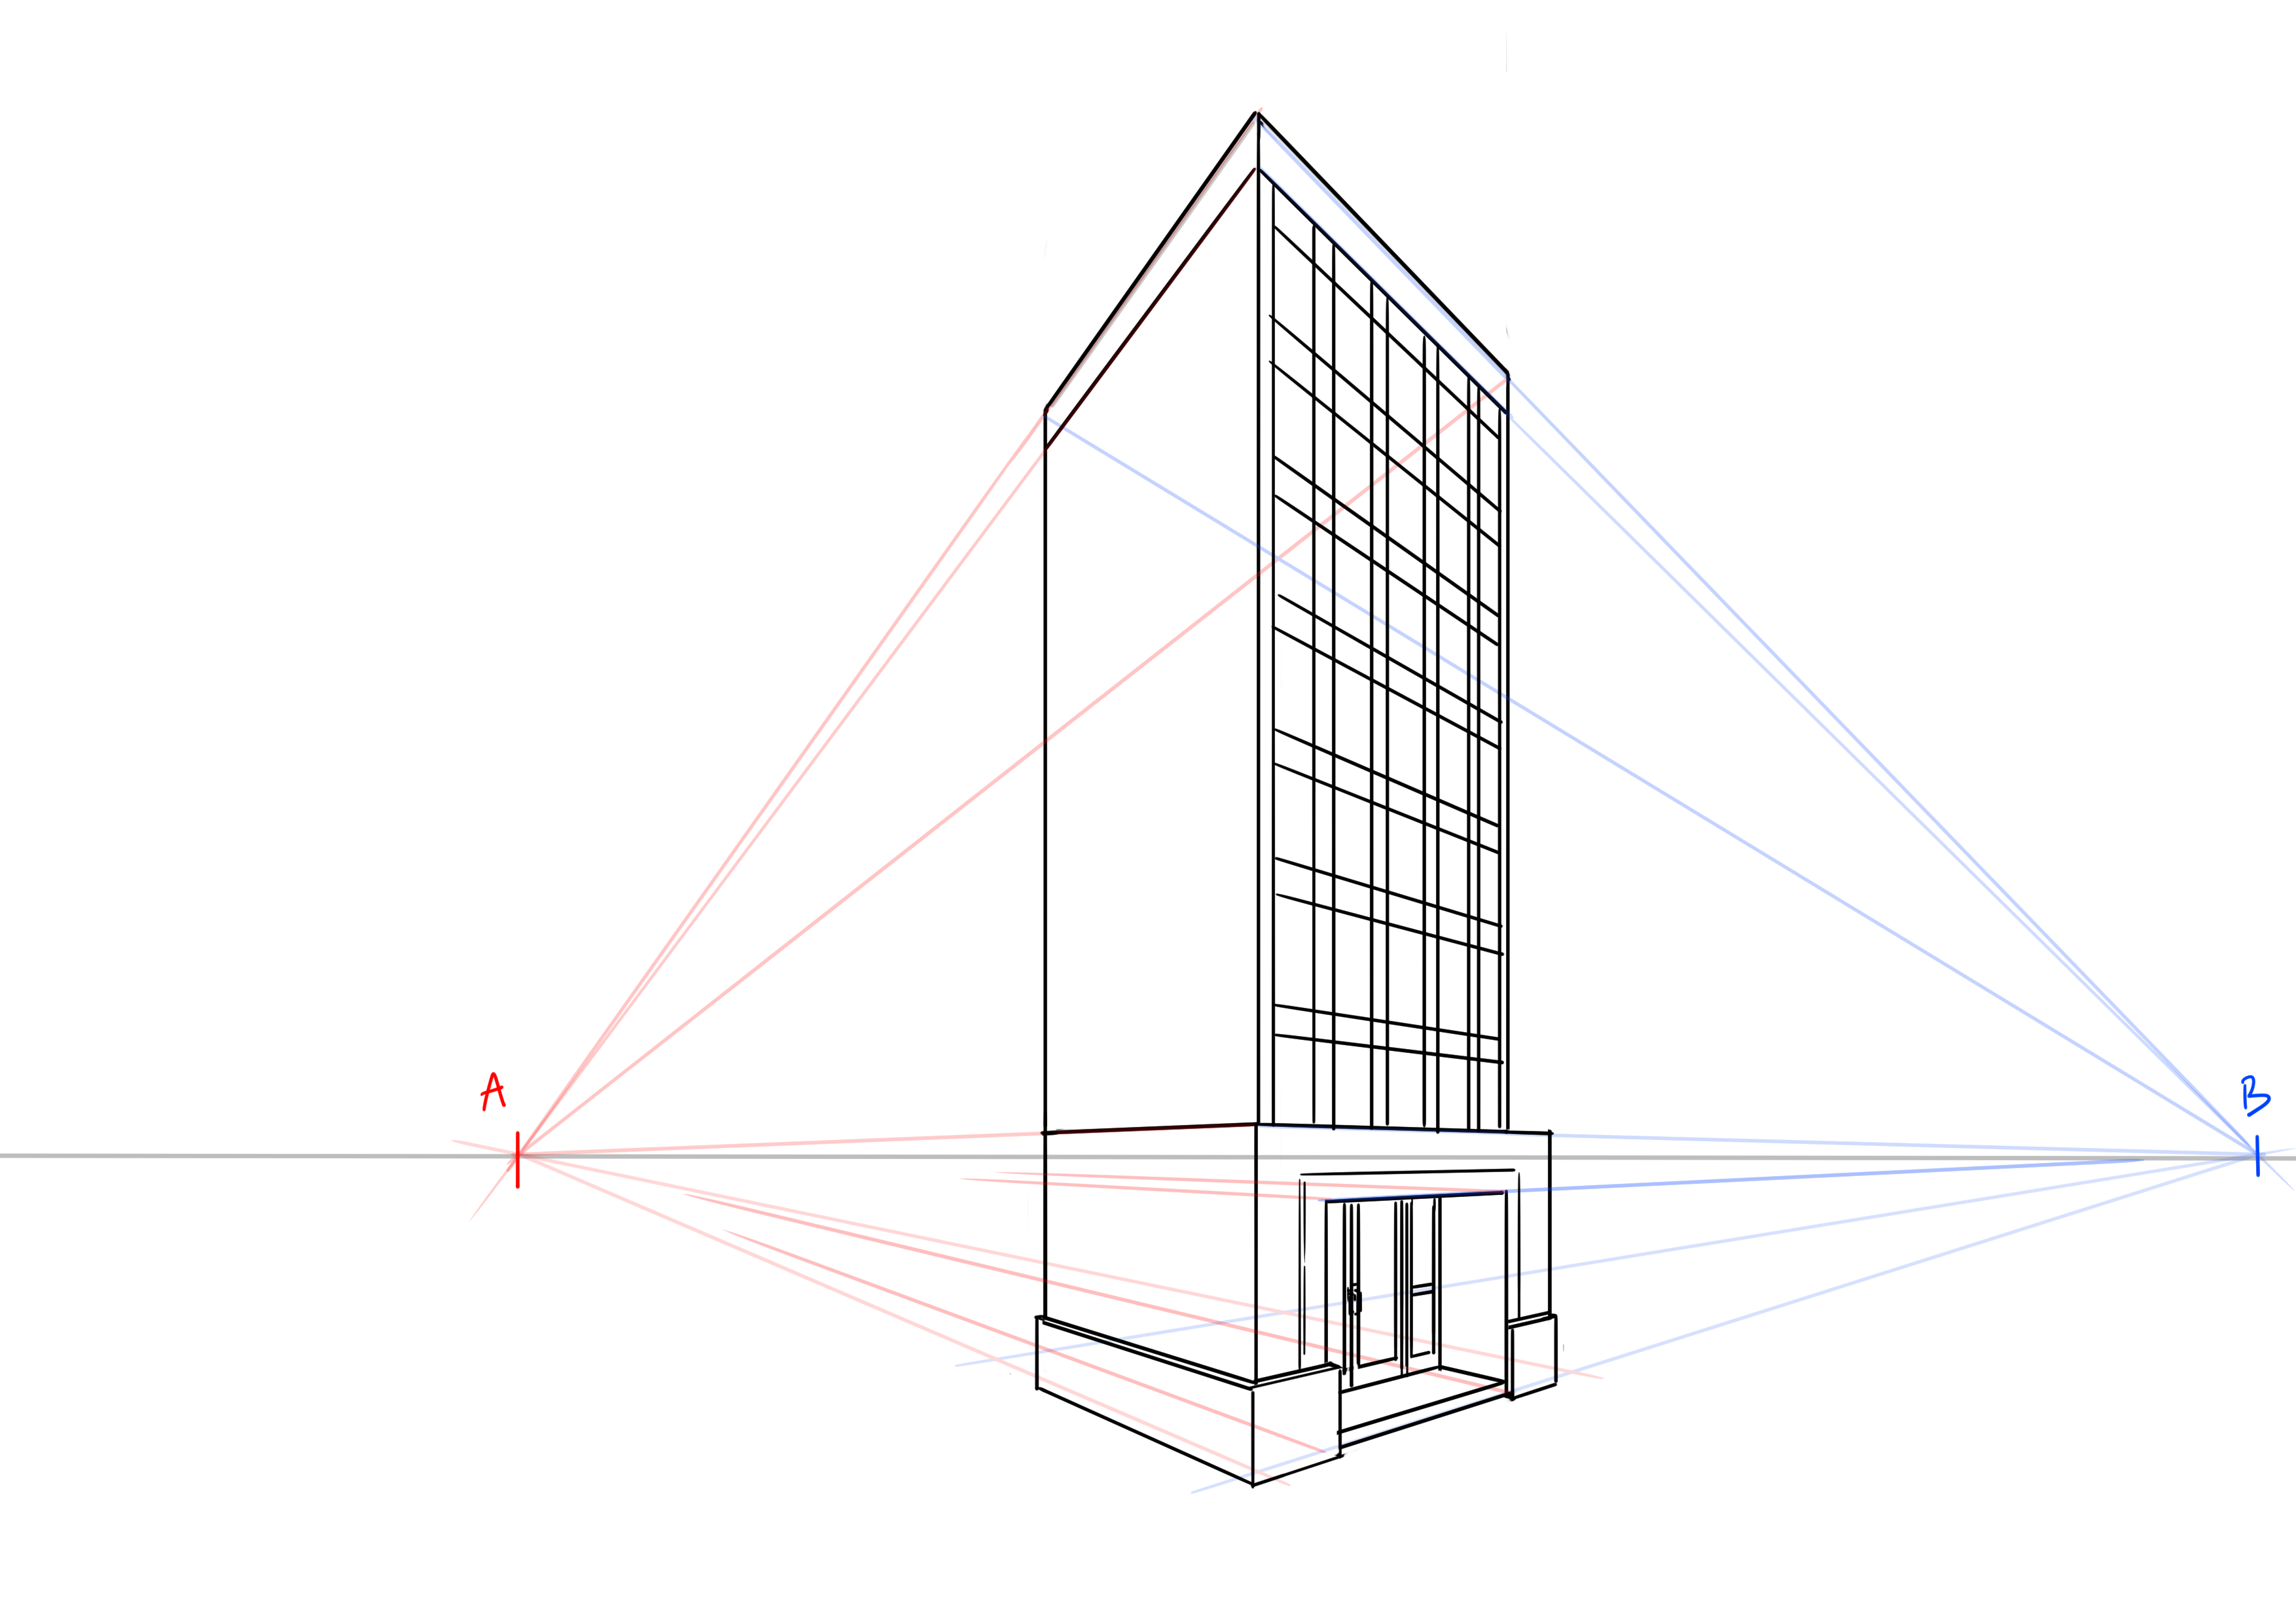

We're also going to give depth to these windows. Yes, yes, all of them. Come on, let's get motivated, we love decoration! It's exactly the same principle as for the door, except that we're going to indent them much less.
This is where we're happy that I only put very few windows for our little exercise today, right? Once that's done, we'll be able to detail our windows. You can alternate between those with shutters open, closed, curtains, no curtains, etc. It's a building, it's alive!
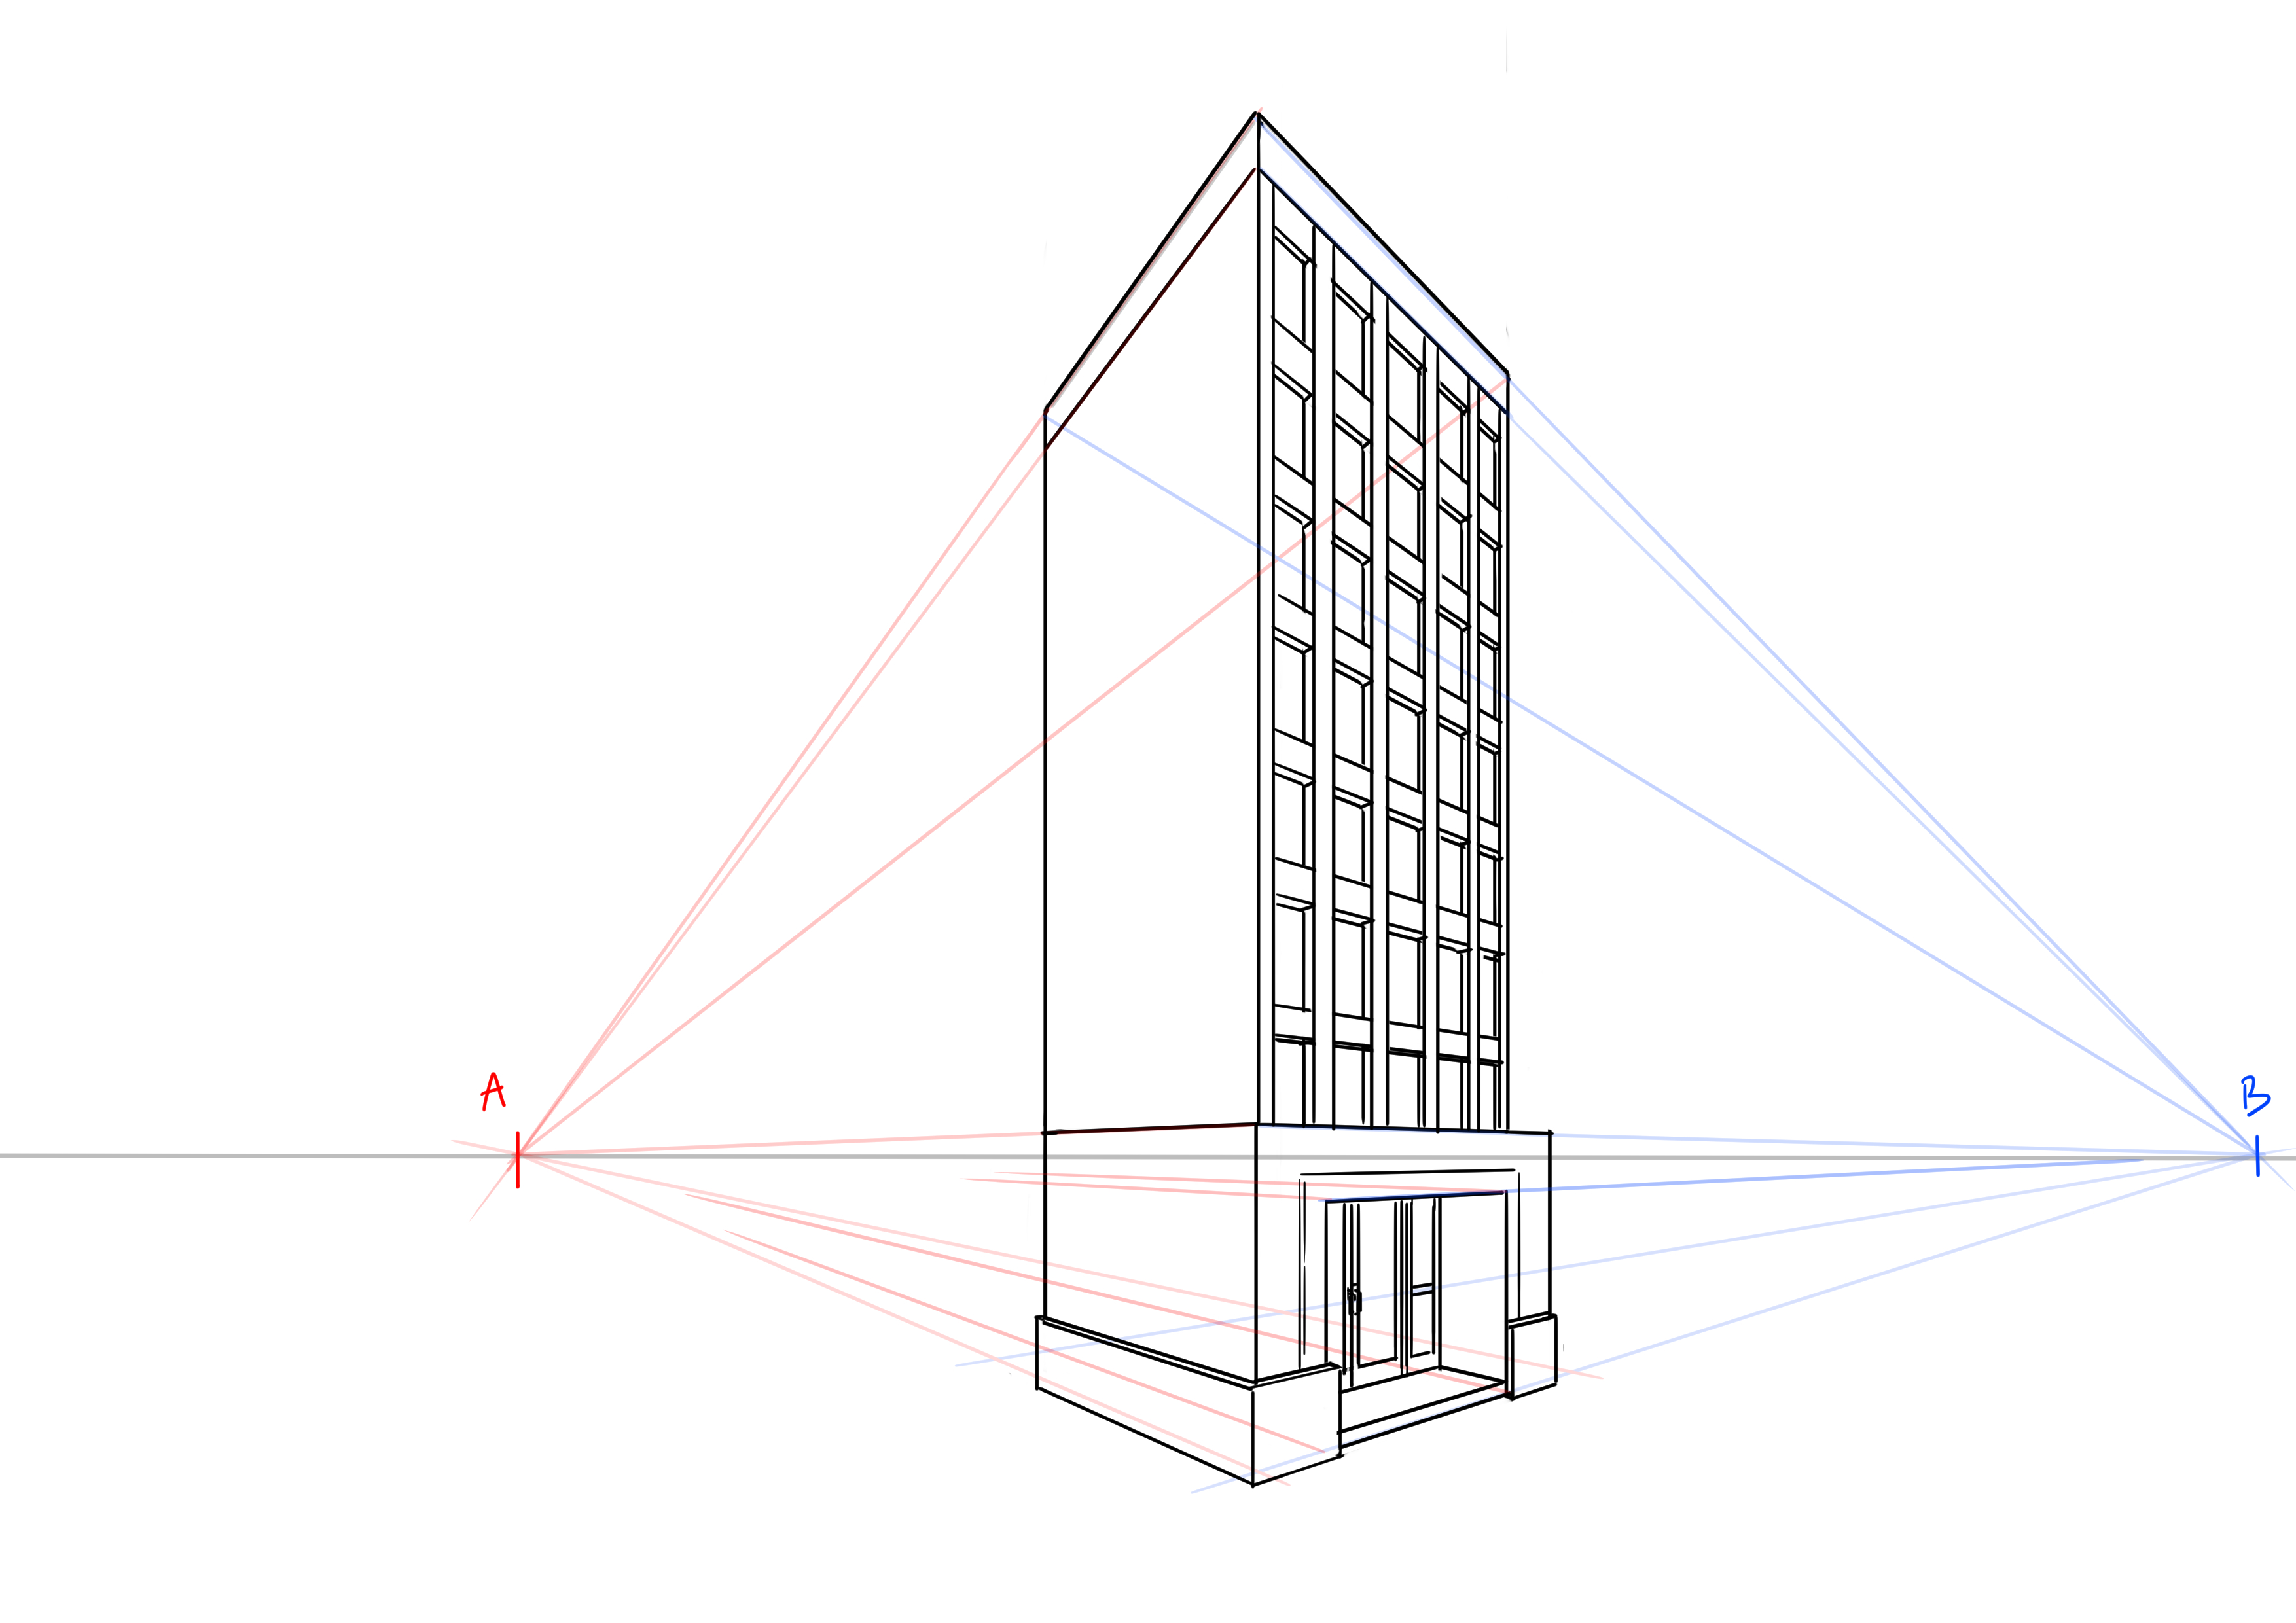
DRAWING THE FINAL DETAILS OF THE BUILDING
Overall, we're done. I repeat: this example was very simple. We'll still add a few small details: the street number on the front facade (important), the building buzzers, and some moldings to embellish it all.
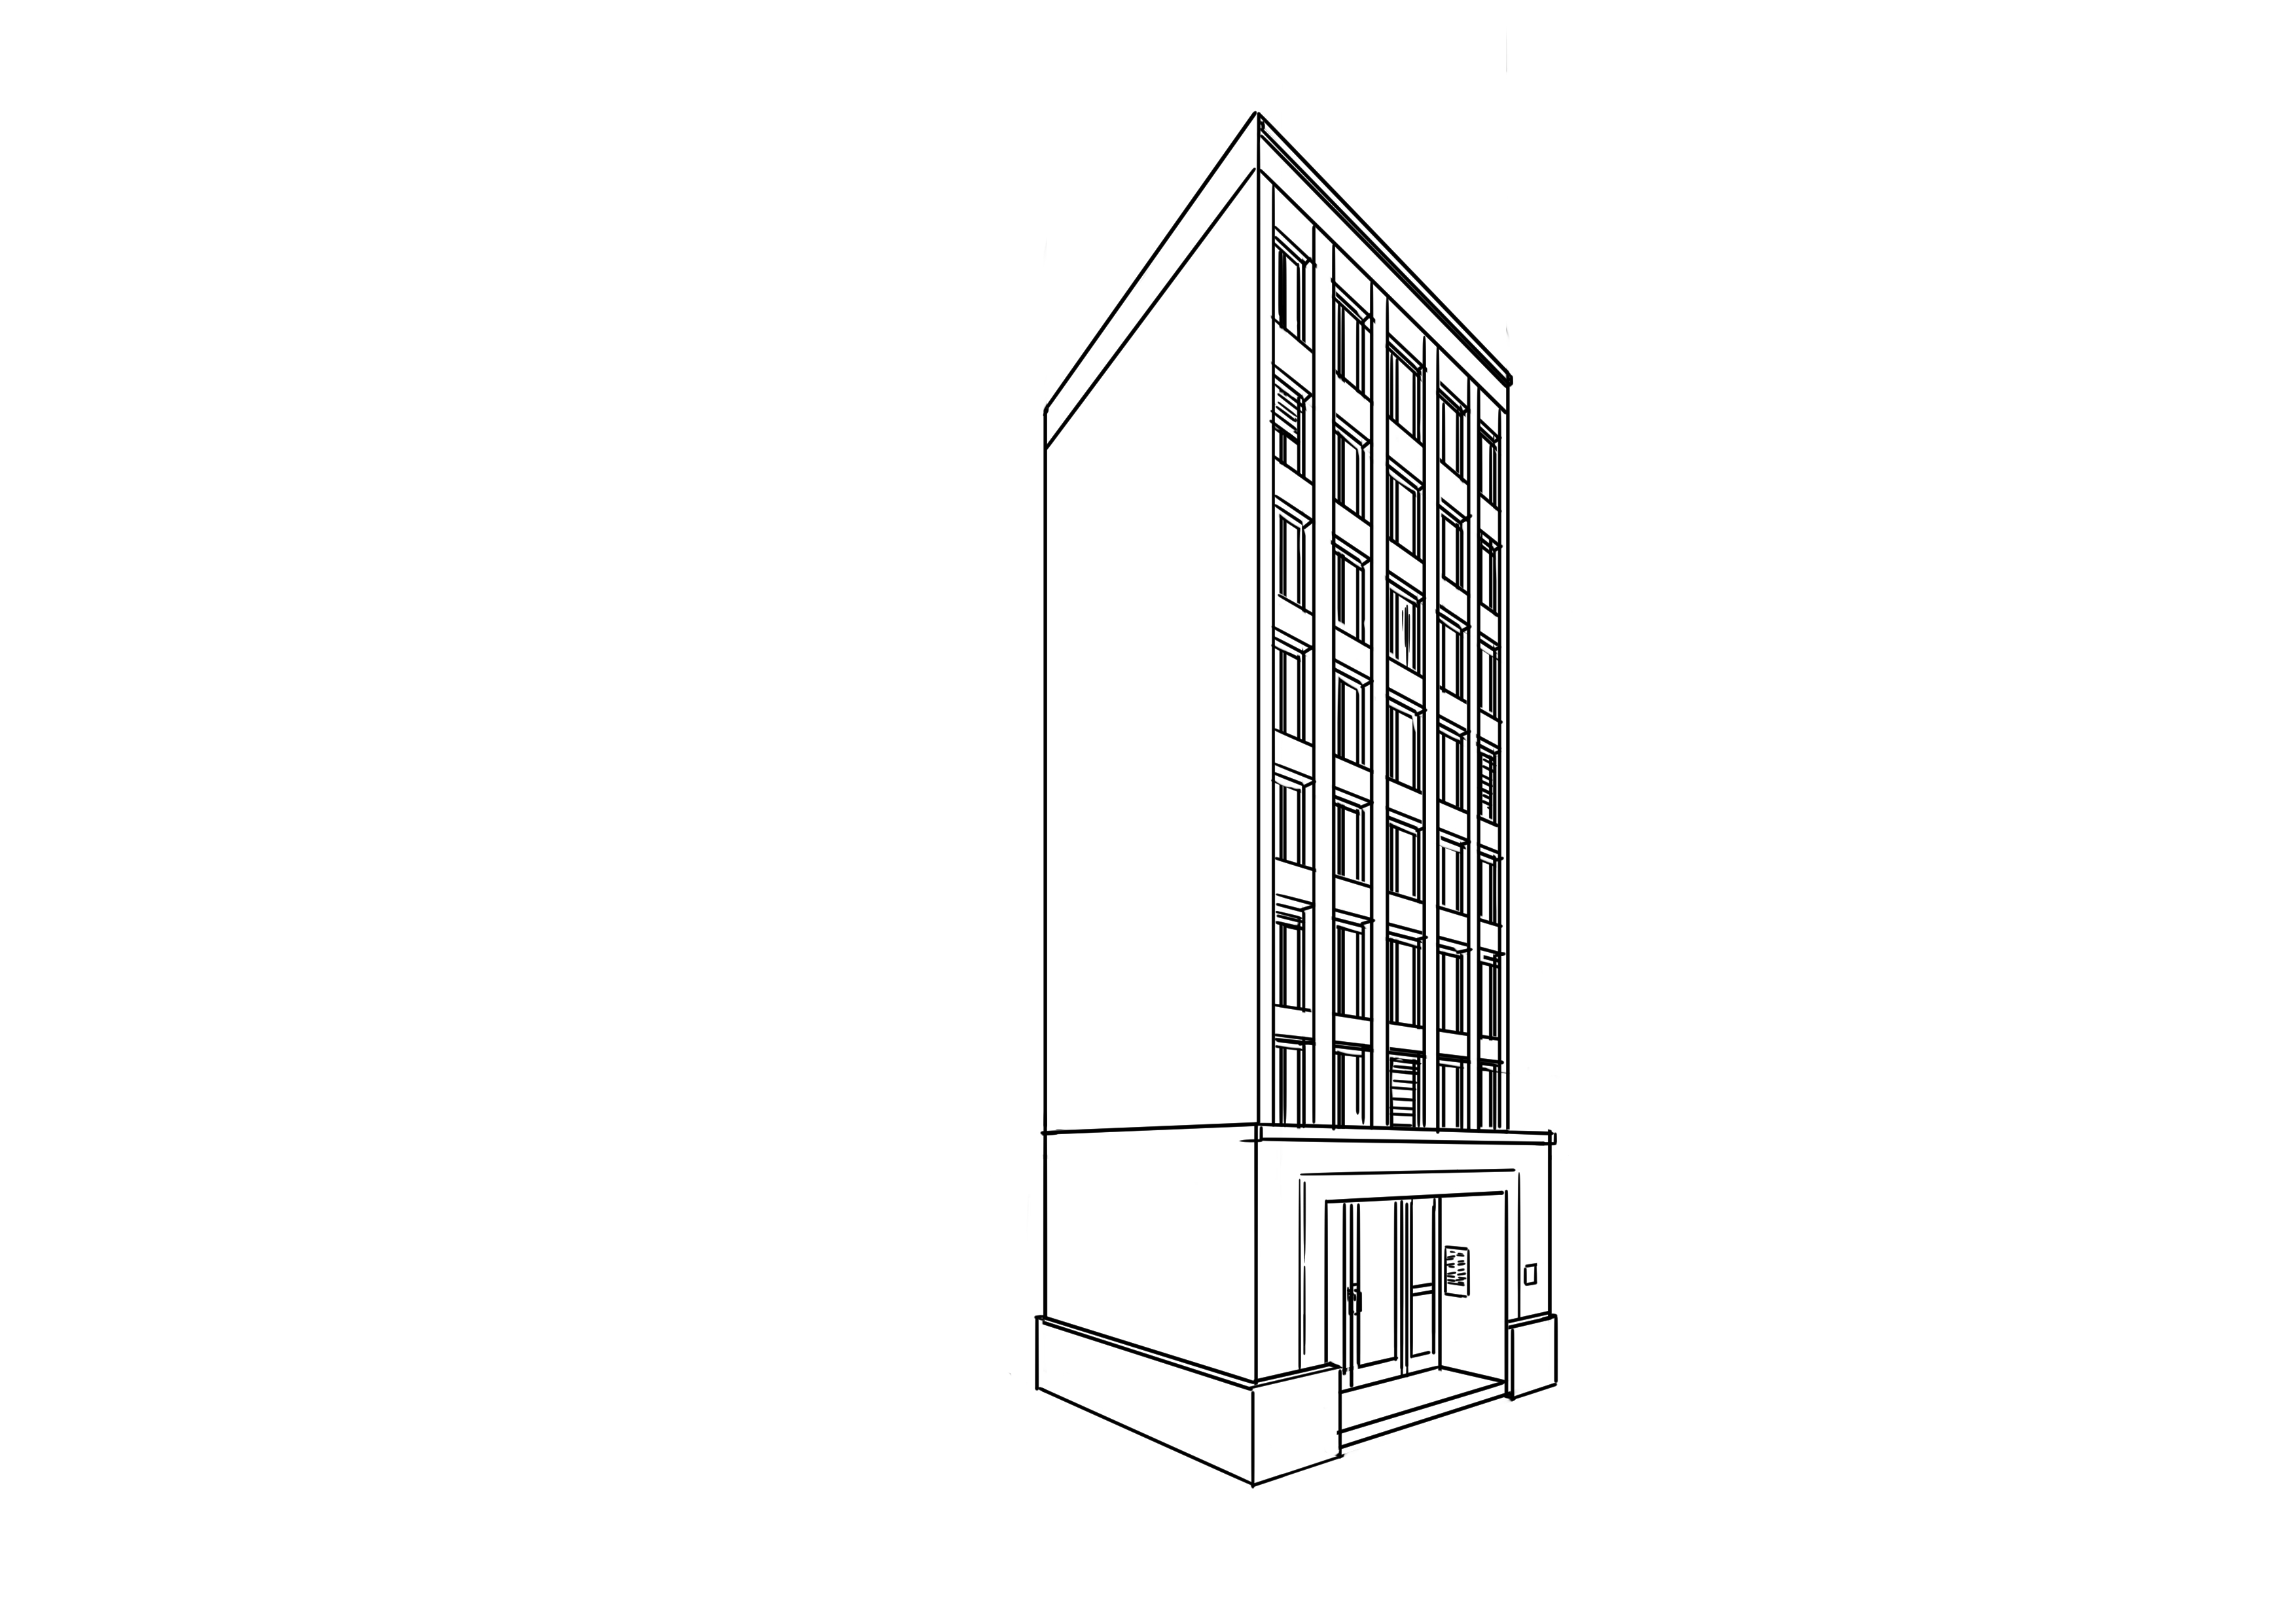
And I think we can say that we are done with our building.
Since we have lots of construction lines everywhere, it's time to erase and redraw everything cleanly if you haven't been cleaning things up gradually like me.
At this stage, you have two options: either you go back to using a ruler to have straight and sharp lines. Or you go freehand to give a more sketchy and dynamic look (less rigid, less cold). It’s purely a matter of taste at this level. The advantage of freehand drawing is that if you make errors, they are less noticeable, since your lines aren’t perfect. It will probably blend better with your characters as well (to be tested).
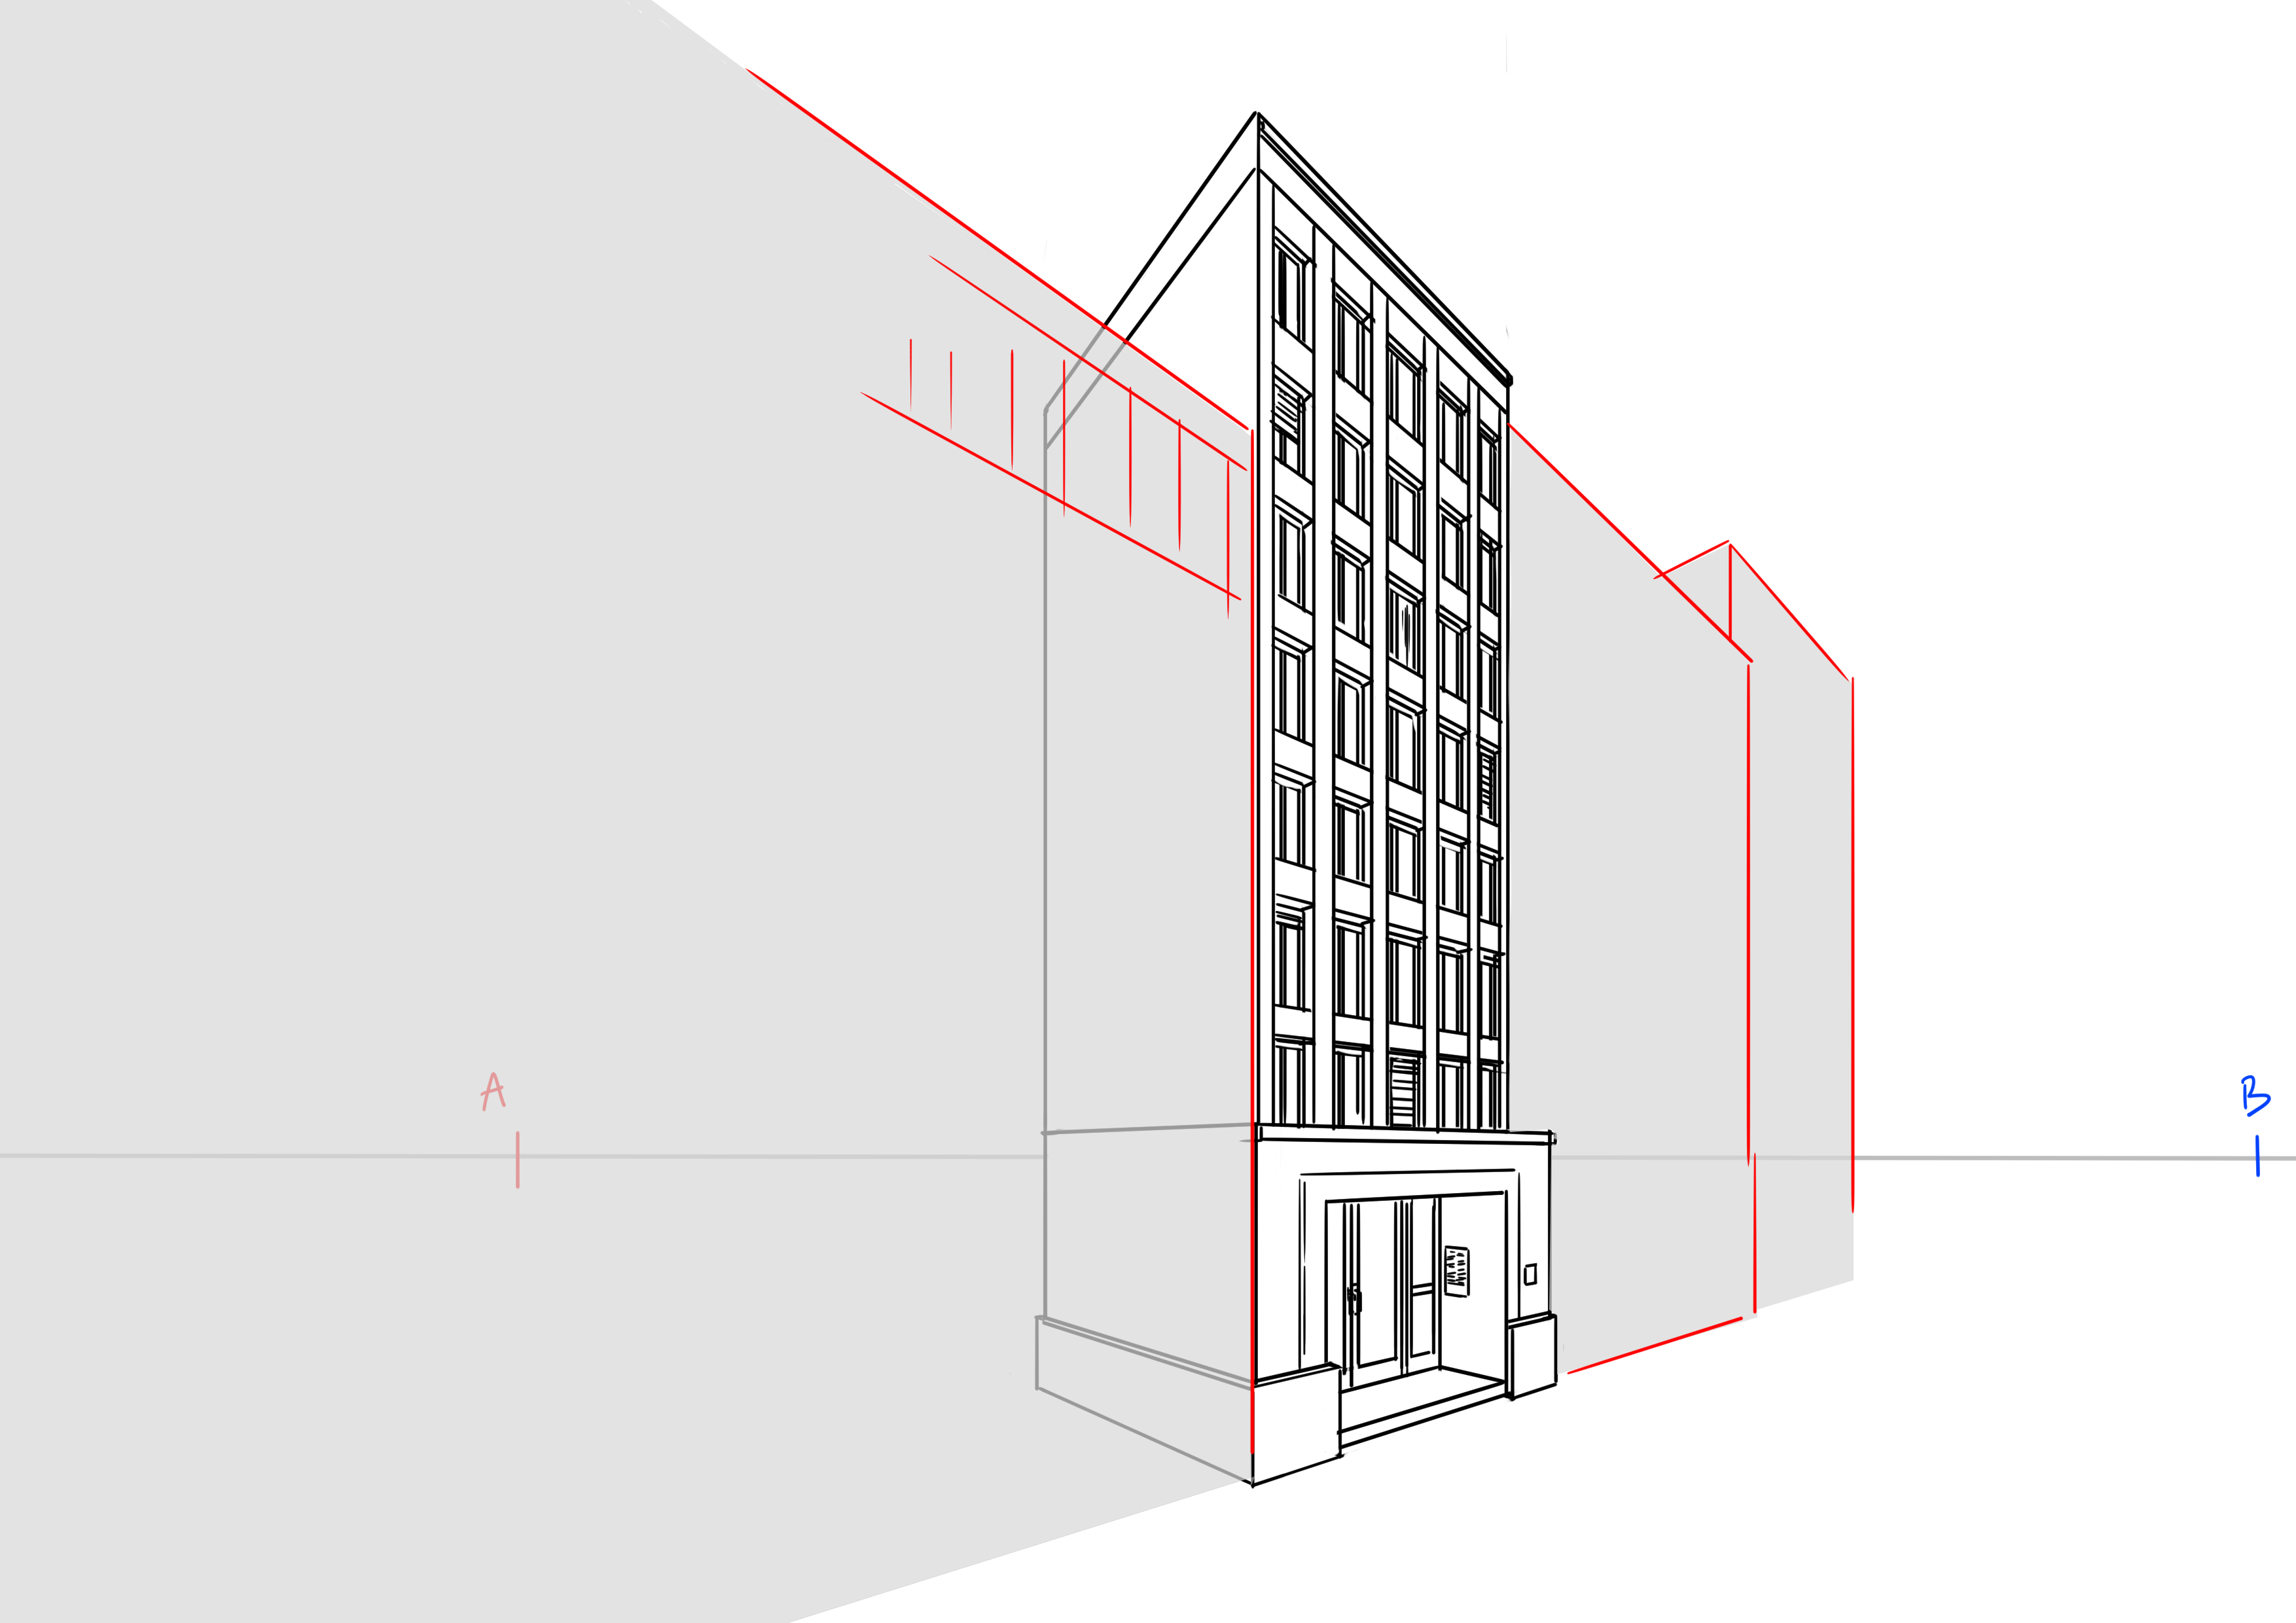
Here's what it looks like once the construction lines have been removed.
And for fun, I quickly sketched the silhouettes of adjacent buildings:

In short, the big mistake that many beginners make is neglecting the setting and therefore also the perspective. If your perspective is already good, even if your setting is ultra minimal, it will look fairly good.
But what will add a special touch to your illustrations or comics is the presence of a background. Because backgrounds provide a whole bunch of super useful information about the place where the character is, but also about their character (look at the rooms of different characters, normally, it tells you quite a bit about them).
So to summarize:
- Perspective is good. Take care of it and it will repay you.
- What's in front is always bigger than what's behind (it sounds stupid said like that, but many people do reverse perspectives when they start, so be careful)
- Details give realism. Rely on references. Mix things together or look at a certain type of building to find its characteristics. And then, you can even have fun creating your own buildings (right, SF and Steampunk fans?)
Good luck o/

Discussion
16 comments