How to Draw Comic Characters

Franco-Belgian comics are very rich in different styles and authors, but their most famous representatives all have a common touch. Uderzo, Franquin or Hergé all have characters made of roundness and with the very characteristic stroke of the Belgian school. In this little tutorial, we will see how to draw a comic book character in the ‘big nose’ style.
Of course, this provides a foundation on which you can build your characters. The idea will then be to create character sheets and add the specifics unique to each of your characters; hairstyle, clothing, life mark, mouth size, eye shape, and so on. It will be up to you to create unique and impactful characters.
All this and more, you can find in the complete and progressive training on how to create your own comic book. So, if you're interested in the world of comics, this is where it's happening:

DRAWING YOUR COMIC CHARACTER STEP BY STEP
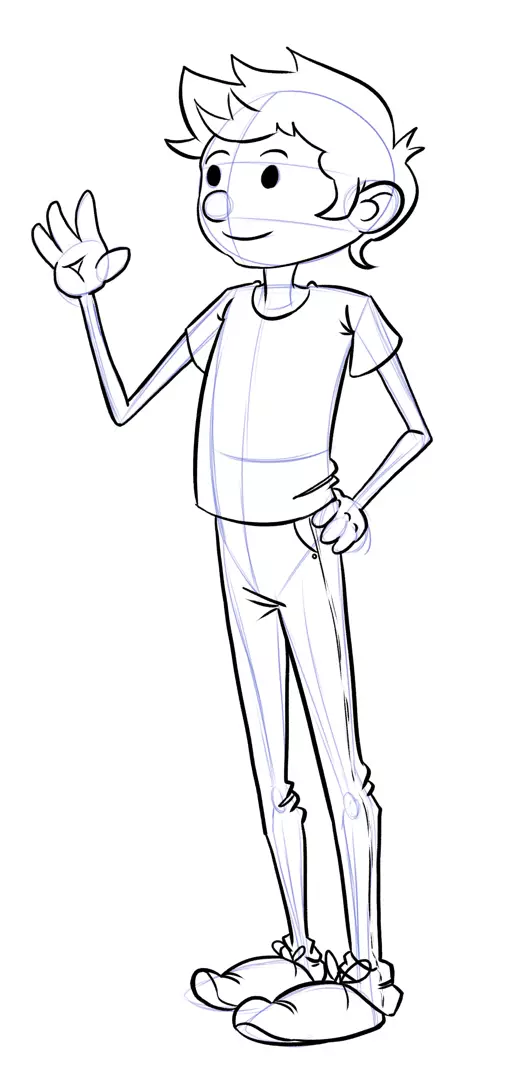
As mentioned in the introduction, the key word is roundness. We will therefore try to use as many circles and curves as possible to draw our character.
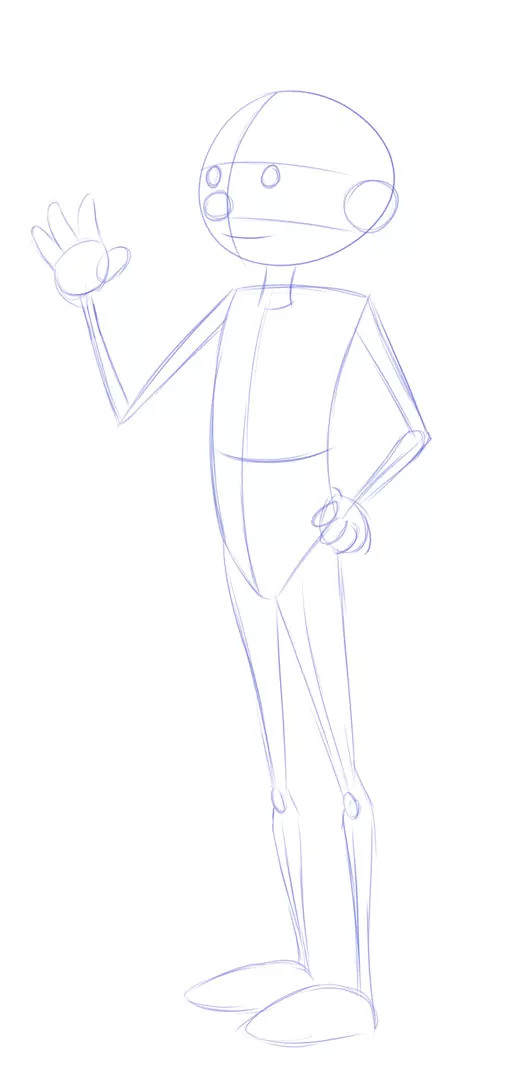
Let's start with the head. We will place a first sphere which will serve as a base for the skull. I add a line to orient it. This orientation line will be very useful to center the facial features. I place a second one for the level of the arches, which allows me to obtain the crossing of the eyes.

I add a sphere on the side for the ear, and I base the position of the nose on its location.
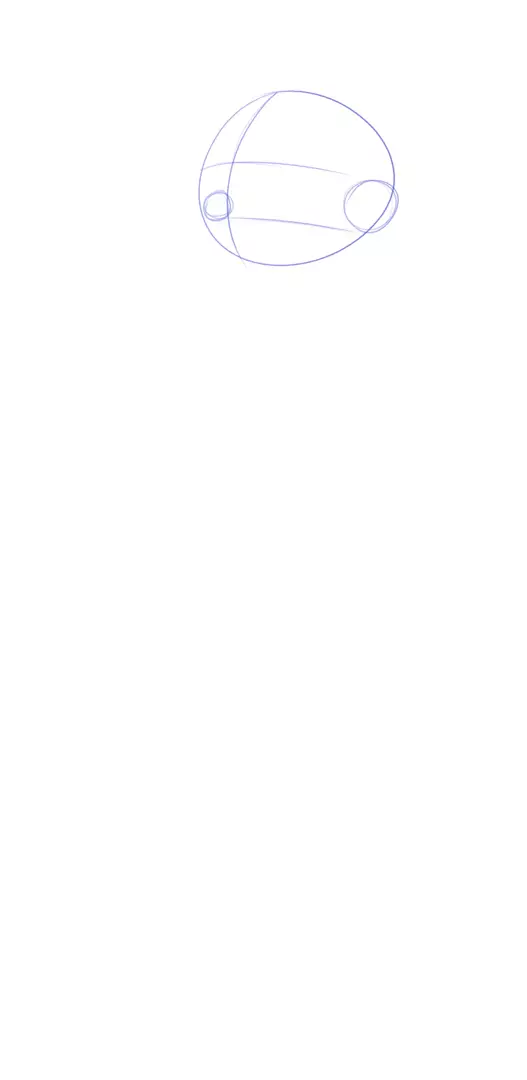
I then place two marbles for the eyes and two curves for the eyebrows. The mouth will also be a small curve, to maintain the simplicity of the cartoon style.

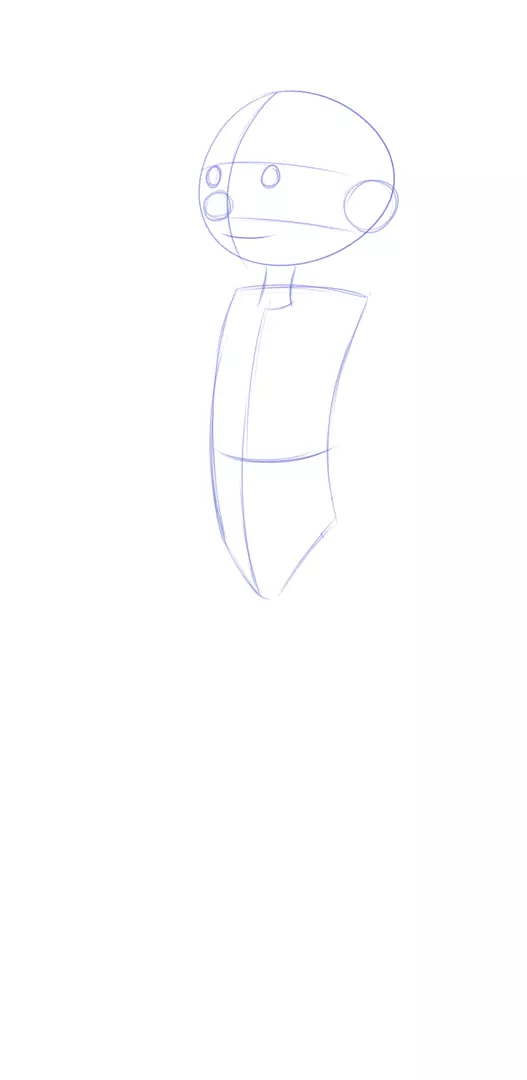
Let us now move on to the body. For this exercise I chose to make a rather slender character, so I opted for an elongated body. In terms of proportions, I want to keep a rather large head in relation to the body, so I make sure that I have a volume that is less thick than that of the head. Finally, I add my guideline and connect the body to the head with a very thin neck.

I mark the size reference of my character. This will allow me to extimate the length of the arms.
I come to represent my members in wireframe. For this, I first place the arms, which are the length between the shoulder and the waist. As the forearms are the same size as the arms, I also base their positioning on this length. I finish with the potatoes for the positioning of the hands. The hands are generally wide enough to be visible and expressive in small boxes, so don't hesitate to make them big enough!
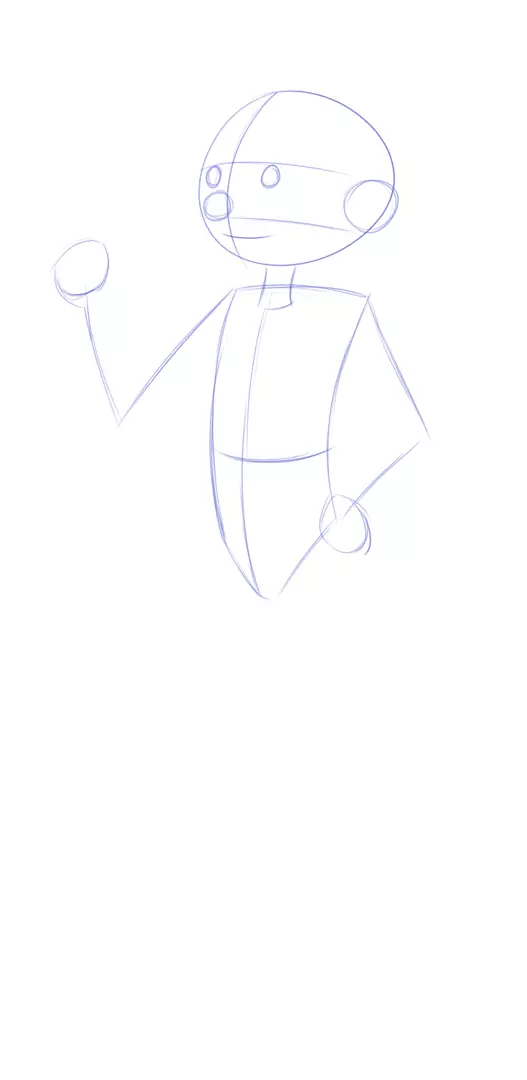
For the legs, I want them long. So I will make them slightly longer than the length of my arms. I end with flat potatoes underneath for the feet. As with the hands, the proportions are generally exaggerated here.
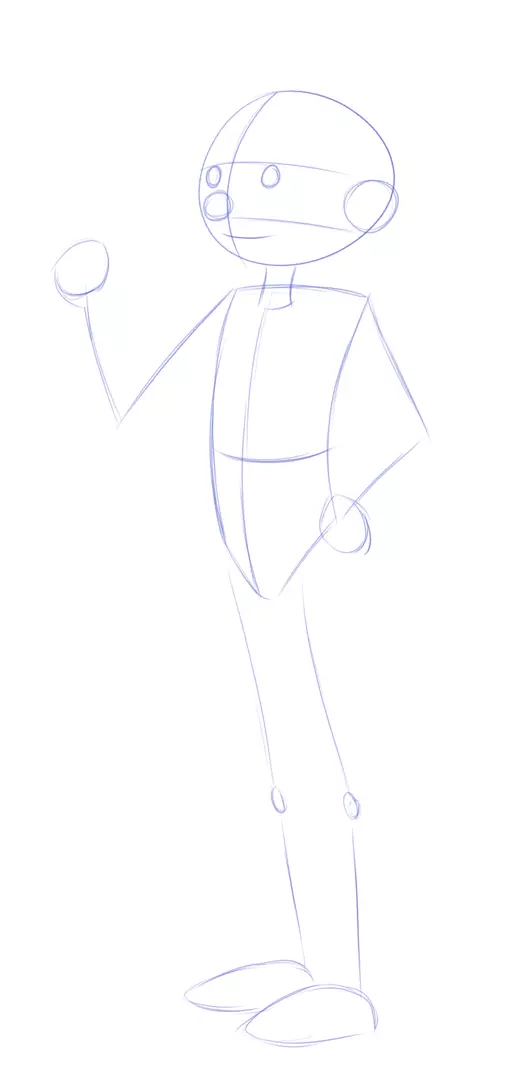
I then go on to draw the volumes of the limbs. As with the body, I keep it thin and curved around my wireframes.

Finally, I add the fingers to my character. I keep it simple and make little sausages for the hands. For a more streamlined look, I put 4 fingers instead of 5.
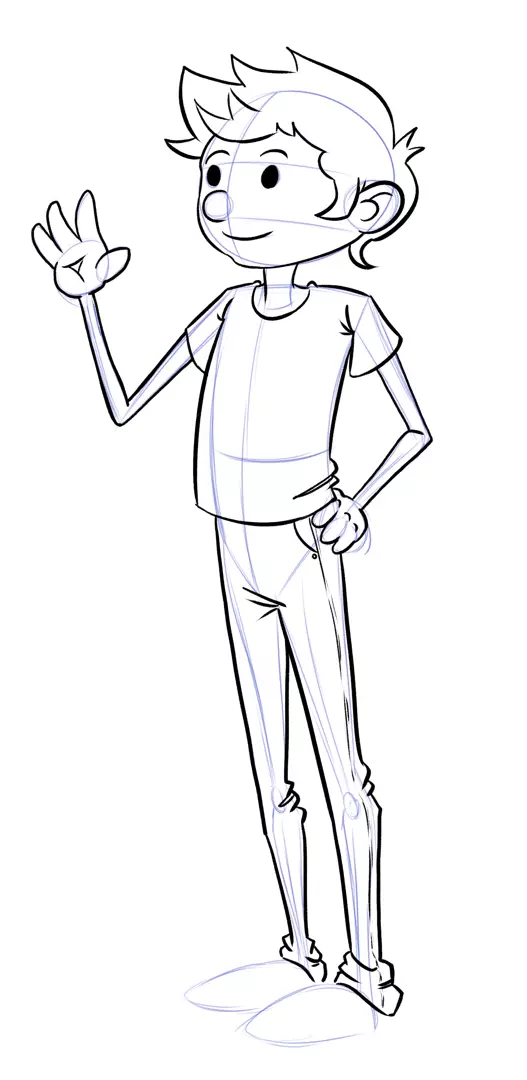
Our base is finished! Let's move on to cleaning it up.
CLEANING UP YOUR CHARACTER
We will draw our character with line art. If you have read our, you surely know what I'm talking about. If not, don't panic, you should be able to understand what follows without it. Nonetheless, feel free to go read it ;)
I start by cleaning the head. I carve the sphere around the eyes to create the depth of the eye sockets and add some volume under the sphere for the chin. I add hair on top of the sphere. Note that the hair is a mass on top of the head and therefore does not touch the skull. As for the other details, I try to keep them as simple as possible: an open sphere for the nose, two bows for the inside of the ear... And once again, the curves!
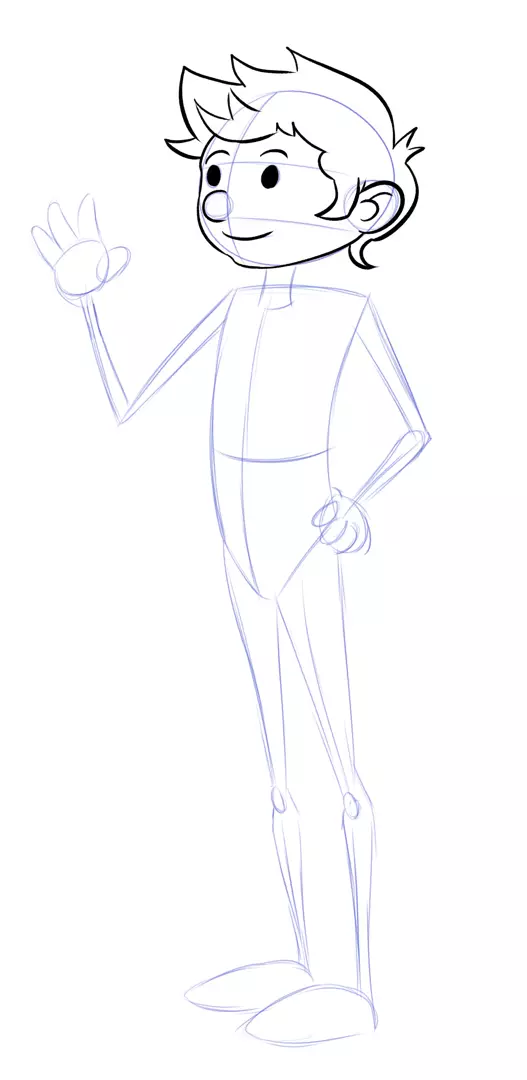
For the body, my character will wear the classic jeans + t-shirt combo. If I have to draw him for 48 pages of comics, I try to avoid overloading his clothes with details! I put a few creases at the seams and more or less approach the construction lines to define the thickness of the clothes, just as I do with the hair.
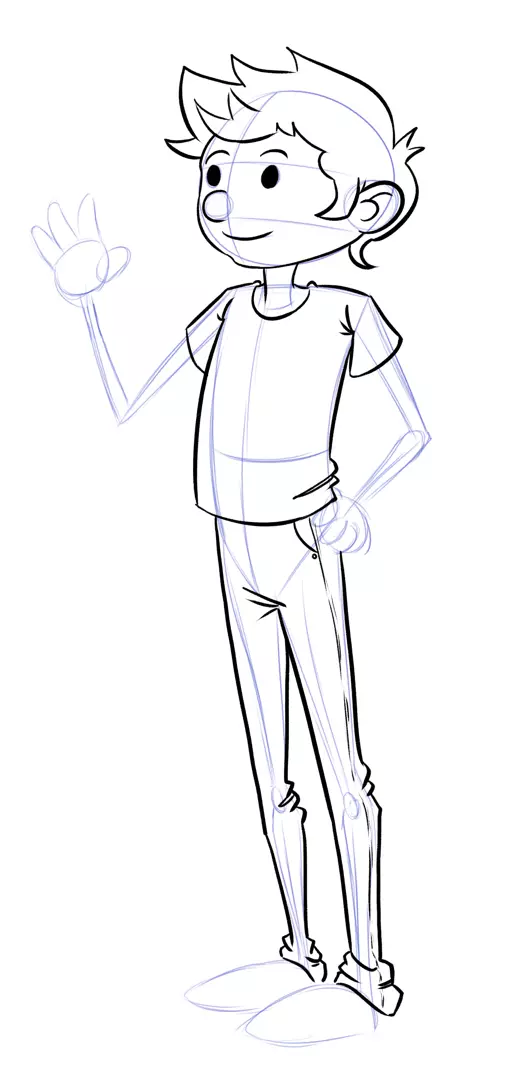
For the forearms and hands, I just need to go over my construction lines.
For the feet, I add shoes according to my design. Two laces in the shape of rabbit ears and that's it! The ends of the shoes have been raised to give more dynamism.
ADDING COLOURS TO YOUR DRAWING
Our character is almost finished! All that remains is to move on to colouring it.
I start by applying the basic flat colours all over the character.
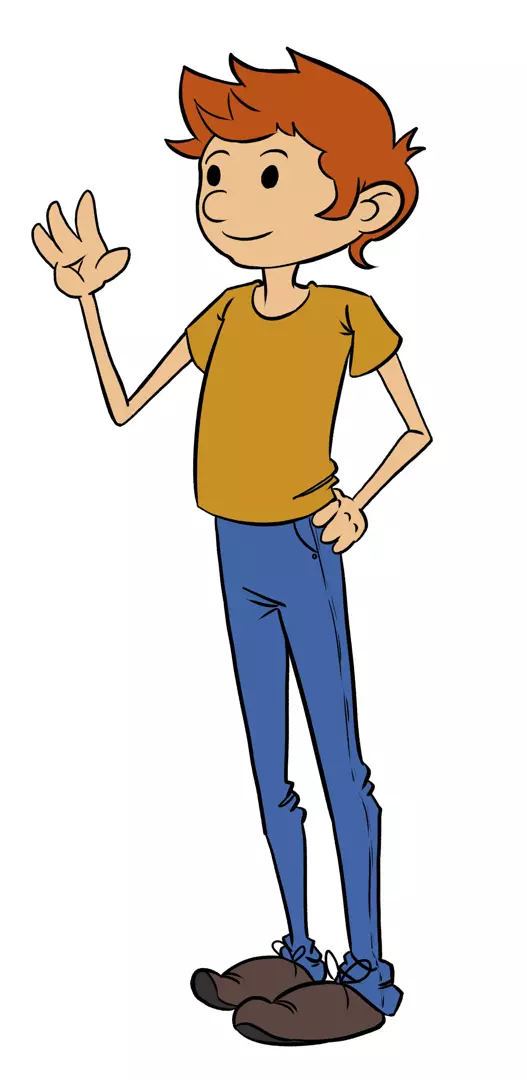
Finally, I use a darker colour to define the shadows. A little tip for your skin: use a darker colour that is also redder and more saturated than your base colour! You will achieve a much better result and avoid having a dull skin tone.

And there you have it, our character is almost finished! I add small white highlights to shiny areas, such as the eyes or hair, for a more expressive and lively result.

Now it's your turn to try! As I said in the article's introduction, use this tutorial as a basis for creating your comic book characters and have fun varying the shapes! Remember that your essential tools will be spheres, curves and exaggeration.
Popular Articles
Discussion
What specific <a href="https://sportsgamesaz.io">sports games</a> techniques or tools do you plan to use to achieve the elongated body and the large head proportions in your character design?
great tutorial thank you