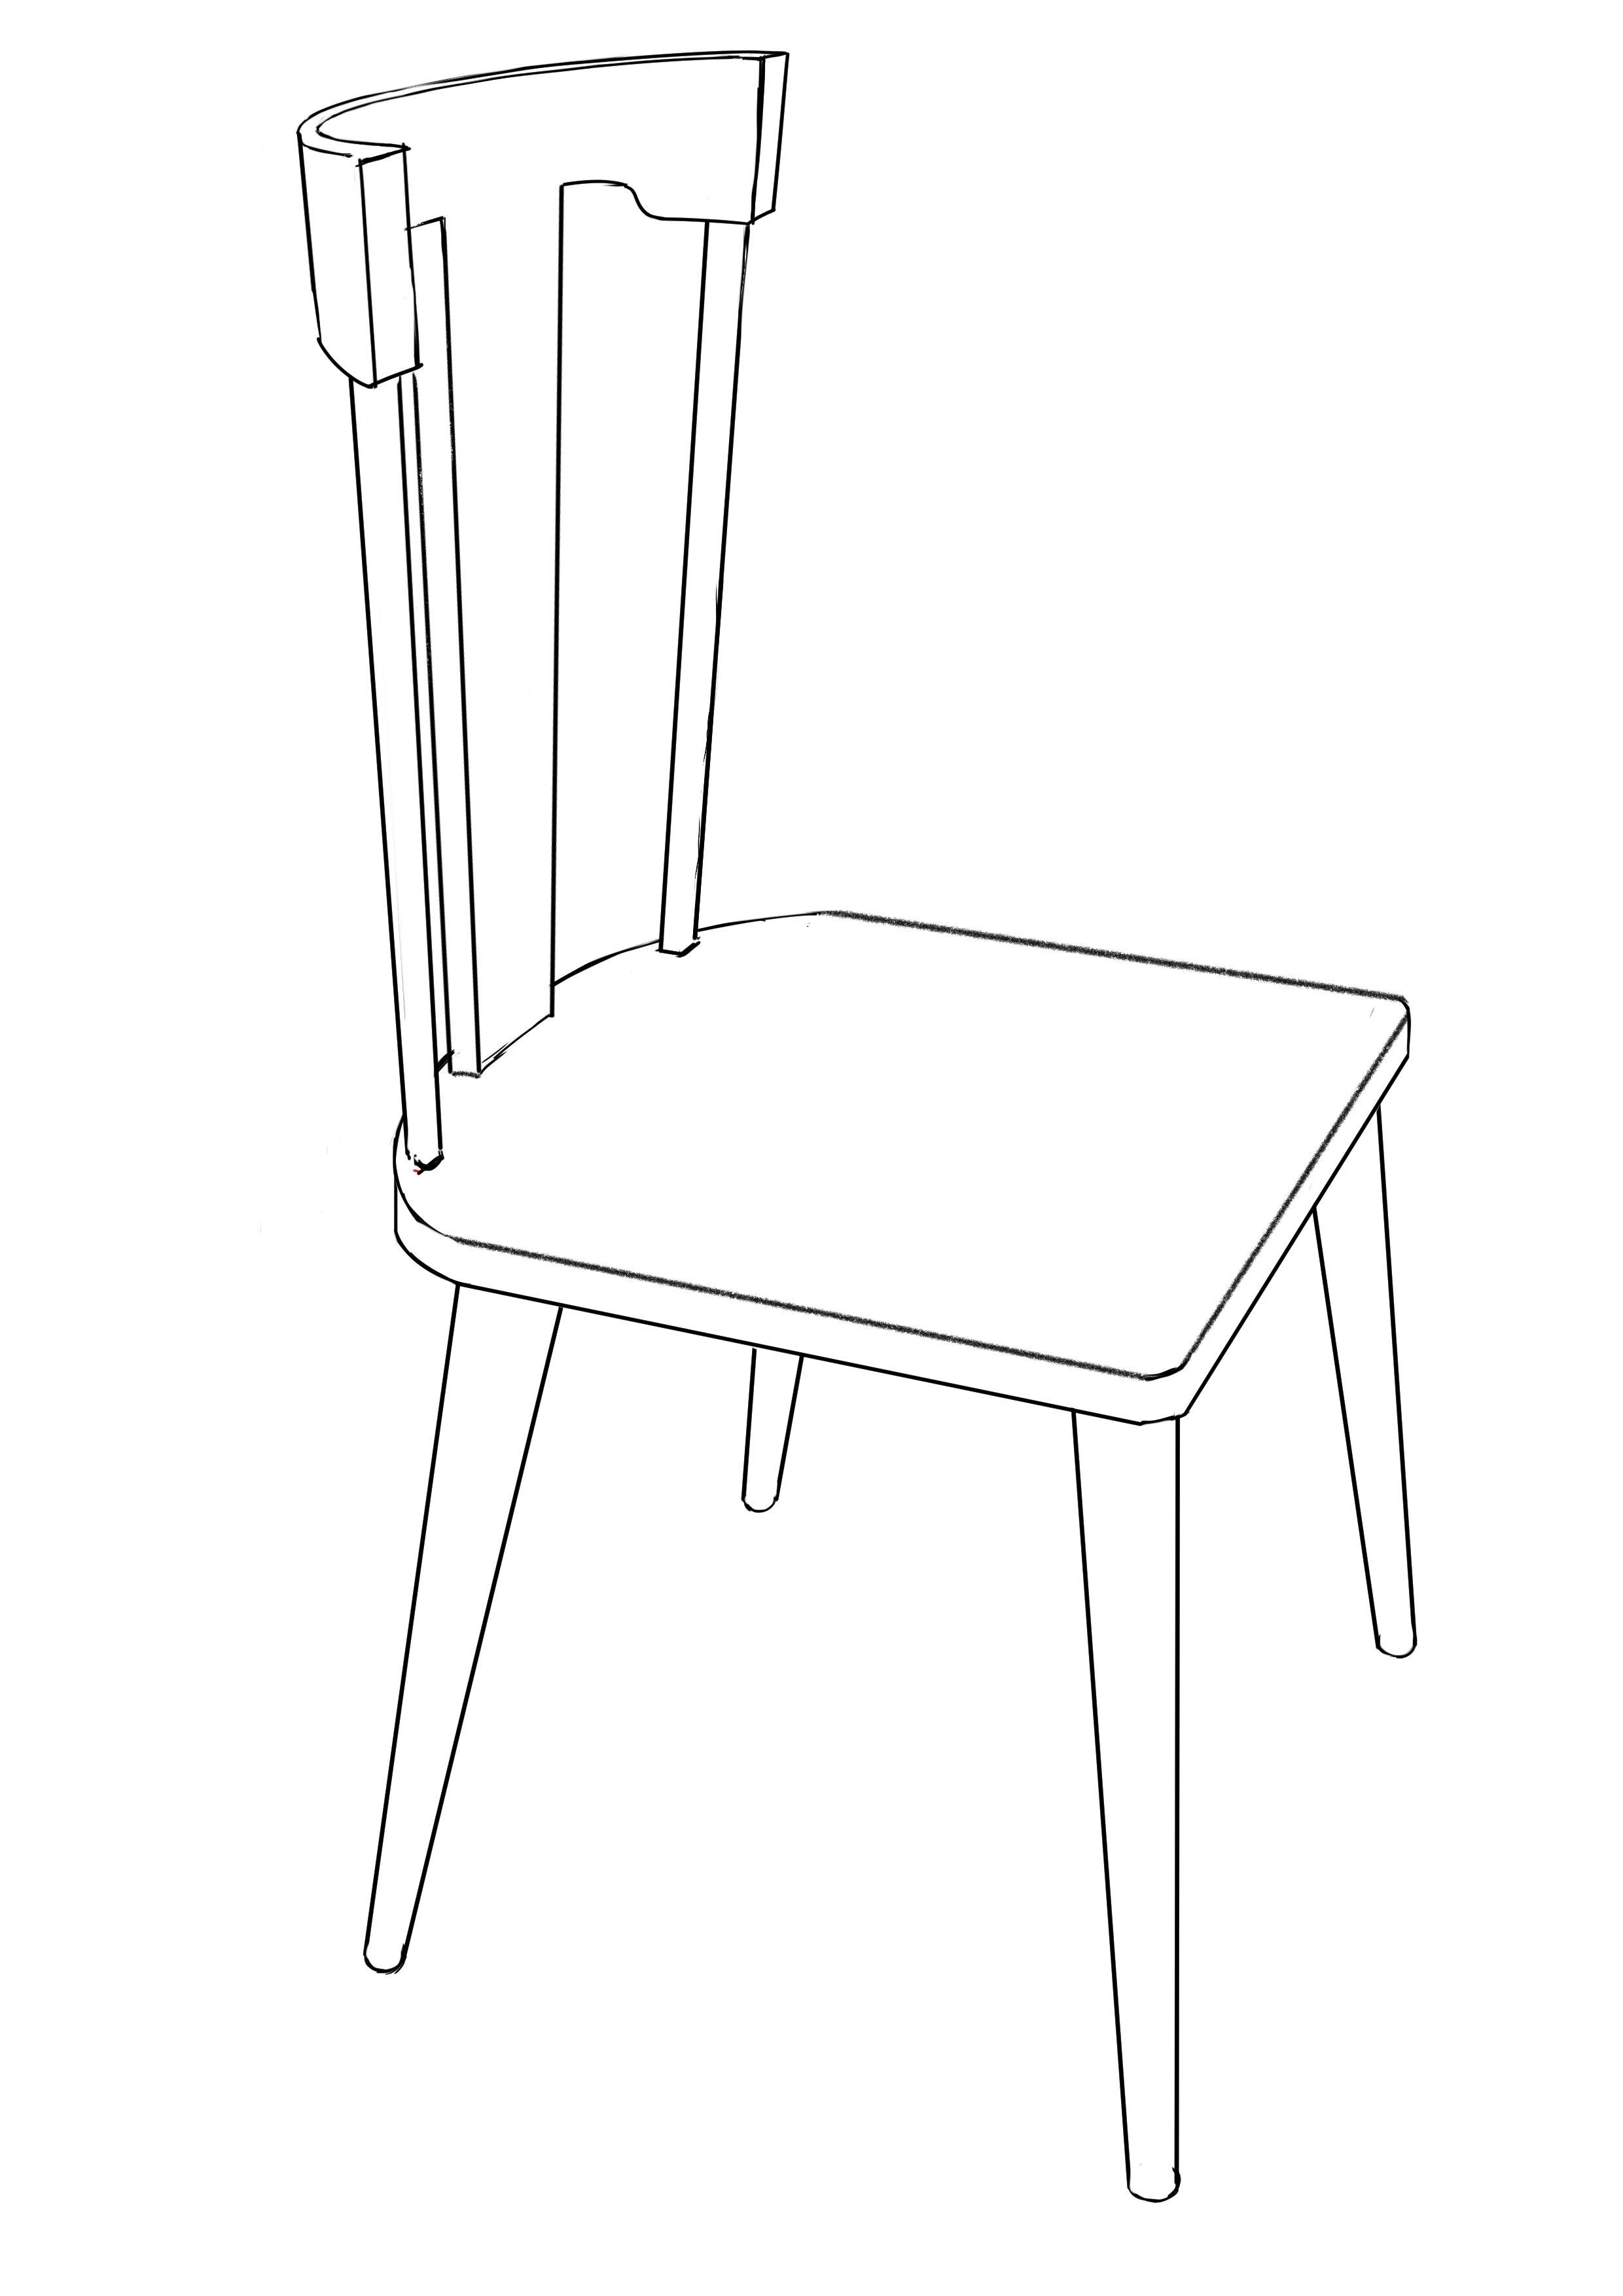
How to Draw a Chair
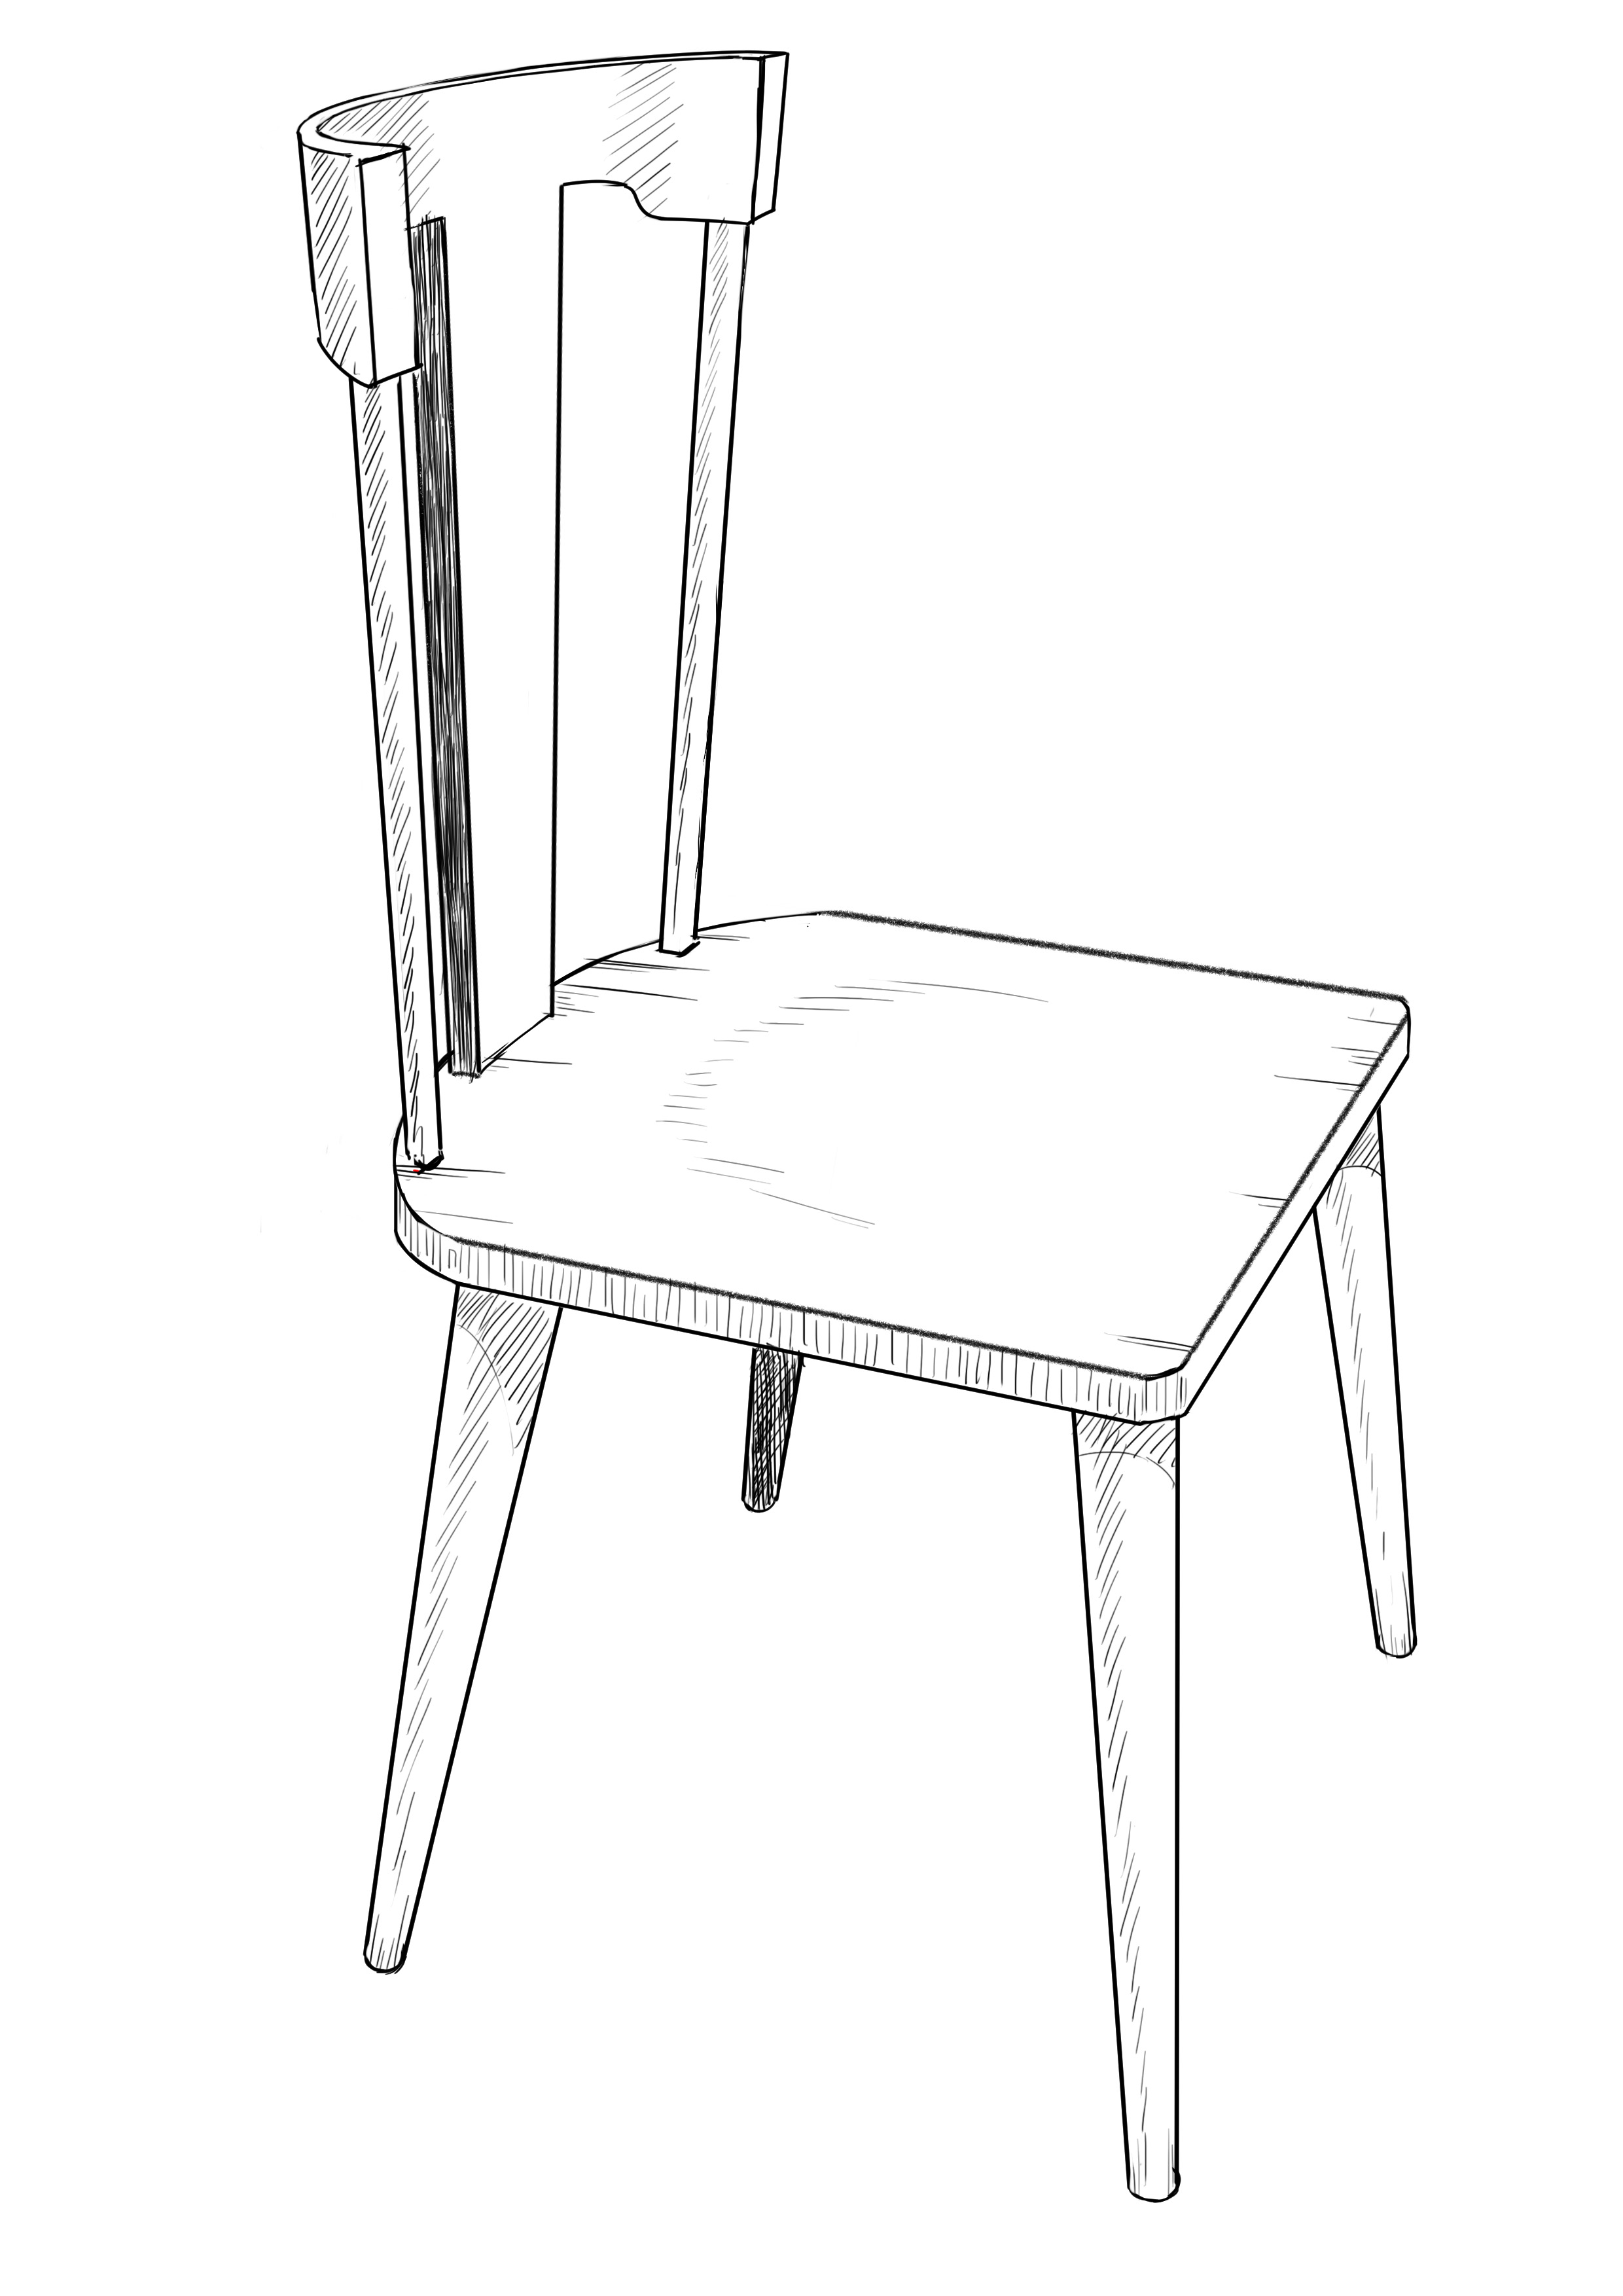
Hello, perspective fans! Today we're going to tackle the chair.
No matter the type of chair you choose, you should focus on the following details:
- The inclination of the chair legs
- The tilt of the backrest
- The shape of the seat
- The possible bars on the chair
DRAWING A CHAIR STEP BY STEP
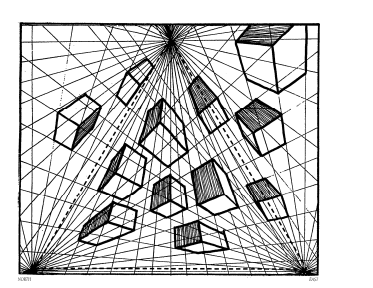
Careful! Today, we will need to place the vanishing points outside the paper. So, how does that work?
THE DRAWING'S VANISHING POINTS
You will simply need to take some scrap paper and attach it to your worksheet. These sheets will allow you to expand your horizon and therefore place your vanishing points in a much larger area and outside your sheet.
It gives you something like this:
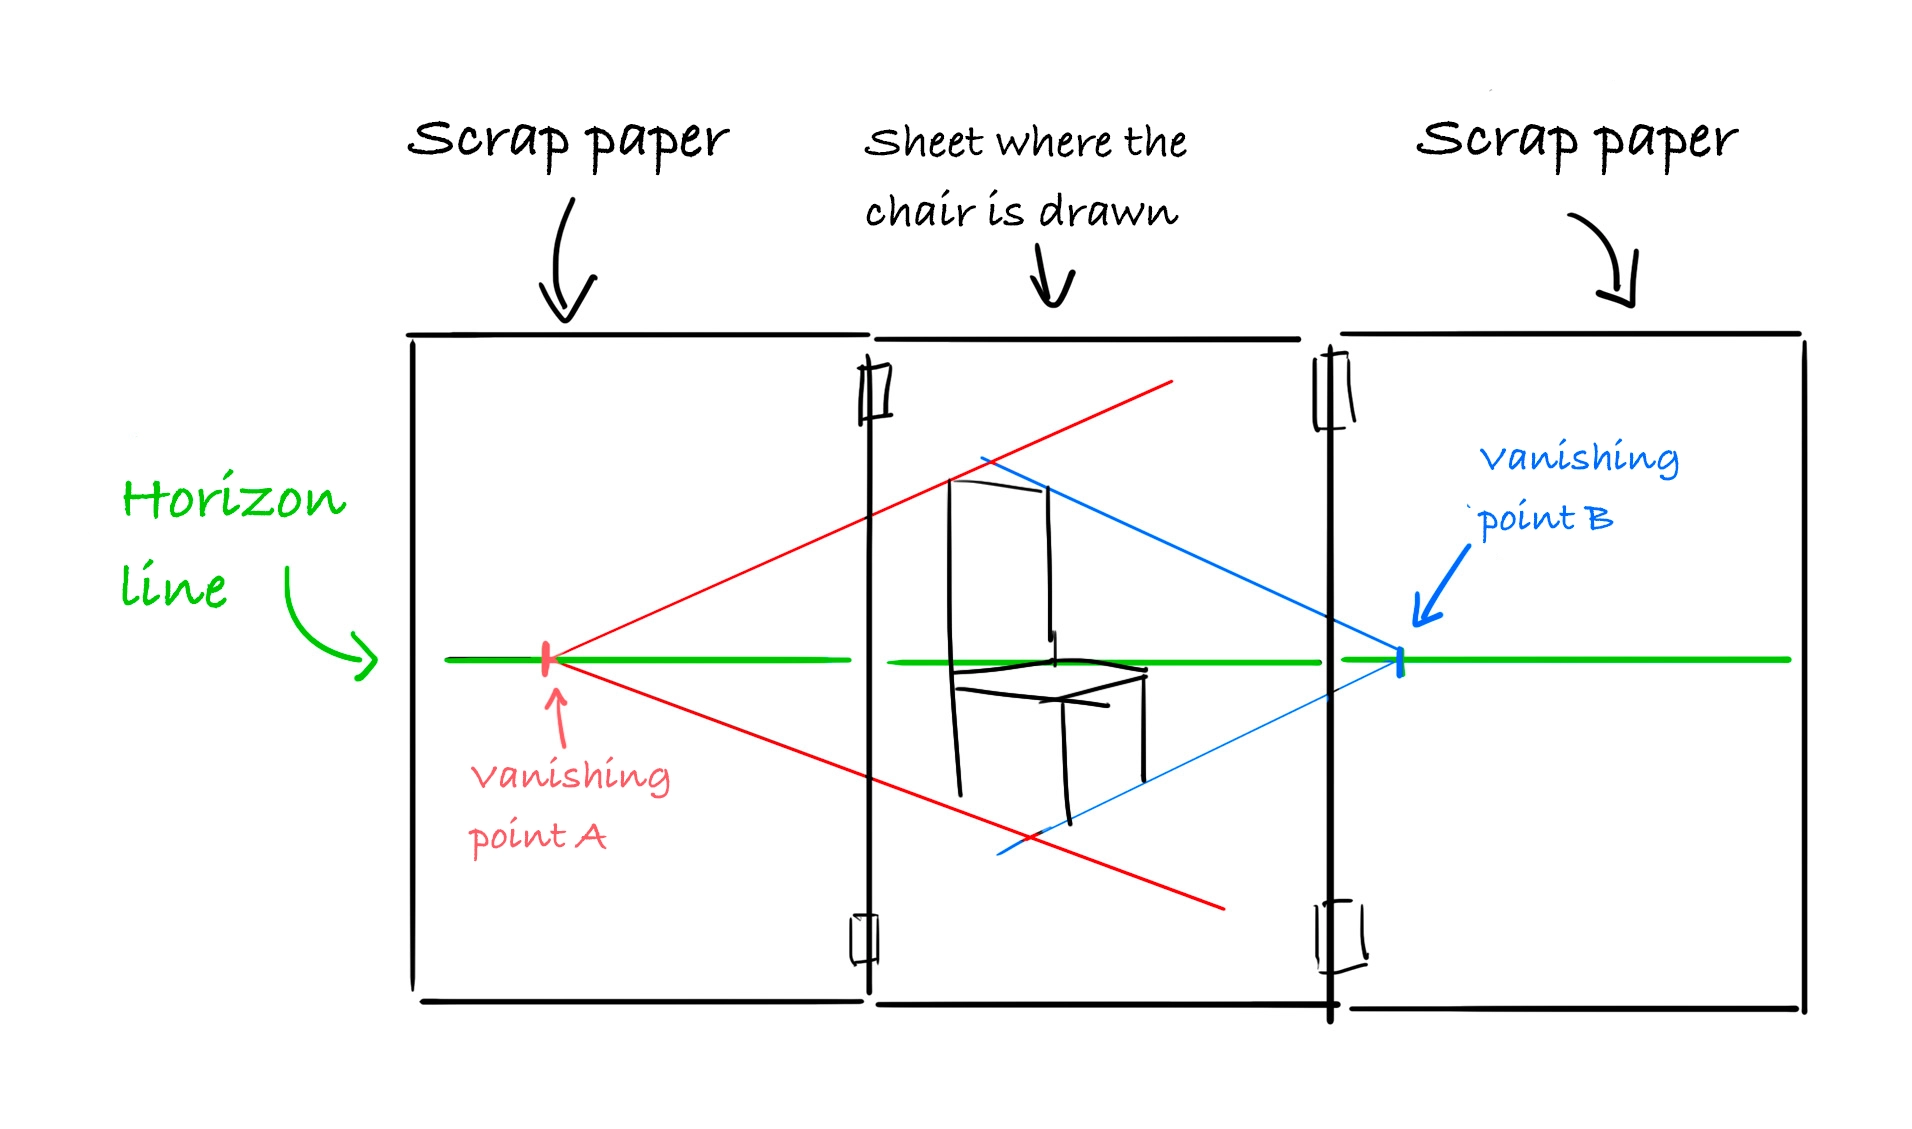
We will need two vanishing points today, and the horizon line is towards the top of our sheet because we are looking downwards. If you are lost, I suggest you check out our blog post for drawing perspective.
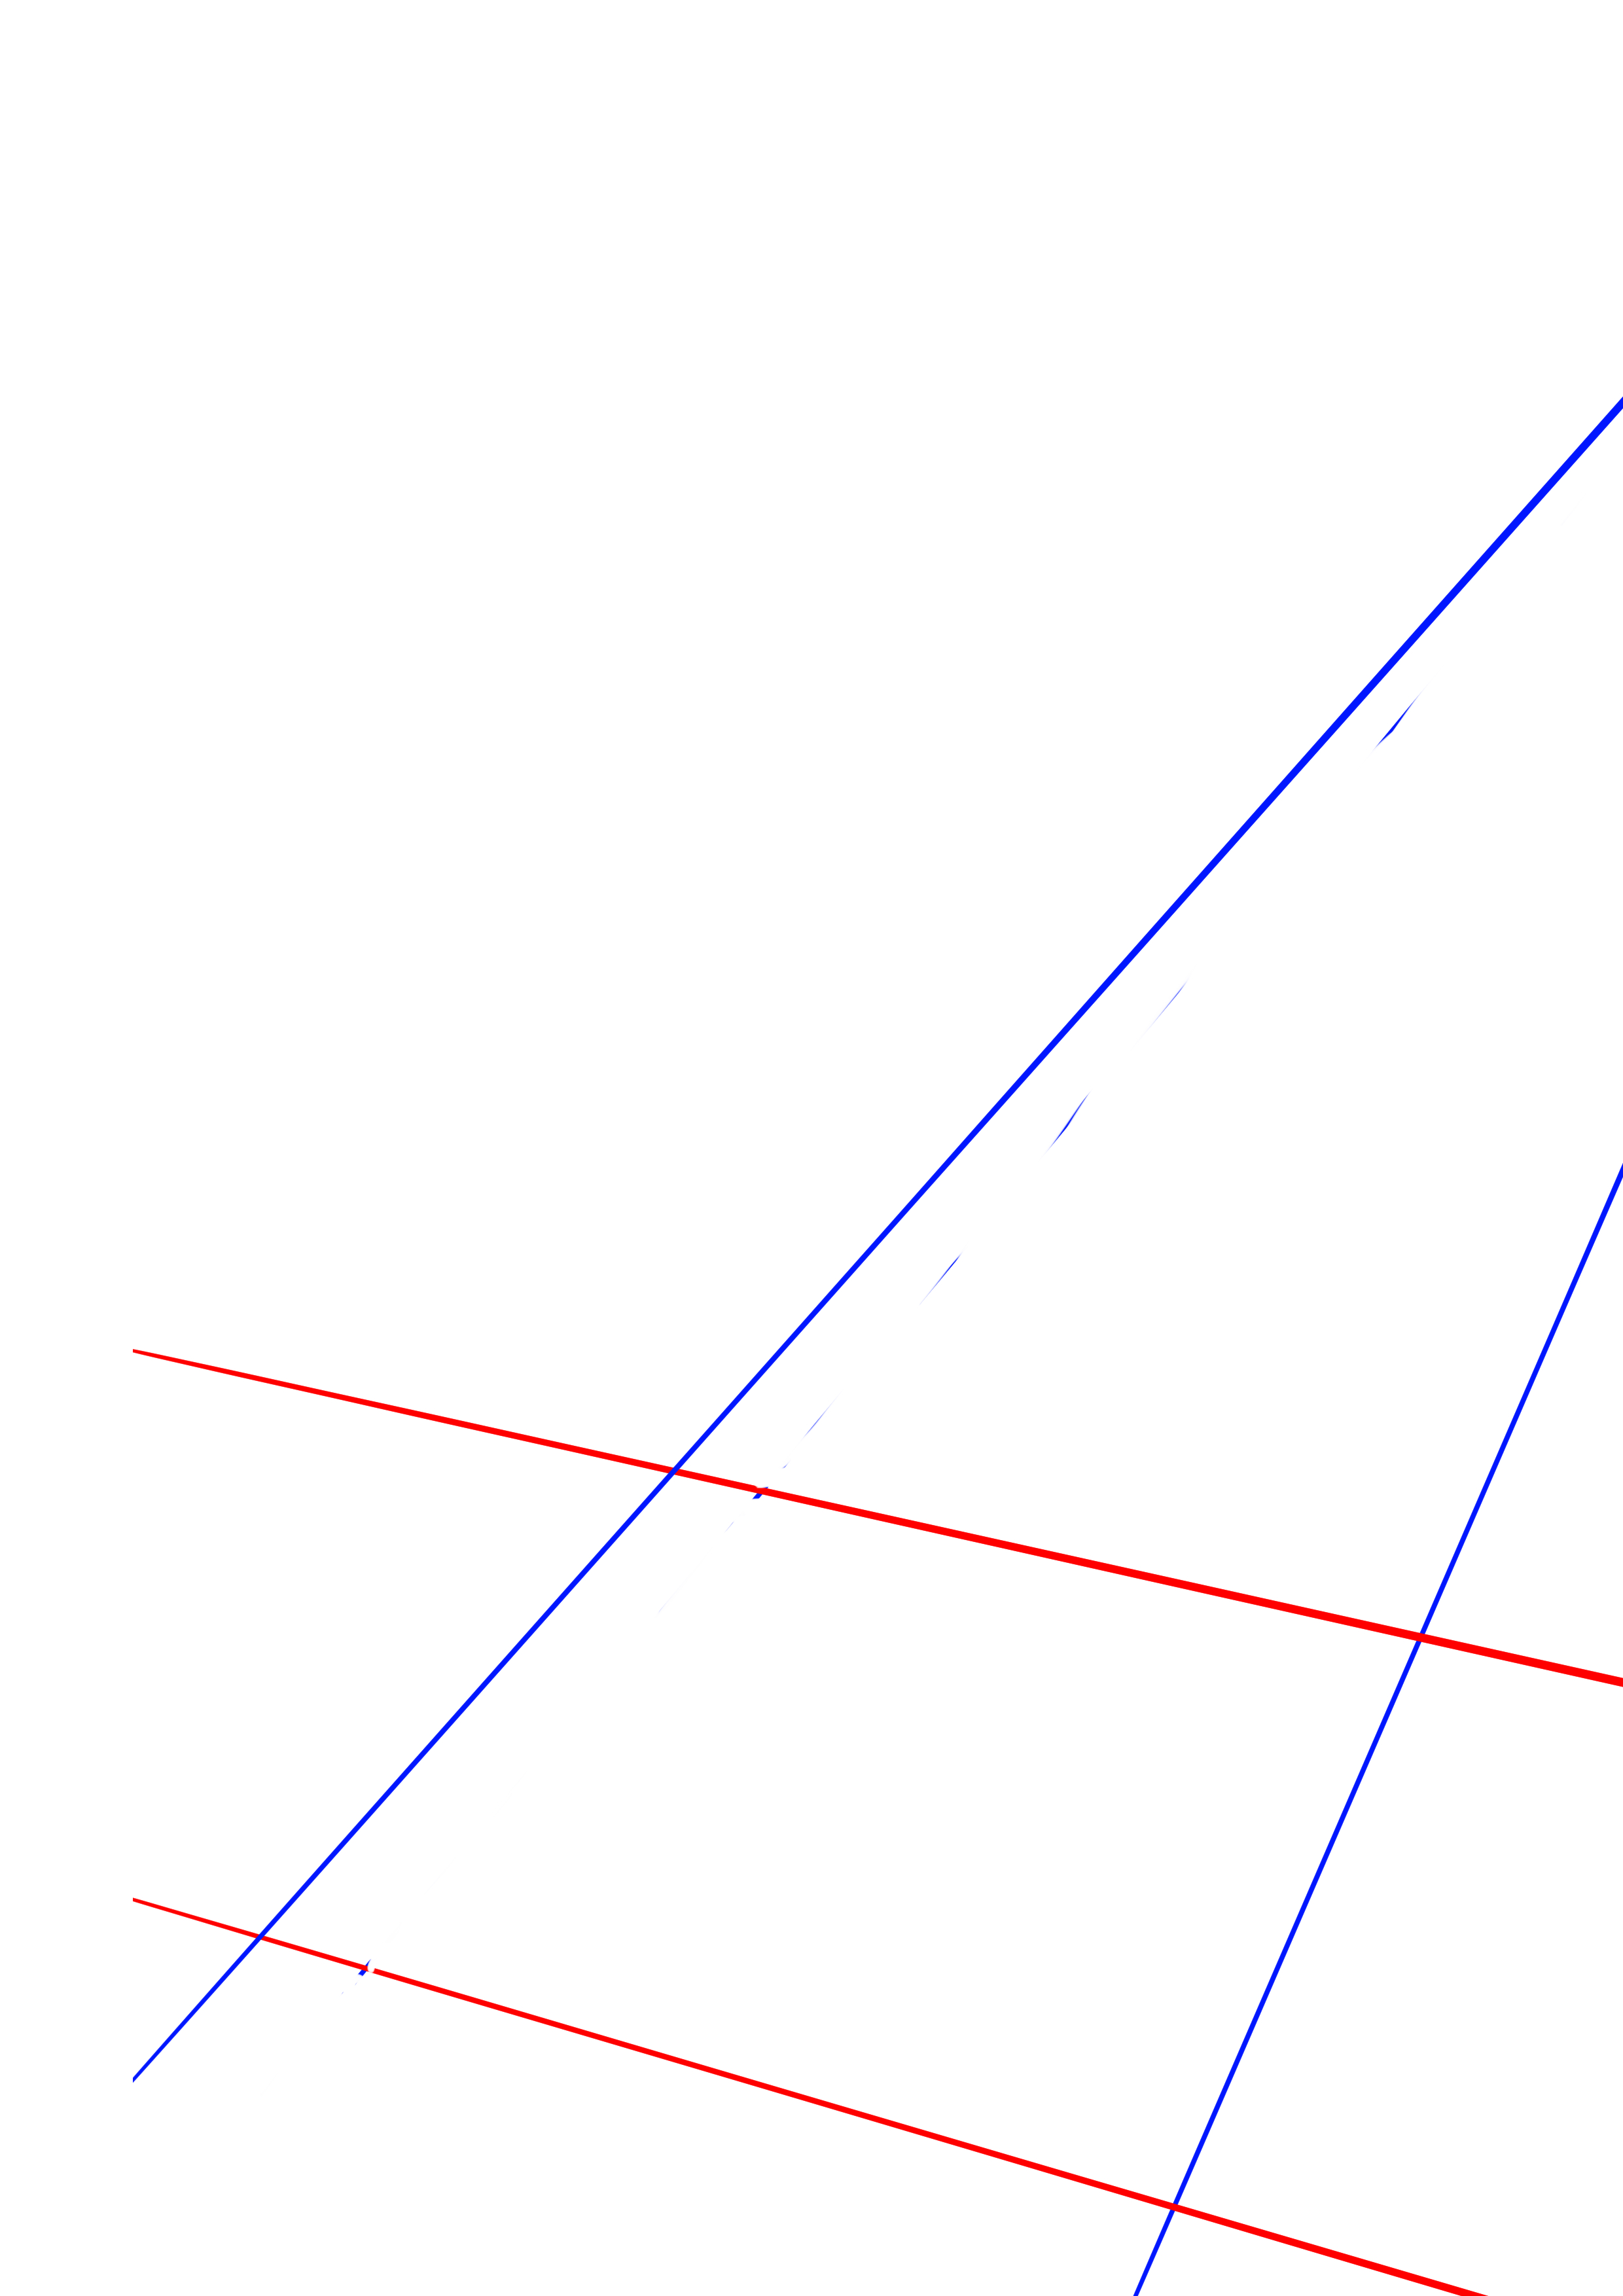
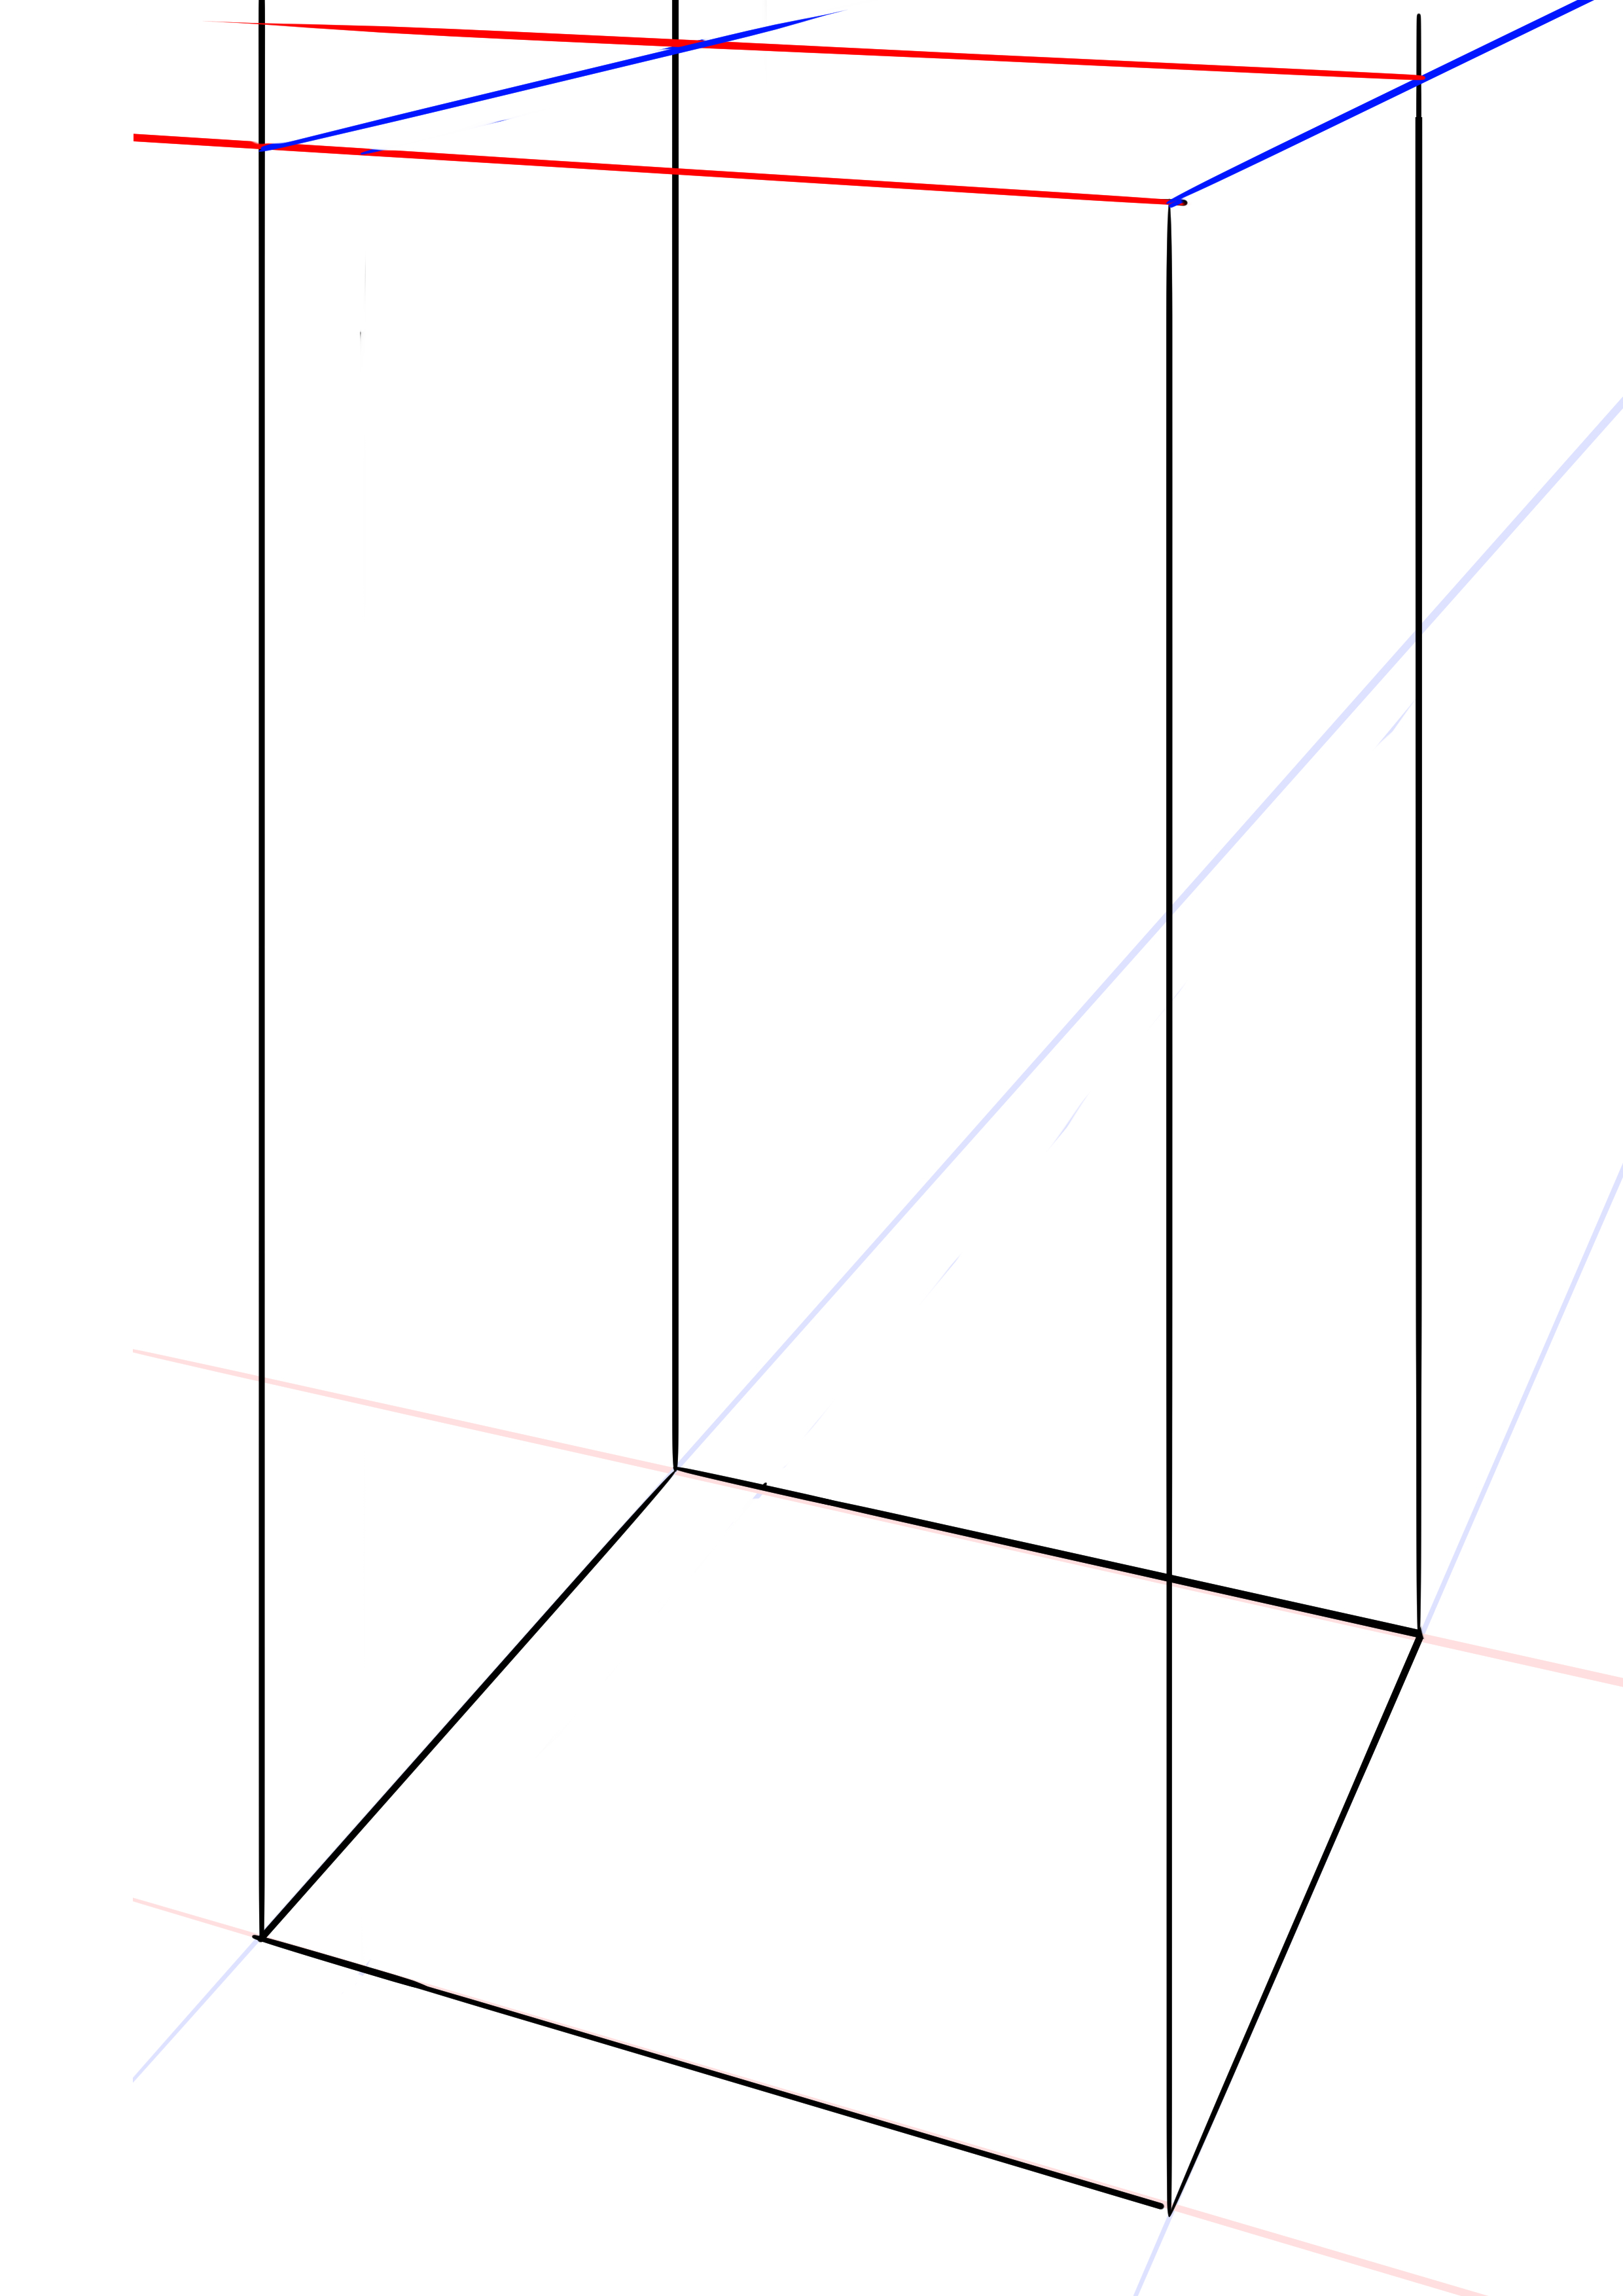
For more clarity, I will use two colors: red for the lines emanating from the left vanishing point, and blue for the lines emanating from the right vanishing point.
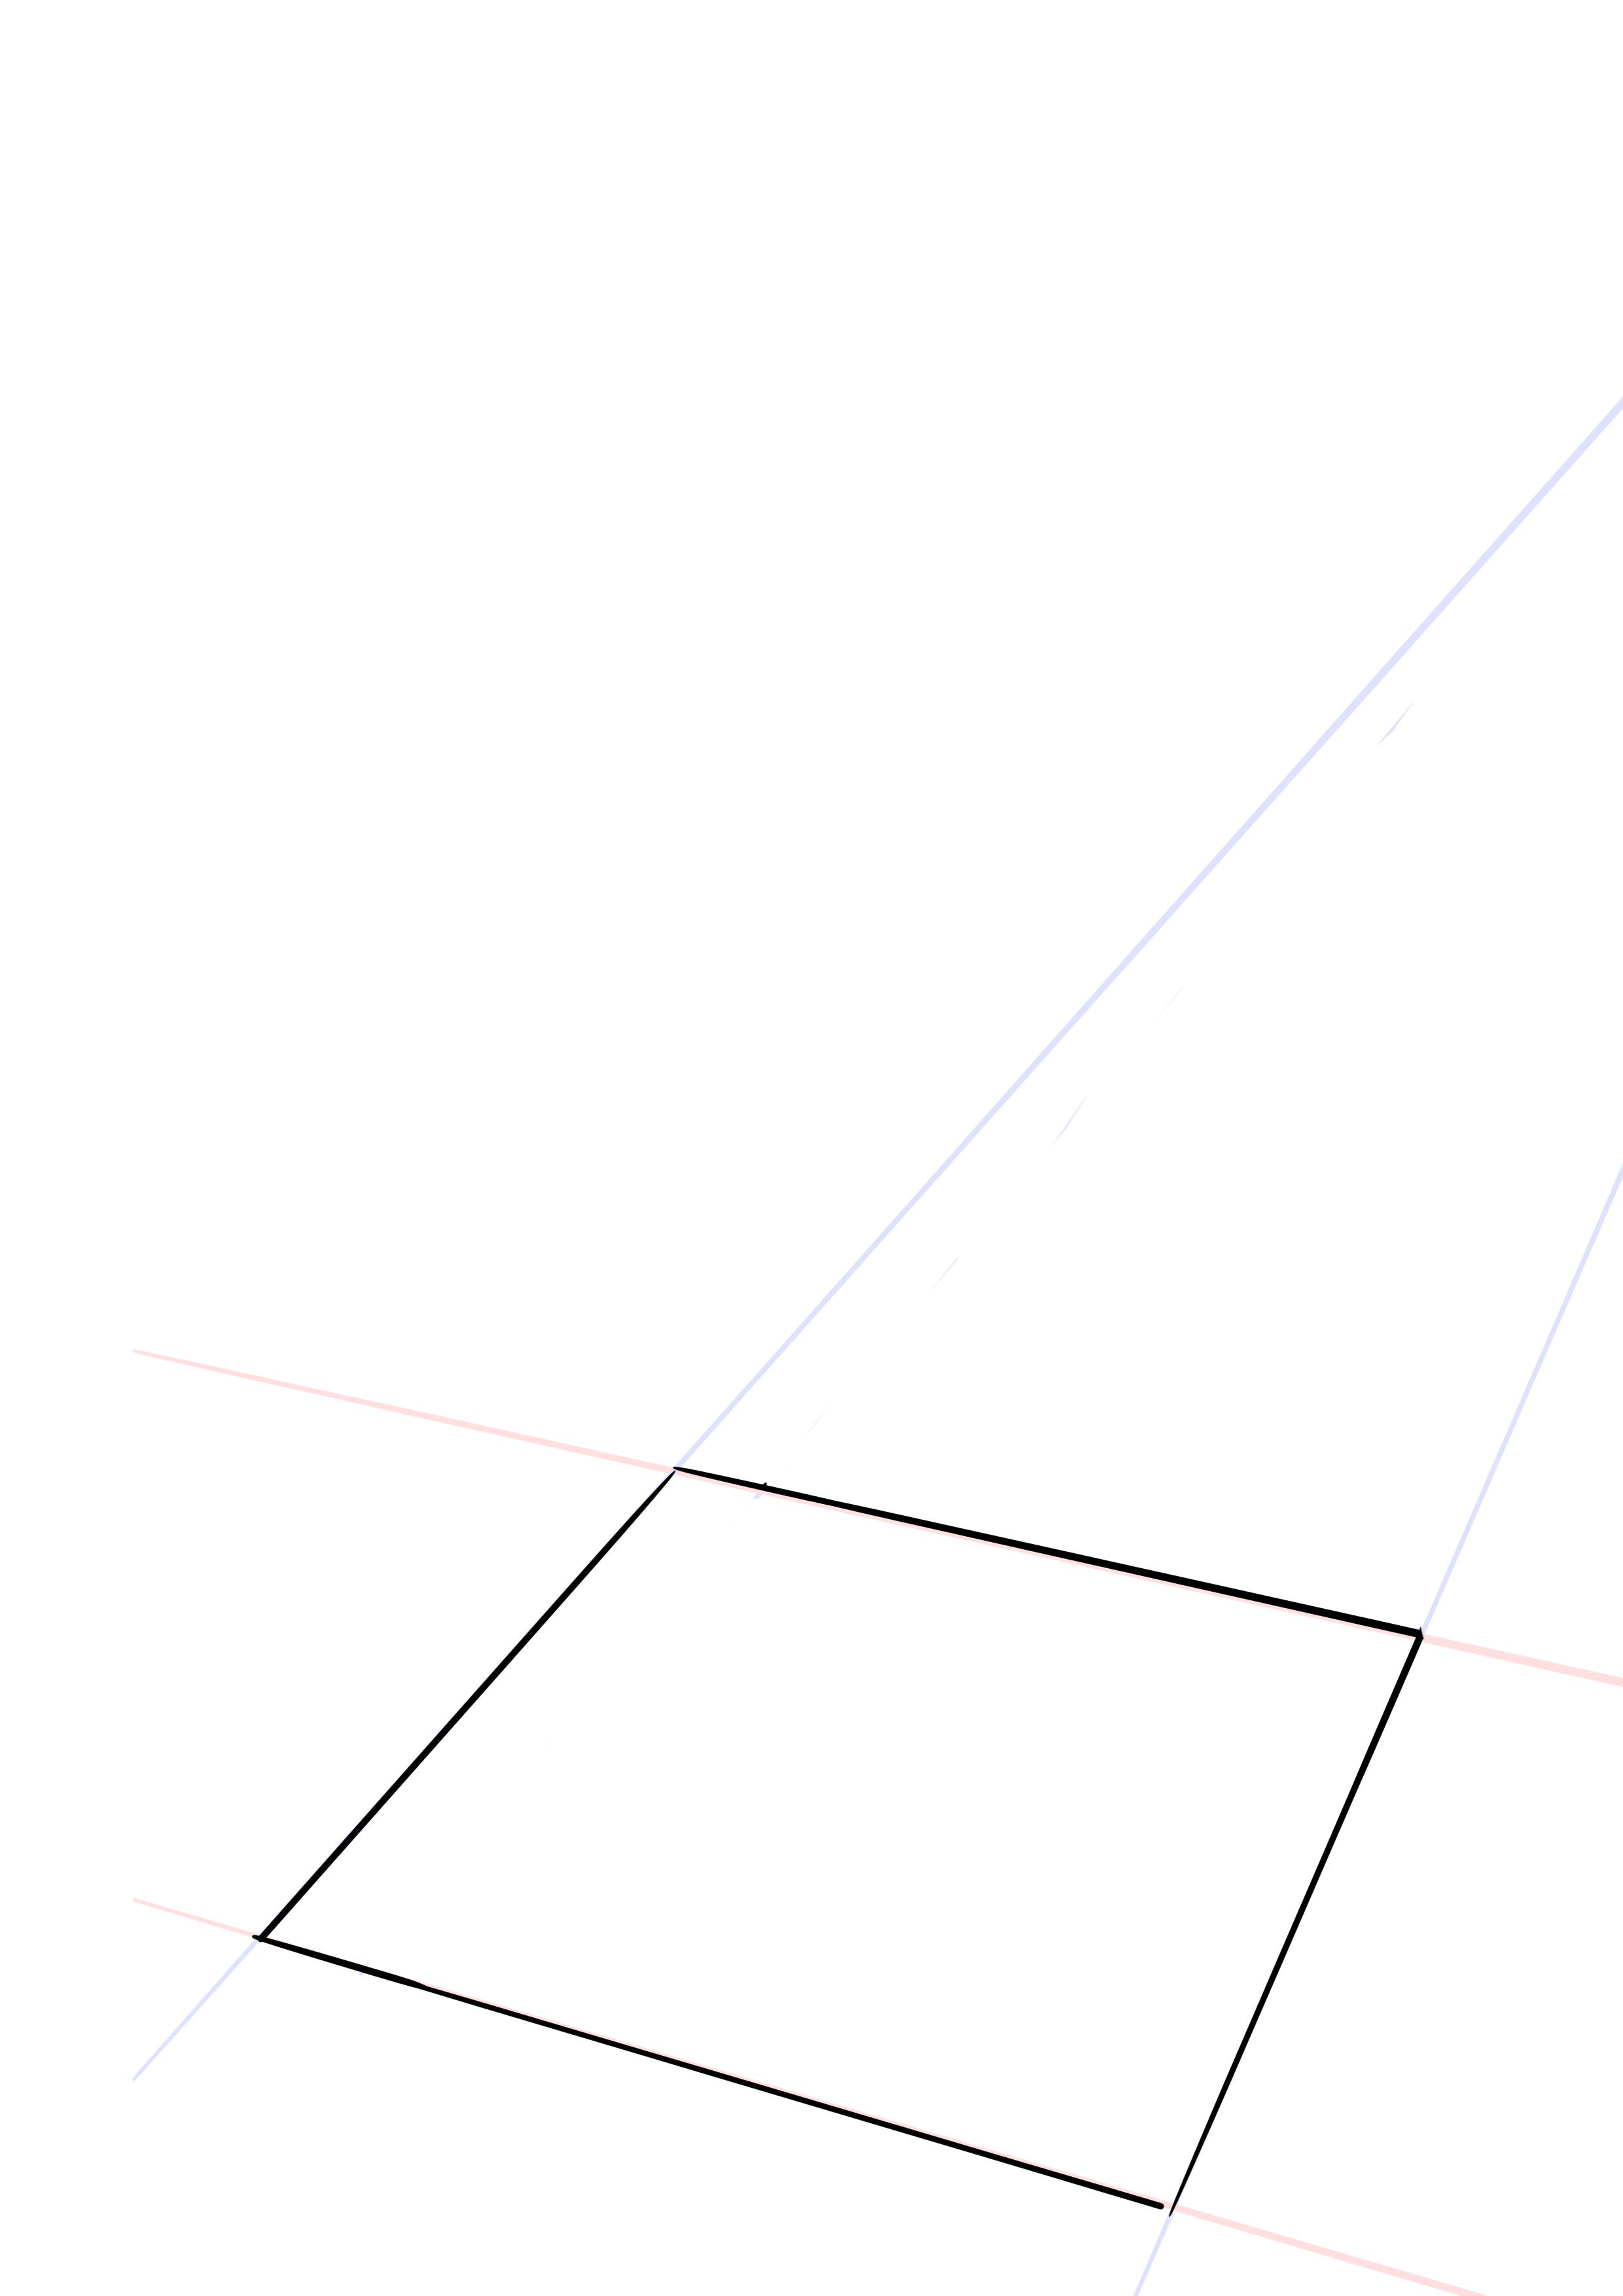
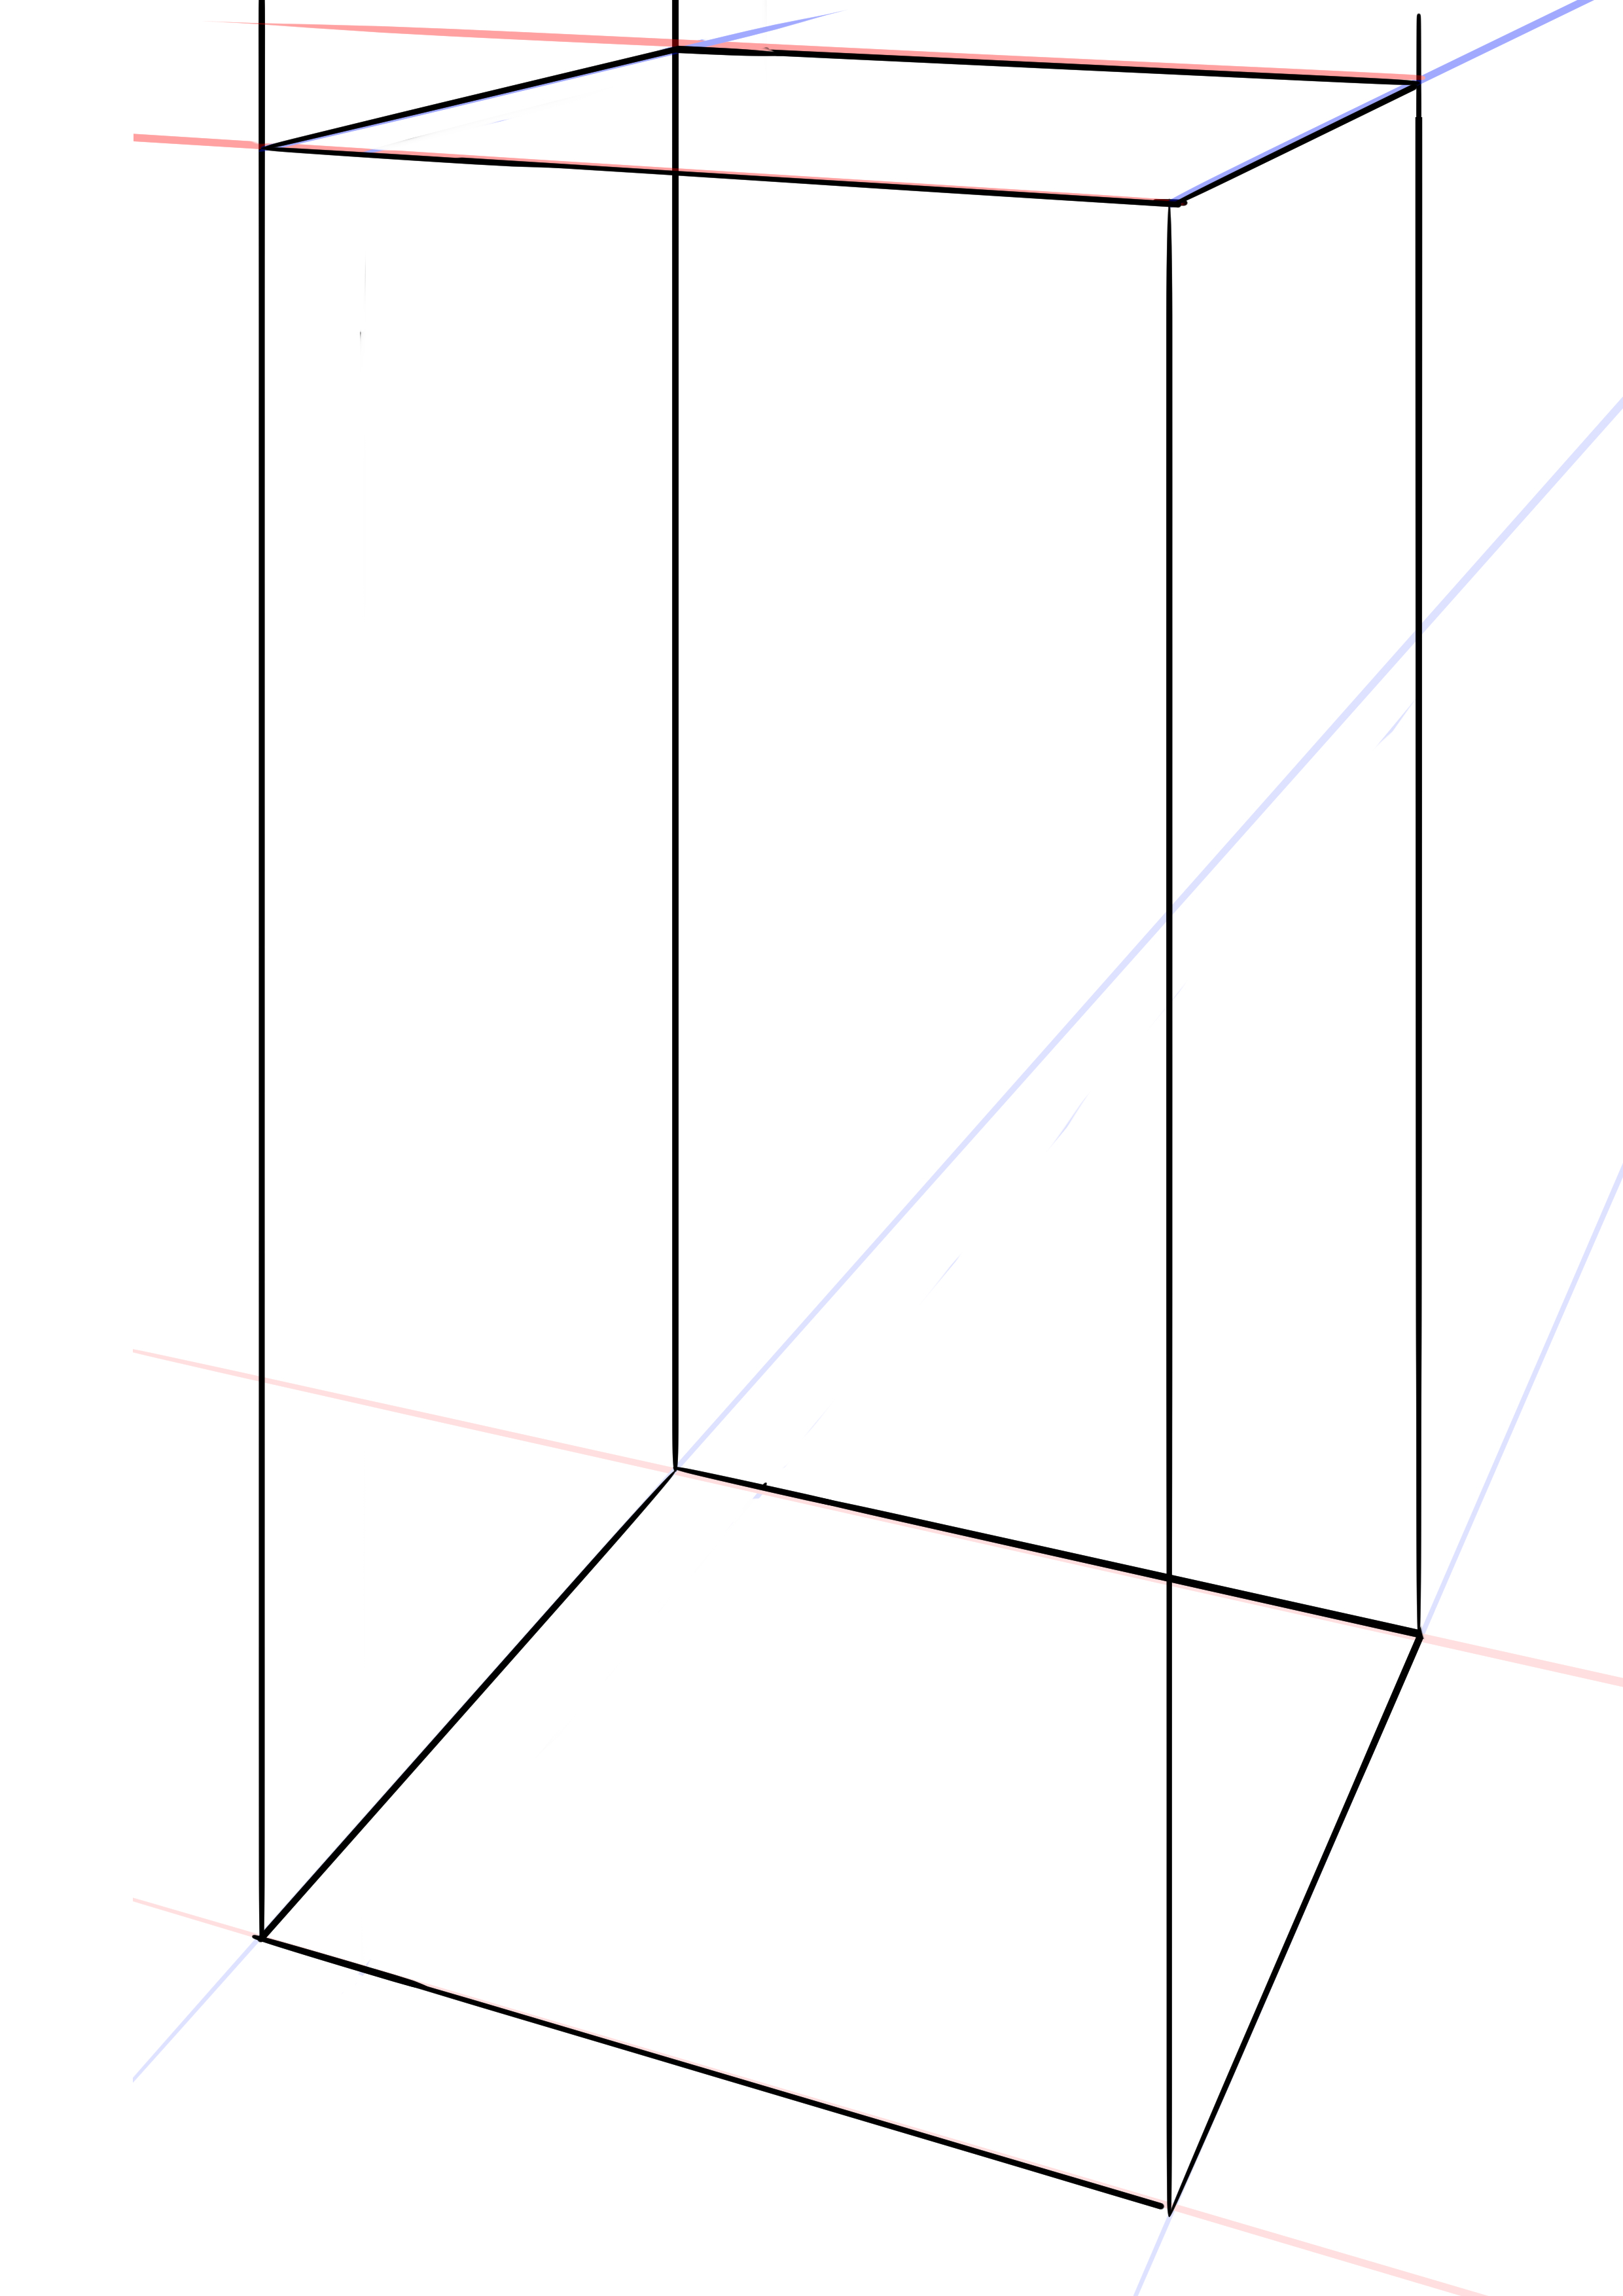
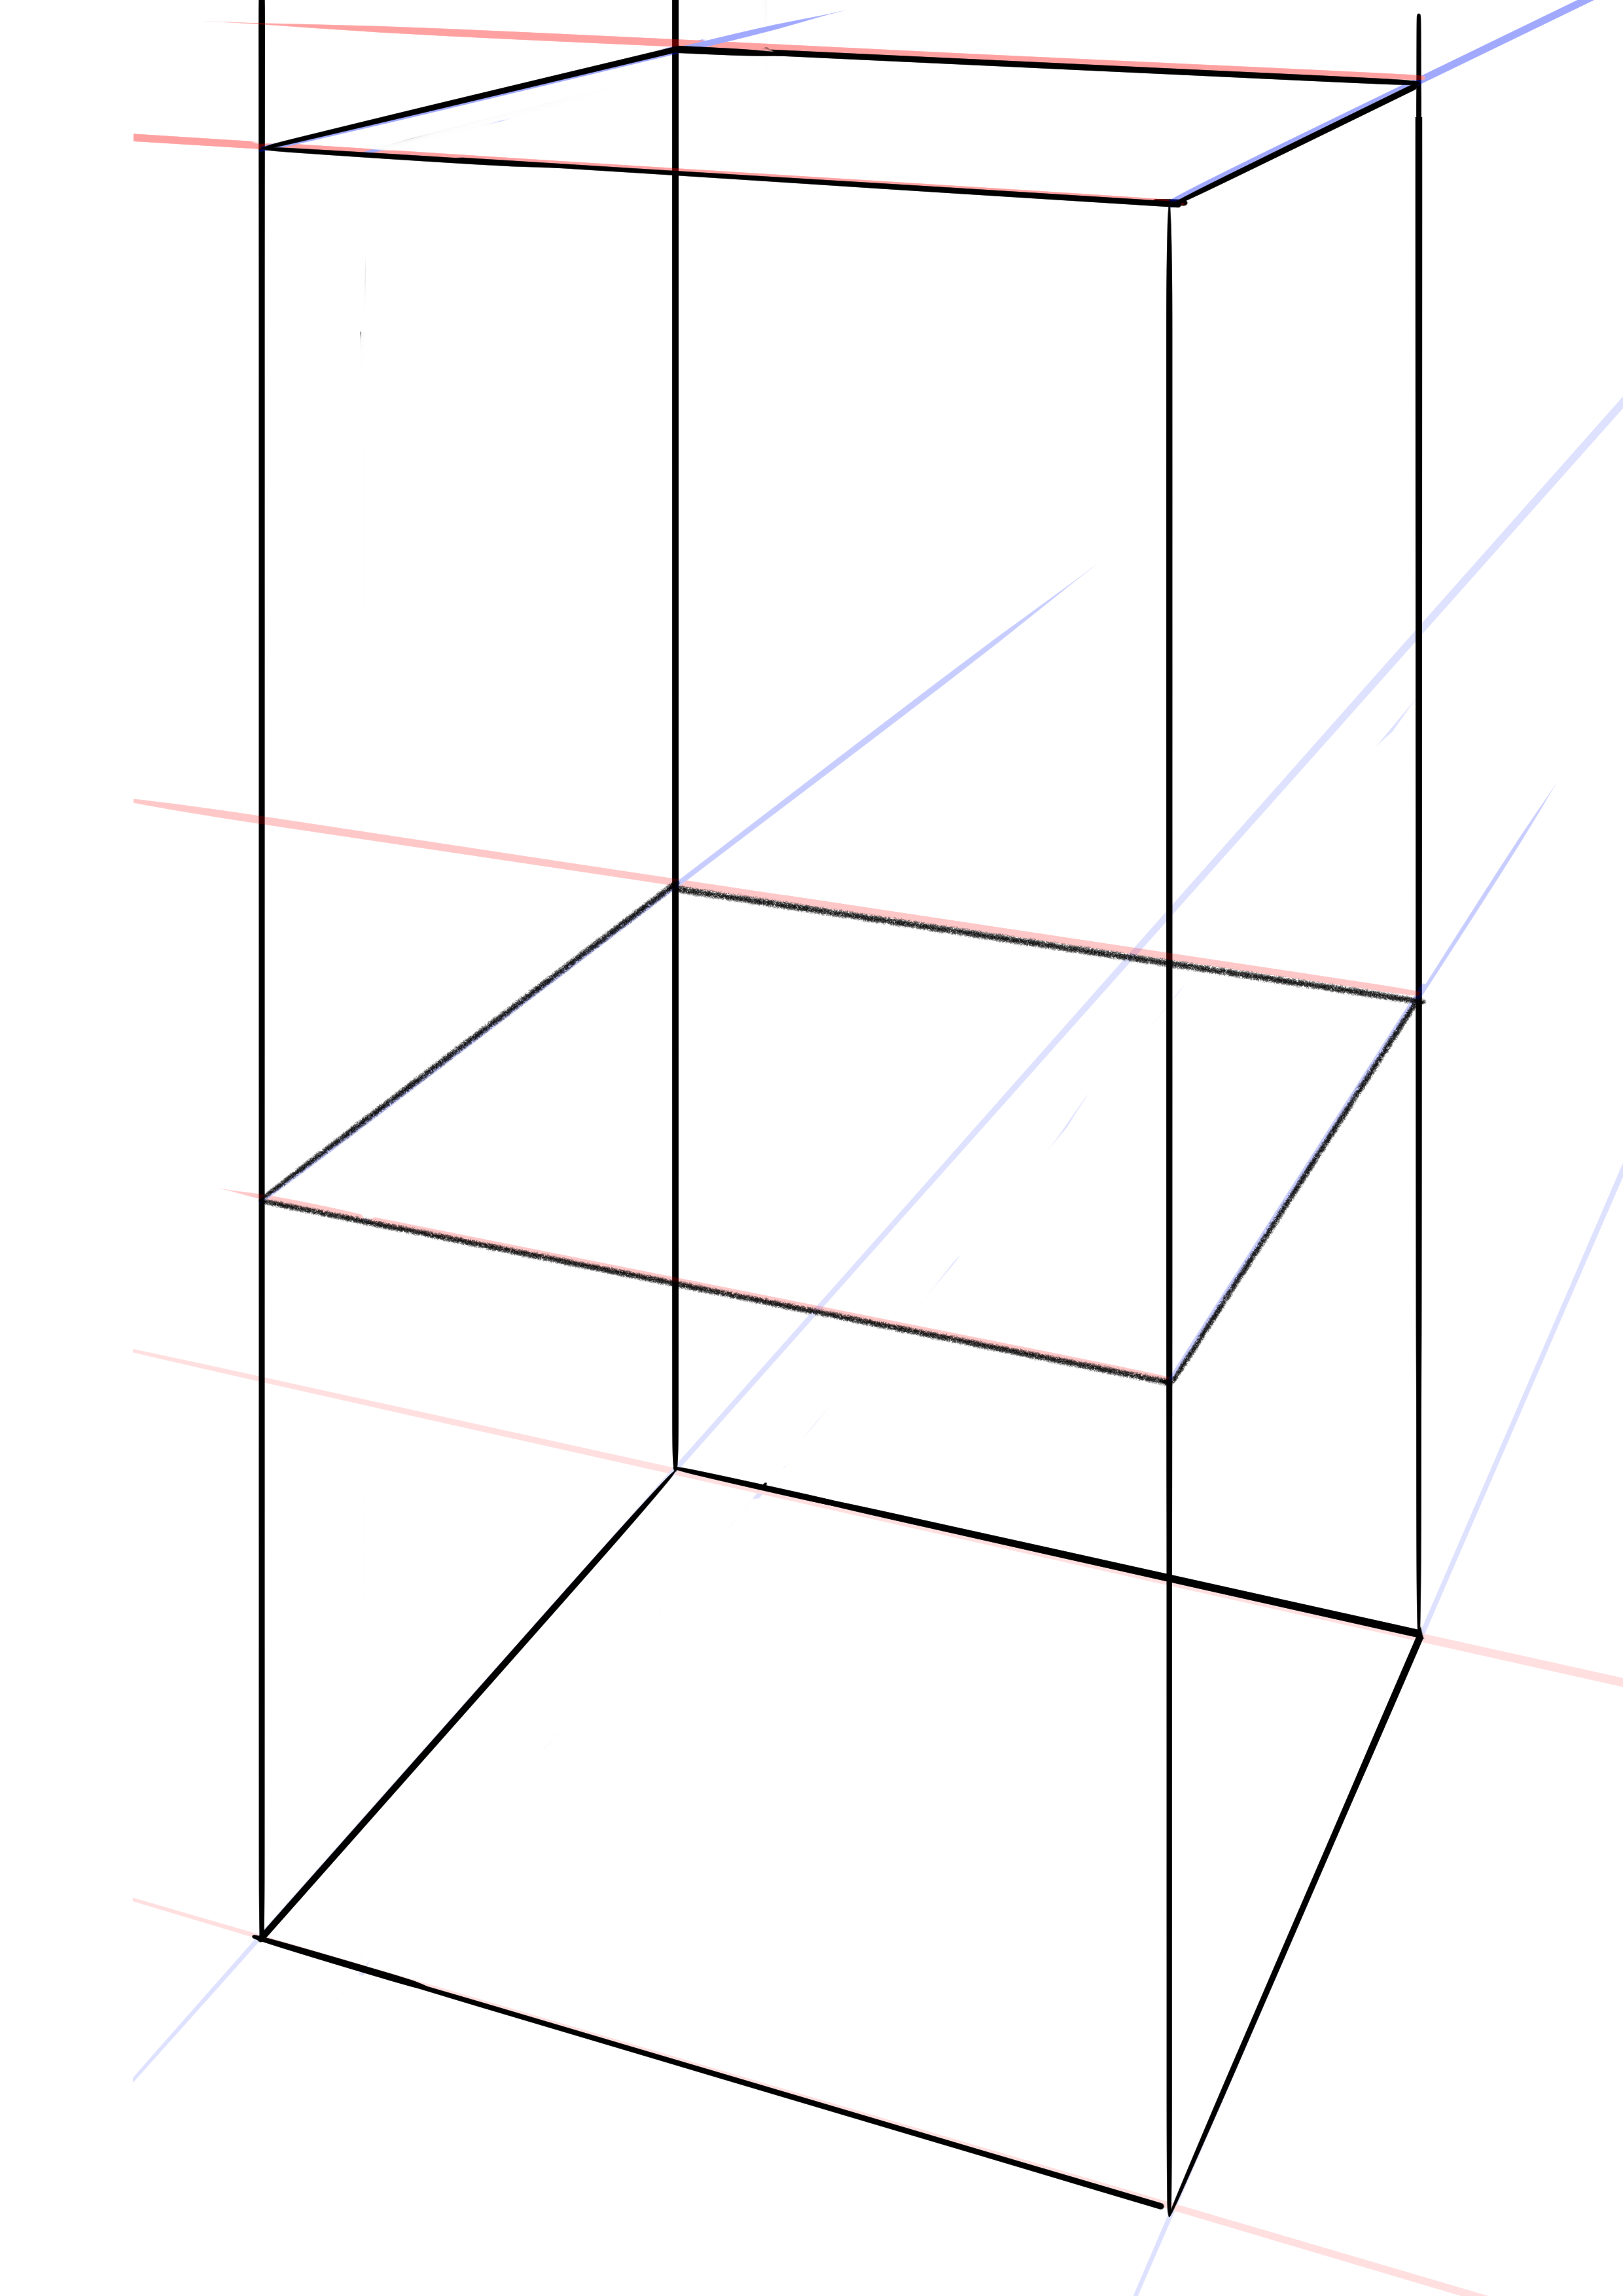
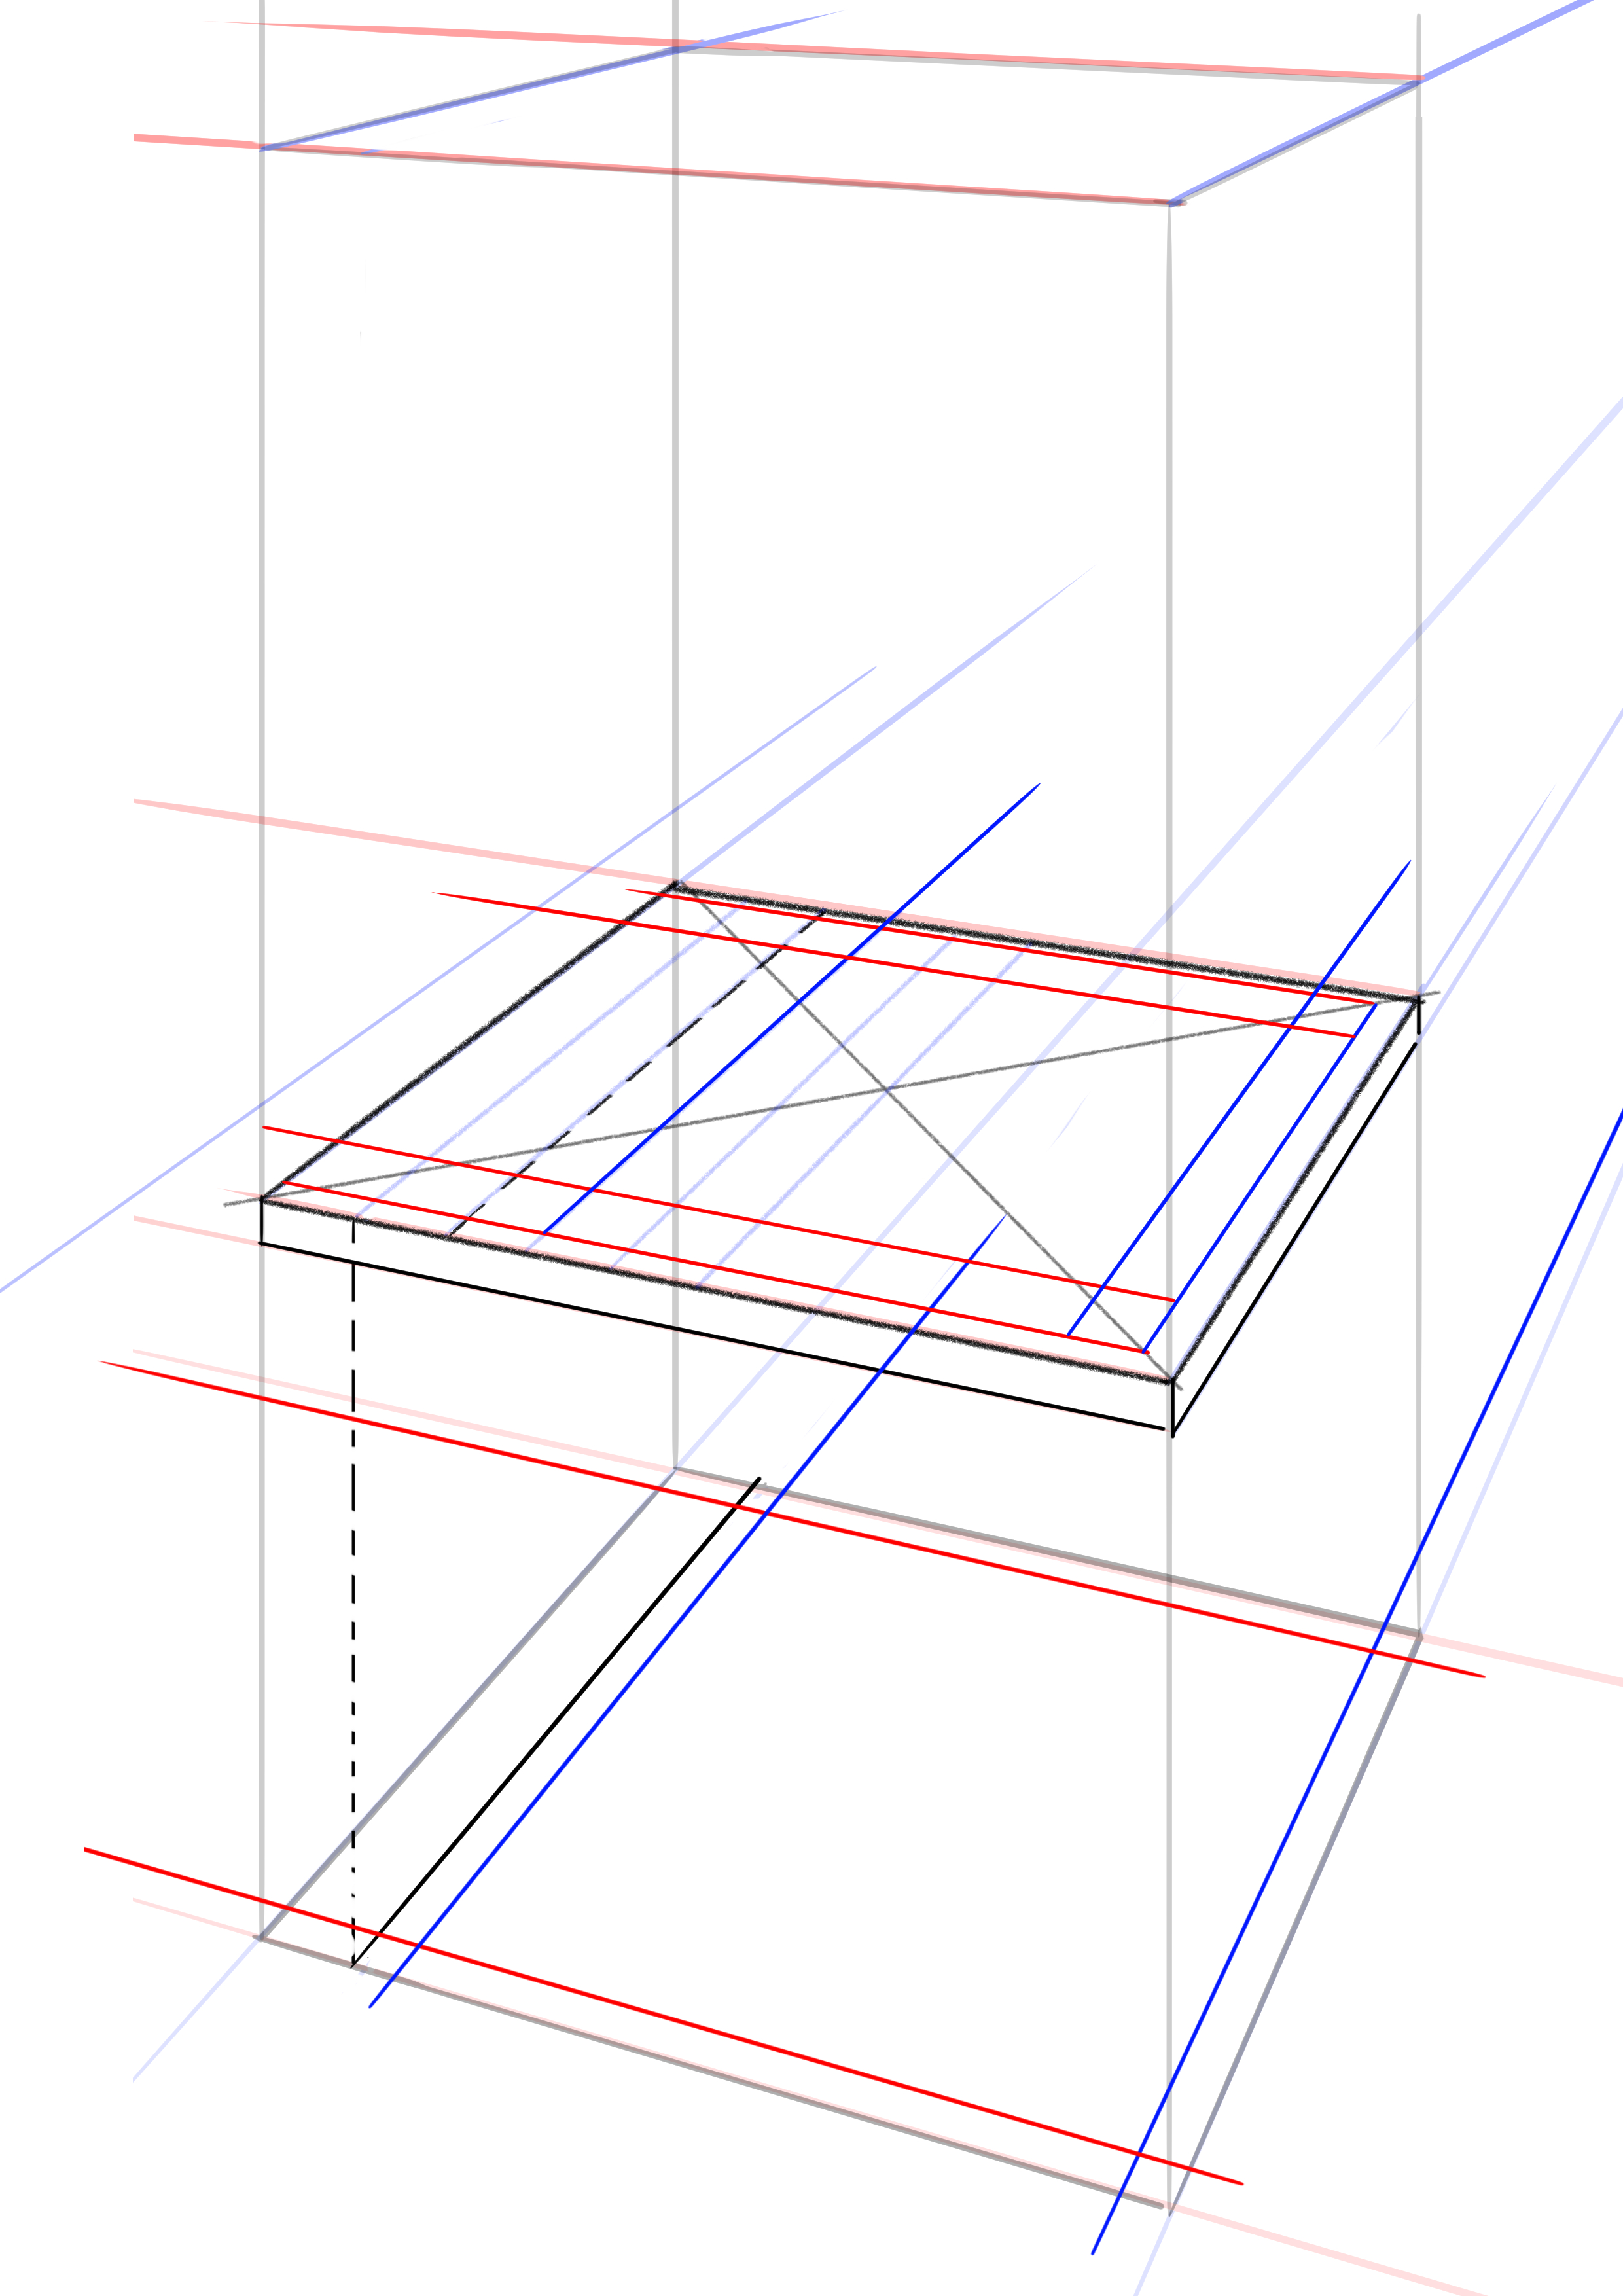
We will start by drawing a square on the ground by pulling lines from our vanishing points.
Then we will draw vertical lines so that the lines at the front (towards us) are a little more than twice the width of the square we have traced.
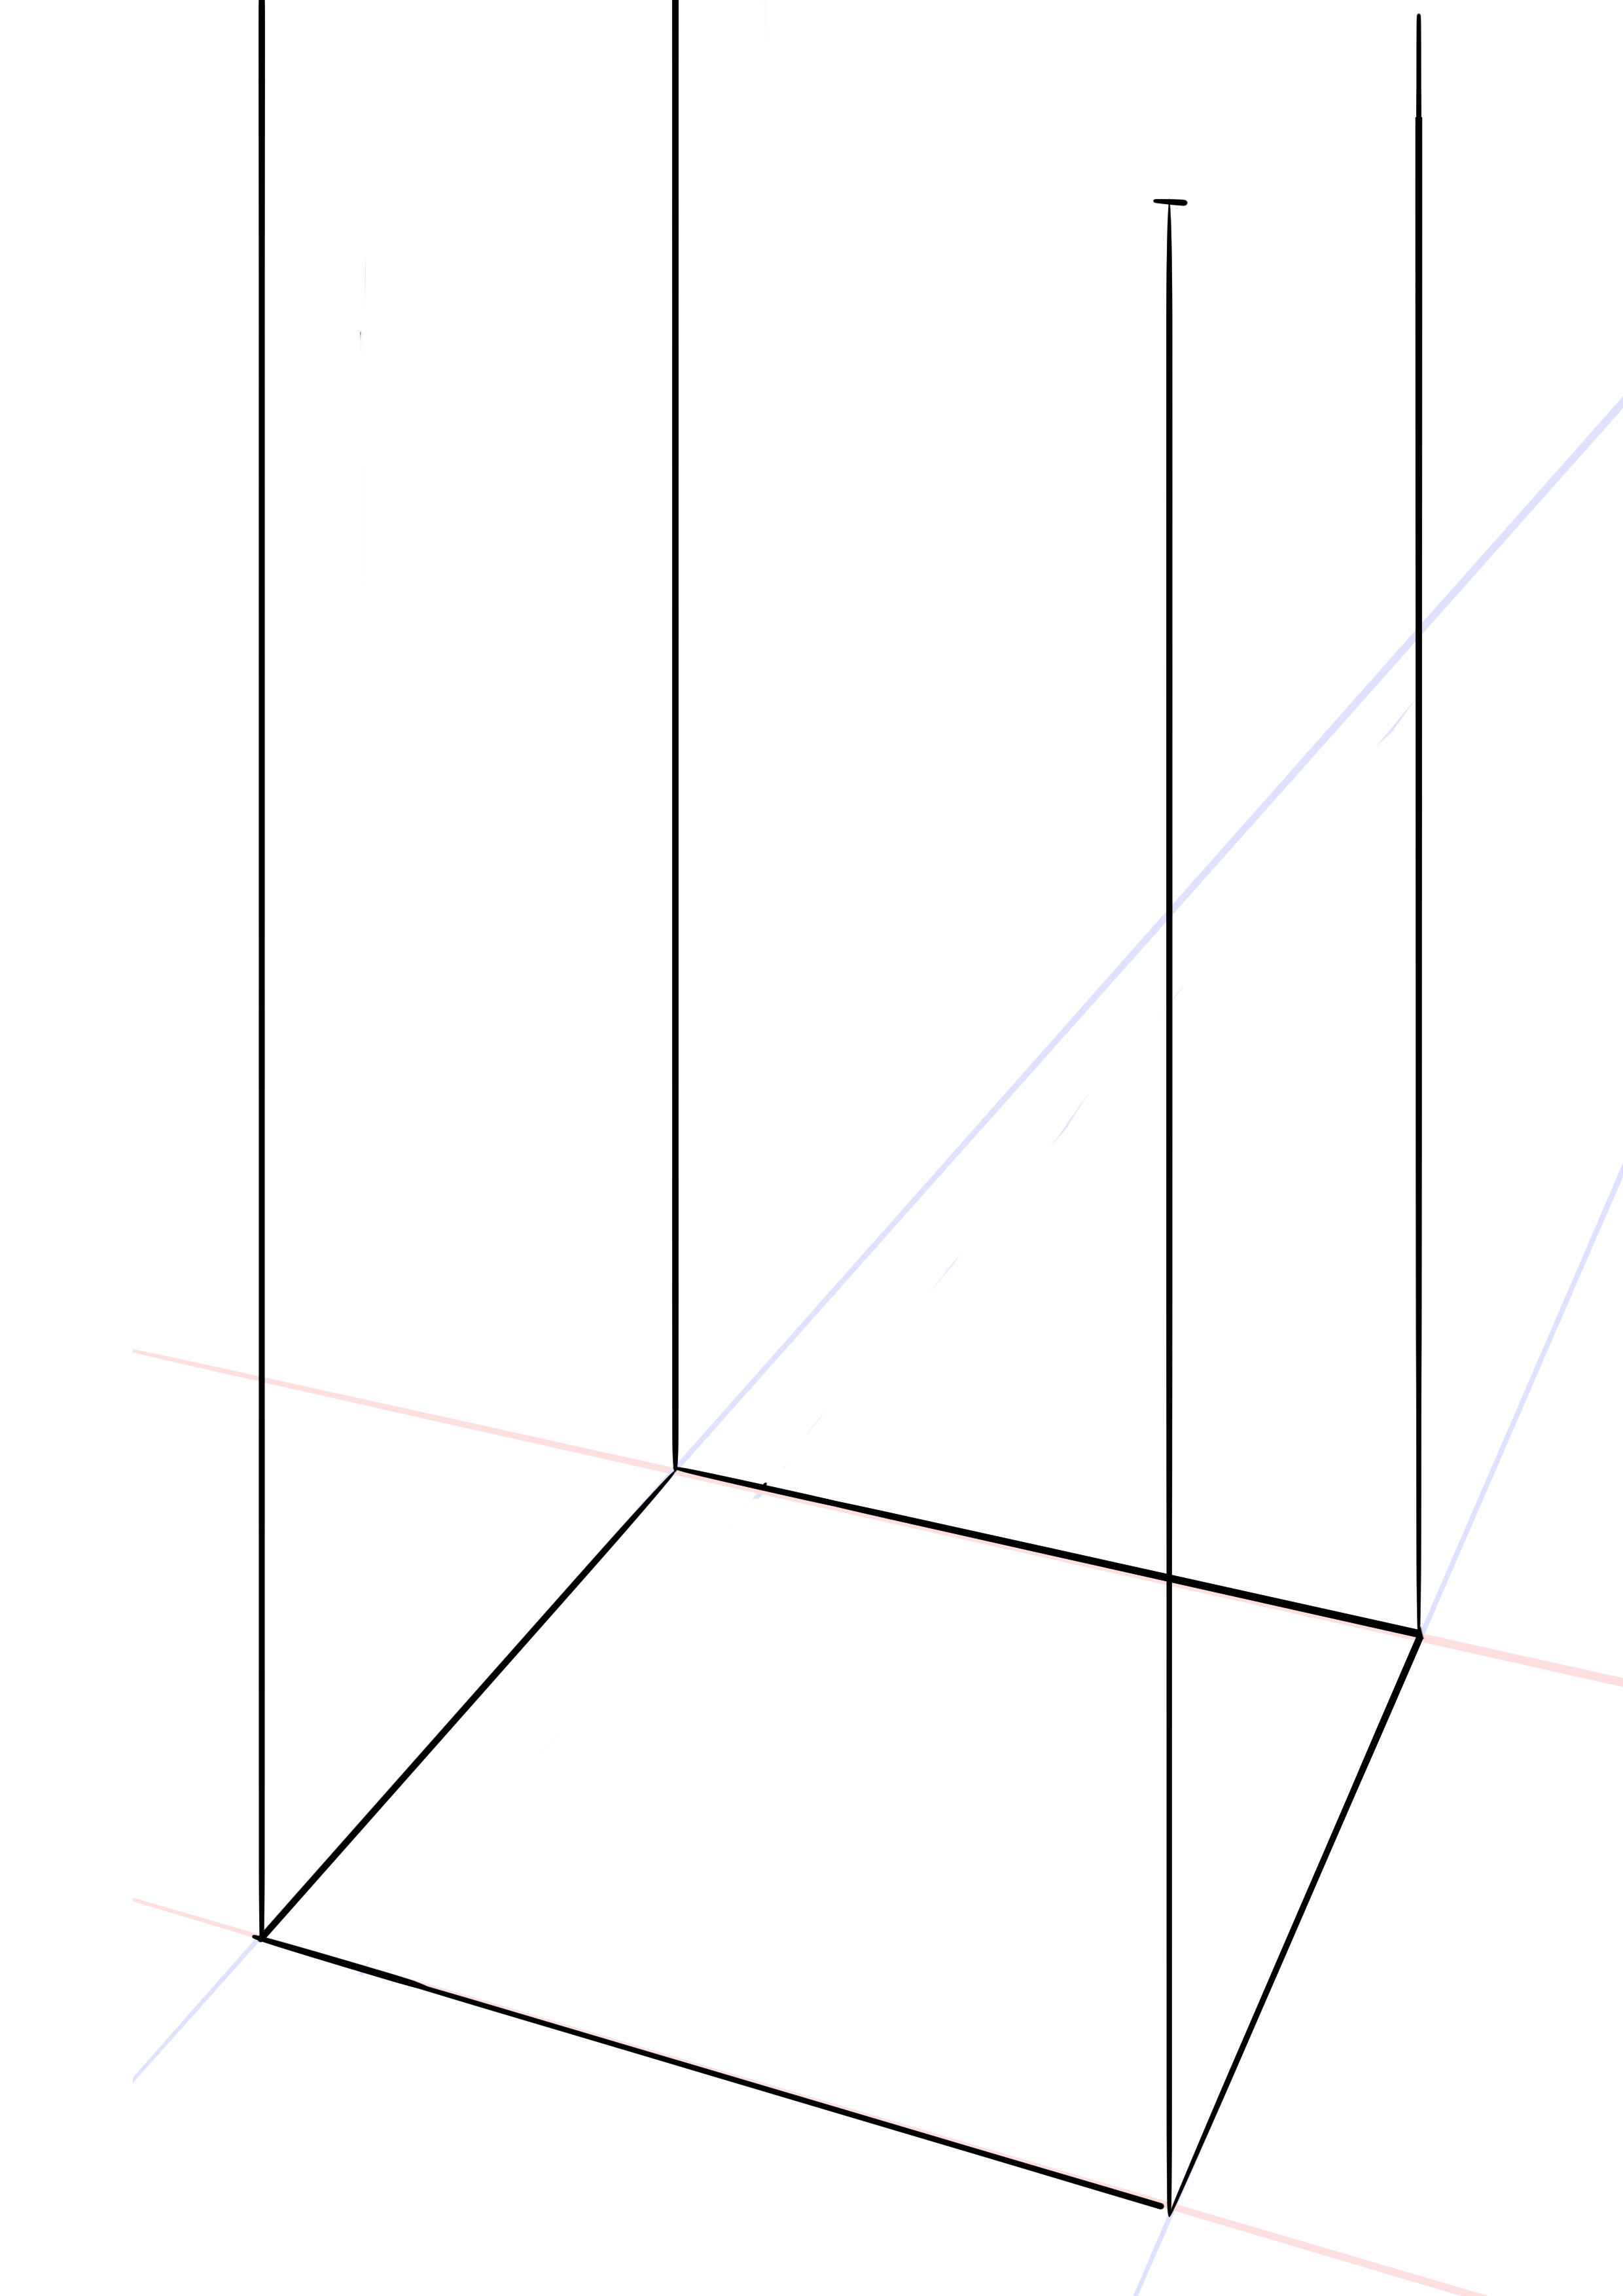
Then we will close it with a new square.
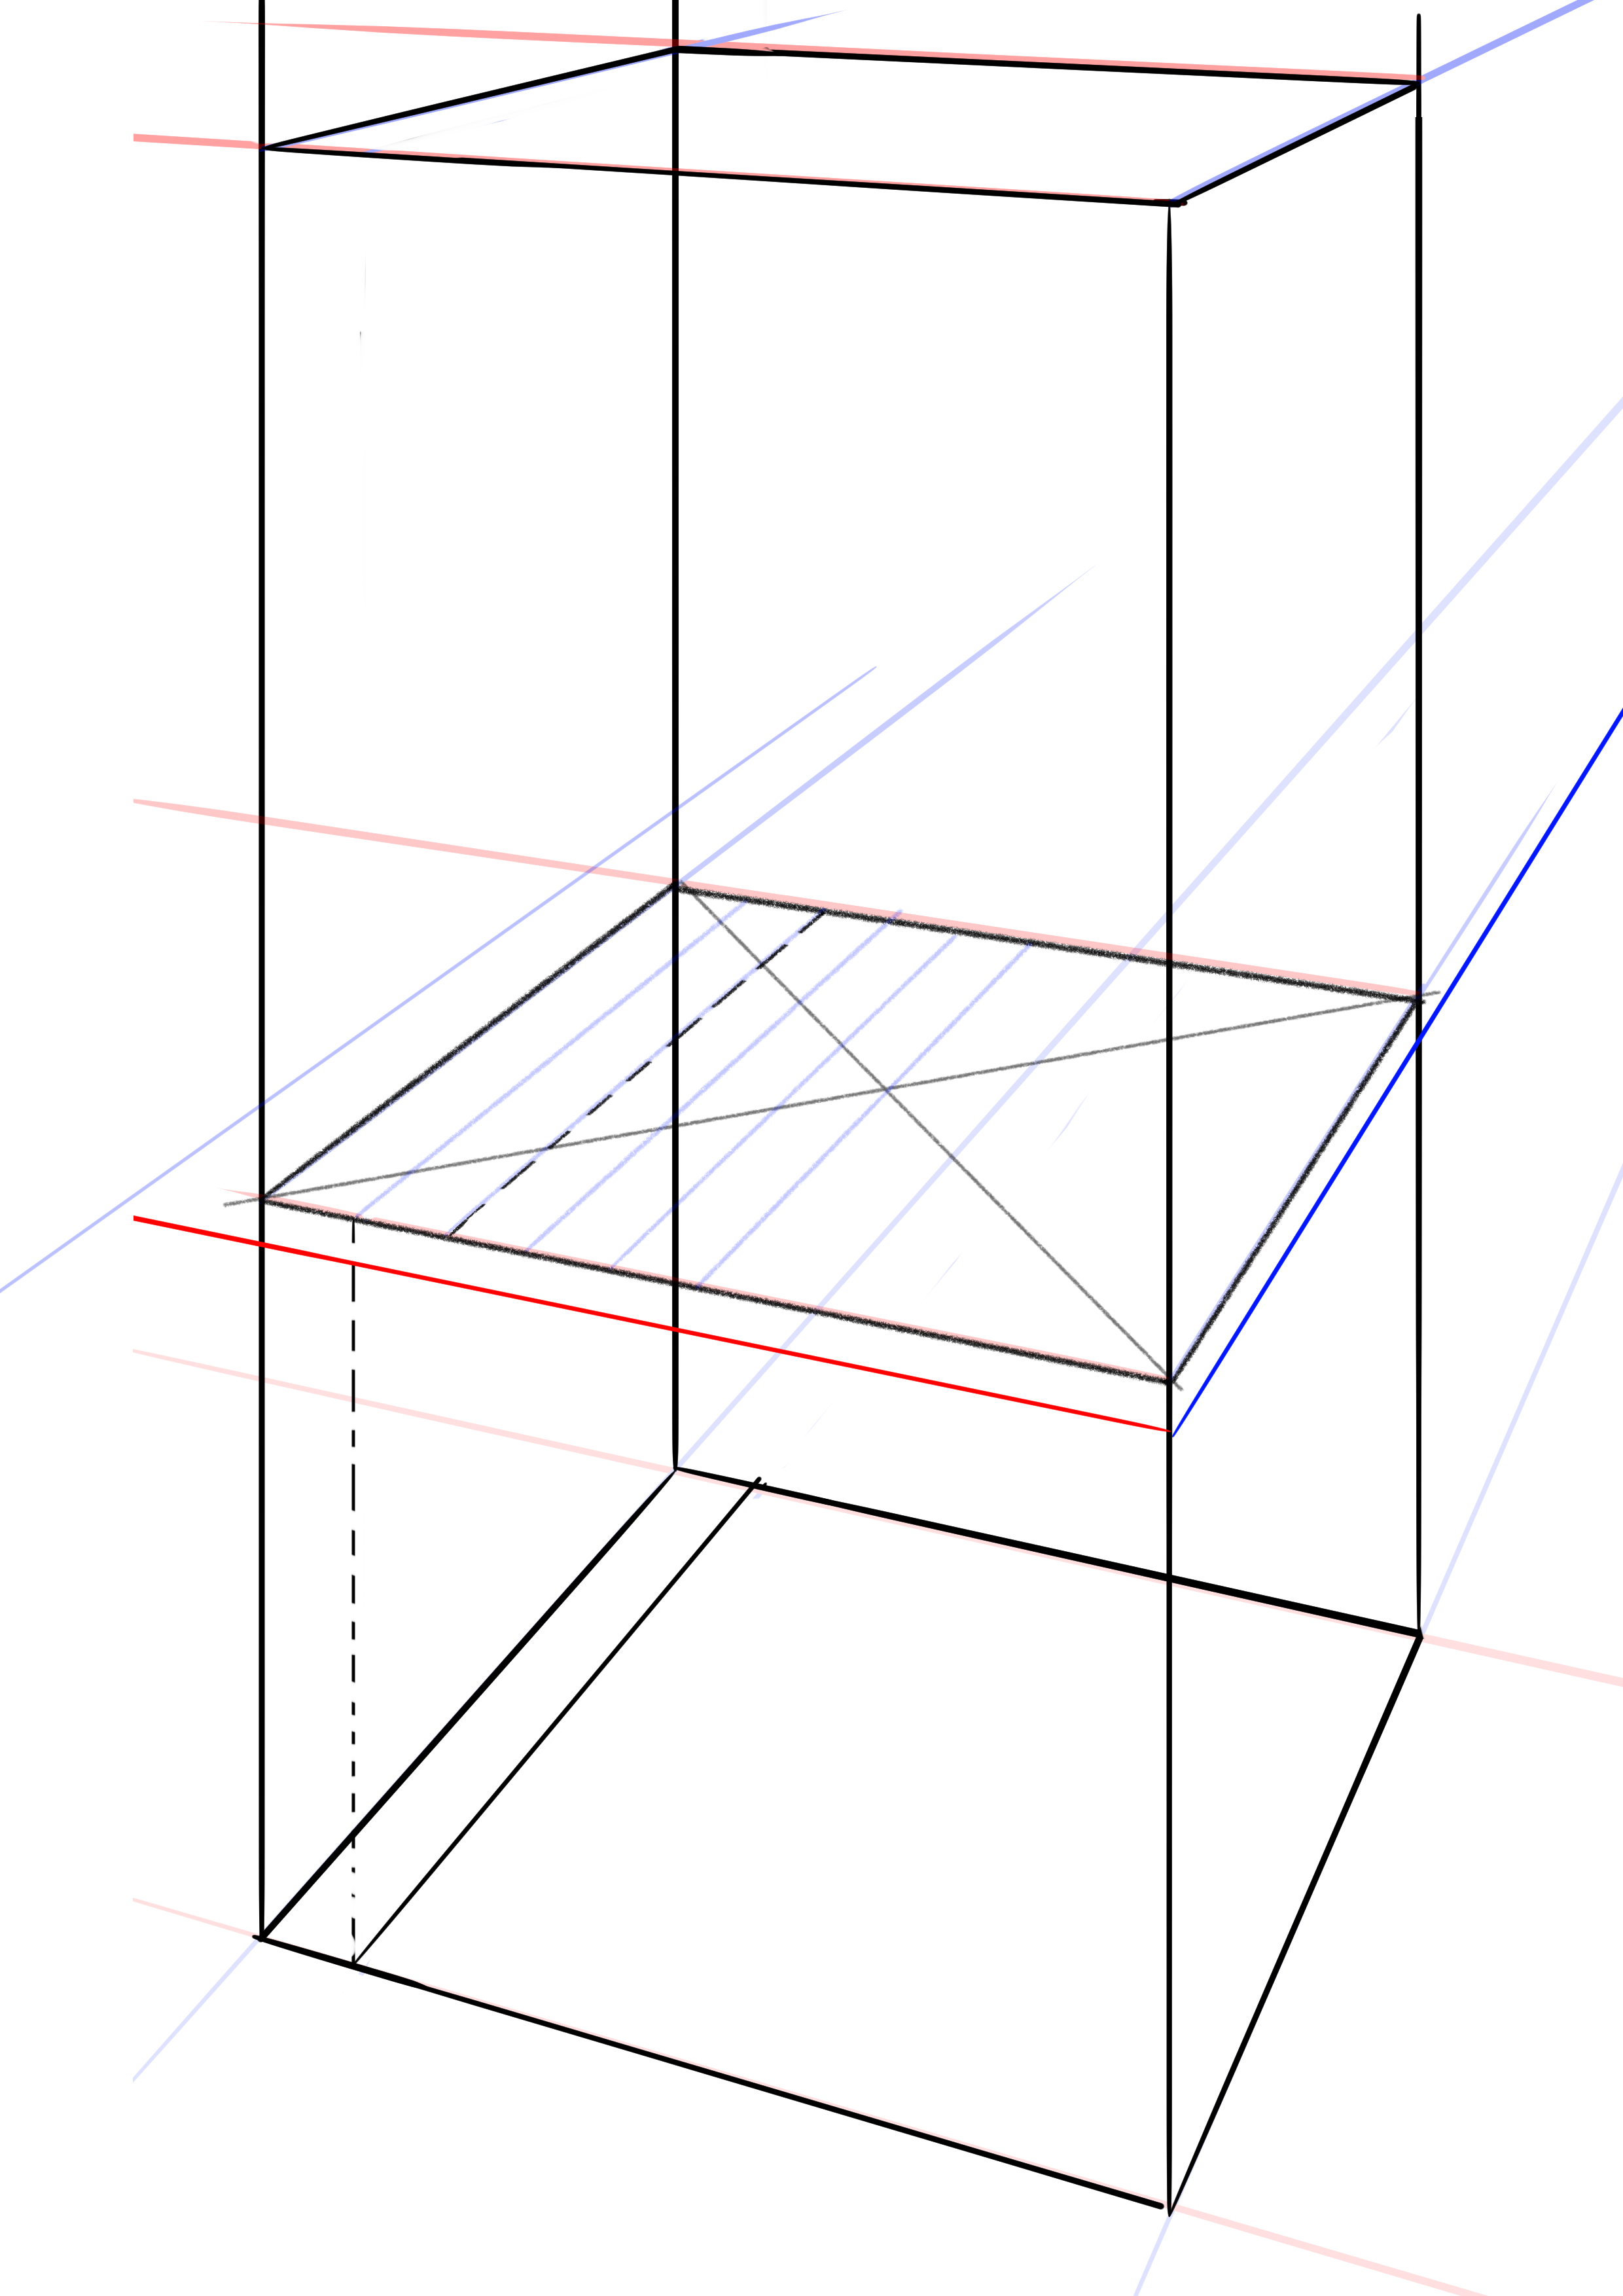
DRAWING THE SEAT OF THE CHAIR
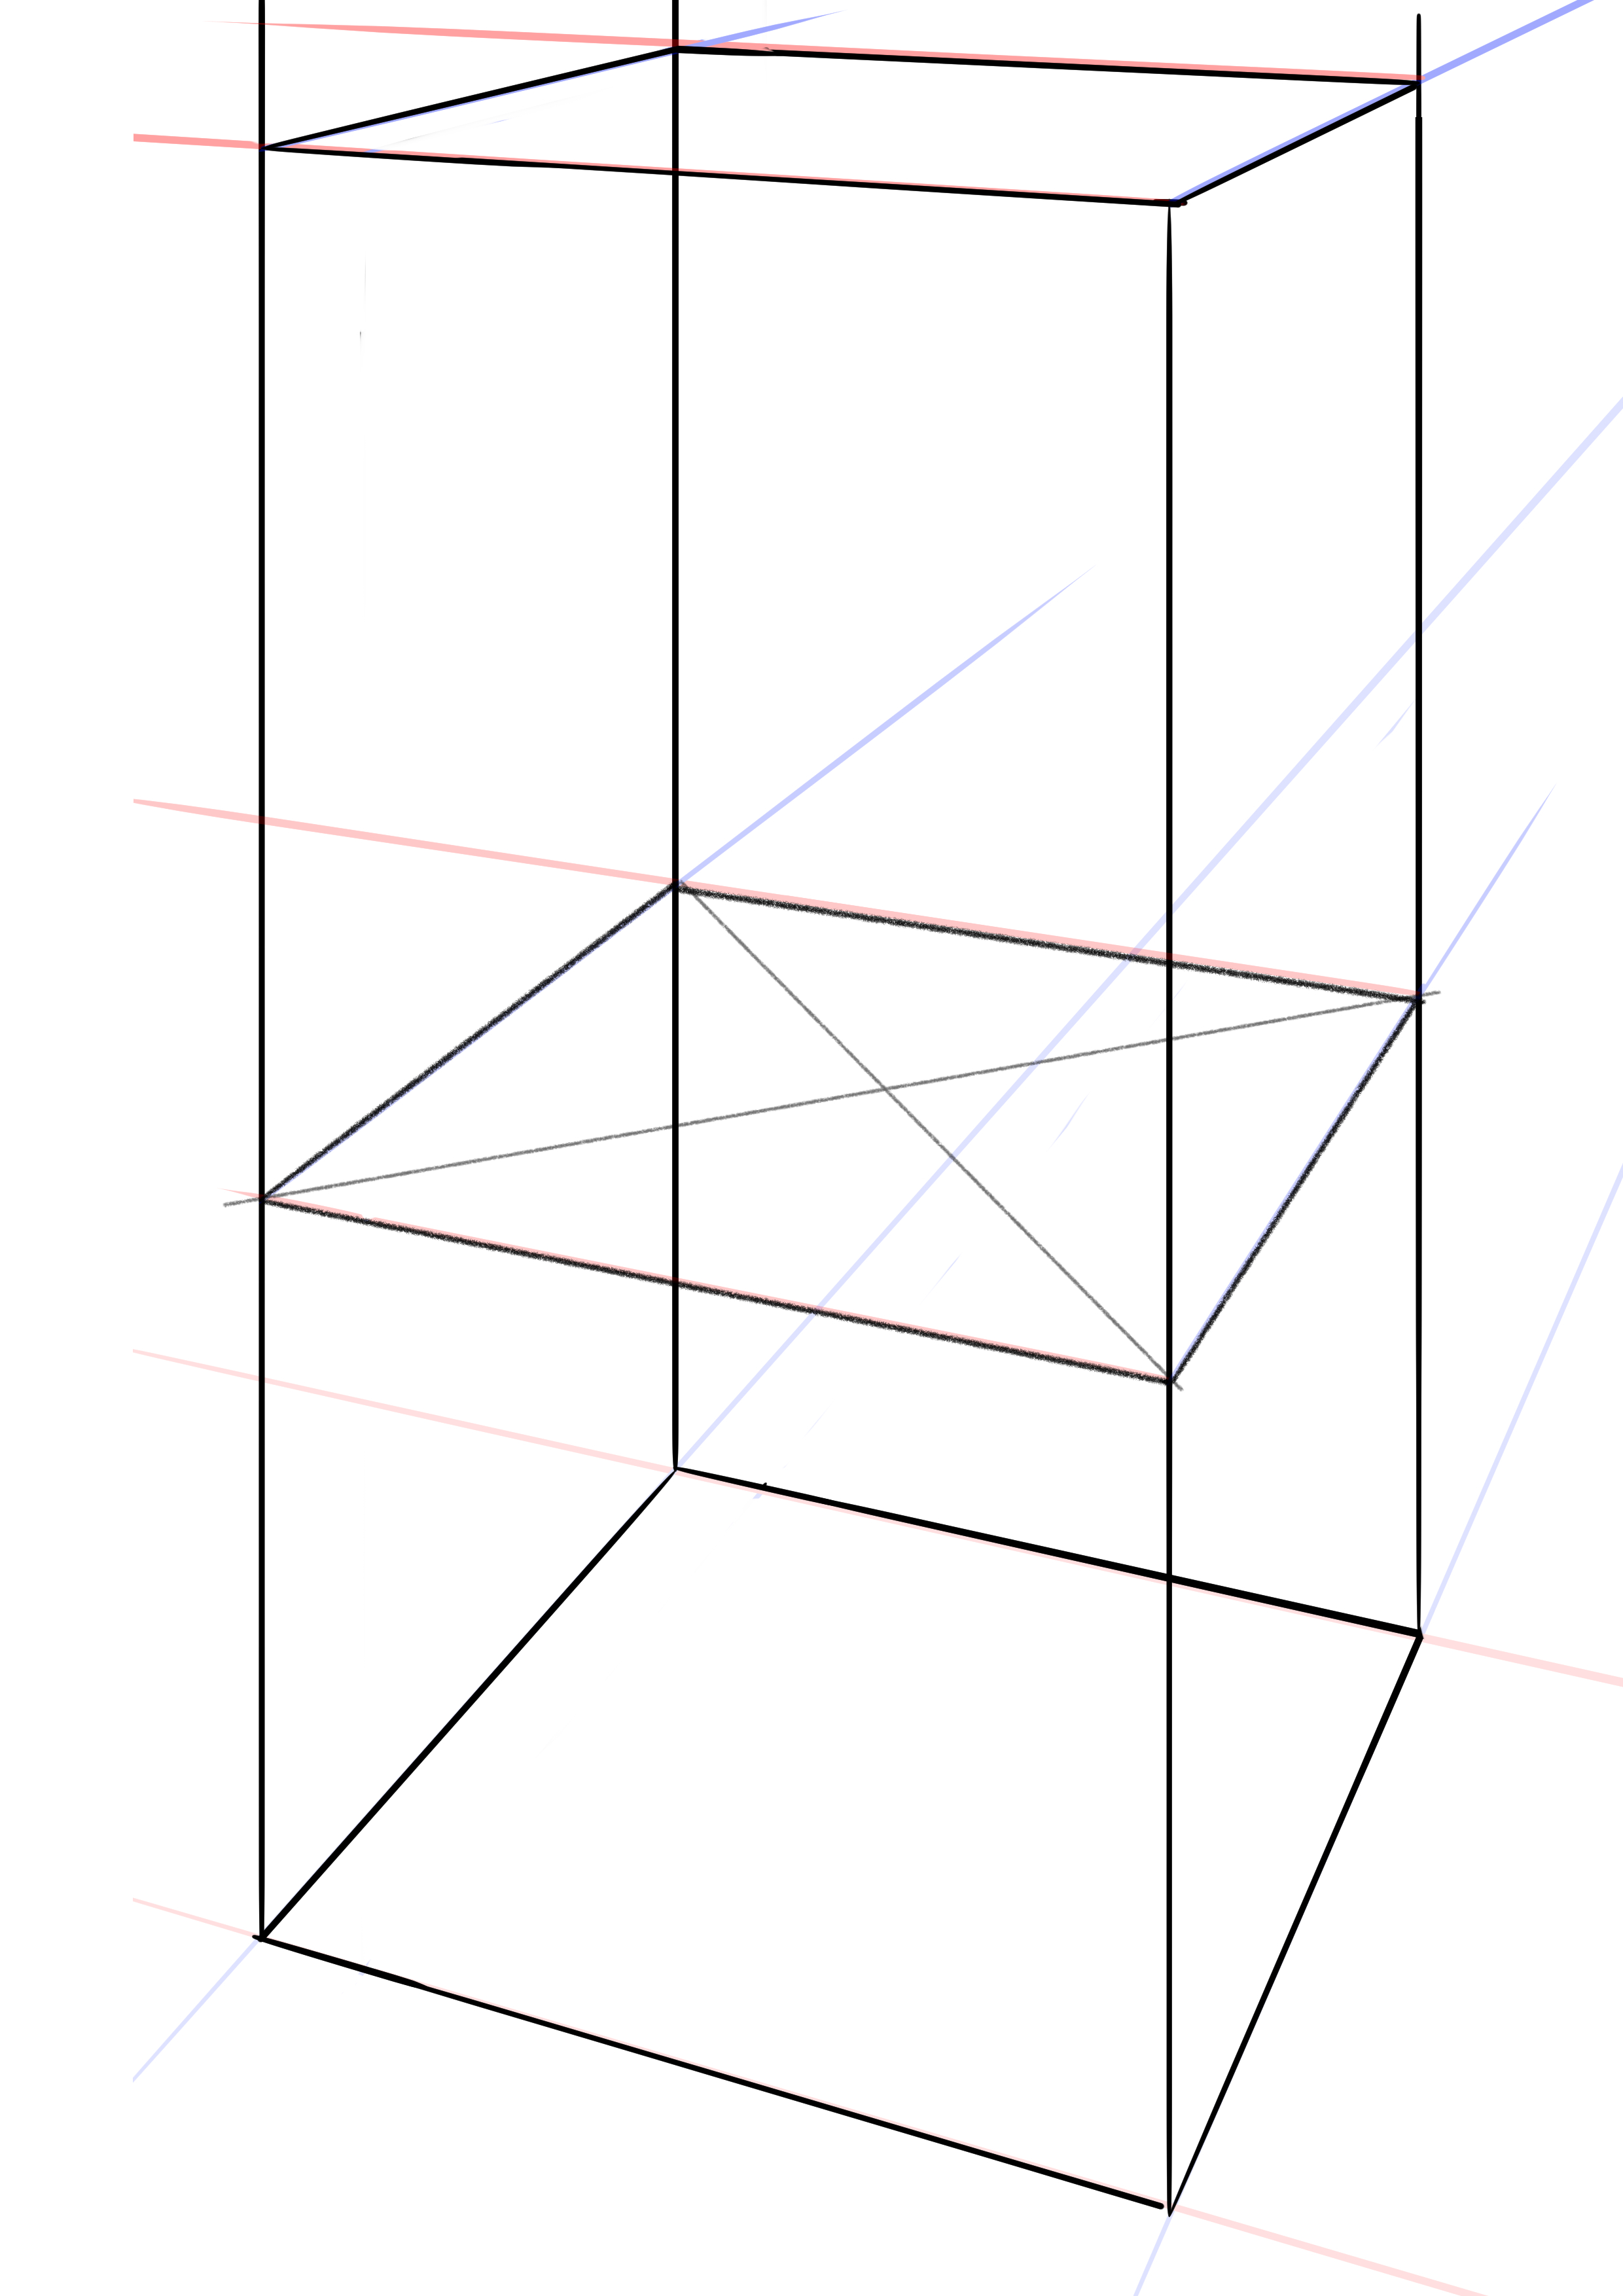
We will then cut our parallelepiped at the level of the chair seat, slightly below the halfway point.
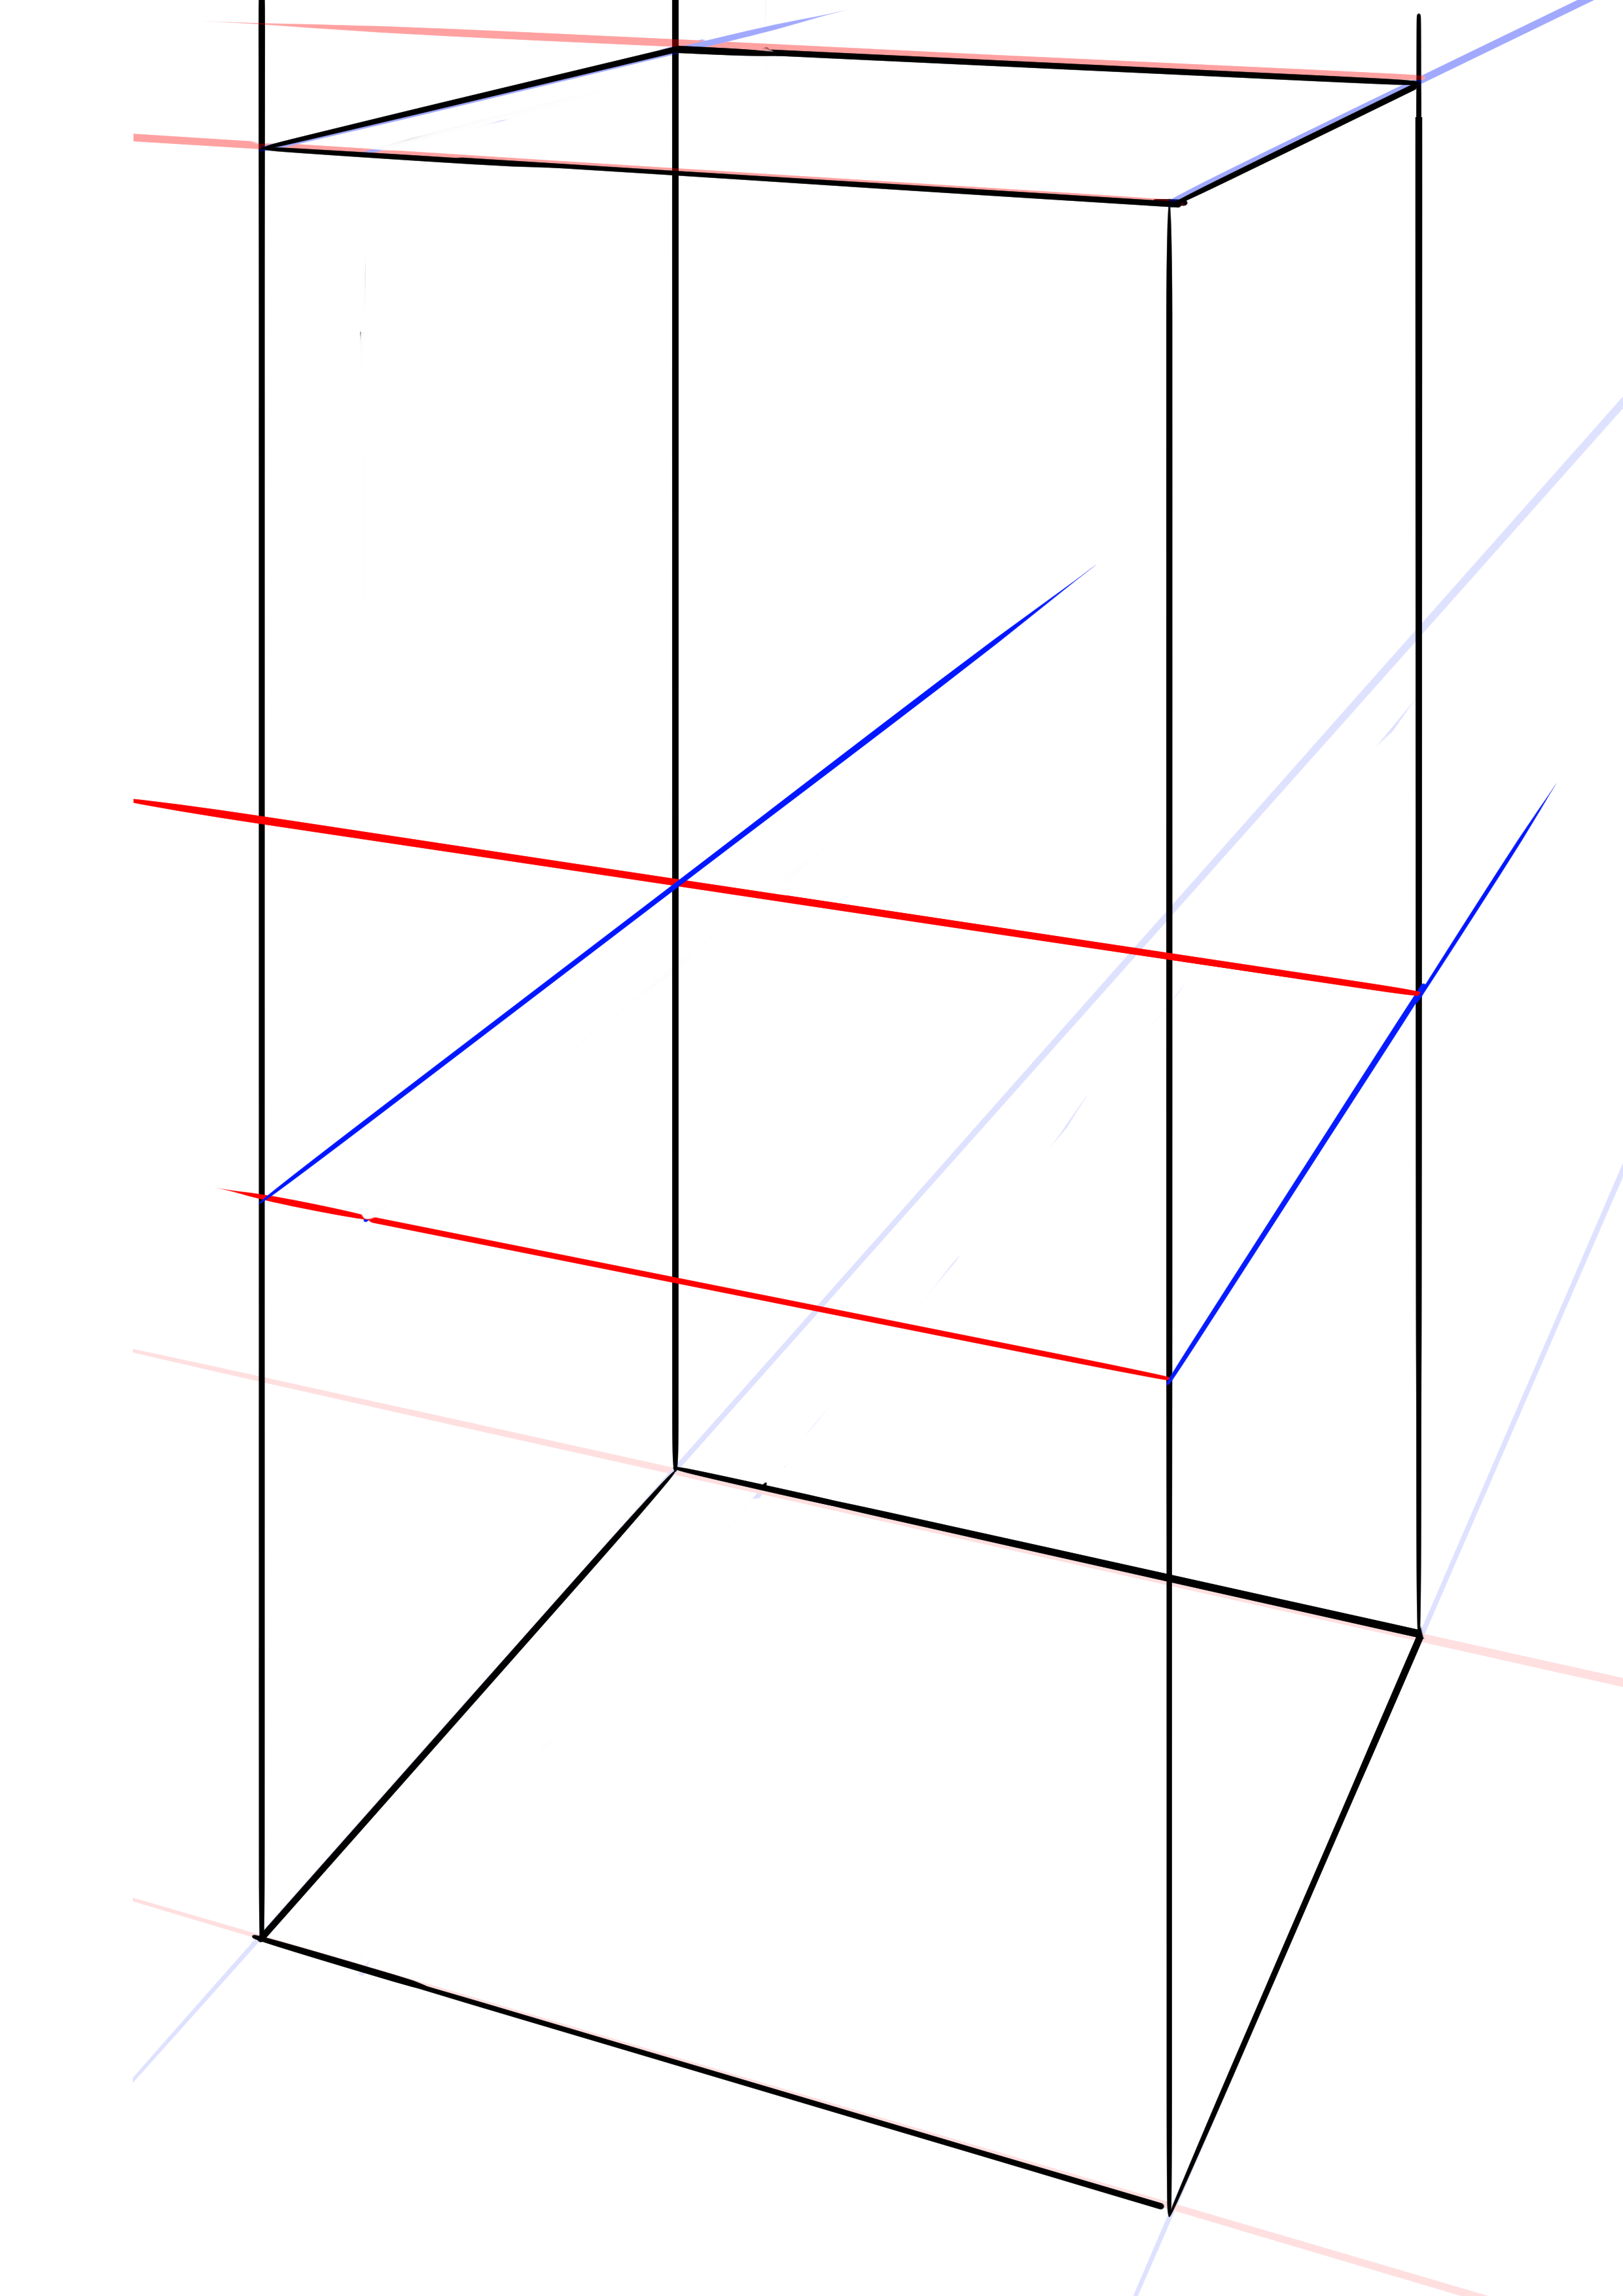
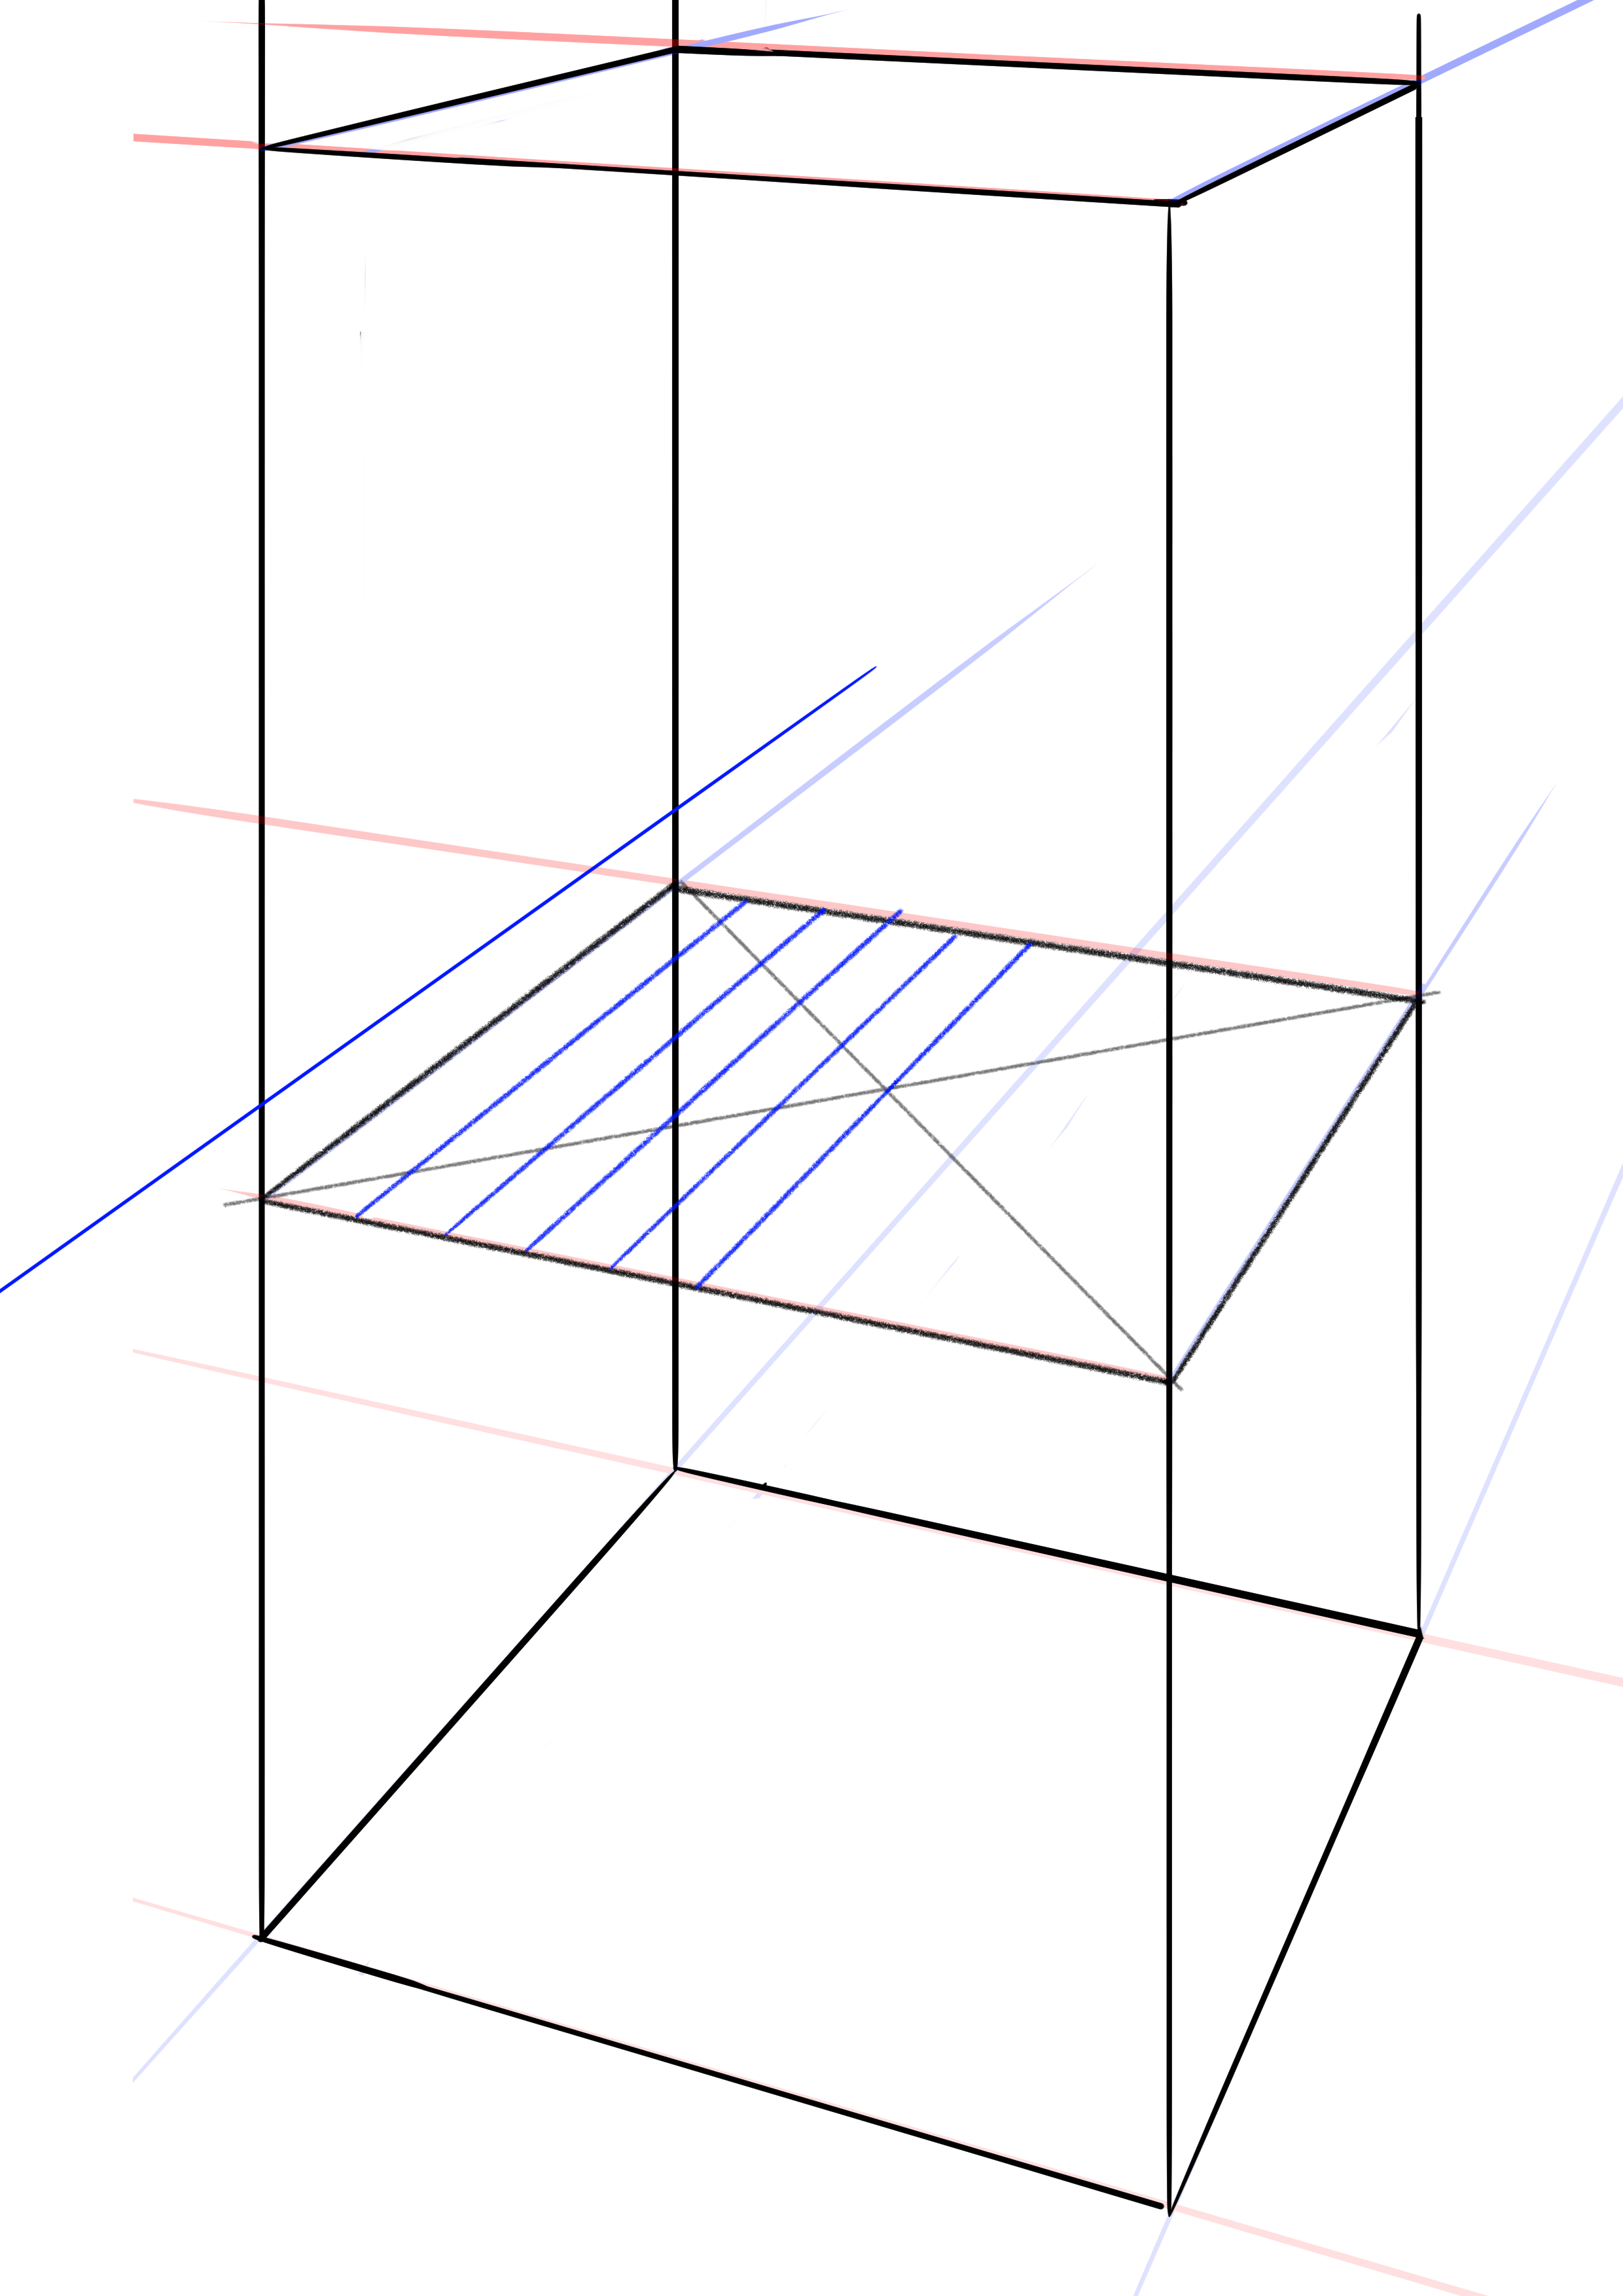
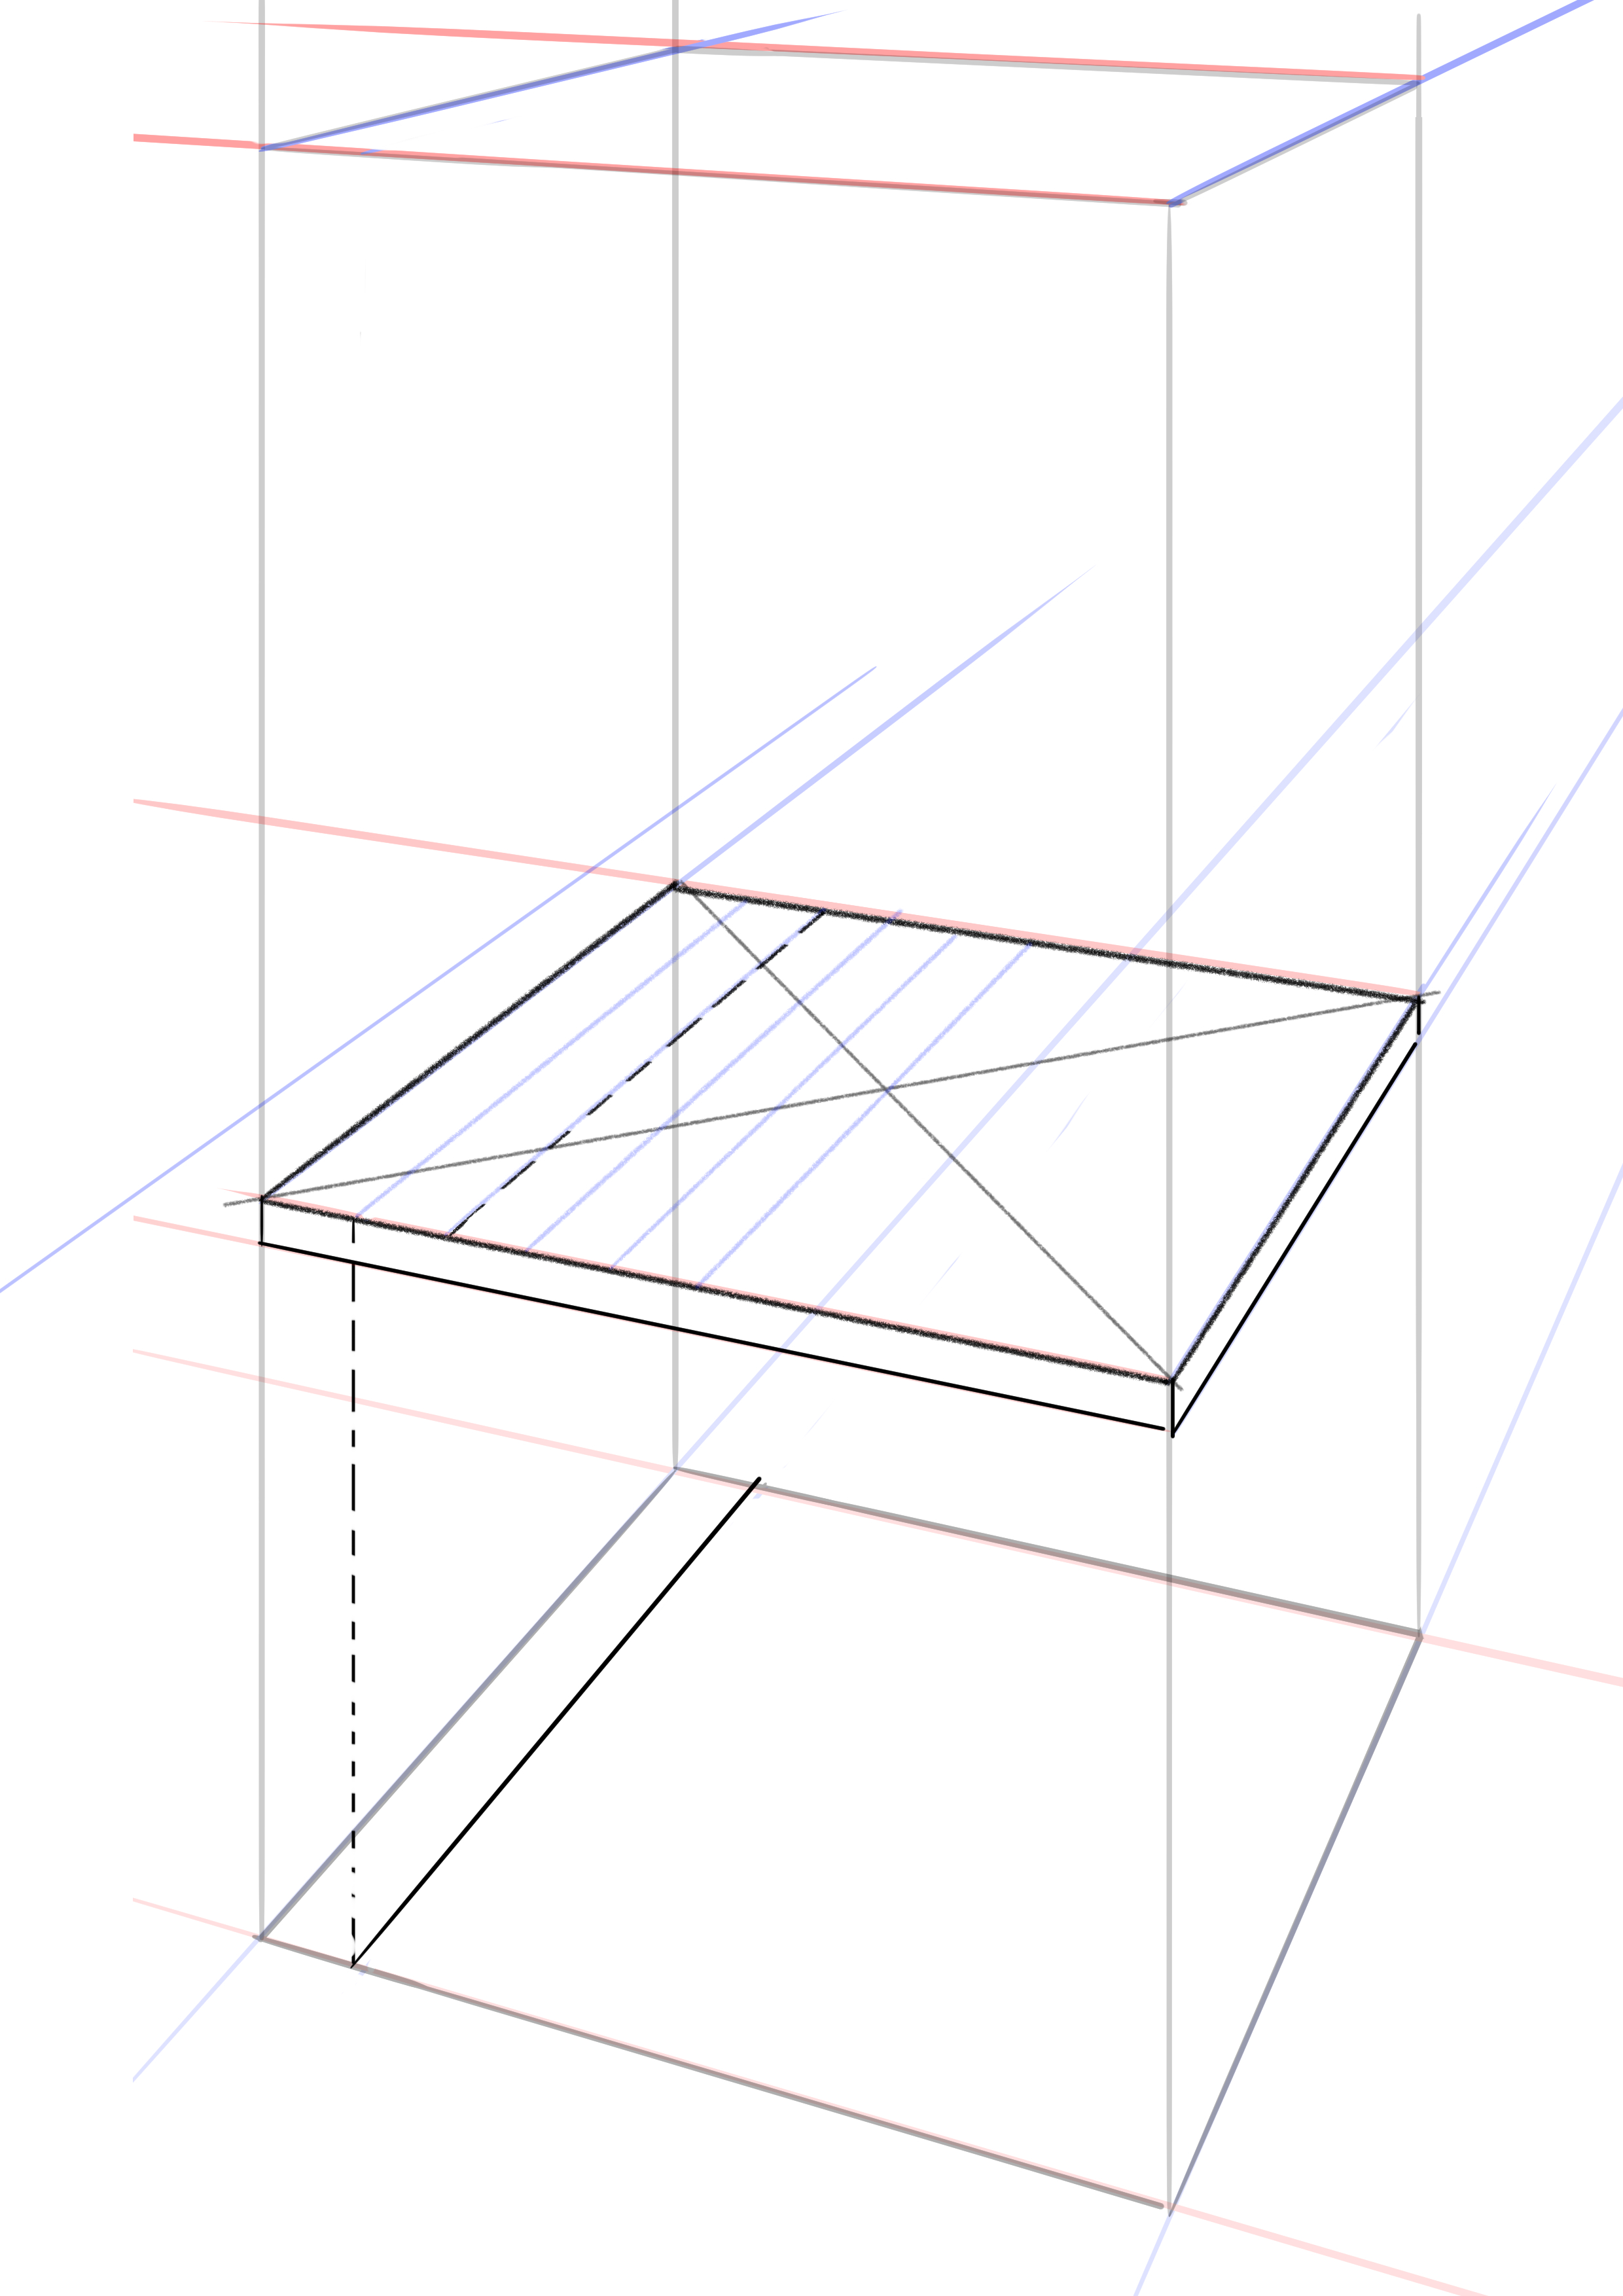
I will now structure the chair by looking for offsets due to the tilts of the different parts. For this, we will start by drawing a cross that will indicate the middle of the seat.
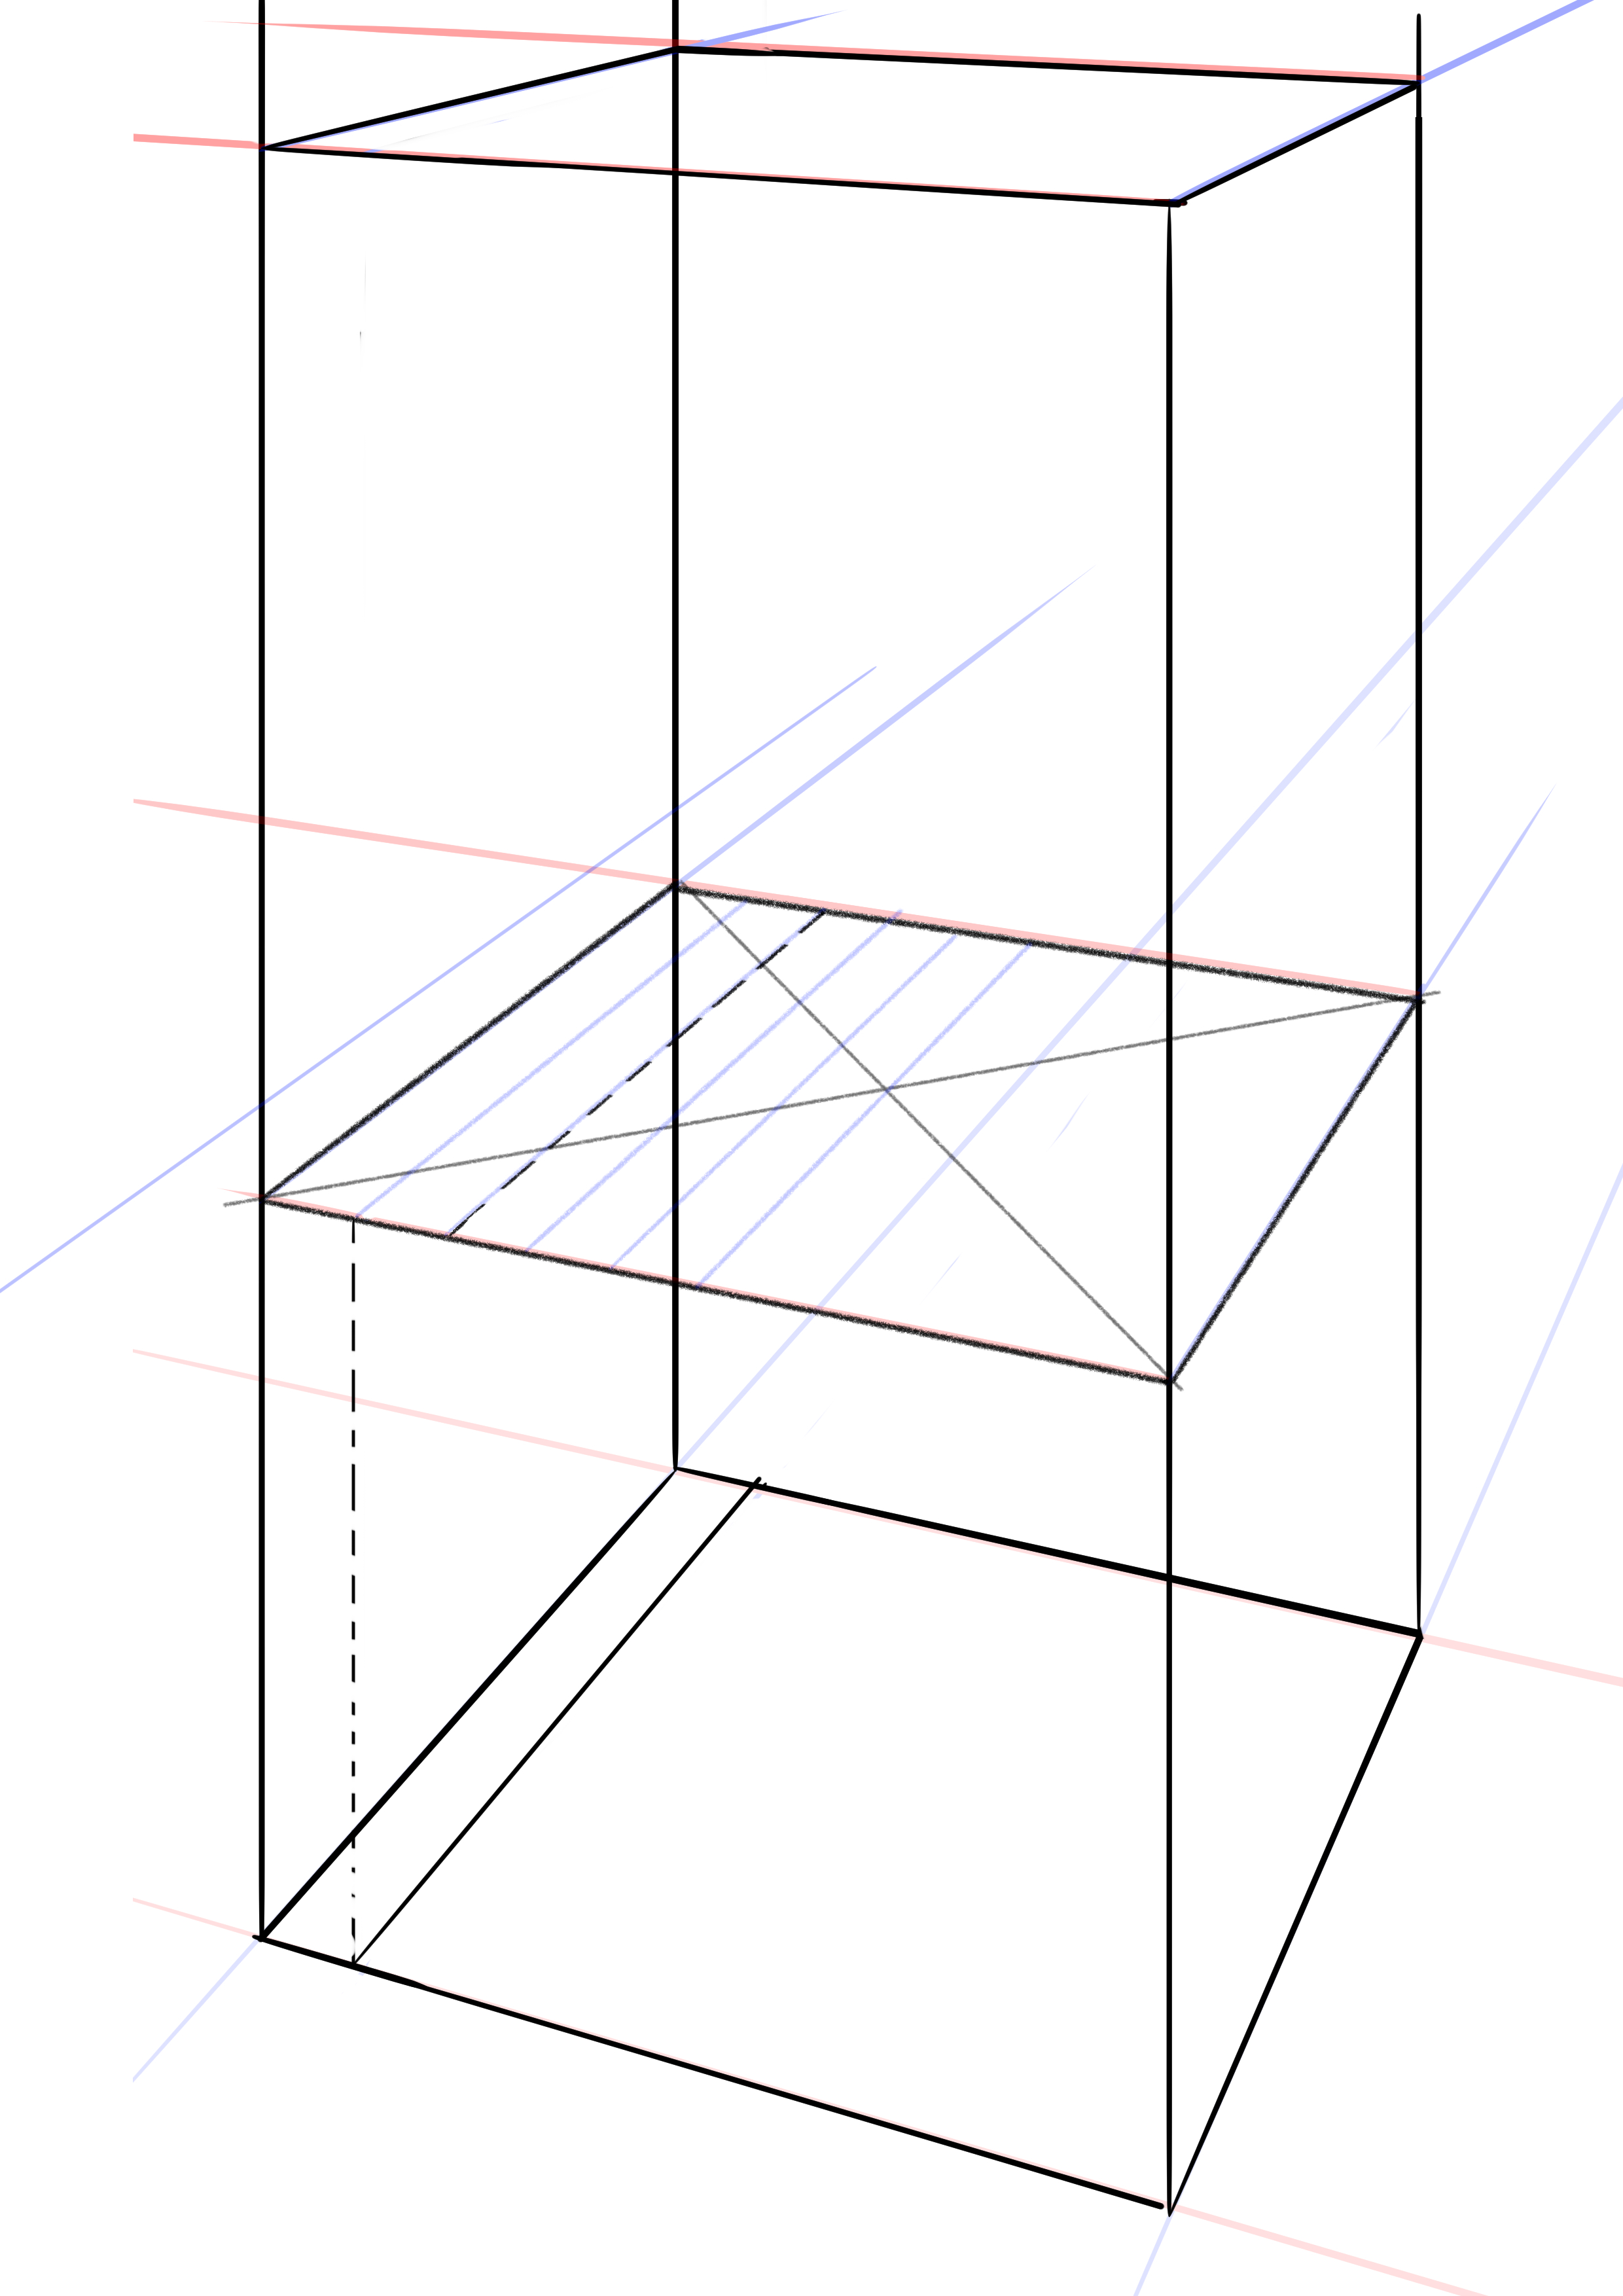
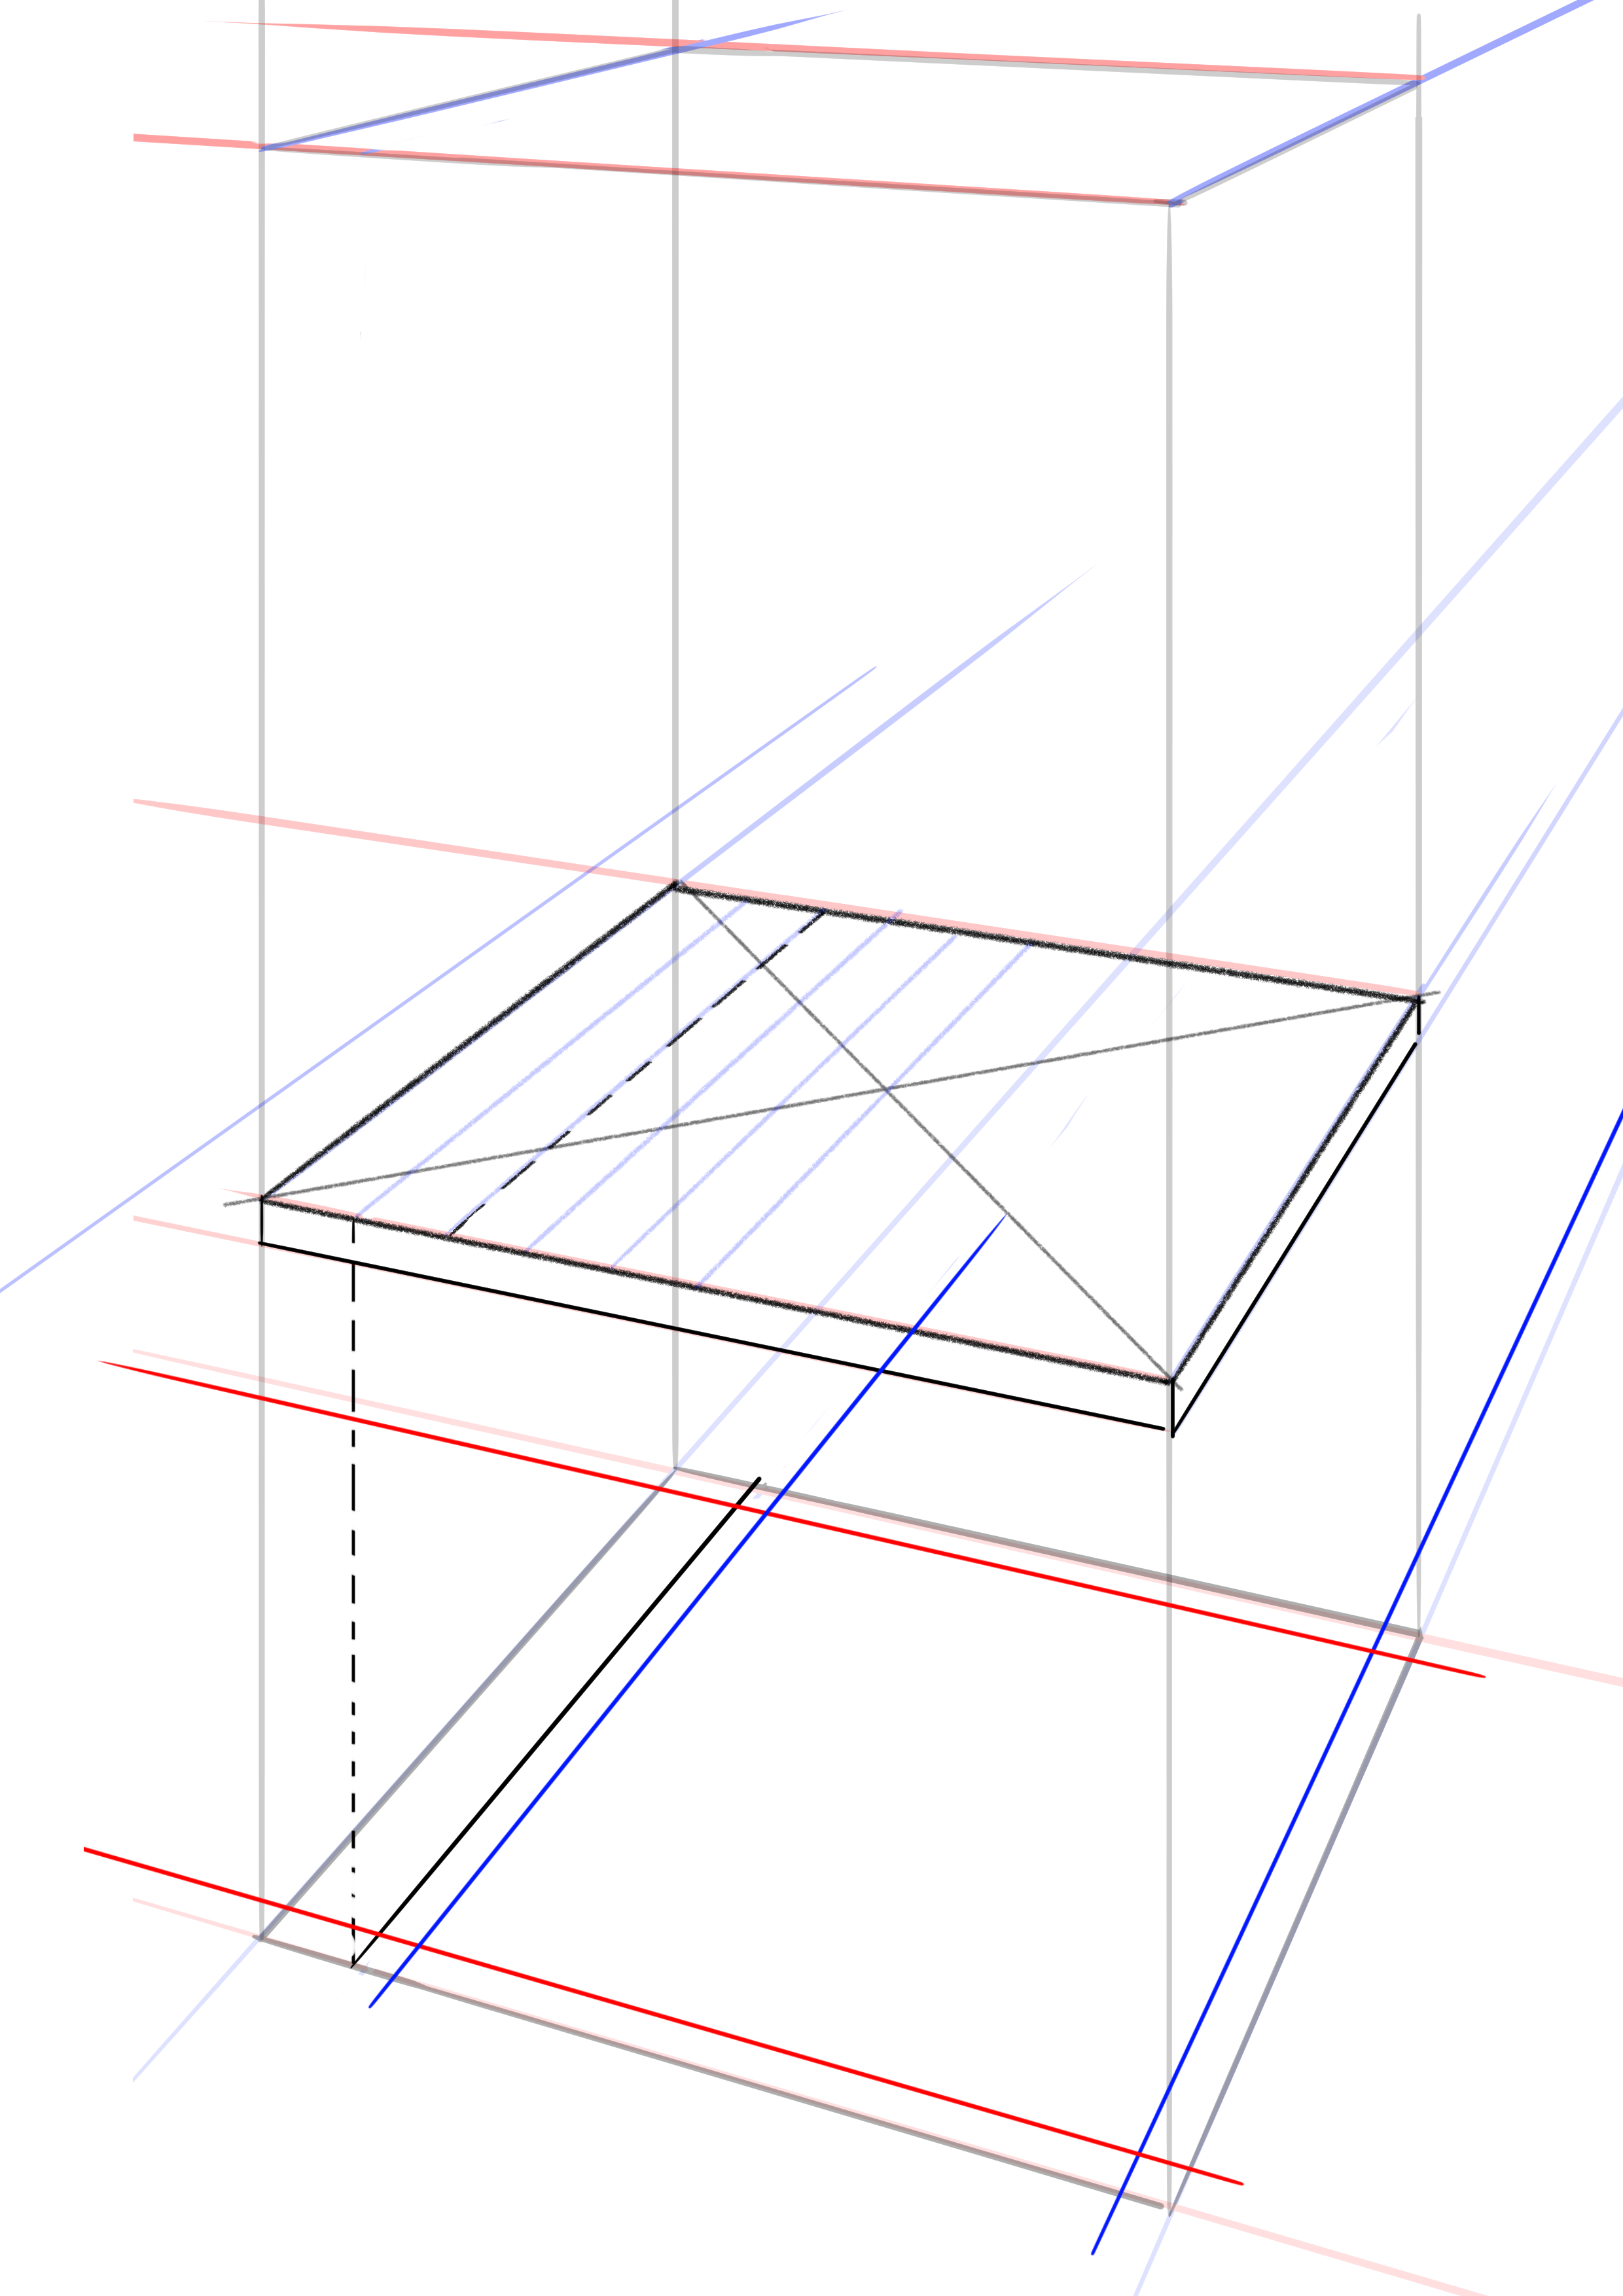
A line is drawn through this middle point, and the left half is divided into 5 equal parts (done by eye). A sixth part is added outside of our cube. This will help us to properly angle the backrest of the chair later.
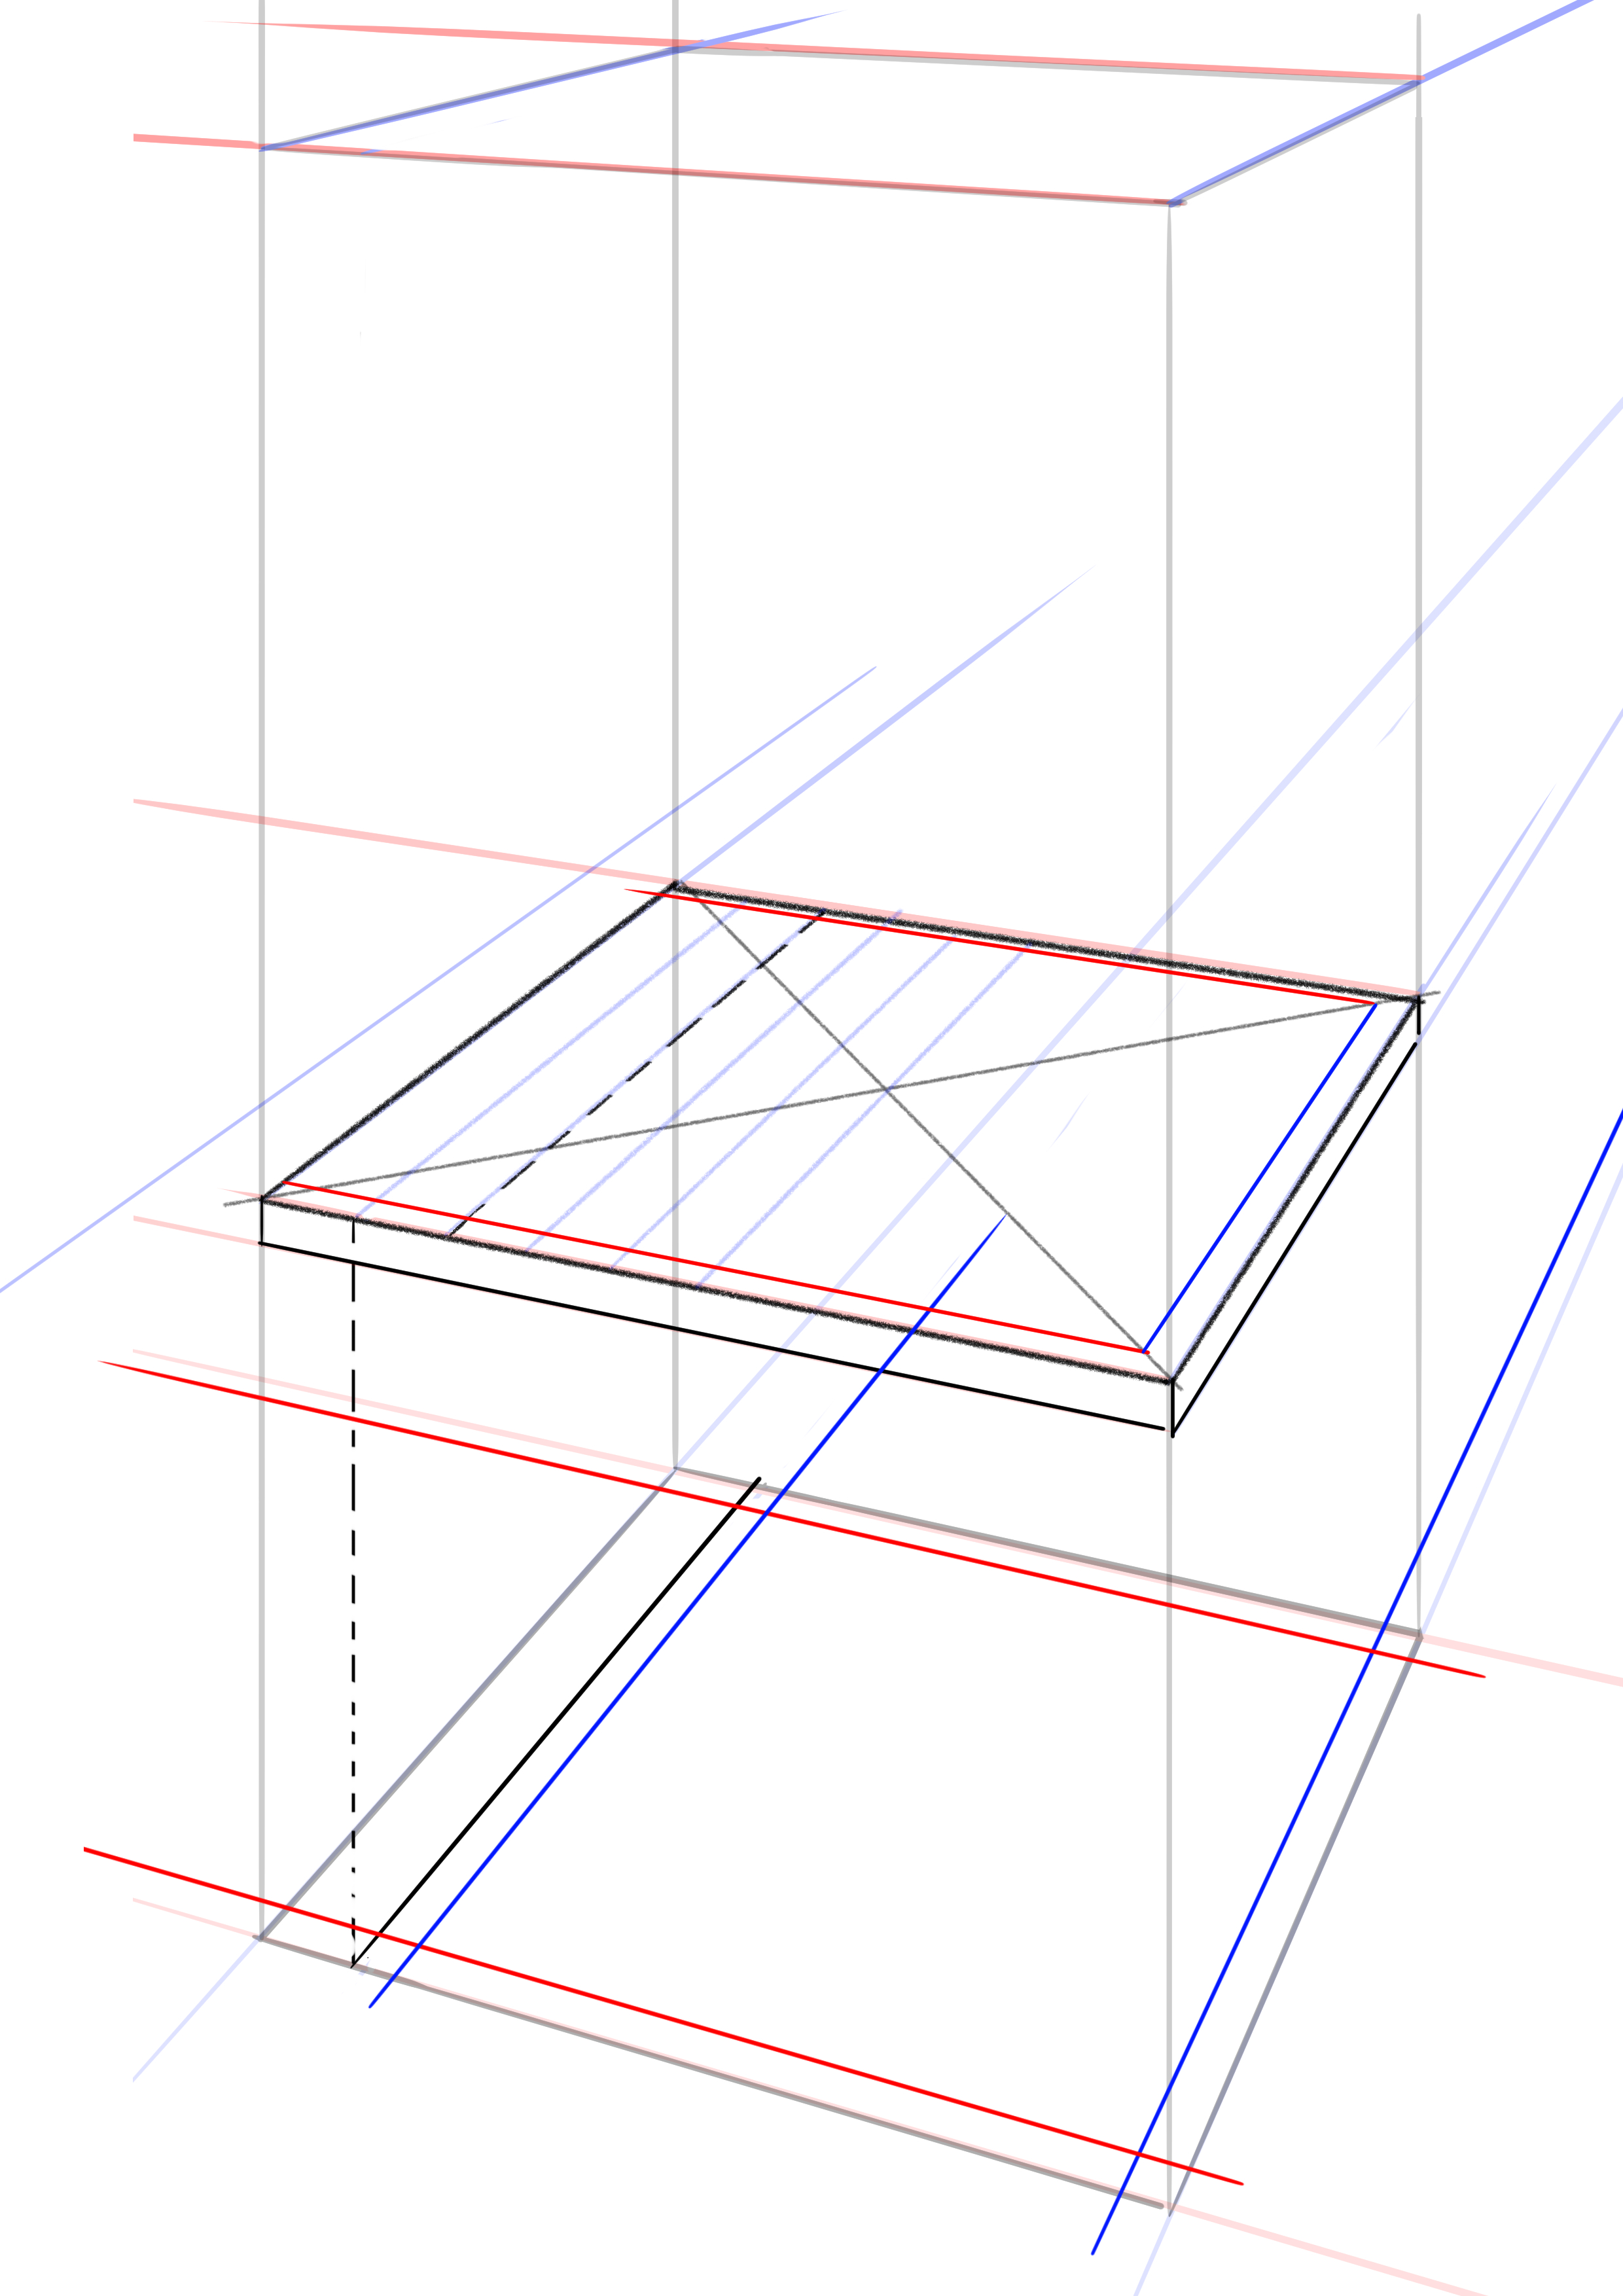
We will then mark two references. The first reference is the first line from the left included in the parallelepiped that we will lower to the ground. This will indicate the maximum distance where the chair's legs are located. The second reference is the next line, which will serve as a reference for the rounded shape of the back of the chair.
Now, we will trace the thickness of the chair seat.
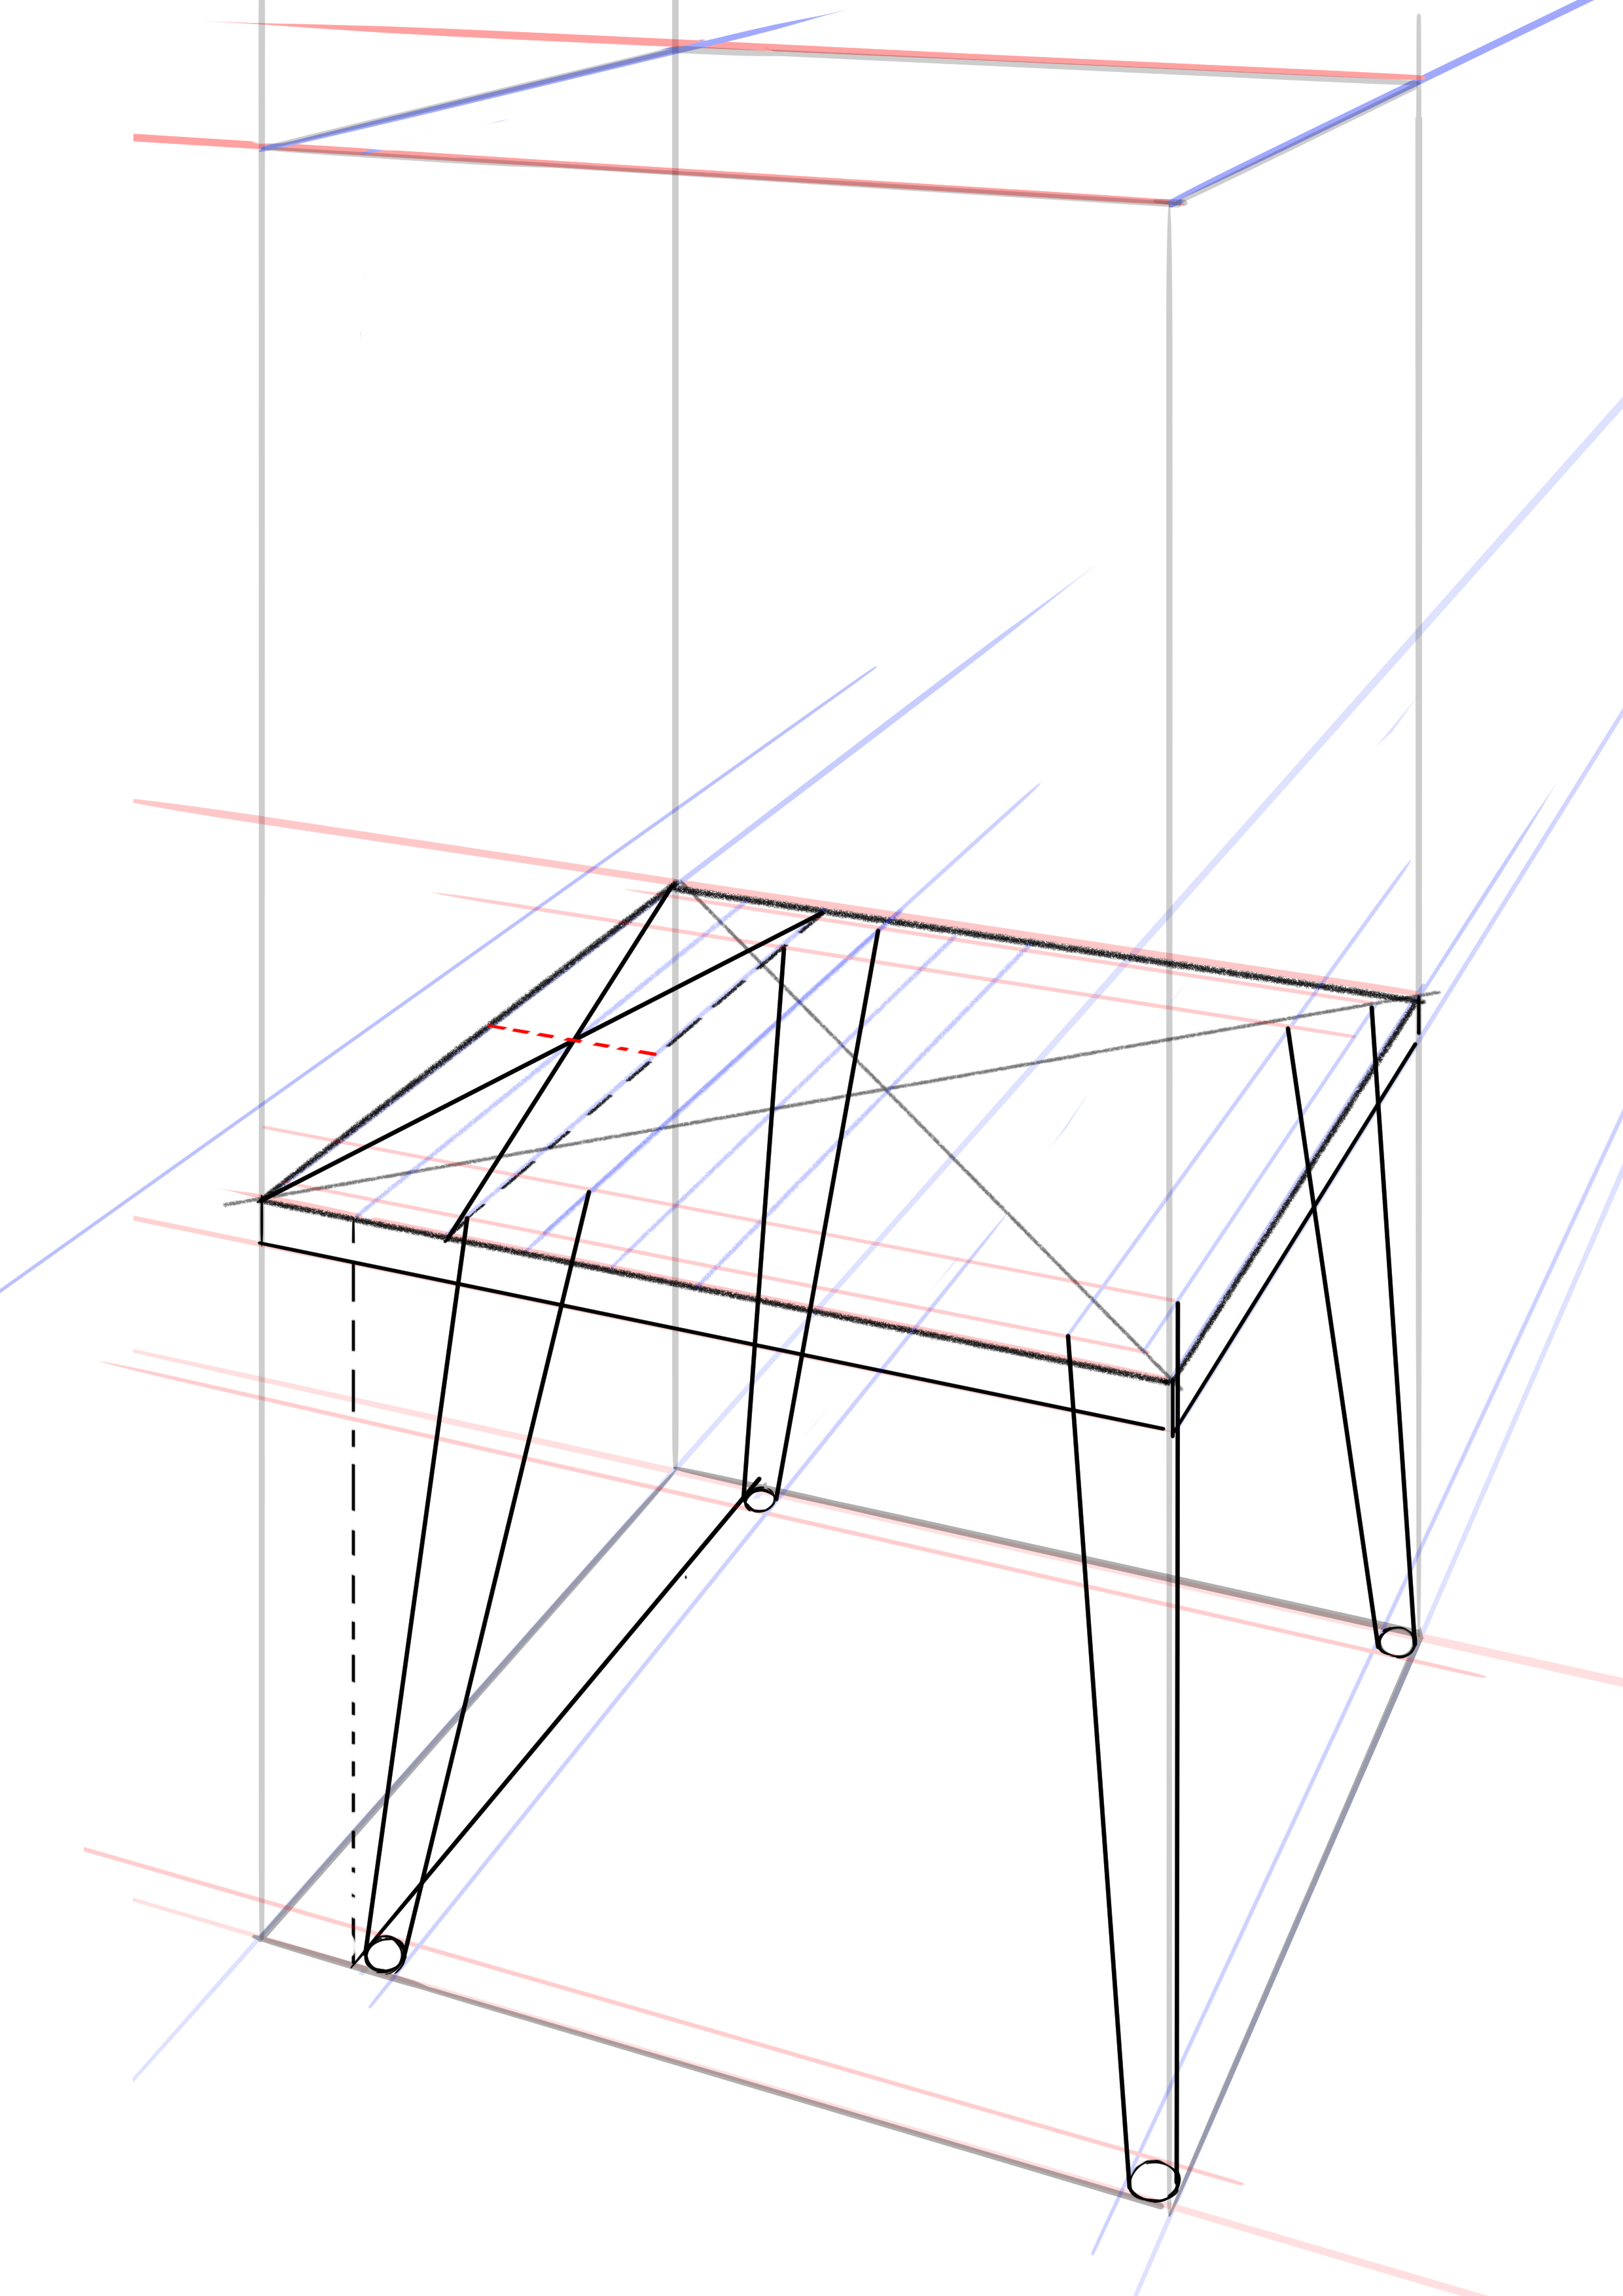
DRAWING THE CHAIR LEGS
Now we will place the feet. To do this, we will need to draw a second square inside the one we already have. Draw this square so that the intersections form small squares where we will draw the chair legs.
Next, we do the same thing on the seat to know where the chair legs end. Since my chair's 4 legs are angled here, they will need to be offset from their position on the floor. The legs are not fixed just at the edge of the seat either, there is a small margin. And they are wider at the top than at the bottom.
So, first we will draw the safety margin.
Then we will draw a second square inside that is smaller than the one on the ground to get larger squares for the top of the chair legs. If this explanation is a bit unclear, look at what follows and you'll see what I'm trying to do.
We will then draw small ellipses in the small squares on the floor (you can draw this by eye as they are tiny, so there's little chance of messing up ^^). And then draw a straight line from the edge of each ellipse to the squares we drew on the seat. We will then have our chair legs :)

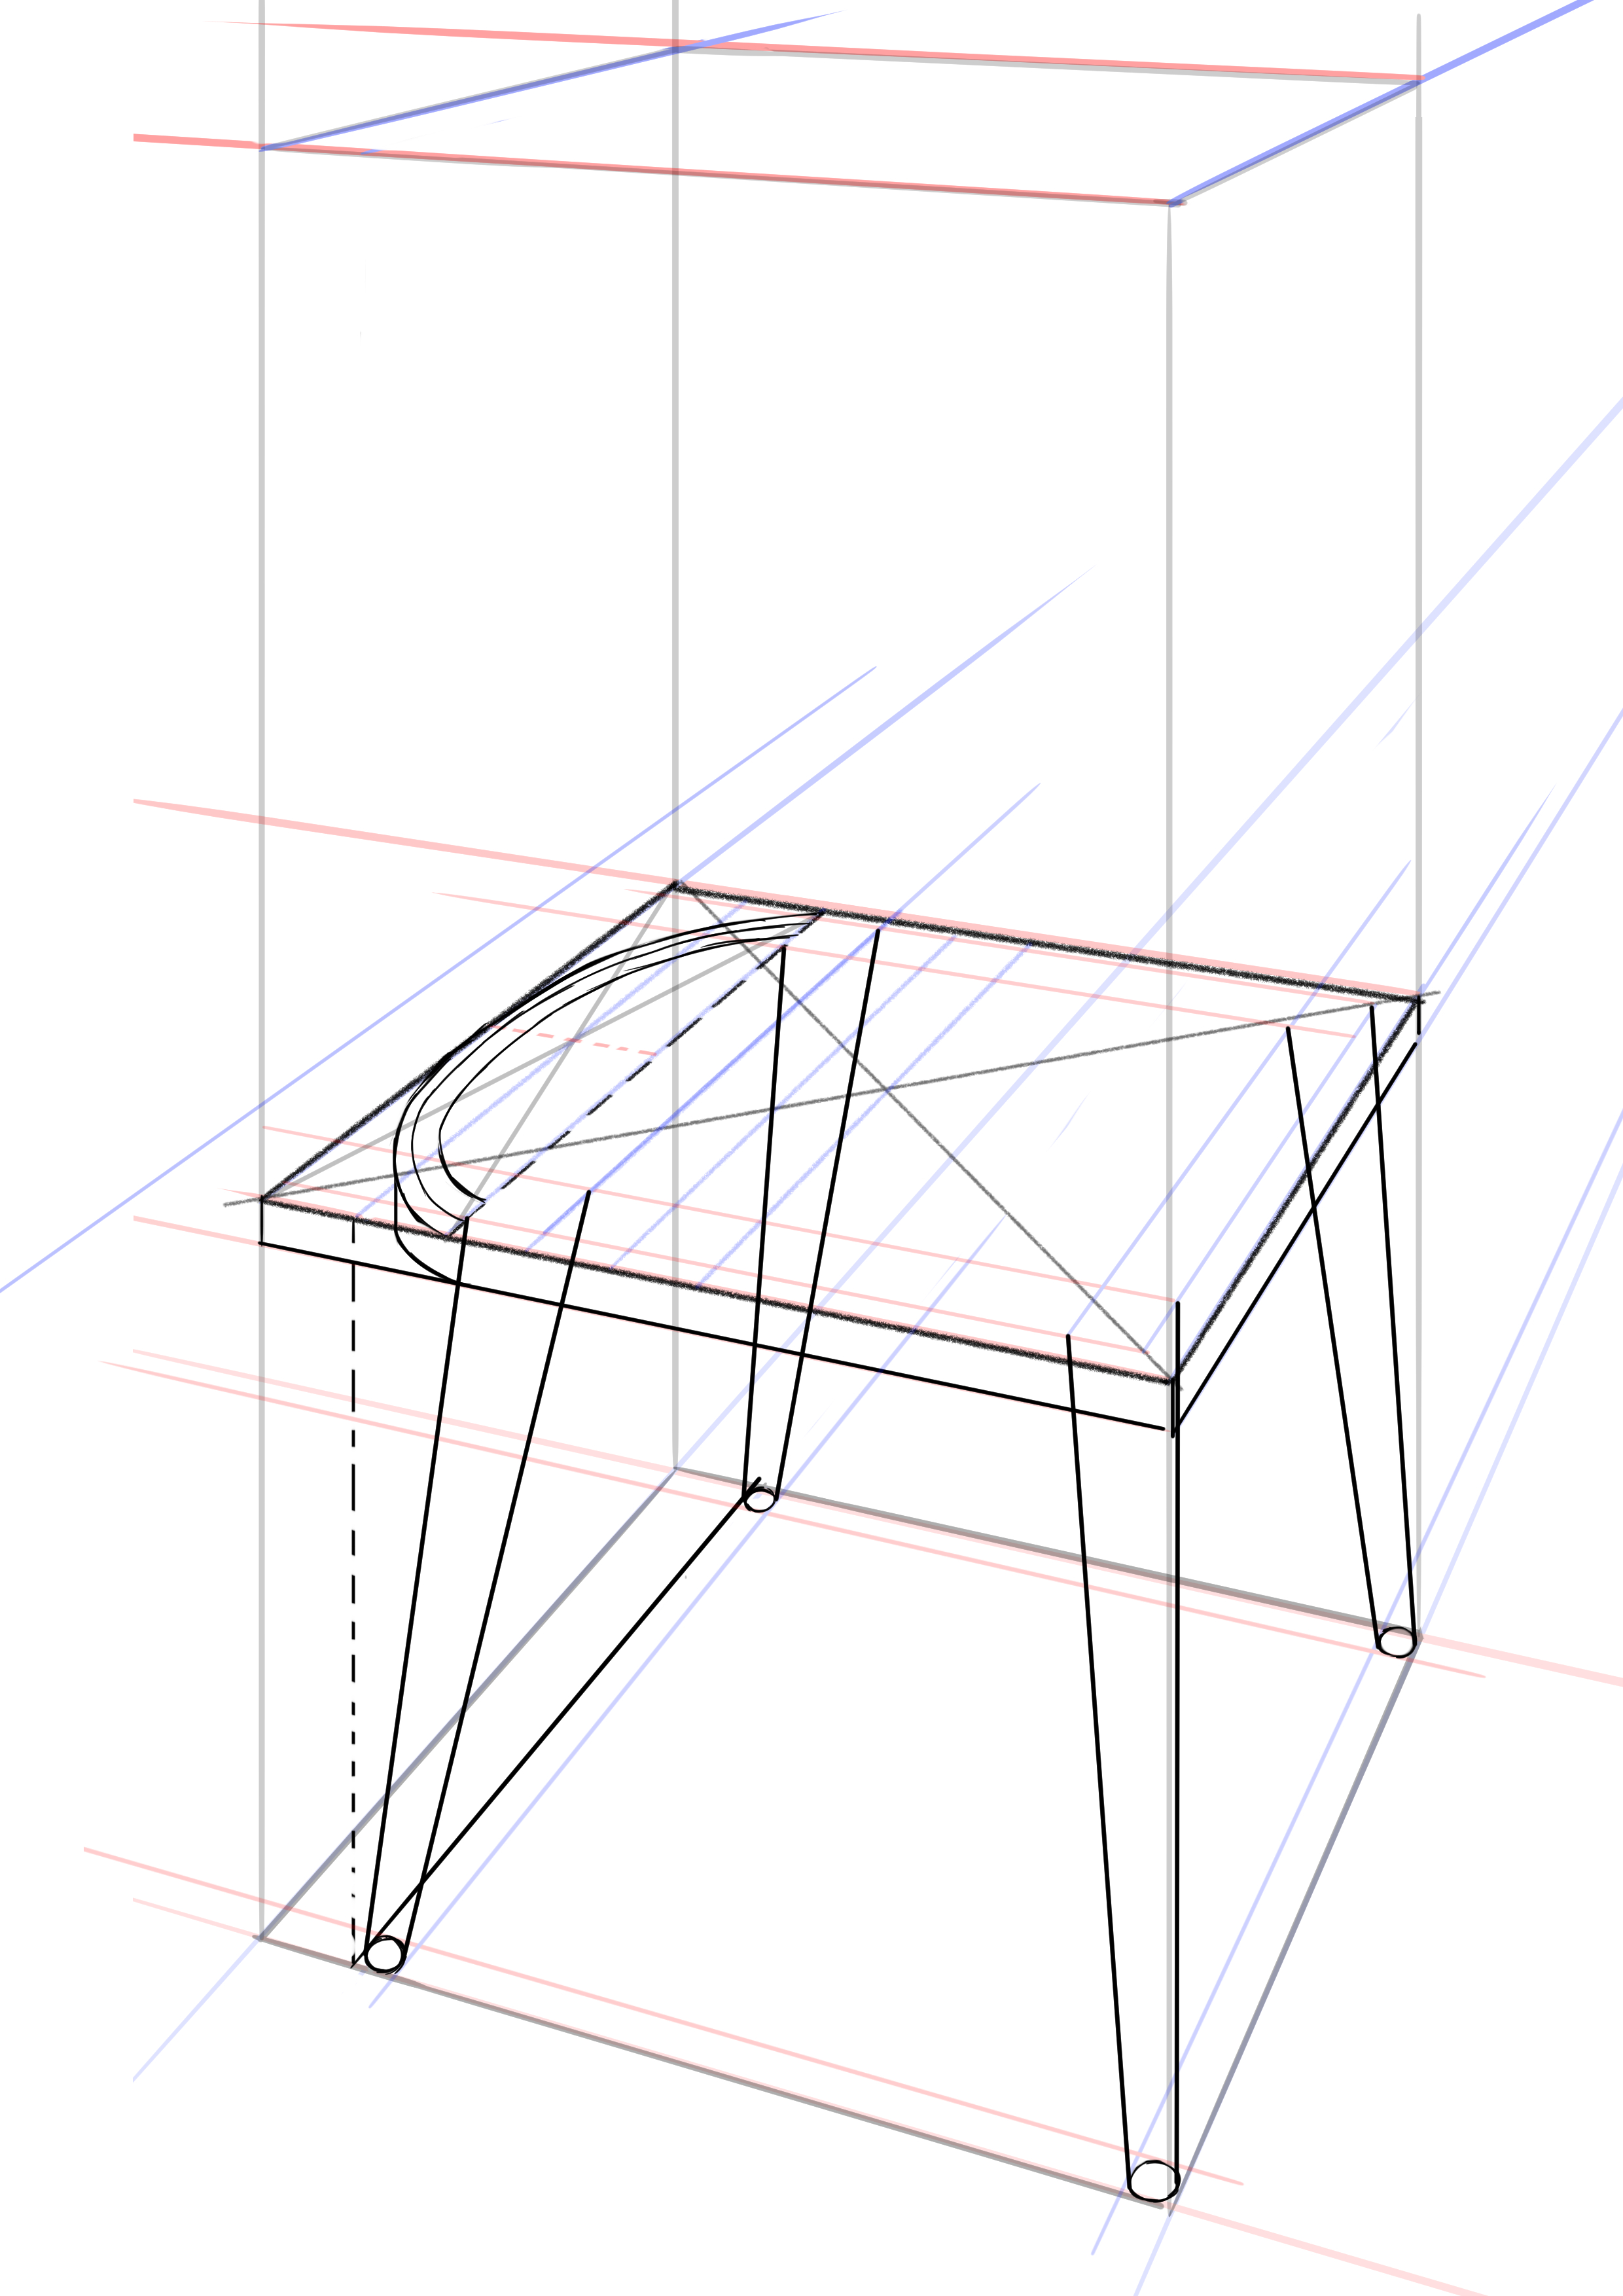
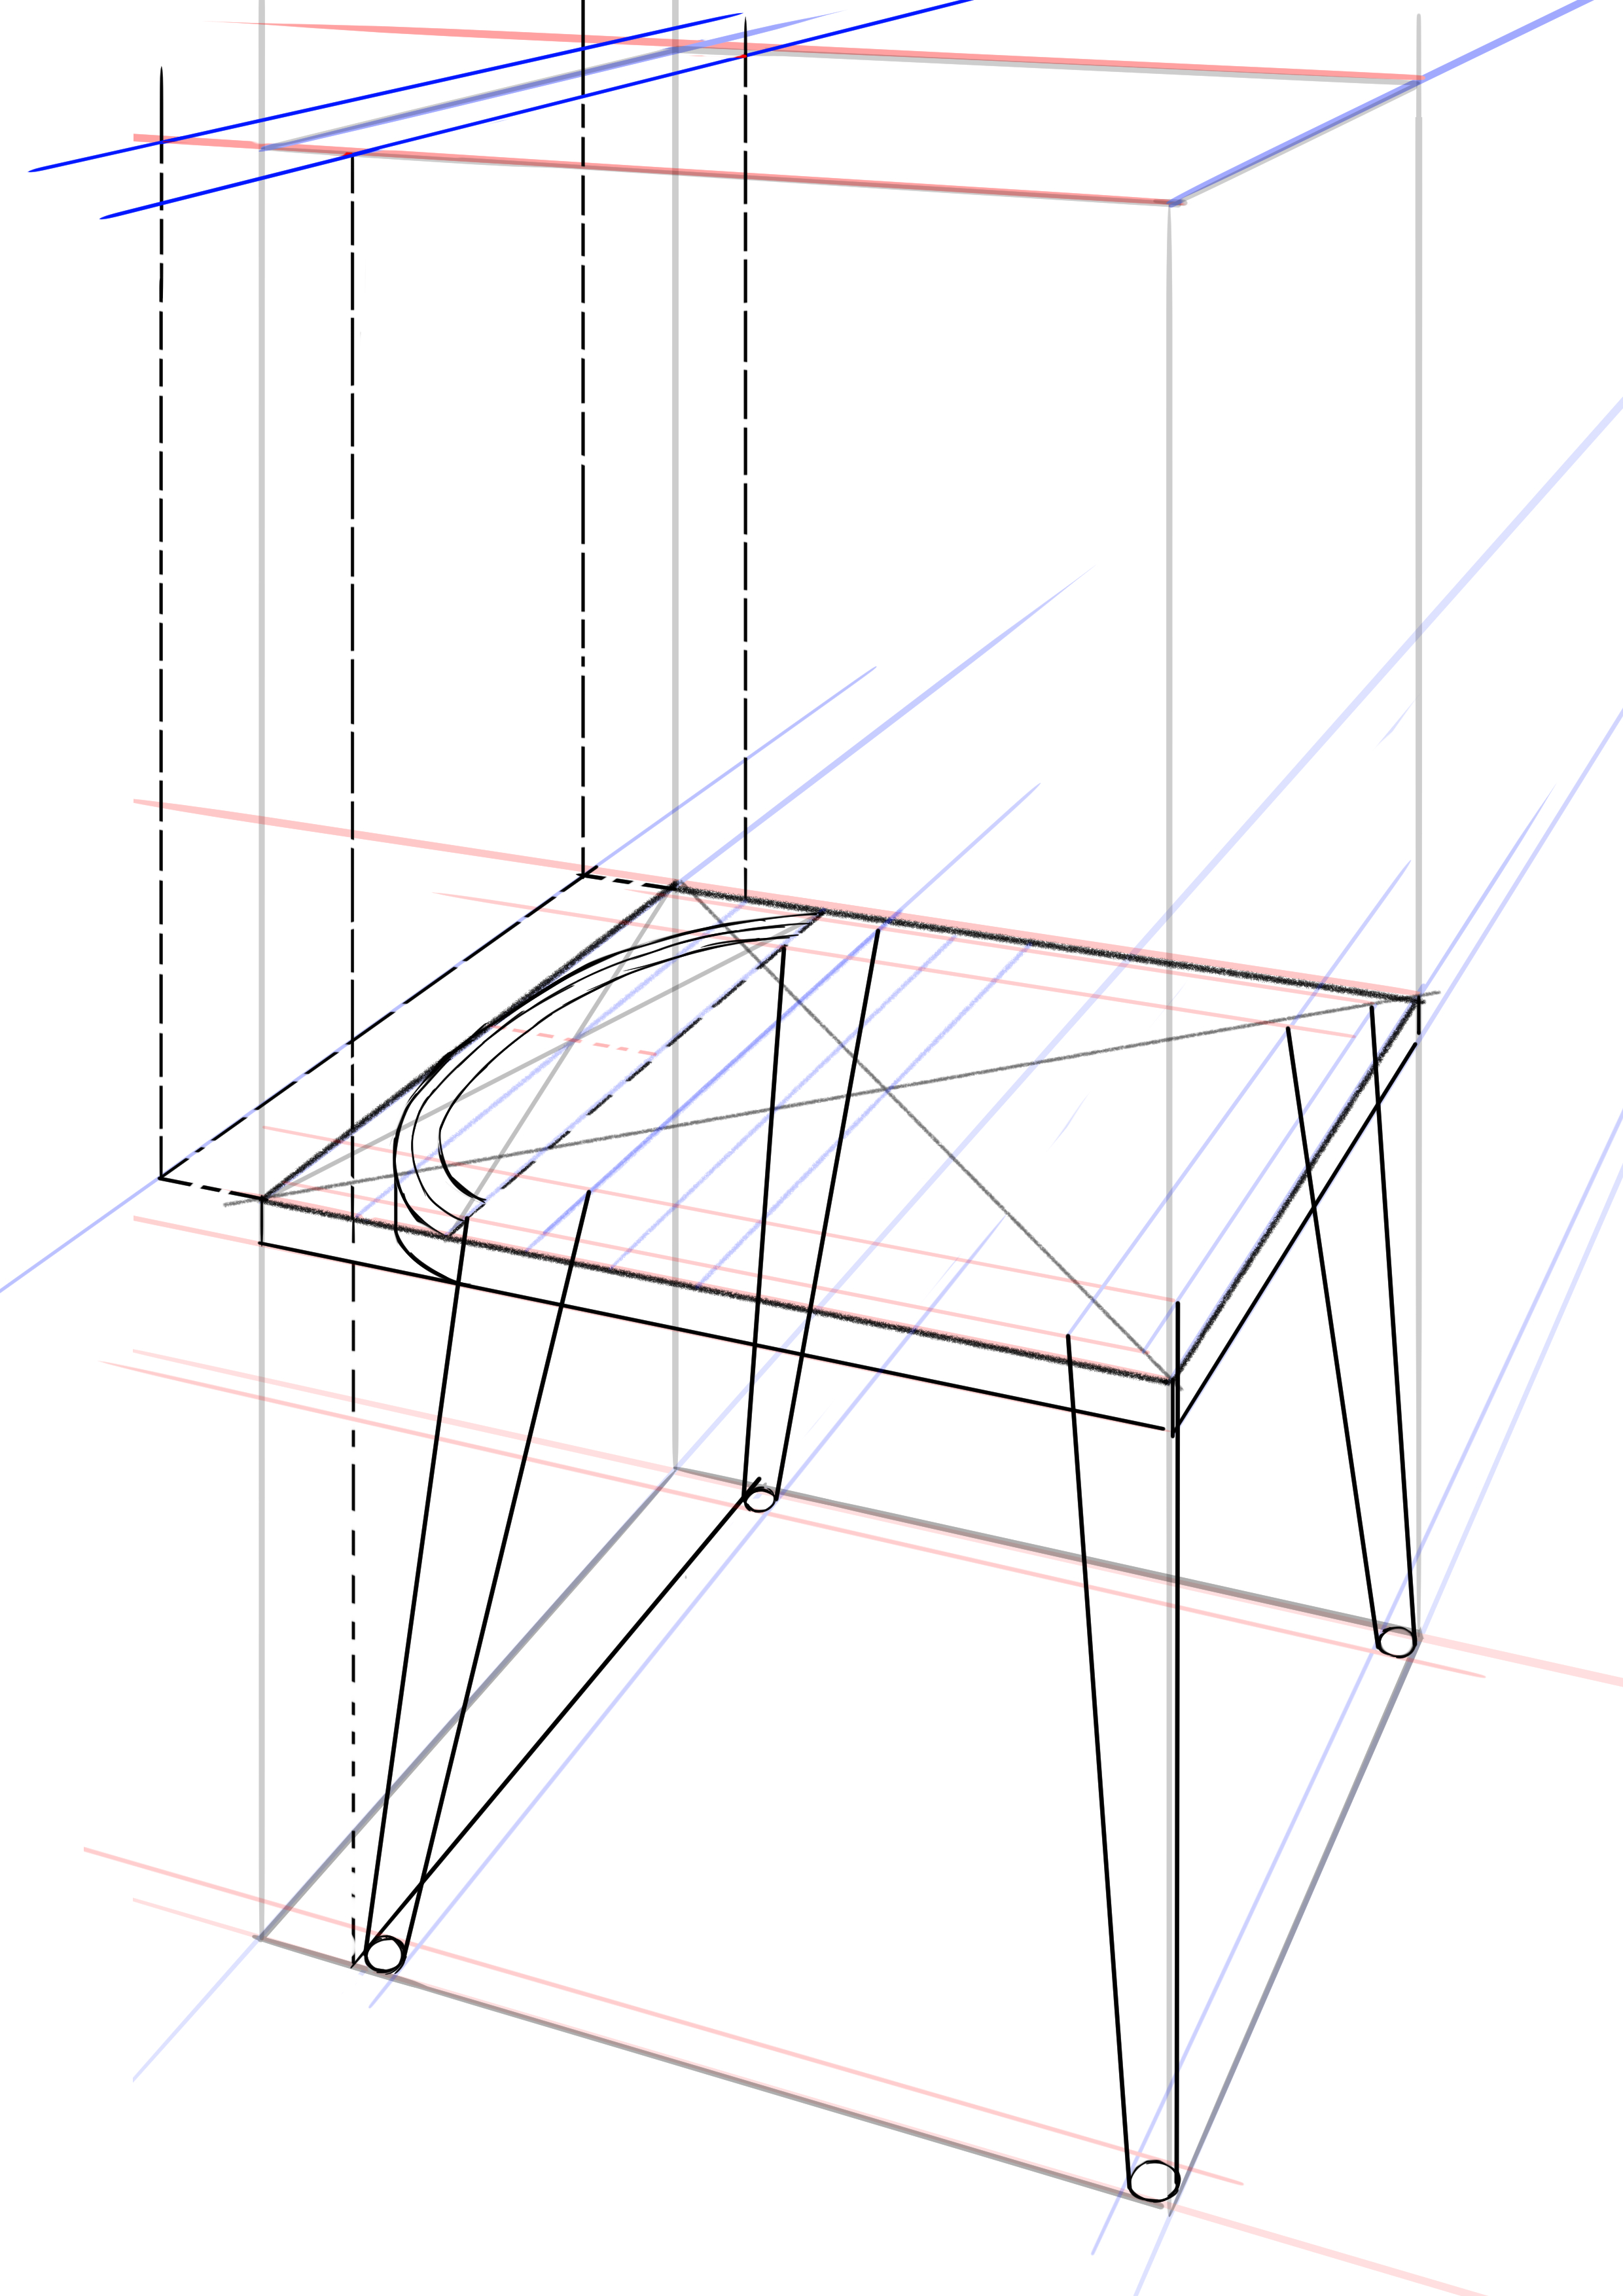
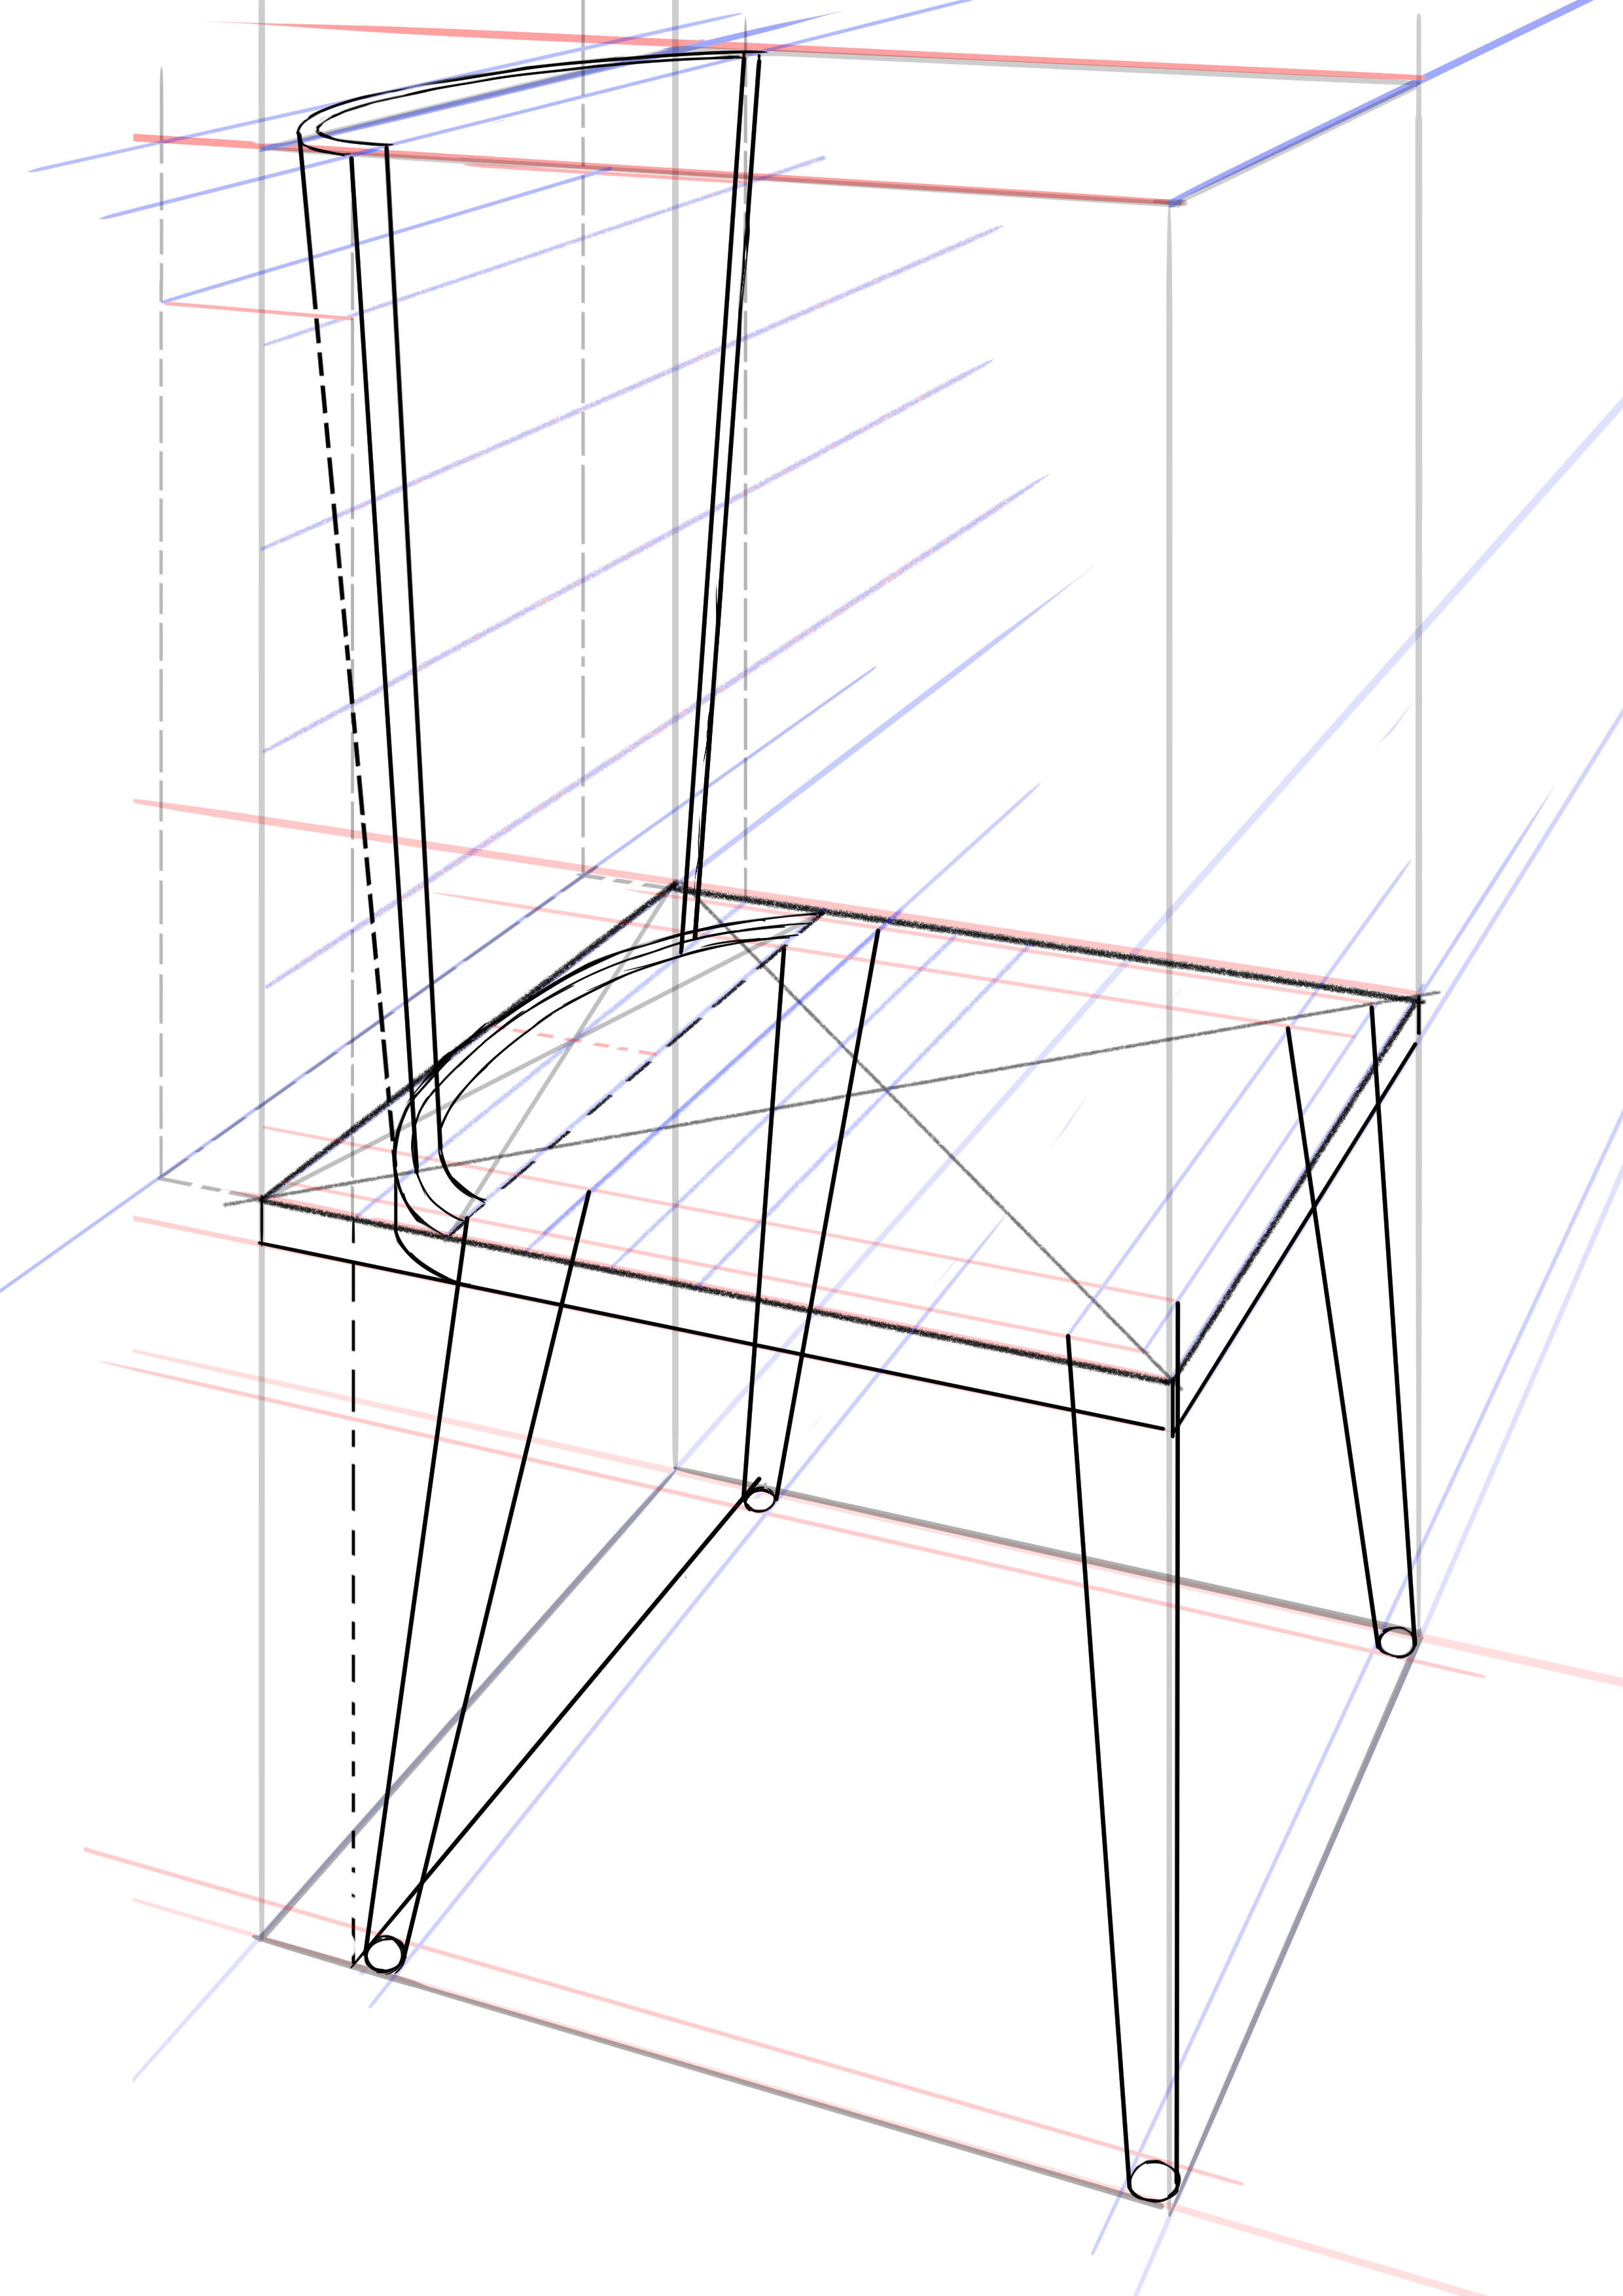
ROUNDING THE SEAT AND DESIGNING THE BACK OF THE CHAIR
We're going to focus on the seat's support and give it a rounded shape. That means we'll make an ellipse. Remember that we have already drawn our line in dots for that! So we're going to draw a cross in this area to find the middle that we're going to pull from the left vanishing point :D
Next, draw a half-ellipse in this area. It should touch the rectangle at the right edges of the cross and the middle line on the left. For the rest, feel free to draw and redraw until you have something that seems right to you. Honestly, apart from practice, I don't really have a miracle method for you. I also had to try this several times to get it right myself. However, you will notice that there is an angle from which it will be easier to make a correct curve, so do not hesitate to turn your paper if necessary.

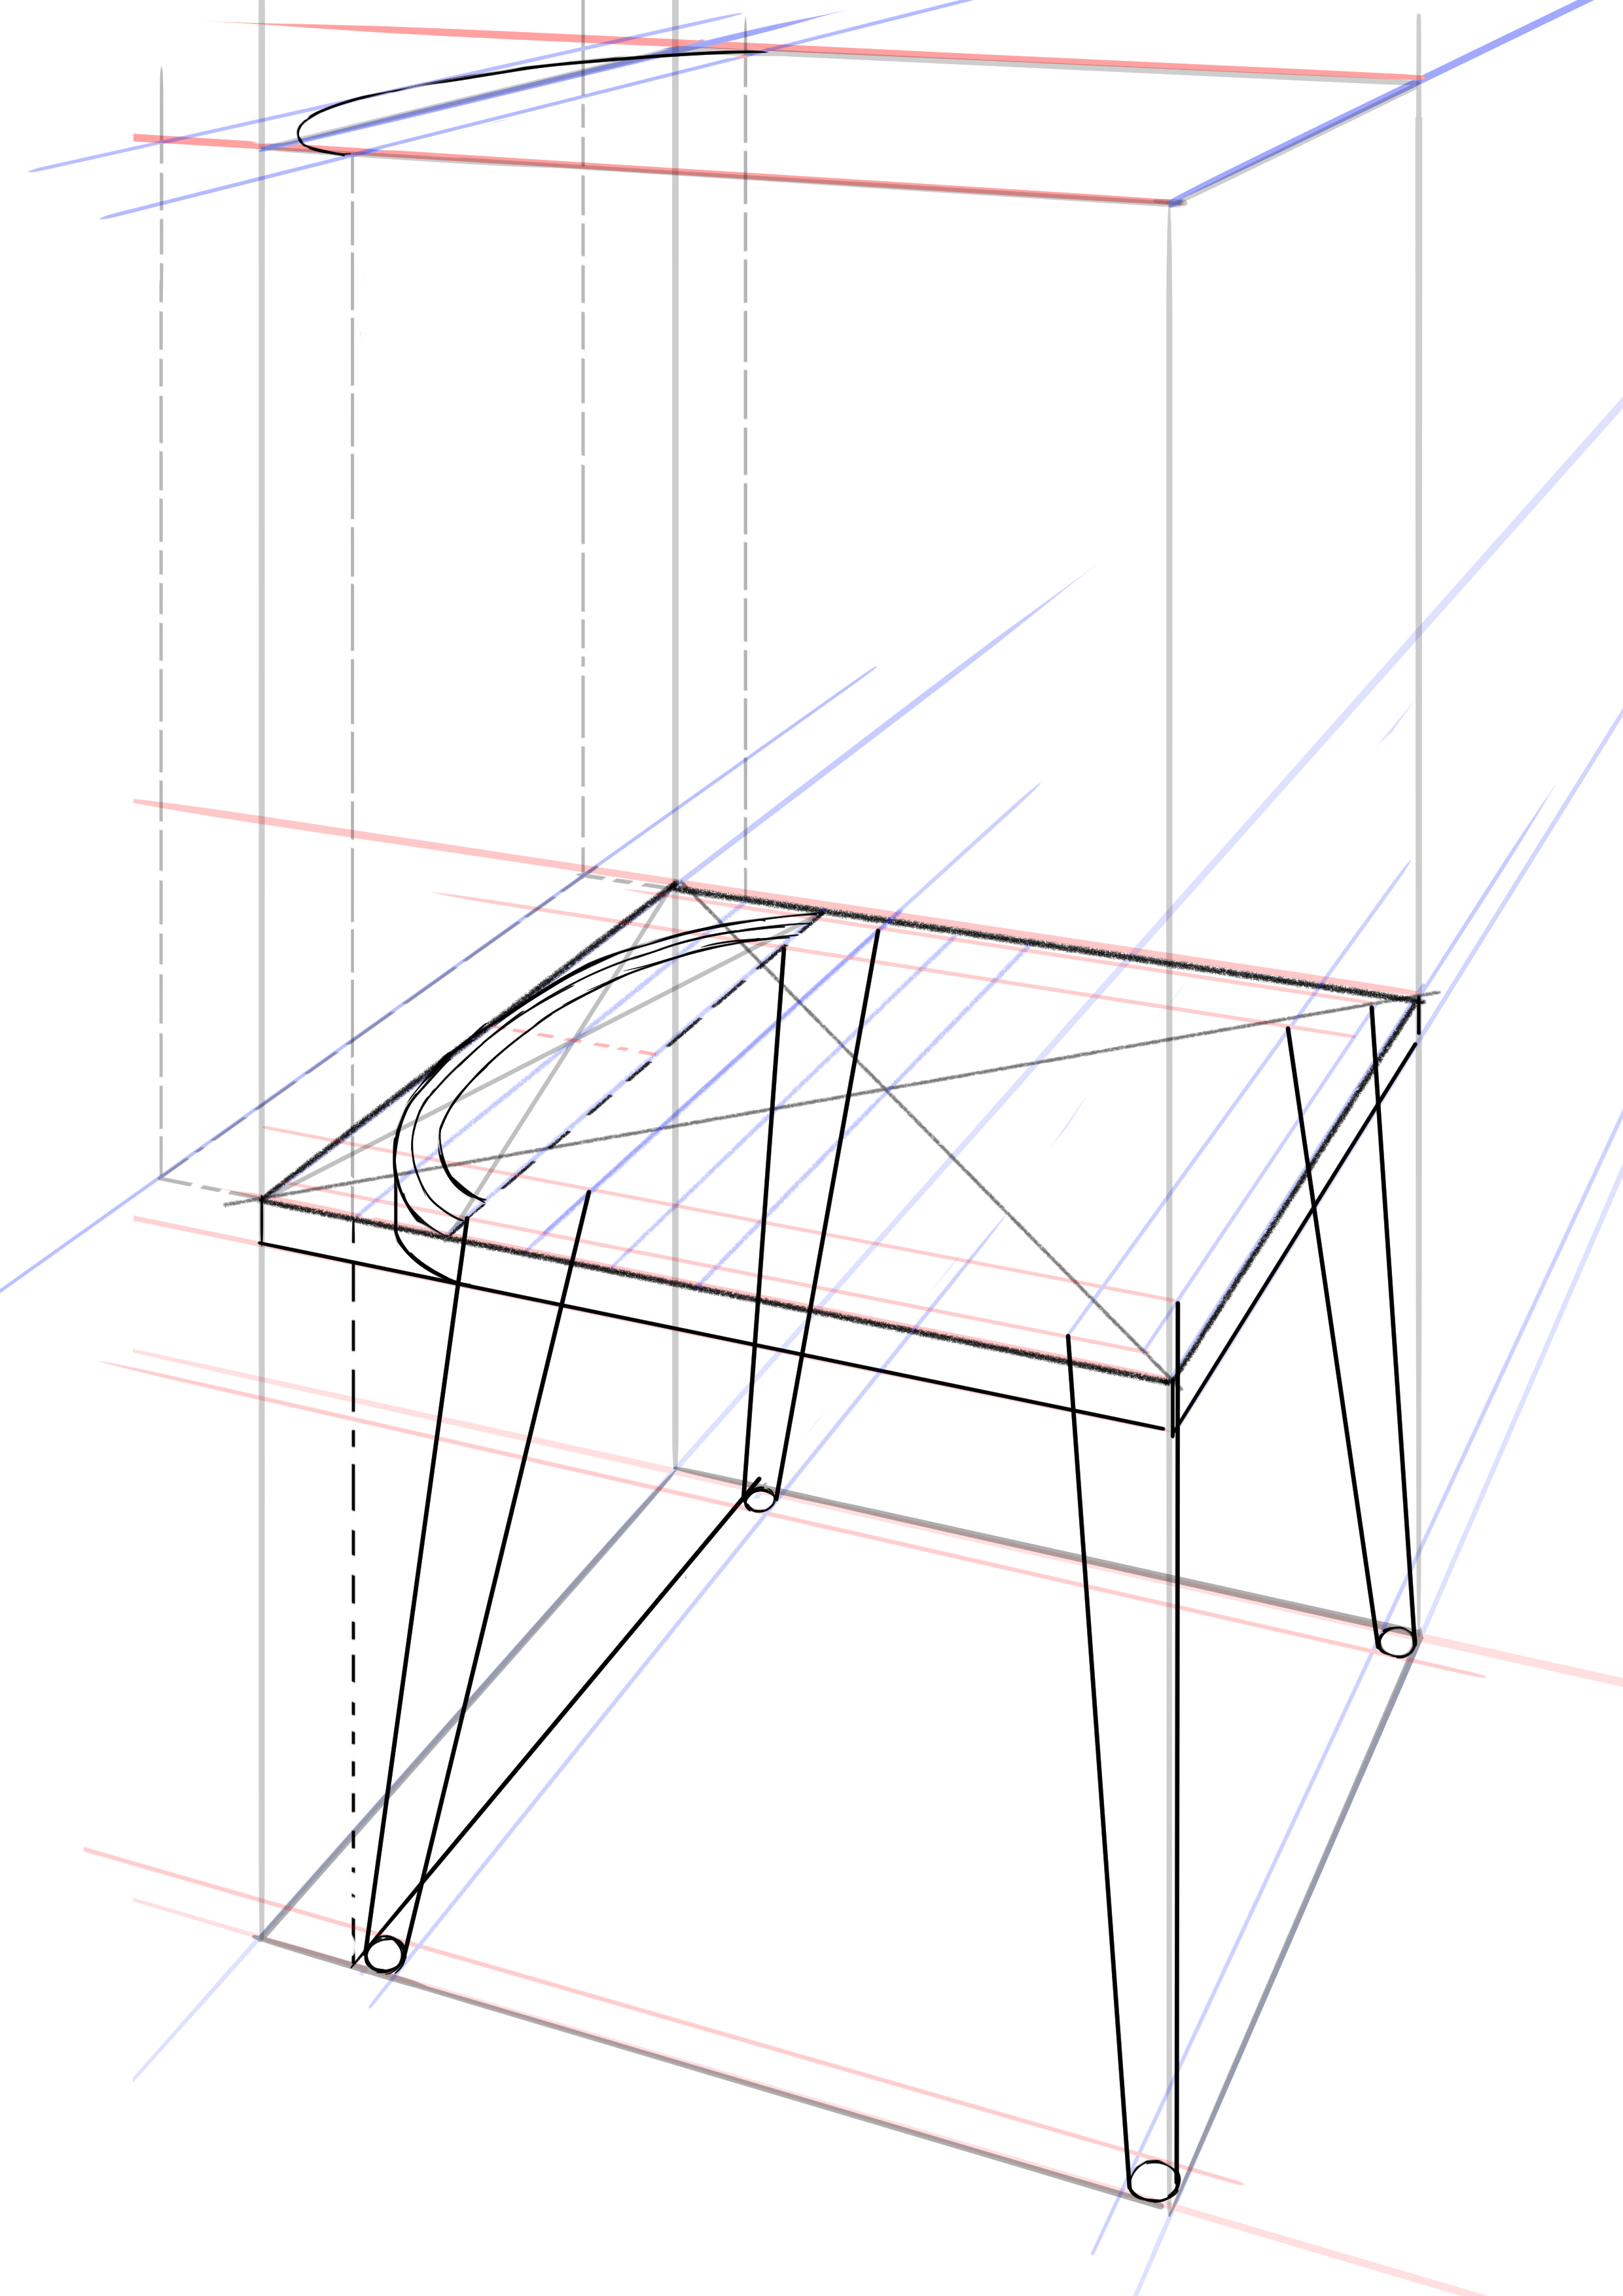
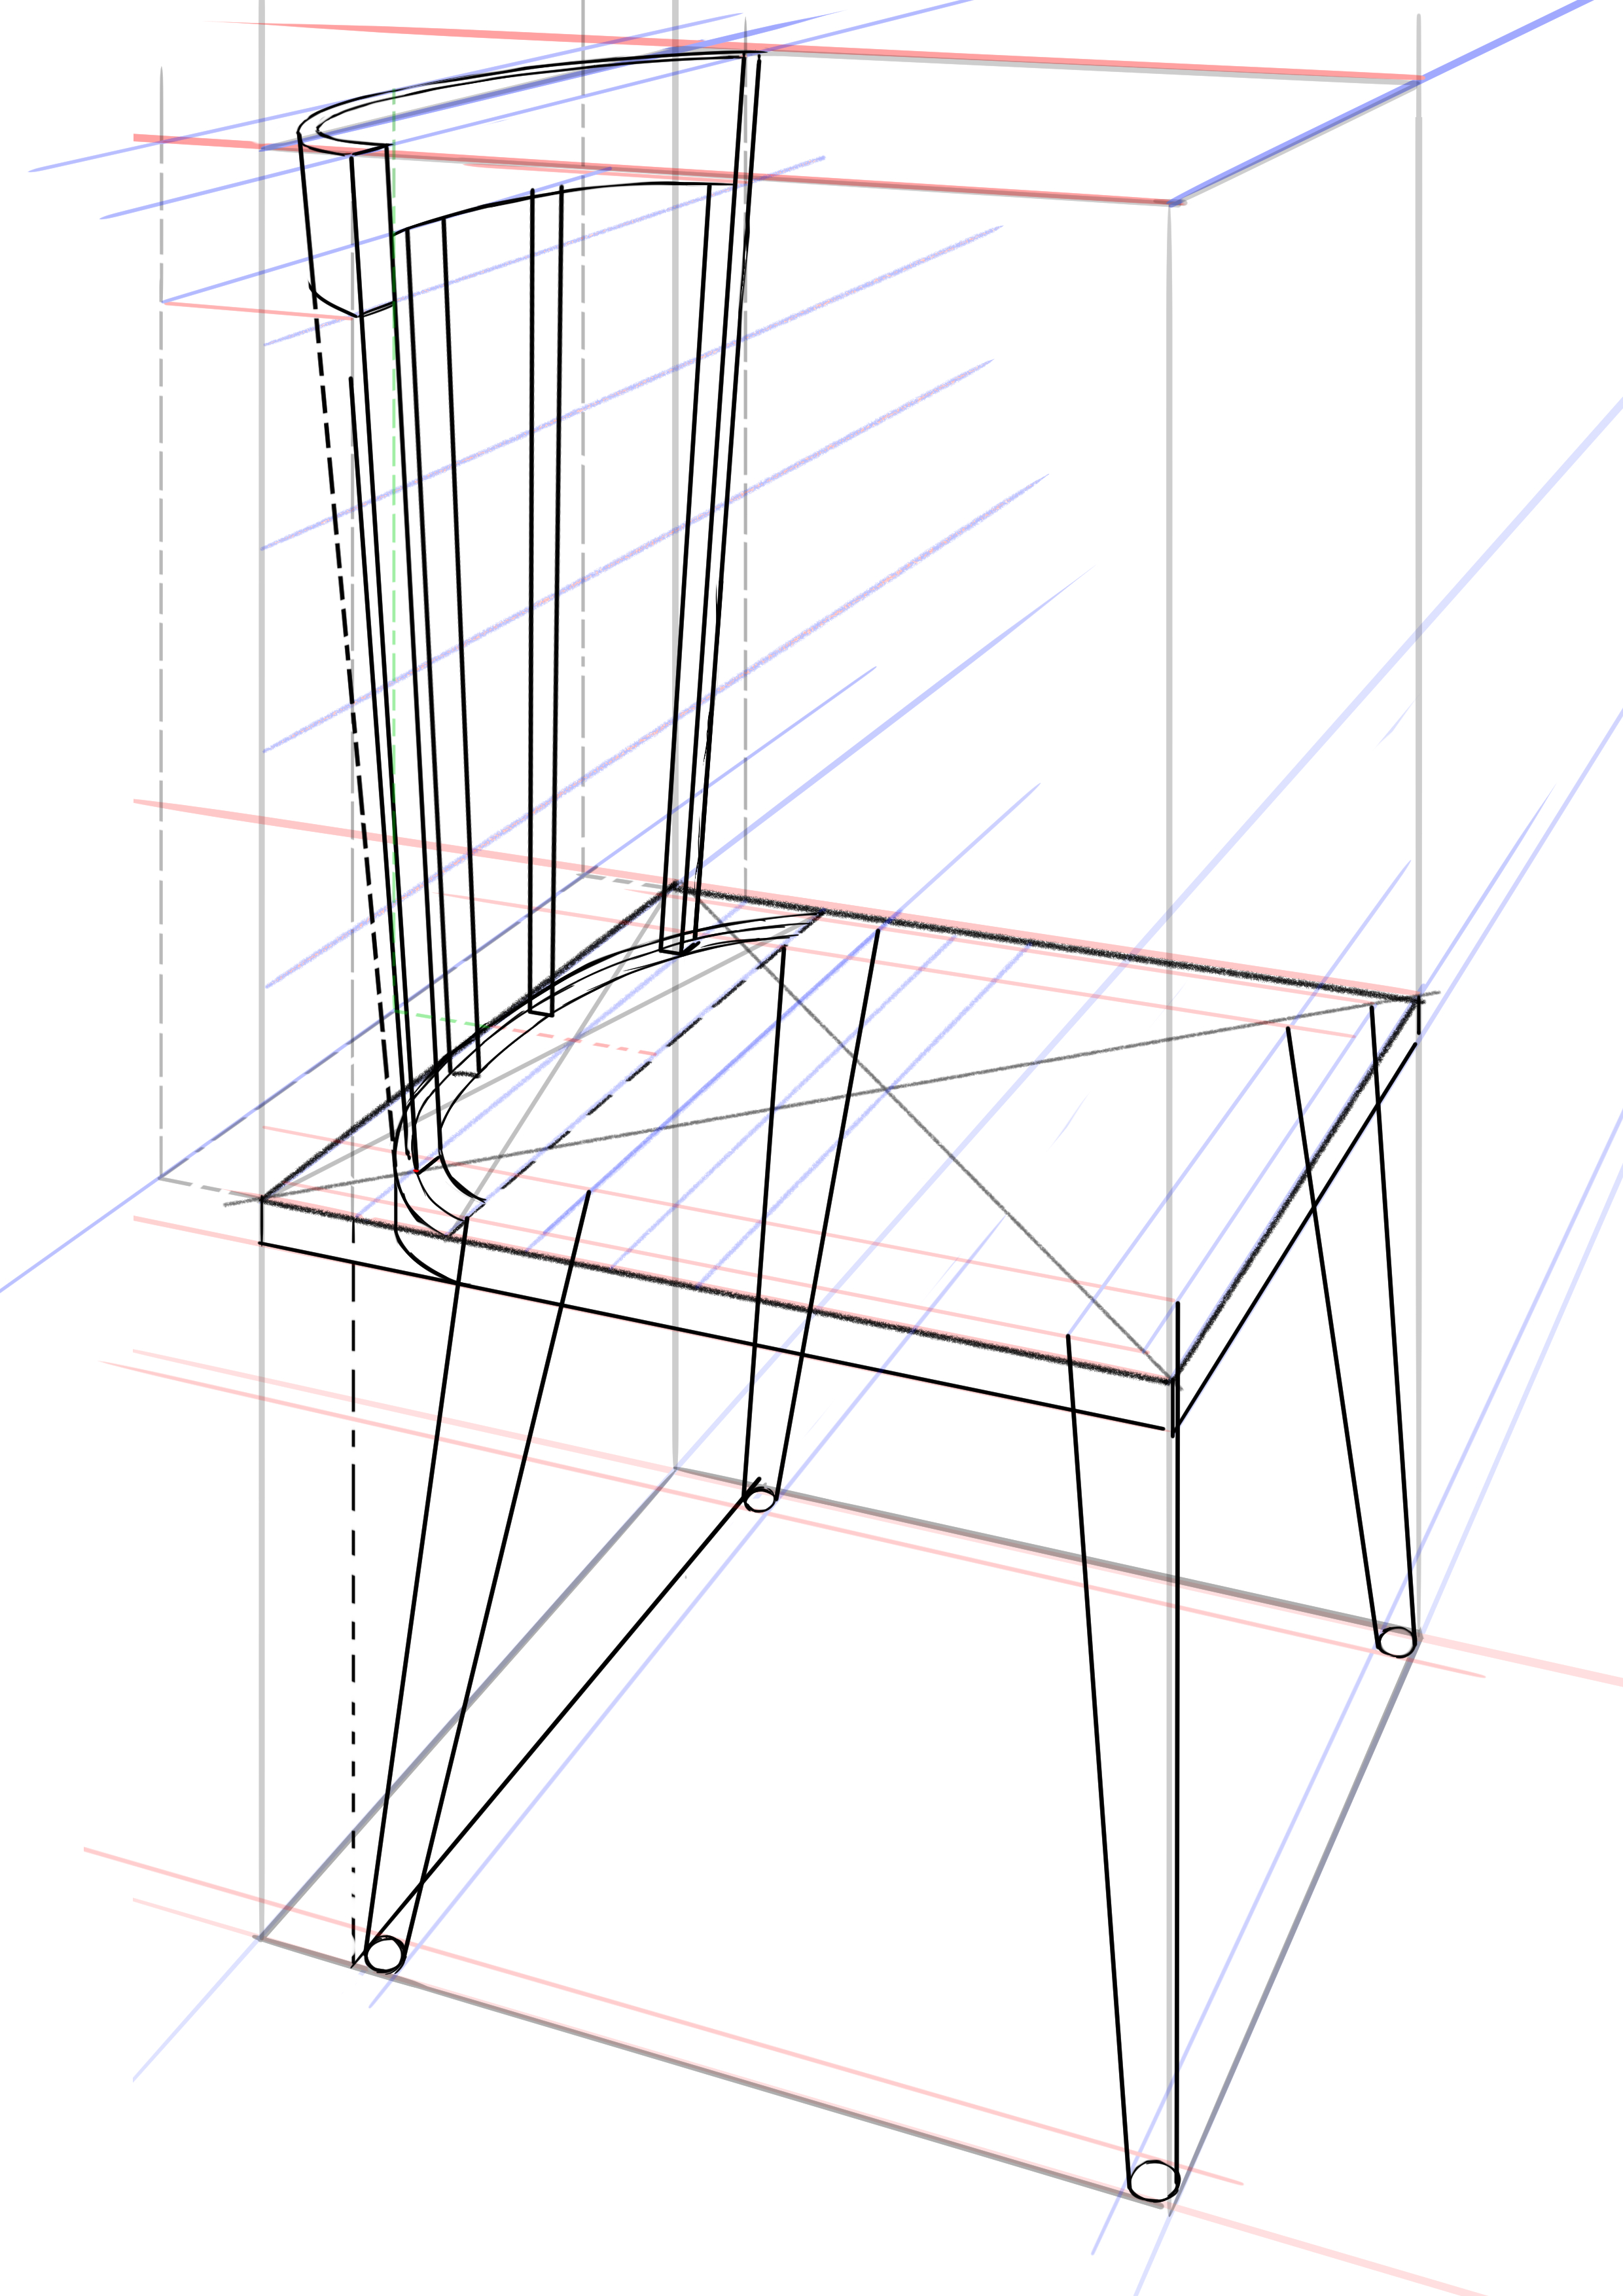
We will then trace a section of an ellipse for the thickness of the seat. You can also do this by eye ^^

Now, in the same area, draw two new half ellipses, making sure that they're smaller. These ellipses will help us place the backrest of the chair. It should be simpler this time as you just need to follow the curve of your first ellipse.
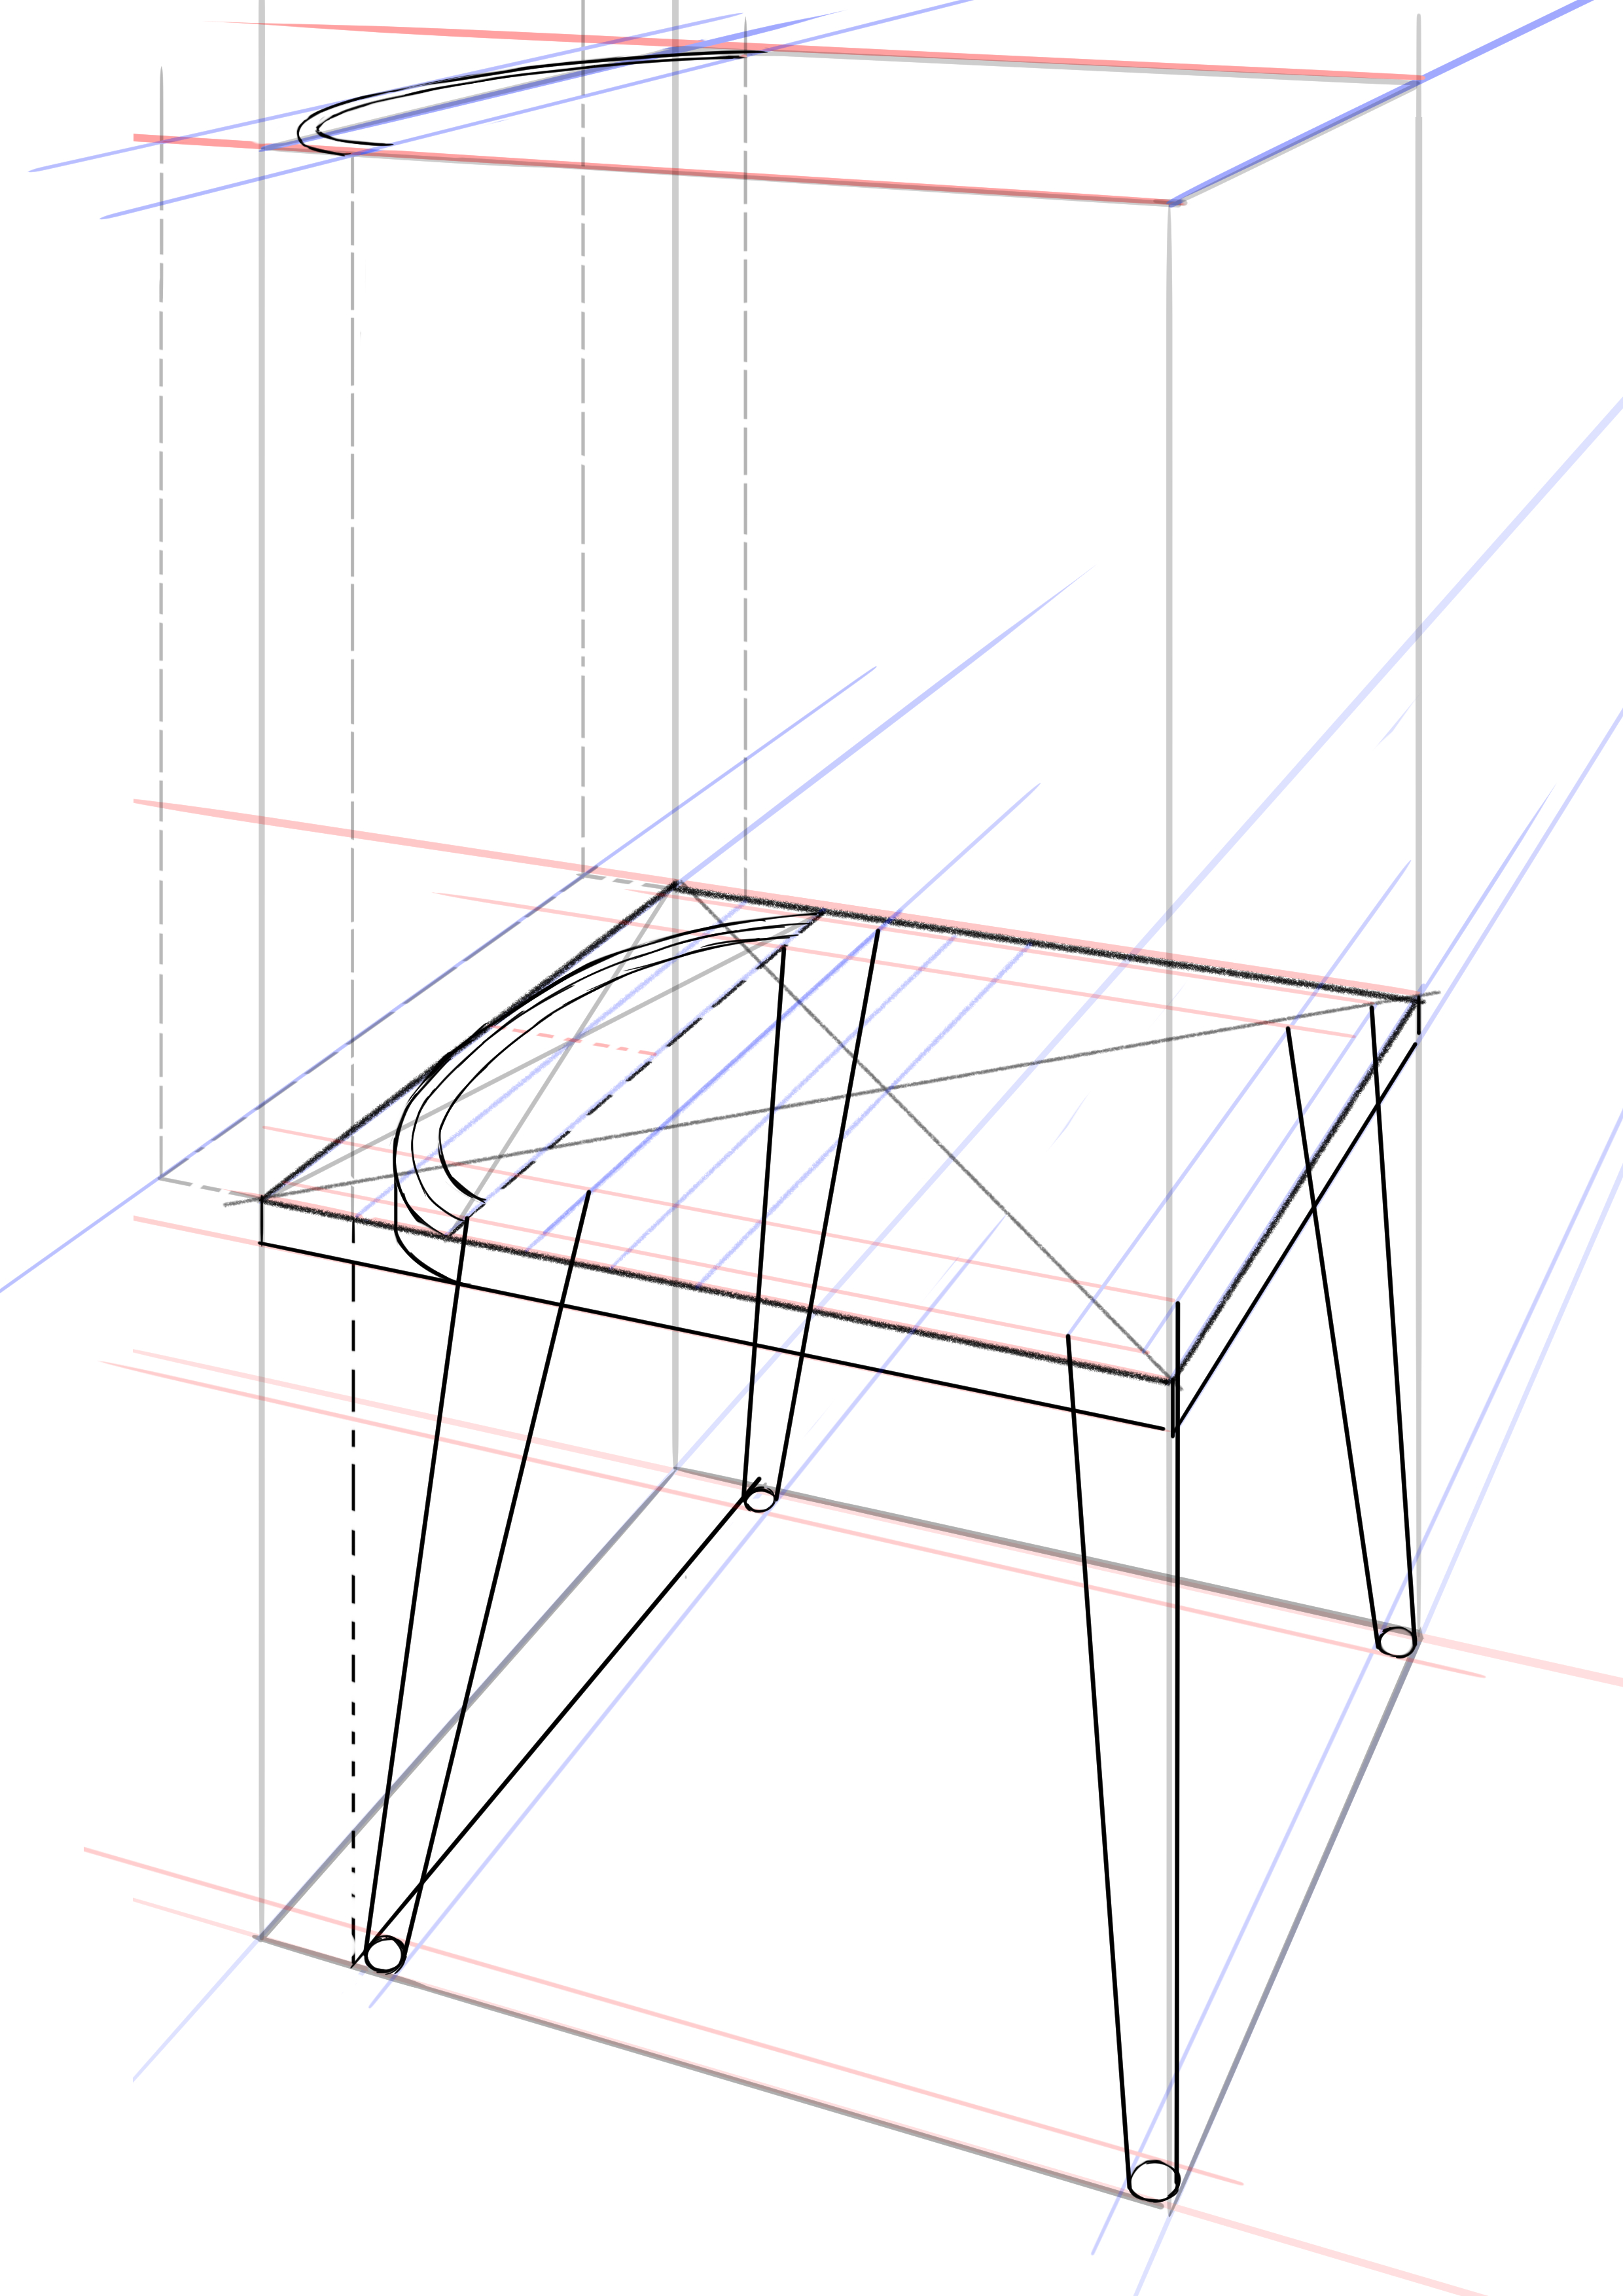
Once that's done, we'll set up the verticals for the chair's backrest (starting from the line you added outside the parallelepiped). Once at the top, extend the top of the parallelepiped to close it properly.
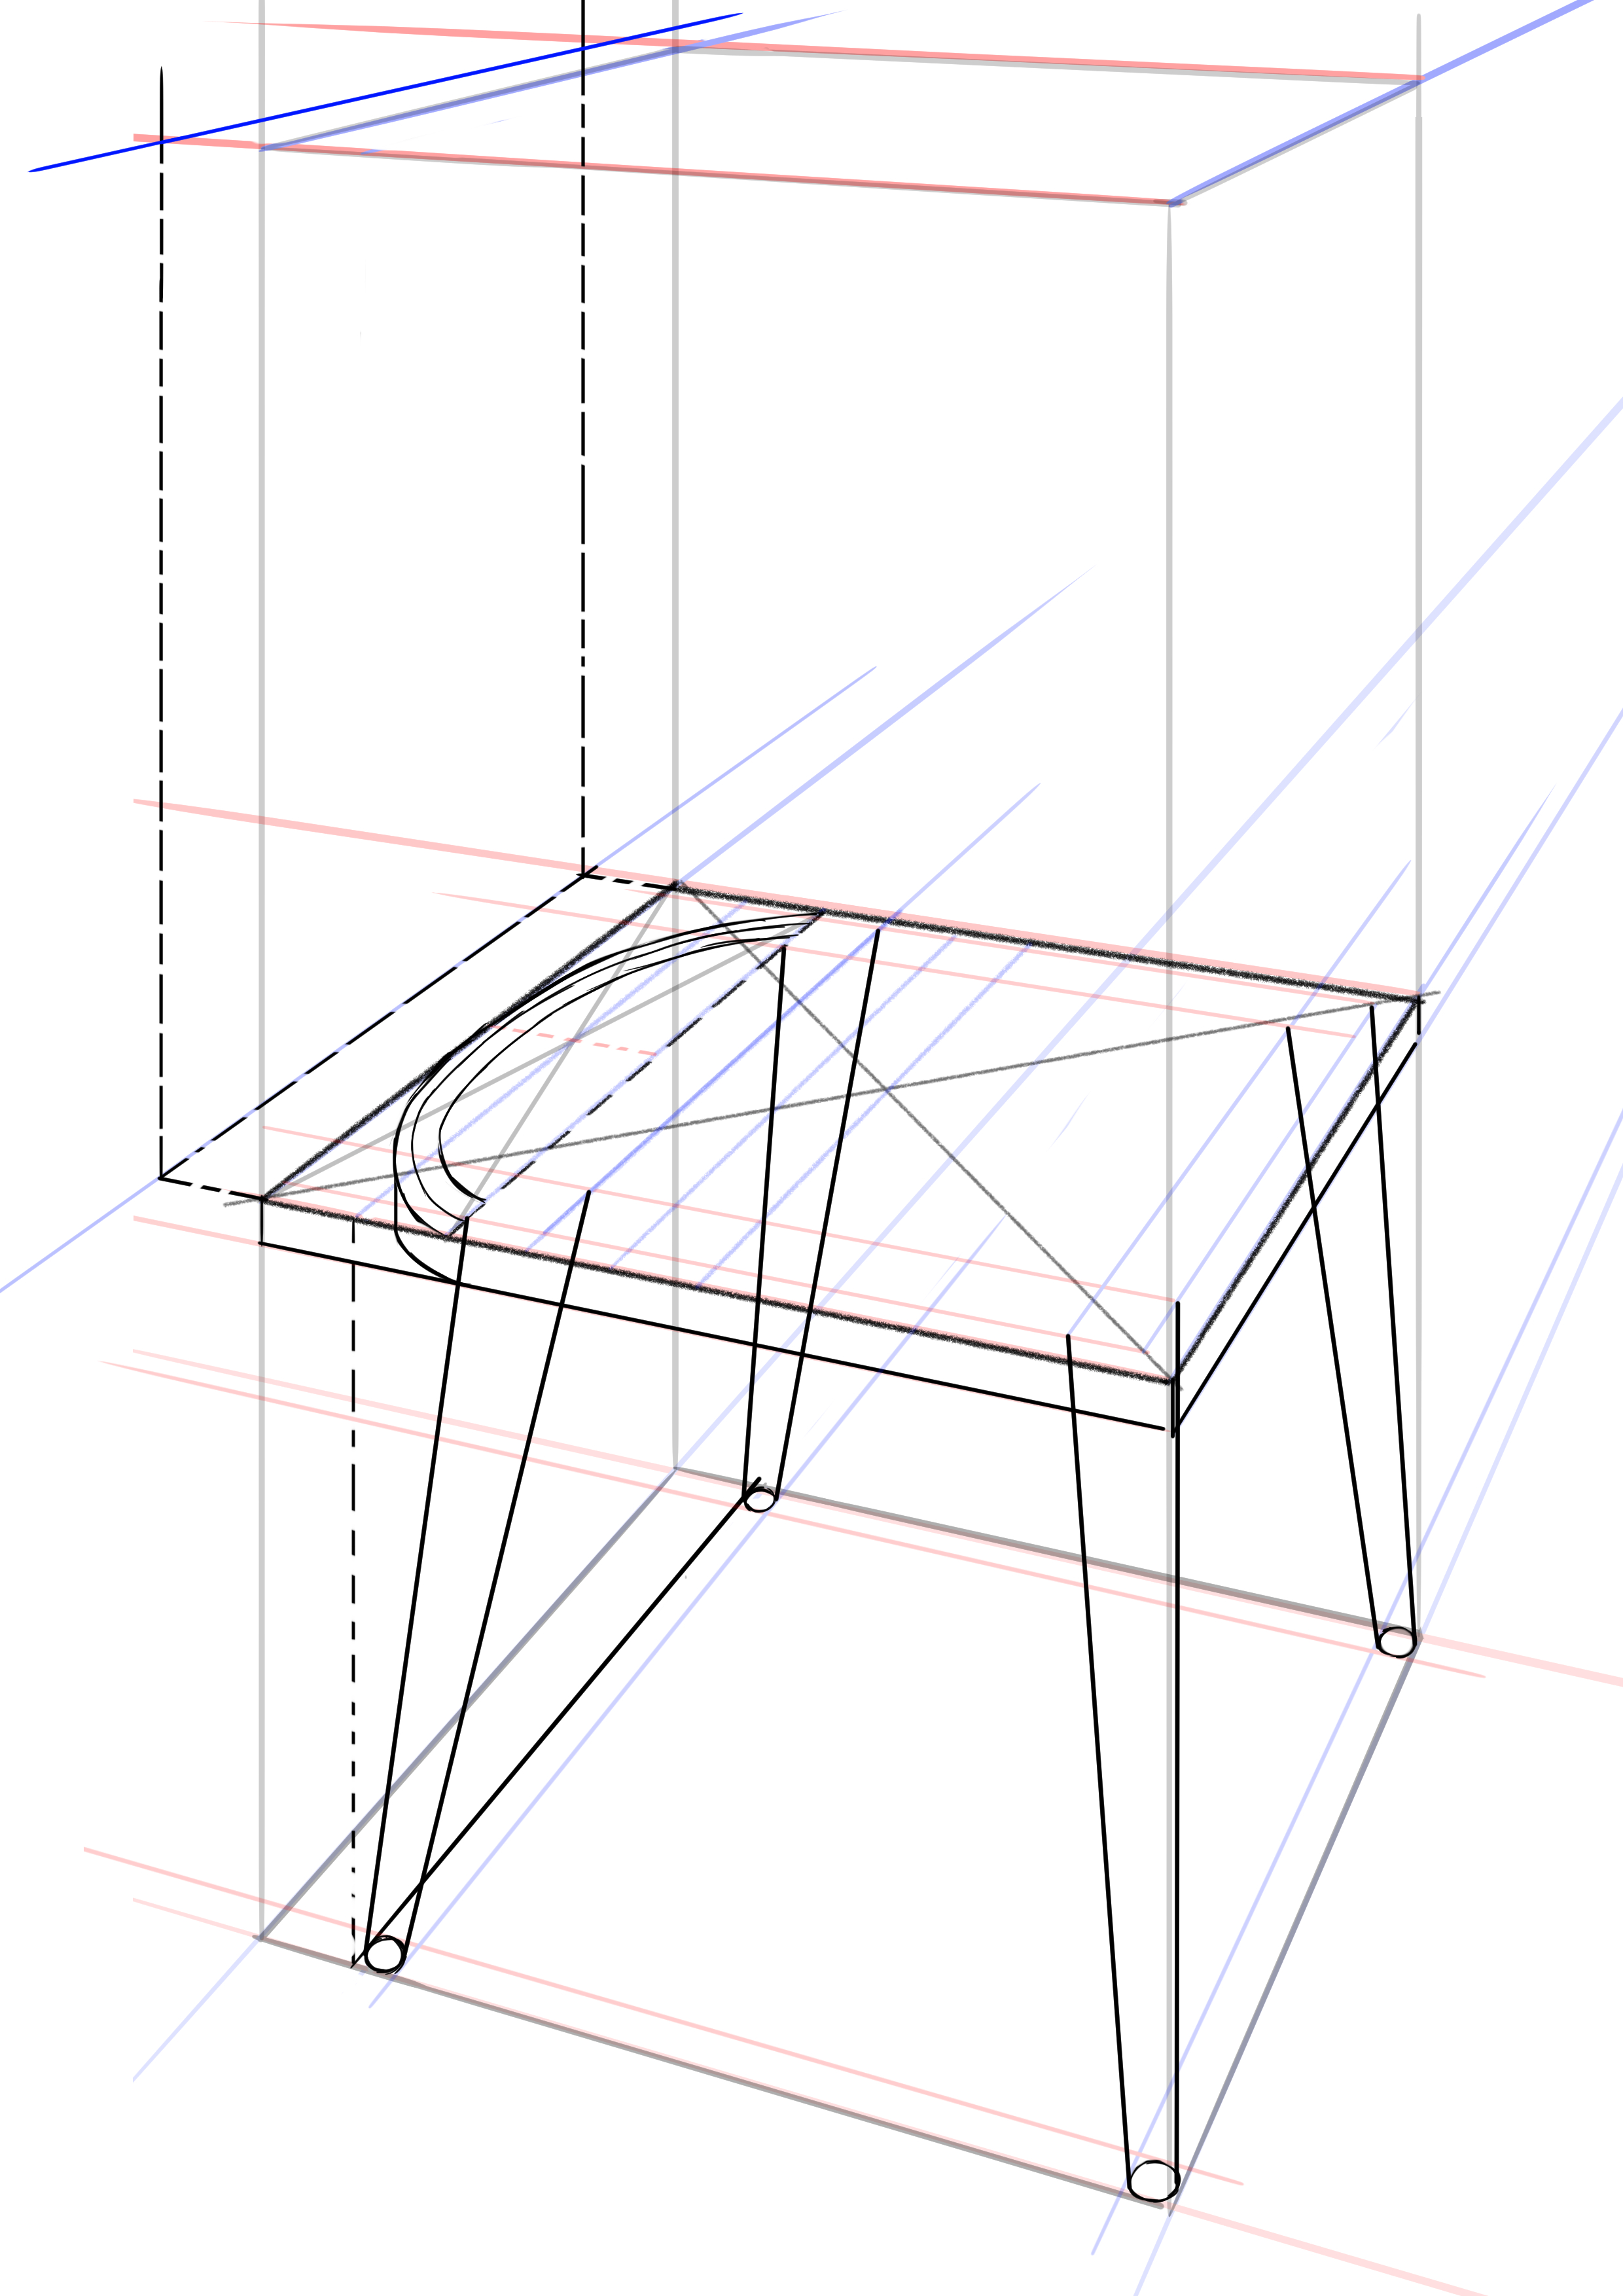
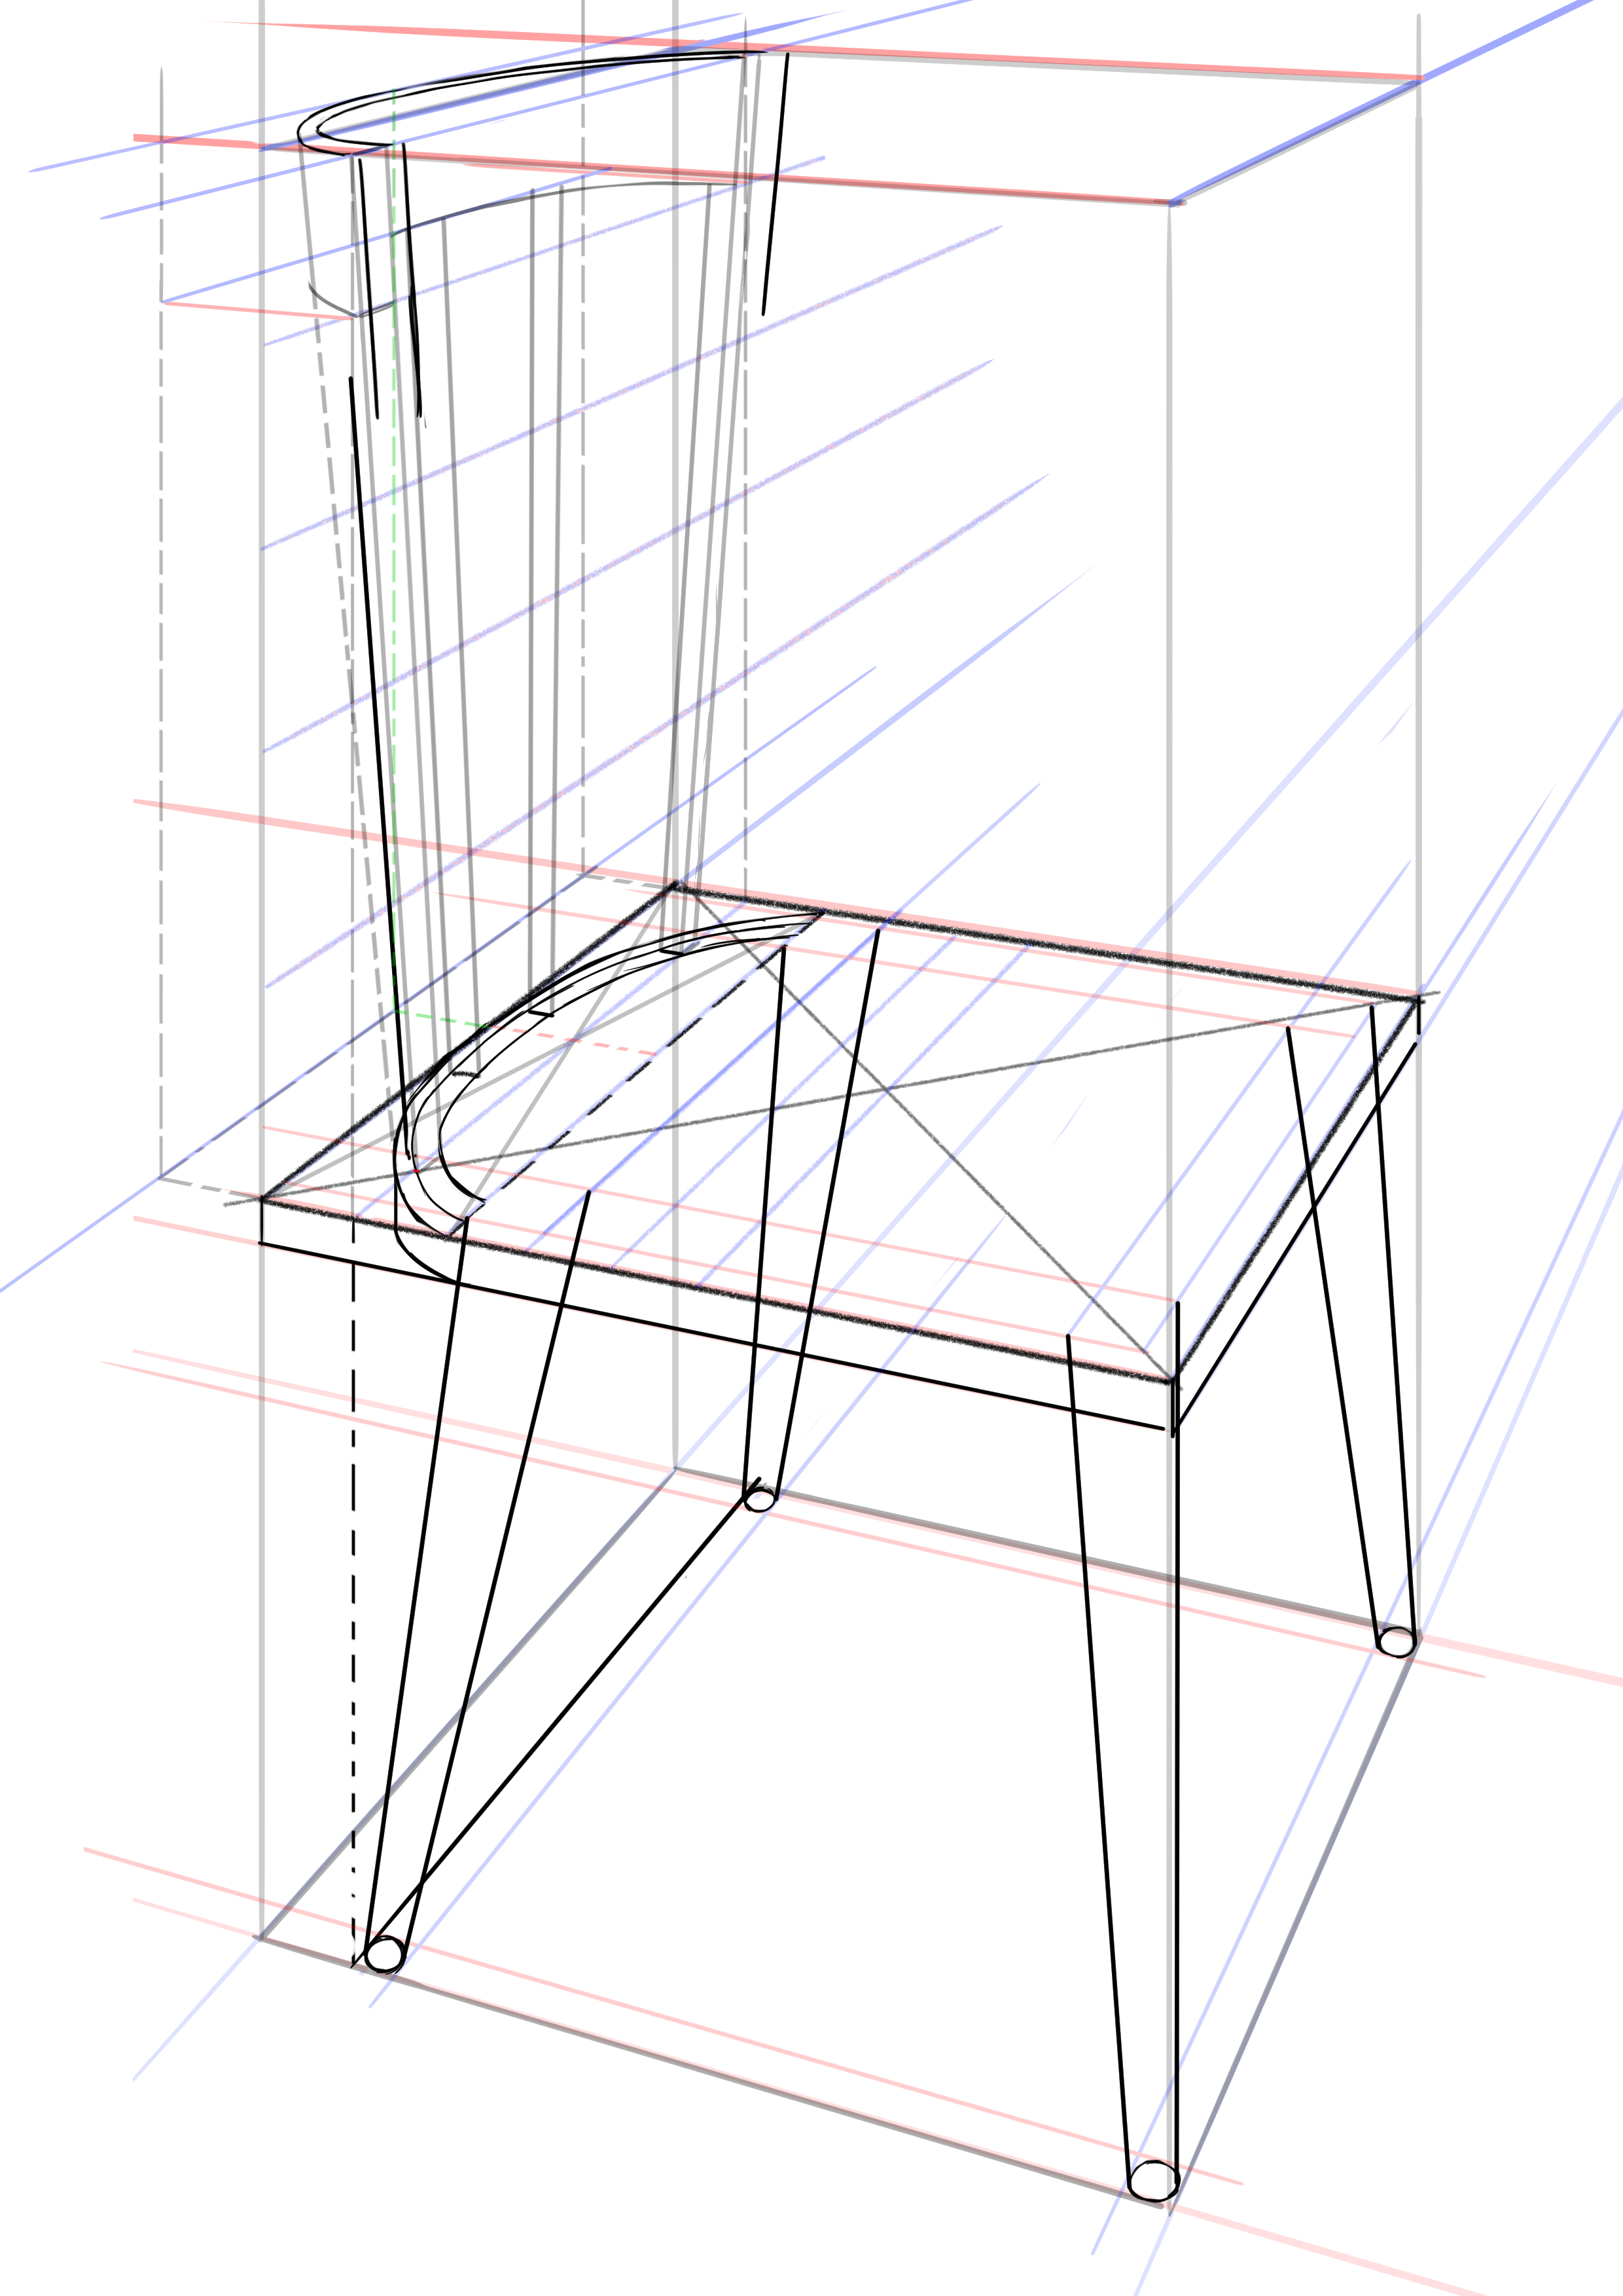
Start from the base, and pull the verticals of the middle line of the ellipse (basically shift two notches to the right), then pull another line up to get a rectangle that will be used to draw the half-ellipse of the backrest.
Using the same principle as above, trace the half ellipse. You can either trace the middle as we did earlier or do it by eye.
And of course, also add the thickness.
Then, in the vertical direction, divide the area into (approximately) 5 equal parts. This will help us to create a pattern. At 1/5th, draw lines towards the vanishing point A and trace a rectangle horizontally. This will be useful later.
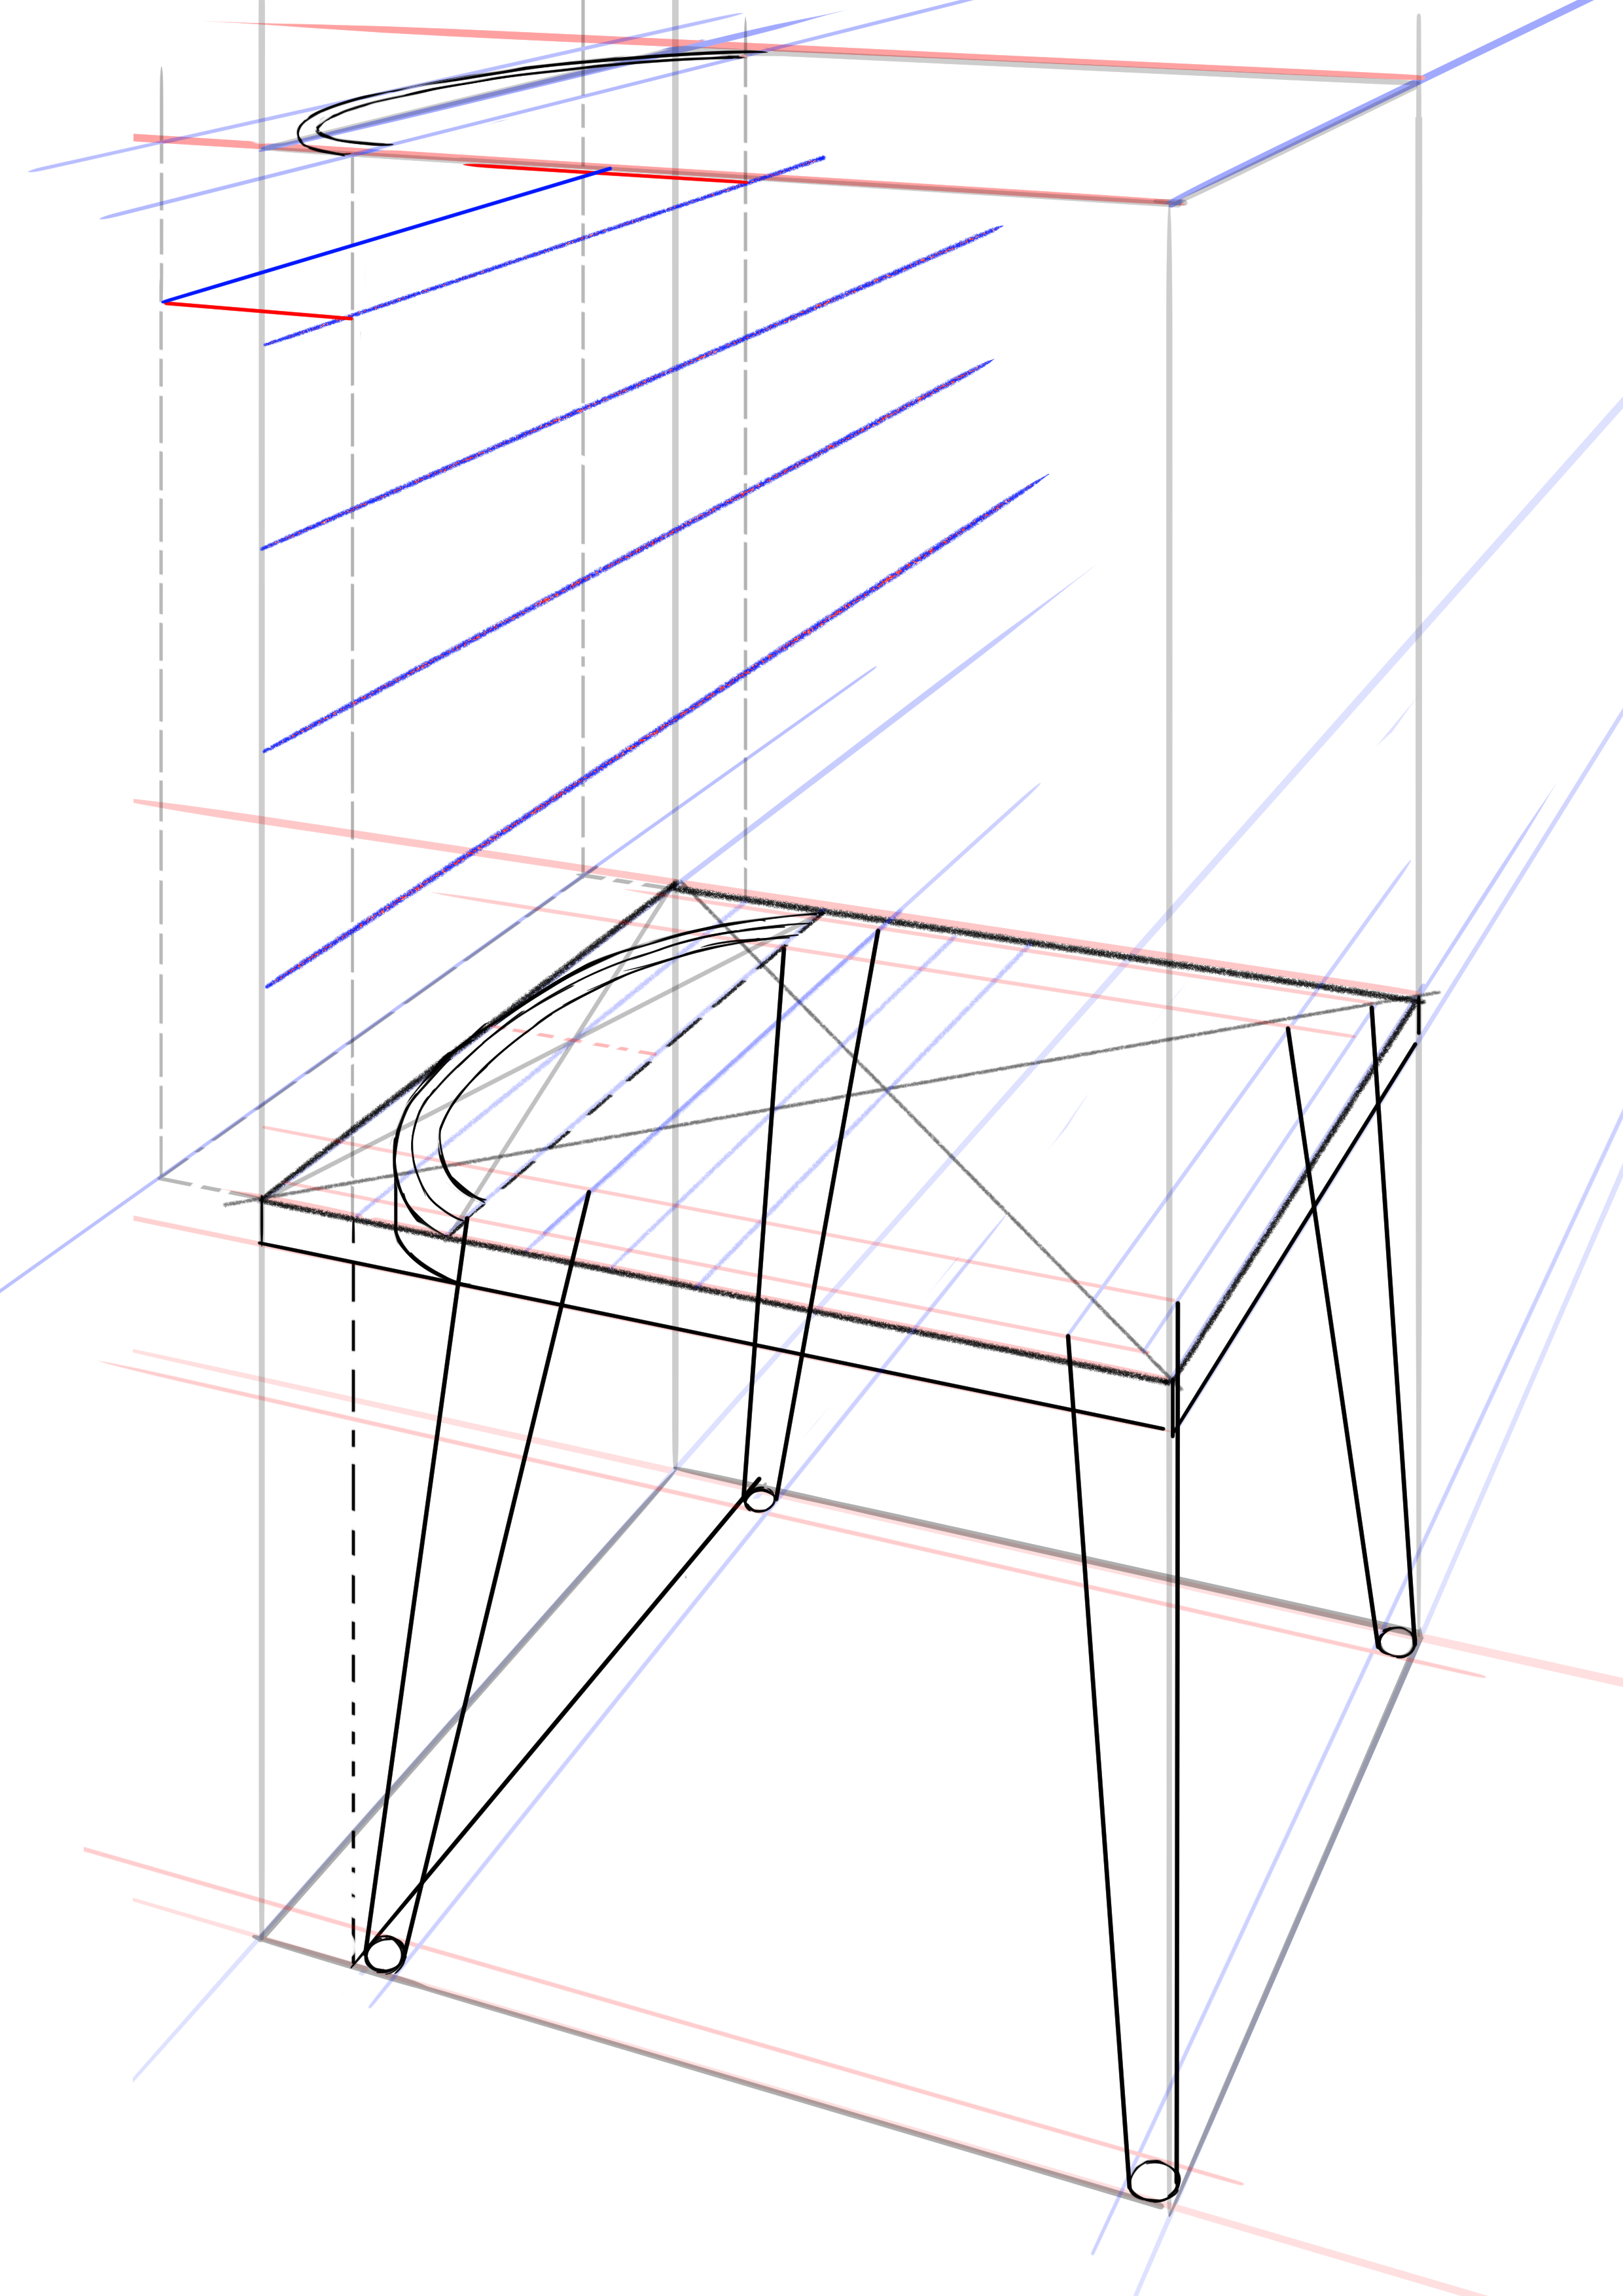
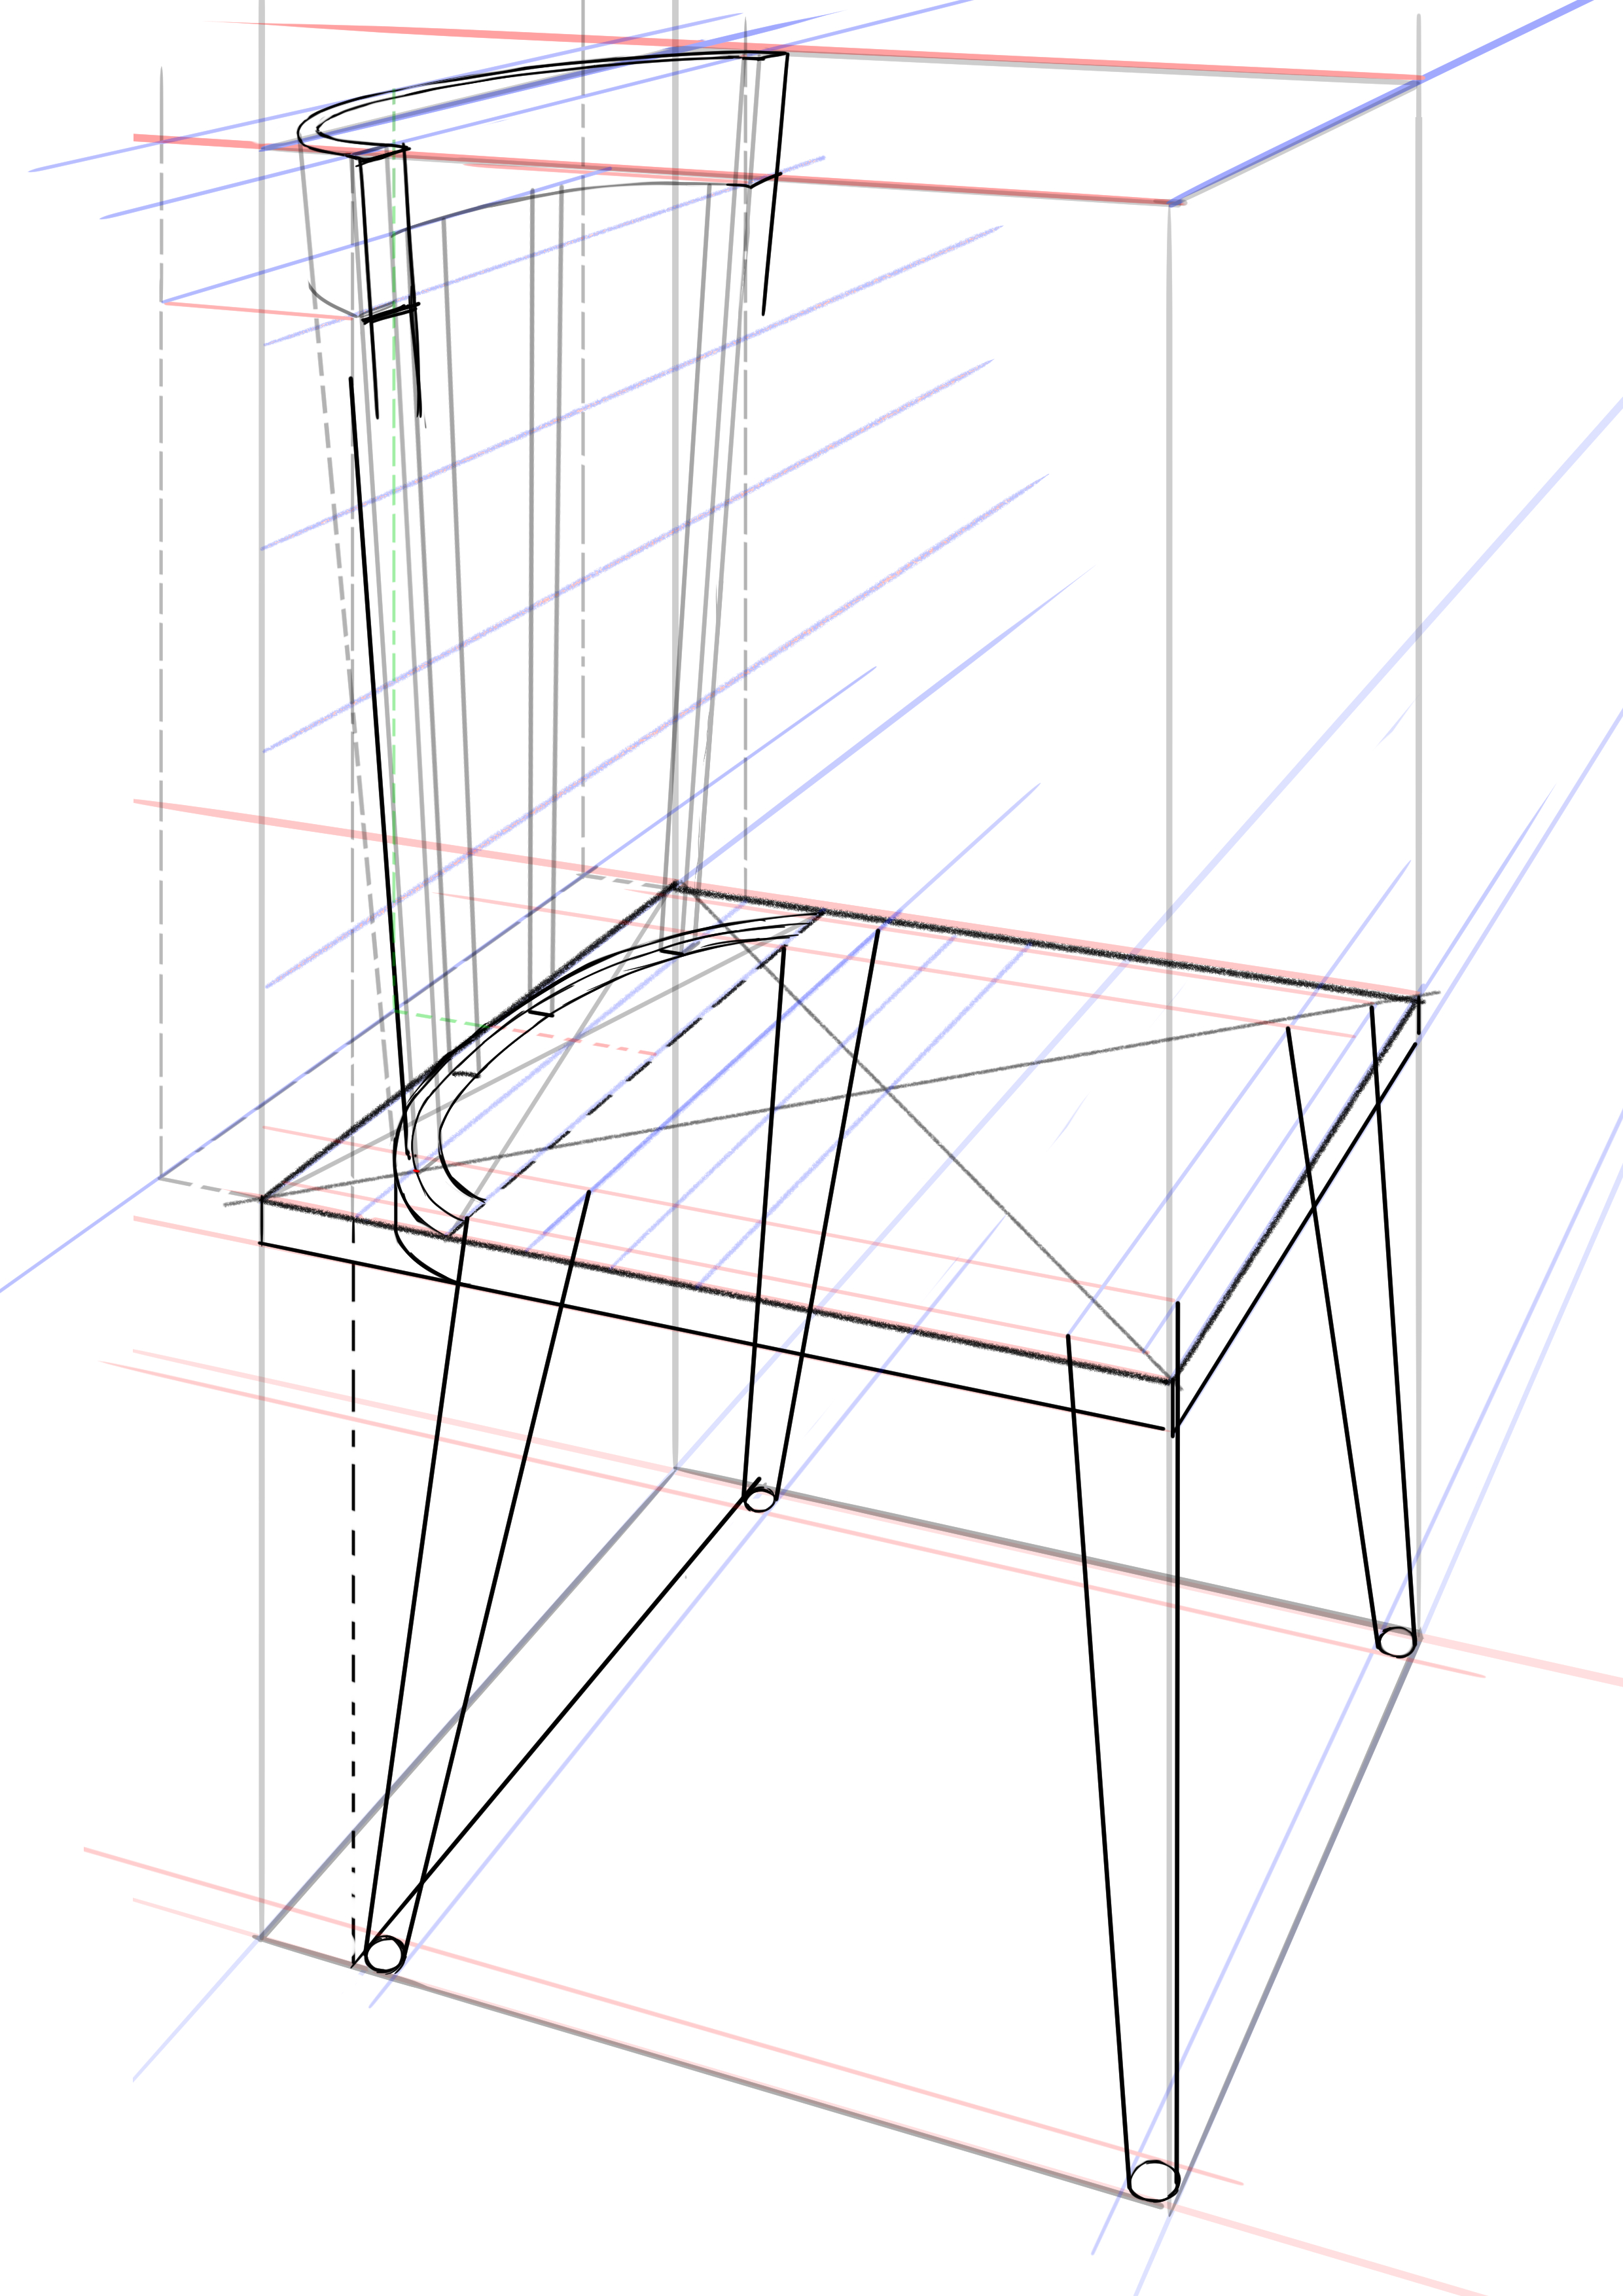
Now we will outline the general shape of the backrest. It flares out towards the top. Hence, it is narrower at its base. I will use the lines already drawn for this. I will choose the blue line that cuts my half ellipse and passes through the middle of the cross. This gives me two areas for the edges of my chair. I will also draw the line at the same angle for the back of the backrest because, beware, these are not verticals. The backrest is tilted, so the verticals are also tilted, even if it's only a slight tilt.
We will resume the 5 zones that we just outlined and draw a new half-ellipse.

Roughly place a kind of central strip on the back of the chair (to support the back), relying on the middle line on the seat of the chair to help you. Be careful, this strip is also flared. We know that the left side is parallel to the edge of the backrest we have already drawn, the same for the other side, so we place it approximately in the center.

Draw the thickness lines.

Trace the thickness, including on the outer bars of the backrest.
Extend the end of the seat (at the top).
Now you can add a small pattern.

PUTING THE DRAWING IN ORDER
Now let's clean all this up!
Add some hatching to add style and texture.

SUMMARY:
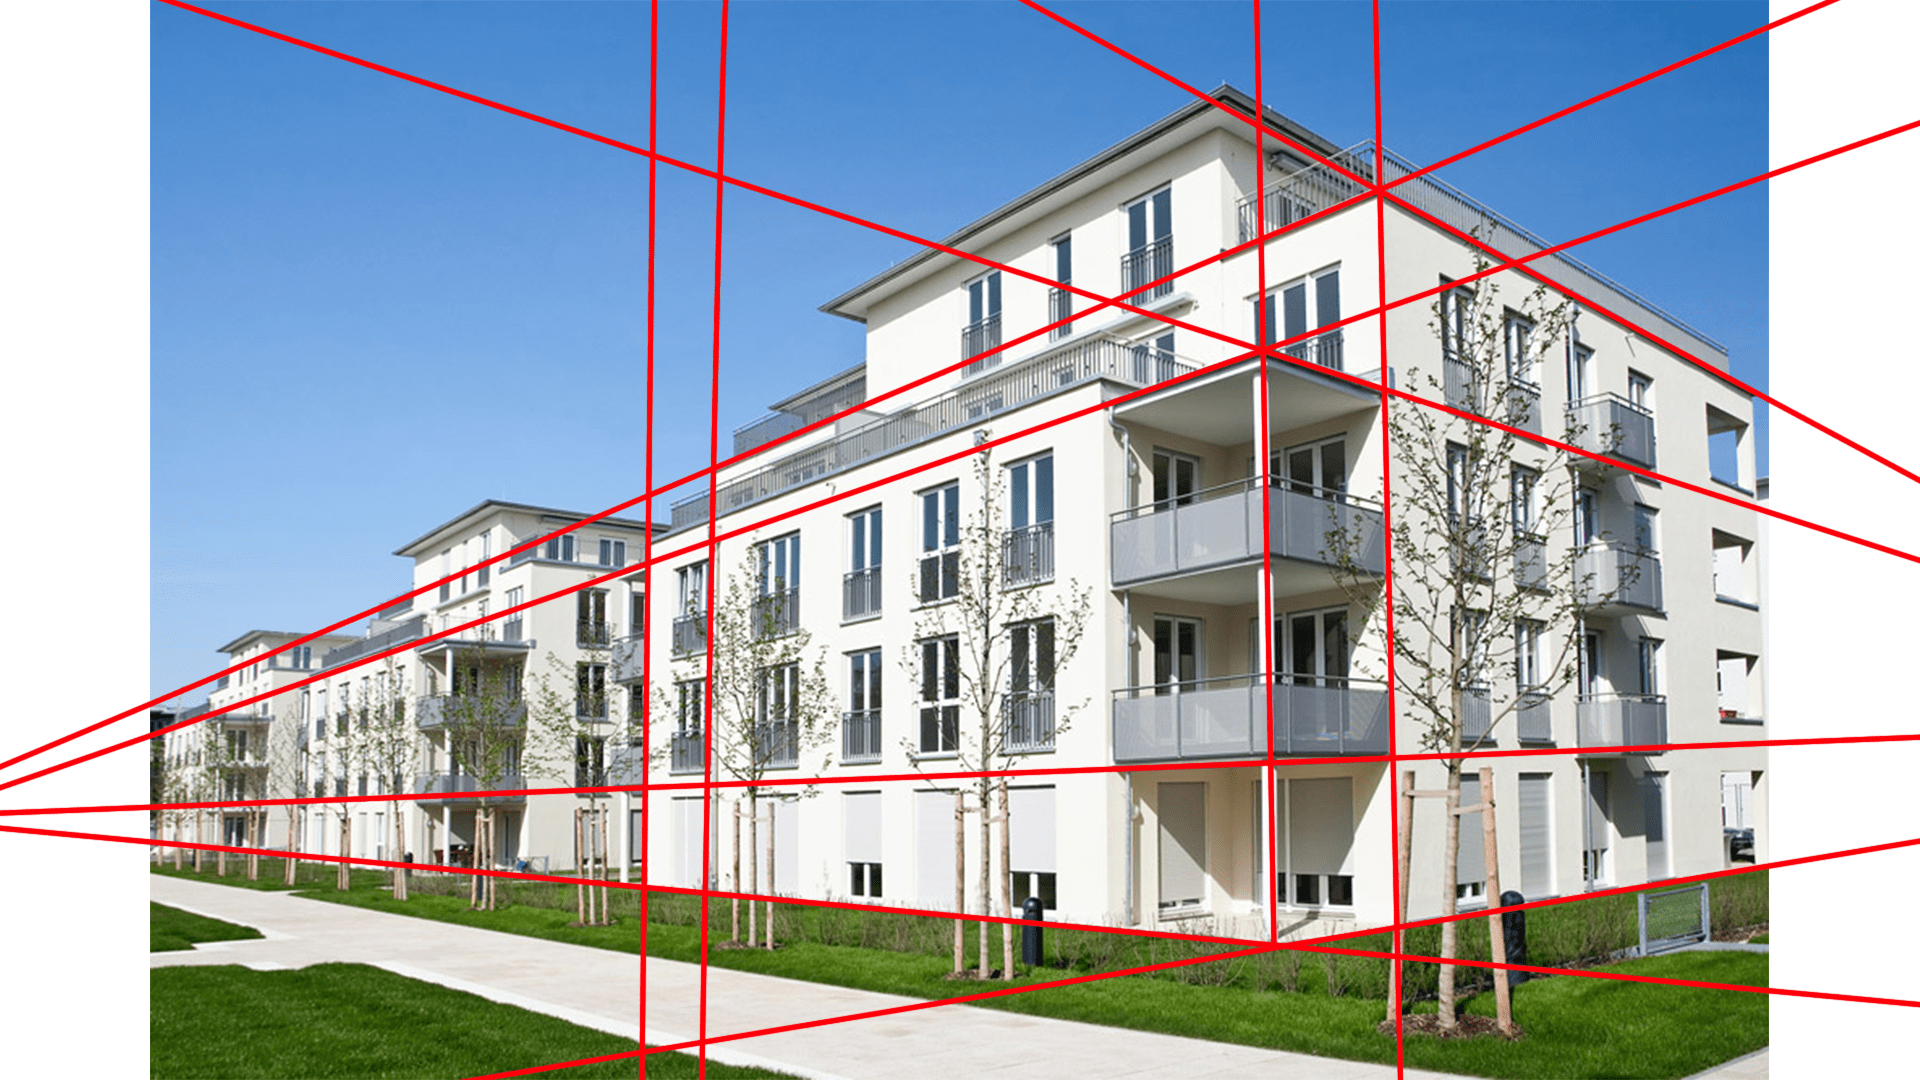
- Clearly observe the specifics of your chosen object and how it is designed.
- Use scrap paper to expand your horizon line, it's convenient!
- Consistency is extremely important in manufactured objects.
Discussion
2 comments