Drawing with a Grid
There are various ways to draw with accurate proportions, but one of the most highly recommended and used is the grid method.
WHAT IS THE GRID TECHNIQUE?
It is simply a matter of creating a grid on both the model and the drawing sheet in order to be able to transfer the most important points of the subject and draw them to scale with precise and accurate proportions.
Most of the time, we print our model on a sheet and draw the grid directly on it, or on a piece of tracing paper to avoid damaging the photo, then we directly transfer the points onto our drawing sheet.
But how do we use this technique when we want to draw from reality?
Today, I'll show you two uses of the grid:
In the first part, we will draw a homemade grid...
There are many tools with a ready-made grid or for transferring the pattern onto a sheet, but they are often quite expensive, so I will show you a cost-effective and easy solution!
Thanks to your creation, you will be able to faithfully reproduce real life objects.
In the second part, I will show you how to create a grid on a printed model as well as how to use it.
MAKING A GRID FOR DRAWING
It's a technique that my perspective teacher taught me.
The grid size is up to you, you can make several to have different formats or just make one. I made mine A4, but you could make it smaller or larger if you like.
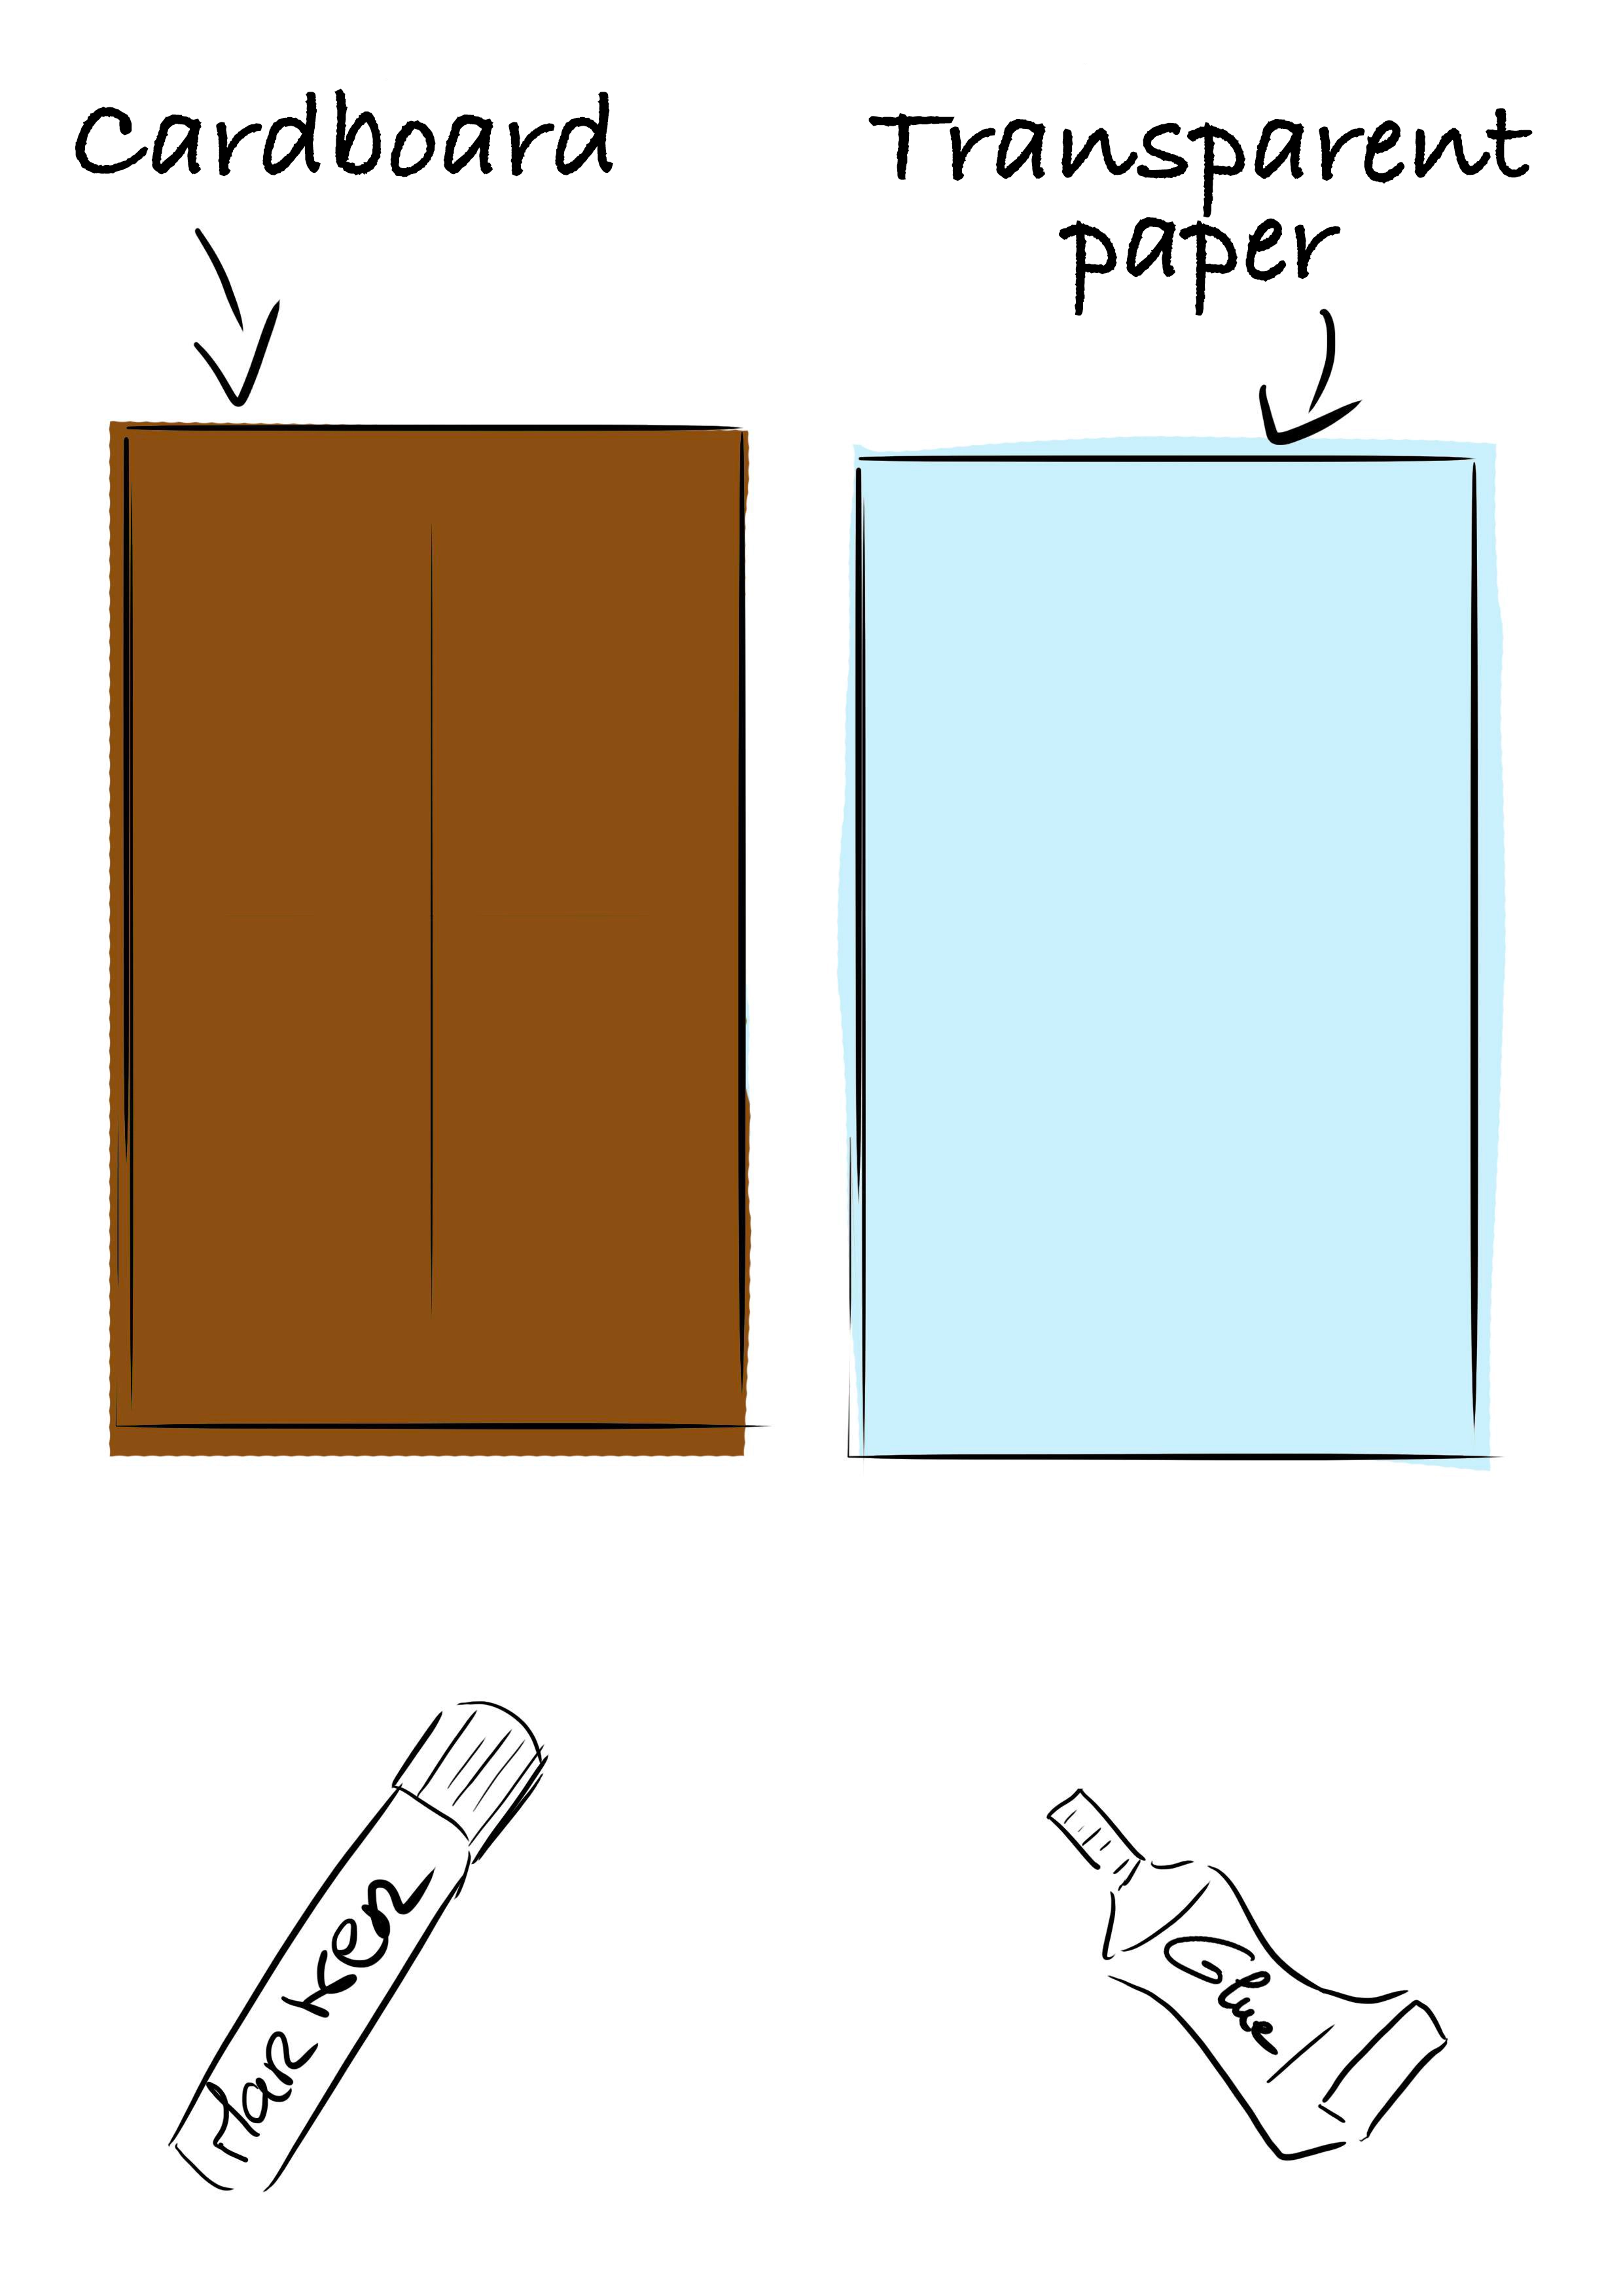
To create your own grid, you will need stiff cardboard, rigid transparent paper (you can find this in stationery or art stores), a fine marker, and strong glue (something that holds well).
The cardboard sheet must be larger than the transparent sheet.
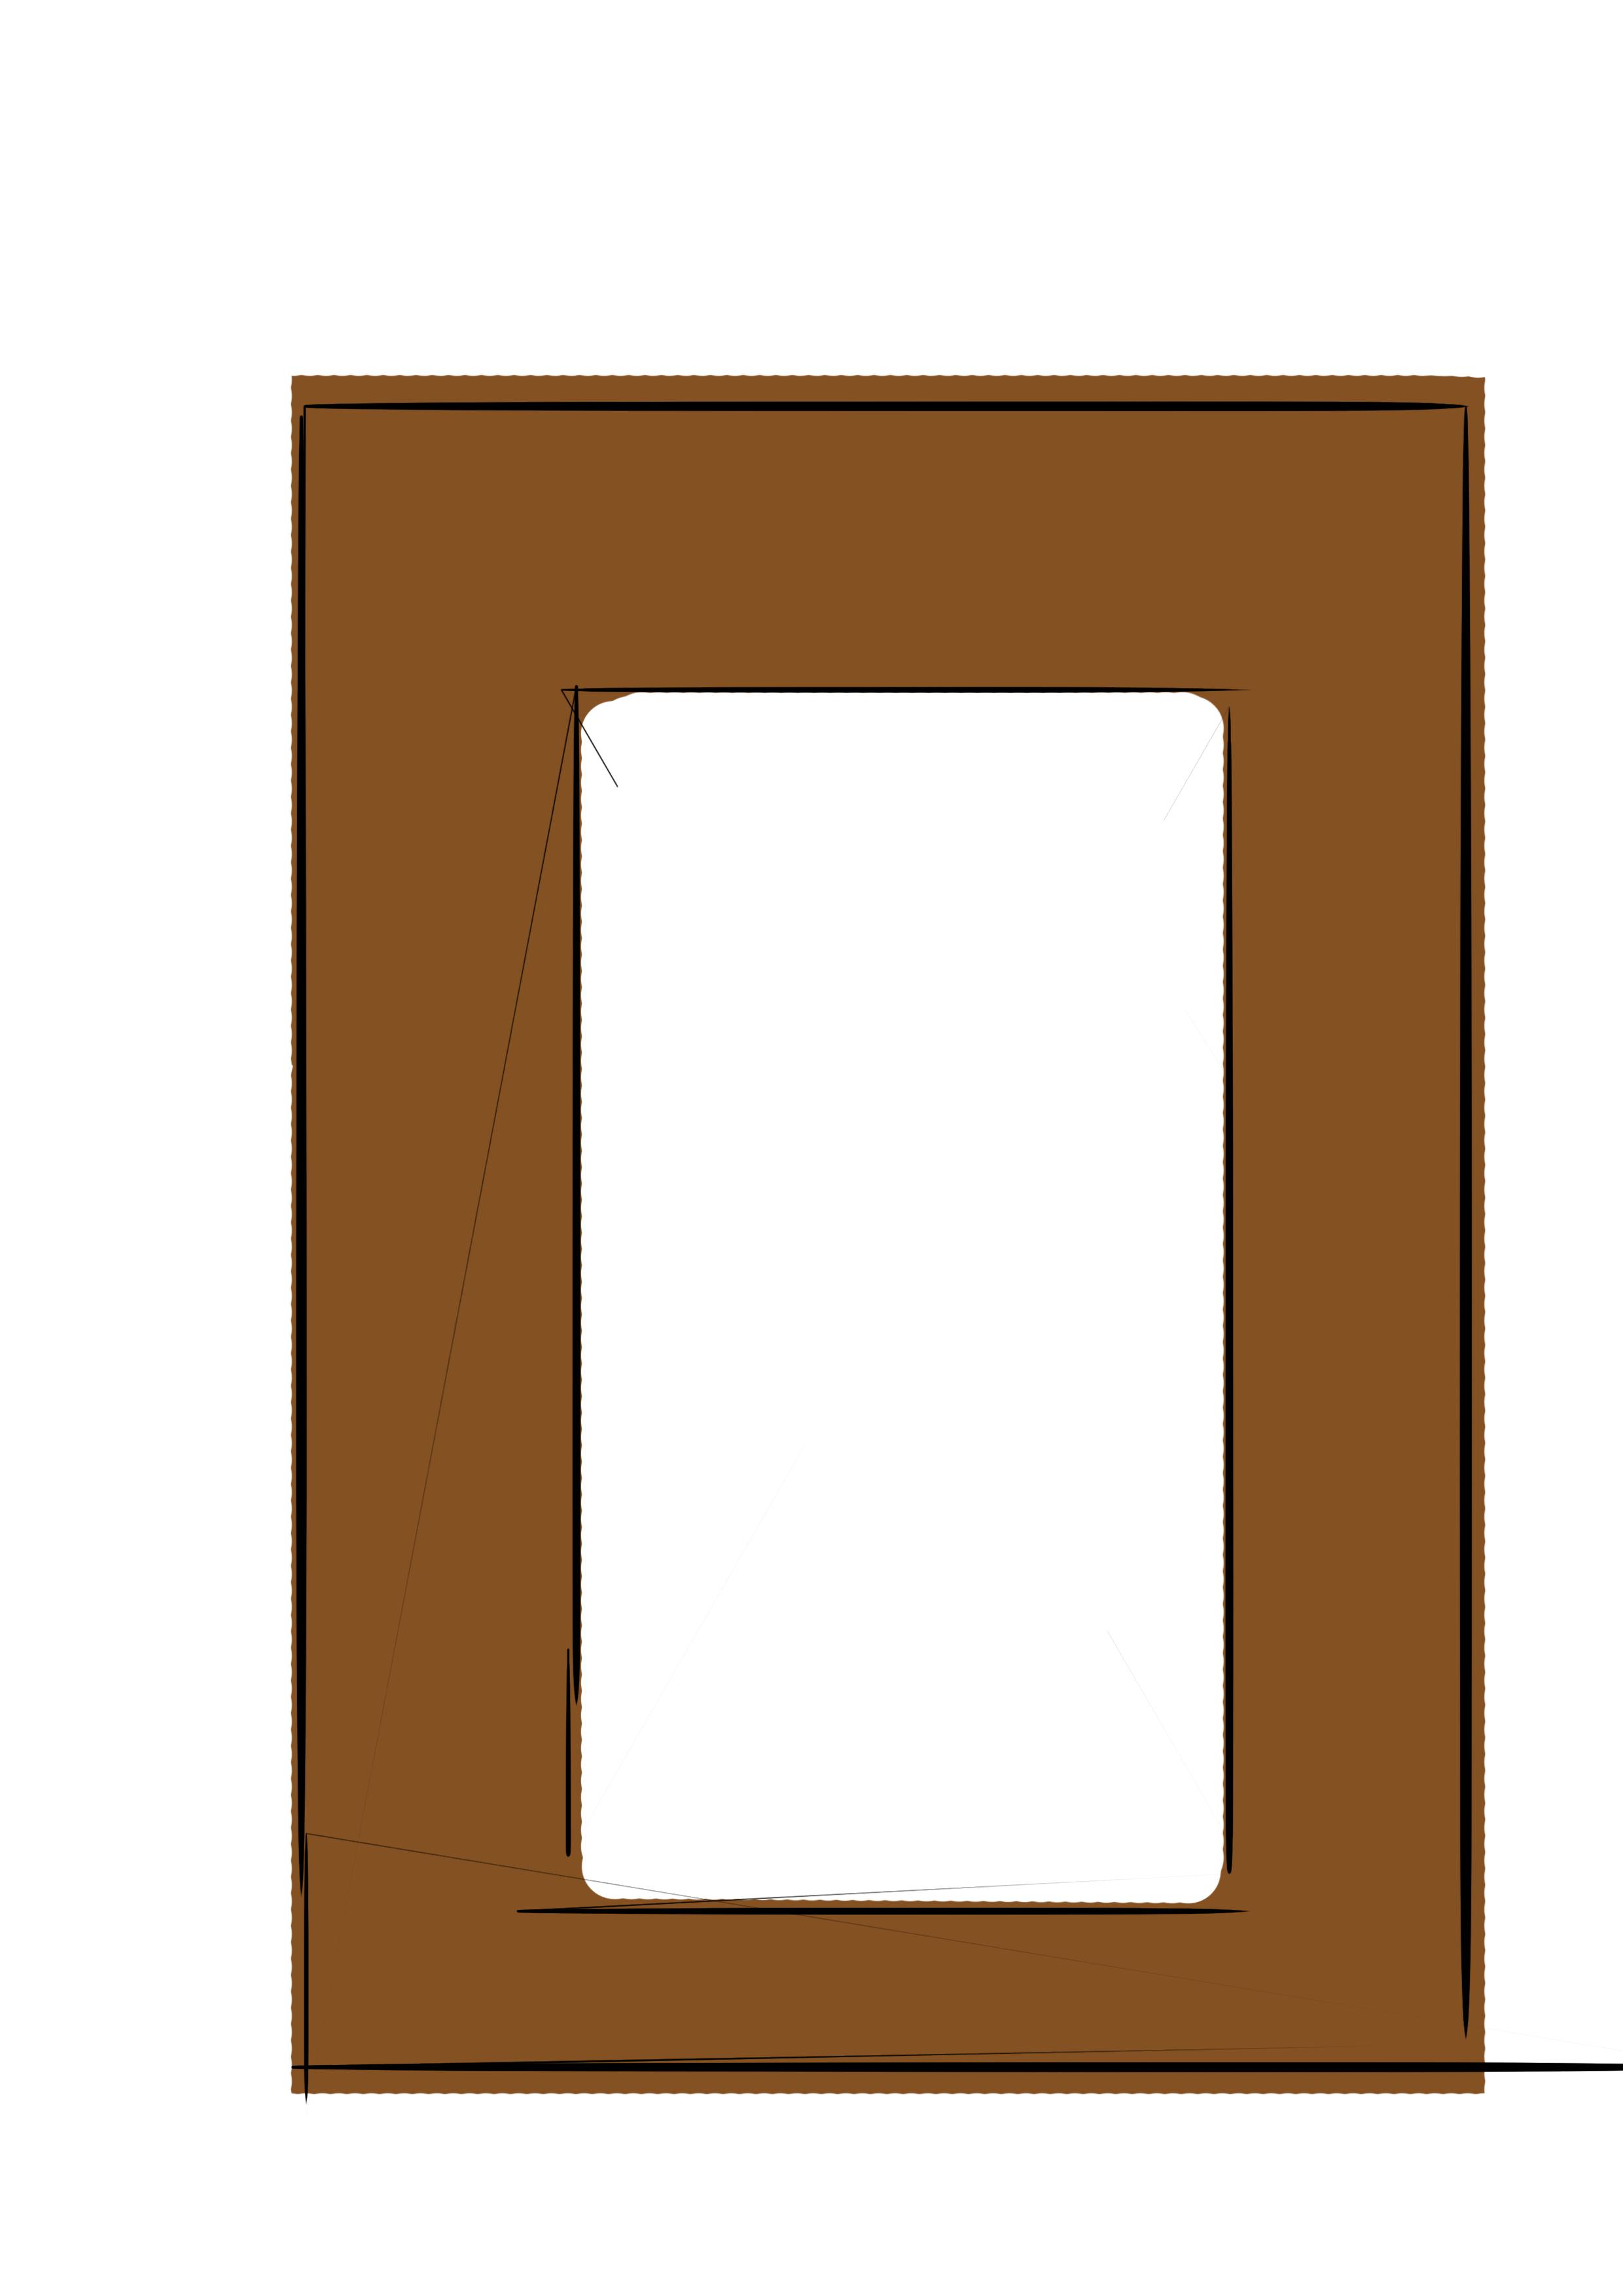
Take your cardboard and cut out the inside to create a frame.
Cut it to the size that suits you, but make sure that the hole is slightly smaller than the transparent sheet.

Next, glue the transparent sheet onto your cardboard. You will end up with a frame with a transparent section in the middle.
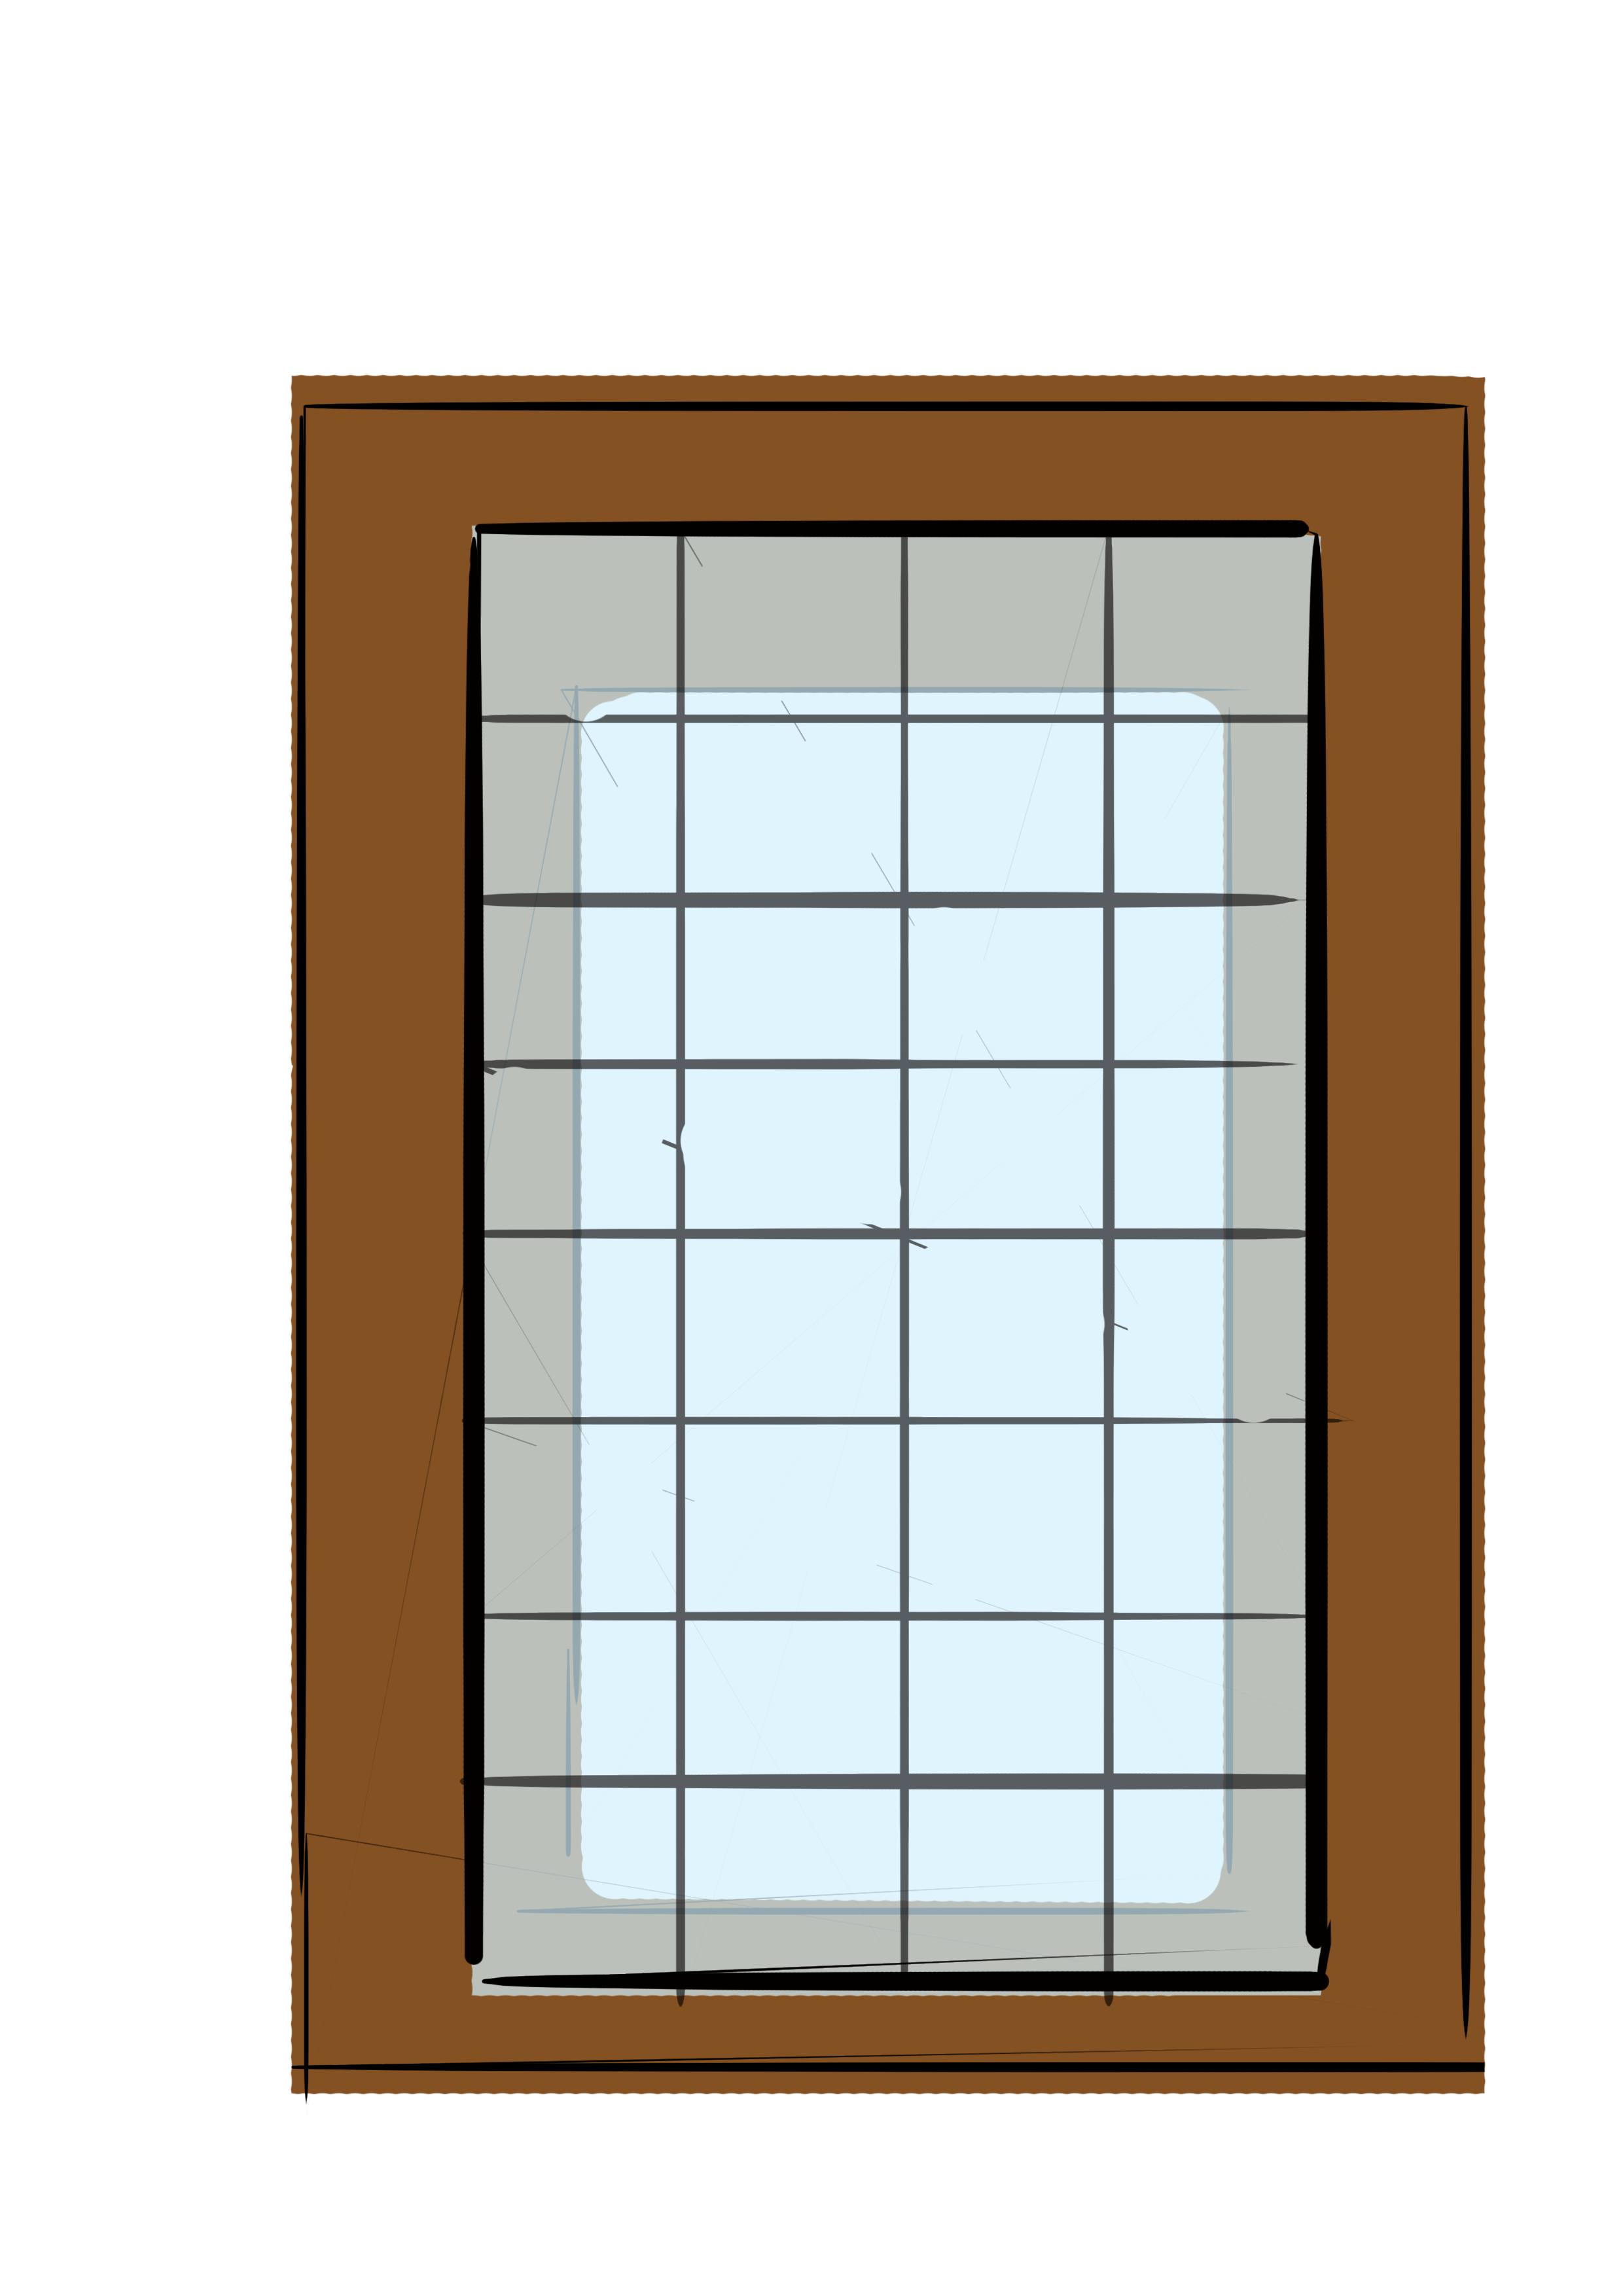
Draw your preferred size of grid on the transparent sheet. The tighter you make the grid, the more precision you will achieve.

Your grid is finally ready!
Draw a grid on your drawing paper identical to your frame.
Stand in front of your model and hold out your hand with the frame in front of you.
Draw on your frame with a Veleda marker. Then you just have to transfer everything onto your drawing sheet!
Be careful not to choose a model that is too complicated and takes a long time to draw with a marker, because if you shake or move while you are drawing it, you will have to start over... ;) Speaking of something not too complicated, there is an article available on the Dessindigo blog about 5 Easy Drawings to Make, take a look if you haven't already! :D
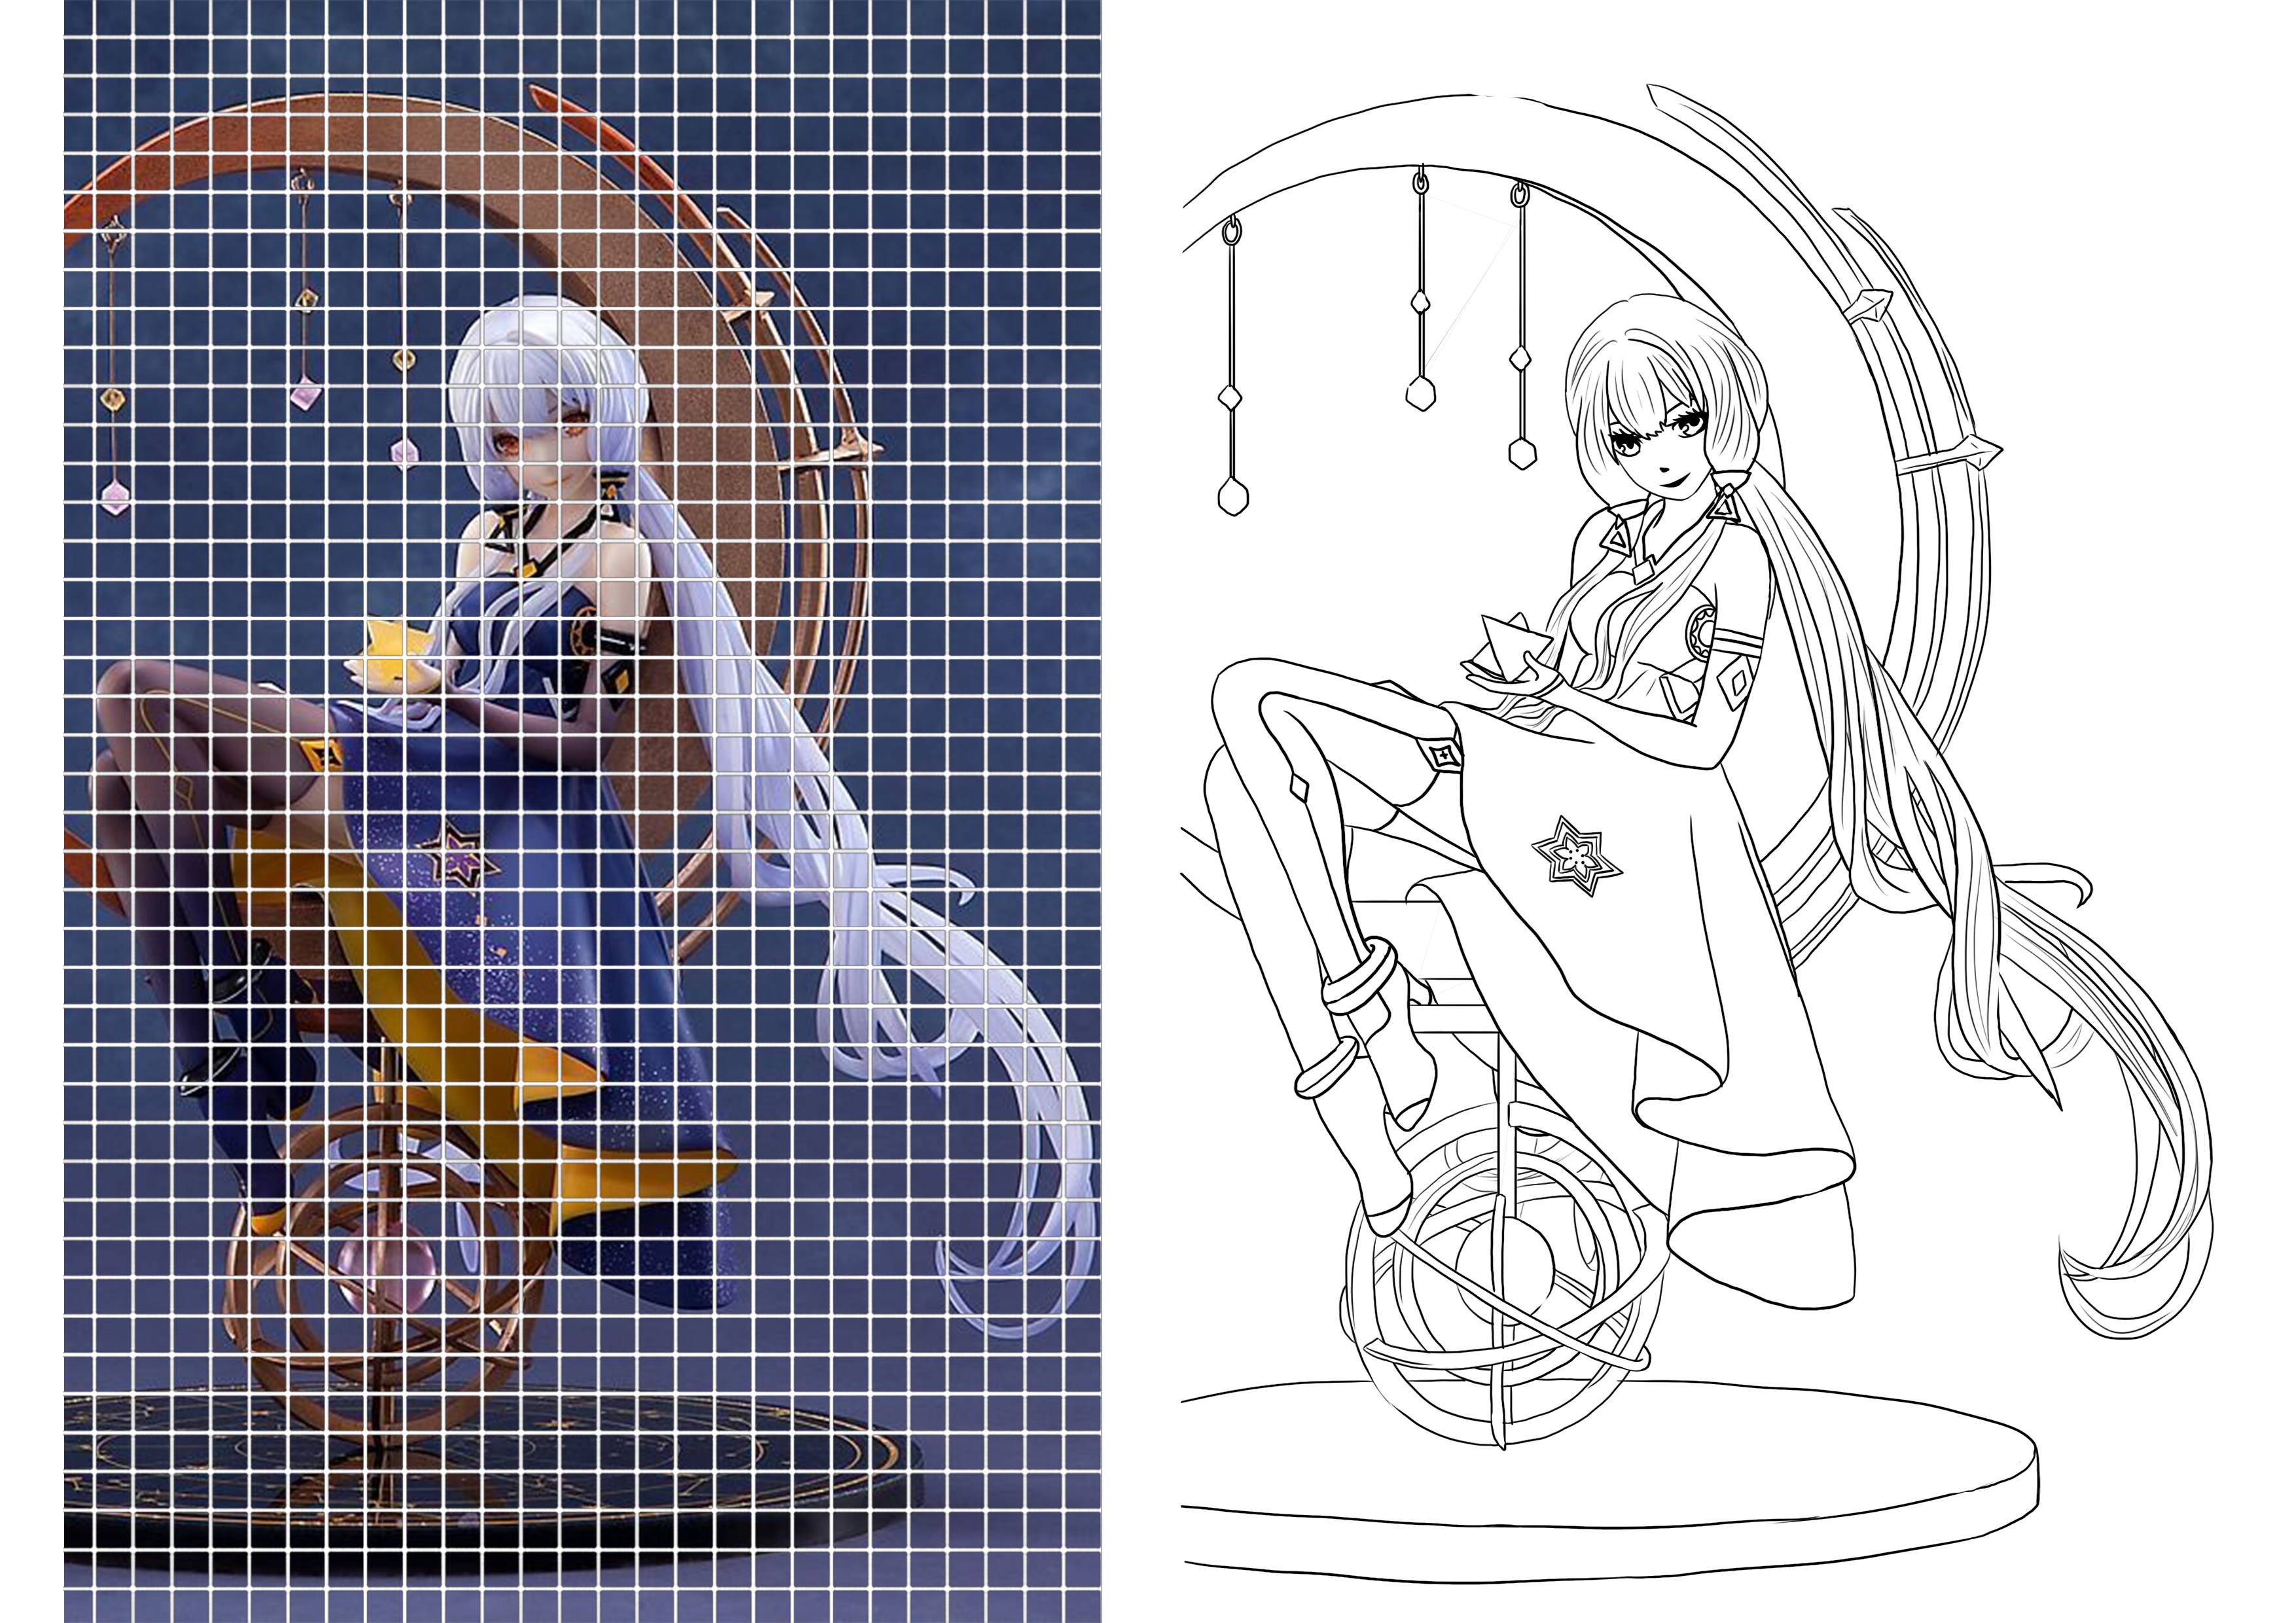
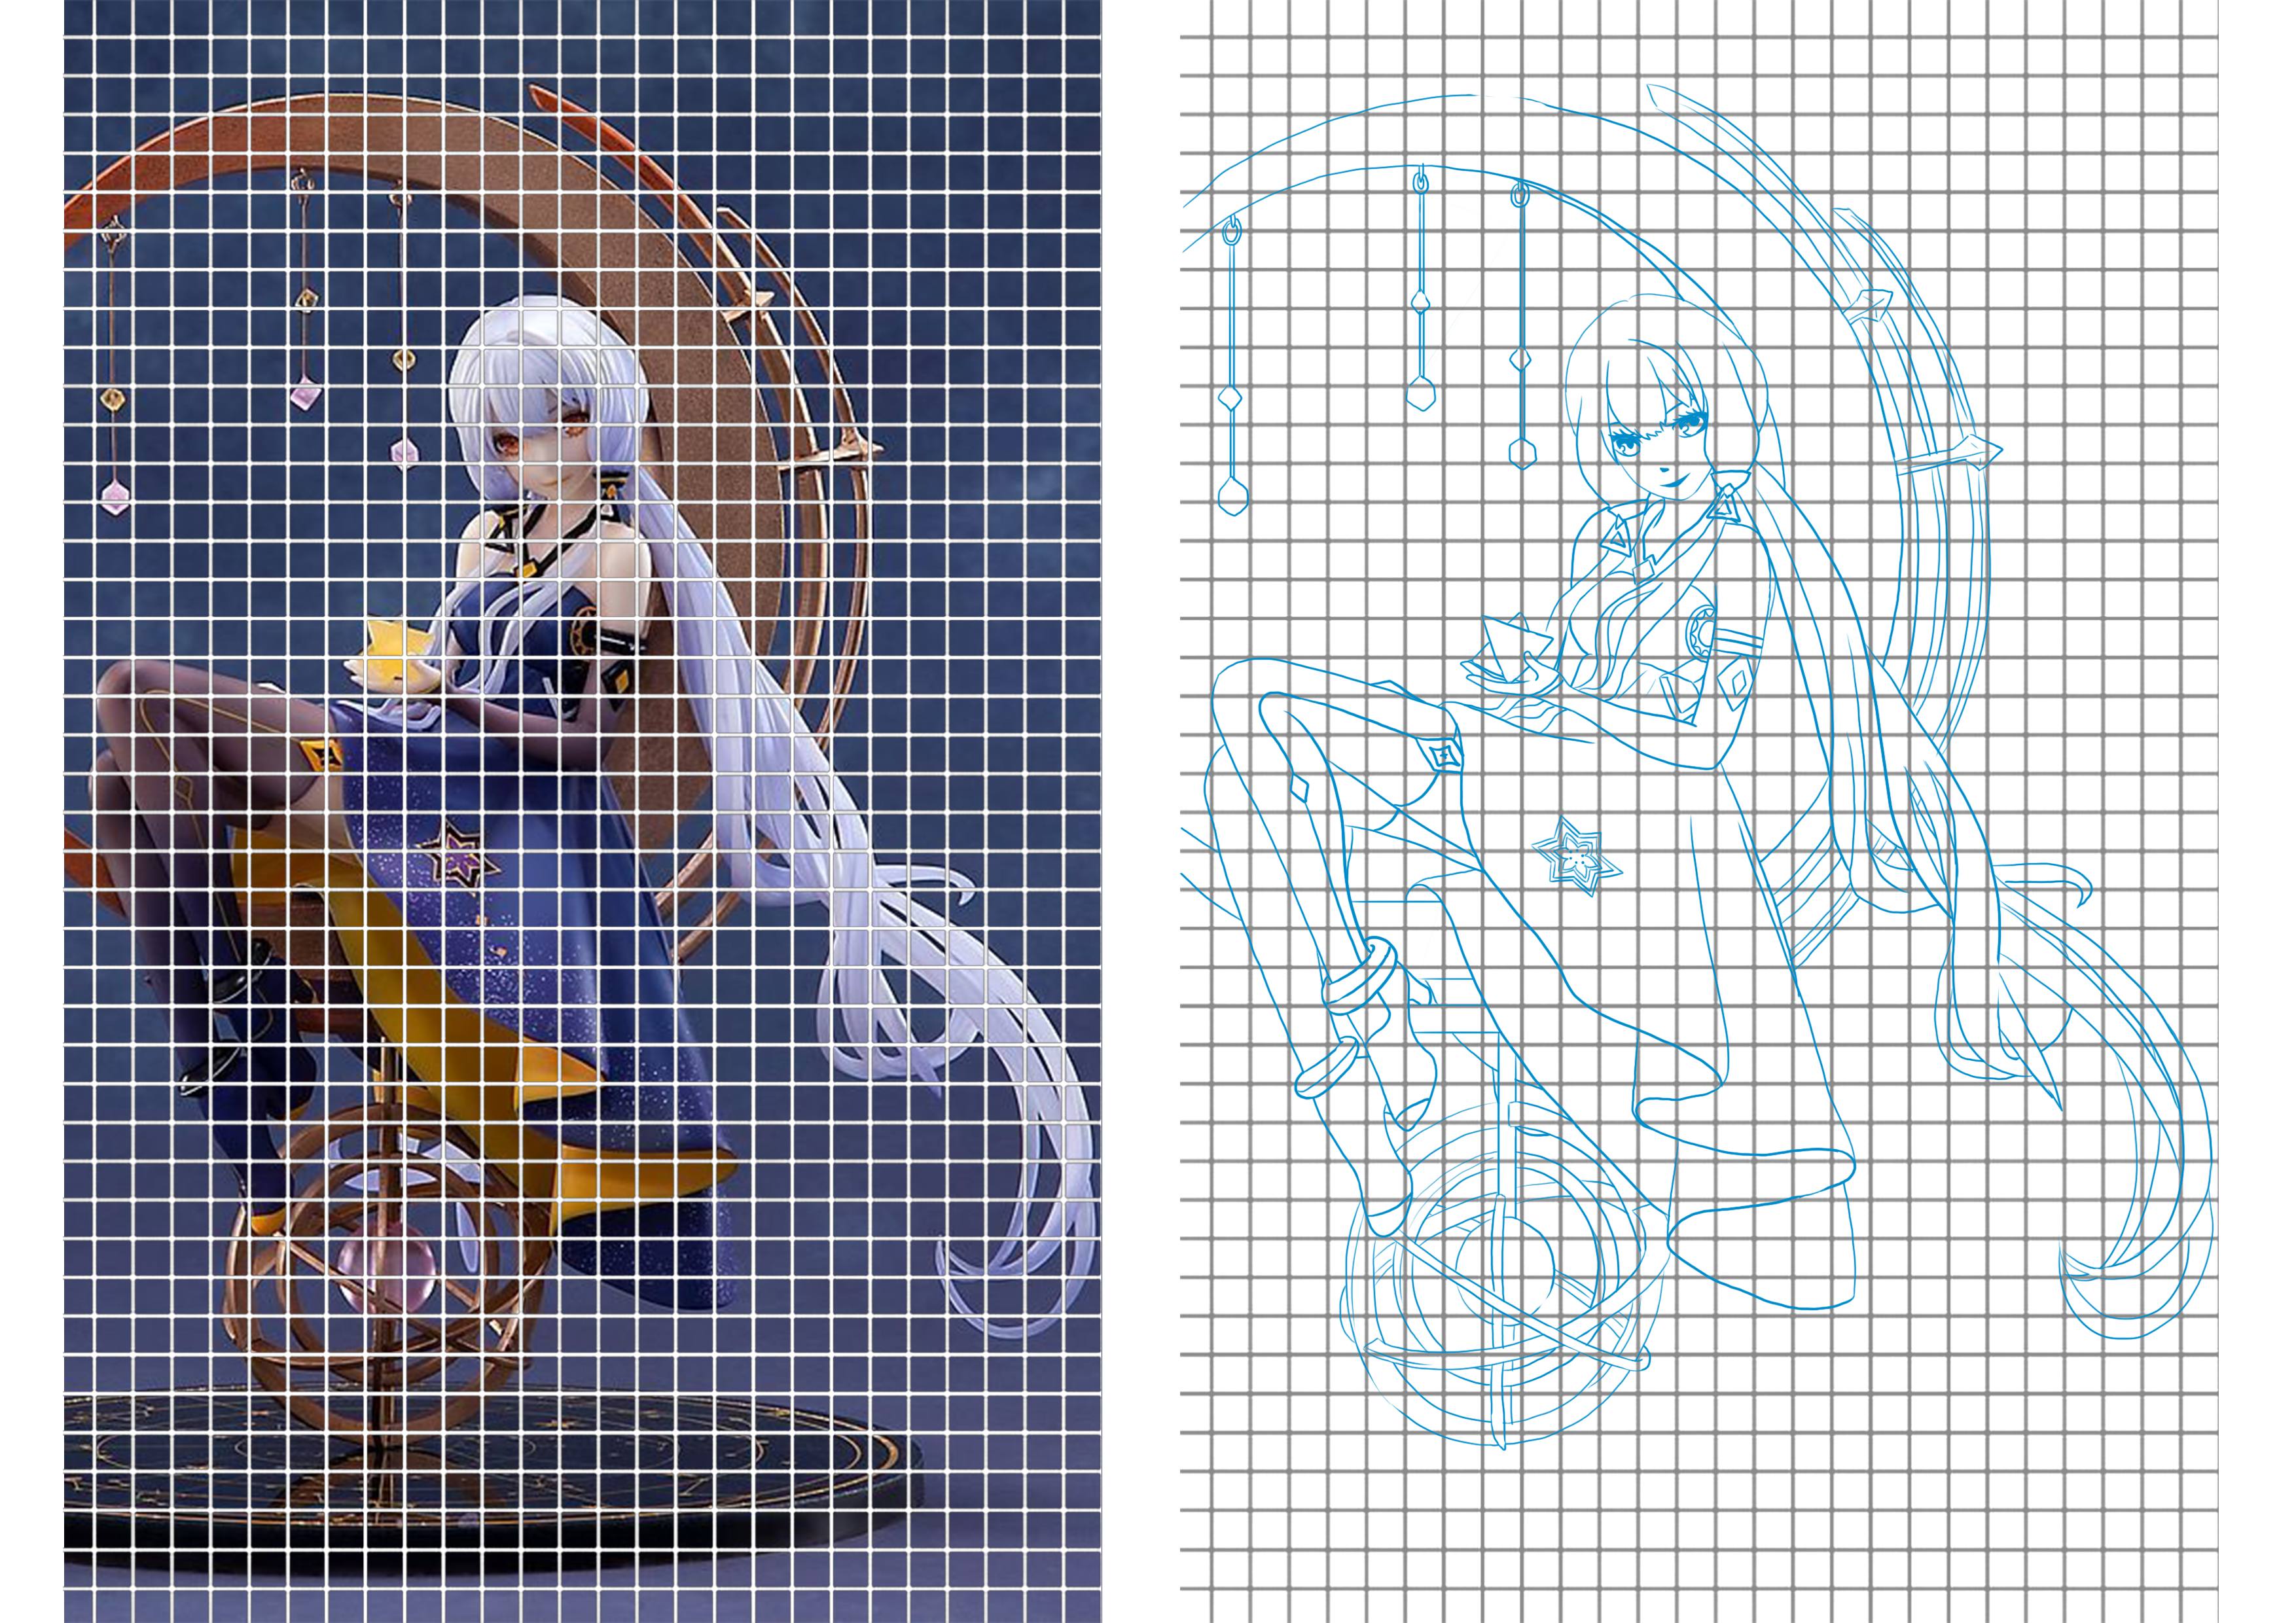
USING THE GRID TECHNIQUE TO DRAW A PRINTED MODEL
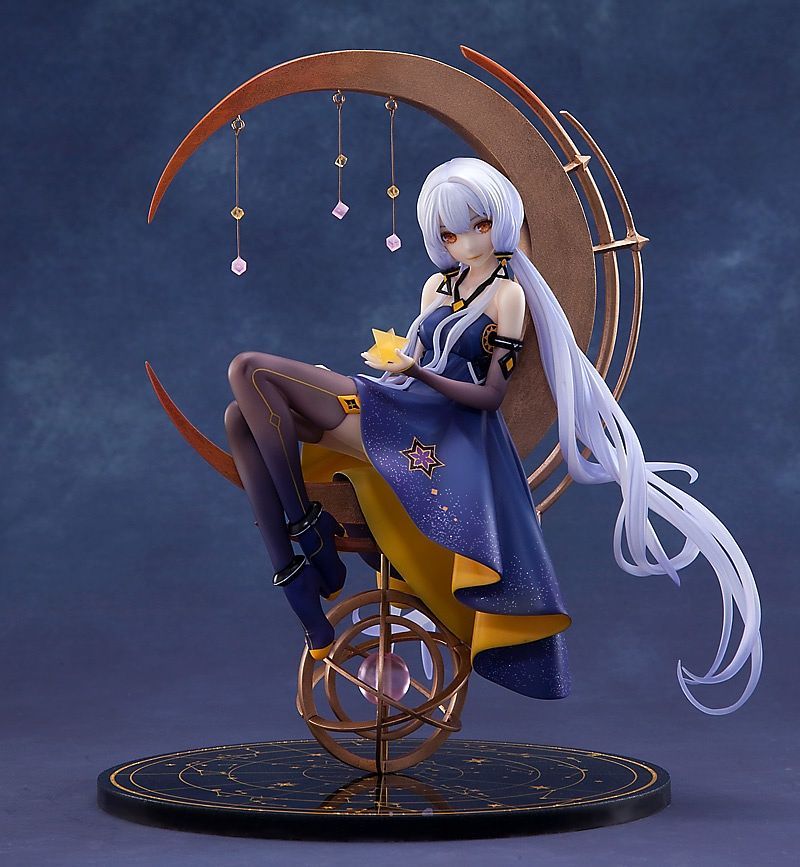
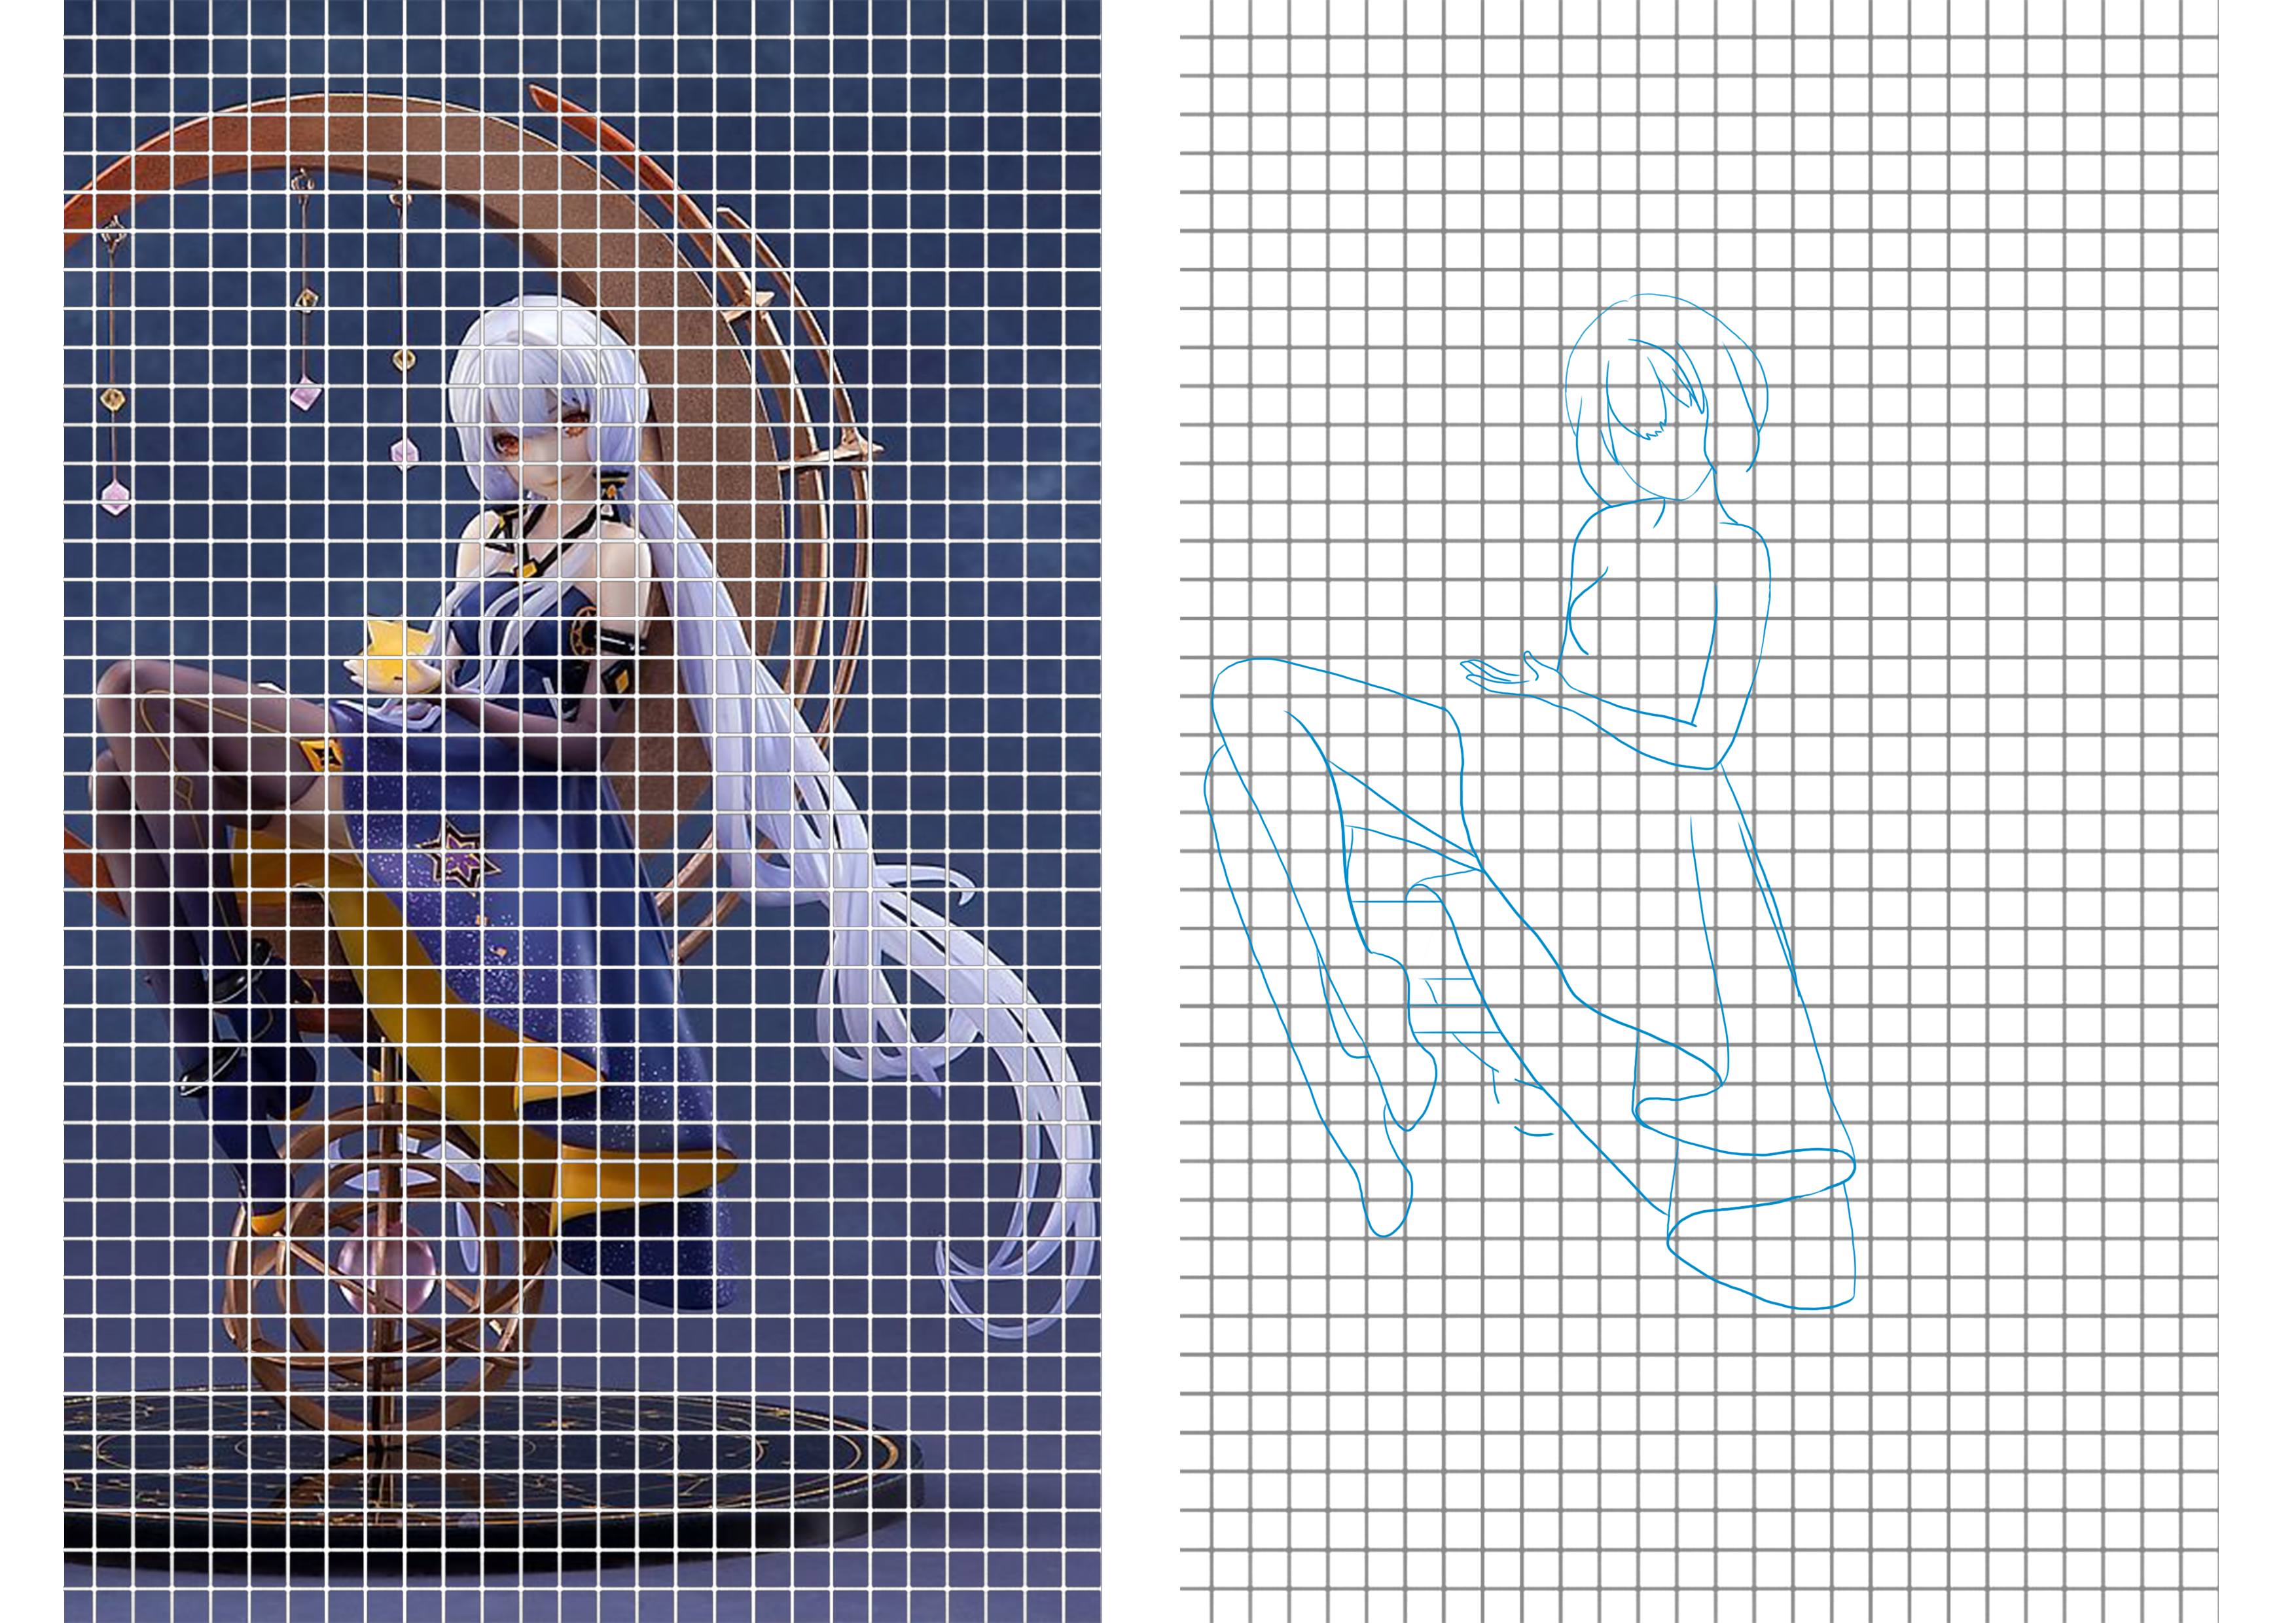
To start, choose a model that you like. For this article, I have chosen a Vocaloid "Stardust" figurine that I find very beautiful, and one that has lots of little details that need to be properly placed :)

So, print your image, if you haven't already, and draw a grid over it.
Draw the same grid on your drawing sheet. Make sure to do it lightly in pencil so that you can easily erase it later!
Now transfer your drawing onto your grid.
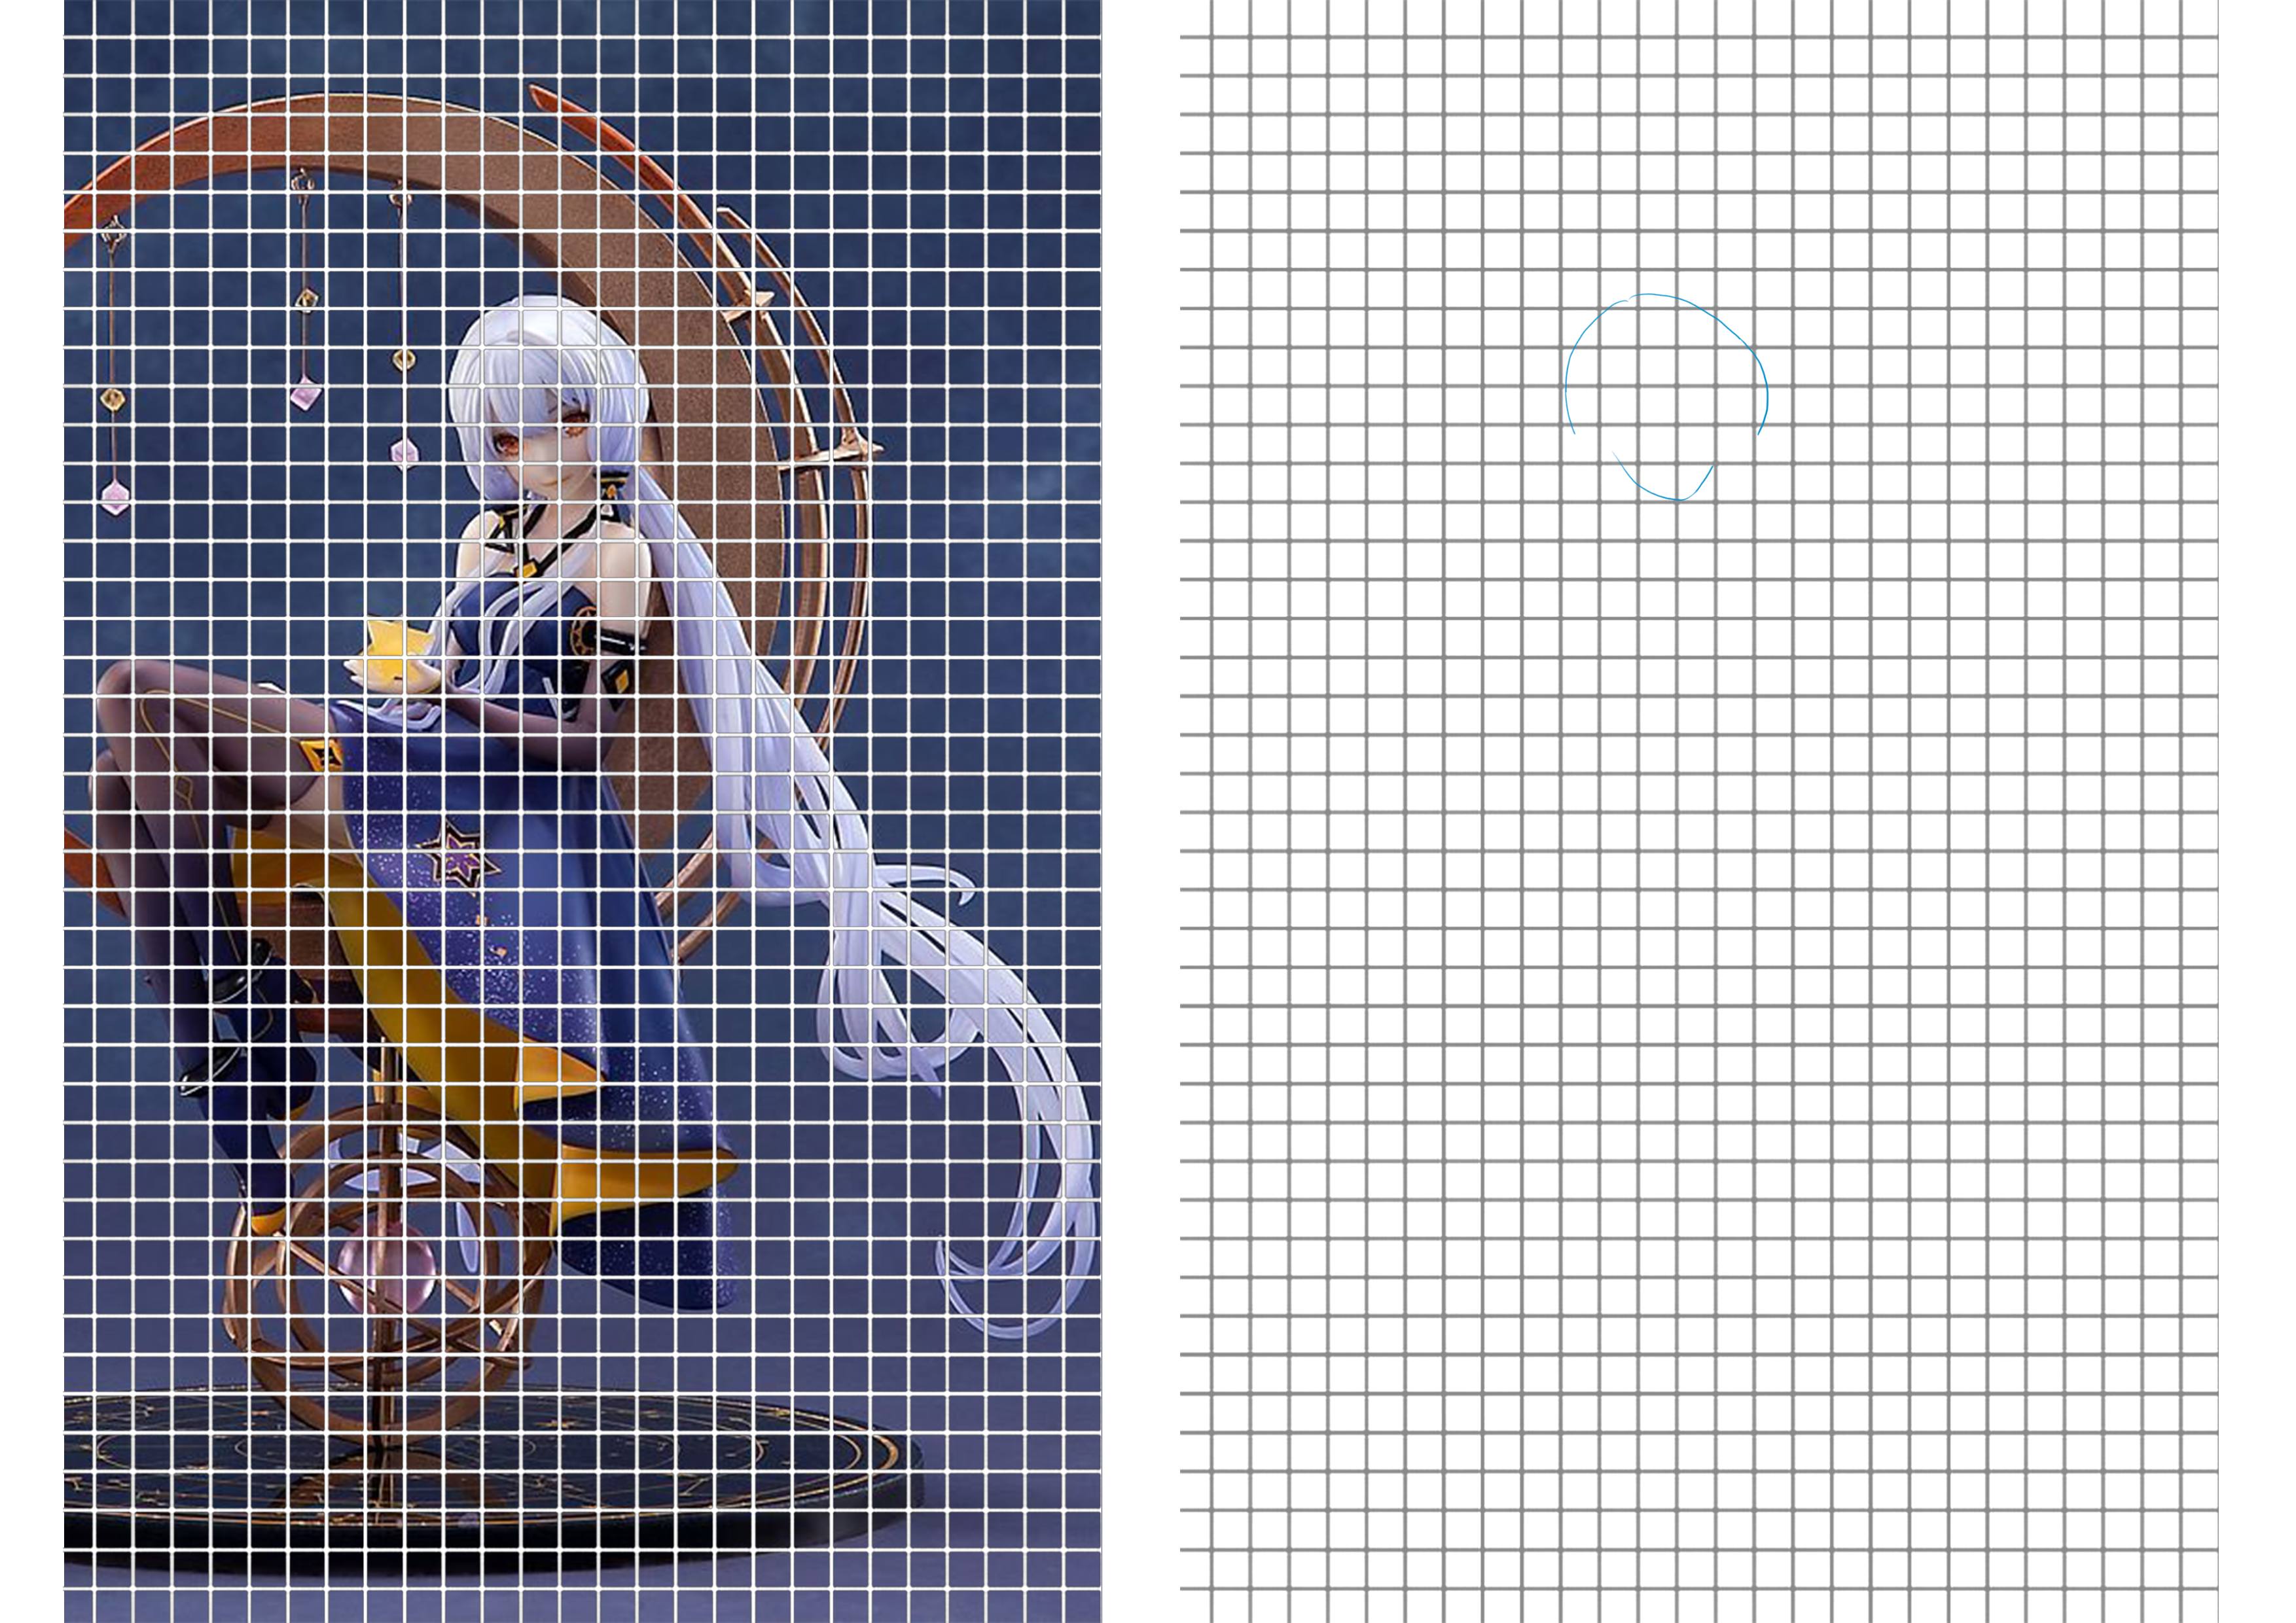
I will start by drawing the shape of the head.

I will continue the head by adding the bangs.
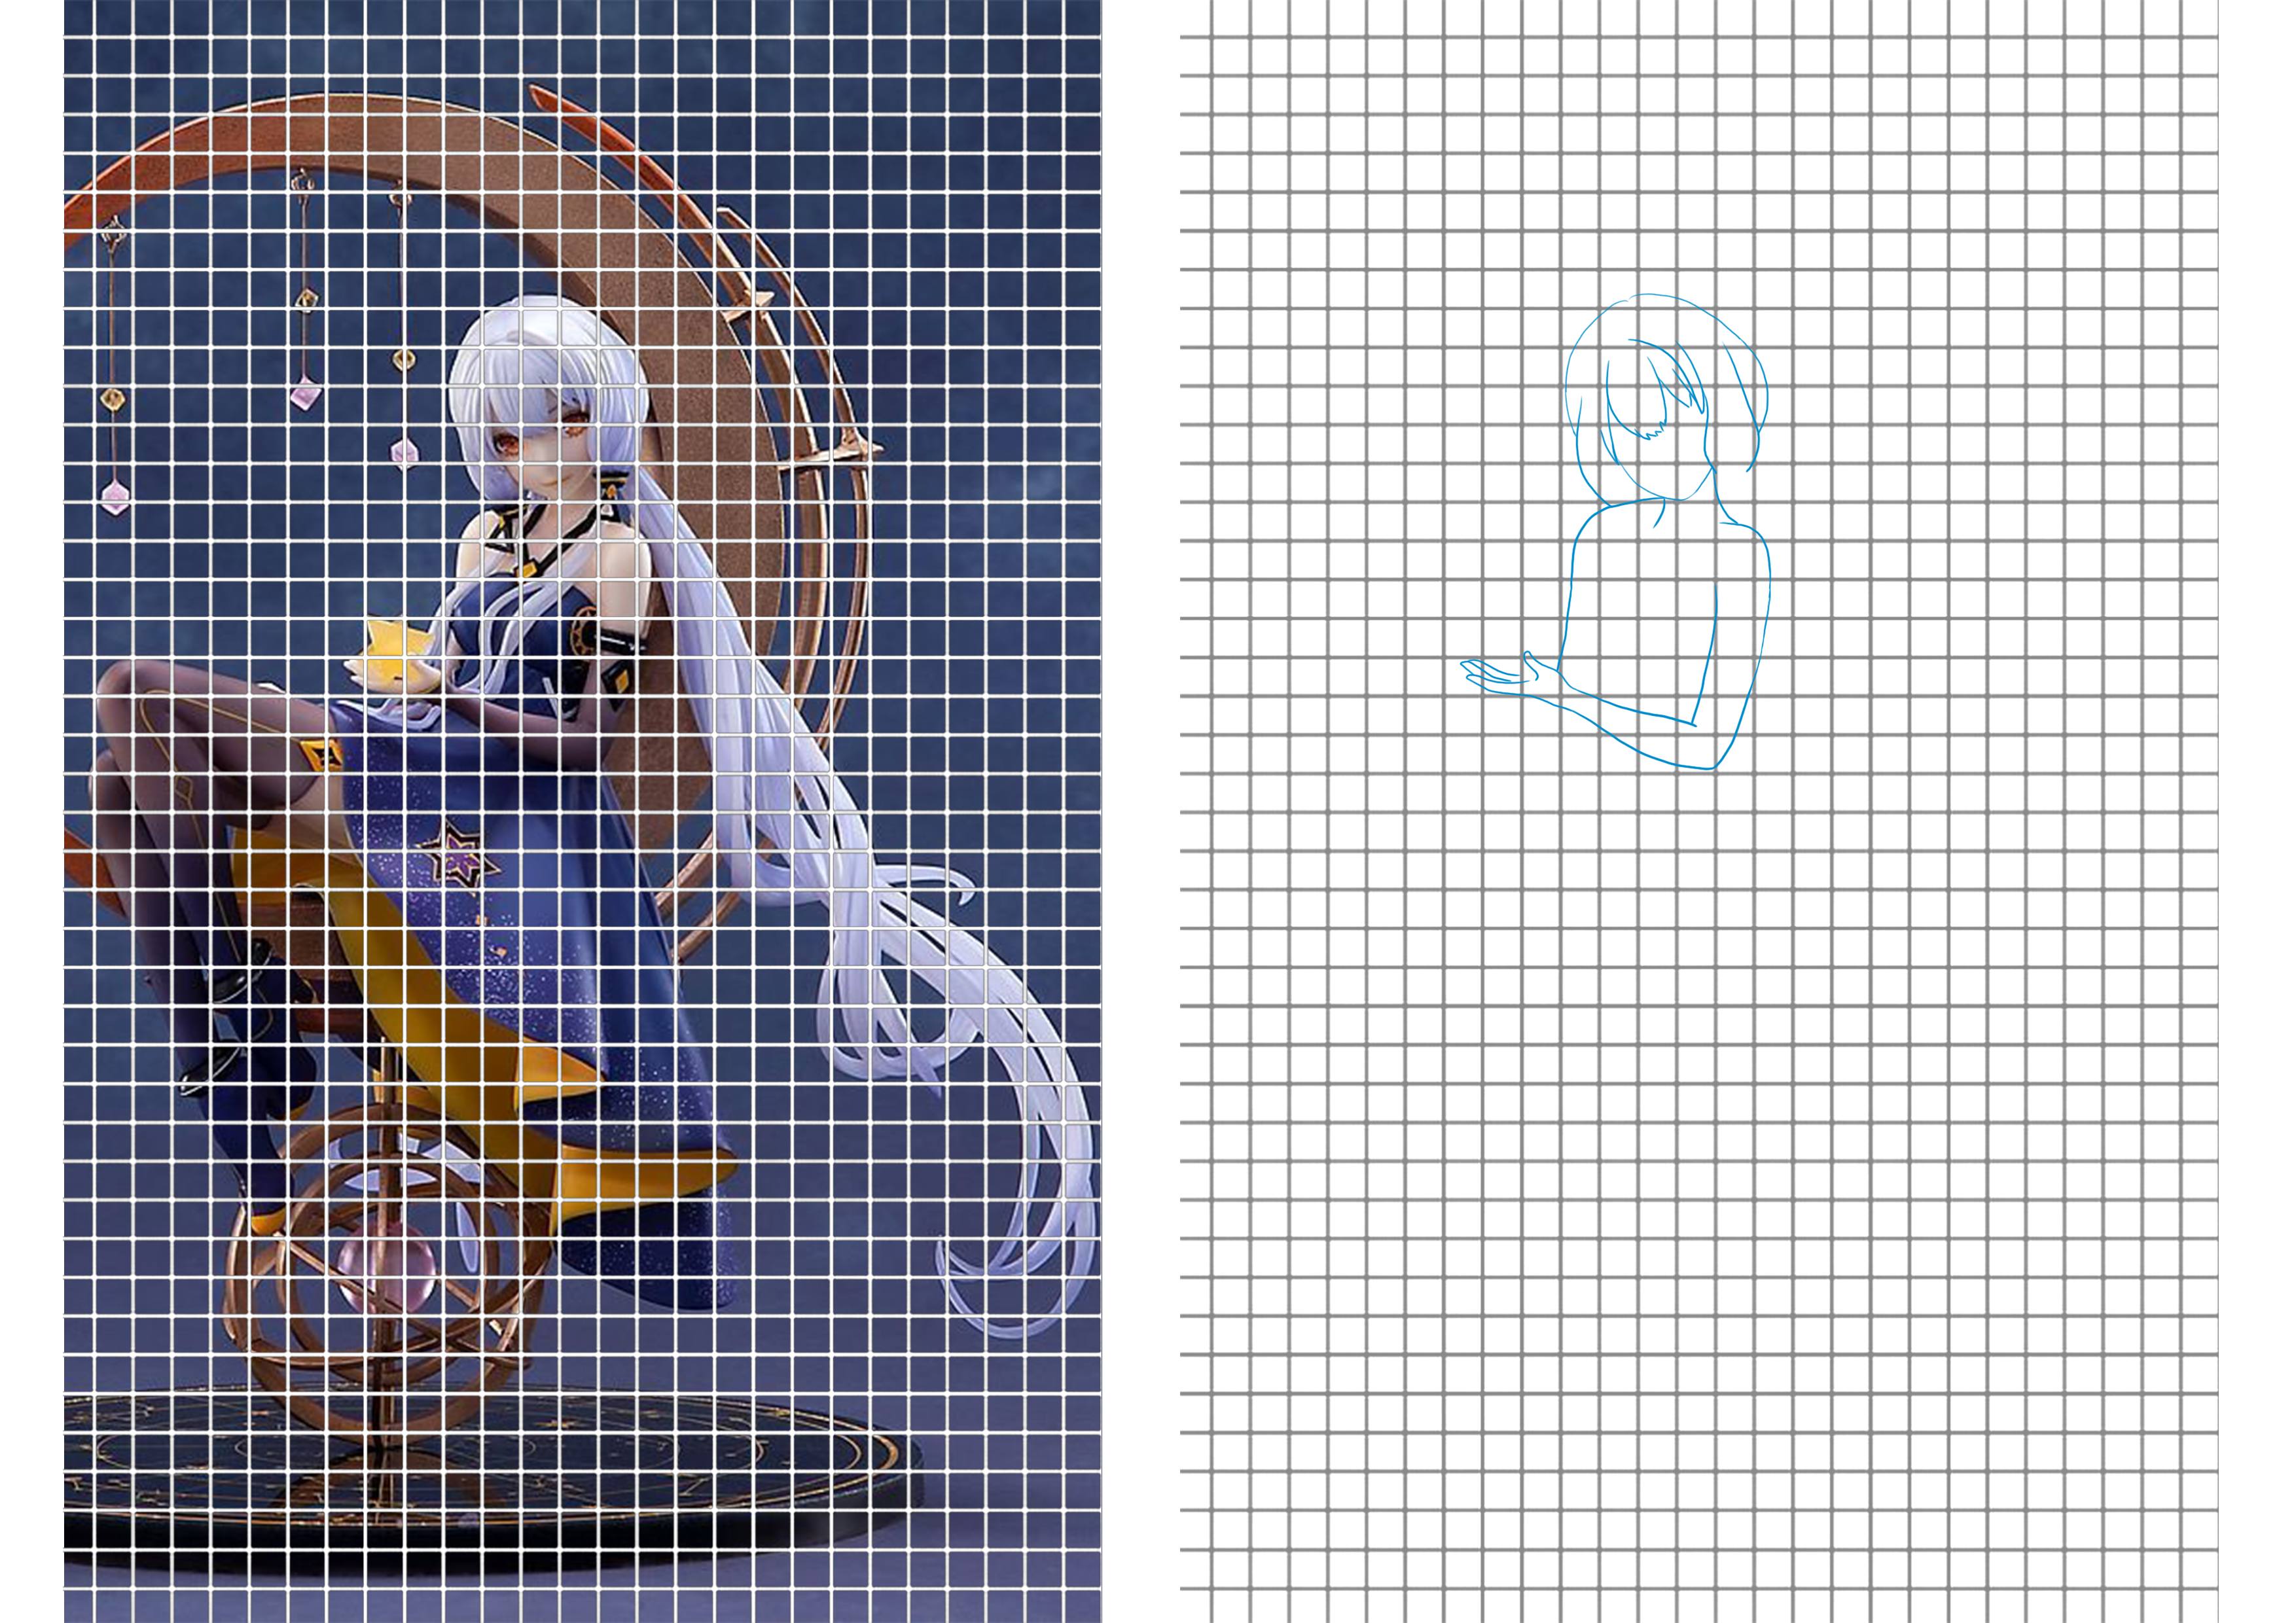
Then I will do the shoulders and the arm in the foreground.

I will continue with the body, the legs and the feet, not worrying about the clothes.
Thanks to my grid, I know exactly where the visible elements of the body begin.
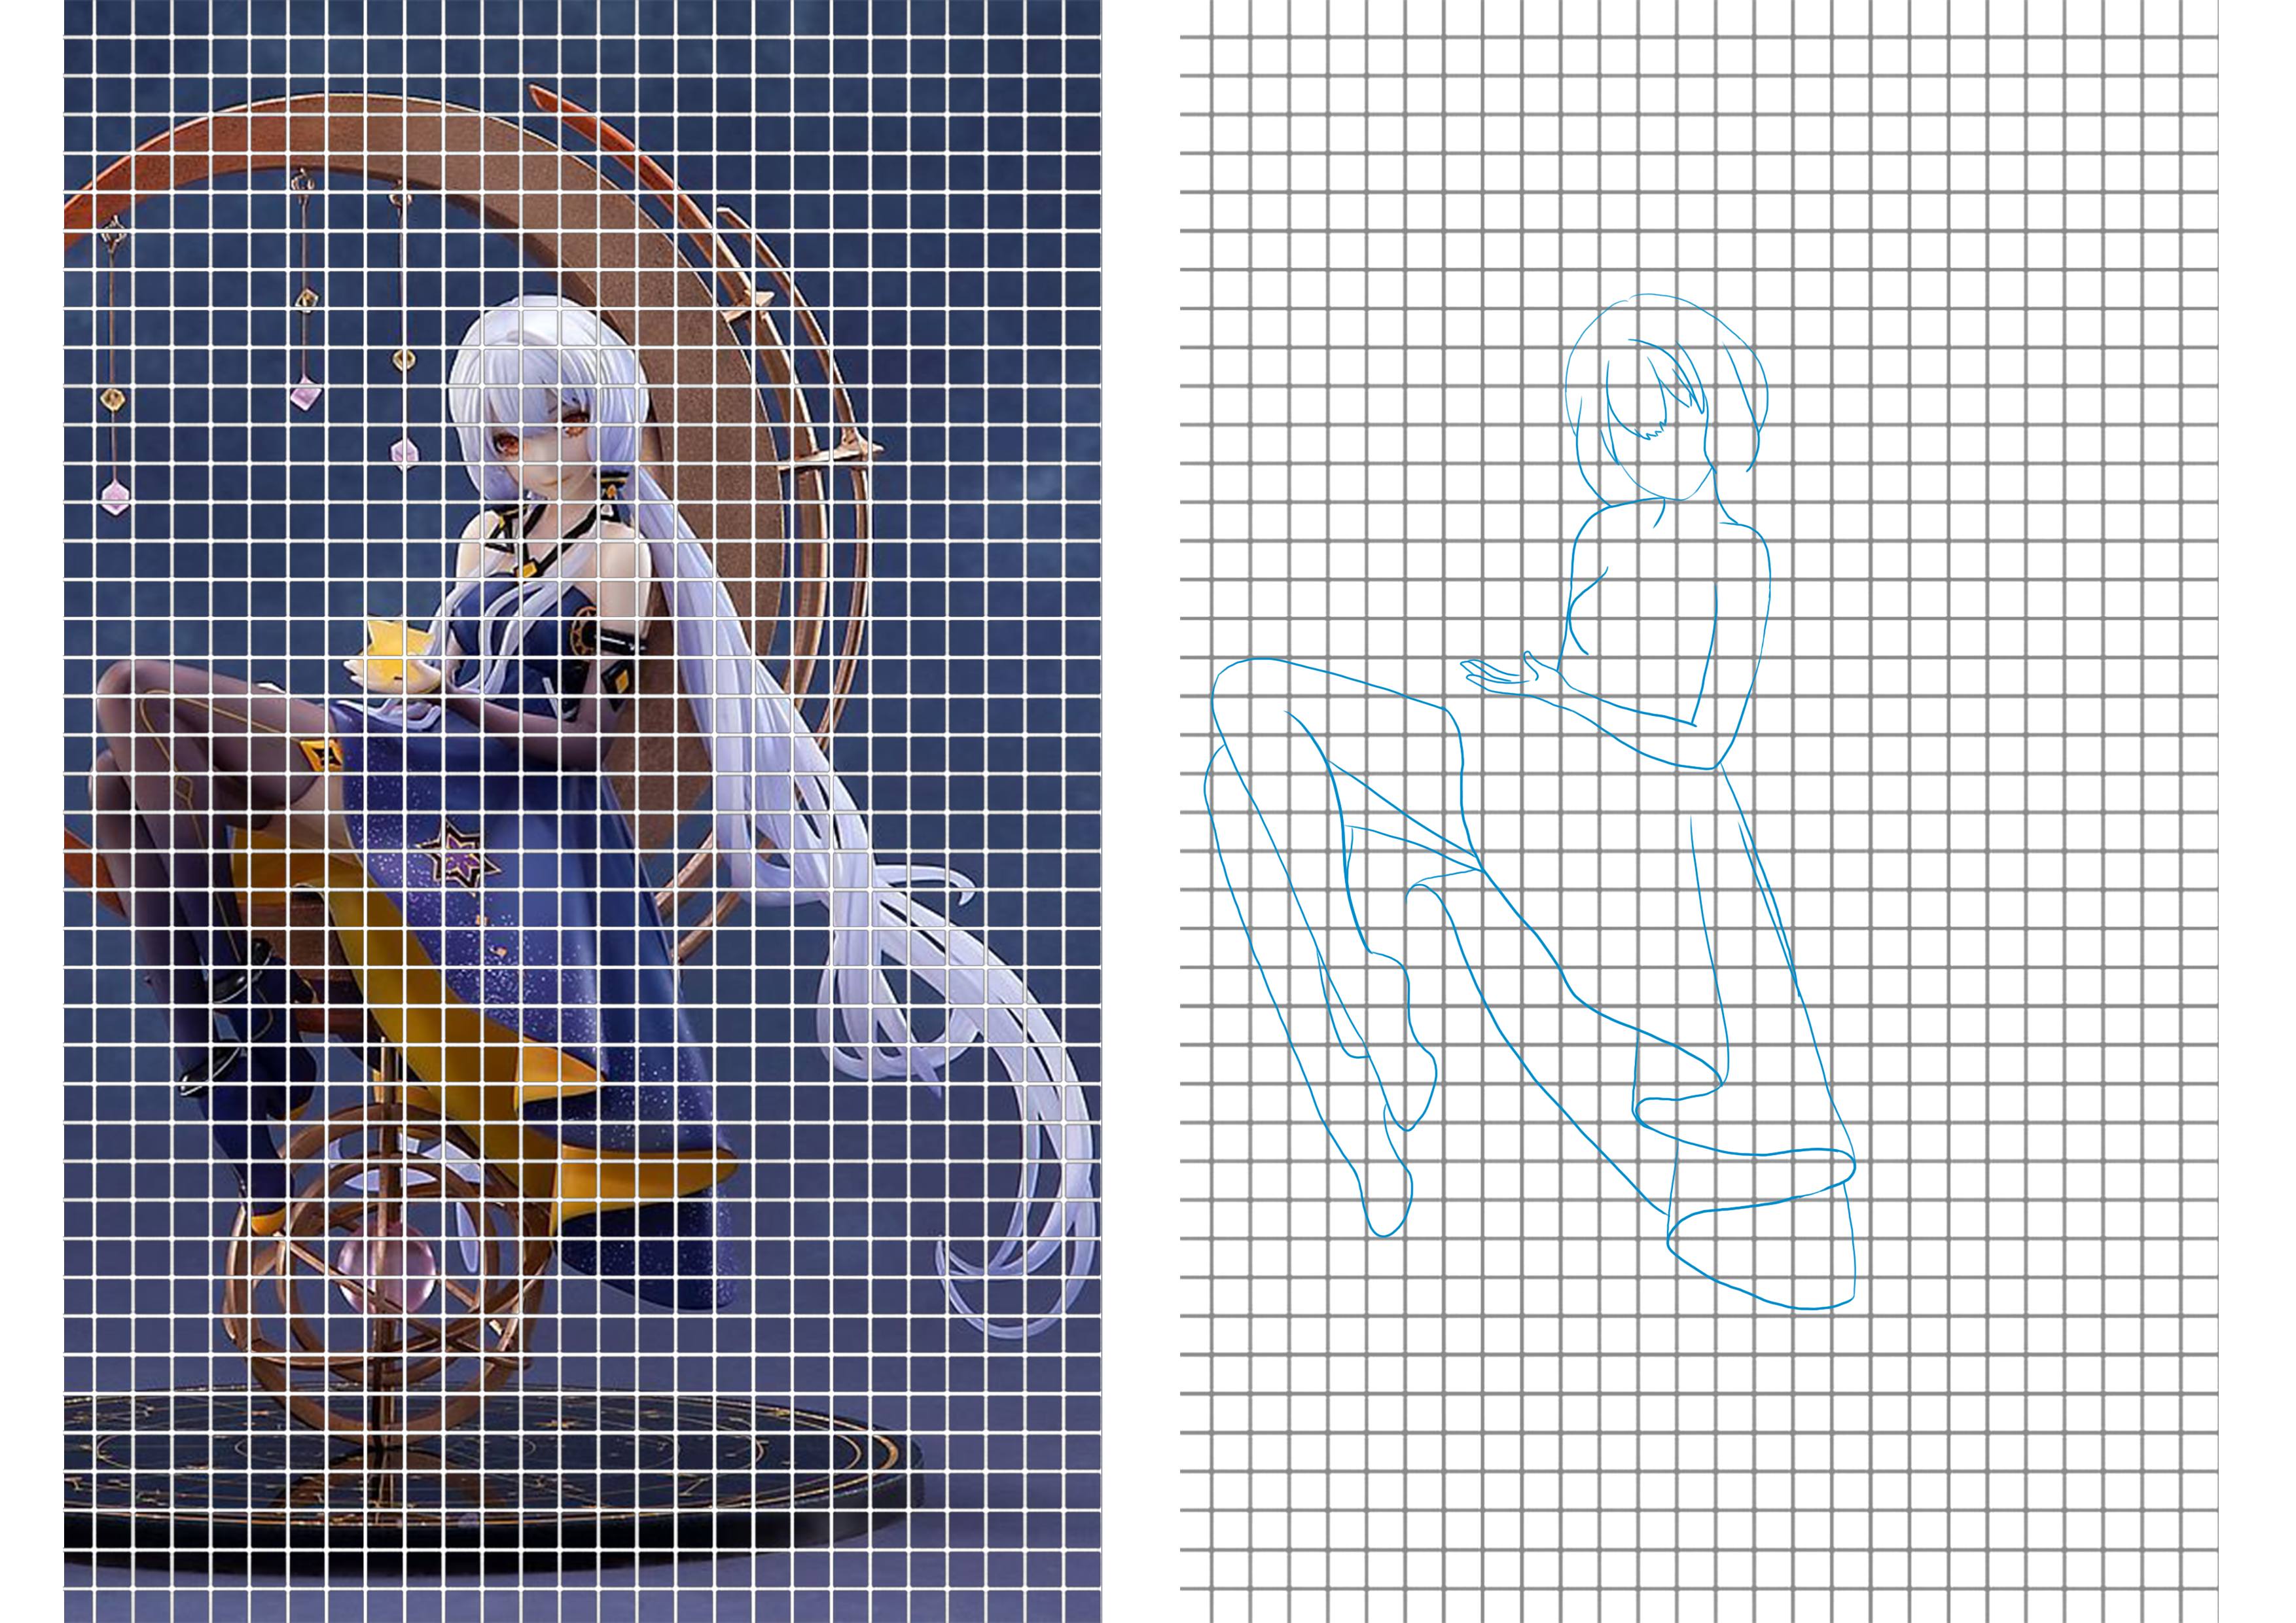
I will draw the dress, carefully respecting the number and size of the folds.
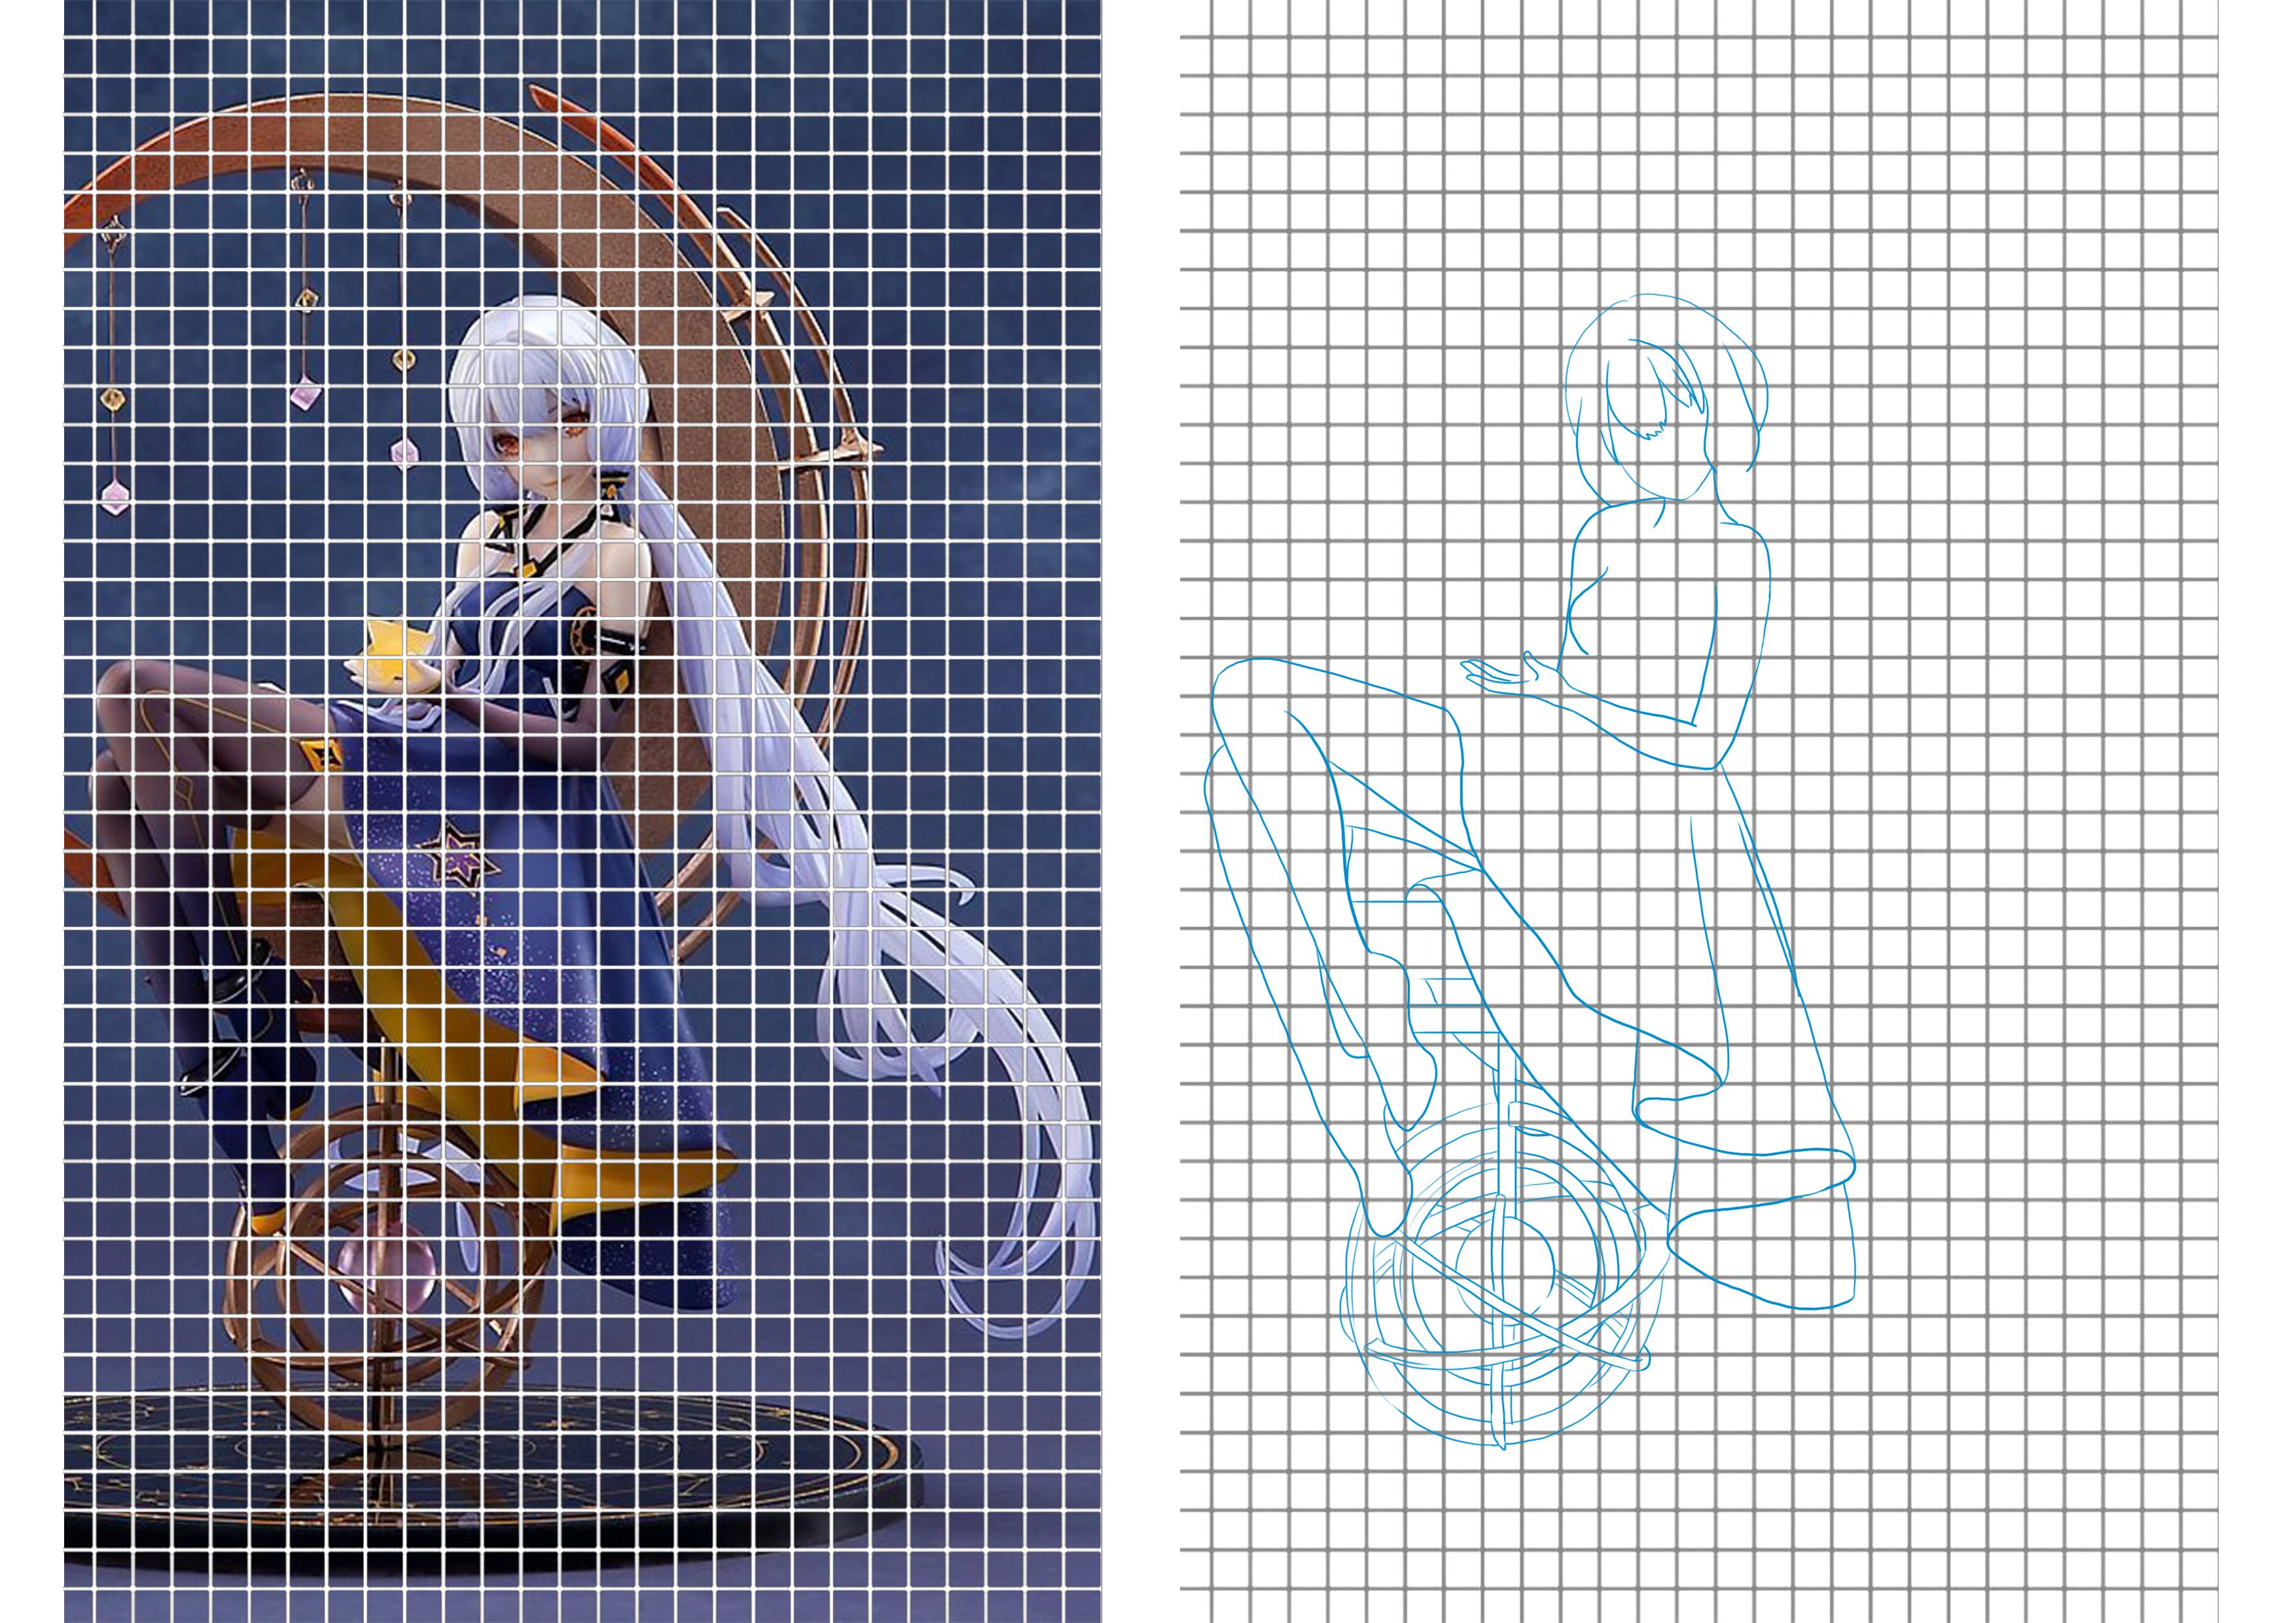
With the help of the grid, I will start placing the lower elements of the decor.
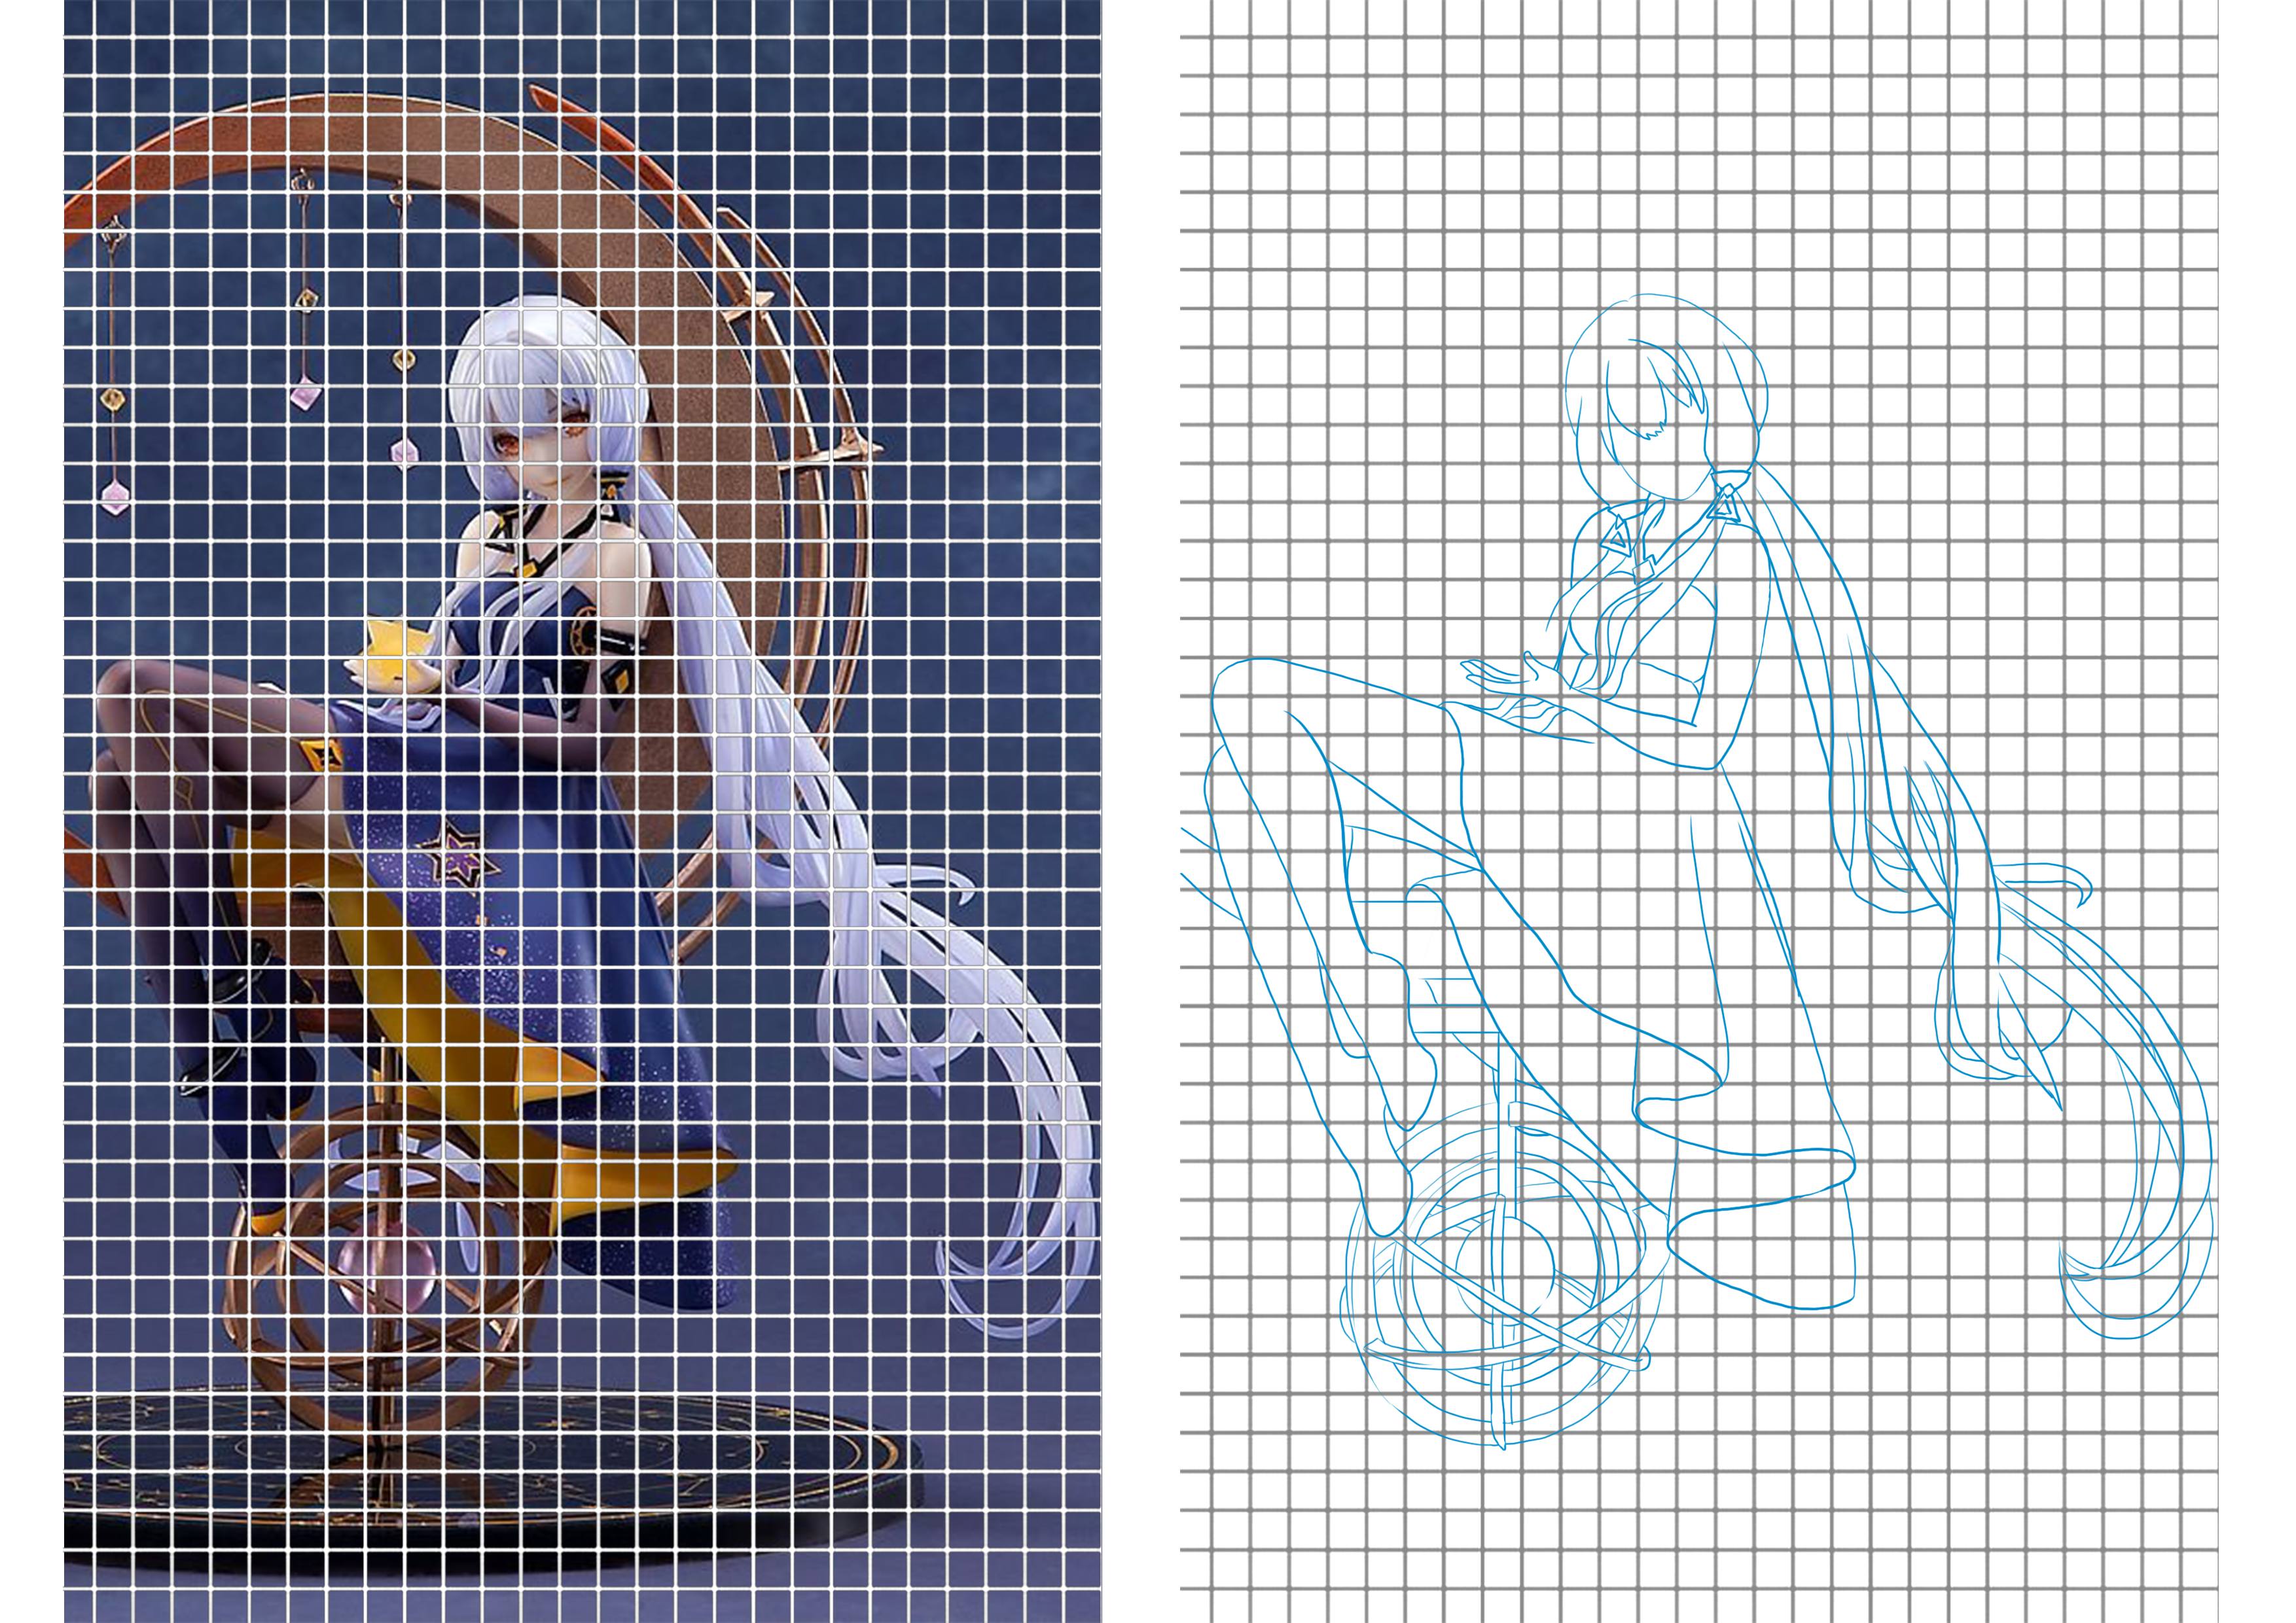

I will continue with the hair and add details like the decorations on the dress. To learn more about how to draw hair, I invite you to read the article how to draw hair, available on our blog.

I will finish the decor by adding the moon on which the character is sitting.
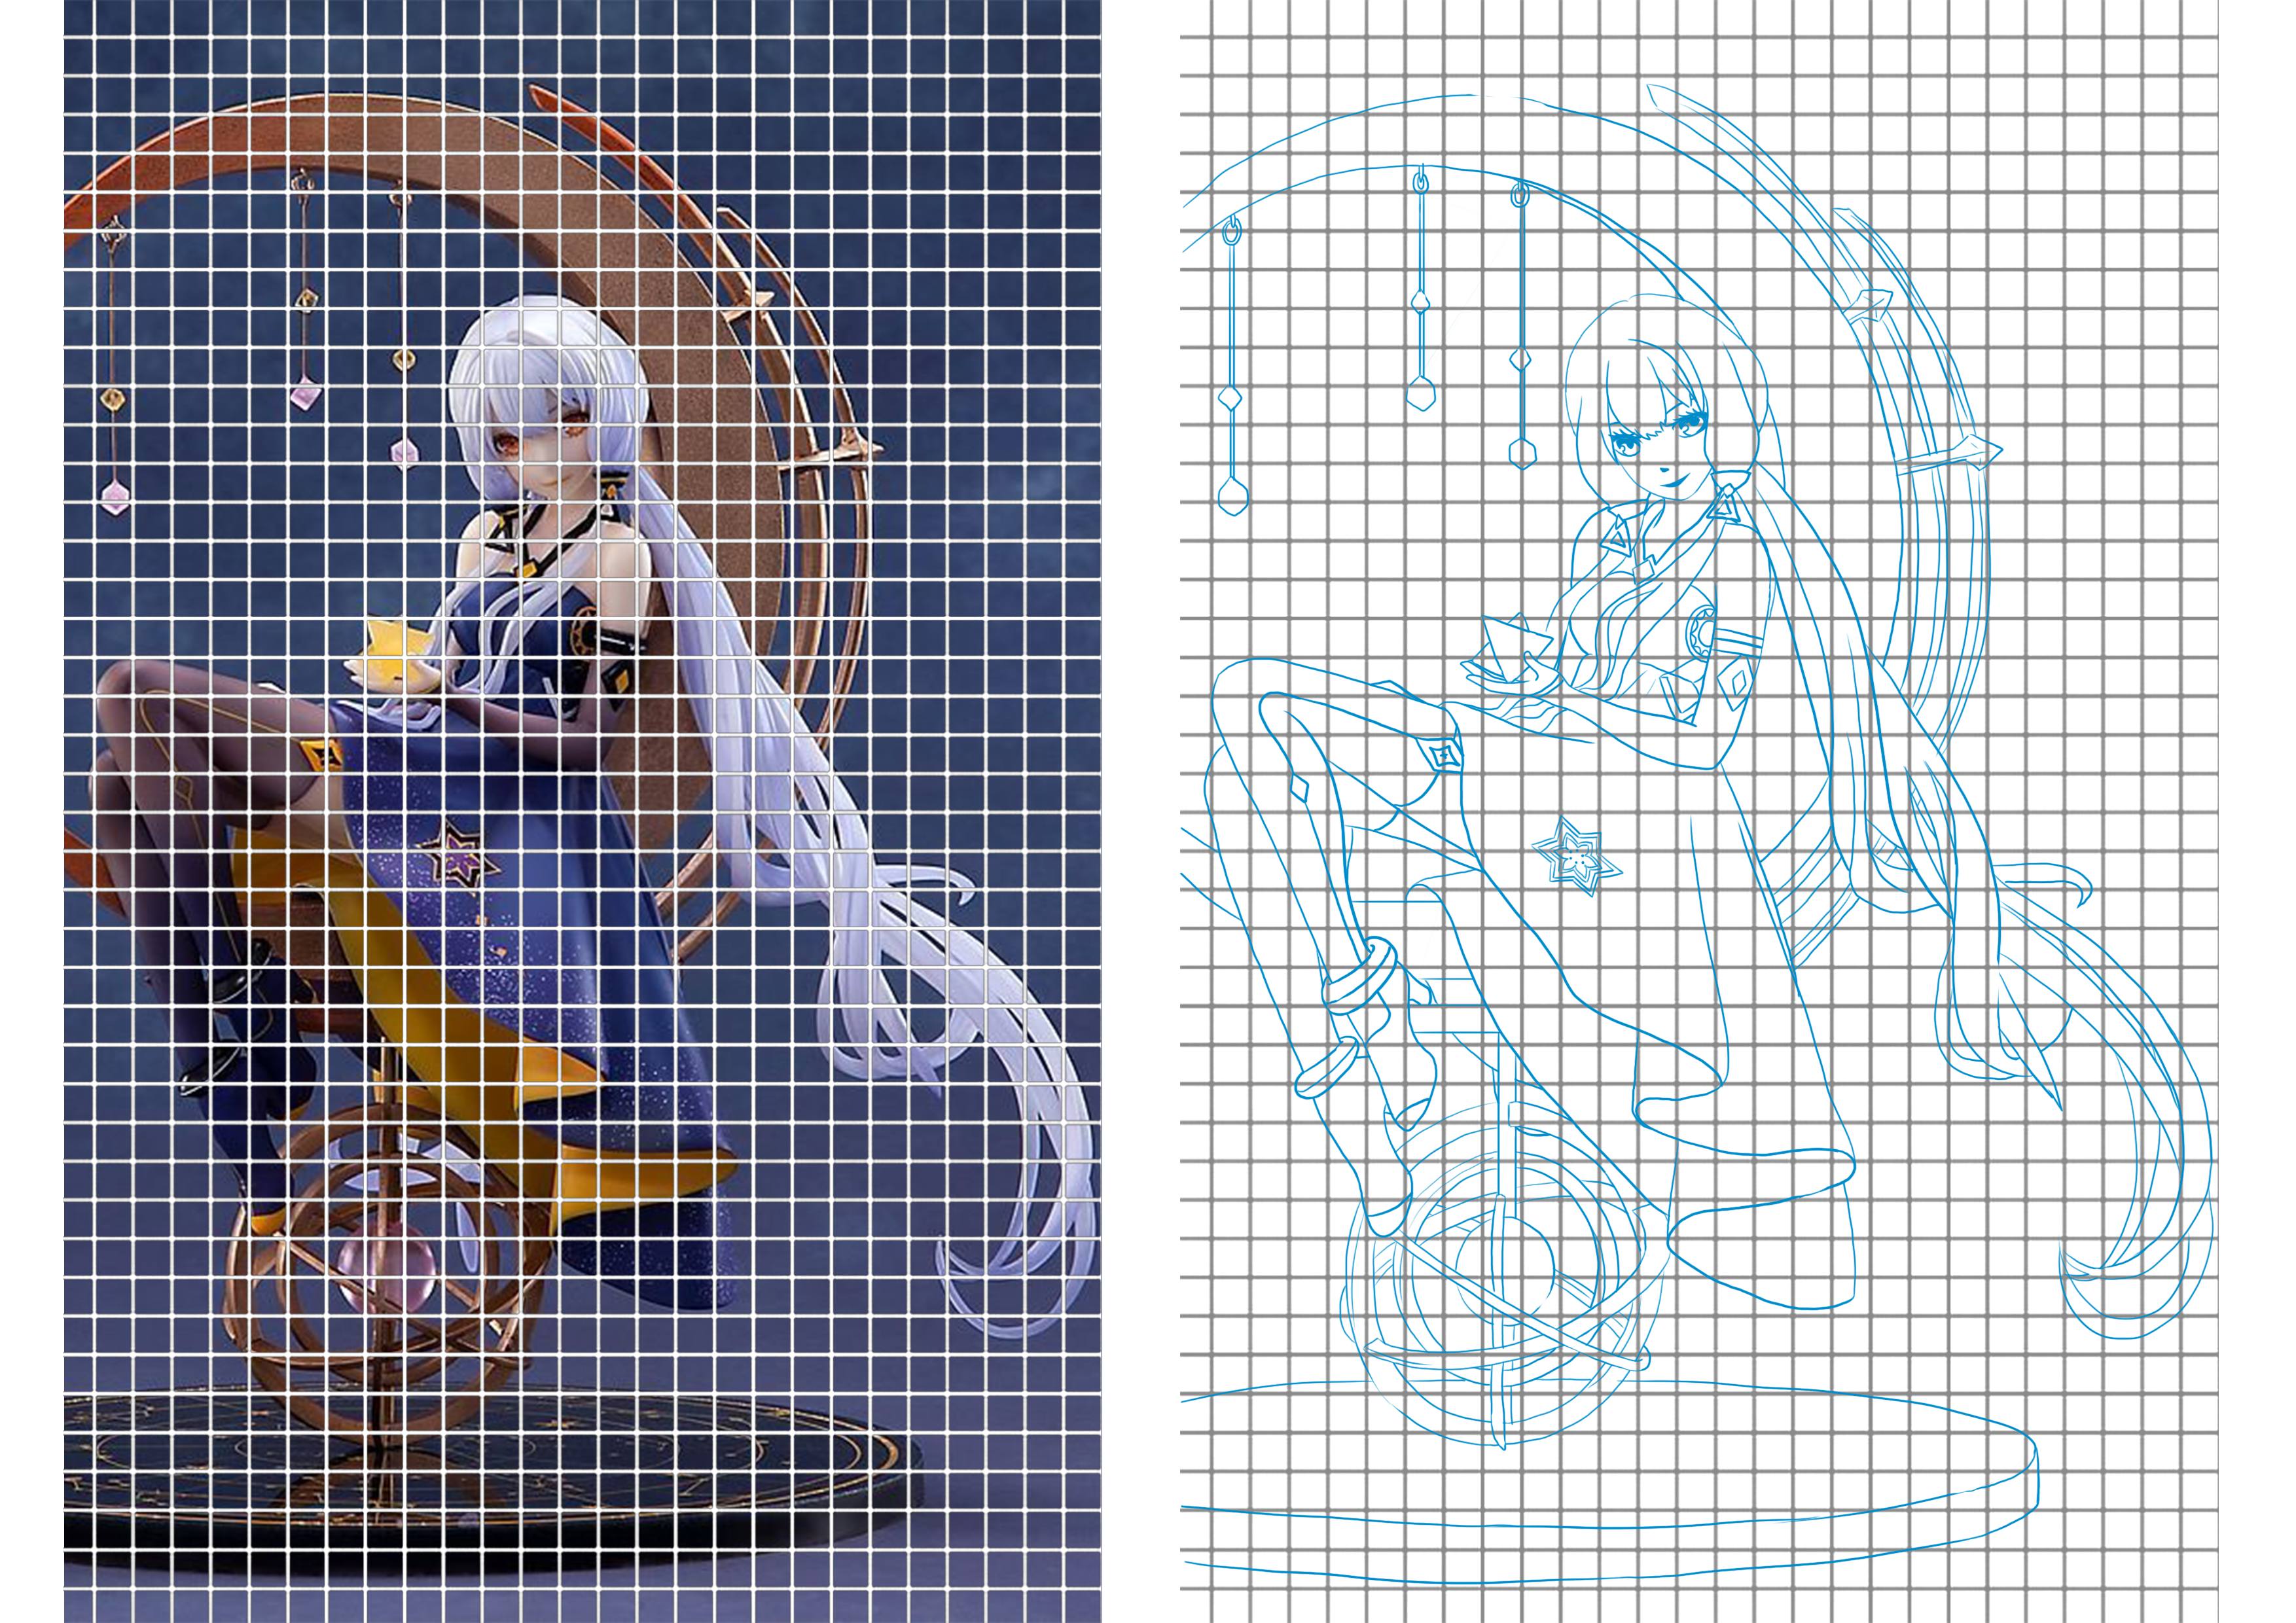
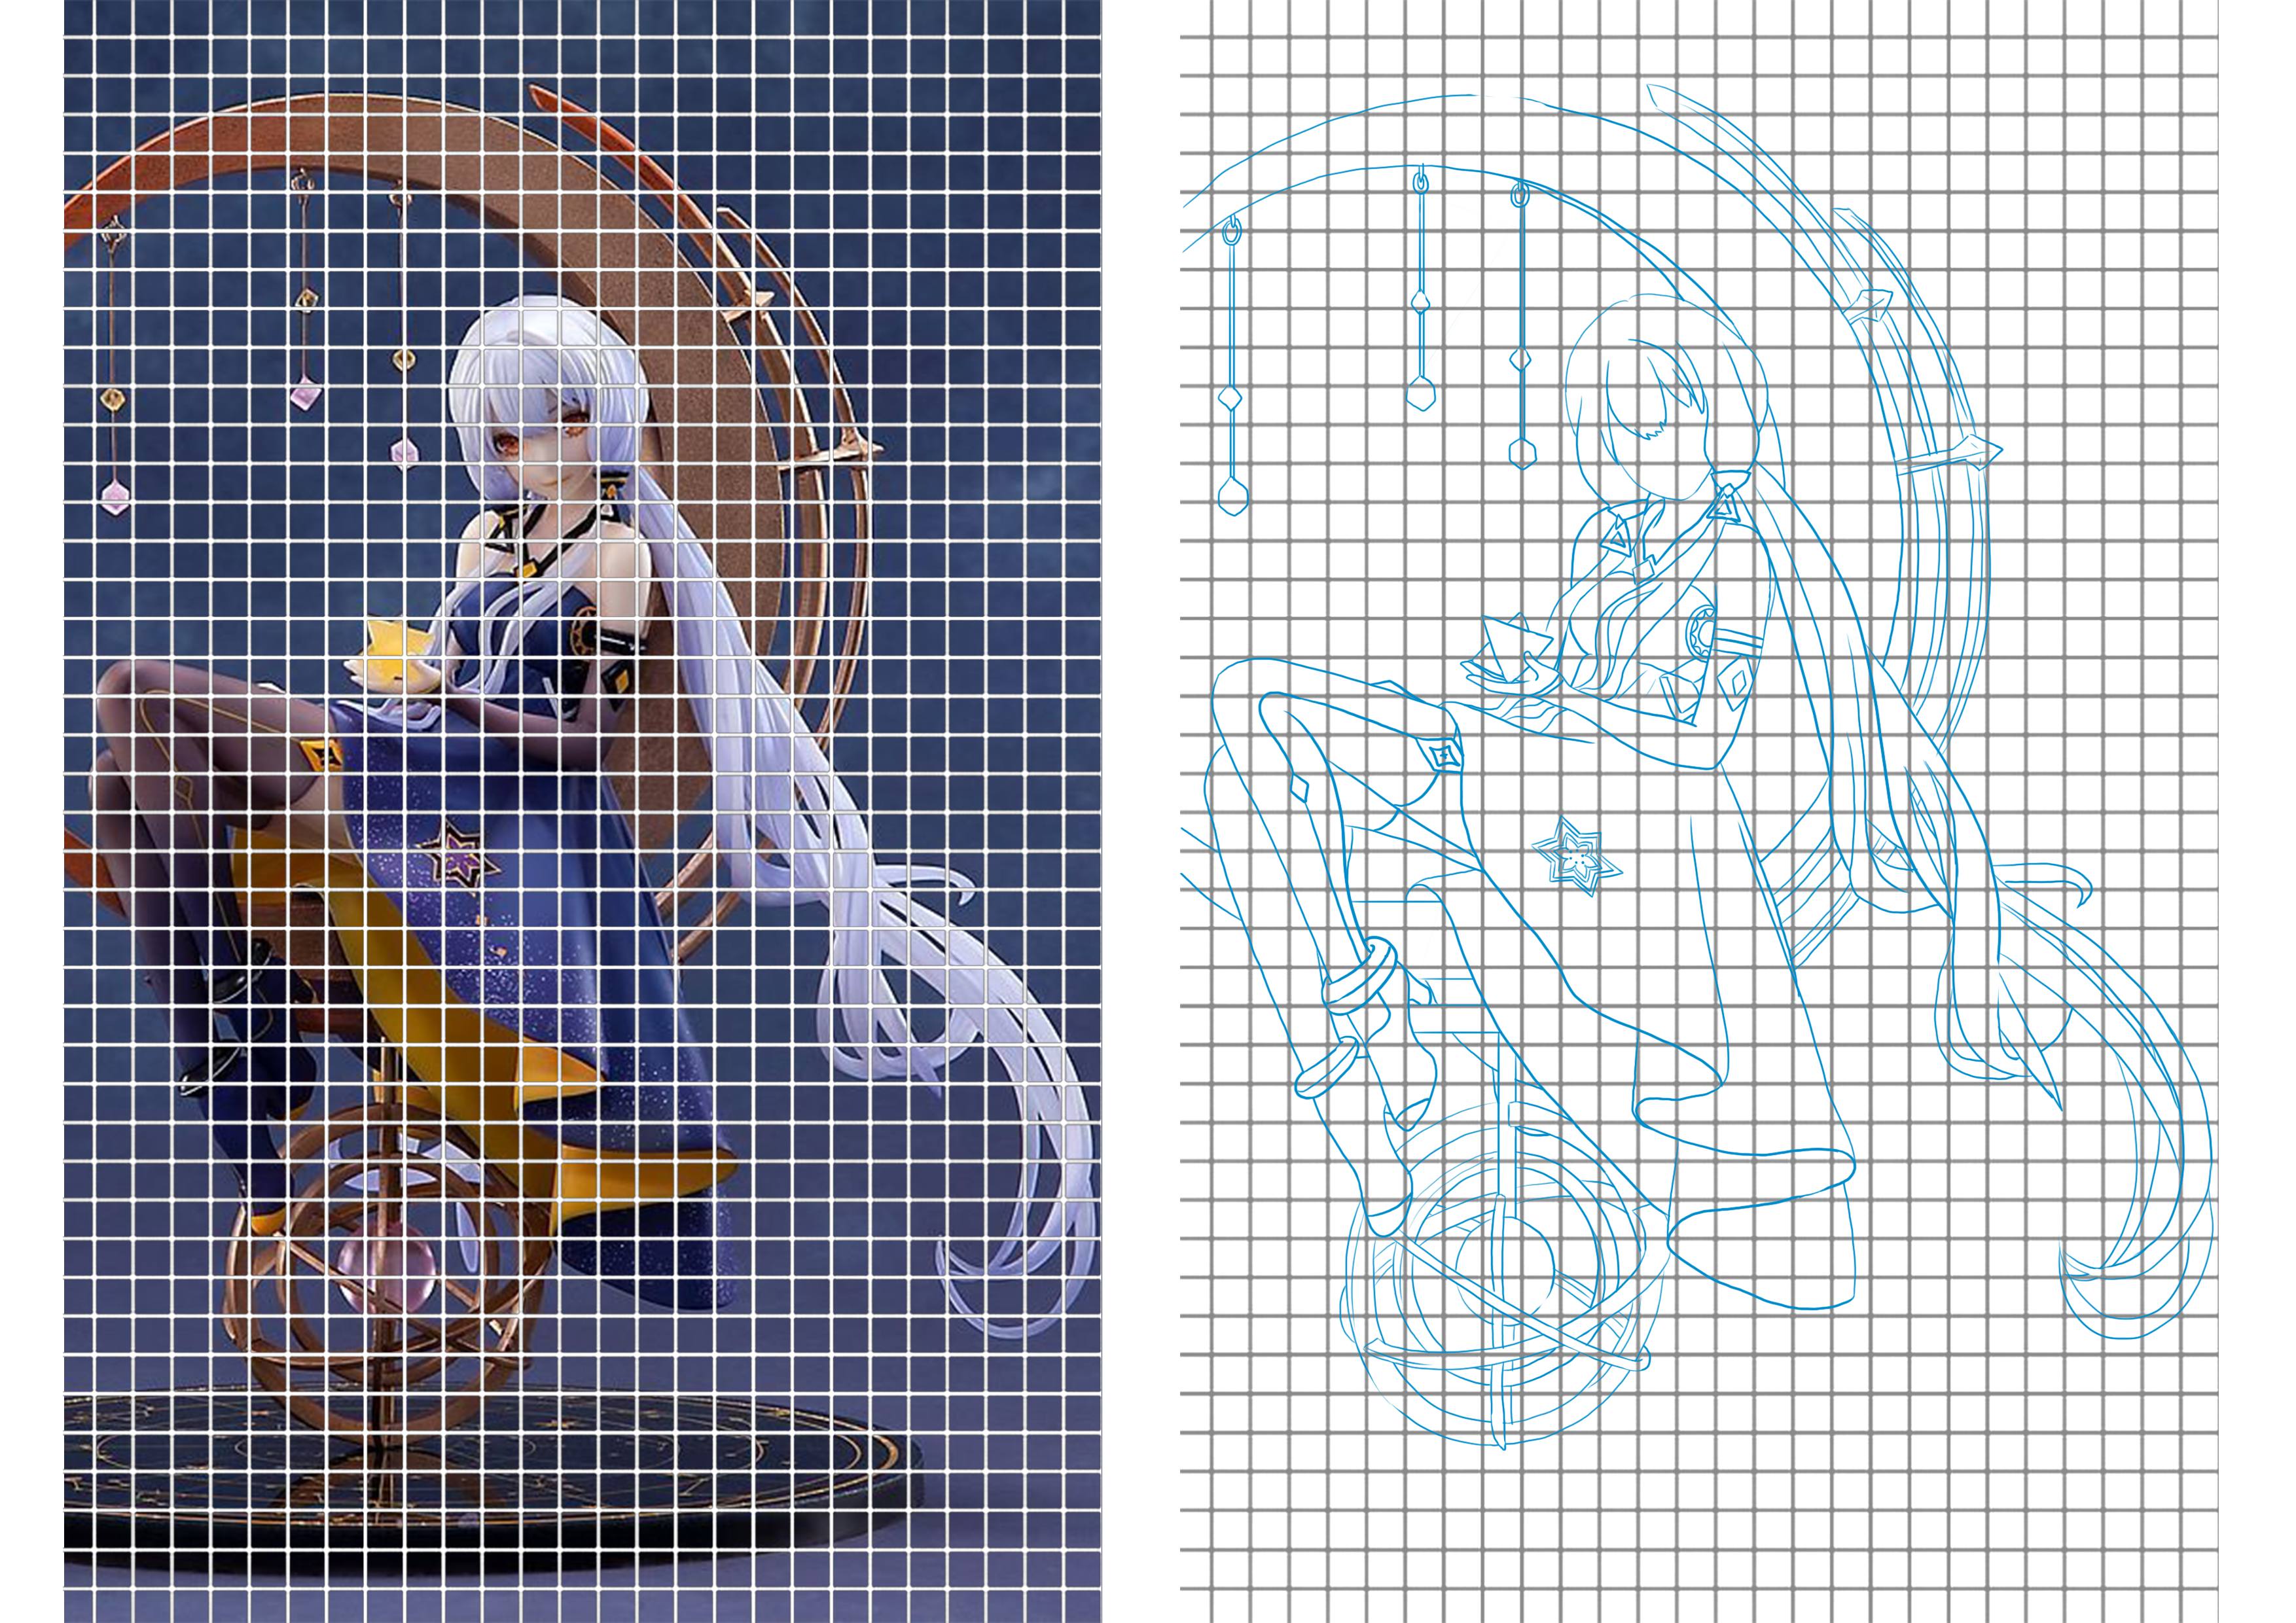
I will refine the drawing by adding the facial features and the missing elements in the background.

My drawing is finished, so I can now go over it neatly with a pen or other tools.
Once my ink is dry, I will carefully erase my gridlines with an eraser.
I will finish it off by adding in the missing details, such as strands of hair.

The drawing is finished!
When starting to draw, using a grid is an excellent way to draw with accurate proportions and to have a kind of "safety net." It takes a long time to set up, but it will ensure that you get a good result while your eye improves and allows you to draw from sight.
When you start drawing, you might be lost in terms of how to actually draw, so I invite you to check out our article on that subject: how to learn to draw.


Discussion
4 comments